
SB-50DX - Flash externe NIKON - Notice d'utilisation et mode d'emploi gratuit
Retrouvez gratuitement la notice de l'appareil SB-50DX NIKON au format PDF.


| Type de produit | Flash externe pour appareils photo reflex numériques |
| Caractéristiques techniques principales | Guide numéro 50 (ISO 100, m), zoom de 24 à 85 mm, tête inclinable et rotative |
| Alimentation électrique | 4 piles AA (Alcalines ou NiMH) |
| Dimensions approximatives | Dimensions : 113 x 78 x 103 mm |
| Poids | Environ 300 g (sans piles) |
| Compatibilités | Compatible avec la plupart des appareils photo Nikon reflex numériques |
| Type de batterie | Piles AA (Alcalines ou NiMH) |
| Tension | 6 V |
| Puissance | Guide numéro 50 à ISO 100 |
| Fonctions principales | Mode TTL, mode manuel, compensation d'exposition, synchronisation haute vitesse |
| Entretien et nettoyage | Essuyer avec un chiffon doux, éviter l'humidité et la poussière |
| Pièces détachées et réparabilité | Réparabilité limitée, pièces de rechange disponibles auprès de Nikon |
| Sécurité | Ne pas exposer à des températures extrêmes, éviter les chocs physiques |
| Informations générales utiles | Vérifier la compatibilité avec votre modèle d'appareil photo avant l'achat |
FOIRE AUX QUESTIONS - SB-50DX NIKON
Questions des utilisateurs sur SB-50DX NIKON
0 question sur cet appareil. Repondez a celles que vous connaissez ou posez la votre.
Poser une nouvelle question sur cet appareil
Téléchargez la notice de votre Flash externe au format PDF gratuitement ! Retrouvez votre notice SB-50DX - NIKON et reprennez votre appareil électronique en main. Sur cette page sont publiés tous les documents nécessaires à l'utilisation de votre appareil SB-50DX de la marque NIKON.
MODE D'EMPLOI SB-50DX NIKON
Nikon

Autofocus
Speedlight
SB-50 DX

INSTRUCTION MANUAL

En
Foreword
Thank you for purchasing the Nikon Speedlight SB-50DX.
Get to know your SB-50DX, and be sure to read this manual thoroughly before using it.
Main features of the SB-50DX:
- The SB-50DX is a high-performance Speedlight having a guide number of 22/72 (at 35mm zoom-head position, ISO 100, m/ft., 20^ / 68^ ). According to the camera/lens used with the SB-50DX, you can perform various types of TTL auto flash (p. 25) and Manual flash (p. 31). When used with Nikon digital SLR cameras, D-TTL auto flash can be performed.
- Automatic power zoom continuously changes the zoom-head position from 24mm to 50mm according to the lens' focal length (incompatible with some lenses, see p. 16). The built-in wide-flash adapter increases the angle of coverage to match a 14mm lens (p. 17).
- Flash head tilts up to 90^ or down to -18^ , enabling bounce-flash photography (p. 40) or close-up photography (p. 43).
- When used with a camera having a built-in Speedlight, both the SB-50DX and the camera's built-in Speedlight fire simultaneously (p. 42, 54) for double-flash photography. A diffuser (p. 42) is provided to diffuse light for bounce-flash photography with the double flash.
- Wireless multiple flash photography (p. 48) is also possible.
- The supplied Infrared Filter SW-9IR enables you to use the SB-50DX as an infrared remote commander (p. 53).
-
For operation in dim light, an illuminator for the LCD panel is provided (p. 8) and light condensing paint is applied to characters and symbols on the backside (p. 7).
-
The Nikon N90s, N90, N70, N8008/N8008s, PRONEA 6i, N6006, N6000, N60, N50 N5005 and N4004/N4004s are sold exclusively in the U.S.A.
- The Nikon N80-series and N65-series are sold exclusively in the U.S.A., Central and South America.
- The Nikon N2020 and N2000 are sold exclusively in the U.S.A. and Canada.
Tips on Using the Speedlight
Take trial shots
Take trial shots before shooting at important occasions like weddings or graduations.
Have Nikon spot-check your Speedlight regularly
Nikon recommends that you have your Speedlight serviced by an authorized dealer or service center at least once every two years.
Using your Speedlight correctly
The Nikon Speedlight SB-50DX's performance has been optimized for use with Nikon brand cameras/accessories (including lenses). Cameras/accessories made by other manufacturers may not meet Nikon's criteria for specifications, and nonconforming cameras/ accessories could damage the SB-50DX's components. Nikon cannot guarantee the SB-50DX's performance when it is used with non-Nikon brand products.
Supplied accessories
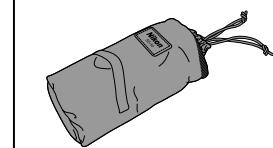
Soft Case SS-50
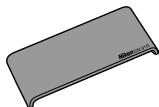
Infrared Filter SW-91R (p. 53)
PREPARATION. 2-9
Foreword. 2
Tips on Using the Speedlight 3
Nomenclature 6-7
LCD Panel. 8
Lenses 9
Example Photos (Bounce-flash photography) 10
BASIC OPERATION 11-21
1.Install Batteries and Check Battery Power. 12-13
2. Attaching the SB-50DX to the Camera 14-15
3. Adjusting the Zoom-Head Position 16-17
4. Setting Camera and SB-50DX Modes.. 18-19
5.Shooting with Flash 20-21
Example Photos (Close-up photography) 22
DETAILED OPERATION 23-37
Shooting in Exposure Mode Other Than Programmed Auto/ Auto-Multi Program 24
Flash Modes and Types of TTL/D-TTL Auto Flash 25-27
Cameras Compatible with TTL/D-TTL Auto Flash. 28-30
Manual Flash 31
Reading Variable Aperture of Zoom Lenses. 32
Guide Number 33
Exposure Compensation in Flash Photography 34
Flash Output Level Compensation 35
Autofocus Flash Photography in Dim Light 36-37
Example Photos (Flash output level compensation) 38
TECHNICAL OPERATION 39-56
Bounce-Flash Photography 40-42
Bounce-flash operation with single flash 41
Bounce-flash operation with double flash (SB-50DX and camera's built-in Speedlight) 42
Close-Up Flash Photography 43-45
Multiple Flash Photography 46-56
Wireless Multiple Flash Operation 48-52
Multiple Flash Operation Using the Infrared Remote Commander 53
Double-Flash Operation 54
Multiple Flash Operation Using Cords 55
Accessories for Multiple Flash Operation 56
EFFECTIVE SPEEDLIGHT PLACEMENT 57-62
Bounce-flash operation to produce more natural-looking pictures....58
Eliminating shadows cast by the subject. 59
Emphasizing the outline of the subject 60
Illuminating a subject mainly from the side. 61
Illuminating a distant subject. 62
MISCELLANEOUS 63-73
Speedlight Care 64
Notes on Batteries. 65
Troubleshooting 66-68
TTL auto flash shooting distance range (ft.) 69
Specifications. 70-71
Index. 72-73
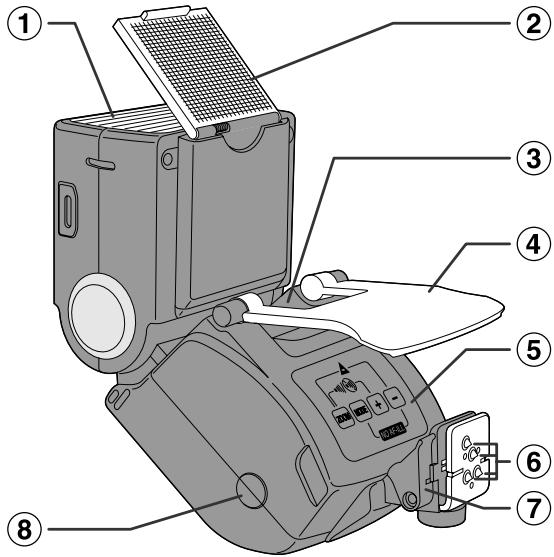
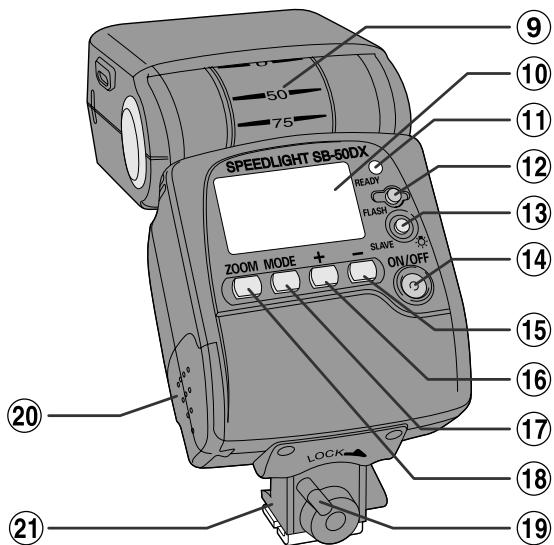

① Flash head P. 15 Can be tilted up to 90^ or down to -18^ .
② Wide-flash adapter P.17 Attach the wide-flash adapter in front of the flash head to increase the angle of coverage to match a 14mm lens or to perform close-up flash photography.
③ AF-Assist Illuminator P.36 Automatically turns on for autofocus operation when the light is dim.
4 Diffuser P. 42 Use to diffuse light from the camera's built-in Speedlight when performing double-flash photography (bounceflash photography).
⑤ Operation button combination chart Underexposure value P.21 AF-Assist Illuminator cancel P.37 Sound monitor off P.50 Operation button combination chart is under diffuser.
(6) Camera contacts
⑦ Built-in Speedlight detecting lever P.42,51,54 Automatically detects the camera's built-in Speedlight if it is used with the SB-50DX.
Light sensor P.48 Senses light from the master flash unit in wireless multiple flash operation.
(9) Tilting angle scale P. 15
⑩ LCD panel P.8
① Ready-light P.12, 21 Lights up when the SB-50DX is fully charged and ready to fire. Blinks after the SB-50DX fires at its maximum output in TTL/D-TTL auto flash mode, telling you that light may be insufficient.
12 FLASH button P. 12 Press to test fire the flash.
⑬ Illuminator/SLAVE button P. 8, 48 Press to turn on the LCD panel illuminator. Or hold it down for approx. one second to set wireless flash mode (only for wireless multiple flash).
14 ON/OFF button P. 12
15 - button P.35 Press to decrease values when setting flash output level compensation.
(16)+ button P.35 Press to increase values when setting flash output level compensation.
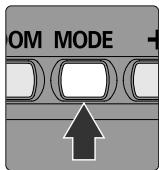
MODE button P.18 Press to set the flash mode or type of TTL auto flash.
18 ZOOM button P. 16 Press to adjust the SB-50DX zoomhead position.
19 Lock lever P. 15
20 Battery chamber lid P. 12
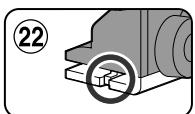
② Mounting foot ② Lock plate P.15
^23 Infrared Filter SW-9IR P. 53 Attach in front of the flash head to use the SB-50DX as an infrared remote commander
Backside indications
Light condensing paint is applied to the backside indications for clearer identification of the characters and symbols in dark conditions.
- All indications are displayed in the illustration for easy reference.
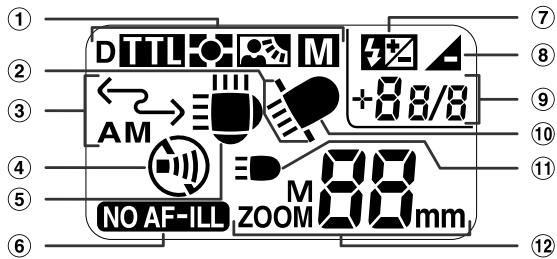
① Flash mode
P. 18
⑤ Flash head tilting up/double flash (horizontal position) P. 15, 54
D: D-TTL auto flash
(6) AF-Assist Illuminator cancel P. 37
TTL: TTL auto flash
⑦ Flash output level compensation P. 35
Automatic Balanced Fill-Flash with TTL Multi-Sensor
Underexposure P.21
Matrix Balanced Fill-Flash, Center-Weighted/Spot Fill-Flash
9 Underexposure value/flash output level compensation value P.21,35
M: Manual flash
10 Flash head tilting down (close-up photography) P. 15
② Wide-flash adapter
11 Camera's built-in Speedlight P. 42, 54
③ Wireless Flash mode
⑫ Zoom-head position P. 16
④ Sound monitor off
About LCD panel
- Because of the directional characteristics of the liquid crystal, the LCD is difficult to read when viewed diagonally from above; however, the display can be seen clearly from a somewhat lower angle.
- The LCD panel display tends to be darker at high temperatures (approx. 60^ / 140^ ). When the temperature returns to normal ( 20^ / 68^ ), the display also returns to normal.
- The LCD's response time tends to slow down at low temperatures (approx. 5^ / 41^ and below). When the temperature returns to normal (20^ / 68^) , response time also returns to normal.
Using the SB-50DX in dim light
- Press the SLAVE/按钮 to turn the illuminator on (when the SB-50DX power is on). Press the button again to turn the illuminator off. It turns off automatically after approx. 16 sec. when the SB-50DX is not in use.
Types of CPU Nikkor lenses and non-CPU Nikkor lenses
| CPU Nikkor lenses | G-type AF Nikkor D-type AF Nikkor Non-G/D-type AF Nikkor lenses (except for AF Nikkor for F3AF) Al-P Nikkor |
| Non-CPU Nikkor lenses | Al-S Nikkor Al Nikkor Series E |
CPU lenses
- CPU lens has CPU contacts.
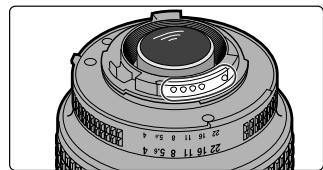
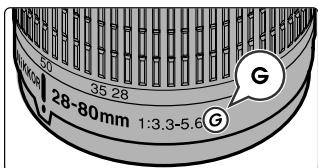
G-type AF Nikkor lenses
- The G-type Nikkor lens does not include an aperture ring. The lens sends the distance information to the camera body. With some camera bodies, the usable exposure mode is limited (see the lens' instruction manual).
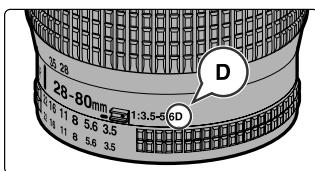
D-type AF Nikkor lenses
- The lens sends the distance information to the camera body. (See the lens' instruction manual).
Bounce flash (p. 40)
Bounce flash with double flash using SB-50DX and camera's built-in Speedlight
Bounce flash with single Speedlight
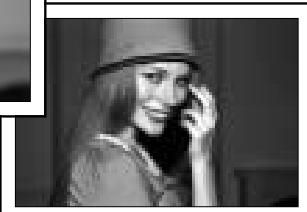
Regular flash (with single built-in Speedlight)

BASIC OPERATION
In this chapter, even first-time users of the SB-50DX can easily perform flash photography by following the instructions on the left-hand pages. More detailed information is given on the right-hand pages.
Install Batteries and Check Battery Power
Use two CR123A or DL123A-type 3V lithium batteries. Other power sources cannot be used.
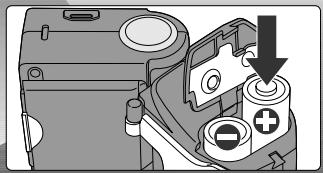
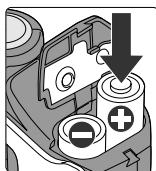
- Open the battery chamber lid and insert batteries with the "+" and "-" ends positioned as marked inside the battery chamber. Then close the battery chamber lid by sliding it into place while pressing it down.
Always use fresh batteries of the same brand.
-
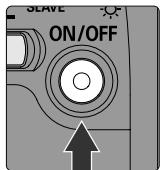
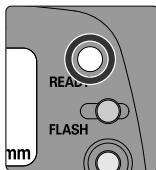
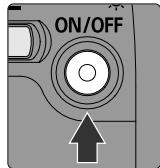
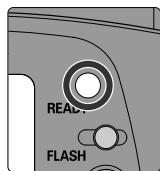
Press the ON/OFF button to turn on the SB-50DX. Confirm that the readylight comes on.
-
If the ready-light does not light up within 30 sec., change batteries.
Note: Storing batteries
Keep the batteries out of children's reach. If swallowed, contact a doctor immediately. (For "Notes on batteries", see p. 65).
Check point
We recommend that you take spare batteries with you, especially when traveling.
Test firing
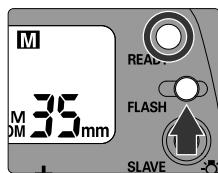
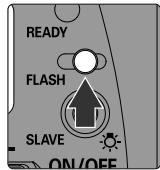
You can perform test firing to ensure that the SB-50DX is working properly. Turn the SB-50DX on, confirm that the ready-light comes on, then press the FLASH button to fire the SB-50DX. For test firing, the SB-50DX fires at 1/16 output in TTL/D-TTL auto flash mode (p. 25) or at maximum output in Manual flash mode (p. 31). When performing test firing, never place your eyes near the flash head.
ON/OFF button and standby function
- Pressing the ON/OFF button turns on the SB-50DX and indications appear in the LCD panel. Pressing the button again turns off the SB-50DX and indications disappear.
- If the SB-50DX is left unused for approx. 40 seconds, the standby function activates and automatically turns it off. In Wireless Flash mode (p. 48), standby function activates in approx. 40 seconds as normal mode when the Speedlight is attached to camera body; however, standby duration is prolonged to approx. one hour when the Speedlight is detached from camera body (used as a slave flash unit, p. 48).
- With a camera body that is compatible with TTL/D-TTL auto flash (p. 28), the SB-50DX automatically turns off when the camera's exposure meter turns off.
- To reactivate the SB-50DX after it has been automatically turned off by the standby function, press ON/OFF button or FLASH button. (Pressing the FLASH button does not activate flash in this case). With a camera body that is compatible with TTL/D-TTL auto flash, the SB-50DX automatically turns on when the camera's exposure meter turns on.
- Standby function cannot be deactivated.
Note: Completely turning off the SB-50DX
When carrying the SB-50DX in a camera bag, make sure that it is completely turned off. If the SB-50DX has been turned off by the standby function, accidental firing, operation and/or battery drain may occur while it is being carried. To completely turn off the SB-50DX, press the ON/OFF button while the LCD panel is on. Then confirm that the LCD indications are off.
Confirming recycling time and replacing batteries
- After firing at its maximum output in Manual flash mode (p. 31), the SB-50DX will take approx. 3.5 sec. to be ready for the next shot (with fresh batteries).
- Replace batteries with new ones if the ready-light takes more than 30 sec. to light up after firing. If the ready-light does not light up within 40 sec. after firing, the SB-50DX turns off.
- Approximately 260 flashes are available with a fresh set of batteries (in Manual flash mode).
Attaching the SB-50DX to the Camera
Turn off the SB-50DX and camera body, and attach the SB-50DX to the camera body.
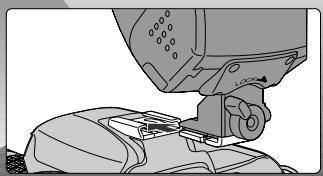
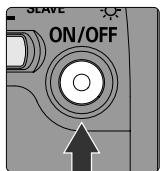
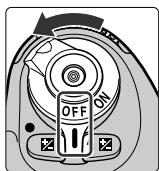
- Turn off the SB-50DX and camera body.
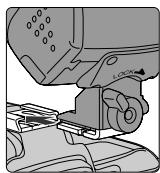
-
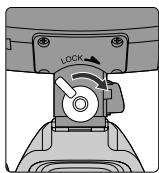
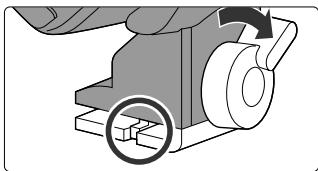
Attach the SB-50DX to the camera body, then turn the lock lever in the direction as illustrated to lock the unit.
-
When detaching the SB-50DX, turn the lock lever in the opposite direction to unlock the unit.
3 Adjust the flash head to the horizontal position.
- Set the tilting angle scale of the flash head to "0".
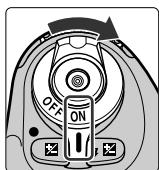
- Turn on the SB-50DX and camera body.
■ Lock lever
- With the SB-50DX attached to the camera body, turning the lever in the direction as illustrated presses the lock plate on the camera body's accessory shoe. This prevents the SB-50DX from accidentally slipping off the camera.
■ Flash head
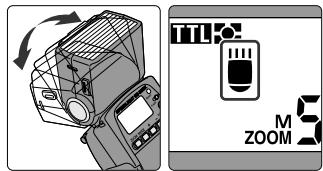
- For normal flash shooting, keep the flash head in the horizontal position. Tilt up the flash head for bounce-flash operation (p. 40) or tilt it down for close-up flash shooting (p. 43). (Click stops are provided at 90^ , 75^ , 50^ , horizontal and -18^ positions).
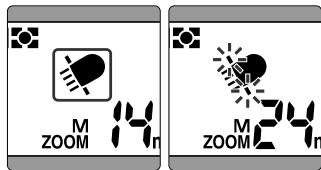
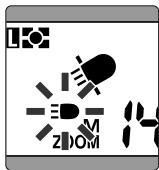
- When the flash head is tilted up, is displayed in the LCD panel. When the flash head is tilted down, is displayed. (When the flash head is tilted down and the wide-flash adapter is not attached, [wide-flash adapter recommend] blinks. p. 44.)
- For details, see "Tilting the flash head" on p. 40.
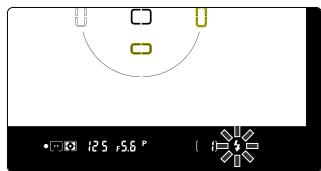
■ When ready-light warning is blinking inside the camera's viewfinder:
- The SB-50DX is not properly attached to the camera body (except for FE 10).
- The ISO film speed (sensitivity) set on the camera is outside the range for the TTL auto flash (with camera in Group V or VI except for F3-series with AS-17 and FM3A, p. 29).
Usable film speed (sensitivity) range
The usable film speed (sensitivity) range for TTL/D-TTL auto flash is ISO 25 to ISO 1600. However, this range also depends on the type of camera body. (For details, see your camera's instruction manual).
Adjusting the Zoom-Head Position
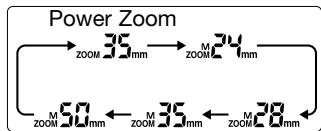
The SB-50DX has four zoom-head positions: 24mm, 28mm, 35mm and 50mm. When the wide-flash adapter is used, the zoom-head position is fixed to 14mm.
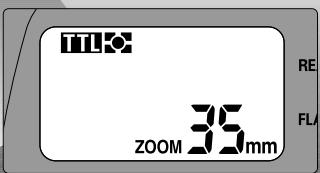
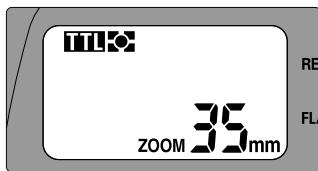
When a camera body that is compatible with Digital Data Communication is attached to the SB-50DX and a CPU lens is used, the Power Zoom function activates and the zoom head is automatically adjusted.
- When the lens focal length is not 24mm , 28mm , 35mm or 50mm , the zoom head adjusts to the closest wide-angle setting of the lens in use. (See table below).
-
When M is not displayed in the LCD panel, the Power Zoom function is activated. If M is displayed, press the ZOOM button a number of times so M disappears from the LCD panel.
-
To change the automatically adjusted zoom-head position, set the zoom-head position manually. (See next page).
- When the wide-flash adapter is attached or when the flash head is tilted up/down, the Power Zoom function becomes inactive.
| Focal length or zooming position of CPU lens | Automatic adjusted zoom-head position |
| 24mm-27mm | ZOOM 24mm |
| 28mm-34mm | ZOOM 28mm |
| 35mm-49mm | ZOOM 35mm |
| 50mm or longer | ZOOM 50mm |
Note: Zoom-head position and guide number
The guide number varies according to the zoom-head position (p. 33).
Digital Data Communication
When the SB-50DX is used with cameras in Groups I and II (p. 28) or Nikon digital SLR cameras, Digital Data Communication is performed. With a CPU lens, the camera automatically sends lens information (focal length, etc.) to the SB-50DX.
Setting the zoom-head position manually
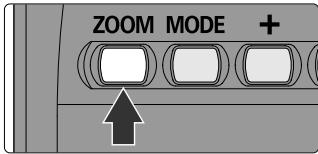
- To change the zoom-head position without using the Power Zoom function or when the camera/lens combination is incompatible with the Power Zoom function, press the ZOOM button to set zoom-head position manually.
- The zoom-head position changes in four positions—24mm, 28mm, 35mm and 50mm every time you press the ZOOM button. (Fixed at 14mm with the wide-flash adapter.) If the camera/lens combination is compatible with the Power Zoom function, pressing the ZOOM button at the 50mm position activates the Power Zoom function. Pressing the ZOOM button again sets the zoom-head position to 24mm.
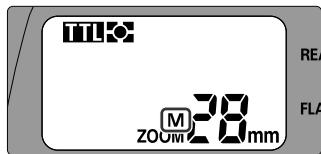
- When the zoom-head position is set manually, "M" appears above the "ZOOM" indication in the LCD panel.
- Generally, set the zoom-head position to the focal length of the lens in use or to the closest wide-angle setting of the lens in use (see the table on p. 16).
Wide-flash adapter
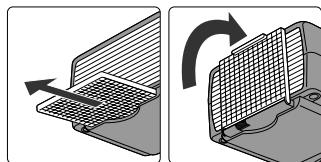
- With 14mm to 23mm lens, use the built-in wide-flash adapter.
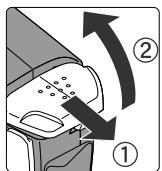
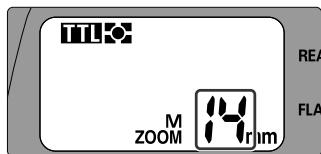
- Slide out the wide-flash adapter from the bottom of the flash head, then attach it in front of the flash head. The Power Zoom function becomes inactive, zoom-head position is automatically set at 14mm, and "ZOOM14mm" is indicated in the LCD panel.
- To store the wide-flash adapter, detach it from the flash head, then slide it back all the way into its original position.
- When using a 14mm lens, the distance between the camera and subject becomes increasingly pronounced from the center of the frame to the periphery, so the peripheral area might not be sufficiently lit in some cases.
Zoom-head position in bounce-flash or close-up photography
In bounce-flash photography (p. 40) or close-up photography (p. 43), the zoom-head position is fixed at 50mm with the flash head tilted up and at 24mm with the flash head tilted down. However, when the wide-flash adapter is used, the zoom-head position is fixed at 14mm regardless of flash head direction.
Setting Camera and SB-50DX Modes
Set the flash mode to TTL/D-TTL to perform TTL/D-TTL auto flash where flash output level is automatically controlled according to shooting situations.
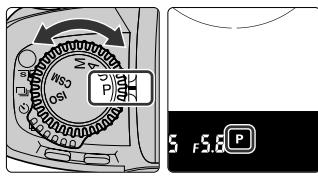
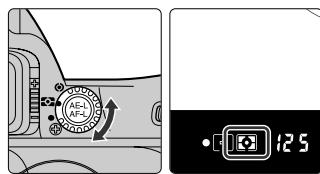
1. Set the camera's exposure mode to Programmed Auto/Auto-Multi Program and the metering system to Matrix Metering.
- If Programmed Auto/Auto-Multi Program cannot be set, select another exposure mode (p. 24). If Matrix Metering cannot be set, select Center-Weighted Metering.
- Shutter speed is automatically set to flash sync speed. (For details, see your camera's instruction manual). In Shutter-Priority Auto or Manual exposure mode, you can select a slower shutter speed than the automatically controlled shutter speed.
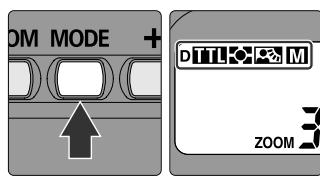
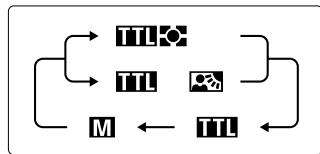
2. Set the flash mode to the desired type of TTL/D-TTL auto flash (p. 25).
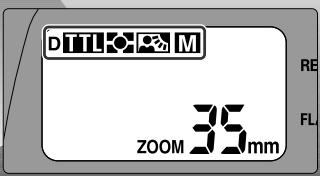
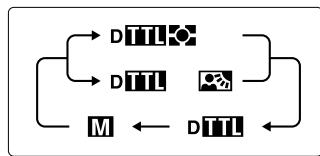
- Every time you press the MODE button, the flash mode or type of TTL auto flash changes in the following order: Multi-Sensor Balanced Fill-Flash or Matrix Balanced/Center-Weighted/Spot Fill-Flash, Standard TTL Flash and Manual Flash. And each indication is displayed in the LCD panel. When TTL auto flash is set, or is displayed in the LCD panel.
- When using Nikon digital SLR cameras, D-TTL auto flash (p. 27) is activated and "D" appears in the LCD panel.
- Usable types of TTL/D-TTL auto flash and flash modes vary depending on the lens, camera, exposure mode and/or metering system combination being used. (For details, see table on p. 28, and your camera's instruction manual).
Automatic flash synchronization with TTL/D-TTL auto flash
In TTL/D-TTL auto flash, after the camera's shutter is released and the flash fires, the camera measures the amount of light reflected from the subject through the lens to automatically control flash output level and give correct exposure. According to the camera, lens, exposure mode and/or metering system combination in use, the SB-50DX offers various types of TTL/D-TTL auto flash. Multi-Sensor Balanced Fill-Flash (p. 26) and Matrix Balanced Fill-Flash (p. 26) control flash output level to give a correct exposure for both the background and foreground subjects, resulting in well-balanced photos. When the SB-50DX is used with a Nikon digital SLR camera, D-TTL auto flash (p. 27) will be activated. With some cameras, TTL/D-TTL auto flash cannot be used. (Perform Manual flash, p. 31, in this case).
If or does not appear in the LCD panel
When the SB-50DX is not attached to the camera body, or when the camera, lens, exposure mode and/or metering system combination is incompatible with Multi-Sensor Balanced Fill-Flash/Matrix Balanced Fill-Flash/Center-Weighted/Spot Fill-Flash, only Standard TTL Flash or Manual Flash can be se
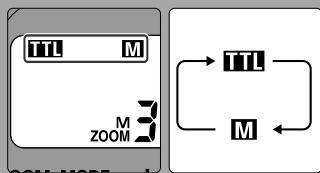
Pressing the MODE button sets Standard TTL Flash with TTL indication in the LCD panel or Manual Flash with M indication, alternately.

Shooting with Flash
Set the camera's flash sync mode, confirm the ready-light comes on, then take a shot with the flash. (For details, see your camera's instruction manual).

1. Set the camera's flash sync mode.
- Set the camera's flash sync mode to Front-Curtain Sync for normal flash shooting.
- If your camera is not provided with flash sync mode option, normal sync mode (Front-Curtain Sync) is automatically selected.
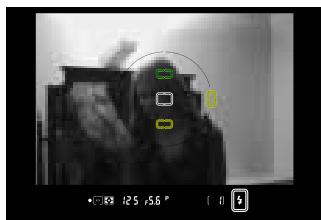
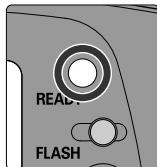
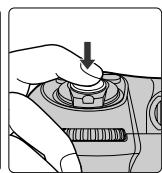
2. Compose picture, focus and confirm the ready-light comes on, then shoot with the flash.
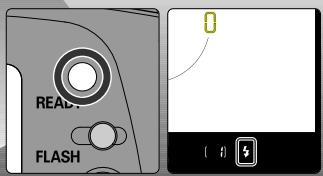
- When the SB-50DX is fully charged and ready to fire, camera's ready-light lights up in the viewfinder as the ready-light on the SB-50DX turns on.
Selecting the camera's flash sync mode
In addition to Front-Curtain Sync (normal sync), Slow Sync, Rear-Curtain Sync, Red-Eye Reduction, etc. can be selected. Available flash sync mode depends on the camera in use. (For details, see your camera's instruction manual).
Rear-Curtain Sync not possible with F90-series/N90
Although the Rear-Curtain Sync can be set on the F90-series/N90 camera, Rear-Curtain Sync will not be performed with the combination of this camera and SB-50DX.
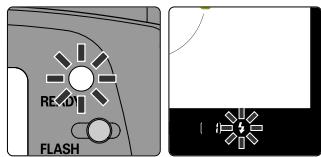
If the ready-light blinks after flash shooting
- In TTL/D-TTL auto flash mode, the ready-light on the SB-50DX and/or the camera's viewfinder ready-light blink for approx. 3 sec. after shooting when the flash has fired at its maximum output and underexposure may have occurred. To compensate, use a wider aperture (smaller f-number) in Aperture-Priority Auto or Manual exposure mode or move closer to the subject and shoot again.
e e
Underexposure indication
- If the underexposure has occurred with cameras of Group I or Nikon Digital cameras (p. 28, 29), blinks and the amount of underexposure (0 to -3.0 EV) appears for 3 sec. in the LCD panel, at the same time the ready-lights blink (as mentioned above).
- Amount of underexposure appears for approx. 3 sec., then disappears. Pressing the ZOOM button and the - button at the same time makes the amount of underexposure appear again.
TTL auto flash shooting distance range in meter (for feet indication, see page 69)
- Usable film speeds (sensitivity), usable apertures and flash shooting distance ranges in the TTL/D-TTL auto flash mode are as follows:
(14mm zoom-head position: with the wide-flash adapter)
For example, if you select f/8 with an ISO 400 film at 35mm zoom-head position, flash shooting distance range would be 0.6m to 5.5m.
| ISO film speed (sensitivity) | Zoom-head position | ||||||||||||
| Aperture | 25 | 50 | 100 | 200 | 400 | 800 | 1600 | 14mm | 24mm | 28mm | 35mm | 50mm | |
| — | — | 1.4 | 2 | 2.8 | 4 | 5.6 | 0.8-8.4 | 1.2-12 | 1.3-14 | 1.4-15 | 1.7-18 | TTL auto flash shooting distance range (m) | |
| — | 1.4 | 2 | 2.8 | 4 | 5.6 | 8 | 0.6-6.0 | 0.8-9.0 | 0.9-10 | 1.0-11 | 1.2-13 | ||
| 1.4 | 2 | 2.8 | 4 | 5.6 | 8 | 11 | 0.6-4.2 | 0.6-6.3 | 0.7-7.0 | 0.7-7.7 | 0.9-9.1 | ||
| 2 | 2.8 | 4 | 5.6 | 8 | 11 | 16 | 0.6-3.0 | 0.6-4.5 | 0.6-5.0 | 0.6-5.5 | 0.6-6.5 | ||
| 2.8 | 4 | 5.6 | 8 | 11 | 16 | 22 | 0.6-2.1 | 0.6-3.1 | 0.6-3.5 | 0.6-3.8 | 0.6-4.6 | ||
| 4 | 5.6 | 8 | 11 | 16 | 22 | 32 | 0.6-1.5 | 0.6-2.2 | 0.6-2.5 | 0.6-2.7 | 0.6-3.2 | ||
| 5.6 | 8 | 11 | 16 | 22 | 32 | 45 | 0.6-1.0 | 0.6-1.5 | 0.6-1.7 | 0.6-1.9 | 0.6-2.3 | ||
| 8 | 11 | 16 | 22 | 32 | 45 | — | 0.6-0.7 | 0.6-1.1 | 0.6-1.2 | 0.6-1.3 | 0.6-1.6 | ||
| 11 | 16 | 22 | 32 | 45 | — | — | 0.6 | 0.6-0.8 | 0.6-0.8 | 0.6-0.9 | 0.6-1.1 | ||
| 16 | 22 | 32 | 45 | — | — | — | — | — | 0.6 | 0.6-0.7 | 0.6-0.8 | ||
Ex a m p l e Photos
Close-up photography (p. 43)


DETAILED OPERATION
This chapter features a detailed description of the SB-50DX functions.
Shooting in Exposure Mode Other Than Programmed Auto/Auto-Multi Program
Usable exposure modes and operations vary depending on the camera being used. (See your camera's instruction manual.) See step 4 on page 18 for shooting in Programmed Auto/Auto-Multi Program exposure mode.
In Shutter-Priority Auto exposure (S) mode
By selecting a slower shutter speed, background exposure can also be taken into account.
- Camera selects the correct aperture. Note that the automatically controlled aperture should provide appropriate shooting distance range (p. 21) for your subject.
- If you set a shutter speed faster than the flash sync speed, the camera automatically shifts to its fastest flash sync speed when the SB-50DX is turned on.
In Aperture-Priority Auto exposure (A) mode
By selecting aperture, you can control depth of field and flash shooting distance range.
- Camera selects the correct shutter speed. The range of automatically controlled shutter speeds varies depending on the camera being used. For details, see your camera's instruction manual.
- Aperture-Priority Auto exposure mode can be used for Manual flash mode (p. 31) where the appropriate aperture should be determined by the guide number (p. 33).
- To determine the aperture, refer to the guide number (p. 33) and the TTL auto flash shooting distance range table (p. 21).
In Manual exposure (M) mode
By selecting shutter speed and aperture, you can control background exposure, depth of field and flash shooting distance range.
- If you set a shutter speed faster than the flash sync speed, the camera automatically shifts to its fastest flash sync speed when the SB-50DX is turned on (except for FM3A).
- Manual exposure mode can be used for Manual flash mode (p. 31) where appropriate aperture should be determined by the guide number (p. 33).
- To determine the aperture, refer to the guide number (p. 33) and the TTL auto flash shooting distance range table (p. 21).
- Select Manual exposure mode to perform double flash operation using the built-in Speedlight (p. 42, 54) of the F70-series/N70.
- Select Manual exposure mode to perform wireless multiple flash operation using the built-in Speedlight (p. 48) of the F80-series/N80-series or F70-series/N70.
Flash Modes and Types of TTL/D-TTL Auto Flash
The Nikon SB-50DX provides three flash modes: TTL auto flash for silver chloride film cameras, D-TTL auto flash for Nikon Digital SLR cameras and Manual flash.
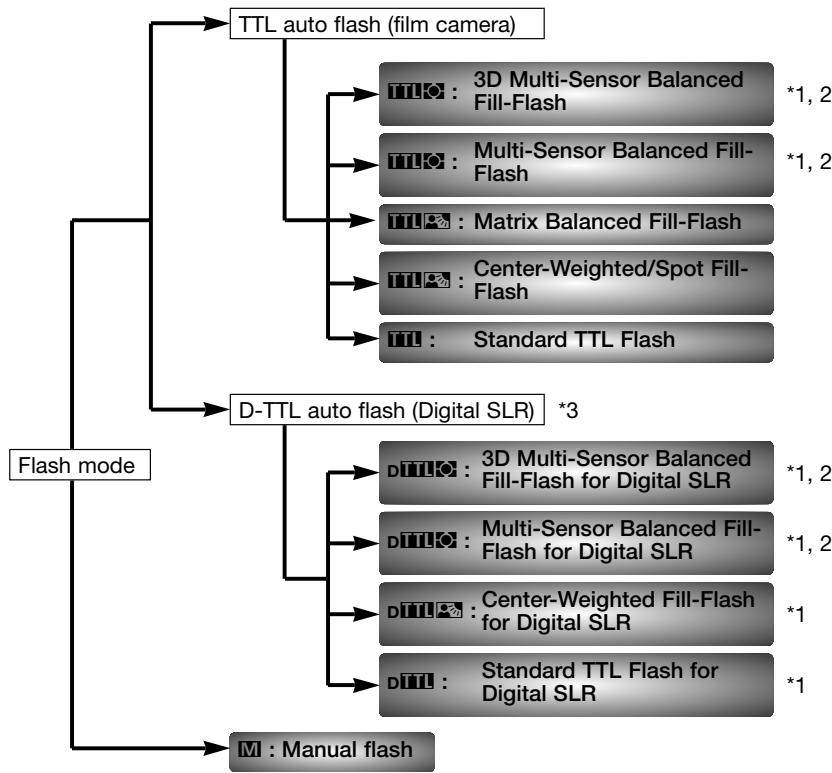
1 Monitor Pre-flashes are fired (p. 27).
2 The 3D Multi-Sensor Balanced Fill-Flash and Multi-Sensor Balanced Fill-Flash together comprise Automatic Balanced Fill-Flash with TTL Multi-Sensor (Automatic Balanced Fill-Flash with TTL Multi-Sensor for Digital SLR in D-TTL auto flash).
*3 TTL auto flash mode for Nikon Digital SLR is called D-TTL auto flash mode.
Flash Modes and Types of TTL/D-TTL Auto Flash—continued
Available types of TTL auto flash vary depending on the camera/lens/exposure mode/metering system combination being used. (For details, see the table on p. 28-29 and your camera's instruction manual.)
3D Multi-Sensor Balanced Fill-Flash (with cameras of Group I only)
- Information obtained by the Monitor Pre-flashes, exposure control information and Distance Information from a G- or D-type lens is integrated to automatically compensate the flash output level for well-balanced exposure on the main subject and the background.
- You can take well-balanced pictures in very difficult situations, such as a scene that includes an object with extremely high reflectivity or a subject against an "infinite" background (empty sky, clouds, etc.).
■ Multi-Sensor Balanced Fill-Flash (with cameras of Group I only)
- Multi-Sensor Balanced Fill-Flash, without the Distance Information of the 3D Multi-Sensor Balanced Fill-Flash, can be performed with a combination of the cameras of Group I and CPU Nikkor lenses other than G/D-type.
Matrix Balanced Fill-Flash
- Exposure control information obtained by the camera's Matrix meter is used to automatically compensate the flash output level for well-balanced exposure on the main subject and the background.
Center-Weighted Fill-Flash/Spot Fill-Flash
- Exposure control information with Center-Weighted Metering or Spot Metering is used to properly compensate the flash output for a natural fill-flash effect.
- The exposure balance on the subject and the background may be rather rough when compared to results obtained with the Matrix Balanced Fill-Flash.
Standard TTL Flash
- The main subject is correctly exposed.
- Useful when you want to highlight the main subject.
Exposure balance on the main subject and the background
The level of exposure balance on the main subject and the background varies as the type of TTL auto flash changes. The most well-balanced TTL auto flash is 3D Multi-Sensor Balanced Fill-Flash, the balance control decreases from Multi-Sensor Balanced Fill-Flash, Matrix Balanced Fill-Flash, Center-Weighted/Spot Fill-Flash, down to Standard TTL Flash, in that order. (With D-TTL auto flash, it decreases from 3D Multi-Sensor Balanced Fill-Flash for Digital SLR, Multi-Sensor Balanced Fill-Flash for Digital SLR, Center-Weighted Fill-Flash for Digital SLR, down to Standard TTL Flash for Digital SLR, in that order.) Take the level of exposure balance on the main subject and the background into account when choosing the camera/length/exposure mode/metering system combination.
When the SB-50DX is used in TTL auto flash mode with Nikon digital SLR cameras, D-TTL auto flash mode is automatically activated and Monitor Preflashes become available. Available types of D-TTL auto flash vary depending on the lens/metering system combination being used. (For details, see the table on p. 28-29 and your camera's instruction manual.)
3D Multi-Sensor Balanced Fill-Flash for Digital SLR
- Information obtained by the Monitor Pre-flashes, exposure control information and Distance Information from the G- or D-type lens are integrated to automatically compensate the flash output level for well-balanced exposure on the subject and the background.
- You can take well-balanced pictures in very difficult situations, such as a scene that includes an object with extremely high reflectivity or a subject against an "infinite" background (empty sky, clouds, etc.).
Multi-Sensor Balanced Fill-Flash for Digital SLR
- Multi-Sensor Balanced Fill-Flash, without the Distance Information of the 3D Multi-Sensor Balanced Fill-Flash for Digital SLR, can be performed with a CPU Nikkor lens other than G/D-type.
Center-Weighted Fill-Flash for Digital SLR
- Exposure control information with Center-Weighted Metering and information obtained by the Monitor Pre-flashes is used to properly compensate the flash output for a natural fill-flash effect (with non-CPU lens).
Standard TTL Flash for Digital SLR
- Exposure control information and information obtained by the Monitor Preflashes is used for correct exposure on the main subject.
- Useful when you want to highlight the main subject.
- With Spot Metering, Standard TTL Flash for Digital SLR is automatically activated.
Monitor Pre-flashes
Monitor Pre-flashes are available in Automatic Balanced Fill-Flash with TTL Multi Sensor (of the TTL auto flash) and all the flash modes in D-TTL auto flash to determine the condition of the subject.
Just after you depress the shutter release button and before the shutter is activated, the SB-50DX fires a series of imperceptible pre-flashes that are detected by the camera's TTL Multi Sensor, and analyzes it for brightness and contrast. (Monitor Pre-flashes are fired instantaneously and cannot be differentiated from the main flash.)
Monitor Pre-flashes are not fired when the flash head is tilted up, in Rear-Curtain Sync (p. 20) or Wireless Flash mode (p. 48) in Automatic Balanced Fill-Flash with TTL Multi Sensor.
Cameras Compatible with TTL/D-TTL Auto Flash Mode
| Group | Camera | TTL/D-TTL auto flash mode | Lens | Exposure mode | Metering system | Notes (p. 30) | ||||||
| CPU | Non-CPU | |||||||||||
| I | F5 F100 | TILO | ○ | P | S | A | M | # | * | 1 | ||
| TILO | ○ | A | M | * | * | 2 | ||||||
| TILO | ○ | P | S | A | M | # | * | 3,4 | ||||
| TILO | ○ | A | M | * | * | 3,4 | ||||||
| F90X/N90s F90-series/N90 F70-series/N70 | TILO | ○ | P | S | A | M | # | * | 1,5 | |||
| TILO | ○ | A | M | * | * | 2 | ||||||
| TILO | ○ | P | S | A | M | # | * | 3,5 | ||||
| TILO | ○ | A | M | * | * | 3 | ||||||
| F80-series/ N80-series | TILO | ○ | P | S | A | M | # | * | 1 | |||
| TILO | ○ | P | S | A | M | # | * | 3 | ||||
| TILO | ○ | M | * | 4,6 | ||||||||
| II | F4-series | TILO | ○ | P | S | A | M | # | * | 5 | ||
| TILO | ○ | A | M | # | * | * | 3,5 | |||||
| TILO | ○ | P | S | A | M | * | 2,5 | |||||
| TILO | ○ | A | M | * | * | 2 | ||||||
| TILO | ○ | P | S | A | M | # | * | 3,4 | ||||
| TILO | ○ | A | M | # | * | * | 3,4 | |||||
| F65-series/ N65-series | TILO | ○ | P | S | A | # | * | 3,7,8 | ||||
| TILO | ○ | P | S | A | M | # | * | 3,7,8 | ||||
| F-801s/N8008s F-801/N8008 | TILO | ○ | P | S | A | M | # | * | 5 | |||
| TILO | ○ | P | S | A | M | * | 2,5,9 | |||||
| TILO | ○ | A | M | * | * | 2,9 | ||||||
| TILO | ○ | P | S | A | M | # | * | 3,5,9 | ||||
| TILO | ○ | A | M | * | * | 3,9 | ||||||
| PRONEA 600i/ PRONEA 6i | TILO | ○ | P | S | A | # | * | 3,8 | ||||
| TILO | ○ | P | S | A | M | # | * | 3,8 | ||||
| TILO | ○ | M | * | * | 8 | |||||||
| III | F-601/N6006 F-601m/N6000 | TILO | ○ | P | S | A | M | # | * | 10,11 | ||
| TILO | ○ | P | S | A | M | * | 2,9,10,11 | |||||
| TILO | ○ | A | M | * | * | 2,9,10 | ||||||
| TILO | ○ | P | S | A | M | # | * | 3,7,9,11,12 | ||||
| TILO | ○ | A | M | * | * | 3,6,7,9,12 | ||||||
| IV | F60-series/N60 F50-series/N50 F-401x/N5005 | TILO | ○ | P | S | A | # | * | 10 | |||
| TILO | ○ | M | * | * | 2,7,10 | |||||||
| Group | Camera | TTL/D-TTL auto flash mode | Lens | Exposure mode | Metering system | Notes (p. 30) | ||||||
| CPU | Non-CPU | |||||||||||
| V | F-501/N2020 | III | ○ | ○ | P | A | M | 13, 14 | ||||
| F-301/N2000 | ||||||||||||
| F-401s/N4004s | III | ○ | P | S | A | 13 | ||||||
| F-401/N4004 | ||||||||||||
| VI | FA | III | ○ | ○ | P | A | M | 14 | ||||
| FG | III | ○ | ○ | P | A | M | 14 | |||||
| F3-series (with AS-17) | III | ○ | ○ | A | M | 14 | ||||||
| FM3A | ||||||||||||
| FE2 | ||||||||||||
| Nikonos V | III | ○ | A | M | 15 | |||||||
| Digital SLR | D1x | DIIII | ○ | P | S | A | M | 16, 17 | ||||
| D1H | DIIII | ○ | ○ | A | M | 16 | ||||||
| D1 | DIIII | ○ | P | S | A | M | 16, 18 | |||||
| D100 | DIIII | ○ | A | M | 16, 18 | |||||||
- TTL/D-TTL auto flash mode
TTL: Automatic Balanced Fill-Flash with TTL Multi Sensor
Matrix Balanced Fill-Flash/Center-Weighted Fill-Flash/Spot Fill-Flash
TTL: Standard TTL Flash
DITIO: Automatic Balanced Fill-Flash with TTL Multi Sensor for Digital SLR
DITL2: Center-Weighted Fill-Flash for Digital SLR
DIII: Standard TTL Flash for Digital SLR - Exposure mode
P: Programmed Auto/Auto-Multi Program
S:Shutter-Priority Auto
A: Aperture-Priority Auto
M: Manual - Metering system
Matrix
: Center-Weighted
: Spot
Digital Data Communication
With groups I, II and Digital SLR cameras (in shaded area ), the SB-50DX performs Digital Data Communication (p. 16).
Notes
1:3D Multi-Sensor Balanced Fill-Flash is activated with G- and D-type lenses.
2: Center-Weighted/Spot Fill-Flash is activated.
3: When Standard TTL Flash is selected.
4: Standard TTL Flash is automatically set when the metering system is set to Spot.
5: Aperture-Priority Auto and Manual exposure mode cannot be selected with a G-type Nikkor lens.
6: Standard TTL Flash is automatically set with a non-CPU lens.
7: Center-Weighted Metering is automatically set when the exposure mode is set to Manual.
8: Standard TTL Flash is automatically set when the exposure mode is set to Manual.
9: Spot Metering is not available with the F-801/N8008 and F-601M/N6000.
10: Only III appears in the SB-50DX's LCD panel but Matrix Balanced Fill-Flash is selected. (II) appears in the camera's LCD panel with the F-601/N6006 and F-601M/N6000.)
11: G-type lenses cannot be used with the F-601/N6006. G-type lenses can be used with the F-601M/N6000; however, Aperture-Priority Auto and Manual exposure modes cannot be used.
12: Cancel Automatic Balanced Fill-Flash on the camera body to perform Standard TTL Flash (disappears in the camera's LCD panel).
13: Programmed TTL Flash is selected with exposure mode set to Programmed Auto or Shutter-Priority Auto.
14: G-type Nikkor lenses cannot be used.
15: Use optional V-type sync cord.
16: D-TTL auto flash mode is selected.
17:3D Multi-Sensor Balanced Fill-Flash for Digital SLR is selected with G- and D-type Nikkor lenses.
18: When Standard TTL Flash for Digital SLR is activated. (Standard TTL Flash for Digital SLR is automatically selected when the metering system is set to Spot.)
Manual Flash
In Manual flash mode, the SB-50DX always fires at its maximum output. Manual flash can be performed in any camera, lens and metering system combination. By selecting the aperture, you can control the exposure and flash shooting distance. Flash shooting distance is determined by the guide number and aperture.
Manual flash operation
- Set the camera's exposure mode to Aperture Priority Auto (A) or Manual (M). (See camera's instruction manual.)
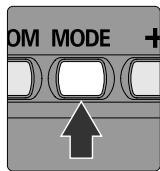
- Press the SB-50DX's MODE button until the "M" for Manual flash appears
in the LCD panel.
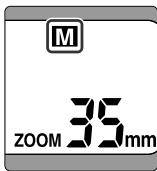
-
Set the camera's flash sync mode (See camera's instruction manual).
-
Set the flash sync mode to Front-Curtain Sync with normal flash shooting.
-
The flash sync mode is automatically set to Front-Curtain Sync with a camera without flash sync mode selection.
-
Determine aperture by referring to the guide number and (p. 33) flash shooting distance and set the aperture.
-
In Manual flash mode, the SB-50DX always fires at its maximum output and the amount of flash output cannot be adjusted. Control exposure by changing aperture.
- Some zoom lenses have variable aperture (lens' brightness) with zooming (variable focal length). (see p. 32).
5.Compose, focus, confirm that the ready-light lights up, then shoot.
Camera's exposure mode in Manual flash mode
The aperture must be manually selected in Manual flash mode. In exposure modes other than Aperture-Priority Auto and Manual, the shutter in some cameras may not be released. (For details, see your camera's instruction manual.)
Reading Variable Aperture of Zoom Lenses
Some zoom lenses have variable aperture (lens' brightness) with zooming (variable focal length). (For details, see the lens' instruction manual.) For example, a lens such as the AF Zoom-Nikkor 28-105mm f/3.5-4.5D has two maximum aperture values. Follow the instructions below to determine aperture with such lens.
■ Reading aperture in the camera's LCD panel and/or inside the viewfinder
- After zooming in/out for composing, set the aperture and confirm the aperture value in the camera's LCD panel and/or inside the viewfinder. The compensated aperture value is displayed. Aperture value displayed in the aperture-direct-readout scale through the camera's viewfinder (of the Nikon F5 or other cameras that are compatible with aperture-direct-readout scale), is fixed and not compensated as "Reading aperture with the scale on the lens" below.
Reading aperture with the scale on the lens
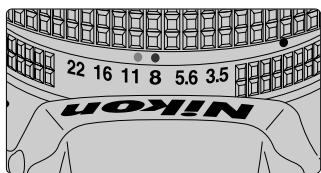
- After zooming in/out for composing, read aperture with the aperture scale on the lens. For the shortest focal length setting, read the aperture value at the green index (or line index); for the longest focal length setting, read the value at the yellow index (or dot index). For intermediate focal length settings, read the aperture value between the two indexes.
- Aperture ring and aperture scale are not provided with the G-type Nikkor lens and the aperture cannot be read with the scale on the lens.
■ Reading aperture of the CPU lens with the Nikon F-401x/N5005, F-401s/N4004s, or F-401/N4004 camera
- Set the camera's exposure mode to Aperture-Priority Auto (A) or Manual (M) and read the aperture value with the camera's dial. Although the aperture varies during zooming, the camera automatically compensates the lens value for correct exposure. Setting the aperture dial to a smaller value than the lens' smallest f-number (maximum aperture) or to a larger value than the lens' largest f-number (minimum aperture) sets the lens aperture to the lens' maximum or minimum aperture.
- In Programmed Auto/Auto-Multi Program (P) or Shutter-Priority Auto (S) exposure mode, the aperture value set on the lens cannot be confirmed. In addition, the shutter cannot be released in Manual flash operation (p. 31).
Guide Number
The guide number indicates the power of the flash. It varies according to ISO film speed (sensitivity) and zoom-head position.
Equations including guide number
- The table below shows the guide numbers for the SB-50DX with ISO 100 sensitivity: (14mm zoom-head position: with the wide-flash adapter, p. 17).
| Zoom-head position | 14mm | 24mm | 28mm | 35mm | 50mm |
| Guide number (m/ft.) | 12/39 | 18/59 | 20/66 | 22/72 | 26/85 |
- Use the following equation to determine the correct aperture:
$$ f / s t o p = \frac {\text {g u i d e n u m b e r}}{\text {f l a s h - t o - s u b j e c t d i s t a n c e}} $$
Or, use the following equation to determine the flash-to-subject distance:
$$ f / s t o p $$
- For sensitivity other than ISO 100, multiply the guide number at ISO 100 by the factors shown in the table below:
| ISO film speed | 25 | 50 | 200 | 400 | 800 | 1600 |
| Factor | X0.5 | X0.71 | X1.4 | X2 | X2.8 | X4 |
- For close-up flash photography, see p. 43.
Guide number in 1/300 TTL High-Speed Sync (with the F5 camera)
- The table below shows the guide numbers for the SB-50DX with ISO 100 sensitivity: (14mm zoom-head position: with the wide-flash adapter.)
| Zoom-head position | 14mm | 24mm | 28mm | 35mm | 50mm |
| Guide number (m/ft.) | 9.5/31 | 10/33 | 11/35 | 12/38 | 14/44 |
Combined guide number
- Calculating the combined guide number of two or more Speedlight units may be necessary when performing double-flash operation (p. 54) or illuminating a distant subject (p. 62). The combined guide number is calculated using the following equations. The guide number varies according to ISO film speed (sensitivity) and zoom-head position. For guide number information of the camera's built-in Speedlight or Accessory Speedlight other than the SB-50DX, see your camera's instruction manual or Speedlight's instruction manual.
Combined guide number in double-flash operation (GN = guide number): Combined GN = √(GN of the SB-50DX)² + (GN of the camera's built-in Speedlight)²
Combined guide number in multiple flash operation (GN = guide number): Combined GN = √(GN of Speedlight A)² + (GN of Speedlight B)² + (GN of Speedlight C)² + ...
Exposure Compensation in Flash Photography
Exposure compensation lets you intentionally modify the correct exposure. Exposure can be controlled when a subject of high reflectivity is included in a picture, or when you want to create flash photographs that are somewhat brighter or darker to match the subject or your creative preferences. Some plus compensation may be necessary when the background includes a mirror, white wall or other highly reflective surface. Likewise, some minus compensation may be required when the background is dark or includes subjects of low reflectivity. You can compensate exposure on both the foreground subject and background, or compensate exposure on only the subject.
To compensate exposure on both subject and background in TTL/D-TTL auto flash mode
- In TTL/D-TTL auto flash mode (p. 25), use the camera's exposure compensation function (see your camera's instruction manual).
- The exposure compensation value set on the camera is not displayed in the SB-50DX LCD panel.
- Exposure compensation beyond the usable ISO film speed (sensitivity) range for TTL/D-TTL auto flash (p. 21) cannot be performed. For example, making a +3 compensation with ISO 100 film (sensitivity) corresponds to ISO 12, which is out of the usable ISO speed (sensitivity) range (ISO 25 to 1600). With ISO 100 film (sensitivity), you can make plus compensation up to +2 (corresponding to ISO 25).
■ To compensate exposure on both subject and background in Manual flash mode
- In Manual flash mode (p. 31), proper aperture (or standard aperture) for correct exposure can be determined by the equation using the guide number (p. 33). You can intentionally change the aperture to compensate exposure.
- To make the subject brighter, use a wider aperture (smaller f-number); to make the subject darker, use a narrower aperture (larger f-number).
To compensate exposure on only the foreground subject
- In TTL/D-TTL auto flash mode, adjust the SB-50DX flash output level (flash output level compensation, p. 35).
- Flash output level compensation is possible only when using cameras of Group I, II, III or Nikon digital SLR cameras (p. 28).
Controlling background exposure in flash photography
By setting Slow Sync (p. 20) or by selecting a slower shutter speed than flash sync speed in Shutter-Priority Auto or Manual exposure mode, you can bring out background details using all of the available light. Available flash sync modes and exposure modes vary depending on the camera being used. (See your camera's instruction manual.)
Flash Output Level Compensation
By adjusting flash output level, you can compensate exposure on a flash-illuminated subject while keeping the same background exposure. Flash output level compensation can be performed with cameras of Groups I, II and III and Nikon digital SLR cameras.
- Flash output level compensation can be performed with cameras of Groups I, II and III and Nikon digital SLR cameras. With cameras of Group III, set flash output level compensation on the camera. (For details, see your camera's instruction manual.)
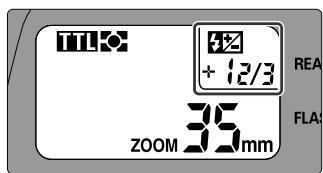
- In TTL/D-TTL auto flash mode, press the + or - button to adjust flash output level. The LCD panel shows the compensated value with symbol.
- You can adjust the flash output level from -3 to +3 EV in 1/3 steps (or in 1/6 steps with Nikon digital SLR cameras).
- With a camera having the flash output level compensation function (i.e., F80-series/N80-series, F70-series/N70 or PRONEA 600i/PRONEA 6i), you can set flash output level compensation either on the camera or on the SB-50DX. (Compensation range and step depend on the camera. See your camera's instruction manual). Or, you can add compensation values set on the camera to the value set on the SB-50DX (or vice versa). Note that, in this case, the SB-50DX LCD panel shows the compensation value set on the SB-50DX only.
- To cancel flash output level compensation, press the + or - button until the value indication shows "0" and disappears in the LCD panel. (Turning the SB-50DX off does not cancel the flash output compensation.)
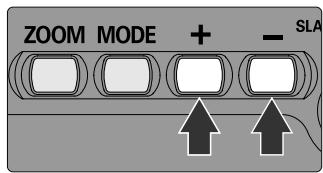
(See photos on p. 38.)
Autofocus Flash Photography in Dim Light
The SB-50DX's AF-Assist Illuminator enables you to perform autofocus flash photography in dim light.
■ AF-Assist Illuminator
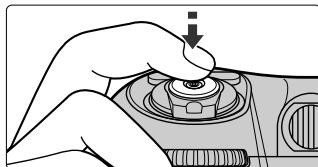
- The AF-Assist Illuminator automatically turns on when the camera's shutter release button is lightly pressed in dim light. After focus is achieved, the AF-Assist Illuminator turns off.
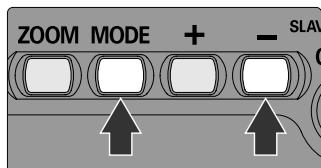
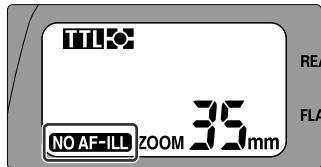
- The AF-Assist Illuminator is not activated when the NO AF-Ill is shown in the LCD panel. To activate the AF-Assist Illuminator, press the MODE and - buttons at the same time until the NO AF-Ill disappears.
- The AF-Assist Illuminator can be used with the Nikon AF camera when AF Nikkor lenses are used.
- Usable focal length for the AF-Assist Illuminator is approx. 24mm to 105mm (35mm to 105mm with the F-501/N2020). Autofocus distance range with the AF-Assist Illuminator is from approx. 1m (3.3 ft.) to approx. 5m (16 ft.).
- For autofocus with the AF-Assist Illuminator, set the camera's focus mode to Single Servo AF (Autofocus with Focus-Priority), AF or A. (See your camera's instruction manual.)
- The AF-Assist Illuminator does not turn on when the focus is locked or when the ready-light does not light up.
- When using the SB-50DX, the camera's AF-Assist Illuminator does not turn on but the AF-Assist Illuminator on the SB-50DX turns on. However with F60-series/N60 and SB-50DX's flash mode set to manual, AF-Assist Illuminator of the F60-series/N60 turns on. (See your camera's instruction manual.)
- With some cameras, AF-Assist Illuminator of the SB-50DX may not turn on when performing double flash shooting using the camera's built-in Speedlight (p. 42, 54).
With cameras having selectable focus areas
Set the camera's AF area mode to Single Area AF and select the center focus area, or set Dynamic AF Mode with Closest Subject Priority. (If center focus area is not selected in Single Area AF mode, the AF-Assist Illuminator does not turn on). For detailed information about AF area mode, see your camera's instruction manual.
■ Canceling AF-Assist Illuminator
- To cancel the AF-Assist Illuminator, press the MODE and - buttons at the same time until NO AF-ILL appears in the LCD panel.
- With the AF-Assist Illuminator canceled, autofocusing may not be performed in dim light.
- To activate the AF-Assist Illuminator, press the MODE and - buttons once again so NOAF-ILL disappears. (Without this operation, the AF-Assist Illuminator remains canceled even after the SB-50DX is turned off.)
- With the F80-series/N80-series and F65-series/N65-series camera bodies, canceling the AF-Assist Illuminator on the SB-50DX does not cancel the AF-Assist Illuminator on camera body. To cancel the AF-Assist Illuminator, also cancel it on the camera body. (For details, see your camera's instruction manual.)
Ex a m p l e P h o t o s
Flash output level compensation (p. 35)
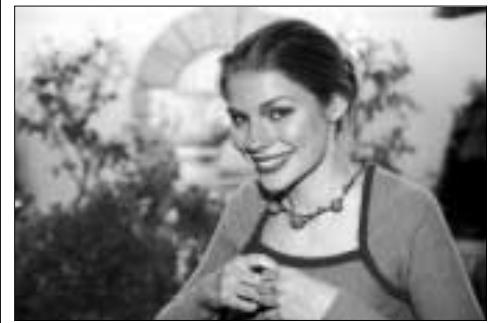
+compensation
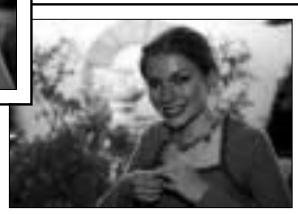
No compensation

- compensation
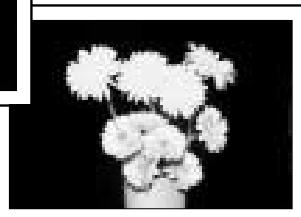
No compensation

TECHNICAL OPERATION
This chapter shows photographic techniques in flash shooting such as bounce flash and multiple flash.
Bounce-Flash Photography
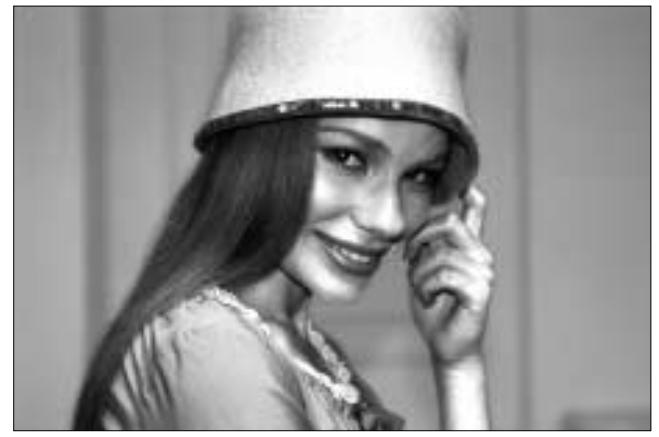
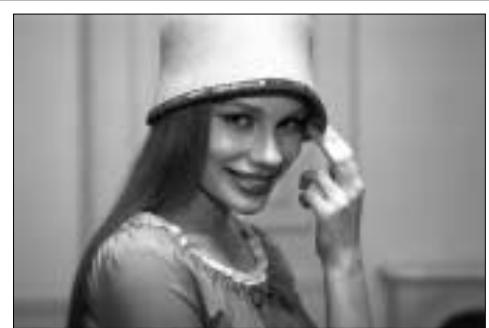
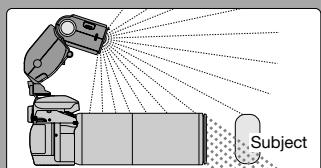
When taking pictures of a person in front of a wall, a direct flash often causes harsh, unattractive shadows on the subject or background (photo below, right). By bouncing the light off the ceiling or walls, you can soften the shadows and produce more natural-looking portraits (left and center photos). In addition to the general single-flash bounce operation (center photo), the SB-50DX enables you to perform double-flash bounce operation when used with a camera having a built-in Speedlight (photo below, left). Double-flash bounce operation will provide a more natural-looking lighting effect. If your camera has a built-in Speedlight, perform this double-flash bounce operation. In bounce-flash photography, high ISO sensitivity such as ISO 400 is recommended.
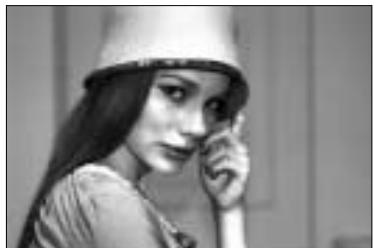
Bounce-flash (off the ceiling) with double flash
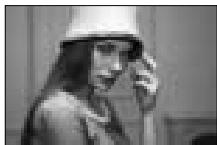
Bounce-flash with single flash
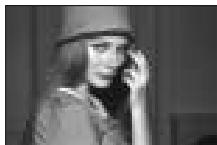
Direct flash (built-in Speedlight)
■ Tilting the flash head
- The flash head can be tilted up to 90^ or down to -18^ .
| Tilting angle | Up to 90° | Horizontal position (0°) | Down to -18°*1 |
| Click-stop positions*2 | 90°, 75° and 50° | 0° | -18° |
| LCD panel indication | |||
| Zoom-head position | Fixed at 50mm*3 | 24 to 50mm | 14mm (with wide-flash adapter*3, 4) |
| Guide number (ISO 100, m/ft.) | 26/85 (fixed) | 18/59 to 26/85 | 12/39 (fixed*4) |
1 Generally, the flash head is tilted down for close-up flash shooting (p. 43). Attach the wide-flash adapter.
2 Flash head can be tilted up or down to the intermediate positions.
3 Power Zoom does not function (p. 16).
4 Zoom head position is fixed at 24mm and guide number 18/59 (m/ft.) without the wide-flash adapter.
■ Bounce-flash operation with single flash (example photos, p. 10)
- Attach the SB-50DX to the camera body and set the camera's exposure mode to Aperture-Priority Auto (A) or Manual (M). (See your camera's instruction manual).
-
Set the camera's metering system to Matrix Metering or Center-Weighted Metering and flash sync mode to Front-Curtain Sync. (See your camera's instruction manual.)
-
Generally, set flash sync mode to Front-Curtain Sync.
-
If your camera does not have the flash sync mode option, Front-Curtain Sync is activated.
-
Press the MODE button of the SB-50DX to set TTL/D-TTL auto flash (p. 18).
-
Tilt the flash head.
-
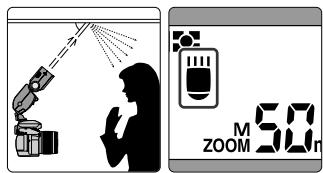
For easiest bounce-flash operation, tilt the flash head up at least 50^ to bounce light off the ceiling. Make sure that the light from the flash head does not directly illuminate the subject.
- Good results are generally obtained when the flash head is positioned 1 to 2m away from the reflecting surface (ceiling, wall, etc.).
-
Set the aperture.
-
With bounce flash, there is light loss when compared to normal flash operation, so use an aperture two to three stops wider (smaller f-number) than you would for regular TTL auto flash operation.
6.Compose, focus, confirm the ready-light comes on, then shoot.
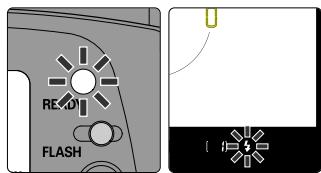
- If the ready-light on the SB-50DX and the camera's viewfinder ready-light 4 % blink for approx. 3 sec. after shooting (p. 21), the flash has fired at its maximum output. This may indicate underexposure has occurred. To compensate, use a wider aperture (smaller f-number) or reduce the bounce distance (distance between the flash head and
reflecting surface and/or distance between the subject and reflecting surface).
Note on reflecting surface
In color photography, select white or highly reflective surfaces to bounce light off of. Otherwise, your picture will come out with an unnatural color cast similar to that of the reflecting surface.
Bounce-Flash Photography—continued
■ Bounce-flash operation with double flash (SB-50DX and camera's built-in Speedlight) (example photos, p. 10)
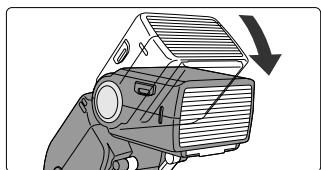
- Attach the SB-50DX to the camera and attach the provided diffuser on the camera's built-in Speedlight.
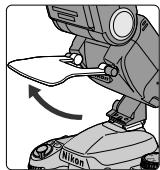
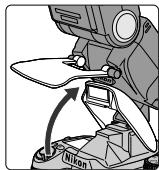
- Strong light from the camera's built-in Speedlight may adversely affect the bounce effect. Use the provided diffuser to soften the light from the camera's built-in Speedlight for a more natural-looking lighting effect.
- Lift up the diffuser, release the camera's built-in Speedlight (see your camera's instruction manual), and then lower the diffuser gently in front of the camera's Speedlight as shown. With F65-series/ N65-series set to AUTO AUTO mode or Vari-Program, the built-in Speedlight does not fire even when it is up.
- The camera Speedlight detecting lever on the SB-50DX detects that the camera's Speedlight is activated and E is displayed in the LCD panel.
-
To store the diffuser, reverse the steps described above.
-
Perform bounce-flash operation in the same manner as with single flash (p. 41).
-
Set the SB-50DX to TTL auto flash mode (p. 18).
Exposure mode with the Nikon F70-series/N70
When performing double-flash operation using the built-in Speedlight of the F70-series/N70, cancel Monitor Pre-flashes (p. 27) by setting the camera's exposure mode to Manual (M). (See F70-series/N70's instruction manual for details.) With the F80-series/N80-series, Monitor Pre-flashes are automatically canceled.
When using the Nikon F70-series/N70 or PRONEA 600i/PRONEA 6i
When performing double-flash operation with the Nikon F70-series/N70 or PRONEA 600i/PRONEA 6i camera, the Power Zoom function (p. 16), standby function linked to the camera's exposure meter (p. 13), viewfinder ready-light warnings (p. 15, 20, 21) and AF-Assist Illuminator (p. 36) are not available. (ZOOM and mm in the SB-50DX's LCD panel blink.) Set the zoom-head position manually. Also, Rear-Curtain Sync cannot be performed (p. 20).
Close-Up Flash Photography
With the wide-flash adapter attached to the SB-50DX, close-up flash shooting down to 0.3m (1.0 ft.) can be performed.
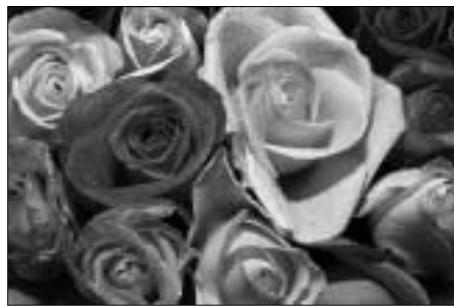
Close-up flash operation (example photos, p. 22)
-
Attach the SB-50DX to the camera body and set the camera's exposure mode to Aperture-Priority Auto (A) or Manual (M). (See your camera's instruction manual).
-
Set the camera's metering system to Matrix or Center-Weighted Metering and flash sync mode to Front-Curtain Sync. (See your camera's instruction manual.)
-
Generally, set flash sync mode to Front-Curtain Sync.
-
If your camera does not have the flash sync mode option, Front-Curtain Sync is activated.
-
Press the MODE button of the SB-50DX to set the flash mode for TTL/D-TTL auto flash (p. 18).
-
Attach the wide-flash adapter in front of the flash head.
-
The wide-flash adapter diffuses light and softens the subject's shadow. Always attach the wide-flash adapter for close-up flash shooting.
- Slide the wide-flash adapter straight out from the bottom of the flash head where it is stored, then attach it to the front of the flash head.
- Zoom-head position is fixed at 14mm and the Power Zoom function becomes inactive.
- To store the wide-flash adapter, detach it from the flash head, then slide it back into its original position.
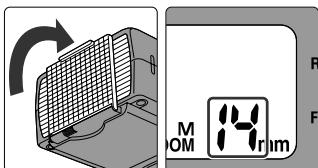
Close-Up Flash Photography—continued
5. Tilt the flash head down.
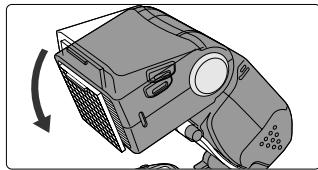
- Tilt the flash head down to -18^ .
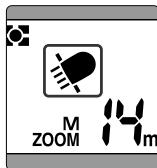
- is displayed in the LCD panel.
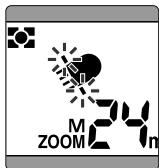
- blinks if the wide-flash adapter is not attached. Attach the wide-flash adapter for close-up flash shooting.
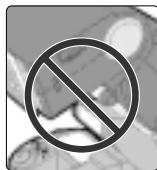
- The camera's built-in Speedlight cannot be used when flash head of the SB-50DX is tilted down. When the built-in Speedlight is activated, blinks. Press the camera's Speedlight down to retract it.
6. Set the aperture.
- Refer to the table below and use the following equation to determine the aperture.
| ISO film speed | 25 | 50 | 100 | 200 | 400 | 800 |
| Factor (m/ft.) | 1.4/4.6 | 2/6.6 | 2/6.6 | 4/13 | 4/13 | 5.6/18 |
$$ f / s t o p \geq \frac {\text {f a c t o r}}{\text {f l a s h - t o - s u b j e c t d i s t a n c e}} $$
For example, with a subject 0.5m (1.6 ft.) away using ISO 100 film, the suggested aperture is:
$$ f / s t o p \geq \frac {2}{0 . 5} = 4 $$
$$ \begin{array}{l} \text {O r ,} \ \mathbf {f} / \mathbf {s t o p} \geq \frac {6 . 6}{1 . 6} = 4 \end{array} $$
In this instance you should use at least f/4 or even smaller aperture (larger f-number), such as f/5.6 or f/8.
7. Compose, focus, confirm the ready-light comes on, then shoot.
- If the ready-light on the SB-50DX and the camera's viewfinder ready-light 4 blink for approx. 3 sec. after shooting, the flash has fired at its maximum output. This may indicate underexposure has occurred. To compensate, use a wider aperture (smaller f-number).
- Vignetting due to lighting situation, lens in use, focal length, etc. may occur in close-up flash shooting. Test shooting is recommended.
Usable lenses for close-up flash shooting
With a long-size lens, light may be obstructed by the lens barrel.
Multiple Flash Photography
Perform multiple flash shooting in the following situations:
- To eliminate shadows cast by the subject (p. 59)
To emphasize the subject's outline (p. 60) - To illuminate the subject mainly from the side (p. 61)
To illuminate a far subject (p. 62)
The SB-50DX enables you to perform the following multiple flash shootings.
- Wireless multiple flash shooting (p. 48)
- Multiple flash shooting with the SB-50DX attached with the Infrared Filter SW-9IR used as an infrared remote commander (p. 53)
- Double flash shooting using the SB-50DX with the camera's built-in Speedlight (p. 54)
- Multiple flash shooting using cords (p. 55)
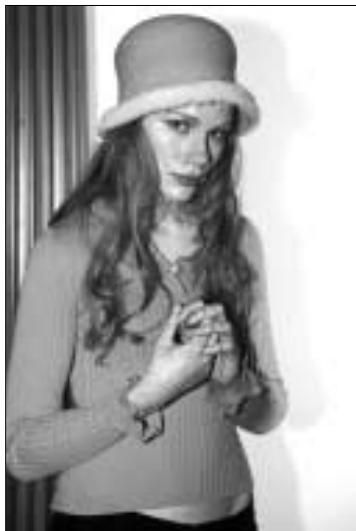
Multiple flash (eliminating shadows cast by the subject)
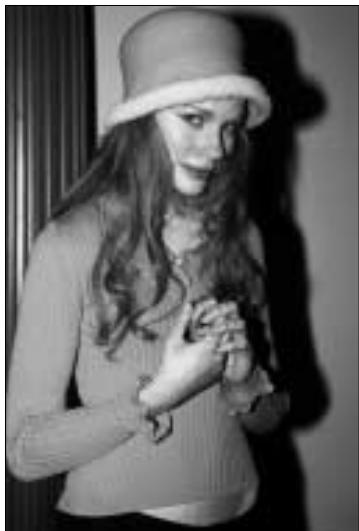
Single flash (built-in Speedlight)
Camera's settings in multiple flash operation
- Set the camera's exposure mode to Aperture-Priority Auto or Manual, exposure metering system to Matrix or Center-Weighted and flash sync mode to Front-Curtain Sync in multiple flash operation. If your camera does not have the flash sync mode option, Front-Curtain Sync is automatically activated.
Canceling Monitor Pre-flashes in multiple flash operation
Automatic Balanced Fill-Flash with TTL Multi Sensor (p. 25) in TTL auto flash (p. 26) and all the D-TTL auto flash modes (p. 27) cannot be used for a master flash unit in multiple flash operation since Monitor pre-flashes (p. 27) cause incorrect exposure.
When performing multiple flash operation, cancel Monitor pre-flashes of the master flash unit (p. 48) following the methods described in the table below.
| Master flash unit | How to cancel | |
| Automatic Balanced Fill-Flash with TTL Multi-Sensor (Group I camera, p. 28) | SB-80DX, 50DX | Set the Wireless Flash mode (p. 48). |
| Press the MODE button to set it to Standard TTL Flash (p. 26). | ||
| Tilt the flash head up. | ||
| Built-in Speedlight (F80-series/N80-series, F70-series/N70) | Set exposure mode to Manual (Standard TTL Flash is performed). | |
| SB-28/28DX, 27, 26, 25 | Set Standard TTL Flash. | |
| Tilt the flash head up. | ||
| All the D-TTL auto flash modes (digital SLR) | SB-50DX | Cannot be canceled. |
| SB-80DX, 28DX | Cannot be canceled. (Set non-TTL auto flash instead of D-TTL auto flash; the Speedlight can be used as a master flash unit in wireless multiple flash operation.) | |
Nikon COOLPIX-series
Wireless multiple flash operation is not possible using the built-in Speedlight of the Nikon COOLPIX-series digital cameras as a master flash unit.
Wireless Multiple Flash Operation
You can perform wireless multiple flash operation with the SB-50DX. The light sensor on the SB-50DX senses light received from the master flash unit (Speedlight, such as the SB-50DX attached on the camera or camera's built-in Speedlight) to trigger the SB-50DX and control the flash duration of the SB-50DX.
■ TTL auto wireless multiple flash operation
- Attach the master flash unit to the camera.
- Before attaching the Speedlight, turn off the Speedlight and camera.
- Position the SB-50DX as a slave flash unit.
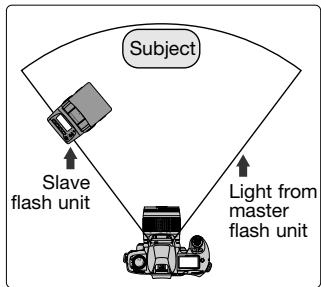
- Set the SB-50DX at a position (normally closer to the subject than the camera) where light from the master flash unit can reach the light sensor on the SB-50DX.
- Effective range of the SB-50DX's light sensor in the TTL wireless multiple flash operation is approx. 7m (23 ft.).
- There is no limit to the number of slave flash units (SB-80DX, SB-50DX, SB-30 units or other Speedlights with the SU-4 attached, p. 56) that can be used together. However, if too much light from other slave flash units enters the light sensor of the Speedlight, correct operation may not be possible. So the practical number of Slave flash units usable is up to three.
3. Turn on the camera and all the Speedlights.
-
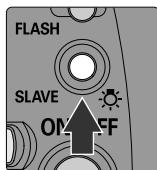
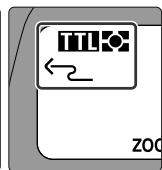
To use the SB-50DX as a master flash unit with (silver chloride) film cameras, press the SLAVE button for approx. 1 sec. to set the Wireless Flash mode with indication in the LCD panel. Monitor pre-flashes (p. 27) will not be fired even if the Automatic Balanced Fill-Flash with TTL Multi-Sensor (p. 25) is selected.
-
Set the flash mode on the master flash unit to TTL auto (p. 18).
-
To use the camera's built-in Speedlight as the master unit, release the built-in Speedlight. (See your camera's instruction manual).
- Auto wireless multiple flash operation is also possible with the master flash unit set to non-TTL auto. (See the Speedlight instruction manual for details.) With the master flash unit set to non-TTL auto, the light sensor on the slave SB-50DX unit also senses light received from the master flash unit to trigger the slave SB-50DX unit and control the flash duration. With non-TTL auto, you can perform auto wireless multiple flash operation with Nikon digital SLRs or cameras that are not compatible with TTL auto flash (Nikon FM2, FE10, FM10, etc.).
Cancel Monitor pre-flashes
When using a Group I camera (p. 28), cancel the Monitor pre-flashes of the master flash unit (p. 47).
-
Set the SB-50DX (used as a slave flash unit) to the Wireless Flash mode.
-
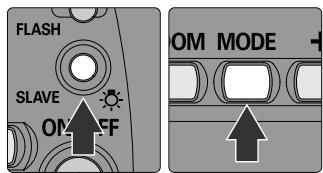
Press the SLAVE button for approx. one second to activate ^2 for Auto Slave Flash mode or ^ for Manual Slave Flash mode indicated in the LCD panel. If the ^ is shown, press the MODE button to set the Auto Slave Flash mode with ^2 indication.
- When the Wireless Flash mode is activated, the flash mode indication (p. 18) disappears from the LCD panel.
- In the Wireless Flash mode, leaving the SB-50DX unused for more than approx. one hour activates the standby function (p. 13) and the SB-50DX is automatically turned off.
- To cancel the Wireless Flash mode, press the SLAVE button until the Wireless Flash mode
indication disappears from the LCD panel. (Turning off the SB-50DX does not cancel the Wireless Flash mode.)

Wireless Multiple Flash Operation—continued
-
Shoot following the same procedure as in normal TTL auto flash operation.
-
Flash operation can be confirmed with ready-light indication or beeping sound.
| Master flash unit | Slave flash unit | Speedlight condition | |
| Ready-light | Ready-light | Sound monitor | |
| Lights up | Lights up | Beeps once | Ready to fire |
| Lights up or does not come on (not blinking) | Lights up or does not come on (not blinking) | Beeps twice | Fired properly |
| Blinks | Blinks | Beeps for approx. three sec. | Both master and slave flash units have fired at full output and light may have been insufficient (or too much) for correct exposure. Change the distance between Speedlights and subject or select another aperture and shoot again (p. 21). |
| Lights up or does not come on (not blinking) | Blinks | Beeps for approx. three sec. | Slave SB-50DX has fired at full output. The light sensor on the slave SB-50DX unit could not detect when to stop firing in sync with the master flash unit. This was because either the light sensor window was not directed at the master flash unit or a strong reflection from the slave SB-50DX itself or light from another slave flash unit may have entered the light sensor window. In this case, change the direction or position of the slave SB-50DX unit and/or other slave flash unit(s), then shoot again. |
Canceling sound monitor
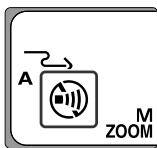
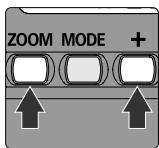
To cancel the sound monitor, press the ZOOM and + buttons simultaneously so appears in the LCD panel. To reactivate the sound monitor function, press the ZOOM and + buttons simultaneously again so disappears from the LCD panel and the sound monitor beeps twice.
Wireless Flash mode
Pressing the SLAVE button on the SB-50DX for approx. 1 sec. activates the Wireless Flash mode. When using the SB-50DX as a master flash unit and attaching it to a camera body (other than Nikon digital SLR), appears in the LCD panel and Monitor pre-flashes (p. 27) are canceled. Monitor pre-flashes will not be fired even if the Automatic Balanced Fill-Flash with TTL Multi-Sensor (p. 25) is selected. If the SB-50DX is detached as it is, indication is replaced by or and you can use the SB-50DX as a slave flash unit.
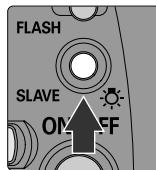
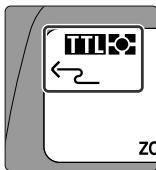
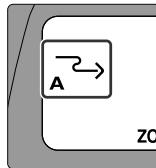
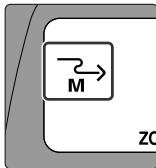
Do not leave the SB-50DX turned on in Wireless Flash mode
When detached from a camera body, the SB-50DX may fire accidentally due to static electricity or electromagnetic noise if it is kept turned on in Wireless Flash mode. Make sure to turn the SB-50DX off when not in use.
Canceling (preventing accidental) flash firing
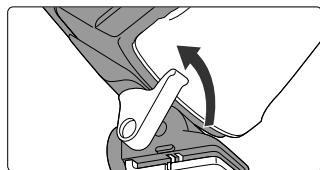
Raise the camera Speedlight detecting lever with your finger to prevent accidental firing in sync with other Speedlights. The SB-50DX will not fire while the lever is in the "up" position.
Wireless Multiple Flash Operation—continued
■ Manual wireless multiple flash operation with the SB-50DX set at Manual Slave Flash mode
To fire the slave SB-50DX unit placed distant from the master flash unit (or where the light of the master flash does not reach) without cords, set the slave SB-50DX unit to Manual Slave Flash mode. Slave SB-50DX unit detects the light from other flash unit(s) such as a master flash unit and fires at full output.
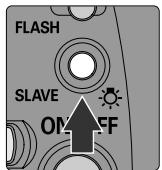
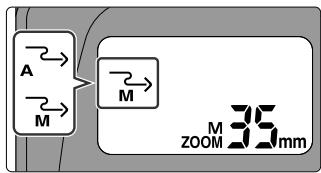
- Press the SLAVE button for approx. one second to activate ^2 for Auto Slave Flash mode or ^2 for Manual Slave Flash mode indicated in the LCD panel. If the ^2 is shown, press the MODE to set the Manual Slave Flash mode with ^2 indication.
- Aperture is determined by the guide number (p. 33) and flash shooting distance. You can control exposure by varying flash-to-subject distance. (Test shooting is recommended.)
- Effective range of the SB-50DX's light sensor in the Manual Slave Flash mode is approx. 40m (131 ft.). In the Manual Slave Flash mode, the light sensor on the slave SB-50DX becomes very sensitive; manual wireless multiple flash shooting may be performed even if the light sensor is not facing the master flash unit.
- Set flash mode on the master flash unit to TTL auto flash mode without Monitor pre-flash (p. 27) (See "Canceling Monitor pre-flashes", p. 47), non-TTL auto or Manual (p. 31). (Usable flash mode depends on camera/Speedlight combination. See instruction manual of your camera and Speedlight).
Multiple Flash Operation Using the Infrared Remote Commander
With the Infrared Filter SW-9IR, you can use the master SB-50DX unit as an infrared remote commander to perform wireless multiple flash operation. With the SW-9IR attached, the master SB-50DX unit fires infrared rays that do not expose normal film to trigger the slave SB-80DX, 50DX, 30 unit or other slave flash unit (with the SU-4) to illuminate the subject without master flash unit lighting.
■ Multiple flash operation using the infrared remote commander
-
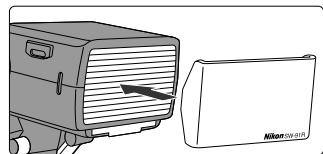
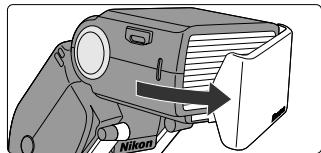
Attach the Infrared Filter SW-9IR to the SB-50DX flash head.
-
Attach the SW-9IR so that it fits into the grooves on the flash head.
- To remove the SW-9IR, pull it out from the groove on one side.
-
Attach the SB-50DX to the camera body for use as a master flash unit.
-
Before attaching the SB-50DX, turn off the SB-50DX and camera.
-
Do not use the camera's built-in Speedlight.
-
Shoot following the same procedure as in wireless multiple flash operation without infrared remote commander (p. 48).
-
Press the SLAVE button on the SB-50DX (master flash unit) for approx. 1 sec. to set the Speedlight to Wireless Flash mode (p. 48)
- Use another SB-80DX, 50DX, 30 and/or other Speedlight with the SU-4 (p. 56) as slave flash unit(s).
- With the SW-9IR attached to the master SB-50DX, the effective range of the light sensor on the slave flash unit is approx. 7m (23 ft.) in the Auto Slave Flash mode (p. 49) or approx. 40m (131 ft.) in the Manual Slave Flash mode (p. 52).
Carrying the Infrared Filter SW-9IR
When not used, the SW-9IR can be placed on top of the flash head. Fit the SW-9IR into the grooves on the flash head.
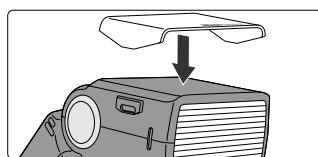
By attaching the SB-50DX to a camera that has a built-in Speedlight, you can easily perform double-flash operation.
Double-flash operation with built-in Speedlight (with the SB-50DX in horizontal position)
- Attach the SB-50DX to the camera body and release the camera's built-in Speedlight.
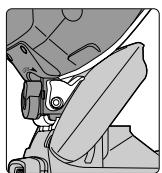
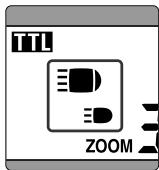
- Set the flash head in the horizontal position.
- Release the camera's built-in Speedlight. (See your camera's instruction manual).
-
The camera Speedlight detecting lever detects that the camera's built-in Speedlight is activated. The LCD panel shows indicating the horizontal position of the SB-50DX flash head and indicating the built-in Speedlight.
-
Set the zoom-head position (p. 16) on the SB-50DX. (For the angle of coverage of the camera's built-in Speedlight, see your camera's instruction manual).
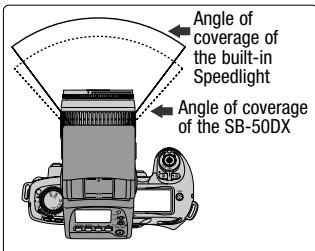
- The usable focal length of the lens should be determined by the angle coverage of the camera's built-in Speedlight. With a zoom lens, select the zoom position so that it is within the angle of coverage of the built-in Speedlight.
-
With a CPU lens and cameras of Group I, II or Nikon Digital SLR, the zoom-head position is automatically adjusted by the Power Zoom function (p. 16). When the Power Zoom is not activated with camera/lens combination in use, manually set the zoom-head position (p. 17) so that it corresponds to the angle of coverage of the lens' focal length.
-
Shoot following the same procedure as in normal TTL auto flash operation (p. 20).
-
Set the flash mode on the SB-50DX to TTL auto (p. 18).
- For the combined guide number in double-flash operation, see p. 33.
- With F65-series/N65-series set to AUTO AUTO mode or Vari-Program, built-in Speedlight does not fire even when it is up.
- For available exposure mode in double-flash operation with the F70-series/N70, see "Exposure mode with the Nikon F70-series/N70" on p. 42.
- In double-flash operation with the Nikon F70-series/N70 or PRONEA 600i/PRONEA 6i camera, see "When using the Nikon F70-series/N70 or PRONEA 600i/PRONEA 6i" on p. 42.
For detailed information about function, operation, connection, etc., see the instruction manual for your camera and Speedlight.
■ TTL multiple flash operation using cords
-
Turn off all the Speedlights and connect the TTL multiple flash terminals with the optional TTL Multi-Flash Sync Cord SC-18/SC-19 (p. 56)
-
The SB-50DX does not come with a TTL multiple flash terminal. Use the optional TTL Remote Cord SC-17/SC-24 (p. 56) for TTL multiple flash operation.
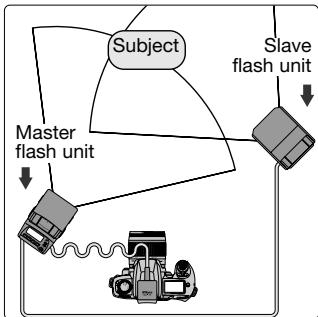
Using SB-50DX or SB-23 as a slave flash unit
When using the SB-50DX or SB-23 as a slave flash unit in TTL multiple flash operation using cords, the SB-50DX or SB-23 may turn off during operation since the standby function of the Speedlight cannot be canceled. Use of the SB-50DX or SB-23 as a slave flash unit is not recommended.
Notes on TTL multiple flash operation using cords
Take care that the combined total of the coefficients (numbers shown in parentheses below) for all Speedlights used at any one time does not exceed 20 at 20^ (68^) or 13 at 40^ (104^) . (One coefficient equals approx. 70~mA .) SB-80DX (1) SB-50DX (1) SB-30 (1) SB-29s (1) SB-29 (1) SB-28 (1) SB-28DX (1) SB-27 (1) SB-26 (1) SB-25 (1) SB-24 (1) SB-23 (4) SB-22 (6) SB-22s (6) SB-21 (4) SB-20 (9) SB-17 (4) SB-16 (4) SB-15 (4) SB-14 (1) SB-11 (1) SB-140 (1)
In multiple flash operations, if the electronic current in the synchro circuit exceeds a certain level, you man not be able to take a second shot after taking the first one. In this case, turn off each of the Speedlights once or turn the master flash unit off and disconnect it from the camera. This resets the circuits so that you can resume shooting.
Accessories for Multiple Flash Operation
To perform TTL multiple flash operation, use the following optional accessories.
Wireless Slave Flash Controller SU-4
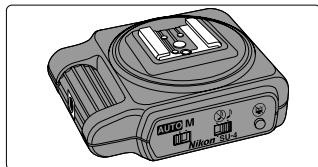
- The SU-4 enables a Speedlight other than the SB-80DX, 50DX and 30 to be used as a slave flash unit to perform wireless multiple flash operation (p. 48).
Bracket SK-7
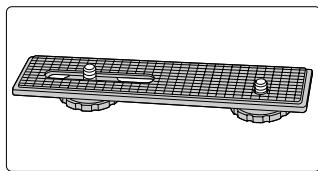
- The SK-7 is used to position the camera and SB-50DX horizontally for multiple flash operation.
- Use the TTL Multi-Flash Adapter AS-10 to attach the SB-50DX on the Bracket SK-7.
TTL Remote Cord SC-17 (approx. 1.5m/4.9 ft.)/SC-24 (approx. 1.5m/4.9 ft.)
- Use the SC-17/SC-24 for off-camera TTL auto flash operation or TTL multiple flash operation with the SB-50DX. Two TTL multiple flash terminals and one tripod socket are provided. For F5 cameras with the DW-30/DW-31 finder or for F4 cameras with the DW-20/DW-21 finder, use the SC-24.
TTL Multi-Flash Sync Cord SC-18 (approx. 1.5m/4.9 ft.)/SC-19 (approx. 3m/9.8 ft.)
- Use the SC-18 or SC-19 cord to connect the Speedlights via the TTL multiple flash terminal (on the AS-10, SC-17, etc.) for TTL multiple flash operation.
TTL Multi-Flash Adapter AS-10
- The TTL Multi-Flash Adapter AS-10 can be connected to perform TTL multiple flash operation using cords for slave flash Speedlight units that do not have TTL multiple flash terminals. However, in TTL multiple flash operation using cords, use of the SB-50DX (or SB-23) as a slave flash unit is not recommended (p. 55). The tripod socket of the AS-10 enables stable placement of the Speedlight unit on a tripod or Bracket SK-7 in wireless multiple flash operation.
- Three multiple flash terminals are provided on the AS-10.

EFFECTIVE SPEEDLIGHT PLACEMENT
Properly adjusting the position and angle of the Speedlights improves results in multiple flash photography.
Effective Speedlight Placement
■ Bounce-flash operation to produce more natural-looking pictures
Bounce the light off the ceiling or walls to produce more natural-looking portraits where the entire frame is properly exposed.
Reflective surface (ceiling)
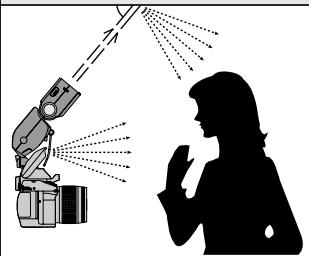
- See "Bounce-Flash Photography" on p. 40 to 42.
- For using the camera's built-in Speedlight, see "Bounce-flash operation with double flash (SB-50DX and camera's built-in Speedlight)" on p. 42.
- If the light from the master flash unit is too strong, bounce-flash operation is not effective. In this case, use the diffuser (p. 42) or wide-flash adapter (p. 17) to reduce the brightness of the master flash unit.

Single flash (built-in Speedlight)
Camera: F80D (Aperture-Priority Auto exposure mode, Front-Curtain Sync flash mode)
Lens: AF Zoom-Nikkor 28-80mm f/3.3-5.6G
Master flash unit (built-in Speedlight): Standard TTL Flash
Slave flash unit (SB-50DX): Standard TTL Flash
Eliminating shadows cast by the subject
To eliminate unattractive shadows from the background when taking portraits, you can use one or more slave flash units to illuminate the background.
- Set the slave flash unit to Manual flash mode (Manual Slave Flash mode with the SB-50DX, p. 52). Calculate and determine aperture by using the guide number and distance from the slave flash unit to the background with the equation (p. 33). Use an aperture value obtained with the equation or 1/3 to one step smaller (larger f-number).
You can also choose a higher flash output setting (by two to three steps) for the slave flash unit to overexpose the background and completely eliminate it.
- When using a camera in Group I, II or III (p. 28), compensate flash output level to the + side (p. 35).
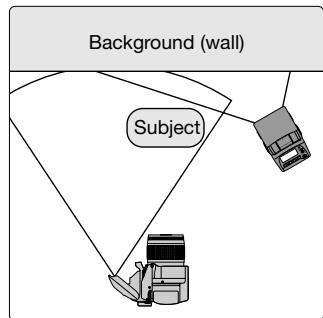
Single flash (built-in Speedlight)
Camera: F80D (Manual exposure mode, Front-Curtain Sync flash mode)
Lens: AF Zoom-Nikkor 28-80mm f/3.3-5.6G
Master flash unit (built-in Speedlight): Standard TTL Flash
Slave flash unit (SB-50DX): Manual Slave Flash mode
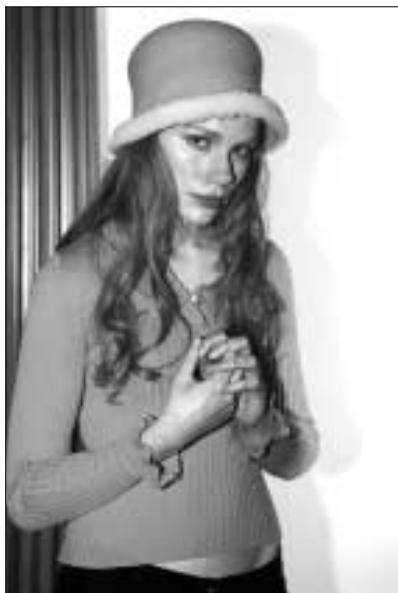
Effective Speedlight Placement—continued
■ Emphasizing the outline of the subject
When taking a portrait, you can backlight the subject by placing a Speedlight directly behind the subject to emphasize the outline of the subject.
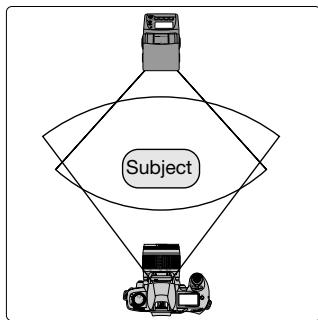
- Set the slave flash unit to Manual flash mode (Manual Slave Flash mode with the SB-50DX, p. 52) for rather high output level.
- When using a camera in Group I, II or III (p. 28), compensate flash output level (p. 35) to the + side.

Single flash (built-in Speedlight)
Camera: F80D (Manual exposure mode, Front-Curtain Sync flash mode)
Lens: AF Zoom-Nikkor 28-80mm f/3.3-5.6G
Master flash unit (built-in Speedlight): Standard TTL Flash
Slave flash unit (SB-50DX): Manual Slave Flash mode
Illuminating a subject mainly from the side
By using the infrared remote commander (p. 53), a subject can be illuminated mainly from the side with Speedlights placed away from the camera.
- Place the Speedlight(s) to achieve desired effect.

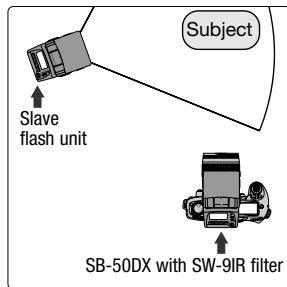
Master flash unit without SW-9IR
Camera: F80D (Aperture-Priority Auto exposure mode, Front-Curtain Sync flash mode)
Lens: AF Zoom-Nikkor 28-80mm f/3.3-5.6G
Master flash unit (SB-50DX with SW-9IR filter): Wireless Flash mode (Automatic Balanced Fill-Flash with TTL Multi-Sensor)
Slave flash unit (SB-50DX): Auto Slave Flash mode
Using more than two Speedlights
The brightness of flash illumination is inversely proportional to the square of the distance between the flash unit and the subject. For example, if the distance between Speedlight A and the subject is 1m (3.3 ft.), and Speedlight B is 2m (6.6 ft.), the combined brightness of the two Speedlights will be:
A: B = 12:2^2 = 1:4 (in meters)
or 3.32:6.6^2 = 11:44 (in feet)]
Therefore, the illumination provided by Speedlight A is four times (or two steps) brighter than that provided by Speedlight B.
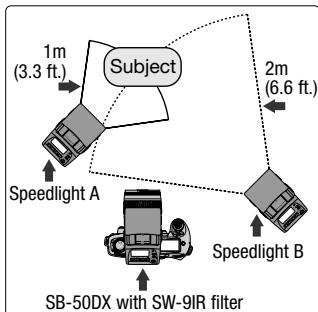
Effective Speedlight Placement—continued
Illuminating a distant subject
When light from the master flash unit is not strong enough to illuminate a subject at a distance with a single flash unit (or the camera's built-in Speedlight), you can use several Speedlights in combination to produce pictures with a properly illuminated subject.
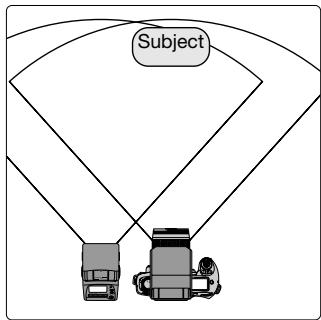
- Position the slave flash unit at the side of the camera and master flash unit (as illustrated). The optional SK-7 bracket (p. 56) enables you to easily set the slave flash unit to the side of the camera and master flash unit.
- For calculating the compound guide number, see "Guide number" on p. 33.
Single flash (built-in Speedlight)
Camera: F80D (Aperture-Priority Auto exposure mode, Front-Curtain Sync flash mode)
Lens: AF Zoom-Nikkor 28-80mm f/3.3-5.6G
Master flash unit (SB-28): Standard TTL Flash
Slave flash unit (SB-50DX): Auto Slave Flash mode

MISCELLANEOUS
- Cleaning Speedlight
Use a blower brush to remove dirt and dust from the SB-50DX and clean it with a soft, clean cloth. After using the SB-50DX near seawater, wipe the SB-50DX with a soft, clean cloth slightly moistened with pure water to remove salt, and then dry it with a dry cloth. NEVER use organic solvents like thinner or benzene. They may damage the SB-50DX.
On rare occasions, the LCD may turn on or turn dark due to static electricity. This is not a malfunction. The display soon returns to normal.
- Do not subject the SB-50DX to strong vibration or shock
Do not drop the SB-50DX or hit it against a hard surface as this may damage its precision mechanism.
- Avoid strong electric or magnetic fields
The SB-50DX may not function properly in strong electric or magnetic fields such as near a transmitter tower. Avoid using the SB-50DX in such locations.
- Store the SB-50DX in a cool, dry place
Store the SB-50DX in a cool, dry place to prevent mold and mildew.
Keep it away from naphthalene or camphor (moth repellent), electrical appliances that generate magnetic fields or an excessively hot place such as inside a vehicle during the summer or near a heater.
- Avoid extreme temperature change
An extreme temperature change can cause condensation inside the SB-50DX. When taking the SB-50DX to a very hot place from a very cold place or vice versa, place it inside an airtight container such as a plastic bag and leave it inside a while to expose the SB-50DX gradually to the temperature change.
- Avoid water or moisture
Keep the SB-50DX away from water or moisture. When using the SB-50DX near water, guard against splashes, especially salt water spray.
- Remove the batteries and store the SB-50DX with a desiccant
If you do not intend to use the SB-50DX for a long time, remove the batteries to protect the SB-50DX from battery leakage.
- In a humid environment, store the SB-50DX inside a plastic bag with a desiccant to keep out dust, moisture and salt. Note, however, that storing leather cases in vinyl bags may cause the leather to deteriorate. Keep the batteries in a cool, dry place away from heat or humidity.
- Change the desiccant occasionally since it does not absorb moisture effectively after a while.
- Leaving the SB-50DX unused for a long period of time may cause mold to grow and result in malfunction. To maintain the Speedlight in peak condition, fire it a few times every month. This will enable you to use the flash for many years.
WARNING

Do not leave
Keep batteries out of children's reach.
If someone accidentally swallows batteries, call a doctor immediately.
- Use two CR123A or DL123A type lithium batteries
Use two fresh CR123A or DL123A type lithium batteries. Do not mix different types of batteries.
- Change the batteries well before the end of their life and prepare spare batteries before important photographic occasions.
- Turn the SB-50DX's power off when changing batteries
Turn the SB-50DX's power off before changing batteries and insert the batteries with and ends positioned correctly.
- Stains on the battery poles may cause lack of contact. Wipe the batteries well with a dry cloth before installing.
- Use fresh batteries at low temperatures
Battery power diminishes at extremely low temperatures and the SB-50DX may not function properly with old batteries. Use a fresh set of batteries at low temperatures, keep spare batteries warm, and use them alternately.
- Flash recycling time slows down and number of firings per set of batteries becomes less at low temperatures. However, battery power usually recovers when the temperature returns to normal.
- Do not throw batteries into a fire or short circuit batteries
Do not throw batteries into a fire. Do not short, disassemble, heat or charge batteries.
Nikon cannot be held responsible for any malfunction resulting from the use of the camera other than as specified in this manual.
| Camera | Warning indication | Cause | Remedy | Page |
| All cameras | Ready-light does not come on. | Batteries are not correctly installed. | Install batteries correctly. | 12 |
| The SB-50DX is automatically turned off. | Batteries are exhausted. | Replace batteries with new ones. | 12 | |
| Wide-flash adapter is not attached or improperly attached. | Attach the wide-flash adapter correctly. | 43 | ||
| In close-up flash shooting, the wide-flash adapter indication blinks in the LCD panel. | ||||
| Cameras other than FE10 | Only the camera's (not SB-50DX's) viewfinder ready-light is blinking when the shutter release button is lightly pressed. | The SB-50DX (in TTL/D-TTL auto flash mode) is not properly attached. | Attach SB-50DX properly. | 15 |
| Cameras that are compatible with TTL/D-TTL auto flash | The ready-light blinks for approx. 3 sec. after TTL/D-TTL auto flash shooting. | The SB-50DX has fired at its maximum output. (This may indicate underexposure has occurred.) | Set wider aperture (smaller f-number) or move closer to the subject and shoot again. | 21 |
| Cameras with built-in Speedlight | In close-up flash shooting, the camera built-in Speedlight indication blinks in the LCD panel. | Camera's built-in Speedlight is released. | Press the built-in Speedlight down to retract it. | 44 |
| Cameras of Group I and Nikon digital SLR cameras | (or Digital) for digital cameras) does not appear in the LCD panel. | Non-CPU lens is attached. | Attach CPU lens. With a non-CPU lens, use flash mode other than Automatic Balanced Fill-Flash with TTL Multi-Sensor. | 9, 25 |
| Automatic Balanced Fill-Flash with TTL Multi-Sensor is not set. | Set Automatic Balanced Fill-Flash with TTL Multi-Sensor. | 18 | ||
| Spot Metering is set on camera (except when using the F90X/N90s, F90-series/N90 and F70-series/N70). | Set Matrix Metering or Center-Weighted Metering. | 18 |
| Camera | Warning indication | Cause | Remedy | Page |
| Cameras of Group I and Nikon digital SLR cameras | Ready-light blinks and 4 blinks in the LCD panel. | The SB-50DX has fired at its maximum output. (This may indicate underexposure has occurred.) | Set wider aperture (smaller f-number) or move closer to the subject and shoot again. | 21 |
| Cameras of Group II | 1112 does not appear in the LCD panel. | Non-CPU lens is attached (except when using the F4-series). | Attach CPU lens. With a non-CPU lens, use flash mode other than Matrix Balanced Fill-Flash/Center-Weighted Fill-Flash. | 9, 25 |
| Matrix Balanced Fill-Flash/Center-Weighted Fill-Flash is not set. | Set Matrix Balanced Fill-Flash/Center-Weighted Fill-Flash. | 18 | ||
| Spot Metering is set (except when using the F-801s). | Set Matrix Metering or Center-Weighted Metering. | 18 | ||
| Cameras of Group V and VI except for F3-series with AS-17 and FM3A | Camera's viewfinder ready-light blinks when SB-50DX (in TTL auto flash mode) is attached to camera and power is turned on. | ISO film speed of the film in use or film speed set on the camera exceeds the high-sensitivity side of the usable film speed range. (Same warning appears with the FA camera when the lower side is exceeded.) | Use a film with ISO film speed within the usable film speed range, set the camera's film speed within the range, or set Manual flash mode. | 15, 31 |
| Cameras of Group VI except for F3-series with AS-17, FE2 and FG | Ready-light on the SB-50DX lights up but camera's viewfinder ready-light blinks. | Shutter speed is set at M90, M250 or B in TTL auto flash mode. | Set shutter speed to another setting. | |
| FM3A and FM2 | Ready-light on the SB-50DX lights up but camera's viewfinder ready-light blinks. | Shutter speed is set at faster speed than the sync shutter speed. | Set shutter speed to flash sync speed or slower. | |
| Cameras incompatible with TTL/D-TTL auto flash | Ready-light on the SB-50DX lights up but camera's viewfinder ready-light blinks. | TTL auto flash is set on the SB-50DX. | Set Manual flash mode. | 31 |
Troubleshooting—continued
Microcomputer of the SB-50DX
The SB-50DX is electronically controlled by a microcomputer. In certain cases, the microcomputer may not correctly control the SB-50DX even with fresh, properly installed batteries. In the same way, incorrect indications may appear in the LCD panel. In each of these cases, to resume operation, remove and reinstall the batteries with the SB-50DX turned on.
If -- blinks in place of zoom-head position indication
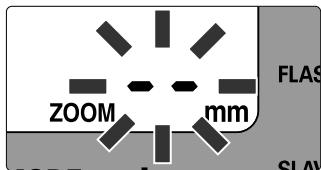
- Zoom-head cannot be set.
- Turn off the SB-50DX and camera, detach the SB-50DX from the camera and reattach it, then turn both units on. If operation is not resumed, contact an authorized Nikon dealer or service center.
Blinking ZOOM and mm indications in the LCD panel
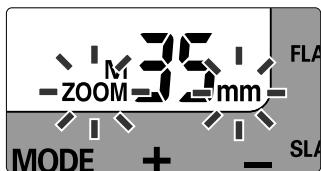
- ZOOM and mm blink when performing double-flash operation with F70-series/N70 or PRONEA 600i/PRONEA 6i cameras; however this does not indicate any malfunction. See "When using the Nikon F70-series/N70 or PRONEA 600i/PRONEA 6i" on p. 42.
- When performing double-flash operation with F80-series/N80-series cameras, Power Zoom function (p. 16) may not operate properly in rare cases. In this case ZOOM and mm blink in the SB-50DX's LCD panel; turn the SB-50DX power off and then turn it on again.
TTL auto flash shooting distance range (ft.)
Usable film speeds, usable apertures and flash shooting distance ranges in the TTL auto flash mode are as follows:
(14mm zoom-head position with the wide-flash adapter)
For example, if you select f/8 with an ISO 400 film at 35mm zoom-head position, flash shooting distance range would be 2.0-18 ft.
| ISO film speed | Zoom-head position | |||||||||||
| Aperture | 25 | 50 | 100 | 200 | 400 | 800 | 1600 | 14mm | 24mm | 28mm | 35mm | 50mm |
| — | — | 1.4 | 2 | 2.8 | 4 | 5.6 | 2.6-29 | 3.9-39 | 4.2-46 | 4.6-49 | 5.6-59 | |
| — | 1.4 | 2 | 2.8 | 4 | 5.6 | 8 | 2.0-20 | 2.6-30 | 3.0-33 | 3.3-36 | 3.9-43 | |
| 1.4 | 2 | 2.8 | 4 | 5.6 | 8 | 11 | 2.0-14 | 2.0-21 | 2.3-23 | 2.3-25 | 3.0-30 | |
| 2 | 2.8 | 4 | 5.6 | 8 | 11 | 16 | 2.0-9.8 | 2.0-15 | 2.0-16 | 2.0-18 | 2.0-21 | |
| 2.8 | 4 | 5.6 | 8 | 11 | 16 | 22 | 2.0-6.9 | 2.0-10 | 2.0-12 | 2.0-13 | 2.0-15 | |
| 4 | 5.6 | 8 | 11 | 16 | 22 | 32 | 2.0-4.9 | 2.0-7.2 | 2.0-8.2 | 2.0-8.9 | 2.0-11 | |
| 5.6 | 8 | 11 | 16 | 22 | 32 | 45 | 2.0-3.3 | 2.0-4.9 | 2.0-5.6 | 2.0-6.2 | 2.0-7.5 | |
| 8 | 11 | 16 | 22 | 32 | 45 | — | 2.0-2.3 | 2.0-3.6 | 2.0-3.9 | 2.0-4.3 | 2.0-5.2 | |
| 11 | 16 | 22 | 32 | 45 | — | — | 2.0 | 2.0-2.6 | 2.0-2.6 | 2.0-3.0 | 2.0-3.6 | |
| 16 | 22 | 32 | 45 | — | — | — | — | — | 2.0 | 2.0-2.3 | 2.0-2.6 | |
| Electronic construction | Automatic Insulated Gate Bipolar Transistor (IGBT) and series circuitry. | ||||||||
| Guide number(ISO 100, m/ft.) | Zoom-head position | 14mm | 24mm | 28mm | 35mm | 50mm | |||
| Guide number | 12/39 | 18/59 | 20/66 | 22/72 | 26/85 | ||||
| • See p. 33 for guide numbers in 1/300 TTL High-Speed Sync. | |||||||||
| Angle of coverage | Variable in four steps, plus one-step with wide-flash adapter. | ||||||||
| Zoom-head position | Angle of coverage | ||||||||
| Recycling time and number of flashes (Manual flash mode) | Minimum recycling type: approx. 3.5 sec. with fresh batteries. Number of flashes and recycling time: 260 times or more with 3.5 to 30 sec. recycling time. (With AF-Assist Illuminator, Power Zoom function and LCD panel illuminator not activated.) | |
| AF-Assist Illuminator | Automatically fires LED beam toward subject when performing autofocus in dim light or in the dark with Nikon AF cameras. | |
| Ready-light | Lights up when SB-50DX is charged and ready to fire. Blinks when flash fires at its maximum output, indicating light may have been insufficient (in TTL/D-TTL auto flash mode). | |
| FLASH button | Pressing FLASH button performs test firing. • Pressing the button turns the SB-50DX on again after the unit has been automatically turned off by the standby function. | |
| Wide-flash adapter | Allows the SB-50DX to be used with 14mm lenses. | |
| Diffuser | Attach diffuser to the camera's built-in Speedlight for double-flash (bounce) operation. | |
| Sound monitor | The SB-50DX emits a single beep when it is charged and ready-to-fire in wireless multiple flash operation. The SB-50DX emits two beep when it has fired properly in wireless multiple flash operation. The SB-50DX emits beep for 3 sec. after it has fired at maximum output or improperly fired in TTL wireless multiple flash operation in the Auto Slave Flash mode. | |
| Light sensor | Senses light received from the master flash unit in wireless multiple flash operation. | |
| Wireless Flash mode | Effective range | |
| Auto Slave Flash | Approx. 7m (23 ft.) | |
| Manual Slave Flash | Approx. 40m (131 ft.) | |
| Infrared Filter SW-9IR | Enables you to use the SB-50DX as an infrared remote commander. | |
| Lock lever | Prevents the SB-50DX from accidentally slipping off the camera. | |
| LCD panel illuminator | Turned on and off every time the SLAVE button is pressed; automatically turns off after approx. 16 sec. when the SB-50DX is not in use. | |
| Backside indications | Light-condensing paint is applied to the characters and symbols. | |
| Dimensions (W x H x D) | Approx. 63 x 107 x 105 mm (2.5 x 4.2 x 4.1 in.) | |
| Weight (without batteries) | Approx. 235g (8.3 oz.) | |
| Accessories supplied | Soft Case SS-50, Infrared Filter SW-9IR | |
1/300 TTL High-Speed Sync. 33
A
AF-Assist Illuminator 36
Angle of coverage 16
Aperture-Priority Auto exposure mode. 24
Automatic Balanced Fill-Flash with TTL Multi Sensor 25
Auto Slave Flash mode. 49
Auto wireless multiple flash. 48
B
Bounce flash photography. 40
Bounce-flash operation with double flash 42
Bounce-flash operation with single flash. 41
C
Center-Weighted Fill-Flash for Digital SLR. 25, 27
Center-Weighted/Spot Fill-Flash...25, 26
Center-Weighted Metering 29
Close-up flash photography 43
Combined guide number 33
CPU Nikkor lens. 9
D
Digital data communication 16
Double flash 54
D-TTL auto flash mode. 25, 27
D-type Nikkor lens .9
E
Equations including guide number ....33
Exposure compensation 34
Exposure meter. 13
Exposure metering system 29
Exposure mode. 18, 29
F
Flash output level compensation. 35
Flash shooting distance range. 21
Flash mode. 25
Flash sync mode. 20
G
Guide number. 33
G-type Nikkor lens 9
1
Infrared remote commander 53
L
LCD illuminator. 8
Light condensing paint. 6
M
Manual exposure mode 24
Manual flash mode. 31
Manual Slave Flash mode. 52
Manual wireless multiple flash 52
Master flash unit. 48
Matrix Balanced Fill-Flash. 25, 26
Matrix Metering. 18, 29
Monitor Pre-Flashes. 27
Multiple flash photography 46
Multi-Sensor Balanced Fill-Flash...25, 26
Multi-Sensor Balanced Fill-Flash for Digital SLR. 25, 27
N
Non-CPU Nikkor lens. 9
P
Power zoom. 16
Programmed Auto/Auto-Multi Program exposure mode. 18
R
Ready-light 21
S
Shutter-Priority Auto exposure mode. 24
Slave flash unit. 48
Spot Metering. 29
Standard TTL flash. 25, 26
Standard TTL flash for Digital SLR. 25, 27
Standby mode. 13
Sync shutter speed 18
T
3D Multi-Sensor Balanced Fill-Flash 25, 26
3D Multi-Sensor Balanced Fill-Flash for Digital SLR. 25, 27
TTL auto flash mode. 25, 26
W
Wireless multiple flash. 48
Wireless Flash mode. 47, 48, 51
No reproduction in any form of this manual, in whole or in part (except for brief quotation in critical articles or reviews), may be made without written authorization from NIKON CORPORATION.
Nikon
NIKON CORPORATION
FUJI BLDG., 2-3, MARUNOUCHI 3-CHOME,
CHIYODA-KU, TOKYO 100-8331, JAPAN