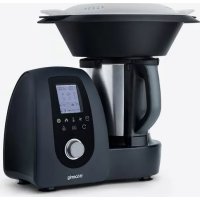
HK8 - Keukenmachine H.KOENIG - Gratis gebruiksaanwijzing en handleiding
Vind de handleiding van het apparaat gratis HK8 H.KOENIG in PDF-formaat.



Kies uw taal en geef uw e-mailadres: we sturen u een specifiek vertaalde versie.
| Soort product | Keukenmachine |
| Merk | H.Koenig |
| Model | HK8 |
| Inhoud van de kom | 2 L |
| Maximale inhoud van het stoommandje | 3,5 L |
| Temperatuurbereik | 37 °C tot 120 °C |
| Snelheidsbereik | 1 tot 10 |
| Thermisch vermogen | 10 niveaus |
| Nominaal vermogen | 1200 W (schatting) |
| Voeding | 220-240 V ~ 50/60 Hz |
| Aantal automatische programma's | 10 (Hakken, Stoven, Stoom, Velouté, Snelle soep, Saus, Kneden, Risotto, Smoothie, Yoghurt) |
| Turbo functie | Ja |
| Warmhoudfunctie | Ja, tot 12 u |
| Geprogrammeerde functie (uitgestelde start) | Ja, van 30 min tot 12 u |
| Zelfreiniging | Ja |
| Materiaal van de kom | Metaal met antiaanbaklaag |
| Meegeleverde accessoires | Kom, deksel, maatbeker (150 ml), kleine en grote stoomkoker, filtermand, vlinder, spatel, receptenboek |
| Motorblok wasbaar | Nee, alleen afnemen met een vochtige doek |
| Veiligheid | Veiligheidsschakelaar, oververhittingsbeveiliging, automatische uitschakeling |
| Garantie | 2 jaar |
Veelgestelde vragen - HK8 H.KOENIG
Hoe gebruik ik de stoomfunctie?
Verwijder het deksel van de kom, plaats de stoomkoker op de kom (groot of klein). Voeg water toe aan de kom (500 ml voor 30 min). Selecteer het programma STOOM (STEAM). Tijd instelbaar van 15 tot 60 min. Zorg ervoor dat het deksel van de stoomkoker goed is geplaatst om brandwonden te voorkomen.
Wat te doen als foutcode E1 verschijnt?
Fout E1 geeft aan dat de veiligheidsschakelaar niet is ingeschakeld. Controleer of de kom en het deksel correct zijn gemonteerd en vastgezet. Druk op de veiligheidsschakelaar voordat u het deksel draait om te vergrendelen.
Kan ik warme voedingsmiddelen mixen?
Ja, maar de snelheid is beperkt tot 4 als de temperatuur boven 60 °C komt. Verwijder nooit het deksel wanneer het water kookt. Voor zeer hete voedingsmiddelen (>90 °C) is de Turbo-functie uitgeschakeld.
Hoe maak ik de kom schoon?
Haal de stekker uit het stopcontact en laat afkoelen. Was de kom met warm zeepwater en een zachte spons. Spoel af en droog grondig. Gebruik geen schurende reinigingsmiddelen. Het motorblok wordt afgenomen met een vochtige doek. Dompel het motorblok nooit onder.
Kan ik de accessoires in de vaatwasser doen?
Nee, geen enkel accessoire of de kom mag in de vaatwasser. Was ze met de hand om de antiaanbaklaag en de afdichtingen te behouden.
Wat is de maximale capaciteit voor het kneden van deeg?
Voor het kneden is de maximale hoeveelheid bloem 800 g (brood) of 500 g (noedels). Gebruik het kneedmes en een snelheid van 2 tot 3. Overschrijd snelheid 3 niet.
Hoe gebruik ik de yoghurtfunctie?
Meng 1 liter verse melk met 1 kopje naturel yoghurt en suiker naar smaak. Giet in de kom, selecteer het programma YOGHURT (temperatuur 37-39 °C). De standaardduur is 6 u, instelbaar van 3 tot 12 u. Eenmaal klaar, bewaar in de koelkast.
De kom draait maar verwarmt niet, wat te doen?
Controleer of de kom goed op het motorblok is geplaatst en of de temperatuursensor contact maakt. Fout E2 duidt op een probleem met de sonde. Neem contact op met de klantenservice als het probleem aanhoudt.
Kan ik de vlinder gebruiken met het mixprogramma?
De vlinder is ontworpen om te mengen zonder te snijden. Gebruik het met de programma's STIR of Risotto, met een snelheid van niet meer dan 4. Gebruik het niet met de hak- of smoothieprogramma's.
Hoe stel ik de timer handmatig in?
Druk op de TIMER-knop. De minuten knipperen: draai aan de knop om de minuten in te stellen. Druk nogmaals om de seconden in te stellen, en een derde keer voor de uren (max 60 min). Tijdens het gebruik, druk op TIMER om de aftelling te starten.
Gebruikersvragen over HK8 H.KOENIG
0 vraag over dit apparaat. Beantwoord die u kent of stel uw eigen vraag.
Stel een nieuwe vraag over dit apparaat
Nog geen vragen. Stel de eerste vraag.
Download de handleiding voor uw Keukenmachine in PDF-formaat gratis! Vind uw handleiding HK8 - H.KOENIG en neem uw elektronisch apparaat weer in handen. Op deze pagina staan alle documenten die nodig zijn voor het gebruik van uw apparaat. HK8 van het merk H.KOENIG.
GEBRUIKSAANWIJZING HK8 H.KOENIG
H
Instruction Manual
Manuel d'instructions
Bedienungsanleitung
Gebruiksaanwijzing
Manual de instrucciones
Manuale d'uso
Manual do usuario
Instrukcja obstugi

natural_image
Exterior view of a modern kitchen blender with digital display (no visible text or symbols)
Kitchen robot
Robot culinaire chauffant
Küchenmaschine
Food processor
Procesador de alimentos
Robot da cucina
Processador de alimentos
Robot kuchenny

ENGLISH
Important Safety Instruction
\- The following safety precautions should always be followed, to reduce the risk of electric shock, personal injury or fire. It is important to read all of these instructions carefully before using the product, and to save them for future reference or new users.
\- This appliance may be used by persons with reduced physical, sensory or mental capabilities or lack of experience or knowledge, provided that they are supervised or instructed in the safe use of the appliance and that they fully understand the potential hazards.
\- This appliance shall not be used by children. Keep the appliance and its cord out of reach of children.
\- Warning: potential injury from misuse. Care shall be taken when handling the sharp cutting blades emptying the bowl and during cleaning.
\- Switch off the appliance and disconnect from supply code before changing accessories or approaching parts that move in use. Always disconnect the appliance from the supply if it is left unattended and before assembling, disassembling or cleaning.
\- If the supply cord is damaged, it must be replaced by the manufacturer, its service agent or similarly qualified persons in order to avoid a hazard.
\- Accessories, other than those supplied with the appliance, shall include instructions for their safe use.
\- WARNING: Do not remove the lid while the water is boiling. Do not set speed more than level 4 when temperature higher than 90 degree centigrade.
\- The appliance must not be immersed.
\- Your appliance has been designed for domestic use only. It is not intended for use in the following situations which are not covered by the warranty:
- in staff kitchen areas in shops, offices and other professional environments,
- in farm hostels,
- by guests in hotels, motels and other residential environments,
- in bed and breakfast type environments.
\- Please put the unit on stable, flat table which will not become hot and ensure it is in safe distance from the edge to avoid falling down. When it is used to knead the dough or cut food, the unit may move because of vibration. So please do not use it without super vision of people so as to avoid the equipment falling down to the floor.
\- Please pull out the plug when cleaning the appliance or put it away for a long time.
\- Regularly check whether the main body, jar, steamer or other components are damaged or not. The damaged parts will decrease the safety of use.
Once something wrong is found, please stop using and contact our after-sales service center.
\- If the appliance stops unexpectedly or appears to malfunction, switch off the power supply, unplug from the mains and stop using immediately. Seek professional advice to rectify the fault or make repairs.
\- The measuring cup is the only part which can be used to cover the round hole in the jar lid. Please do not use cloth or similar things to cover the hole.
\- Do not touch the edge of blades. Please be careful and hold the top part when you assemble or remove the blade.
\- Pay attention to the capacity mark on the blender jar.
\- Open the lid until the food in the jar stops rotating.
\- Pay attention to the high-temperature food when you open the jar lid. Please put the measuring cup at
the hole of jar lid correctly when processing food.
- Do not touch the jar when processing hot food of more than 60°C.
• Make sure that steamer and the jar are connected well when using steamer.
- Pay attention that vapor will outflow through the cover top or sides.
- In operation, do not touch any place of the steamer except its handles.
- Do not use the steamer without the steamer lid in place.
- When opening the steamer lid, be careful not to be scalded by vapor.
- When using steaming and boiling setting, pay attention that vapor will outflow through jar mouth when move the steamer.
- Keep on checking that the vent hole on the steamer lid is unblocked, or else the vapor may come out somewhere else.
- Please put the appliance and its hot after-use parts in the place which is out of the children's reach and warn the children that the unit will become hot and do not touch it.
- The leakage of food: Make sure that the blade sealing ring is placed well and the blade assembly is tightly fixed by the fixing bracket on the bottom. The failure of installation will cause the food leakage which will damage the appliance.
- Damage of poor ventilation: Ensure that the vents on the back of the main body are not blocked by any articles, or else the equipment will be damaged.
- The jug and all the accessories are to be used only with the stand provided. Do not use the foreign parts on this machine.
• Pay attention to avoid spillage on the connector.
- The jug will be still hot due to residual heat after use, take care not to get burnt.
- This appliance may be used by children of at least
8 years of age, as long as they are supervised and have been given instructions about using the appliance safely and are fully aware of the dangers involved.
\- Cleaning and maintenance should not be carried out by children unless they are at least 8 years of age and are supervised by an adult.
\- Keep the appliance and its power cord out of reach of children under 8 years of age.
\- When using electrical equipment, safety precautions must always be taken to prevent the risk of fire, electric shock and/or injury in the event of misuse.
\- Make sure that the voltage rating on the type plate corresponds to your main voltage of your installation. If this is not the case, contact the dealer and do not connect the unit
\- Never leave the unit unattended while in operation.
\- Never open the appliance from the front, always position yourself slightly to the side to avoid burning yourself with steam.
\- The device must not be used if it has been dropped, it obvious signs of damage are visible or if it has leaks.
\- Do not operate this appliance if it has a damaged cord or plug, if it is not working properly or if it has been damaged or dropped. If the supply cord is damaged, it must be replaced by the manufacturer or its service agent or a similarly qualified person in order to avoid a hazard.
PACKAGE CHECKING
When opening the packing box, take out all the accessories and get to know them according to the components list. The spare parts are as follows:
1 Main body 7 Steamer lid
2 Blending jar 8 Filter basket
3 Jar lid 9 Butterfly
4 Measuring cup 10 Spatula
5 Small steamer 11 Recipe book
6 Big steamer

ACCESSORIES
Blending Jar assembly:
There are jar capacity marks on one side of the jar. The maximum capacity of the jar is 2L.

natural_image
Line drawing of a trash bin with handle and side slots (no text or symbols)


natural_image
Simple line drawing of a cylindrical object with an oval top and a curved line extending upward (no text or symbols)
Notice
The quantity of food put into the jar should not exceed 2.0L, or else the food may outflow or splash out to cause danger.
Put the lid on the jar, press the safety switch, turn the lid clockwise to fix the lid onto the jar, or else the motor can not be started. (Always push the safety switch first to lock or open the lid)

natural_image
Mechanical component diagram showing a circular assembly with rotational arrows (no text or symbols)

natural_image
Technical line drawing of a mechanical component with a central hub and an arrow indicating direction (no text or symbols)

natural_image
Technical line drawing of a mechanical component with an arrow indicating direction (no text or symbols)
Put the jar onto the main body at the correct direction and sit properly, or else the motor cannot be started.

natural_image
Line drawing of a blender and toaster (no text or symbols)

natural_image
Line drawing of a kitchen blender with digital display (no text or symbols)
Blade assembly:
Fix the sealing ring on the blade assembly, put it into the through the hole of the jar bottom, hold the half top of the blade tightly and turn bottom upside, use the fixing bracket to fix the blade by turning clockwise. Doing oppositely to remove it from the jar. Do not miss the blade sealing ring between the blade and the jar bottom.


natural_image
Line drawing of a mechanical component with a central hub and four blades (no text or symbols)
Notice
- The blade is very sharp. Please wrap the blade with washcloth when assembling or removing the blade base.
- Please hold the blade assembly firmly and take it out carefully so as to ensure that blade assembly will not fall down and cause danger.
- Please make sure that the fixing bracket and the sealing ring is in place and locked tightly with blade assembly. If the sealing ring isn't well placed, the food being mixed or cooked may leak out and damage the appliance.
Kneading shaft assembly:
Remove the blade, fix the kneading shaft the same way as fixing the blade. It can be used for kneading, or stirring and mixing without cutting the food.

Notice
• Do not use it for speed over 3, otherwise it will cause big vibration to the machine and cause risk.
- As the smallest distance between the stirring assembly and the jar wall is only 1cm, sometimes the food may stuck and the motor may stop for self protection. Use the spatula to mix and remove the stuck and it will be smoothly working again.
- Please make sure that the fixing bracket and the sealing ring is in place and locked tightly with blade assembly. If the sealing ring isn't well placed, the food being mixed or cooked may leak out and damage the appliance
Measuring cup:
- The measuring cup has many functions: it is a part of the lid to prevent losing heat or splashing; it is a measuring cup to measure the ingredients with full capacity 150ml.
- Put the measuring cup into the hole of the lid, turn it clockwise to fix it on the lid.

natural_image
Simple line drawing of a cylindrical object with a flared base (no text or symbols)

natural_image
Technical line drawing of a mechanical component with concentric circles and handle (no text or symbols)
Notice
• The measuring cup is the only part which can be used to cover the round hole of the lid
- Do not cover the hole by any other articles to avoid splash of the food to cause danger
Spatula:
- The spatula is the only comp on ent to be used to scrape the food in the jar. The other articles may cause damage to the non-stick coating inside of the jar.
• There is a small groove on the handle of the spatula, use it to hold the filler basket

natural_image
Technical line drawing of a mechanical tool or tool component (no text or symbols)

natural_image
Line drawing of a cleaning brush with a circular base and handle (no text or symbols)
Notice
- Do not use it to mix in the jar when the blade is working.
- Do not use the spatula if butterfly is inside.
- Do fix closely the handle with the filter basket before lifting it.
Filter basket:
The basket has many functions:
\- Sieve. Filter fruit and Vegetable juice. After grinding or making fruit sauce with the appliance, put the basket into thejar to help pour out the juice.
\- Stew soft food such as pasta or noodles;
• Cook side dishes, such as rice and potatoes.

natural_image
Line drawings of two containers with different internal patterns, one showing a handle and the other a handle (no text or symbols)
Notice
• To use the spatula handle to the hole of the edge of the basket to put it into or take out of the jar.
\- If you want to decrease the water in the food, such as tomatoes, then take the measuring cup away and cover with the basket instead. The water can be easily removed.
Butterfly:
\- Installed on the blade, the butterfly can help to mix the food but preventing from cutting by blades, and prevent the food from being adhesive together and let the food keep on mixing.
• Fix the butterfly on the blade assembly by the hole, and press it with enough force for good connection, turn the butterfly bar counterclockwise to make it locked onthe blade.

natural_image
Technical line drawings of a mechanical device and a multi-story building (no text or symbols)
Notice
- Do not start the appliance until the butterfly is fixed in place.
• Do not use above speed 4when using butterfly.
- Do not use spatula when using butterfly.
- Do not add ingredients into the jar when the appliance is working with the butterfly, orelse the butterfly may be damaged or blocked.
Steamer Assembly:
There are three parts of the steamer: Small steamer, Big steamer and lid. The lid can put on both the small steamer and big steamer, and the big steamer can sit on the small steamer.
Remove the jar lid, sit the steamer on the jar.

natural_image
Simple line drawing of a square pot with handles and a circular center (no text or symbols)

natural_image
Illustration of a cooking pan with three views showing different interior designs (no text or symbols)

natural_image
Black kitchen blender with digital display and control panel (no visible text or symbols)
Notice
- Please make sure that the steamer lid is covered before steaming.
• The steamer cannot be used in microwave oven or other electric appliances.
• Do not touch or get close to the holes of the steamer lid to avoid hurt by hot steam.
- Do not cover or block the holes of the steamer lid by any articles or else the steam may come out from the edge or other places and cause danger.
INSTRUCTION FOR USE
INSTRUCTION FOR USE
At the early stage of using this unit, there will be light smell from the motor which is normal phenomenon. After a period of time, this kind of smell will disappear.
\- Please put the appliance on clean, stable and flat table. Do not put it too close to the edge, and keep it away from the built-in wardrobe or hanging bracket.
• It is better to put the appliance on some fixed place for your convenience.
\- Please thoroughly clean the appliance before using.
\- "Beep" sound shows the button has brought into effect.
.


STOP/ CANCEL
• Get the machine plugged ,turn on the switch at the back of the machine, the machine beeps once but no display.

natural_image
Line drawing of a mechanical or electrical component with no visible text or symbols
- Press this button, and all the back lights turn on and comes to standby mode, you can select the desired functions.
- Press this button during setting period, all setting cleared and come back to standby mode.
- Press this button during working process, and the appliance stops working immediately and come back to standby mode.
- Press this button during DIY recording process, and the appliance stop working and cancelled recording.
- The machine will turn off automatically in 30s without operation under standby mode.
KNOB (START/ PAUSE)
• After selected the desired setting or program, press this button to start working immediately.
- Press this button during working process, the machine pause working and standby, LCD shows. (The USE consumer can open the lid, take away the jar, etc.
But it must be fixed well again before re-starting). Press it again and it starts again.
- The machine will turn off automatically in 10min without operation under PAUSE status.
- It is also a knob for setting timer, speed, temperature, heat power, with increasing when turn the knob clockwise, and decreasing when turn the knob anti-clockwise, or choosing among the 15 auto programs.

TIMER
- The LCD screen shows , it 88:88:88 means hour: minute: second.
- Press timerbutton and the minute signal on LCD flicker; Turn the knob to adjust the minutes. Press it again, the second signal on LCD flicker, turn the knob to adjust the seconds. Press it again, the hour signal on LCD flicker, turn the knob to adjust the hours from 1-12h.
- Press the timer during working process, the machine starts to count down directly.
- Max 60min by manual setting; max 3h under DIY setting. The timer limit of each program please refer to chapter "MENU" below.
Preset


Press Timer button ⏻ and hold 3 seconds to enter preset / appointment setting mode. Time digit flicking together with preset logo. Use same way to set preset time from 30 minutes to 12 hours.
Preset mode only goes with DIY or Menu. Set DIY or choose Menu firstly. Press knob after setting then time start to count down,
Press
preset

to cancel.

SPEED
\- Press this button in stand-by mode or during working process (except some auto programs locked the speed adjustment), the appliance gets into speed setting mode.

The signal on LCD flicker, then speed is adjustable. Turn the knob to select desired speed.
- Speed range from level 1-10.
- Press this button in blending & heating process, if the temperature setting or the actual temperature is over 60^ , the speed can be only adjustable from speed 1 to 4. If it was working at high speed, it will drop to speed 4 automatically.
- There is a speed transfer on the structure, so it's normal to hear little noise before the motor start working, or transferring the speed between level 5 and level 6.
- For crushing or chopping hard food or big volume of food, it is suggested to select speed 5 first and then turn to speed 10, to avoid vibration and achieve perfect performance.
- Please do not use speed 8,9,10 over 5 minutes each time; please do not use speed 5,6,7 over 10 minutes each time.

TEMPERATURE
\- Press this button in stand-by mode or during heating process (except some auto programs locked the temperature adjustment), the appliance gets into
temperature setting mode. The signal on LCD flicker, then temperature is adjustable.
Turn the knob to select desired temperature.
• Temperature range: 37-120°C

HEAT POWER
\- Press this button in stand-by mode or during heating process (except some auto programs locked the heat power adjustment), the appliance gets into temperature setting mode.

The signal on LCD flicker, then heat power is adjustable. Turn the knob to select desired heat power.
• Heat power range from level 1-10.
\- For some sticky food, it is suggested to select low heat power to avoid being burnt at the bottom.
\- If food volume is small and it requires precise temperature, it is suggested to select low heat power.
\- Low power will be more precise control; High power will heat quicker.
\- It will not work if just select the heat power but no temperature selected. It is suggested to follow the default setting when choosing different temperature levels.

SELF-CLEANING
\- This program is for cleaning purpose after use.
\- Add water from 500ml to 1 liter.
• Some detergent will be helpful
• Whole process takes around 10 minutes

TURBO
\- Press and hold this button at standby mode, the machine starts working at maximum speed, release and it stop immediately
\- When the temperature in the jar is over 60°C, PULSE cannot be used, and the screen will show E11.
• There is a speed transfer on the structure, so it's normal to hear little noise before the motor start working at the first pulse.
• Maximum operation time for Pulse is 3 min and then rest for 10 minutes

MENU
• This button is to choose among the below 10 auto programs.

natural_image
Grid of ten simple food icons including kitchen utensils, cooking pot, steaming bowl, sauce bowl, seafood dish, hot pot, plate with meat, drink, and soda (no text or symbols)
CHOP (HACHER)
• STEW (MIJOTE2)
• STEAM (VAPEUR)
• THICK SOUP (VELOUTE)
• QUICK SOUP (SOUPE)
• STIR (SAUCE)
KNEAD (PETRIR)
• RISOTTO (Rice)
SMOOTHIE
• YOGURT (YAOURT)
- Press this button in standby mode, the SMOOTHIE signal on LCD starts flicker turn the knob to choose the desired program.
- For the program QUICK SOUP, THICK SOUP, STIR, STEW, RICE, , after completed, it will show "End". If no operation after 10 minutes, it will turn to KEEP WARM automatically for 12 hours until manually stopped.
Some default setting of the program is adjustable, and it shows the real data on the screen; some of them are blocked and it shows "--" on the screen, as following form
Programs Default setting Setting Tips CHOP *Speed: 5*Temperature: 0*Heat power: 0*Timer: 1min *To crush but not to be smoothie. Time adjustable from 1s-5min for desired consistency.*If left idle for 10 minutes after program completion, machine will turn off automatically *Suggested chopped size of the ingredients with hard articles like carrot, meat is 1-2cm.*If you need to crush the food to be the finest, please use SMOOTHIE STEW Step 1:*Speed: 0*Temperautre:100°C*Heat power: 10*Timer: no limit, until boilStep 2:*Speed: 0*Temperature: 90-95°C*Heat power: no certain, may change automatically according to the temperature and food volume*Timer: 3h *Default timer 3h, adjustable from 1-12h*If left idle for 10 minutes after program completion, machine will automatically enter ‘WARM’ mode. *Slow cook STEAM *Speed: 0*Temperature: 120°C*Heat power: 10*Timer: 20min *Time adjustable from 15-60m*If left idle for 10 minutes after program completion, machine will automatically enter ‘WARM’ mode. *500g of water for every 30 minutes of steaming*Vegetable 20min; meat 30min THICK SOUP Step 1:*Speed: 0*Temperature: 120*Heat power: 10*Timer: Till BoilStep 2:*Speed: 0*Temperature: 100°C*Heat power: 4*Timer: 29.5minStep 3:*Speed: 0*Temperature: 0°C*Heat power: 0*Timer: Cooling down to 80°CStep 4:*Speed: slowly from 6 to 10*Temperature: 0°C*Heat power: 0*Timer: 1 min *Suitable for meat soup, crush first and then cook and stir. Timer adjustable from 15-60m.*If left idle for 10 minutes after program completion, machine will automatically enter ‘WARM’ mode. *Suggested chopped size of the ingredients with hard articles like carrot, meat is 1-2cm*Suggest to pause and add butterfly after Step 1. QUICK SOUP Step 1:*Speed: 10*Temperature: 0*Heat power: 0*Timer: 30sStep 2:*Speed: 2*Temperature: 120°C*Heat power: 10*Timer: Till boilingStep 3:*Speed: 2*Temperature: 100°C*Heat power: 10*Timer: 19.5min *Suitable for vegetable soup, crush first and then cook and stir. Timer adjustable from 15-60m.*If left idle for 10 minutes after program completion, machine will automatically enter ‘WARM’ mode. *Suggested chopped size of the ingredients with hard articles like carrot, meat is 1-2cm*Suggest to pause and add butterfly after Step 1. STIR *Speed: 2*Temperature: 100°C*Heat power: 10*Timer: 30min *Speed adjustable from level 0-3;*Temperature adjustable from 90-120°C.*Time adjustable from 5-60m*If left idle for 10 minutes after program completion, machine will automatically enter 'WARM' mode. *Use butterfly or kneading blade KNEAD Step 1:*Speed: 3*Temperature: 0*Heat power: 0*Timer: 3minStep 2:*Speed: 2*Temperature: 0*Heat power: 0*Timer: 7min *Speed adjustable from level 2-3;*Temperature adjustable at 0 or 37°C for spreading.*Time adjustable from 3-20m*If left idle for 10 minutes after program completion, machine will turn off automatically *Knead for bread: 330g water + 500g flour + other ingredients; knead 10min by default setting*Knead for noodle: 200g water + 400g flour; knead 3min by speed 2*Set temperature 37°C for spreading, and if it doesn't spread enough, choose 37°C for 30min more without speed RISOTTO Step 1:*Speed: 0*Temperautre:100°C*Heat power: 6*Timer: Till boilingStep 1:*Speed: 1*Temperautre:965°C*Heat power: 4*Timer: 18 MinHeat power & Timer: not certain, may adjust automatically according to the temperature and volume *All setting non-adjustable*If left idle for 10 minutes after program completion, machine will automatically enter 'WARM' mode. *Suggested volume (max): 500g rice + 800g water, run RICE by default setting.Rice crust will form at the bottom.*Or steam rice by setting: 400g rice in the filter basket, 2L water, choose BOIL;then pour out some water with 1L left, choose STEAM for 20min SMOOTHIE *Speed: 10*Temperature: 0*Heat power: 0*Timer: 30s *All setting non-adjustable, run once more if not fine enough.*If left idle for 10 minutes after program completion, machine will turn off automatically Suggested chopped size of the ingredients with hard articles like carrot, meat is 1-2cm YOGURT *Speed: 1 at the first 30min, and then stop*Temperature: 37-39°C*Heat power: 1*Timer: 6h *Time adjustable from 3-12h*If left idle for 10 minutes after program completion, machine will turn off automatically *Suggested volume: 1 cup yogurt + 1L fresh milk + sugar, 6-12h according to desired consistency
Suggested speed and capacity for each components:
Tools Picture Function Speed Capacity Operation time Cutting blade 
CHOP but not being smoothie 5 2L max, chop to be 1-2cm size before operation 1min CHOP to be finest 10 2L max, chop to be 1-2cm size before operation 1min Kneading blade 
Knead dough for bread, pizza, etc 2-3 800g flour max 5-10min Knead dough for noodles 2 500g flour max 3min Butterfly 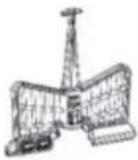
Stir 1-3 2L max 30min whisk egg whites or cream 4 2L max 10min Steamer 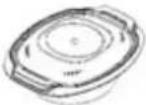
Steam vegetables N/A 3.5L max 15min Steam meat N/A 3.5L max 20-30min
TROUBLE-SHOOTING
\- The below error information appeared on the screen is normal. If it still appears the problem after you acted according to the solution below, please contact our customer service center.
Error code Description Possible reasons Solution E1 Safety switch not fixed Jar or jar lid is not fixed properly. Re-assemble the jar and jar lid, make sure all the parts are assembled properly and tightly E2 Temperature sensor missing The jar is not in place, or connection of the temperature sensor at the jar base is damaged Re-assemble the jar and make sure it is fixed properly and tightly E3 Motor blocked Too big loading in the jar Decrease the volume of the food in the jar, or cut the food to smaller pieces and re-start the machine. E4 Too high temperature No food in the jar, or very little food with high temperature setting for too long time. Add food in the jar E5 Motor temperature too high The machine works at high loading for too long time Stop and let the machine to cool before re-started E7 Speed transfer failure Speed changing between low level (1-5) and high level (6-10) blocked Remove the jar, turn the lower clutch manually and fix the jar and restart. E8 Motor NTC missing Motor temperature sensor connection loose or damaged Stop using and send to after sales service center to fix it E11 Cannot use Pulse The temperature in the jar is over 90°C Cool down the food and Pulse again, or use lower speed 4
Cleaning your appliance
1. DO NOT was any parts of your cooker in a dishwasher. Always wash the cooker thoroughly after every use, or it has not been used for an extended period of time.
2. Unplug the appliance from the wall outlet and let the unit cool before cleaning.
3. Wash the removable cooking pot with warm soapy water. Rinse and dry thoroughly.
4. Wipe main body with a clean damp cloth. If food residue remains, dampen cloth in warm soapy water before wiping. NEVER submerge the main body in water or other liquid. Wipe the stationary pot as necessary to remove any food product.
5. In order to maintain good performance of you ...soup maker, the bottom of the removable cooking pot should be inspected and cleaned, if necessary, after each use. Wipe with a soft damp cloth and dry thoroughly before using.
6. If the soup maker is not used for a period of time, please unplug it and keep in cool and clean area.
http://dl.hkoenig.com/SiteHkoenig/Livrederecettes\_HK8.pdf
Or scan here:

WARRANTY
The warranty period for our products is 2 years, unless otherwise stated, starting from the date of initial purchase or the date of delivery.
If you have any problems or questions, you can easily access our help pages, troubleshooting tips, FAQ, and user manuals on our service site: https://sav.hkoenig.com.
By typing the reference name of your device in the search bar, you can access all available online support, designed to best meet your needs.
If you still cannot find an answer to your question or problem, then click on “Did the answer solve your problem?”. This will direct you to the Customer Support Request Form, which you can fill out to validate your request and get help.
WARRANTY CONDITIONS
The warranty covers all failures occurring under normal use, in accordance with the usage and specifications in the user's manual.
This warranty does not apply to packaging or transportation problems during shipment of the product by the owner. It also does not include normal wear and tear of the product, nor maintenance or replacement of consumable parts.
EXCLUSION OF WARRANTY
- Accessories and wearing parts (\*).
- Normal maintenance of the device.
- All breakdowns resulting from improper use (shocks, failure to comply with power supply recommendations, poor conditions of use, etc.), insufficient maintenance or misuse of the device, as well as the use of unsuitable accessories.
- Damage of external origin: fire, water damage, electrical surge, etc.
- Any equipment that has been disassembled, even partially, by persons other than those authorized to do so (notably the user).
- The products whose serial number would be missing, deteriorated or illegible that would not allow its identification.
- The products subjected to leasing, demonstration, or exhibition.
(\*) Some parts of your device, called wear parts or consumables, deteriorate with time and frequency of use of your device. This wear and tear are normal but can be accentuated by poor conditions of use or maintenance of your device. These parts are therefore not covered by the warranty.
The accessories supplied with the device are also excluded from the warranty. They cannot be exchanged or refunded. However, some accessories can be purchased directly through our website: https://sav.hkoenig.com/.
DISPOSAL AND ENVIRONMENT
If your electrical appliance requires replacement or is of no further use, please think of protecting the environment. Contact your local authority for advice as many have facilities for environmentally safe disposal

This marking indicates that this product should not be disposed with other household wastes throughout the EU. To prevent possible harm to the environment or human health from uncontrolled waste disposal, recycle it responsibly to promote the sustainable reuse of material resources. To return your used device, please use the return and collection systems or contact the retailer where the product was purchased. They can take this product for environmental safe recycling.
Adeva SAS / H.Koenig Europe - 8 rue Marc Seguin, 77290 Mitry-Mory, France www.hkoenig.com - https://en.hkoenig.com - Tél: +33 1 64 67 00 05
FRANÇAIS
Instructions de sécurité importantes
Les précautions de sécurité suivantes doivent toujours être suivies afin de réduire le risque d'électrocution, de blessure ou d'incendie. Lisez attentivement toutes ces instructions avant d'utiliser le produit et conserver le mode d'empoi en lieu sûr.
\- Cet appareil peut être utilisé par des personnes dont les capacités physiques, sensorielles ou mentales sont réduites ou dont l'expérience ou les connaissances ne sont pas suffisantes, à condition qu'elles bénéficient d'une surveillance ou qu'elles aient reçu des instructions quant à l'utilisation de l'appareil en toute sécurité et qu'elles en comprennent bien les dangers potentiels.
\- Cet appareil ne doit pas être utilisé par des enfants. Ne laissez pas l'appareil et son cordon d'alimentation à la portée des enfants.
\- Il existe un risque de blessure en cas de mauvaise utilisation. Des précautions doivent être prises lors de la manipulation des lames coupantes, du vidage du bocal et pendant le nettoyage.
\- Éteignez et débranchez l'appareil avant de remplacer les accessoires ou de toucher les pièces qui sont mobiles quand l'appareil fonctionne. Débranchez toujours l'appareil de la prise électrique s'il est laissé sans surveillance, mais aussi avant l'assemblage, le démontage ou le nettoyage.
\- Si le cordon d'alimentation est endommagé, il doit être remplacé par le fabricant, son agent de service ou bien toute personne qualifiée afin d'éviter tout accident.
\- Les accessoires, autres que ceux fournis avec l'appareil, doivent inclure des instructions pour une utilisation en toute sécurité.
- AVERTISSEMENT: ne retirez pas le couvercle pendant que l'eau bout. Ne réglez pas la vitesse au-dessus du niveau 4 lorsque la température est supérieure à 90 degrés centigrades.
• L'appareil ne doit pas être plongé dans un liquide.
- Cet appareil est destiné à être utilisé dans un cadre domestique et dans des contextes similaires tels que :
– coin-cuisine réservé au personnel de magasins, bureaux et autres lieux de travail ;
\- les exploitations agricoles ;
\- par les clients dans les hôtels, les motels et les autres lieux à caractère résidentiel ;
\- les hébergements de type chambre d'hôtes.
\- Veuillez placer l'appareil sur une table plane et stable qui ne deviendra pas chaude et assurez-vous qu'il soit à une distance sûre du bord pour éviter de tomber. Lorsqu'il est utilisé pour petrir la pâte ou couper des aliments, l'appareil peut bouger à cause des vibrations. Donc, soyez vigilant afin d'éviter qu'il ne tombe au sol.
\- Veuillez retirer la fiche lors du nettoyage de l'appareil ou le ranger lorsque vous ne l'utilsez pas durant une longue période.
\- Vérifiez régulièrement si le bloc-moteur, le bocal, le cuiseur-vapeur ou d'autres composants sont endommagés ou non. Les pièces abîmées augmentent le risque d'accident. Une fois que quelque chose ne va pas, veuillez cesser d'utiliser l'appareil et contactez notre service après-vente.
• Si l'appareil s'arrête de façon inattendue ou fonctionne mal, éteignez-le et débranchez-le du secteur immédiatement. Demandez conseil à un professionnel pour corriger le défaut ou effectuer des réparations.
• Le récipient à mesurer est la seule partie qui peut être utilisée pour recouvrir le trou rond dans le couvercle du bocal. Veuillez ne pas utiliser de tissu ou des objets similaires pour recouvrir le trou.
- Ne touchez pas le tranchant des lames. Soyez prudent et tenez la partie supérieure lorsque vous assemblez ou retirez les lames.
• Tenez compte du repère de capacité sur le bocal.
- Ouvrez le couvercle quand les aliments dans le bocal ont cessé de tourner.
- Faites attention aux aliments chauds lorsque vous ouvrez le couvercle du bocal. Veuillez placer correctement le récipient à mesurer dans le trou du couvercle du bocal lors du traitement des aliments.
- Ne touchez pas le bocal lorsqu'il s'y trouve des aliments qui sont à plus de 60 °C.
- Assurez-vous que le cuiseur-vapeur et le bocal soient bien assemblés lorsque vous utilisez le cuiseur-vapeur.
- Faites attention à ce que la vapeur s'écoule par le haut ou les côtés du couvercle.
- Pendant le fonctionnement, ne touchez pas le cuiseur à vapeur à l'exception de ses poignées.
- N'utilisez pas le cuiseur à vapeur sans son couvercle bien en place.
- Lorsque vous soulevez le couvercle du cuiseur, veillez à ne pas vous ébouillanter avec la vapeur.
- Lorsque vous faites une cuisson à la vapeur ou à l'eau bouillante, faites attention à ce que la vapeur s'écoule par le bec du bocal lorsque vous déplacez le cuiseur-vapeur.
- Vérifiez souvent que le trou d'aération du couvercle du cuiseur-vapeur n'est pas obstrué, sinon la vapeur pourrait sortir ailleurs.
- Après utilisation, veuillez mettre l'appareil et ses accessoires chauds dans un endroit hors de portée des enfants.
- Le débordement de nourriture : assurez-vous que la bague d'étanchéité de la lame soit bien placée et que l'ensemble des lames soit fermement fixé au support en dessous.
Si ce n'est pas le cas, cela entraînera un débordement
de nourriture qui endommagera l'appareil.
\- Dégâts dus à une mauvaise ventilation : assurez-vous que les évents à l'arrière du bloc-moteur ne soient pas bouchés, sinon l'appareil sera endommagé.
\- Le bocal et tous les accessoires doivent être utilisés uniquement avec le support fourni. N'utilisez pas de pièces qui ne soient pas d'origine.
\- Faites attention à ne pas renverser le bocal sur le branchement.
\- Après utilisation de l'appareil, le bocal reste chaud un certain temps, donc veillez à ne pas vous brûler.
\- Cet appareil peut être utilisé par des enfants d'au moins 8 ans s'ils sont surveillés, qu'ils ont reçu des instructions pour utiliser l'appareil en toute sécurité et qu'ils sont pleinement conscients des dangers encourus.
\- Le nettoyage et l'entretien ne doivent pas être effectués par des enfants à moins qu'ils aient au moins 8 ans et qu'ils soient surveillés par un adulte.
\- Gardez l'appareil et son cordon d'alimentation hors de portée des enfants de moins de 8 ans.
\- Lors de l'utilisation d'appareils électriques, des précautions de sécurité doivent toujours être prises pour éviter les risques d'incendie, de choc électrique et / ou de blessure en cas de mauvaise utilisation.
• Assurez-vous que la tension nominale indiquée sur la plaque signalétique corresponde à la tension principale de votre installation. Si ce n'est pas le cas, contactez le revendeur et ne branchez pas l'appareil.
\- Ne laissez jamais l'appareil sans surveillance pendant son fonctionnement.
• N'ouvrez jamais l'appareil devant vous ; placez-vous toujours légèrement sur le côté pour éviter de vous brûler avec la vapeur.
• L'appareil ne doit pas être utilisé s'il est tombé, s'il présente des signes évidents de dommages ou des fuite
• N'utilisez pas cet appareil si son cordon ou sa fiche
est abîmée, s'il ne fonctionne pas correctement, s'il a été endommagé ou est tombé par terre. Afin d'écarter tout danger en cas de cordon d'alimentation endommagé, celui-ci doit être remplacé par le fabricant, son représentant ou toute personne de même qualification.
\- Votre appareil a été conçu pour un usage domestique seulement. Elle n'a pas été conçue pour être utilisée dans les cas suivants qui ne sont pas couverts par la garantie :
- dans des coins de cuisines réservés au personnel dans des magasins, bureaux et autres environnements professionnels,
- dans des fermes aubèrges,
- par les clients des hôtels, motels et autres environnements à caractère résidentiel,
– dans des environnements de type chambres d'hôtes.
DESCRIPTION DE L'APPAREIL
Lors de l'ouverture du carton d'emballage, sortez tous les accessoires et vérifiez qu'ils correspondent à la liste des composants. Les pièces détachées sont les suivantes :
1 Bloc-moteur 7 Couvercle
2 Bocal 8 Panier
3 Couvercle du bocal 9 Papillon
4 Récipient à mesurer 10 Spatule
5 Petit cuiseur à vapeur 11 Livre de recettes
6 Grand cuiseur à vapeur

ACCESSOIRES
Assemblage du bocal mélangeur :
Il y a des repères concernant les volumes du bocal sur une des parois. La capacité maximale du bocal est de 21.

Avis
La quantité de nourriture placée dans le bocal ne doit pas dépasser 2l, faute de quoi la nourriture pourrait déborder et causer un danger.
Mettez le couvercle sur le bocal, appuyer sur l'interrupteur de sécurité et tournez-le vers la droite pour le fixer, sinon le moteur ne peut pas démarrer. (Toujours appuyer sur l'interrupteur de sécurité pour vérouiller ou ouvrir le couvercle)

natural_image
Three-step diagram showing a mechanical component with arrows indicating rotation or assembly (no text or symbols present)
Placez le bocal sur le bloc-moteur dans le bon sens et fixez-le correctement, sinon le moteur ne peut pas démarrer.

natural_image
Line drawings of two kitchen appliances: a blender and a four-kg toaster (no text or symbols)
Assemblage des lames :
Fixez la bague d'étanchéité sur les lames, placez le tout dans le trou au fond du bocal, maintenez fermement la partie haute de l'ensemble et tournez la partie basse à l'envers. Utilisez le support de fixation pour fixer les lames en tournant dans le sens des aiguilles d'une montre. Faites l'inverse pour le retirer du bocal. N'oubliez pas de mettre la bague d'étanchéité entre les lames et le fond du bocal.


natural_image
Line drawing of a hand holding a circular mechanical component with three blades (no text or symbols)
Avis
- Les lames sont très pointues. Veuillez les envelopper avec un gant de toilette lors de l'assemblage ou du démontage.
- Veuillez tenir fermement les lames et les retirer avec précaution pour qu'elles ne tombent pas ni ne vous blessent.
- Veuillez vous assurer que le support de fixation et la bague d'étanchéité sont en place et bien verrouillés avec l'ensemble des lames. Si la bague d'étanchéité n'est pas bien placée, les aliments mélangés ou cuits peuvent déborder et endommager l'appareil.
Assemblage de l'arbre de pétrissage :
Retirez les lames, fixez l'arbre de pétrissage de la même manière que pour la fixation des lames. Il peut être utilisé pour pétrir ou remuer et mélanger sans couper les aliments.


natural_image
Diagram of a mechanical component with concentric rings and a curved arrow indicating rotation (no text or symbols)

natural_image
Technical diagram of a mechanical component with concentric rings and mounting holes (no text or symbols)
Avis
- N'utilisez pas une vitesse supérieure à 3, sinon cela provoquera de fortes vibrations de l'appareil et entraînera des risques.
- Comme la plus petite distance entre l'accessoire de pétrissage et la paroi du bocal n'est que de 1 cm, parfois la nourriture peut se coincer et le moteur peut s'arrêter par sécurité. Utilisez alors la spatule et retirer ce qui coince pour que l'appareil fonctionne à nouveau en douceur.
- Veuillez vous assurer que le support de fixation et la bague d'étanchéité sont en place et bien verrouillés avec l'ensemble des lames. Si ce n'est pas le cas, les aliments mélangés ou cuits peuvent déborder et endommager l'appareil.
Récipient à mesurer
Le récipient à mesurer a de nombreuses fonctions : il fait partie du couvercle pour éviter la perte de chaleur ou les éclaboussures; c'est un récipient pour mesurer les ingrédients avec une capacité totale de 150 ml.
Mettez le récipient à mesurer dans le trou du couvercle, tournez-le dans le sens des aiguilles d'une montre pour le fixer.

natural_image
Simple line drawing of a top hat with a flared base (no text or symbols)

natural_image
Technical line drawing of a mechanical component with concentric circles and a handle (no text or symbols)
Avis
• Le récipient à mesurer est la seule pièce qui peut être utilisée pour recouvrir le trou du couvercle
\- Ne recouvrez pas le trou avec d'autres accessoires afin d'éviter les éclaboussures de nourriture pouvant provoquer un danger.
Spatule :
Spatule
- La spatule est le seul accessoire à utiliser pour gratter les aliments dans le bocal. Les autres pièces peuvent endommager le revêtement anti-adhésif à l'intérieur du bocal.
- Il y a une petite rainure sur le manche de la spatule, utilisez-la pour tenir le panier.

natural_image
Line drawings of two kitchen utensils: a handle and a brush (no text or symbols)

natural_image
Line drawing of a bucket with a handle and side rack (no text or symbols)
Avis
- Ne l'utilisez pas pour mélanger les aliments lorsque les lames tournent.
- N'utilisez pas la spatule si le papillon est à l'intérieur.
- Fixez bien le manche avec le panier avant de le soulever.
Panier-filtre
Le panier a de nombreuses fonctions :
• Passoire pour jus de fruits et de légumes Après avoir broyé ou fait une sauce aux fruits avec l'appareil, placez le panier dans le bocal pour verser le jus.
- Ragoût d'aliments mous comme des pâtes ou des nouilles;
• Cuisson de plats d'accompagnement, comme du riz ou des pommes de terre.

natural_image
Line drawings of two mechanical components with no visible text or symbols
Avis
- Mettez le manche de la spatule dans le trou du bord du panier pour le mettre ou le sortir du bocal.
- Si vous souhaitez réduire l'eau contenue dans les aliments, comme les tomates, retirez le récipient à mesurer et mettez-y le panier. L'eau peut être facilement éliminée.
Papillon :
• Installé sur les lames, le papillon permet de mélanger les aliments mais sans les couper, et empêche les aliments de coller ensemble.
- Placez le papillon sur l'ensemble des lames et appuyez dessus avec suffisamment de force, puis tournez le papillon dans le sens inverse des aiguilles d'une montre pour bien le verrouiller.

natural_image
Technical line drawing of a mechanical component with no visible text or symbols

natural_image
Line drawing of a mechanical assembly with a conical component and structural supports (no text or symbols)
Avis
- Ne démarrez pas l'appareil tant que le papillon n'est pas en place.
• N'utilisez pas le papillon au-dessus de la vitesse 4.
- N'utilisez pas de spatule lorsque vous employez un papillon.
- N'ajoutez pas d'ingrédients dans le bocal lorsque l'appareil fonctionne avec le papillon, sinon il pourrait être endommagé ou se bloquer.
Assemblage du cuiseur à vapeur :
Le cuiseur est constitué de trois parties : petit vapeur, grand vapeur et couvercle. Le couvercle peut se placer sur le petit et le grand vapeur, celui-ci peut se mettre sur le petit vapeur.
Retirez le couvercle du bocal et placez le cuiseur-vapeur sur le bocal.

natural_image
Simple line drawing of a square container with handles and a central circular hole (no text or symbols)

natural_image
Diagram of three stacked circular containers with concentric rings, no text or symbols present

natural_image
Black kitchen blender with digital display and control panel (no visible text or symbols)
Avis
\- Veuillez vous assurer que le couvercle du cuiseur-vapeur est recouvert avant de cuire à la vapeur.
\- Le cuiseur-vapeur ne peut pas être utilisé dans un four à micro-ondes ou d'autres appareils électriques.
\- Ne touchez pas et ne vous approchez pas des trous du couvercle du cuiseur-vapeur pour éviter de vous brûler avec la vapeur.
\- Ne recouvrez pas et ne boucher pas les trous du couvercle du cuiseur-vapeur, sinon la vapeur pourrait sortir par d'autres endroits et provoquer un danger.
INSTRUCTIONS D'UTILISATION
Lors de l'utilisation de cet appareil pour la première fois, il y aura une légère odeur provenant du moteur, ce qui est un phénomène normal. Après un certain temps, cette odeur disparaîtra.
- Veuillez placer l'appareil sur une table propre, stable et plane. Ne le mettez pas trop près du bord ni dans une armoire encastrée.
• Il est préférable de placer l'appareil à un endroit défini pour plus de commodité.
• Veuillez nettoyer soigneusement l'appareil avant de l'utiliser.
- Le son «bip» indique que l'appareil est allumé.


ARRÊTER / ANNULER
\- Branchez l'appareil, allumez l'interrupteur situé à l'arrière, l'appareil émet un bip mais n'affiche rien.

natural_image
Pure mechanical diagram showing a lever and connecting rod (no text or symbols)
- Appuyez sur ce bouton, et tous les témoins à l'arrière s'allument et se mettent en mode veille ; vous pouvez alors sélectionner les fonctionnalités souhaitées.
- Quand vous appuyez sur ce bouton pendant les réglages, ils sont alors effacés et retour au mode veille.
- Quand vous appuyez sur ce bouton pendant le fonctionnement de l'appareil, il cesse de fonctionner immédiatement et revient en mode veille.
- Quand vous appuyez sur ce bouton pendant le processus d'enregistrement DIY, l'appareil cesse de fonctionner et l'enregistrement est annulé.
• L'appareil s'éteindra automatiquement au bout de 30 secondes s'il n'est pas utilisé.
BOUTON DÉMARRAGE/PAUSE
\- Après avoir sélectionné le réglage ou le programme souhaité, appuyez sur ce bouton pour commencer à travailler.
\- Quand vous appuyez sur ce bouton pendant le fonctionnement, il cesse de fonctionner et revient en mode veille ; l'écran LCD affiche (US utilisateur peut ouvrir le couvercle, retirer le bocal, etc. Mais il faut bien tout remettre en place avant de recommencer). Appuyez à nouveau et il repart.
- L'appareil s'éteindra automatiquement au bout de 10 minutes sans utilisation s'il est en mode PAUSE.
- Ce bouton sert aussi à régler la minuterie, la vitesse, la température, la puissance thermique, avec une augmentation lorsque vous tournez le bouton vers la droite et une diminution lorsque vous le tournez vers la gauche. Vous pouvez aussi choisir parmi les 15 programmes automatiques.

MINUTERIE
• L'écran LCD affiche 88:88,89 ce qui veut dire heure: minute: seconde :.
\- Appuyez sur le bouton minuterie et les minutes clignotent sur l'écran LCD. Tournez le bouton pour régler les minutes. Appuyez à nouveau, ce sont alors les secondes qui s'affichent. Tournez le bouton pour régler les secondes. Appuyez à nouveau, ce sont alors les heures qui s'affichent. Tournez le bouton pour régler de 1 à 12 heures.
- Quand vous appuyez sur la minuterie pendant le fonctionnement, l'appareil commence à décompter aussitôt.
- 60min max par réglage manuel; 3h par réglage DIY. La limite de minuterie de
chaque programme est indiquée dans le chapitre ci-dessous.

Fonction programmable

Appuyez sur le bouton de l'horloge et maintenez-le enfoncé durant 3 secondes pour accéder au mode programmable. L'icône de l'horloge et l'icône de programmation se mettent à clignoter. Procédez de la même manière que pour régler l'heure, et ajustez la durée de 30 minutes à 12 heures.
Le mode programmable ne peut être utilisé qu'avec DIY et MENU. Sélectionnez d'abord DIY ou MENU, appuyez sur la molette, et le temps commence à décompter.
Appuyez sur le bouton de réinitialisation pour annuler l'action.

VITESSE
\- Quand vous appuyez sur ce bouton en mode veille ou pendant le fonctionnement (attention, certains programmes automatiques ont verrouillé le réglage de la vitesse), l'appareil passe en mode de réglage de la vitesse et le symbole clignote sur l'écran LCD. Tournez le bouton pour sélectionner la vitesse souhaitée.
- Plage de vitesse de 1 à 10.
- Quand vous appuyez sur ce bouton pendant le processus de mélange ou de chauffage, si le réglage de la température ou la température réelle est supérieure à 60 °C, vous ne pouvez sélectionner que les vitesses de 1 à 4.
Si l'appareil fonctionnait à grande vitesse, il passerait automatiquement à la vitesse 4.
\- Il y a un changement de vitesse, il est donc normal d'entendre un peu de bruit avant que le moteur ne commence à fonctionner ou lors du changement de vitesse entre le niveau 5 et le niveau 6.
\- Pour broyer ou hacher des aliments durs ou de gros volumes de nourriture, il est suggéré de sélectionner d'abord la vitesse 5, puis de passer à la vitesse 10 pour éviter les vibrations et obtenir les meilleures performances.
\- Veuillez ne pas utiliser les vitesses 8,9,10 pendant plus de 5 minutes à chaque fois ni les vitesses 5,6,7 pendant plus de 10 minutes.

TEMPÉRATURE
\- Quand vous appuyez sur ce bouton en mode veille ou pendant le processus de chauffage (attention, certains programmes automatiques ont verrouillé le réglage de la température), l'appareil passe en mode de réglage de la température. Le symbole clignote sur l'écran LCD. Tournez alors le bouton pour sélectionner la température souhaitée.
• Plage de température : 37-120 °C

PUISSANCE THERMIQUE
\- Quand vous appuyez sur ce bouton en mode veille ou pendant le processus de chauffage (attention, certains programmes automatiques ont verrouillé le réglage de la puissance thermique), l'appareil passe en mode de réglage de température et le
symbole 📋 clignote sur l'écran. Tournez le bouton pour sélectionner la puissance thermique souhaitée.
\- Plage de puissance : 1-10.
\- Pour certains aliments collants, il est suggéré de sélectionner une faible puissance thermique pour éviter de brûler le fond.
\- Si le volume des aliments est petit et nécessite une température précise, il est suggéré de sélectionner une puissance thermique faible.
\- Cela permettra un contrôle plus précis.
\- Cela ne fonctionnera pas si vous choisissez simplement la puissance thermique sans sélectionner une température. Il est suggéré de suivre le réglage par défaut lors du choix de différents niveaux de température.

AUTO-NETTOYAGE
\- Ce programme est destiné au nettoyage après l'utilisation.
\- Ajoutez de l'eau de 500 ml à 1 litre.
\- Un détergent sera utile
• L'ensemble du processus prend environ 10 minutes

TURBO
\- Appuyez et maintenez ce bouton en mode veille, l'appareil commence à fonctionner à la vitesse maximale, relâchez et il s'arrête
\- Lorsque la température dans le bocal est supérieure à 60 °C, PULSE ne peut pas être utilisé et l'écran affichera E11.
\- Il y a un changement de vitesse, il est donc normal d'entendre un peu de bruit
avant que le moteur ne commence à fonctionner à la première impulsion.
\- Le temps de fonctionnement maximum pour Pulse est de 3 min avec ensuite une pause de 10 mn.

MENU
\- Ce bouton permet de choisir parmi les 10 programmes automatiques ci-dessous :

natural_image
Grid of ten simple food icons including cooking utensils, steaming dishes, and beverages (no text or labels)
- Quand vous appuyez sur ce bouton en mode veille, SMOOTHIE clignote sur l'écran. Tournez alors le bouton pour choisir le programme souhaité.
- Pour les programmes QUICK SOUP, THICK SOUP, STIR, STEW, RICE, une fois terminé, il s'affichera END. Si aucune opération n'est effectuée au bout de 10 minutes, il passe automatiquement à KEEP WARM pendant 12 heures jusqu'à ce qu'il soit arrêté manuellement.
Certains paramètres par défaut du programme sont réglables et affichent les données réelles à l'écran; certains d'entre eux sont bloqués et le symbole "--" s'affiche sur l'écran, comme indiqué dans le tableau suivant :
- CHOP) HACHER)
- STEW (MIJOTER)
• STEAM (VAPEUR)
• THICK SOUP (VELOUTÉ)
• QUICK SOUP (SOUPE)
• STIR (SAUCE)
• KNEAD (PÉTRIR)
• RISOTTO (RIZ)
- SMOOTHIE
- YOGURT (YAOURT)
Programmes Réglages par défaut Réglages Conseils HACHER Vitesse : 5 Température :0 Puissance thermique:0 Minuterie : 1 min Pour écraser mais pas pour être smoothie. Temps réglable de 1s à 5 min pour la consistence souhaitée.Si non utilisé pendant 10 minutes après la fin du programme, l'appareil s'éteindra automatiquement La taille suggérée des ingrédients durs comme la carotte, la viande est de 1 à 2 cm.Si vous avez besoin d'écraser les aliments pour qu'ils soient plus fins, veuillez utiliser SMOOTHIE MIJOTER Étape 1:Vitesse: 0 Température:100 °CPuissance thermique:10Minuterie: pas de limite, jusqu'à ébullitionÉtape 2: Vitesse: 0Température: 90-95 °CPuissance thermique: pas certain, peut changer automatiquement selon la température et le volume des aliments.Minuterie: 3 h Minuterie par défaut de 3 h, réglable de 1 à 12h.Si non utilisé pendant 10 minutes après la fin du programme, l'appareil entrera automatiquement en mode WARM. Cuisson lente VAPEUR Vitesse: 0Température: 120 °CPuissance thermique:10Minuterie: 20 min Temps réglable de 15 à 60 minSi non utilisé pendant 10 minutes après la fin du programme, l'appareil entrera automatiquement en mode WARM 500 ml d'eau pour 30 minutes de cuisson à la vapeurLégumes 20 minViande 30 min SOUPE ÉPAISSE Étape 1:Vitesse: 0Température: 120°CPuissance thermique: 10Minuterie: jusqu'à ébullitionÉtape 2:Vitesse: 0 Température:100 °C Puissance thermique: 4 Minuterie:29,5 minÉtape 3:Vitesse: 0 Température:0 °C Puissance thermique: 0 Minuterie:refroidissement jusqu'à80 °CEtape 4:Vitesse: lentement de 6 à10Température: 0 °CPuissance thermique: 0Minuterie: 1 min Convient pour la soupe de viande, écraser d'abord, puis cuire et remuer.Minuterie réglable de 15 à 60 minutes.Si non utilisé pendant 10 minutes après la fin du programme, l'appareil entrera automatiquement en mode WARM Taille suggérée des ingrédients hachés avec des aliments durs comme la carotte, la viande est de 1 à 2 cmSuggéré de faire une pause et d'ajouter le papillon après l'étape 1. SOUPE RAPIDE Étape 1:Vitesse: 10 Température:0 Puissance thermique: 0Minuterie: 30 sÉtape 2:Vitesse: 2 Température:120 °C Puissance thermique: 10Minuterie: jusqu'àébullitionÉtape 3:Vitesse: 2 Température:100 °C Puissance thermique: 10Minuterie: 19,5 min Convient pour la soupe aux légumes, écraser d'abord, puis cuire et remuer.Minuterie réglable de 15 à60 minutes.Si non utilisé pendant 10minutes après la fin duprogramme, l'appareilentrera automatiquement en mode WARM. Taille suggérée des ingrédients hachés avec des aliments durs comme la carotte, la viande est de 1 à 2 cmSuggéré de faire une pause et d'ajouter le papillon après l'étape 1. SAUCE Vitesse: 2 Température:100 °C Puissance thermique: 10Minuterie: 30 min Vitesse réglable du niveau0-3. Température réglable de 90 à 120 °C.Temps réglable de 5-60 minutesSi non utilisé pendant 10minutes après la fin duprogramme, l'appareilentrera automatiquement en mode WARM. Utilisez un papillon ou une lame de pétrissage PÉTRIR Étape 1:Vitesse: 3 Température:0 Puissance thermique: 0Minuterie: 3 minÉtape 2:Vitesse: 2 Température:0 Puissance thermique:0 Minuterie: 7 min Vitesse réglable du niveau 2-3; Température réglable à 0 ou 37 °C pour répartir.Temps réglable de 3 à 20 minutesSi non utilisé pendant 10 minutes après la fin du programme, l'appareil s'éteindra automatiquement Pétrissage du pain: 330 ml d'eau + 500 g de farine + autres ingrédients; pétrir 10 min par défaut Pétrissage des nouilles:200 ml d'eau + 400 g de farine; pétrir 3 min à la vitesse 2Régler la température à 37 °C pour répartir, et si ce n'est pas suffisant, choisir 37 °C pour 30 min de plus sans vitesse RISOTTO Étape 1 :Vitesse: 0 Température: 100 °CPuissance thermique: 6 Minuterie: jusqu'à ébullitionÉtape 1 :Vitesse: 1 Température : 965 °CPuissance thermique: 4 Minuterie: 18 minPuissance thermique et minuterie: incertain, peut s'ajuster automatiquement en fonction de la température et du volume Tous les paramètres ne sont pas réglablesSi non utilisé pendant 10 minutes après la fin du programme, l'appareil entrera automatiquement en mode WARM. Volume suggéré (max): 500 g de riz + 800 ml d'eau, exécutez RICE par défaut.Une croûte de riz se formera au fond.Ou bien cuire du riz à la vapeur en réglant : 400 g de riz dans le panier-filtre, avec 2 l d'eau, choisissez BOIL puis enlevez un peu d'eau en conservant 1 l, choisissez VAPEUR pendant 20 min SMOOTHIE Vitesse: 10 Température:0 Puissance thermique:0 Minuterie: 30 s Tous les paramètres ne sont pas réglables,recommencez une fois de plus si ce n'est pas assez fin.Si non utilisé pendant 10 minutes après la fin du programme, l'appareil entrera automatiquement en mode WARM. Taille suggérée des ingrédients hachés avec des aliments durs comme la carotte, la viande est de 1 à 2 cm YOGOURT Vitesse: 1 pendant 30 min, puis s'arrêteTempérature: 37-39 °CPuissance thermique: 1 Minuterie: 6 h Temps réglable de 3-12hSi non utilisé pendant 10 minutes après la fin du programme, l'appareil s'éteindra automatiquement Volume suggéré:1 tasse de yaourt + 1 l de lait frais + sucre, 6-12 h selon la consistance souhaitée
Vitesse et capacité suggérées pour chaque composant:
Outil Schéma Fonction Vitesse Capacité Durée Lame de coupe 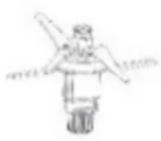
HACHER mais sans être smoothie 5 2 l max, découper pour avoir une taille de 1 à 2 cm avant l'opération 1 min HACHER pour être plus fin 10 2 l max, couper pour avoir une taille de 1 à 2 cm avant l'opération 1 min Lame de pétrissage 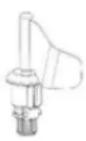
Pétrir la pâte pour le pain, la pizza, etc. 2-3 800 g de farine max 5-10 min Pétrir la pâte pour les nouilles 2 500 g de farine max 3 min Papillon 
Remuer 1-3 2 l max 30 min Fouetter les blancs d'œuf ou la crème 4 2 l max 10 min Cuiseur vapeur 
Légumes vapeur N/A. 3,5 l max 15 min Viande vapeur N/A 3,5 l max 20-30 min
GUIDE DE DÉPANNAGE
\- Les informations d'erreur ci-dessous, qui apparaissent à l'écran, sont normales. Si le problème persiste après que vous avez agi conformément aux recommandations ci-dessous, veuillez contacter notre service clientèle.
Code d'erreur Description Causes possibles Solution E1 Interrupteur de sécurité non fixé Le bocal et/ou son couvercle ne sont pas bien fixés Réassemblez le bocal et son couvercle, assurez-vous que toutes les pièces soient correctement et fermement fixées E2 Sonde de température manquante Le bocal n'est pas en place ou la connexion de la sonde de température au fond du bocal est endommagée Remonter le bocal et assurez-vous qu'il soit correctement et fermement fixé E3 Moteur bloqué Bocal surchargé Diminuez le volume des aliments dans le bocal ou coupez-les en plus petits morceaux et redémarrez l'appareil. E4 Température trop élevée Pas d'aliment dans le bocal ou très peu à une température élevée pendant trop longtemps. Rajoutez des aliments dans le bocal E5 Température du moteur trop élevée L'appareil fonctionne à forte charge pendant trop longtemps Arrêtez et laissez l'appareil refroidir avant de le redémarrer E7 Changement de vitesse impossible Changement de vitesse entre les niveaux bas (1-5) et les niveaux haut (6-10) bloqué Retirez le bocal, tournez l'embrayage inférieur manuellement, replacez le bocal et redémarrez. E8 Moteur NTC manquant La connexion de la sonde de température du moteur est lâche ou endommagée Cessez de l'utiliser et envoyez-le au service après-vente pour le réparer E11 Impossible d'utiliser Pulse La température du bocal est supérieure à 90°C Laissez refroidir les aliments et appuyez de nouveau sur Pulse ou utiliser la vitesse 4
Nettoyage de l'appareil
1. NE LAVEZ PAS les accessoires de votre appareil dans un lave-vaisselle. Lavez toujours l'appareil à fond après chaque utilisation ou s'il n'a pas été utilisé pendant une période prolongée.
2. Débranchez l'appareil de la prise murale et laissez-le refroidir avant de le nettoyer.
3. Lavez le bocal à l'eau chaude savonneuse. Rincez et séchez-le soigneusement.
4. Essuyez le bloc-moteur avec un chiffon propre et humide. S'il reste des résidus de nourriture, humidifier le chiffon à l'eau chaude savonneuse avant de l'essuyer. N'immergez JAMAIS le bloc-moteur dans de l'eau ou un autre liquide. Essuyez le support du bocal si nécessaire pour éliminer tout résidus alimentaire.
5. Afin de maintenir le bon fonctionnement de votre appareil, le fond du bocal doit être inspecté et nettoyé, si nécessaire, après chaque utilisation.
Essuyez-le avec un chiffon doux et humide et séchez-le soigneusement avant de l'utiliser.
6. Si l'appareil n'est pas utilisé pendant un certain temps, veuillez le débrancher et le conserver dans un endroit frais et propre.

RETROUVEZ TOUTES NOS RECETTES :
http://dl.hkoenig.com/SiteHkoenig/Livrederecettes\_HK8.pdf
Ou scannez le QR code :

GARANTIE
La durée de garantie de nos produits est de 2 ans, sauf décret en vigueur, à compter de la date d'achat initiale ou la date de livraison.
En cas de problèmes ou d'interrogations, vous pouvez facilement accéder à nos pages d'aides, conseils de dépannage, FAQ et modes d'emplois sur notre site
SAV : https://sav.hkoenig.com.
En tapant le nom de référence de votre appareil dans la barre de recherche, vous accédez à tous les supports en ligne disponibles, conçus pour vous répondre au mieux à vos besoins.
Si vous ne trouvez toujours pas de réponse à votre question ou votre problème, alors cliquez sur « Est-ce que la réponse a résolu votre problème ? ». Vous accéderez alors au formulaire de demande d'assistance SAV, qu'il vous suffira de compléter pour valider votre demande et obtenir de l'aide.
CONDITIONS DE GARANTIE
La garantie couvre l'ensemble des pannes survenant dans le cadre d'une utilisation normale, conforme aux usages et spécifications présentes sur le manuel d'utilisation. Cette garantie ne s'applique pas aux problèmes d'emballage ou de transport pendant l'expédition du produit par son propriétaire. Elle n'inclut également pas l'usure normale du produit, ni la maintenance ou le remplacement de pièces consommables.
EXCLUSION DE GARANTIE
- Les accessoires et les pièces d'usure (\*).
- L'entretien normal de l'appareil.
- Toutes pannes survenant par suite d'une mauvaise utilisation (chocs, non-respect des préconisations d'alimentation électrique, mauvaises conditions d'utilisation, etc.), d'un entretien insuffisant ou d'un détournement de fonction de l'appareil, ainsi que l'usage d'accessoires non appropriés.
- Les dommages d'origine externe : incendie, dégâts des eaux, surtension électrique, etc.
- Tout matériel qui aura été démonté même partiellement par des personnes autres que celles habilitées (notamment l'utilisateur).
- Les produits dont le numéro de série serait absent, détérioré ou illisible que ne permettrait pas son identification.
- Les produits soumis à la location, à la démonstration ou à l'exposition.
(\*) Certaines pièces de votre appareil dites pièces d'usure ou consommables se détériorent avec le temps et la fréquence d'usage de votre appareil. Cette usure est normale, mais peut être accentuée par des mauvaises conditions d'utilisation ou entretien de votre appareil. Ces pièces ne sont donc pas couvertes par la garantie. Les accessoires fournis avec l'appareil sont également exclus du champ de la garantie. Ils ne peuvent donc être ni échangés, ni remboursés. Toutefois, certains accessoires peuvent être directement achetés via notre site : https://sav.hkoenig.com/.
ENVIRONNEMENT
ATTENTION :

Ce logo indique que ce produit ne doit pas être éliminé avec d'autres déchets ménagers dans toute l'UE. Pour éviter les éventuels dommages à l'environnement ou à la santé humaine dus à l'élimination incontrôlée des déchets, il faut le recycler de manière responsable afin de promouvoir la réutilisation durable des ressources matérielles. Pour vous débarrasser de votre appareil usagé, veuillez utiliser les systèmes de retour et de collecte ou contacter le détaillant chez qui le produit a été acheté. Ils peuvent prendre ce produit pour le recycler sans nuire à l'environnement.
Adeva SAS / H.Koenig Europe - 8 rue Marc Seguin, 77290 Mitry-Mory, France
www.hkoenig.com - https://sav.hkoenig.com - Tél: +33 1 64 67 00 05
DEUTSCH
Wichtige Sicherheitsanweisungen
Die folgenden Sicherheitsanweisungen müssen immer befolgt werden, um das Risiko eines Stromschlages, einer Körperverletzung oder eines Brandes zu verringern. Es ist wichtig, alle diese Anweisungen sorgfältig vor der Nutzung des Produktes zu lesen, und diese als künftige Referenz für neue Besitzer aufzubewahren.
\- Das Gerät kann von Personen mit eingeschränkten physischen, sensorischen oder geistigen Fähigkeiten oder mangels Erfahrung und Wissen benutzt werden, wenn sie beaufsichtigt werden oder die Anweisungen zur sicheren Nutzung des Gerätes und den damit verbundenen Gefahren erhalten haben. Kinder dürfen mit dem Gerät nicht spielen.
• Dieses Gerät kann von Personen mit eingeschränkten körperlichen, sensorischen oder geistigen Fähigkeiten oder mangelnder Erfahrung und Kenntnis benutzt werden, vorausgesetzt, dass sie beaufsichtigt oder in der sicheren Benutzung des Gerätes unterwiesen werden und die möglichen Gefahren vollständig verstehen.
\- Schalten Sie das Gerät aus und trennen Sie dieses von der Stromversorgung, bevor Sie das Zubehör aufladen oder bevor Sie bewegliche Teile während des Betriebs herangehen. Trennen Sie das Gerät immer vom Netz, wenn es unbeaufsichtigt ist oder während der Montage, Demontage oder Reinigung.
\- Wenn das Stromkabel beschädigt ist, muss es von dem Hersteller, seinem Dienstleister oder einer ähnlich qualifizierten Person ersetzt werden, um Gefahren zu vermeiden.
\- Das Zubehör, das nicht mit dem Gerät geliefert wurde, muss eine Anleitung zu seiner sicheren Nutzung haben.
\- WARNUNG: Nehmen Sie den Deckel während das Wasser kocht nicht ab. Stellen Sie die Geschwindigkeit nicht höher als auf die Stufe 4 ein, wenn die Temperatur 90 Grad Celsius übersteigt.
\- Das Gerät darf nicht in Flüssigkeiten getäucht werden.
\- Das Gerät ist für die Haushaltsnutzung und ähnliche Anwendungsbereiche bestimmt, wie zum Beispiel:
\- Küchenbereiche in Geschäften, Büros und anderen Arbeitsumgebungen;
• Bauernhäuser;
\- Bei Kunden in Hotels, Motels, und anderen Wohnumgebungen;
\- Bed und Breakfast Einrichtungen;
\- Platzieren Sie bitte das Gerät auf einem stabilen, flachen Tisch, der nicht heiß wird, und stellen Sie sicher, dass dieses einen sicheren Abstand zu der Kante hat, um das Herunterfallen zu vermeiden. Bei der Nutzung des Gerätes zum Kneten von Teig oder zum Schneiden von Lebensmitteln kann es sich wegen der Vibrationen bewegen. Benutzen Sie das Gerät deswegen nicht unbeaufsichtigt, um das Herunterfallen zu vermeiden.
\- Ziehen Sie bitte den Stecker, wenn Sie das Gerät reinigen oder dieses für eine längere Zeit nicht benutzen.
\- Überprüfen Sie regelmäßig, ob die Haupteinheit, der Mixbehälter, der Dampfer oder andere Komponente beschädigt sind. Die beschädigten Teile können die Sicherheit der Nutzung beeinträchtigen. Wenn Ihnen etwas Verdächtiges aufgefallen ist, benutzen Sie das Gerät nicht und kontaktireren Sie unseren Kundendienst.
\- Wenn das Gerät den Betrieb plötzlich einstellt oder, eine Fehlfunktion zu haben scheint, schalten Sie dieses aus, trennen Sie es von der Stromversorgung und benutzen Sie das Gerät nicht mehr. Lassen Sie
sich fachlich beraten, um den Mangel zu beseitigen und Reparaturen durchzuführen.
\- Der Messbecher ist der einzige Teil, der zu der Abdeckung der runden Öffnung in dem Behälterdeckel benutzt werden kann. Benutzen Sie bitte, keine Stoffe oder ähnlichen Gegenstände, um die Öffnung abzudecken.
\- Fassen Sie die Spitzen der Klingen nicht an. Seien Sie bitte vorsichtig und greifen Sie am Oberteil, wenn Sie die Klingen montieren oder abnehmen.
\- Achten Sie auf die Kapazitätsmarkierung auf dem Mixbehälter.
\- Offnen Sie den Deckel erst wenn die Lebensmittel in dem Mixbehälter stillstehen.
\- Achten Sie auf heiße Lebensmittel, wenn Sie den Behälterdeckel öffnen. Platzieren Sie bitte den Messbecher in der Öffnung des Behälterdeckels korrekt, wenn Sie die Produkte verarbeiten.
\- Fassen Sie den Mixbehälter nicht an, wenn Sie über 60°C heiße Lebensmittel von verarbeiten.
\- Stellen Sie sicher, dass der Dampfer und der Mixbehälter gut verbunden sind, wenn Sie den Dampfer benutzen.
\- Achten Sie auf den Dampf, der oben durch den Deckel oder an den Seiten entweichen kann.
\- Während des Betriebs berühren Sie keine Teile des Dampfers außer der Griffe.
\- Benutzen Sie den Dampfer nicht ohne den aufgesetzten Dampfdeckels.
\- Seien Sie vorsichtig, wenn Sie den Deckel des Dampfers öffnen, es besteht Verbrühungsgefahr.
\- Wenn Sie die Dampf- und Kocheinstellungen benutzen, auchten Sie darauf, dass der Dampf durch die Behältermündung entweichen wird, wenn Sie den Dampfer bewegen.
\- Überprüfen Sie regelmäßig, dass die Entlüftungsöffnung auf dem Dampfdeckel frei ist, ansonsten wird der Dampf aus anderen Stellen
entweichen.
- Platzieren Sie bitte das Gerät und seine heiße Komponenten nach der Nutzung außer Reichweite von Kindern und warnen Sie Kinder darüber, dass das Gerät heiß wird und nicht berührt werden darf.
- Das Austreten von Lebensmitteln: Vergewissern Sie sich, dass der Klingen-Dichtungsring richtig platziert ist und die Klingen-Baugruppe an dem Haltewinkel auf dem Boden gut befestigt ist. Eine fehlerhafte Installation kann zum Austreten von Lebensmitteln führen, welches das Gerät beschädigen kann.
\- Beschädigungen durch eine schlechte Belüftung: Vergewissern Sie sich, dass die Entlüftungsöffnungen auf der Rückseite der Haupteinheit durch keine Gegenstände blokiert sind, ansonsten kann das Gerät beschädigt werden.
\- Der Mixbehälter und anderes Zubehör darf ausschließlich mit dem zur Verfügung gestellten Stand benutzt werden. Benutzen Sie keine fremden Komponente mit diesem Gerät.
\- Vermeiden Sie das Auslaufen auf den Stecker.
\- Achten Sie bitte darauf, dass der Mixbehälter nach der Nutzung wegen der Restwärme immer noch heiß bleiben wird, um Verbrennungen zu vermeiden.
\- Dieses Gerät darf von Kindern ab 8 Jahre benutzt werden, solange sie beaufsichtigt werden oder Anweisungen erhielten, wie das Gerät sicher zu benutzen ist, und kennen die damit verbundenen Gefahren.
• Die Reinigung und Wartung dürfen nicht von Kindern durchgeführt werden, es sei den sie sind über 8 Jahre alt und werden von einem Erwachsenen beaufsichtigt.
\- Halten Sie das Gerät und sein Stromkabel außer Reichweite von Kindern unter 8 Jahren.
\- Während der Nutzung des elektrischen Gerätes müssen die grundliegenden Vorsichtsmaßnahmen
immer befolgt werden, um das Risiko eines Stromschlages, eines Brandes und/oder einer Körperverletzung im Falle eines Missbrauchs zu vermeiden.
- Vergewissern Sie sich, dass der Spannungswert auf dem Typenschild mit der Hauptspannung Ihrer Einrichtung übereinstimmt. Wenn dies nicht der Fall ist, kontaktieren Sie den Händler und schließen Sie das Gerät nicht an.
- Lassen Sie das Gerät im Betrieb niemals unbeaufsichtigt.
- Bedienen Sie das Gerät niemals von vorne, stellen Sie sich immer etwas seitlich, um Dampfverbrennungen zu vermeiden.
- Das Gerät darf nicht benutzt werden, wenn es fallen gelassen wurde, wenn es sichtbare Anzeichen einer Beschädigung aufweist oder eine Leckage hat.
- Bedienen Sie das Gerät nicht, wenn das Kabel oder der Stecker beschädigt sind, wenn es nicht richtig funktioniert, beschädigt oder fallen gelassen wurde. Wenn das Stromkabel beschädigt ist, muss es von dem Hersteller, seinem Dienstleister oder einer ähnlich qualifizierten Person ersetzt werden, um Gefahren zu vermeiden.
- Dieses Gerät ist für die Verwendung in Haushalten und ähnlichen Bereichen vorgesehen, wie z. B.
- Küchenbereiche in Geschäften, Büros und anderen Arbeitsumgebungen
- in Bauernhäusern
- in Hotels, Motels und anderen Wohnbereichen
- Gästezimmern.
•
VERPACKUNGSKONTROLLE
Nach dem Öffnen der Verpackung, entnehmen Sie bitte das gesamte Zubehör und überprüfen Sie dieses gemäß der Komponentenliste. Die folgenden Teile sind dabei:
1 Hauptteil 7 Dampfdeckel
2 Mixbehälter 8 Filterkorb
3 Behälterdeckel 9 Schmetterling
4 Messbecher 10 Spatel
5 Kleiner Dampfer 11 Rezeptbuch
6 Großer Dampfer

ZUBEHÖR
Mixbehälter-Baugruppe:
Der Behälter verfügt über Kapazitätsmarkierungen an den Seiten. Die maximale Kapazität des Behälters beträgt 2L.

Hinweis
Die Lebensmittelmenge im Mixbehälter darf 2.0L nicht überschreiten, ansonsten können die Lebensmittel austreten oder herausspritzen, was zu Gefahren führen kann.
Setzen Sie den Deckel auf den Behälter, drücken Sie den Sicherheitsschalter, drehen Sie den Deckel nach rechts, um diesen auf dem Behälter zu befestigen, sonst wird der Motor nicht starten. (Drücken Sie immer zuerst den Sicherheitsschalter, um den Deckel zu verriegeln oder zu öffnen)

natural_image
Three-step diagram showing a mechanical component with arrows indicating rotation or assembly (no text or symbols present)
Setzen Sie den Behälter ordnungsgemäß in die richtige Richtung auf die Haupteinheit, damit der Motor gestartet werden kann.

natural_image
Line drawings of two kitchen appliances: a blender and a four-tiered blender (no text or symbols)
Klingen-Baugruppe:
Befestigen Sie den Dichtungsring auf der Klingen-Baugruppe, setzen Sie diese durch die Öffnung in dem Behälterboden ein, halten Sie den oberen Teil der Klingen fest und drehen Sie diese mit der Bodenseite nach oben um, benutzen Sie den Haltewinkel, um die Klingen zu befestigen, indem Sie diese rechtläufig drehen. Führen Sie die Schritte in der umgekehrten Reihenfolge aus, wenn Sie die Klingen von dem Behälter abnehmen. Vergessern Sie den Dichtungsring zwischen der Klinge und dem Behälterboden nicht.

natural_image
Simple line drawing of a mechanical component with no text or symbols

natural_image
Diagram of a mechanical component with concentric rings and a curved arrow indicating rotation (no text or symbols)

natural_image
Cross-sectional diagram of a mechanical component with no visible text or symbols

natural_image
Line drawing of a hand holding a circular mechanical component with four blades (no text or symbols)
Hinweis
• Die Klinge ist sehr scharf. Wickeln Sie die Klinge bitte mit einem Tuch um, wenn Sie die Klingengrundlage montieren oder abnehmen.
\- Halten Sie bitte die Klingen-Baugruppe fest und entnehmen Sie diese vorsichtig, um sicherzustellen, dass diese nicht herunterfällt und keine Gefahren verursacht.
\- Vergewissern Sie sich bitte, dass der Haltewinkel und der Dichtungsring eingesetzt und an der Klingen-Baugruppe fest angeschlossen sind. Wenn der Dichtungsring nicht korrekt platziert ist, können die zubereitenden Lebensmittel austreten und das Gerät beschädigen.
Knetwelle-Baugruppe:
Entnehmen Sie die Klingen, befestigen Sie die Knetwelle auf die gleiche Weise wie die Klingen. Diese kann zum Kneten, Umrühren oder Mischen benutzt werden, ohne dass die Produkte geschnitten werden.


natural_image
Diagram of a mechanical component with concentric rings and a curved arrow indicating rotation (no text or symbols)

natural_image
Technical diagram of a mechanical component with concentric rings and mounting holes (no text or symbols)
Hinweis
- Benutzen Sie keine höheren Geschwindigkeitsstufen als 3, ansonsten kann dies starke Vibrationen des Gerätes verursachen und zu Risiken führen.
- Da der kleinste Abstand zwischen der Knetwelle und dem Behälter nur 1 cm beträgt, können die Produkte manchmal stecken bleiben, wobei der Motor aus Selbstschutz anhalten kann. Benutzen Sie den Spatel, um die Verstopfung umzurühren und zu entfernen, danach wird alles wieder normal funktionieren.
- Vergewissern Sie sich bitte, dass der Haltewinkel und der Dichtungsring eingesetzt und an der Klingen-Baugruppe fest angeschlossen sind. Wenn der Dichtungsring nicht korrekt platziert ist, können die zubereitenden Lebensmittel austreten und das Gerät beschädigen.
Messbecher:
\- Der Messbecher hat folgende Funktionen: Er misst bis zu 150ml und ist ein Teil des Deckels, um den Hitzeverlust oder Spritzer vorzubeugen.
\- Setzen Sie den Messbecher in die Öffnung des Deckels ein, drehen Sie diesen nach rechts, um ihn zu verriegeln.

natural_image
Simple line drawing of a cylindrical object with a flange base and two labeled points (a and b) on its top surface (no text or symbols beyond labels)

natural_image
Technical line drawing of a mechanical component with concentric circles and handle (no text or symbols)
Hinweis
\- Der Messbecher ist der einzige Komponent, der zum Abdecken der runden Öffnung in dem Deckel benutzt werden kann.
\- Bedecken Sie die Öffnung nicht mit anderen Gegenständen, um das Spritzen von Lebensmitteln zu vermeiden, dies kann zu Gefahren führen.
Spatel:
- Der Spatel ist der einzige Komponent, der zum Abkratzen von Produkte in dem Behälter benutzt werden kann. Andere Gegenstände können die Antihaftbeschichtung des Behälters beschädigen.
- Der Spatelgriff verfügt über eine kleine Rille, die zur Befestigung an dem Filterkorb dient.

natural_image
Line drawings of two kitchen utensils and a bucket with a brush (no text or symbols)
Hinweis
- Benutzen Sie den Spatel nicht zum Mischen, wenn die Klinge im Einsatz ist.
- Benutzen Sie den Spatel nicht, wenn der Schmetterling drinnen ist.
• Befestigen Sie den Griff sicher an dem Filterkorb, bevor Sie diesen anheben.
Filterkorb:
Der Korb hat viele Funktionen:
\- Sieb. Um den Obst- und Gemüsesaft abzusieben. Nach dem Mahlen, oder nachdem Sie mit dem Gerät Obstsaft gemacht haben, legen Sie den Korb in den Behälter, um den Saft besser auszugießen.
\- Um weiche Lebensmittel wie Pasta oder Nudeln zu dünsten;
\- Um Beilagen wie z.B. Reis oder Kartoffeln zuzubereiten

natural_image
Line drawings of two mechanical components with no visible text or symbols
Hiweis
- Setzen Sie den Spatelgriff in die Öffnung an der Kante des Korbes ein, um diesen in den Behälter einzusetzen oder ihn zu entnehmen.
- Wenn Sie den Wasserinhalt in den Produkten wie z.B. Tomaten reduzieren möchten, entnehmen Sie den Messbecher und setzen Sie den Korb an diese Stelle ein, So kann das Wasser einfach entfernt werden.
Schmetterling:
• Installiert auf der Klinge, kann der Schmetterling helfen, die Produkte zu mischen, ohne diese durch die Klingen zu schneiden, das Zusammenkleben zu verhindern und die Lebensmittel immer weiter zu vermengen.
- Befestigen Sie den Schmetterling auf der Klingen-Baugruppe an der Öffnung, und drücken Sie diesen mit ausreichend Kraft für eine gute Verbindung, drehen Sie die Schmetterlings-Stange linksläufig, damit diese an der Klinge verriegelt wird.

natural_image
Technical line drawing of a mechanical component with no visible text or symbols

natural_image
Line drawing of a mechanical device with a central tower and surrounding compartments (no text or symbols)
Hinweis
- Starten Sie das Gerät nicht, bevor der Schmetterling fixiert ist.
- Benutzen Sie die Geschwindigkeitsstufen nicht höher als 4 mit dem Schmitterling.
- Benutzen Sie keinen Spatel, wenn der Schmetterling im Einsatz ist.
- Fügen Sie keine Zutaten in den Behälter hinzu, wenn der Schmetterling im Einsatz ist, ansonsten kann der Schmetterling beschädigt oder blockiert werden.
Dampfer-Baugruppe:
Der Dampfer besteht aus drei Teilen: der kleine Dampfer, der große Dampfer und der deckel. Der deckel passt zu dem kleinen und dem großen Dampfer, und der große Dampfer kann in den kleinen eingesetzt werden.
Nehmen Sie den Behälterdeckel ab, setzen Sie den Dampfer auf den Behälter auf.

natural_image
Line drawing of a square pot with handles and central circular opening (no text or symbols)

natural_image
Illustration of three open cooking panes with different interior designs (no text or symbols)

natural_image
Black kitchen blender with digital display and control panel (no visible text or symbols)
Hinweis
• Vergewissern Sie sich bitte vor dem Dampfen, dass der Dampfdeckel aufgesetzt ist.
• Der Dampfer kann nicht in einer Mikrowelle oder anderen elektrischen Geräten verwendet werden.
- Berühren Sie die Öffnungen des Dampfdeckels nicht und kommen Sie nicht zu nah heran, um Verletzungen durch heißen Dampf zu vermeiden.
- Bedecken oder blockieren Sie die Öffnungen auf dem Dampfdeckel mit keinen Gegenständen, sonst kann der Dampf aus dem Rand oder anderen Stellen kommen und Gefahren verursachen.
GEBRAUCHSANLEITUNG
Am Anfang der Nutzung dieses Gerätes kann von dem Motor ein leicher Geruch kommen, was normal ist. Mit der Zeit wird dieser Geruch verschwinden.
- Platzieren Sie das Gerät bitte an einem sauberen, stabilen und flachen Tisch. Stellen Sie das Gerät nicht zu nah am Rand, und halten Sie es von Einbauschränken und Aufhängebügel fern.
- Bequemlichkeitshalber wird es empfohlen, das Gerät an einem festen Platz zu haben.
- Reinigen Sie bitte das Gerät sorgfältig vor der Nutzung.
• .Ein Piepton bedeutet, dass die Taste betätigt wurde.


STOPP/ ABBRUCH
\- Schließen Sie das Gerät an, schalten Sie den Schalter auf der Rückseite des Gerätes ein, ein Piepton ertönt, aber auf dem Display wird nichts angezeigt.

natural_image
Pure mechanical diagram showing a rope and cable assembly without any text, numbers, or symbols
- Drücken Sie auf diese Taste, alle hinteren Leuchten gehen an und das Gerät betritt den Ruhemodus, nun können Sie die gewünschten Funktionen auswählen.
- Wenn Sie auf diese Taste während der Einstellung drücken, werden alle Einstellungen zurückgesetzt, und das Gerät kehrt in den Ruhemodus zurück.
- Drücken Sie auf diese Taste während des Betriebs, das Gerät bricht den Betrieb sofort ab und kehrt in den Ruhemodus zurück.
- Drücken Sie auf diese Taste während
der DIY Aufnahme, das Gerät bricht den Betrieb ab und löscht die Aufnahme.
\- Das Gerät wird nach 30 Sekunden ohne Bedienung im Ruhemodus automatisch ausgeschaltet.
KNOPF (START/ PAUSE)
- Nachdem Sie die gewünschte Einstellung oder das Programm gewählt haben, drücken Sie auf die Taste, um direct loszulegen.
- Drücken Sie auf diese Taste während des Betriebsvorgangs, das Gerät wird den Betrieb unterbrechen und den Ruhemodus betreten, das LCD zeigt an (Der Nutzer kann den Deckel abnehmen, den Behälter entnehmen usw., aber alles muss vor dem Neustart richtig eingesetzt werden.) Drücken Sie auf diese Taste erneut, um den Betrieb aufzunehmen.
- Das Gerät wird nach 10 Sekunden ohne Bedienung im PAUSE-Modus automatisch ausgeschaltet.
Der Knopf dient auch dazu, den Timer, die Geschwindigkeit, die Temperatur, die Hitzestärke einzustellen, wobei diese beim Drehen rechtsläufig erhöht, und linksläufig verringt werden, oder eine unter 15 automatischen Programmen zu wählen.

TIMER
• Das LCD Display zeigt ☎ 88:88:88 an, dies bedeutet Stunden:Minuten:Sekunden.
- Drücken Sie auf die Timer-Taste und das Minuten-Signal auf dem LCD wird flimmern; Drehen Sie den Knopf, um die Minuten einzustellen. Drücken Sie die Taste erneut, das zweite Signal auf dem
LCD wird flimmern; Drehen Sie den Knopf, um die Sekunden einzustellen. Drücken Sie auf die Taste erneut, das Stunden-Signal wird flimmern, drehen Sie den Knopf, um die Stunden von 1 bis 12 einzustellen.
- Drücken Sie auf die Timer-Taste während des Betriebs, das Gerät wird sofort beginnen herunterzuzählen
- Max 60 Min bei der manuellen Einstellung; max 3 Stunden bei der DIY Einstellung. Für die Timerbegrenzungen für jedes Programm beziehen Sie sich bitte auf das untenstehende Kapitel "Menü".

Timer-Funktion
Halten Sie die

3

Sekunden lang gedrückt um den
Timer-Modus aufzurufen. Das

Zeitsymbol blinkt gleichzeitig mit dem Timer-Symbol auf. Auf die gleiche Weise wie Sie die Zeit einstellen, stellen Sie den Timer. Möglich zwischen 30 Minuten und 12 Stunden.
Der Timer-Modus kann nur mit DIY und MENU verwendet werden. Stellen Sie zuerst DIY ein oder wählen Sie MENU, drücken Sie den Knopf und der Timer ist aktiviert.
Drücken Sie die Reset-Taste um den Vorgang abzubrechen.

GESCHWINDIGKEIT
- Drücken Sie auf diese Taste im Ruhemodus oder während des Betriebs (außer einigen Autoprogrammen, wo die Geschwindigkeitseinstellung gesperrt ist), das Gerät betritt den Geschwindigkeits-Einstellmodus. Das Signal auf dem LCD wird flimmern, nun kann die Geschwindigkeit eingestellt werden. Drehen Sie den Knopf, um die gewünschte Geschwindigkeit zu wählen.
- Der Geschwindigkeitsbereich besteht aus Stufen 1-10.
- Drücken Sie auf diese Taste beim Misch-& Heizvorgang, wenn die Temperatur 60°C übersteigt, können nur die Stufen 1 bis 4 gewählt werden. Wenn eine höhere Geschwindigkeit eingestellt war, wird das Gerät automatisch bis Stufe 4 entschleunigen.
- Das Gerät verfügt über ein Transfergetriebe, es ist normal, ein kleines Geräusch zu hören, bevor der Motor startet, oder die Geschwindigkeit zwischen Stufen 5 und 6 wechselt.
- Zum Zerkleinern und Hacken von kleinen Produkten oder großen Mengen von Zutaten wird es empfohlen, zuerst die Geschwindigkeit 5 einzustellen, und dann auf die Geschwindigkeit 10 zu wechseln, um Vibrationen zu vermeiden und die beste Leistung zu erzielen.
- Benutzen Sie bitte die Stufen 8,9,10 für nicht länger als 5 Minuten auf einmal; benutzen Sie bitte die Stufen 5,6,7 für nicht länger als 10 Minuten auf einmal;
\- Drücken Sie auf diese Taste im Ruhemodus oder während des Heizvorgangs (außer einigen Autoprogrammen, wo die Temperatureinstellung gesperrt ist), das Gerät betritt den 888 Einstellmodus. Das Signal 📁 auf dem LCD wird flimmern, nun kann die Temperatur eingestellt werden. Drehen Sie den Knopf, um die gewünschte Temperatur zu wählen.
• Der Temperaturbereich: 37-120°C

HITZE-POWER
\- Drücken Sie auf diese Taste im Ruhemodus oder während des Heizvorgangs (außer einigen Autoprogrammen, wo die Hitze-Powereinstellung gesperrt ist), das Gerät betritt den Temperatur-Einstellmodus. Das Signal 📁 auf dem LCD wird flimmern, nun kann die Hitze eingestellt werden. Drehen Sie den Knopf, um die gewünschte Hitze-Power zu wählen.
• Die Hitze-Power besteht aus Stufen 1-10.
- Für manche klebrige Produkte wird es empfohlen, eine niedrige Hitze zu wählen, um das Anbrennen auf dem Boden zu vermeiden.
- Wenn die Zutatenmenge gering ist und diese eine bestimmte Temperatur benötigen, empfehlen wir Ihnen, eine niedrige Hitze zu wählen.
- Eine niedrige Hitze kann genauer kontrolliert werden; eine höhe Hitze-Power heizt schneller auf.
- Es wird nicht funktionieren, wenn Sie nur die Hitze-Power wählen, aber keine
Temperatur eingestellt haben. Es wird empfohlen, die Standardeinstellung zu befolgen, wenn Sie zwischen verschiedenen Temperaturstufen wählen.

SELBSTREINIGUNG
• Dieses Programm dient zu Reinigungszwecken nach der Nutzung.
- Fügen Sie Wasser ab 500ml bis 1 Liter hinzu.
- etwas Reinigungsmittel kann hilfreich sein.
- Der ganze Vorgang dauert ca. 10 Minuten.

TURBO
- Halten Sie diese Taste im Ruhemodus gedrückt, das Gerät wird auf der höchsten Geschwindigkeit funktionieren, es halt sofort an, sobald Sie die Taste loslassen.
- Wenn die Temperatur im Behälter 60°C übersteigt, PULS kann nicht benutzt werden, auf dem Bildschirm wird E11 angezeigt.
- Das Gerät verfügt über ein Transfergetriebe, es ist normal, ein kleines Geräusch zu hören, bevor der Motor mit dem ersten Puls startet.
• Die maximale Laufzeit für Puls ist 3 Minuten, mit einer 10-minütigen Pause.
• Mithilfe dieser Taste können Sie zwischen 10 folgenden automatischen Programmen wählen.


HACKEN (HACHER)
• DÜNSTEN (MIJOTE2)
• DAMPFEN (VAPEUR)
• DICKFLÜSSIGE SUPPE
(VELOUTE)
• SCHNELLE SUPPE
(SOUPE)
• RÜHREN (SAUCE)
• KNETEN (PETRIR)
• RISOTTO (Rice)
SMOOTHIE
• JOGHURT (YAOURT)
- Drücken Sie auf diese Taste im Ruhemodus, das SMOOTHIE Signal auf dem LCD fängt an zu flimmern, drehen Sie den Knopf, um das gewünschte Programm zu wählen.
• Nach der Beendung der Programmen SCHNELLE SUPPE; DICKFLÜSSIGE
SUPPE, RÜHREN, DÜNSTEN, REIS wird "End" angezeigt. Wenn das Gerät innerhalb von 10 Minuten nicht bedient wird, geht es automatisch in WARM HALTEN für 12 Stunden, bis Sie das Programm manuell stoppen. Manche Voreinstellungen des Programms sind einstellbar, auf dem Display werden tatsächliche Daten angezeigt; manche sind gesperrt, es wird „--“ auf dem Display angezeigt
Programme Standardeinstellung Einstellung Hinweise HACKEN *Geschwindigkeit: 5*Temperatur: 0*Hitzestärke: 0*Timer: 1 Min * Zum Zerkleinern, aber nicht zu einem Smoothie machen. Einstellbare Zeit, 1 Sek - 5 Min für die erforderliche Konsistenz * Nach 10 Minuten der Nichtnutzung nach der Programmbeendung geht das Gerät automatisch aus. *Die empfohlene Stückengröße der Zutaten bei festen Produkten wie Möhren oder Fleisch ist 1-2 cm.*Wenn Sie die Produkte am feinsten zerkleinern möchten, benutzen Sie bitte SMOOTHIE DÜNSTEN Schritt 1:* Geschwindigkeit : 0*Temperautr:100°C* Hitzestärke : 10*Timer: keine Begrenzung, bis es aufkochtSchritt 2:* Geschwindigkeit : 0*Temperatur: 90-95°C*Hitzestärke : keine genaue Angaben, kann sich je nach Temperatur und Essensmenge automatisch ändern*Timer: 3 St *Voreingestellte Zeit beträgt 3 Stunden, einstellbar von 1-12 St* Nach 10 Minuten der Nichtnutzung nach der Programmbeendung geht das Gerät automatisch in “WARM” Modus. *Langsam kochen DAMPFEN * Geschwindigkeit : 0*Temperatur: 120°C*Hitzestärke : 10*Timer: 20 Min *Einstellbare Zeit 15-60 Min.*Nach 10 Minuten der Nichtnutzung nach der Programmbeendung geht das Gerät automatisch in “WARM” Modus. *500g Wasser für jede 30 Minuten des Dampfens.*Gemüse 20 Min; Fleisch 30 Min. DICKFLÜSSIGESUPPE Schritt 1:* Geschwindigkeit : 0*Temperatur: 120*Hitzestärke : 10*Timer: bis es aufkochtSchritt 2:* Geschwindigkeit : 0*Temperatur: 100°C*Hitzestärke : 4*Timer: 29.5 MinSchritt 3:* Geschwindigkeit : 0*Temperatur: 0°C*Hitzestärke : 0*Timer: Bis 80°CabkühlenSchritt 4:* Geschwindigkeit : langsam von 6 bis 10*Temperatur: 0°C*Hitzestärke: 0*Timer: 1 Min * Passt zu einer Fleischsuppe, erst zerkleindern und dann kochen und umrühren.Einstellbare Zeit von 15-60 Min.*Nach 10 Minuten der Nichtnutzung nach der Programmbeendung geht das Gerät automatisch in “WARM” Modus. *Die empfohlene Stückengröbe der Zutaten bei festen Produkten wie Möhren oder Fleisch ist 1-2 cm.* Es empfehlt sich, nach dem Schritt 1 das Programm zu pausieren und den Schmetterling einzusetzen. SCHNELLESUPPE Schritt 1:* Geschwindigkeit : 10*Temperatur: 0*Hitzestärke: 0*Timer: 30 SekSchritt 2:* Geschwindigkeit : 2*Temperatur: 120°C*Hitzestärke: 10*Timer: bis es aufkochtSchritt 3:* Geschwindigkeit : 2*Temperatur: 100°C*Hitzestärke: 10*Timer: 19.5 Min * Passt zu einer Gemüsesuppe, erst zerkleindern und dann kochen und umrühren. Einstellbare Zeit von 15-60 Min.*Nach 10 Minuten der Nichtnutzung nach der Programmbeendung geht das Gerät automatisch in “WARM” Modus. * Die empfohlene Stückengröbe der Zutaten bei festen Produkten wie Möhren oder Fleisch ist 1-2 cm.* Es empfehlt sich, nach dem Schritt 1 das Programm zu pausieren und den Schmetterling einzusetzen. RÜHREN * Geschwindigkeit : 2*Temperatur: 100°C*Hitzestärke: 10*Timer: 30 Min * Einstellbare Geschwindigkeit, Stufen 0-3.*Einstellbare Temperatur, 90-120°C.*Einstellbare Zeit, 5-60 Min* Nach 10 Minuten der Nichtnutzung nach der Programmbeendung geht das Gerät automatisch in “WARM” Modus. * Benutzen Sie den Schmetterling oder die Knetschaufel KNETEN Schritt 1:* Geschwindigkeit : 3*Temperatur: 0*Hitzestärke: 0*Timer: 3 MinSchritt 2:* Geschwindigkeit : 2*Temperatur: 0*Hitzestärke: 0*Timer: 7 Min *Einstellbare Geschwindigkeit, Stufen 2-3;*Einstellbare Temperatur bei 0 oder 37°C zum Ausdehnen.*Einstellbare Zeit, 3-20 Min* Nach 10 Minuten der Nichtnutzung nach der Programmbeendung geht das Gerät automatisch aus. *Brotteig kneten:330g Wasser +500g Mehl +andere Zutaten; 10Min bei der Voreinstellung kneten.*Nudelteig kneten: 200g Wasser + 400g Mehl; 3 Minuten bei Geschwindigkeit 2 kneten.*Die eingestellte Temperatur zum Ausdehnen ist 37°C, wenn es nicht gut dehnt, wählen Sie 37°C für weitere 30 Minuten ohne der Geschwindigkeit. RISOTTO Schritt 1:* Geschwindigkeit : 0*Temperautr:100°C*Hitzestärke: 6*Timer: bis es aufkochtSchritt 1:* Geschwindigkeit : 1*Temperautr:965°C*Hitzestärke: 4*Timer: 18 MinHitzestärke & Timer: keine genaue Angaben, kann sich je nach Temperatur und Menge automatisch ändern *Alle Einstellungen sind nicht einstellbar.*Nach 10 Minuten der Nichtnutzung nach der Programmbeendung geht das Gerät automatisch in “WARM” Modus. *Empfohlene Menge (max): 500g Reis +800g Wasser, lassen Sie REIS bei der Voreinstellung laufen. Eine Reiskruste wird auf dem Boden entstehen.* Oder Reis bei der folgenden Einstellung dampfen: 400g Reis in den Filterkorb, 2L Wasser, wählen Sie KOCHEN, dann gießen Sie etwas Wasser aus, damit 1L bleibt, und wählen Sie DAMPF für 20 Min. SMOOTHIE * Geschwindigkeit : 10*Temperatur: 0*Hitzestärke: 0*Timer: 30 Sek *Alle Einstellungen sind nicht einstellbar, lassen Sie das Gerät noch Mal laufen, wenn die Konsistenz nicht fein genug ist.* Nach 10 Minuten der Nichtnutzung nach der Programmbeendung geht das Gerät automatisch aus. Die empfohlene Stückengröße der Zutaten bei festen Produkten wie Möhren oder Fleisch ist 1-2 cm. JOGHURT * Geschwindigkeit : 1 bei den ersten 30 Min, dann stoppen*Temperatur: 37-39°C*Hitzestärke: 1*Timer: 6 St. *Einstellbare Zeit, 3-12 St.* Nach 10 Minuten der Nichtnutzung nach der Programmbeendung geht das Gerät automatisch aus. * Empfohlene Menge: 1 Becher Joghurt + 1L frische Milch + Zucker, 6-12 Sunden je nach der gewünschten Konsistenz.
Tools Abbildung Funktion Geschwin. Kapazität Betriebszeit Schneideklinge 
HACKEN, aber nicht bis zum Smoothie Zustand 5 2L max, in 1-2cm große Stücke vor dem Betrieb hacken 1 Min Zu kleinsten Stücken HACKEN 10 2L max, in 1-2cm große Stücke vor dem Betrieb hacken 1 Min Knetschaufel 
Den Teig für Brot, Pizza usw. kneten 2-3 800g Mehl max 5-10 Min Den Teig für Nudeln kneten 2 500g Mehl max 3 Min Schmetterling 
Umrühren 1-3 2L max 30 Min Eisweiß oder Sahne aufschlagen 4 2L max 10 Min Dampfer 
Gemüse dämpfen K/A 3.5L max 15 Min Fleisch dämpfen K/A 3.5L max 20-30 Min
Empfohlene Geschwindigkeit und Kapazität für jedes Komponent:
FEHLERSUCHE
\- Das Erscheinen der unten aufgeführten Fehlermeldungen ist normal. Wenn der Fehler immer noch besteht, nachdem Sie gemäß der vorgeschlagenen Lösung gehandelt haben, kontaktieren Sie bitte unsere Kundendienst.
Fehlercode Beschreibung Mögliche Ursachen Lösung E1 Der Sicherheitsschalter ist nicht fixiert. Der Behälter oder der Behälterdeckel sind nicht richtig fixiert. Fixieren Sie den Behälter und den Behälter-Deckel erneut, vergewissern Sie sich, dass alle Teile richtig und fest montiert sind. E2 Das Temperatur-Sensor fehlt. Der Behälter ist nicht eingesetzt oder die Verbindung zwischen dem Temperatursensor und der Behälter-Grundlage ist beschädigt. Montieren Sie den Behälter erneut und vergewissern Sie sich, dass dieser ordentlich und fest fixiert ist. E3 Der Motor ist blokiert. Der Behälter ist überladen. Verringern Sie die Essensmenge in dem Behälter, oder schneiden Sie die Zutaten in kleinere Stücke, und starten Sie das Gerät neu. E4 Die Temperatur ist zu hoch. Keine Lebensmittel in dem Behälter oder zu wenig Zutaten bei einer höhen Temperatureinstellung für zu lange. Fügen Sie die Lebensmittel in den Behälter hinzu. E5 Die Motortemperatur ist zu hoch. Das Gerät läuft bei einer höheren Einstellung für zu lange. Pausieren Sie das Gerät und lassen Sie es abkühlen, bevor Sie es neustarten. E7 Fehler in der Übertragungsgeschwindigkeit. Der Geschwindigkeitswechsel zwischen unteren Stufen (1-5) und höheren Stufen (6-10) ist blokiert. Entnehmen Sie den Behälter, drehen Sie die untere Kupplung manuell, befestigen Sie den Behälter und starten Sie das Gerät erneut. E8 Der Motor NTC fehlt. Die Verbindung mit dem Motor-Temperatursensor ist unterbrochen. Benutzen Sie das Gerät nicht und schicken Sie dieses zu einer Kundendienst-Servicestelle zur Reparatur. E11 “Puls” kann nicht benutzt werden. Die Temperatur im Behälter ist über 90°C. Kühlen Sie die Zutaten ab und schalten Sie “Puls” erneut ein, oder benutzen Sie die niedrigere Geschwindigkeit 4.
Ihr Gerät reinigen
1. Reinigen Sie KEINE Teile des Gerätes in einer Spülmaschine. Reinigen Sie das Gerät immer sorgfältig nach jedem Gebrauch, oder wenn es für eine längere Zeit nicht benutzt wird.
2. Trennen Sie das Gerät vom Netz und lassen Sie dieses vor der Reinigung abkühlen.
3. Reinigen Sie den abnehmbaren Kochtopf mit warmem Seifenwasser. waschen Sie ihm ab und trocknen Sie deisen gut.
4. Wischen Sie die Haupteinheit mit einem sauberen feuchten Tuch ab. Wenn Essensreste daran bleiben, befeuchten Sie das Tuch vorm Abwischen in Seifenwasser. Tauchen Sie die Haupteinheit NIEMALS in Wasser oder andere Flüssigkeiten. Wischen Sie den stationären Topf wie notwendig ab, um jegliche Essensreste zu entfernen.
5. Um eine gute Leistung Ihres Suppenbereiters aufrechtzuerhalten, muss der Boden des abnehmbaren Kochtopfes kontrolliert und, wenn nötig, nach jedem Gebrauch gereinigt werden, Wischen Sie
diesen mit einem weichen feuchten Tuch ab und trocknen Sie ihn sorgfältig vor der Nutzung.
6. Wenn der Suppenbereiter für eine längere Zeit nicht benutzt wird, trennen Sie diesen von der Stromversorgung und bewahren Sie das Gerät an einem trockenen und sauberen Ort auf.

FINDEN SIE ALLE UNSERE REZEPTE:
http://dl.hkoenig.com/SiteHkoenig/Livrederecettes\_HK8.pdf
Oder scannen Sie den QR-Code:

GARANTIE
Die Garantiezeit für unsere Produkte beträgt 2 Jahre, sofern keine anderen Bestimmungen gelten, ab dem Datum des ursprünglichen Kaufs oder ab dem Lieferdatum.
Bei Problemen oder Fragen können Sie sich an unsere Hilfeseiten, Tipps zur Fehlerbehebung, FAQs und Bedienungsanleitungen auf unserer Kundendienst-Website wenden: https://sav.hkoenig.com.
Wenn Sie den Referenznamen Ihres Geräts in die Suchleiste eingeben, erhalten Sie Zugang zu allen verfügbaren Online-Supports.
Wenn Sie immer noch keine Antwort auf Ihre Frage oder Ihr Problem finden, dann klicken Sie auf "Hat die Antwort Ihr Problem gelöst?". Sie können dieses Formular ausfüllen, um Ihre Anfrage zu bestätigen und Hilfe zu erhalten.
GARANTIEBEDINGUNGEN
Die Garantie deckt alle Defekte ab, die bei normalem, bestimmungsgemäßem Gebrauch und den in der Bedienungsanleitung enthaltenen Spezifikationen auftreten.
Diese Garantie gilt nicht für Probleme mit der Verpackung oder dem Transport während des Versands des Produkts durch den Eigentümer. Sie umfasst auch nicht den normalen Verschleiß des Produkts, die Wartung oder den Austausch von Verschleißteilen.
AUSSCHLUSS DER GARANTIE
- Zubehör und Verschleißteile (\*).
- Die normale Wartung des Geräts.
- Alle Defekte, die durch unsachgemäßen Gebrauch (Stöße, Nichteinhaltung der empfohlenen Stromzufuhr, schlechte Nutzungsbedingungen usw.), unzureichende Wartung oder Zweckentfremdung des Geräts auftreten, sowie die Verwendung von ungeeignetem Zubehör.
- Schäden durch äußere Einflüsse: Brand, Wasserschäden, elektrische Überspannung usw.
- Alle Geräte, die von anderen als den befugten Personen (insbesondere dem Nutzer) auch nur teilweise auseinandergebaut wurden.
- Produkte, deren Seriennummer fehlt, beschädigt oder unleserlich ist, sodass sie nicht identifiziert werden können.
- Produkte, die vermietet, vorgeführt oder ausgestellt werden.
(\*) Einige Teile Ihres Geräts, die als Verschleißteile oder Verbrauchsmaterialien bezeichnet werden, verschleiben mit der Zeit und der Häufigkeit der Nutzung Ihres Geräts. Diese Abnutzung ist normal, kann aber durch falsche Nutzung oder Pflege Ihres Geräts noch verstärkt werden. Diese Teile sind daher nicht durch die Garantie abgedeckt.
Das mit dem Gerät gelieferte Zubehör ist ebenfalls von der Garantie ausgeschlossen. Sie können daher weder umgetauscht noch erstattet werden. Einige Zubehörteile können jedoch direkt über unsere Website https://sav.hkoenig.com/ erworben werden.
ERSETZUNG DER KLINGE

Diese Markierung zeigt an, dass dieses Produkt in der EU nicht zusammen mit anderen Hausabfällen entsorgt werden sollte. Um schädliche Auswirkungen auf Umwelt oder Gesundheit durch unsachgemäße Entsorgung zu verhindern, führen Sie es einer fachgerechten Entsorgung zu, um die umweltverträgliche Wiederverwendung von Materialressourcen zu fördern. Verwenden Sie zur Rückgabe Ihres gebrauchten Gerätes bitte die entsprechenden Rückgabe- und Sammelsysteme, oder wenden Sie sich an den Händler, bei dem das Produkt gekauft wurde. Er kann dieses Produkt annehmen und einer umweltfreundlichen Wiederverwertung zuführen.
NEDERLANDS
Belangrijke veiligheidsinstructies
De volgende veiligheidsvoorzorgsmaatregelen dienen altijd te worden opgevolgd, om het risico op elektrische schok, verwondingen of vuur te verkleinen. Het is belangrijk om al deze instructies zorgvuldig te lezen voordat u het product gebruikt, en bewaar ze voor toekomstig gebruik of voor nieuwe gebruikers.
\- Dit apparaat kan gebruikt worden door personen met beperkte geestelijke of lichamelijke capaciteiten, of met een gebrek aan ervaring en kennis, zolang ze toezicht krijgen of instructies voor veilig gebruik van dit apparaat hebben gehad en ze de bijbehorende gevaren begrijpen. Kinderen mogen er niet mee spelen.
\- Dit apparaat kan worden gebruikt door personen met verminderde fysieke, zintuiglijke of mentale vermogens of met gebrek aan ervaring of kennis, op voorwaarde dat zij onder toezicht staan of instructies hebben gekregen over het veilige gebruik van het apparaat en dat zij de mogelijke gevaren volledig begrijpen.
\- Waarschuwing: verkeerd gebruik kan tot verwondingen leiden. U dient voorzichtig te zijn met de scherpe messen bij het legen en tijdens het schoonmaken.
\- Schakel het apparaat uit en haal de stekker uit het stopcontact voor het wisselen van accessoires en als u in de buurt van onderdelen komt die tijdens gebruik bewegen. Altijd de stekker uit het stopcontact halen als het apparaat onbeheerd wordt achtergelaten en voor assemblage, uit elkaar halen of het schoonmaken.
\- Als de stroomkabel beschadigd is, moet het worden vervangen door de fabrikant, een monteur of een gekwalificeerd persoon om gevaren te vermijden.
- Accessoires, naast de meegeleverde, moeten voorzien zijn van instructies voor veilig gebruik.
- WAARSCHUWING: Niet de deksel verwijderen als het water kookt. Gebruik geen hogere snelheid dan niveau 4 als de temperatuur hoger is dan 90 graden Celsius.
- Het apparaat mag niet ondergedompeld worden.
- Dit apparaat is bedoeld voor gebruik in huishoudens en soortgelijke ruimten, zoals:
\- keukenruimten in winkels, kantoren en andere werkomgevingen
\- in boerderijen
\- in hotels, motels en andere woonwijken
\- gastenkamers.
\- Plaats het apparaat op een stabiele, vlakke tafel die niet heet wordt en zorg voor voldoende ruimte tot de rand zodat het er niet af kan vallen. Als het gebruikt wordt voor het kneden van deeg of het hakken van voedsel, kan het apparaat zich verplaatsen door de trillingen. Dus gebruik het niet zonder toezicht van een persoon om zo te voorkomen dat er iets op de grond valt.
\- Trek de stekker uit het stopcontact bij het schoonmaken of als het langere tijd niet gebruikt wordt.
\- Controleer regelmatig of de basis, kan, stomer of andere onderdelen niet beschadigd zijn. Beschadigde onderdelen zorgen voor minder veilig gebruik. Als er een mankement is gevonden, gebruik het dan niet meer en neem contact op met onze klantenservice.
\- Als het apparaat onverwachts stopt of niet goed lijkt te werken, schakel het dan uit en haal de stekker uit het stopcontact en gebruik het niet meer. Zoek professioneel advies om het mankement te verhelpen of voor reparaties.
\- De maatbeker is het enige onderdeel dat gebruikt kan worden om het gat in de deksel te dichten.
Gebruik geen doek of andere dingen om het gat af te dichten.
\- Raak niet de randen van de messen aan. Wees voorzichtig en houd het bovenste stuk vast als u het mes plaatst of weghaalt.
\- Let op de capaciteitsmarkering op de kan.
\- Open de deksel pas als het voëdsel in de kan niet meer draait.
\- Let op bij het hete voedsel als u de deksel opent. Plaats de maatbeker correct op de deksel als bij het bewerken van voedsel.
\- Raak de kan niet aan bij voedsel met een temperatuur boven 60°C.
\- Zörg dat de stomer en de kan goed zijn aangesloten bij gebruik van de stomer.
\- Let op dat er stoom zal ontsnappen bij de deksel of langs de zijkanten.
\- Tijdens gebruik mag de stomer alleen aangeraakt worden bij de handgrepen.
\- Niet de stomer gebruiken zonder dat de stomerdeksel geplaatst is.
\- Bij het openen van de stomerdeksel moet u oppassen dat u zich niet verbrandt door de stoom.
\- Bij de stoom- en kookfunctie dient u er rekening mee te houden dat stoom uit de mond van de kan zal komen als u de stomer verplaatst.
\- Controleer dat de ventilatieopening op de stomerdeksel niet geblokkeerd is, anders kan de stoom ergens anders ontsnappen.
\- Plaats het apparaat en zijn hete onderdelen na gebruik op een plek buiten het bereik van kinderen en waarschuw ze dat het apparaat heet zal zijn en dat ze het niet mogen aanraken.
\- Lekkage van voedsel: Zorg dat de afdichtring van het mes goed geplaatst is en het mes stevig vastzit door het plaatsen van de klem onderop. Het niet goed plaatsen leidt tot lekkage van voedsel, wat leidt tot
schade aan het apparaat.
\- Schade door slechte ventilatie: Zorg dat de ventilatieopeningen aan de achterkant van de behuizing niet geblokkeerd worden, anders kan het apparaat beschadigd raken.
\- De kan en alle accessoires dienen alleen te worden gebruikt met de meegeleverde houder. Gebruik geen andere onderdelen van andere apparaten.
• Let op dat u vermijdt te morsen op de aansluiting.
\- De kan zal nog steeds heet zijn na gebruik, pas op dat u zich niet verbrandt.
\- Dit apparaat mag gebruikt worden door kinderen van minimaal 8 jaar als er toezicht wordt gehouden en ze instructies hebben gehad over hoe ze het apparaat moeten gebruiken en ze de gevaren begrijpen.
\- Het schoonmaken en onderhoud mag niet worden uitgevoerd door kinderen tenzij ze 8 jaar of ouder zijn en er toezicht is.
\- Houd het apparaat en de stroomkabel uit de buurt van kinderen jonger dan 8 jaar.
\- Bij het gebruik van elektrische apparaten moeten altijd de standaard veiligheidsinstructies worden opgevolgd om de kans op vuur, elektrische schokken en/of verwondingen te voorkomen.
\- Controleer dat de aangegeven spanning op het typeplaatje overeenkomt met de spanning van uw voedingsbron. Als dit niet het geval is, neem dan contact op met de dealer en sluit het apparaat niet aan.
\- Laat het apparaat nooit onbeheerd achter tijdens gebruik.
\- Nooit het apparaat van voren openen, plaats uzelf iets naar de zijkant om te vermijden dat u zich verbrandt door stoom.
\- Het apparaat mag niet gebruikt worden als het gevallen is, als er duidelijk zichtbare schade is of als
het lekt.
\- Niet het apparaat gebruiken als deze een beschadigde kabel of stekker heeft, als het niet goed werkt of beschadigd of gevallen is. Als de stroomkabel beschadigd is, moet het worden vervangen door de fabrikant, een servicemonteur of een gelijkwaardig gekwalificeerd persoon om gevaren te vermijden.
CONTROLEER INHOUD
Haal na het openen van de doos alle accessoires eruit en leer ze kennen aan de hand van de onderdelenlijst. De onderdelenlijst ziet er als volgt uit:
1 Hoofdbehuizing 7 Stomerdeksel
2 Mengkan 8 Filtermand
3 Deksel van de kan 9 Vlinder
4 Maatbeker 10 Spatel
5 Kleine stomer 11 Receptenboek
6 Grote stomer

ACCESSOIRES
Assemblage mengkan:
Er staan capaciteitsmarkeringen op één zijde van de kan. De maximale capaciteit van de kan is 2 liter.

Opmerking
De hoeveelheid voedsel in de
kan mag niet de 2 liter
overschrijden, anders kan
het voedsel overstromen en
voor gevaar zorgen.
Plaats de deksel op de kan, druk op de veiligheidsschakelaar, draai de deksel tegen de klok in op de kan, anders kan de motor niet ingeschakeld worden. (Druk altijd eerst op de veilidheidsschakelaar om het deksel te vergrendelen of te openen)

natural_image
Three-step mechanical assembly diagram showing progressive assembly of a cylindrical component (no text or labels)
Plaats de kan op de basis in de juiste richting en zorg dat deze er goed op zit, anders kan de motor niet ingeschakeld worden.

natural_image
Line drawings of two kitchen appliances: a blender and a toaster, both with digital display screens (no text or symbols)
Assemblage mes :
Plaats de afdichtring bij de assemblage van het mes, plaats het door het gat in de bodem van de kan, houd het mes goed vast en draai deze andersom, gebruik de klem om het mes vast te zetten door met de klok mee te draaien. Doe het tegenovergestelde om het van de kan te verwijderen. Vergeet niet de afdichtring te plaatsen tussen het mes en de bodem van de kan.


natural_image
Line drawing of a mechanical component with a central hub and four blades (no text or symbols)
Opmerking
- Het mes is zeer scherp. Dek het mes af met een doek bij de assemblage of het verwijderen.
- Houd het mes stevig vast en haal deze er voorzichtig uit om te zorger dat het niet zal vallen of voor gevaar zorgt.
- Zorg dat de klem en de afdichtring stevig op hun plek zitten bij de plaatsing van het mes. Als de afdichtring niet juist geplaatst is, kan er gemixte of gekookte voedsel weglekken en het apparaat
Assemblage kneed-as:
Verwijder het mes, plaats de kneed-as op dezelfde manier als het mes. Het kan gebruikt worden voor kneden, roeren of mixen zonder het voedsel te malen.

Opmerking
\- Gebruik geen hogere snelheid dan 3, anders kunnen de vibraties een risico vormen voor het apparaat.
\- Omdat de kleinste afstand bij het mixen tussen de roerder en de wand van de kan maar 1 cm is, kan het voedsel soms vast komen te zitten en dan stopt de motor uit zelfbescherming. Gebruik een spatel om het vastzittende voedsel los te maken en het zal weer werken.
\- Zorg dat de klem en de afdichtring stevig op hun plek zitten bij de plaatsing van het mes. Als de afdichtring niet juist geplaatst is, kan er gemixte of gekookte voedsel weglekken en het apparaat beschadigen.
Maatbeker:
\- De maatbeker heeft veel functies: het hoort bij de deksel om gespetter en verlies van warmte te voorkomen; je kunt er ingrediënten mee meten tot een capaciteit van 150 ml.
\- Plaat de maatbeker in het dekselgat, draai hem met de klok mee op de deksel.

Opmerking
\- De maatbeker is het enige onderdeel dat gebruikt kan worden om het ronde gat in de deksel af te dichten.
• Dicht het gat niet af met andere
voorwerpen om gespetter tegen te
Spatel:
\- Alleen de spatel mag gebruikt worden om voedsel uit de kan te schrapen. Andere voorwerpen kunnen de antihechtlaag in de kan beschadigen.
• Er zit een inkeping in de handgreep van de spatel waarmee die in de filtermand past.

natural_image
Line drawings of two kitchen utensils: a handle and a measuring tool (no text or symbols)

natural_image
Line drawing of a small bowl with a spoon, no text or symbols present
Opmerking
- Gebruik hem niet om te roeren als het mes draait.
- Gebruik de spatel niet als de vlinder in het apparaat zit.
Filtermand:
De mand heeft vele functies:
\- Zeven. Filter sap van fruit en groente. Na het persen of het maken van fruitsaus met het apparaat plaats u de mand in de kan om het sap eruit te gieten.
\- Stoven van zacht voedsel zoals pasta of noedels;
\- Bereid bijgerechten zoals rijst en aardappeltjes.

natural_image
Technical line drawing of a mechanical component with two views (top and side), no text or symbols present.
Opmerking
\- Gebruik de handgreep van de spatel aan de rand van de mand om deze te plaatsen of te verwijderen.
\- Als u wat water bij het voedsel wil verwijderen, zoals bij tomaten, neem dan de maatbeker weg en dek het af met de mand. Het water kan dan eenvoudig worden verwijderd.
Vlinder:
\- Geplaatst op het mes, kan de vlinder helpen bij het mixen van voedsel zonder dat de messen het hakken, en het voorkomt dat het voedsel samenklontert en het blijft mengen.
\- Plaats de vlinder op het mes door het gat en druk er stevig op voor een goede verbinding, draai de vlinder tegen de klok in om hem vast te zetten op het mes.

natural_image
Technical line drawing of a mechanical component with no visible text or symbols

natural_image
Line drawing of a mechanical device with a central tower and two adjacent panels (no text or symbols)
Opmerking
\- Start het apparaat niet voordat de vlinder goed op zijn plek zit.
\- Gebruik geen hogere snelheid dan 4 bij gebruik van de vlinder.
\- Gebruik geen spatel bij gebruik van de vlinder.
\- Voeg geen ingrediënten toe in de kan als het apparaat in werking is met de vlinder, anders kan de vlinder beschadigd of geblokkeerd raken.
Assemblage stomer:
De stomer bestaat uit drie onderdelen: Kleine stomer, grote stomer, deksel. De deksel past op zowel de kleine stomer als de grote stomer, en de grote stomer past op de kleine stomer.
Verwijder deksel van de kan, plaats de stomer op de kan.

natural_image
Line drawing of a square-shaped container with handles and a central circular hole (no text or symbols)

natural_image
Illustration of a cooking pan with three panes and a lid (no text or symbols)

natural_image
Black kitchen blender with digital display and control panel (no visible text or symbols)
Opmerking
- Controleer dat de stomerdeksel goed geplaatst is voor het stomen.
- De stomer mag niet gebruikt worden in een magnetron of andere elektrische apparaten.
- Kom niet in de buurt van de stoomopeningen van de stomerdeksel om te voorkomen dat de hete stoom u verwondt.
- Dek de openingen van de stomer niet af, want anders kan de stoom bij de rand of andere plekken ontsnappen en zo voor gevaar zorgen.
INSTRUCTIES VOOR GEBRUIK
Bij de eerste keren dat u dit apparaat gebruikt, kan er een lichte geur vrijkomen van de motor, dat is normaal. Na een tijdje verdwijnt deze geur vanzelf.
- Plaats het apparaat op een lege, stabiele en vlakke tafel. Plaats het niet te dicht bij de rand en houdt het weg bij ophangbeugels.
- Het is beter om het apparaat op een vaste ondergrond te plaatsen.
- Maak het apparaat grondig schoon voor gebruik.
- Een 'piep' geeft aan dat een knop is ingedrukt.


STOP/ CANCEL
\- Steek de stekker in het stopcontact, schakel het apparaat in met de knop op de achterkant, het apparaat piept maar het display brandt niet.

natural_image
Pure mechanical diagram showing a rope and cable assembly without any text, numbers, or symbols
- Druk op deze knop en de verlichting brandt en de stand-by-modus wordt gestart, kies de gewenste functie.
- Druk op deze knop tijdens het instellen en instellingen worden gewist en het apparaat gaat terug naar stand-by-modus.
- Druk op deze knop als het apparaat in werking is en het stopt dan en gaat terug naar stand-by-modus.
- Druk op deze knop tijdens het opnameproces en het apparaat annuleert de opname.
- Het apparaat zal zich automatisch
uitschakelen na 30 s in stand-by-modus.
KNOP (START/PAUSE)
- Na het selecteren van de gewenste instelling of programma drukt u op deze knop om meteen te beginnen.
- Druk op deze knop als het apparaat in werking is en het stopt en gaat in standby-modus, het display toont PRA (De gebruiker kan de deksel openen, de kan weghalen, etc. Maar alles moet weer terug zijn geplaatst voor een herstart). Druk nog een keer en het apparaat werkt weer.
- Het apparaat schakelt automatisch uit na 10 minuten in pauze-stand.
- Het is ook een knop voor het instellen van de timer, snelheid, temperatuur, warmtevermogen. Met de klok mee verhoogt het en tegen de klok verlaagt het, of kies een van 15 automatische programma's.
•

TIMER
- Het display toont ☐ 00:00:00, dit geeft uren: minuten: seconden aan.
- Druk op de timer knop en de minuten op het display gaan knipperen; draai de knop om de minuten aan te passen. Druk nog een keer en het tweede getal op het display gaat knipperen, draai de knop om de seconden aan te passen. Druk nog een keer en de uren op het display gaan knipperen, draai de knop om de uren tussen 1 en 12 te kiezen.
- Druk op de timer als het apparaat in werking is en deze gaat meteen aftellen.
• Max 60 min bij een standaard-
instelling; max 3 uur bij een zelf ingesteld programma. De timerlimiet voor elk programma kunt vinden bij hoofdstuk
'MENU' hieronder.

Afspraak functie


Houd de tijdknop 3 seconden ingedrukt om de reserveringsmodus te openen. De tijd knippert met het afspraakpictogram. Op dezelfde manier ingesteld om de tijd in te stellen, is de duur 30 minuten tot 12 uur.
Afspraakmodus kan alleen worden gebruikt met DIY en MENU. Stel eerst DIY in of selecteer MENU, druk op de knop en de tijd begint af te tellen.
Druk op de resetknop om te
annuleren

SNELHEID
- Druk op deze knop tijdens stand-by-modus of als het apparaat in werking is (op sommige programma's na waar de snelheid vaststaat), het apparaa gaat dan in snelheidinstellingmodus. Het +teken op het display knippert, dan is de snelheid aanpasbaar. Draai aan de knop voor de gewenste snelheid.
- De snelheid is instelbaar tussen 1 en 10.
- Druk op deze knop tijdens het mengen & verwarmen, als de ingestelde of huidige temperatuur boven 60°C is, kan alleen snelheden 1 tot 4 worden gekozen. Als het apparaat sneller draaide, vertraagt hij automatisch naar 4.
- Er zit een snelheidsoverbrenging in het apparaat, dus is het normaal wat te
horen voordat de motor draait, of bij een verhoging van 5 naar 6.
- Bij het malen of hakken van hard voedsel of van grote volumes wordt aanbevolen eerst snelheid 5 te gebruiken en dan te verhogen naar 10 om vibraties te vermijden en voor het beste resultaat.
- Gebruik snelheden 8, 9 en 10 niet langer dan 5 minuten; gebruik snelheden 5, 6 en 7 niet langer dan 10 minuten.

TEMPERATUUR
\- Druk op deze knop tijdens stand-by-modus of als het apparaat opwarmt (op sommige programma's na waar de temperatuur vaststaat), het apparaat gaat dan in temperatuurinstellingmodus. Het teken op het display knippert, dan is de temperatuur aanpasbaar. Draai de knop naar de gewenste temperatuur.
• Temperatuurbereik: 37-120°C

WARMTEVERMOGEN
\- Druk op deze knop tijdens stand-by-modus of als het apparaat verwarmt (op sommige programma's na waar het warmtevermogen vaststaat), het apparaat gaat dan in temperatuurinstellingmodus. Het teken op het display knippert, dan is het warmtevermogen aanpasbaar. Draai de knop naar het gewenste warmtevermogen.
- Het warmtevermogen is aanpasbaar tussen 1 en 10.
- Kies bij plakkerig voedsel een laag warmtevermogen, zodat niets aanbrandt op de bodem.
- Als er weinig voedsel is en een precieze temperatuur gewenst is, kiest u een laag warmtevermogen.
- Laag warmtevermogen is beter te controleren; Hoog warmtevermogen verwarmt sneller.
- Het werkt niet als er naast het warmtevermogen geen temperatuur wordt geselecteerd. Het wordt aangeraden de standaard instelling te gebruiken bij het kiezen van andere temperaturen.

ZELFREINIGEND
- Dit programma is bedoeld voor reiniging na gebruik.
• Voeg een hoeveelheid water toe tussen 500ml en 1 liter.
- Wat schoonmaakmiddel kan helpen.
- Het hele proces duurt 10 minuten.

TURBO
- Houdt deze knop ingedrukt in stand-by-modus, de machine werkt dan op maximale snelheid, laat hem los en het stopt meteen.
- Als de temperatuur in de kan boven de 60°C is, kan PULSE niet gebruikt worden, dan wordt E11 getoond.
- Er zit een snelheidsoverbrenging in het apparaat, het is normaal wat te horen voordat de motor draait.
- De maximale gebruikstijd bij Pulse is 3 minuten en voor de rest 10.

MENU
\- Met deze knop kunt u uit de 10 standaard programma's kiezen.
geblokkeerd en tonen ‘-’ op het scherm zoals hieronder

• HAKKEN (HACHER)
• STOVEN (MIJOTE2)
• STOOM (VAPEUR)
• DIKKE SOEP (VELOUTE)
• SNELLE SOEP (SOUPE)
- ROEREN (SAUCE)
- KNEDEN (PETRIR)
• RISOTTO (Rice)
- SMOOTHIE
• YOGHURT (YAOURT
\- Druk op deze knop in stand-by-modus, het SMOOTHIE-teken op het display brandt, draai aan de knop voor het juiste programma.
\- Bij de programma's SNELLE SOEP, DIKKE SOEP, ROEREN, STOVEN, RISOTTO wordt na volbrenging 'Einde' getoond. Na 10 minuten zonder actie, wordt WARM HOUDEN ingeschakeld voor maximaal 12 uur, tenzij u het stopt.
Sommige standaard instellingen zijn aanpasbaar, er wordt dan echte info op het display getoond; sommige zijn
Programma's Standaard instelling Stand Tips HAKKEN *Snelheid: 5*Temperatuur: 0*Warmtevermogen: 0*Timer: 1min *Om te hakken, maar niet voor een smoothie. Tijd instelbaar tussen 1s en 5m afhankelijk van dikte.*Na 10 minuten zonder actie, schakelt het apparaat automatisch uit *Aanbevolen grootte van harde ingrediënten zoals wortels en vlees is 1-2 cm.*Als het voedsel zo fijn mogelijk moet, gebruik dan SMOOTHIE STOVEN Stap 1:*Snelheid: 0*Temperatuur:100°C*Warmtevermogen: 10*Timer: geen limiet, tot kookpuntStap 2:*Snelheid: 0*Temperatuur: 90-95°C*Warmtevermogen: staat niet vast, kan automatisch veranderen naar gelang temperatuur en voedselvolume*Timer: 3 uur *Standaard timer 3u, instelbaar tussen 1-12u*Na 10 minuten zonder actie, gaat het apparaat automatisch in ‘WARM’-modus. *Langzaam garen STOOM *Snelheid: 0*Temperatuur: 120°C*Warmtevermogen: 10*Timer: 20min *Tijd instelbaar tussen 15-60m*Na 10 minuten zonder actie, gaat het apparaat automatisch in ‘WARM’-modus. *500g water voor elke 30 minuten stomen*Groente 20min; vlees 30min DIKKE SOEP Stap 1:*Snelheid: 0*Temperatuur: 120*Warmtevermogen: 10*Timer: Tot kookpuntStap 2:*Snelheid: 0*Temperatuur:100°C*Warmtevermogen:4*Timer: 29,5minStap 3:*Snelheid: 0*Temperatuur: 0°C*Warmtevermogen:0*Timer: Afkoelen tot80°CStap 4:*Snelheid:langzaam van 6 tot10*Temperatuur: 0°C*Warmtevermogen:0*Timer: 1 min *Geschikt voor vleessoep, eerst hakken en dan koken en roeren. Timer instelbaar tussen 15 en 60m.*Na 10 minuten zonder actie, gaat het apparaat automatisch in ‘WARM’-modus. *Aanbevolen grootte van harde ingrediënten zoals wortels en vlees is 1-2 cm.*Aanbevolen om te pauzeren en vlinder toe te voegen na stap 1. SNELLESOEP Stap 1:*Snelheid: 10*Temperatuur: 0*Warmtevermogen:0*Timer: 30sStap 2:*Snelheid: 2*Temperatuur:120°C*Warmtevermogen:10*Timer: TotkookpuntStap 3:*Snelheid: 2*Temperatuur:100°C*Warmtevermogen:10*Timer: 19,5min *Geschikt voor vegetarische soep, eerst hakken en dan koken en roeren. Timer instelbaar tussen 15 en 60m.*Na 10 minuten zonder actie, gaat het apparaat automatisch in ‘WARM’-modus. *Aanbevolen grootte van harde ingrediënten zoals wortels en vlees is 1-2 cm.*Aanbevolen om te pauzeren en vlinder toe te voegen na stap 1. ROEREN *Snelheid: 2*Temperatuur:100°C*Warmtevermogen:10*Timer: 30min *Snelheid instelbaar van 0 tot 3;*Temperatuur instelbaar van 90 tot120°C.*Tijd instelbaar tussen 5-60m*Na 10 minuten zonder actie, gaat het apparaat automatisch in 'WARM'-modus. *Gebruik vlinder of kneedmes KNEDEN Stap 1:*Snelheid: 3*Temperatuur: 0*Warmtevermogen:0*Timer: 3minStap 2:*Snelheid: 2*Temperatuur: 0*Warmtevermogen:0*Timer: 7min *Snelheid instelbaar van 2 tot 3;*Temperatuur instelbaar van 0 tot 37°C.*Tijd instelbaar tussen 3-20m*Na 10 minuten zonder actie, schakelt het apparaat zich automatisch uit. *Kneden voor brood: 330g water + 500g bloem + andere ingrediënten;kneed 10 min op standaard instelling*Kneden voor noedels: 200g water + 400g bloem; kneed 3min met snelheid 2*Gebruik temperatuur 37°C voor het rijzen en als het niet genoeg rijst, kies 37°C voor 30min zonder snelheid RISOTTO Stap 1:*Snelheid: 0*Temperatuur:100°C*Warmtevermogen:6*Timer: Tot kookpuntStap 1:*Snelheid: 1*Temperatuur:65°C*Warmtevermogen:4*Timer: 18 minutenWarmtevermogen en timer: staan niet vast, is automatisch aanpasbaar aantemperatuur en volume *Alle instellingen zijn niet instelbaar*Na 10 minuten zonder actie, gaat het apparaat automatisch in 'WARM'-modus. *Aanbevolen volume (max): 500g rijst + 800g water, gebruik RIJST in de standaard instelling. Een rijstkorst vormt zich op de bodem.*Of stoom rijst: 400g rijst in het mandje, 2L water, kies KOKEN; giet vervolgens water eruit zodat er 1L overblijft, kies STOMEN voor 20min SMOOTHIE *Snelheid: 10*Temperatuur: 0*Warmtevermogen: 0*Timer: 30s *Alle instellingen zijn niet instelbaar, herhaal het programma als het niet voldoende is.*Na 10 minuten zonder actie, schakelt het apparaat automatisch uit Aanbevolen grootte van harde ingrediënten zoals wortels en vlees is 1-2 cm YOGHURT *Snelheid: 30 min op 1, dan stoppen*Temperatuur: 37-39°C*Warmtevermogen: 1*Timer: 6u *Tijd instelbaar tussen 3-12h*Na 10 minuten zonder actie, schakelt het apparaat zich automatisch uit. *Aanbevolen volume : 1 kop yoghurt + 1L verse melk + suiker, 6-12u volgens de gewenste dikte
Accessoire Tekening Functie Snelheid Capaciteit Gebruikstijd Hakmes 
HAK maar niet voor een smoothie 5 2L max, hak tot 1-2cm voor gebruik 1min HAK zo fijn mogelijk 10 2L max, hak tot 1-2cm voor gebruik 1min Kneedmes 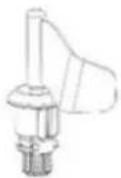
Kneed deeg voor brood, pizza, etc. 2-3 800g bloem max 5-10min Kneed deeg voor noedels 2 500g bloem max 3min Vlinder 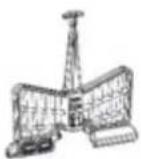
Roeren 1-3 2L max 30min klop eiwit of room 4 2L max 10min Stomer Groente stomen nvt 3,5L max 15min

Vlees stomen nvt 3,5L max 20-30min
Aanbevolen snelheid en inhoud voor alle onderdelen:
PROBLEEMOPLOSSING
\- Als de onderstaande melding op het display wordt getoond dan is dat normaal. Als het blijft terugkomen als u de onderstaande oplossing heeft opgevolgd, neem dan contact op met onze klantenservice.
Foutcode Beschrijving Mogelijke redenen Oplossing E1 Veiligheidsschakelaar niet ingedrukt De kan of de deksel ervan is niet juist geplaatst. Herplaats de kan en de deksel, zorg 91a talles juist geplaatst is E2 Temperatuursensor wordt niet gevonden De kan is niet geplaatst, of de verbinding met de temperatuursensor in de kan is beschadigd. Herplaats de kan en zorg 91a talles juist en stevig geplaatst is. E3 Motorblokkade De druk in de kan is te groot Haal voedsel uit de kan, of snij het in kleinere stukjes en start opnieuw. E4 Te hogetemperatuur Geen voedsel in de kan, of weinig met een hoge temperatuurinstelling gedurende te lange tijd. Voeg voedsel toe in de kan E5 De motortemperatuur is te hoog Het apparaat heeft te lang te veel druk moeten uitoefenen. Laat het apparaat afkoelen en ga dan verder E7 Snelheidsoverdracht werkt niet De veranderen van lage snelheid (1-5) naar hoge (6-10) is geblokkeerd Verwijder de kan, schakel naar lagere snelheid, herplaats de kan en herstart E8 NTC van de motor wordt niet gevonden De temperatuursensor van de motor is los of beschadigd Gebruik het apparaat niet meer en laat het repareren E11 Kan pulse niet gebruiken De temperatuur in de kan is hoger dan 90°C Laat het afkoelen en gebruik pulse weer, of gebruik een lagere snelheid dan 4
Schoonmaken van uw apparat
1. WAS GEEN onderdelen van uw koker in een vaatwasser. Was de koker altijd grondig na elk gebruik, of als deze langere tijd niet gebruikt is.
2. Haal de stekker uit het stopcontact en laat het afkoelen voor de schoonmaak.
3. Was de verwijderbare kan met een warm zeepwater. Spoel en droog grondig af.
4. Maak de basis schoon met een schone vochtige doek. Als er voedselresten achterblijven, maak dan een doek vochtig in warm zeepwater voor het schoonvegen. NOOIT de basis in water of een andere vloeistof onderdompelen. Veeg de vaste basis schoon indien nodig als er voedselresten op zitten.
5. Om het apparaat in goede conditie te blijven houden, moet de basis, indien nodig, na elk gebruik grondig worden nagekeken en schoongemaakt. Veeg schoon met een vochtige doek en droog het goed af voor gebruik.
6. Als het apparaat langere tijd niet gebruikt wordt, haal dan de stekker eruit en bewaar hem in een droge schone ruimte.

VIND AL ONZE RECEPTEN:
http://dl.hkoenig.com/SiteHkoenig/Livrederecettes\_HK8.pdf
Of scan de QR-code:

GARANTIE
De garantieperiode op onze producten is 2 jaar, tenzij anders vermeld, beginnend vanaf de datum van de initiele aankoop of bezorgdatum.
Als u problemen of vragen heeft, kunt u eenvoudig onze hulppagina's bezoeken voor tips om problemen op te lossen, de FAQ's en andere gebruikershandleidingen op onze website: https://sav.hkoenig.com.
Door de referentienaam van uw apparaat in de zoekbalk te typen, krijgt u toegang tot alle beschikbare online hulpmiddelen, ontworpen om aan uw behoeften te voldoen.
Als u toch niet geen antwoord op uw vraag kunt vinden, klik dan op "Heeft het antwoord uw probleem opgelost? Hierdoor gaat u naar het Aanvraagformulier voor
Klantenondersteuning, dat u in kunt vullen om uw verzoek te valideren en hulp te ontvangen.
GARANTIEVOORWAARDEN
De garantie dekt alle mankementen die voortkomen uit normaal gebruik, volgens de sectie gebruik en specificaties in de gebruikershandleiding.
Deze garantie omvat niet verpakkings- of transportproblemen tijdens het vervoer van het product door de eigenaar. Het omvat ook niet de normale slijtage van het product, noch het onderhoud of vervangen van verbruiksartikelen.
UITSLUITINGEN VAN DE GARANTIE
- Accessoires en verbruiksartikelen (\*).
- Normaal onderhoud van het apparaat.
- Alle mankementen veroorzaakt door verkeerd gebruik (schokken, het niet opvolgen van de aanbevolen stroomvoorziening, in slechte omstandigheden gebruiken, etc.), onvoldoende onderhoud of ondeugdelijk gebruik van het apparaat, alsook het gebruik van ongeschikte accessoires.
- Schade van buitenaf: vuur, waterschade, elektrische stroompiek, etc.
- Apparaten die uit elkaar zijn gehaald, ook gedeeltelijk, door personen die niet er niet gekwalificeerd voor zijn (zoals de gebruiker).
- Producten waarvan het serienummer verdwenen, beschadigd of onleesbaar is, waardoor we het niet kunnen identificeren.
- Producten die verhuurd werden of ter demonstratie of showmodel waren.
(\*) Sommige onderdelen van uw apparaat, genaamd verbruiksartikelen, slijten naar verloop van tijd en bij veel gebruik van uw apparaat. Deze slijtage is normaal, maar kan verergerd worden door slechte omstandigheden of onderhoud van uw apparaat. Deze onderdelen worden daarom niet gedekt door de garantie.
De accessoires meegeleverd met het apparaat zijn ook uitgesloten van de garantie. Ze kunnen niet vervangen of gerestitueerd worden. Echter, sommige accessoires zijn te koop via onze website: https://sav.hkoenig.com/.
MILIEU
ATTENTIE:

Voer dit apparaat op de juiste manier af.
Dit symbool geeft aan dat dit product niet mag worden weggegooid bij het normale huishoudelijk afval in de EU. Om mogelijke schade voor mens en milieu te vermijden door de verkeerde afvoer van afval, recycle dit product verantwoord om het gebruik van materiaal te promoten. Om uw gebruikte product te brengen, volg de protocollen op deze terug te brengen of neem contact op met de verkoper. Zij kunnen dit product milieuvriendelijk afvoeren.
Adeva SAS / H.Koenig Europe - 8 rue Marc Seguin, 77290 Mitry-Mory, France
www.hkoenig.com - https://en.hkoenig.com - Tél: +33 1 64 67 00 05
ESPANOL
INSTRUCCIONES DE SEGURIDAD IMPORTANTES
Para reducir el riesgo de descargas eléctricas, lesiones personales o incendios, siempre se deben tomar las precauciones de seguridad que se indican a continuación. Es importante leer cuidadosamente todas las instrucciones del manual antes de usar su electrodoméstico, y guardarlo para referencias futuras o dárselo a un nuevo propietario.
- Este aparato puede ser utilizado por personas con capacidades físicas, sensoriales o mentales reducidas o con falta de experiencia o conocimientos, siempre que sean supervisadas o instruidas en el uso seguro del aparato y que entiendan perfectamente los peligros potenciales.
- Este aparato no debe ser utilizado por niños. Mantenga el aparato y su cable de alimentación fuera del alcance de los niños.
- ADVERTENCIA: riesgo de lesiones por causa de manipulación incorrecta. Tenga sumo cuidado al manipular las cuchillas mientras vacía la jarra y durante la limpieza.
- Apague el aparato y desconecte el cable del tomacorriente antes de cambiar accesorios o tocar las partes móviles. Siempre desenchufe el aparato del tomacorriente cuando no lo pueda atender y antes de montarlo, desmontarlo o limpiarlo.
- Si el cable de alimentación está dañado, deberá ser reemplazado por el fabricante, su agente de servicios técnicos o personas con calificación similar para evitar riesgos.
- Otros accesorios que no sean los suministrados con este aparato deben incluir instrucciones para su uso seguro.
- ADVERTENCIA: no abra la tapa mientras el agua esté hirviendo. No aumente la velocidad más allá del nivel 4 cuando la temperatura esté por encima de 90 grados centígrados.
- No sumerja el aparato en agua ni otros líquidos.
- Este aparato está diseñado para el uso doméstico y aplicaciones similares tales como:
\- Áreas de cocina para el personal de tiendas, oficinas y otros entornos de trabajo.
\- En casas de campo.
A disposición de huéspedes en hoteles, moteles y otras instalaciones de tipo residencial.
En establecimientos como posadas o pensiones.
\- Coloque el aparato sobre una mesa estable, nivelada y resistente al calor; asegúrese de dejarlo a una distancia segura del borde de la mesa para evitar que se caiga. Durante el uso como amasador de masas o cortador de alimentos, el aparato puede deslizarse por la vibración. Por lo tanto, asegúrese de que siempre esté siendo vigilado por alguna persona para evitar que se caiga al suelo.
\- Retire el enchufe del tomacorriente para limpiar el aparato o cuando no vaya a usarlo por algún tiempo.
\- Compruebe regularmente el estado de la unidad principal, la jarra, el vaporizador y otros accesorios. Cualquier componente defectuoso compromete la seguridad del uso.
Si detecta un desperfecto, no use más el aparato y comuníquese con nuestro centro de asistencia.
\- Si el aparato se detiene inesperadamente o parece no funcionar bien, apáguelo, desenchufe el cable del tomacorriente y deje de usarlo inmediatamente. Acuda a un profesional con el aparato para que lo inspeccione y repare si es necesario.
\- La taza medidora es el único accesorio que sirve de tapón para el orificio redondo en la tapa de la jarra. Le pedimos que no use tela, nylon ni cosas similares para tapar taponear este orificio.
\- No toque el filo de las cuchillas. Sostenga la parte superior del mecanismo con cuidado al montar o desmontar las cuchillas.
\- Obedezca la marca de capacidad máxima en la jarra.
\- Abra la tapa de la jarra y espere hasta que los alimentos paren de girar.
\- Tenga extremo cuidado al abrir la tapa de la jarra llena de alimentos a alta temperatura. Coloque la taza medidora correctamente en el orificio de la tapa cuando procese alimentos.
\- No toque la jarra cuando procese alimentos calientes a
más de 60°C.
\- Asegúrese de que el vaporizador y la jarra estén bien acoplados cuando use esa función.
\- Preste especial atención al vapor que saldrá a través de la tapa o los bordes laterales.
\- En funcionamiento, no toque ninguna otra parte del vaporizador que no sea su asa.
\- No use el vaporizador sin la tapa en su lugar.
\- Tenga extremo cuidado al abrir la tapa del vaporizador para no quemarse con el vapor.
\- Preste atención cuando use las funciones vapor y ebullición ya que el vapor saldrá por la boca de la jarra cuando mueva el vaporizador.
\- Siempre asegúrese de que el orificio de circulación en la tapa del vaporizador no esté obstruido, o de lo contrario el vapor puede salir por otra parte.
\- Después del uso, coloque el aparato y sus accesorios calientes en un lugar seguro fuera del alcance de los niños y adviértalos de que la unidad está caliente y que no la toquen.
\- Daños por fuga de alimentos: asegúrese de que la junta del mecanismo de corte esté bien montada y que la cuchilla esté firmemente unida al soporte de fijación en el fondo. Una mala instalación provocará fugas de alimentos que pueden dañar al aparato.
\- Daños por ventilación deficiente: asegúrese de que las rejillas de ventilación de la unidad principal estén libres de objetos, de lo contrario el aparato puede dañarse por obstrucciones.
\- La unidad principal es compatible apenas con la jarra y todos los accesorios suministrados. No use otros componentes ni accesorios extraños en este electrodoméstico.
\- Preste atención para evitar derrames calientes sobre el cable de alimentación.
\- La jarra permanecerá caliente después del uso debido al calor residual, cuídese de quemaduras.
\- Este electrodoméstico puede ser utilizado por niños con al menos 8 años de edad, siempre y cuando sean supervisados o hayan sido instruidos para usar el aparato
de manera segura y estén plenamente conscientes de los peligros involucrados.
\- La limpieza y el mantenimiento no deben ser realizados por niños, a menos que tengan 8 o más años de edad y sean vigilados por un adulto.
\- Mantenga el aparato y su cable de alimentación fuera del alcance de niños menores de 8 años.
\- Al utilizar cualquier electrodoméstico, siempre se deben tomar las precauciones básicas de seguridad para evitar el riesgo de incendio, descarga eléctrica y/o lesiones por mal uso.
\- Asegúrese de que tensión informada en la placa de características del aparato se corresponde con la de su red eléctrica. Si este no es el caso, no use el aparato y comuníquese con su distribuidor.
\- Nunca deje el aparato desatendido mientras esté en funcionamiento.
\- Nunca abra la tapa estando directamente al frente, siempre colóquese ligeramente a un lado para evitar quemaduras con el vapor.
\- No use el aparato luego de haberse caído, o si presenta señales evidentes de daños o fugas.
\- No opere el aparato con su cable de alimentación o enchufe dañados, desperfectos, mal funcionamiento o luego de caídas. Si el cable de alimentación está dañado, deberá ser reemplazado por el fabricante, su agente de servicios técnicos o personas con calificación similar para evitar riesgos.
\- Este aparato está destinado al uso en hogares y áreas similares, como :
\- zonas de cocina en tiendas, oficinas y otros entornos
de trabajo
\- en casas de campo
\- en hoteles, moteles y otras zonas residenciales
\- habitaciones de huéspedes.
●
CONTENIDO DE LA CAJA
Al abrir la caja del producto, saque todos los accesorios e identifíquelos con ayuda de la lista a
continuación:
1 Unidad principal 7 Tapa del vaporizador
2 Jarra 8 Cesta coladora
3 Tapa de la jarra 9 Mariposa
4 Taza medidora 10 Espátula
5 Vaporizador pequeño 11 Libro de recetas
6 Vaporizador grande

ACCESORIOS
Jarra
La jarra tiene marcas por un lado para observar la capacidad. La capacidad máxima de la jarra es de 2 litros.

Observación:
La cantidad de alimentos en la jarra no debe exceder la marca máxima de 2 L, de lo contrario, la preparación puede derramarse o salpicar causando un peligro.
Coloque la tapa en la jarra, presione el interruptor de seguridad y gírela en el sentido de las agujas del reloj para fijarla correctamente en la jarra, de lo contrario, el motor no podrá arrancar. (Siempre presione primero el interruptor de seguridad para bloquear o abrir la tapa)

natural_image
Three-step mechanical assembly diagram showing progressive assembly of a cylindrical component (no text or labels)
Coloque la jarra sobre la unidad principal con el asa en la dirección correcta y encájela de forma segura, de lo contrario, el motor no podrá arrancar.

natural_image
Line drawings of two kitchen appliances: a blender and a four-tiered blender (no text or symbols)
Cuchilla
Coloque la junta en el mecanismo e insértelo por el orificio en el fondo de la jarra, sostenga firmemente la cuchilla por dentro de la jarra y gire la parte inferior hacia arriba, use el soporte de fijación para fijar la cuchilla girándola en sentido horario. Siga el procedimiento inverso para desmontar la cuchilla del mecanismo. Cuidado para no perder la junta de sellado entre la cuchilla y el fondo de la jarra.

natural_image
Technical line drawings of a mechanical component showing three views: front, top, and side (no text or symbols)

natural_image
Technical line drawing of a mechanical component with no visible text or symbols
Observaciones:
\- La cuchilla es muy afilada. Envuelva la cuchilla con una toallita para montarla o desmontarla del mecanismo.
- Agarre bien el mecanismo de corte y sáquelo de la jarra con cuidado para evitar que la cuchilla se caiga y pueda causar un peligro.
\- Asegúrese de que el soporte de fijación y la junta estén bien montados y bloqueados correctamente en el mecanismo de corte. Si la junta de sellado no está bier montada, los alimentos que están siendo cortados o cocidos pueden gotear o filtrarse hacia el interior de la unidad y provocarle daños al aparato.
Amasador
Retire la cuchilla del mecanismo y monte el eje con la paleta amasadora siguiendo el mismo procedimiento que para la cuchilla. Este tipo de montaje se puede usar para amasar, remover o y mezclar alimentos sin cortarlos


natural_image
Diagram of a mechanical or electrical component with concentric rings and directional arrows indicating rotation (no text or symbols)

natural_image
Technical diagram of a mechanical component with concentric rings and mounting holes (no text or symbols)
Observaciones:
\- No use el mecanismo amasador a velocidades arriba del nivel 3 ya que esto puede causar vibraciones fuertes en el aparato y provocar un peligro.
\- La parte baja de la paleta amasadora queda a solo 1 cm de distancia de la pared de la jarra, esto hace que a veces los alimentos se atasquen y el motor se detenga automáticamente por seguridad. Use la espátula para revolver los alimentos atascados y el aparato volverá a funcionar sin problemas.
\- Asegúrese de que el soporte de fijación y la junta estén bien montados y bloqueados correctamente en el mecanismo. Si la junta de sellado no está bien montada, los alimentos que están siendo mezclados o amasados pueden gotear filtrarse hacia el interior de la unidad y provocarle daños al aparato.
Taza medidora
\- La taza medidora tiene varias funciones: es un componente de la tapa de la jarra para evitar la pérdida de calor o salpicaduras de alimentos; es un recipiente graduado para medir la cantidad de ingredientes, con capacidad máxima de 150 mL.
\- Coloque la taza medidora en el orificio de la tapa y gírela en sentido de las manecillas del reloj para fijarla y bloquearla en la tapa.

natural_image
Simple line drawing of a cylindrical object with a flange base (no text or symbols)

natural_image
Technical line drawing of a mechanical component with concentric circles and handle (no text or symbols)
Observaciones:
\- La taza medidora es el único accesorio que sirve para tapar el orificio redondo de la tapa.
\- No cubra este orificio con ningún otro objeto para evitar salpicaduras de alimentos y posibles peligros.
Espátula
- La espátula es el único accesorio que puede ser utilizado para raspar y remover los alimentos dentro de la jarra. Cualquier otro artículo le puede causar daños al revestimiento antiadherente dentro de la jarra.
- Hay una pequeña ranura en el mango de la espátula, úsela para sostener la cesta coladora como se muestra en la figura:

natural_image
Technical line drawing of two mechanical components (no text or symbols)

natural_image
Line drawing of a bowl with a spoon, no text or symbols present
Observaciones:
- No use la espátula para revolver nada dentro de la jarra cuando la cuchilla esté en funcionamiento.
• No use la espátula con la mariposa adentro de la jarra.
- Asegúrese de que la cesta coladora esté bien enganchada en la ranura de la espátula antes de levantarla.
Cesta coladora
La cesta coladora tiene varias funciones:
- Tamiz. Para filtrar el jugo de frutas y verduras. Después de moler o hacer pulpa de frutas con el aparato, coloque la cesta en la jarra para ayudar a verter el jugo.
- Estofado. Para estofar alimentos blandos como pastas, espaguetis o fideos;
• Cocción. Para cocinar guarniciones, tales como arroz y papas.

natural_image
Line drawings of two kitchen utensils, one with a handle and the other with a fork (no text or symbols)
Observaciones:
- Introduzca el mango de la espátula en el orificio del borde de la cesta para colocarla o sacarla de la jarra.
- Si desea reducir la cantidad de agua en los alimentos (como tomates), retire la taza medidora y coloque la cesta en la jarra.
Así el agua se evapora fácilmente.
Mariposa
- Instalada en la cuchilla, la mariposa puede ayudar a mezclar los alimentos sin cortarlos con la cuchilla y al mismo tiempo evita que los alimentos se peguen formado aglomerados, por lo que la mezcla queda más homogénea.
- Inserte la mariposa en el mecanismo de corte por el orificio y presiónela con fuerza suficiente para encajarla, luego gire las aspas de la mariposa en sentido anti horario para bloquearla en la cuchilla.

natural_image
Technical line drawings of a mechanical device and its corresponding schematic view (no text or symbols)
Observaciones:
- No encienda la unidad hasta que la mariposa esté fija en su lugar.
- No use velocidades arriba del nivel 4 cuando esté utilizando la mariposa.
- No use la espátula mientras usa la mariposa.
- No agregue ingredientes en la jarra cuando esté trabajando con la mariposa, ya que esto puede dañar o trabar la mariposa.
Vaporizador
El conjunto de vaporización cuenta con tres componentes: un vaporizador pequeño, un vaporizador grande y una tapa. La tapa se puede colocar tanto en el vaporizador pequeño como en el grande, y el vaporizador pequeño se puede montar por dentro del grande para ciertos usos.
Retire la tapa de la jarra y coloque un vaporizador para utilizarlo.

natural_image
Product display of a black 3D kitchen grater with digital display and various kitchen cutouts (no visible text or symbols)
Observaciones:
\- Asegúrese de que la tapa del vaporizador esté bien colocada antes de cocer alimentos al vapor.
\- Los vaporizadores que acompañan este aparato no se pueden usar en microondas u otros equipos eléctricos.
\- No toque ni se acerque a los orificios de la tapa del vaporizador para evitar quemaduras a causa del vapor caliente.
\- No cubra ni obstruya los orificios de la tapa del vaporizador con ningún objeto, de lo contrario, el vapor puede salir por el borde de la tapa u otros lugares del aparato y causar peligro.
INSTRUCCIONES DE USO
Durante los primeros usos de este electrodoméstico podrá sentir un ligero olor proveniente del motor. Esto es completamente normal y desaparecerá paulatinamente con el uso.
- Instale el aparato sobre una mesa limpia, estable y nivelada. No coloque la unidad principal demasiado cerca del borde y manténgala lejos de armarios empotrados o estantes suspendidos y soportes colgantes.
- Es mejor instalar el aparato en un lugar fijo de su conveniencia para uso continuado.
• Limpie bien y completamente el aparato antes de usarlo.
- El sonido de un "bip" le indicará que la unidad principal está encendida y activa.

nte y

r el interruptor en la
un pitido pero todavía

DETENER/CA
Enchufe el c
no se activará la pantalla LCD.

natural_image
Simple line drawing of a rope knot and connecting rod (no text or symbols)
- Presione este botón; todas las luces de fondo se encenderán y el aparato pasará al modo de espera, donde puede elegir la función deseada.
- Presione este botón mientras configura una función y toda la configuración se borrará; el aparato volverá a entrar al modo de espera.
- Presione este botón durante cualquier ciclo de trabajo para detener al aparato inmediatamente y volver al modo de espera.
- Presione este botón durante el proceso de grabación del bricolaje (DIY) para detener el aparato inmediatamente y cancelar la grabación.
- El aparato se apagará automáticamente si no hace nada durante 30 segundos en el modo de espera.
PERILLA (INICIO/ PAUSA)
- Después de seleccionar la función o programa deseado, presione este botón para iniciar la operación de inmediato.
- Presione este botón durante cualquier ciclo de trabajo para pausar el aparato y entrar en modo de espera, la pantalla LCD mostrará PRUSE. (Usted puede abrir la tapa, quitar la jarra, etc., pero asegúrese de volver a montar todo correctamente antes de recomenzar). Presione el botón nuevamente para reiniciar la operación.
- La unidad se apagará automáticamente si no hace nada durante 10 minutos en el modo de PAUSA.
\- Este botón también es la perilla de control para el temporizador, velocidad, temperatura y potencia. Para aumentar se gira la perilla en sentido horario y para disminuir en sentido anti-horario. Con este botón se escoge uno entre los 15 programas automáticos.

TEMPORIZADOR
- La pantalla LCD muestra 88:88:88, que es el tiempo en hora:minutos:segundos.
- Presione el botón del temporizador y la señal de minutos parpadeará en la pantalla; gire la perilla para ajustar los minutos. Presione el botón nuevamente y parpadearán los segundos, gire la perilla para ajustar los segundos. Vuelva a presionar el botón y gire la perilla para ajustar la hora entre 1 y 12.
- Presione el botón durante un ciclo de trabajo y el aparato comenzará la cuenta regresiva automáticamente desde la hora configurada.
- Máximo 60 minutos por ajuste manual y 3 horas con el ajuste de bricolaje (DIY). Consulte el límite del temporizador para cada programa en la sección “MENÚ”.

FUNCIÓN PREESTABLECIDA

Presione el botón del temporizador durante 3 segundos para entrar en el modo preseleccionado. El tiempo visualizado parpadeará junto con el icono de preselección.
Después, ajuste la hora con el ajuste correspondiente, el rango es entre 30 minutos y 12 horas.
El modo de reserva sólo puede ser usado junto con DIY y MENU. Ponga primero DIY o seleccione MENU, pulse el mando y el tiempo empezará a contar.
Presione el botón de reestablecer para cancelar.

VELOCIDAD
\- Presione este botón en modo de espera o durante un ciclo de trabajo (excepto en algunos programas automáticos que bloquean este ajuste) y el aparato entrará en el modo ajuste de velocidad.
El ícono -parpadeará en la pantalla y podrá ajustar la velocidad girando la perilla de control.
• La velocidad varía del nivel 1 al 10.
\- Presione este botón durante un proceso de mezcla, vaporización o calentamiento, si la temperatura ajustada o la real es superior a 60 °C, la velocidad solo puede llegar al nivel 4. Si fija un nivel superior, caerá al nivel 4 automáticamente.
\- Hay transferencia de energía en la estructura, por lo que es normal escuchar ruidos mientras el motor sube la velocidad del nivel 5 y al nivel 6.
\- Para triturar o picar alimentos duros o grandes volúmenes de alimentos, se sugiere seleccionar primero la velocidad 5 y luego pasar a la velocidad 10, para evitar vibraciones y obtener la máxima eficiencia y rendimiento.
\- No use las velocidades 8, 9 o 10 por 5 minutos seguidos ni las velocidades 5, 6 o 7 durante 10 minutos seguidos.

TEMPERATURA
\- Presione este botón en modo de espera o durante un calentamiento (excepto para algunos programas automáticos que bloquean este ajuste) y el aparato entrará en el modo ajuste de temperatura. El ícono 📁 parpadeará en la pantalla y podrá ajustar la temperatura girando la perilla de control.
• El rango de temperatura es 37-120 °C.

POTENCIA DE CALOR
\- Presione este botón en modo de espera o durante un calentamiento (excepto para algunos programas automáticos que bloquean este ajuste) y el aparato entrará en el modo ajuste de potencia. El ícono parpadeará en la pantalla y podrá ajustar la potencia de calor girando la perilla de control.
• El rango de potencia es de 1 a 10.
\- Para algunos alimentos pegajosos, se recomienda empezar a potencias bajas para evitar quemaduras o adherencia.
\- Si la cantidad de alimentos es poca y requieren una temperatura precisa, se sugiere fijar la potencia más baja.
\- Las potencias bajas permiten un control de temperatura más preciso; y las potencias altas calientan más rápido.
\- El aparato no funcionará si solo fija la potencia de calor pero no fija una temperatura. Se recomienda usar la configuración predeterminada al cambiar los niveles de temperatura.

AUTOLIMPIEZA
\- Este programa es para fines de limpieza después de usar el aparato.
\- Agregue agua de 500 ml a 1 litro.
\- Algún detergente puede ser útil.
\- Todo el proceso dura unos 10 minutos.

PULSO
\- En modo de espera, presione y asegure este botón para que el aparato empiece a funcionar a la velocidad máxima; suéltelo para detener el aparato.
\- Cuando la temperatura en la jarra es superior a 60 °C, el botón PULSO no se puede
usar y la pantalla mostrará "E11".
\- Hay transferencia de energía en la estructura, por lo que es normal escuchar ruidos mientras el motor empieza a funcionar con el primer pulso.
\- El tiempo máximo de operación usando el pulso es de 3 minutos y luego debe descansar durante 10 minutos.

MENÚ
\- Este botón es para elegir entre los siguientes 10 programas automáticos.
- SOPA RÁPIDA
• MEZCLAR
• AMASAR
• ARROZ
• BATIDO
- YOGURT


\- Presione este botón en modo de espera y la función BATIDO parpadeará en la pantalla LCD, gire la perilla para elegir el programa automático deseado.
\- Para los programas SOPA RÁPIDA, SOPA GRUESA, REMOVER, COCER y ARROZ, una vez completado el proceso la pantalla mostrará “Fin”. Si no se realiza ninguna operación después de 10 minutos, el aparato cambiará al modo MANTENER
CALIENTE de forma automática por 12 horas hasta que se detenga el proceso manualmente.
\- La configuración de algunos programas predeterminados puede variar durante el proceso, como se indica en la siguiente tabla, y los datos reales se mostrarán en pantalla. Los programas patrones con ajustes bloqueados mostrarán “—” en la pantalla.
Programa Configuración patrón Ajustes Recomendaciones CORTAR - Velocidad: 5- Temperatura: 0- Potencia: 0- Tiempo: 1 min. - Para triturar pero sin llegar a un batido. Tiempo ajustable de 1 s a 5 min para obtener la consistencia deseada.- Si se deja inactivo durante 10 min después de finalizar el programa, el aparato se apagará automáticamente. - Cortar alimentos consistentes o duros como zanahoria o carne en trozos de 1 cm a 2 cm.- Si necesita hacer puré fino use la función BATIDO. COCER Etapa 1:- Velocidad: 0- Temperatura: 100 °C- Potencia: 10- Tiempo: sin límite, hasta que hierva.Etapa 2:- Velocidad: 0- Temperatura: 90-95 °C- Potencia: variable, cambia automáticamente según la temperatura y la cantidad de alimentos.- Tiempo: 3 h. - El tiempo de la etapa 2 es ajustable de 1 a 12 h.- Si se deja inactivo durante 10 min después de finalizar el programa, el aparato entrará en el modo CALENTAR automáticamente. - La cocción es equivalente a fuego lento. VAPOR - Velocidad: 0- Temperatura: 120 °C- Potencia: 10- Tiempo: sin límite, hasta que hierva. - El tiempo es ajustable de 15 a 60 min.- Si se deja inactivo durante 10 min después de finalizar el programa, el aparato entrará en el modo CALENTAR automáticamente. - 500 g de agua por cada 30 min de vaporización.- Para vegetales use 20 min y para carne use 30 min. SOPA GRUESA Etapa 1:- Velocidad: 0- Temperatura: 120 °C- Potencia: 10- Tiempo: sin límite, hasta que hierva.Etapa 2:- Velocidad: 0- Temperatura: 100 °C- Potencia: 4- Tiempo: 29,5 minEtapa 3:- Velocidad: 0- Temperatura: 0- Potencia: 0- Tiempo: enfriar la sopa hasta 80 °CEtapa 4:- Velocidad: aumento lento de 6 a 10.- Temperatura: 0- Potencia: 0- Tiempo: 1 min. - Programa apropiado para sopa de carne: primero corta los ingredientes y después cocina y mezcla. El tiempo es ajustable de 15 a 60 min.- Si se deja inactivo durante 10 min después definalizar el programa, el aparato entrará en el modo CALENTAR automáticamente. - Cortar alimentos consistentes o duros como zanahoria o carne en trozos de 1 cm a 2 cm.- Se recomienda pausar y colocar la mariposa después de laetapa 1. SOPA RÁPIDA Etapa 1:- Velocidad: 10- Temperatura: 0- Potencia: 0- Tiempo: 30 s.Etapa 2:- Velocidad: 2- Temperatura: 120 °C- Potencia: 10- Tiempo: sin límite, hasta que hierva.Etapa 3:- Velocidad: 2- Temperatura: 100 °C- Potencia: 10- Tiempo: 19,5 min. - Programa apropiado para sopa de vegetales: primero corta los ingredientes y después cocina y mezcla. El tiempo es ajustable de 15 a 60 min.- Si se deja inactivo durante 10 min después de finalizar el programa, el aparato entrará en el modo CALENTAR automáticamente. - Cortar alimentos consistentes o duros como zanahoria o carne en trozos de 1 cm a 2 cm.- Se recomienda pausar y colocar la mariposa después de la etapa 1. MEZCLAR - Velocidad: 2- Temperatura: 100 °C- Potencia: 10- Tiempo: 30 min. - La velocidad es ajustable del nivel 0 al 3.- Temperatura es ajustable de 90 a 120 °C.- El tiempo es ajustable de 5 a 60 min.- Si se deja inactivo durante 10 min después de finalizar el programa, el aparato entrará en el modo CALENTAR automáticamente. - Se recomienda usar la mariposa o el conjunto amasador. AMASAR Etapa 1:- Velocidad: 3- Temperatura: 0- Potencia: 0- Tiempo: 3 min.Etapa 2:- Velocidad: 2- Temperatura: 0- Potencia: 0- Tiempo: 7 min. - La velocidad es ajustable del nivel 2 al 3.- Temperatura ajustable de 0 a 37 °C para esparcir la masa.- El tiempo es ajustable de 3 a 20 min.- Si se deja inactivo durante 10 min después de finalizar el programa, el aparato se apagará automáticamente. - Masa para pan: 330 g de agua + 500 g de harina + otros ingredientes; amasar 10 min por defecto.- Masa para fideos: 200 g de agua + 400 g de harina; amasar 3 min a velocidad 2.- Fije la temperatura en 37 °C para esparcir la masa, y si no se extiende lo suficiente, amase 30 min más a 37 °C pero sin velocidad. ARROZ Etapa 1:- Velocidad: 0- Temperatura: 100 °C- Potencia: 6- Tiempo: sin límite, hasta que hierva.Etapa 2:- Velocidad: 1- Temperatura: 965 °C- Potencia: 4- Tiempo: 18 min.Potencia y Tiempo:variables, cambianautomáticamente según latemperatura y la cantidad dealimentos. - Ninguna configuraciónes ajustable.- Si se deja inactivodurante 10 min después definalizar el programa, elaparato entrará en el modoCALENTARAutomáticamente. - Volumen máximosugerido: 500 g de arroz+ 800 g de agua, cocinecon el programa ARROZpredeterminado. Seformará corteza en elfondo.- Puede vaporizarel arroz usando: 400 gde arroz en la cesta coladora, 2 L de agua, yla función COCINAR;luego vierta un poco deagua hasta dejar 1 L,use ahora VAPORDurante 20 min. BATIDO - Velocidad: 10- Temperatura: 0- Potencia: 0- Tiempo: 30 s. - Ninguna configuraciónes ajustable, repita elprograma si lo desea.- Si se deja inactivodurante 10 min después definalizar el programa, elaparato se apagaráautomáticamente. - Cortar alimentos consistentes o duroscomo zanahoria o carneen trozos de 1 cm a 2cm. YOGURT - Velocidad: 1 durantelos primeros 30 min, luego detener.- Temperatura: 37-39°C- Potencia: 1- Tiempo: 6 h. - El tiempo es ajustablede 3 a 12 h.- Si se deja inactivodurante 10 min después definalizar el programa, elaparato se apagaráautomáticamente. - Volumensugerido: 1 baso deyogurt + 1 L de lechefresca + azúcar a gusto,de 6 a 12 h según laconsistencia deseada.
Velocidad y capacidad recomendadas para cada tipo de accesorio:
Accesorio Imagen Función Velocidad Capacidad Tiempo de operación Cuchilla de corte 
Cortar sin triturar al punto de llegar a un batido. 5 Máximo 2 L; corte los ingredientes en pedazos de 1-2 cm antes. 1 min Cortar bien fino. 10 Máximo 2 L; corte los ingredientes en pedazos de 1-2 cm antes. 1 min Paleta de amasar 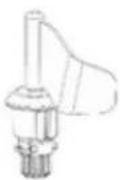
Amasar masa para pan, pizza, etc. 2-3 Máximo 800 g de harina 5-10 min Amasar masa para fideos. 2 Máximo 500 g de harina 3 min Mariposa 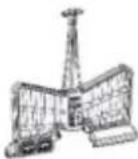
Mezclar o batir 1-3 Máximo 2 L 30 min Batir claras de huevo o cremas. 4 Máximo 2 L 10 min Vaporizador 
Vaporizar vegetales N/A Máximo 3,5 L 15 min Vaporizar carnes N/A Máximo 3,5 L 20-30 min
GUÍA DE SOLUCIÓN DE PROBLEMAS
Es normal que el aparato muestre los siguientes códigos de error en la pantalla. Si el error sigue apareciendo después de ejecutar las acciones de la Guía de Solución de Problemas, comuníquese con nuestro centro de atención al cliente.
Error Descripción Posible problema Posible solución E1 La trabade seguridad no está bloqueada. La jarra o la tapa de la jarra no están montados correctamente. Vuelva a montar la jarra y la tapa de la jarra, asegúrese de que todas las trabas estén bloqueadas. E2 Sensor de temperatura ausente. La jarra no está en su lugar, o la conexión del sensor de temperatura en la base de la jarra está dañada. Vuelva a montar la jarra y asegúrese de que esté bien trabada en su lugar. E3 Motor trabado o bloqueado. La jarra está demasiado llena o pesada. Disminuya la cantidad dealimentos o córtelos en trozos más pequeños y reinicie el proceso. E4 Temperatura demasiado alta. No hay alimentos en la jarra, o poca cantidad con temperatura alta durante mucho tiempo. Agregue más alimentos en la jarra. E5 Temperatura del motor muy alta. El aparato funcionó por mucho tiempo con demasiados alimentos. Pare y espere que el aparato se enfríe antes de reiniciar el proceso. E7 Falla en la transferencia de velocidades. El aumento de velocidad del nivel bajo (1-5) al nivel alto (6-10) está bloqueado. Retire la jarra, gire el mecanismo manualmente, vuelva a colocar la jarra y reinicie el proceso. E8 Motor NTC ausente. La conexión del sensor de temperatura del motor está floja o rota. Pare de usar el aparato y llévelo al centro de atención al cliente para revisarlo. E11 No se puede usar el Pulso. La temperatura en la jarra supera los 90 °C. Espere que se enfríe su preparación y pulse nuevamente, o use una velocidad más baja (4).
LIMPIEZA Y MANTENIMIETO
1. NO lave ninguna pieza o accesorio de su robot en el lavavajillas. Siempre limpie su aparato después de cada uso, o cuando no lo haya utilizado durante un largo período de tiempo.
2. Desenchufe el cable del tomacorriente y espere que la unidad se enfríe antes de limpiarla.
3. Lave las cestas coladoras con agua jabonosa tibia. Enjuague y seque completamente.
4. Limpie la unidad principal con un paño limpio y húmedo. Si quedan restos de comida, humedezca el paño en agua jabonosa tibia y limpie de nuevo. NUNCA sumerja la unidad en agua u otro líquido. Limpie la jarra con cuidado cuando sea necesario para eliminar restos de alimentos adheridos.
5. Con el fin de mantener la alta eficiencia de su robot de cocina, debe inspeccionar el fondo de la jarra y los vaporizadores con frecuencia y limpiarlos después de cada uso si es necesario. Límpielos con un paño suave húmedo y séquelos completamente antes del próximo uso.
6. Si no pretende utilizar el aparato por un largo período, desenchúfelo del tomacorriente y guárdelo en un lugar seguro, fresco y limpio.

ENCUENTRA TODAS NUESTRAS RECETAS:
http://dl.hkoenig.com/SiteHkoenig/Livrederecettes\_HK8.pdf
O escanee el código QR:

GARANTÍA
El periodo de garantía de nuestros productos es de 2 años, salvo que la ley estipule lo contrario, a partir de la fecha de la compra inicial o de la fecha de entrega.
Si tiene algún problema o pregunta, puede acceder fácilmente a nuestras páginas de ayuda, consejos para solucionar problemas, preguntas frecuentes y manuales de usuario en nuestro sitio de servicio: https://sav.hkoenig.com.
Al escribir el nombre de referencia de su dispositivo en la barra de búsqueda, puede acceder a toda la asistencia en línea disponible, diseñada para satisfacer mejor sus necesidades.
Si sigue sin encontrar una respuesta a su pregunta o problema, haga clic en "¿La respuesta ha resuelto su problema? Esto le llevará al formulario de solicitud de asistencia posventa, que puede rellenar para validar su solicitud y obtener ayuda.
CONDICIONES DE GARANTÍA
La garantía cubre todos los fallos que se produzcan en el contexto de un uso normal, de acuerdo con los usos y especificaciones del manual de usuario.
Esta garantía no se aplica a los problemas de embalaje o transporte durante el envío del producto por parte del propietario. Tampoco incluye el desgaste normal del producto, ni el mantenimiento o la sustitución de piezas consumibles.
EXCLUSIÓN DE GARANTÍA
- Accesorios y piezas de desgaste (\*).
- Mantenimiento normal del aparato.
- Todas las averías derivadas de un uso incorrecto (golpes, incumplimiento de las recomendaciones de alimentación eléctrica, malas condiciones de uso, etc.), de un mantenimiento insuficiente o de un mal uso del aparato, así como del uso de accesorios inadecuados.
- Daños de origen externo: incendio, daños por agua, sobrecarga eléctrica, etc.
- Cualquier equipo que haya sido desmontado, incluso parcialmente, por personas que no estén autorizadas a hacerlo (en particular el usuario).
- Productos cuyo número de serie falte, esté dañado o sea ilegible, lo que no permitiría su identificación.
- Productos sujetos a alquiler, demostración o exposición.
(\*) Algunas piezas de su aparato, conocidas como piezas de desgaste o consumibles, se deterioran con el tiempo y la frecuencia de uso de su aparato.
Este desgaste es normal, pero puede acentuarse por las malas condiciones de uso o de mantenimiento de su aparato. Por lo tanto, estas piezas no están cubiertas por la garantía.
Los accesorios suministrados con el aparato también están excluidos de la garantía. No se pueden cambiar ni reembolsar. No obstante, algunos accesorios pueden adquirirse directamente en nuestro sitio web:
https://sav.hkoenig.com/
MEDIO AMBIENTE

Esta marca significa que este aparato no se debe desechar con los residuos domésticos comunes en ninguna parte de la Unión Europea. Para evitarle posibles daños al medio ambiente o la salud humana por causa de la eliminación descontrolada de residuos, recíclelo con responsabilidad para promover el aprovechamiento sostenible de recursos materiales. Utilice los sistemas de devolución y recolección de su localidad o comuníquese con su distribuidor; ellos pueden recibir este producto para reciclarlo de forma segura para el medio ambiente.
Adeva SAS / H.Koenig Europe - 8 rue Marc Seguin, 77290 Mitry-Mory, France
www.hkoenig.com - https://sac.hkoenig.com - Tél: +33 1 64 67 00 05
ITALIANO
Informazioni importanti sulla sicurezza
Le seguenti precauzioni di sicurezza devono essere sempre seguite per ridurre il rischio di scosse elettriche, lesioni personali o incendi. È importante leggere tutte le istruzioni prima di utilizzare il prodotto ed è necessario conservarle per riferimento futuro o nuovi utenti.
\- Questo apparecchio può essere usato da persone con ridotte capacità fisiche, sensoriali o mentali o con mancanza di esperienza o conoscenza, a condizione che siano sorvegliate o istruite sull'uso sicuro dell'apparecchio e che comprendano pienamente i potenziali pericoli.
\- Questo apparecchio non deve essere utilizzato da bambini. Mantenere l'apparecchio e il cavo fuori dalla portata dei bambini.
\- Attenzione: Possibilità di lesioni da uso improprio. Si deve fare attenzione quando si maneggiano le lame taglienti durante lo svuotamento del recipiente e durante la pulizia.
\- Spegnere l'apparecchio e scollegare dall'alimentazione prima di cambiare gli accessori o prima di avvicinarsi alle parti in movimento durante il funzionamento. Scollegare l'apparecchio dalla rete se viene lasciato incustodito e prima del montaggio, lo smontaggio e la pulizia.
\- Se il cavo di alimentazione è danneggiato, esso deve essere sostituito dal produttore, dal suo servizio assistenza o da personale qualificato, per evitare rischi.
\- Accessori, diversi da quelli forniti con l'apparecchio, devono includere le istruzioni per il loro uso sicuro.
\- ATTENZIONE: non rimuovere il coperchio mentre l'acqua bolle. Non impostare una velocità suoeriore al livello 4 quando la temperatura è superiore a 90 gradi centigradi.
\- L'apparecchio non deve essere immerse in acqua o altri liquidi.
\- Questo apparecchio è destinato all'uso in ambienti domestici e simili, come :
\- cucine di negozi, uffici e altri ambienti di lavoro
\- in case coloniche
\- in alberghi, motel e altre aree residenziali
\- nelle camere degli ospiti.
\- Si prega di posizionare l'unità su una superficie piana e stabile che non si surriscalda e assicurarne la distanza di sicurezza dal bordo per evitare che l'apparecchio possa cadere. Quando è usato per impastare o sminuzzare, l'unità può muoversi a causa delle vibrazioni. Quindi per favore non utilizzarla senza super-visione in modo da evitare l'apparecchiatura possa cadere.
\- Si prega di staccare la spina quando si pulisce l'apparecchio o lo si ripone per un lungo periodo di tempo.
\- Controllare regolarmente se il corpo principale, la brocca, la vaporiera o altri componenti sono danneggiati. Le parti danneggiate possono diminuire la sicurezza d'uso. Se di individuano alterazioni, si prega di smettere di usare l'apparecchio e rivolgersi al centro di assistenza post-vendita.
\- Se l'apparecchio si arresta improvvisamente o si verifica un qualsiasi malfunzionamento, spegnere l'appaecchio, scollegare l'alimentazione, ed inviare immediatamente al centro assistenza. Cercare una consulenza professionale per le riparazioni dei guasti.
\- La coppa di misurazione è l'unica parte che può essere utilizzata per coprire il foro rotondo nel coperchio. Si prega di non utilizzare un panno o cose simili per coprire il buco.
- Non toccare il bordo delle lame. Si prega di prestare molta attenzione e tenere la parte superiore quando si monta o si rimuove la lama.
- Prestare attenzione al segno di capacità massima sulla coppa.
• Non aprire il coperchio fino a quando il cibo nella brocca non smette di ruotare.
- Prestare attenzione al cibo ad alta temperatura quando si apre il coperchio brocca. Si prega di mettere il misurino nel foro del coperchio della brocca in modo corretto durante l'elaborazione degli alimenti.
- Non toccare la brocca durante l'elaborazione di cibi caldi oltre I 60° C.
• Assicurarsi che la vaporiera e la brocca sono collegati bene quando si utilizza il vapore.
- Préstare attenzione alla fuoriuscita di vapore d'attraverso il coperchio superiore o dai lati.
- Durante il funzionamento, non toccare nessuna parte della vaporiera, tranne le maniglie.
- Non utilizzare la vaporiera senza che il coperchio sia al suo posto.
- Quando si apre il coperchio della vaporiera, fare attenzione a non scottarsi con il vapore.
- Quando si utilizza l'impostazione vapore, fare attenzione al vapore che potrebbe uscire attraverso la bocca della brocca quando spostare il vapore bollente.
• Assicuratei sempre che il foro di sfiato sul coperchio vapore sia sbloccato, altrimenti il vapore potrebbe venire fuori da qualche altra parte.
- Dopo l'uso si prega di posizionare l'apparecchio e gli accessori caldi fuori dalla portata dei bambini e mettere in guardia i bambini sul fatto che l'unità si surriscalda e di non toccarla.
- La fuoriuscita di cibo: Assicurarsi che l'anello di tenuta della lama sia posizionato bene e che la lama sia saldamente fissata dalla staffa di fissaggio sul fondo. Il montaggio non corretto potrebbe causare trafilamenti cibo che potrebbero danneggiare
l'apparecchio.
- Danni da scarsa ventilazione: Assicurarsi che le aperture sul retro del corpo principale non siano bloccati da qualsiasi oggetto, oppure l'apparecchio potrebbe danneggiarsi.
- La brocca e tutti gli accessori devono essere utilizzati solo con il supporto fornito. Non utilizzare parti non originali su questo pparecchio.
- Prestare attenzione ad evitare perdite sul connettore.
- La brocca sarà ancora calda a causa di calore residuo dopo l'uso, fare attenzione a non scottarsi.
- Questo apparecchio può essere utilizzato da bambini di almeno 8 anni di età, purché siano controllati e gli siano state date istruzioni su come usare l'apparecchio in modo sicuro e sono pienamente consapevoli dei pericoli.
- La pulizia e la manutenzione non devono essere eseguite da bambini a meno che non abbiano almeno 8 anni di età e siano sorvegliati da un adulto.
- Mantenere l'apparecchio e il cavo di alimentazione fuori dalla portata dei bambini sotto gli 8 anni di età.
- Quando si utilizzano apparecchiature elettriche, devono sempre essere prese misure di sicurezza per prevenire il rischio di incendi, scosse elettriche e o lesioni in caso di uso improprio.
• Assicurarsi che la tensione sulla targhetta corrisponda alla tensione principale del vostro impianto elettrico. Se così non fosse, contattare il rivenditore e non collegare l'unità
- Non lasciare mai incustodita l'unità mentre è in funzione.
• Non aprire mai l'apparecchio stando sulla parte anteriore, posizionarsi sempre un po' di lato per evitare di scottarsi con il vapore.
- Il dispositivo non deve essere utilizzato se è stato fatto cadere, ha danni evidenti o se ha perdite.
• Non utilizzare l'apparecchio se ha il cavo o la spina
danneggiati, se non funziona correttamente o se è stato danneggiato o è caduto. Se il cavo di alimentazione è danneggiato, esso deve essere sostituito dal costruttore, da un suo agente di servizio o da una persona qualificata per evitare rischi.
CONTROLLO DEL CONTENUTO
Quando si apre la scatola di imballaggio, togliere tutti gli accessori e verificarli in base alla lista dei componenti. I component sono i seguenti:
1 Corpo principale 7 Coperchio Vaporiera
2 Manico brocca 8 Cestello
3 Coperchio Brocca 9 Farfalla
4 Misurino 10 Spatola
5 Vaporiera piccola 11 Ricettario
6 Vaporiera Grande

ACCESSORI
Assemblaggio brocca:
Su un lato della brocca sono segnate le capacità. La capacità massima della brocca è 2L.

Avviso
La quantità di cibo nella brocca non deve superare 2.0L, in caso contrario il cibo potrebbe fuoriuscire e causare pericolo.
Mettere il coperchio sulla brocca, premi l'interruttore di sicurezza, ruotare il coperchio in senso orario per fissarlo sulla brocca, in caso contrario il motore non può essere avviato. (Premere sempre prima l'interruttore di sicurezza per bloccare o aprire il coperchio)

natural_image
Three-step diagram showing mechanical component assembly (no text or symbols)
Mettere la brocca sul corpo principale nella la direzione corretta e fissarlocorrettamente, altrimenti il motore non può essere avviato.

natural_image
Line drawings of two kitchen appliances: a blender and a toaster, both with digital display cases (no text or symbols)
Montaggio lama:
Fissare l'anello di tenuta sulla lama, posizionarlo attraverso il foro sul fondo della brocca, tenere saldamente la metà superiore della lama e rovesciare il fondo, utilizzare la staffa di fissaggio per fissare la lama ruotando in senso orario. Effettuare la stessa procedura in modo inverso per rimuoverlo dalla brocca. Non dimenticate l'anello di tenuta della lama tra la lama e il fondo brocca.

natural_image
Technical line drawing of a mechanical component with four blades (no text or symbols)

natural_image
Technical diagram of a mechanical component with no visible text or symbols

natural_image
Technical line drawing of a mechanical component with no visible text or symbols

natural_image
Line drawing of a hand holding a circular mechanical component with four blades (no text or symbols)
Avviso
- La lama è molto affilata. Si prega di avvitare la lama utilizzando un panno in fase di montaggio o rimozione.
- Si prega di tenere la lama saldamente ed estrarla con attenzione in modo da non farla scivolare causano pericolo.
• Assicurarsi che staffa e l'anello di tenuta siano a posto e blocca strettamente con lama montaggio. Se l'anello di tenuta non è ben posizionato, il cibo potrebbe fuoriuscire causando danni all'apparecchio.
Montaggio impastatrice:
Rimuovere la lama, fissare l'impastatrice all'albero nello stesso modo in cui fissa la lama. Può essere usato per impastare, mecolare e miscelare senza tagliare il cibo.


natural_image
Diagram of a mechanical or electrical component with concentric rings and directional arrows indicating motion (no text or symbols)

natural_image
Cross-sectional diagram of a mechanical component with no visible text or symbols
Avviso
• Non utilizzarlo per la velocità sueriori a 3, altrimenti causerà una eccessiva e rischiosa vibrazione.
- Dato che la distanza minima tra l'impastatrice e la parete della brocca è di soltanto 1cm a volte il cibo può incastrarsi e il motore potrebbe fermarsi per auto protezione. Utilizzare la spatola per miscelare e rimuovere il cibo bloccato per far funzionare di nuovo l'apparecchio.
• Assicurarsi che staffa e l'anello di tenuta siano a posto e bloccati strettamente con lama montaggio. Se l'anello di tenuta non è ben posizionato, il cibo potrebbe fuoriuscire causando danni all'apparecchio.
Misurino:
\- Il misurino ha molte funzioni: una parte del coperchio per evitare di perdere il calore o schizzi; una tazza di misurazione per misurare gli ingredienti con 150ml di capacità.
\- Mettere il misurino nel foro del coperchio, ruotarlo in senso orario per fissarlo sul coperchio.

natural_image
Simple line drawing of a cylindrical object with a flared base (no text or symbols)

natural_image
Technical line drawing of a mechanical component with concentric circles and a handle (no text or symbols)
Avviso
\- Il misurino è l'unica parte che può essere utilizzata per coprire il foro rotondo del coperchio
\- Non coprire il buco con qualsiasi altrpo oggetto per evitare schizzi di cibo pericolosi.
Spatola:
\- La spatola è l'unico componente da utilizzare per raschiare il cibo nella brocca. Gli altri oggetti possono danneggiare il rivestimento antiaderente all'interno della brocca.
• C'è una piccola scanalatura sul manico della spatola, utilizzarla per tenere il cestello.

natural_image
Technical line drawings of three mechanical components: a tool, a fan, and a brush (no text or symbols)
Avviso
• Non usarlo per mescolare quando la lama è in funzione.
• Non usare la spatola se la farfalla è al suo interno.
• Fissare saldamente la maniglia con il cestello prima di sollevarlo.
Filtro a cestello:
Il cestello ha molte funzioni:
- Setaccio. Filtro per succhi di frutta e verdura. Dopo aver macinato o aver estratto il succo di frutta con l'apparecchio, inserire il cestello nella brocca per facilitare l'uscita del succo
• Cottura di cibi morbidi come la pasta o tagliatelle;
• Cucinare piatti come il riso e le patate.

natural_image
Technical line drawing of a mechanical component with two views (top and side), no text or symbols present.
Avviso
• Utilizzare il manico della la spatola per estrarre il cestello dalla brocca.
- Se si vuole diminuire l'acqua presente nel cibo, come ad esempio i pomodori, togliere il misurino e coprire con il cestello. In questo modo l'acqua può essere facilmente rimossa.
Farfalla:
• Installata sulla lama, la farfalla può aiutare a mescolare il cibo, ma impedisce il taglio delle lame, previene che il cibo si appiccichi e ne consente la miscelazione.
• Fissare la farfalla sulla lama, e premere con forza sufficiente per fissarla correttamente, ruotare la farfalla in senso antiorario per bloccarla sulla lama.

natural_image
Technical line drawing of a mechanical component with no visible text or symbols

natural_image
Line drawing of a mechanical device with a central tower and two adjacent panels (no text or symbols)
Avviso
• Non avviare l'apparecchio fino a quando la farfalle non è fissata in posizione.
• Non usare una velocità superiore a 4 quando si utilizza farfalla.
• Non usare la spatola quando si utilizzala farfalla.
- Non aggiungere gli ingredienti nella brocca quando l'apparecchio è in funzione con la farfalla, altrimenti la farfalla potrebbe danneggiarsi o bloccarsi.
Montaggio vaporiera:
Ci sono tre parti della vaporiera: vaporiera piccolo. Vaporiera grande e coperchio. Il coperchio può essere usato sia sulla vaporiera piccolo che sulla grande, e la vaposiera grande poggiata su euella piccolo.
Togliere il coperchio brocca, poggiare la vaporiera sulla brocca.

natural_image
Three product line drawings: a microwave oven, a closed air fryer with lid, and a modern K-froder (no text or symbols)
Avviso
- Si prega di assicurarsi che il coperchio della vaporiera sia chiuso prima della cottura a vapore.
• La caporiera non può essere usata nel forno a microonde o altri apparecchi elettrici.
- Non toccare o avvicinarsi ai fori del coperchio della vaporiera per evitare ferite da vapore caldo.
- Non coprire o bloccare i fori del coperchio, altrimenti il vapore potrebbe uscire pericolosamente dal bordo o da altri posti.
ISTRUZIONI PER L'USO
Nella fase iniziale di utilizzo di questa unità, ci sarà odore un odore proveniente dal motore, il che è un fenomeno normale. Dopo un certo periodo di tempo, questo tipo odore scomparirà.
\- Si prega di posizionare l'apparecchio su una superfice pulita, stabile e piana. Non metterlo troppo vicino al bordo, nn posizionarlo all'interno di mobiletti o su staffe di sostegno.
- È conveniente posizionare l'apparecchio su un posto fisso a vosta scelta.
• Si prega di pulire a fondo l'apparecchio prima di utilizzarlo.
• Il “Bip” segnala che il pulsante è stato attivato.


STOP / ANNULLA
\- Collegare liapparecchio, accendere l'interruttore sul retro, la macchina emette un segnale acustico, ma il display rimane spento.

natural_image
Pure technical line drawing of a mechanical joint or fastener assembly (no text or symbols)
- Premendo questo tasto, tutte le luci posteriori si accendono e viene avviata modalità standby, è possibile selezionare le funzioni desiderate.
- Premendo questo tasto durante l'impostazione tempo, tutte le impostazioni verranno cancellate e si tornerà alla modalità standby.
- Premendo questo pulsante durante il processo di lavoro, l'apparecchio smette di funzionare e torna immediatamente alla modalità standby.
- Premendo questo tasto durante processo fai da te, l'apparecchio si arresta e la funzione viene annullata.
• La macchina si spegne automaticamente dopo 30s senza funzionamento in modalità di attesa.
Manopola (AVVIO / PAUSA)
\- Dopo aver selezionato
l'impostazione o il programma desiderato,
premere questo tasto per avviare
l'apparecchio immediatamente.
\- Premendo questo pulsante durante il processo di lavoro, l'apparecchio va in pausa, e sul led LCD appare . (Paus E questo momento è possibile aprire il coperchio, togliere la brocca, ecc Ma deve essere fissata bene prima di riavviare l'apparecchio). Premere di nuovo per ricominciare.
\- La macchina si spegne automaticamente dopo 10 minuti senza funzionamento in stato di PAUSA.
- C'è anche una manopola per l'impostazione del timer, velocità, temperatura, potenza termica, che aumenta quando si ruota la manopola in senso orario, e diminuisce quando si ruota la manopola in senso antiorario, o per scegliere tra i 15 programmi automatici.

TIMER
\- I simboli sul dispaly LCD, 88:88:88 Significa ora: minuti: secondi.
\- Premete il pulsante timer e per far lampeggiare il timer sul display LCD; Ruotare la manopola per regolare i minuti. Premere nuovamente il pulsante LCD, ruotare la manopola per regolare i secondi. Premetr di nuovo, il pulsante LCD, ruotare la manopola per regolare le ore da 1 a 12h.
\- Premere il timer durante il processo di lavoro, la macchina inizia il conteggio direttamente.
\- Max 60min dalla regolazione manuale; 3h max sotto impostazione fai da te. Il limite del timer di ciascun programma è riportato nel capitolo "MENU" che troverete di seguito.


Funzione programmabile ☑
Tenere premuto il pulsante dell'ora per ⏻
3 secondi per accedere alla modalità di
programmazione.
L' icona dell' orologio e l' icona della programmazione inizieranno a lampeggiare. Procedete nello stesso modo che per regolare l' ora, potrete scegliere la durata da 30 minuti a 12 ore.
La modalità programmabile puo usarsi solamente con DIY e MENU. Per prima cosa bisognerá quindi selezionare DIY o MENU, premete sulla manopola ed il tempo iniziera a scorrere.
Premere il pulsante di ripristino per annullare.

VELOCITÀ
\- Premere questo pulsante in stand-by o durante il processo di lavoro (ad eccezione di alcuni programmi con blocco della regolazione della velocità), l'apparecchio entra in modalità 88 impostazione della velocità. Il simbolo + lampeggia sul display LCD, ora è possibile regolare la velocità. Ruotare la manopola per selezionare la velocità desiderata.
\- Le velocità vanno da livello 1 a 10.
- Premere questo pulsante nel in fase di riscaldamento, se la temperatura impostata o la temperatura effettiva è superiore a 60^ , La velocità può essere impostato soltanto da 1 a 4. Se si è operato ad alta velocità, si scenderà a velocità 4 automaticamente.
\- Vi è un trasferimento di velocità sulla struttura, quindi è normale sentire del rumore prima che il motore inizi a lavorare,
o aumentando la velocità tra il livello 5 e 6 livello.
- Per schiacciare o tagliare cibi duri o una grande quantità di cibo, si suggerisce di selezionare la velocità 5 e poi girare a velocità 10, per evitare vibrazioni e ottenere prestazioni perfette.
- Si prega di non usare la velocità 8,9,10 più di 5 minuti ogni volta; Si prega di non utilizzare la velocità 5,6,7 oltre 10 minuti ogni volta.

TEMPERATURA
- Premere questo pulsante in stand-by o durante il processo di riscaldamento (ad eccezione di alcuni programmi con blocco della regolazione della temperatura), l'apparecchio entra in modalità di impostazione della temperatura. Ilsimbolo lampeggia sul display LCD, ora è possibile regolare la temperatura. Ruotare la manopola per selezionare la temperatura desiderata.
• Range di temperatura: 37-120°C

POTENZA TERMICA
\- Premere questo pulsante in stand-by o durante il processo di riscaldamento (ad eccezione di alcuni programmi cn blocco della regolazione della potenza termica), l'apparecchio entra in modalità di impostazione della temperatura. Il simbolo lampeggia sul display LCD, or ail calore è regolabile. Ruotare la manopola per selezionare la potenza di cottura desiderata.
- La gamma di potenza termica va dal livello 1 al10.
- Per del cibo appiccicoso, si suggerisce di selezionare una potenza di fuoco basao per evitare che si bruci sul fondo.
- Se il volume cibo è piccolo e richiede una temperatura precisa, si suggerisce di selezionare una potenza termica bassa.
- Una bassa potenza darà un controllo più preciso; Ad alta potenza si riscalda più velocemente.
- Non funzionerà se si seleziona solo la potenza di calore, senza la temperatura selezionata. Si consiglia di utilizzare l'impostazione predefinita quando si scelgono diversi livelli di temperatura.

AUTOPULIZIA
- Questo programma è per la pulizia dopo l'uso.
- Aggiungere acqua da 500 ml a 1 litro.
- Un po' di detergente sarà utile
• L'intero processo dura circa 10 minuti

TURBO
\- Tenere premuto il pulsante in modo qualità standby, per la velocità massima, rilasciare per arrestare immediatamente l'apparecchio
- Quando la temperatura nella brocca è superiore a 60°C, la modalità PULSE non può essere utilizzata, e lo schermo mostrerà E11.
\- Vi è un trasferimento di velocità sulla struttura, quindi è normale sentire rumore prima che il motore inizi a lavorare al primo impulso.
\- Il tempo massimo di funzionamento per la modalità Pulse è di 3 minuti e poi è necessario attendere per 10 minuti

MENÙ
\- Questo pulsante è quello per scegliere tra i 10 programmi automatici


• COLTELLO (Hächer)
- STUPATO (MIJOTE2)
- VAPORE (VAPEUR)
• ZUPPA DENSA (VELOUTE)
• ZUPPA VELOCE (SOUPE)
• SALSA (SAUCE)
• IMPASTARE(Pétrir)
• RISOTTO (Rice)
- SMOOTHIE
- Yogurt (YAOURT)
\- Premendo questo tasto in modalità standby, il segnale SMOOTHIE sul display LCD inizia a lampeggiare, ruotare la manopola per scegliere il programma desiderato.
•
\- Per i programmi QUICK SOUP, THICK SOUP, STIR, STEW, RICE, quando il processo è completato, il display mostrerà la dicitura "End". Se nessuna operazione viene effettuata entro 10 minuti, l'apparecchio si spegne automaticamente per mantenere la preparazione calda per 12 ore fino all'arresto manuale.
Alcune impostazione di default del programma sono regolabili, ed è possibile vederli sullo schermo; alcune di esse sono bloccate e sullo schermo appare il simbolo "-"
Programmi Impostazione predefinita Impostazioni Suggerimenti SMINUZZARE * Velocità: 5Temperatura *: 0 *Potenza Termica: 0* Timer: 1 min * Per schiacciare, ma non frullare. Tempo regolabile da 1s-5min a seconda della consistenza desiderata. * Se lasciata inattiva per 10 minuti dopo il completamento del programma, la macchina si spegne automaticamente * La dimensione suggerita per tritare per gli ingredienti duri come la carota o la carne è di1-2cm. * Se è necessario elaborare il cibo il più sottile possibile, è possibile utilizzare SMOOTHIE STUFATO Fase 1: * Velocità: 0* temperautra:100°C* Potenza Termica:10 * Timer: nessun limite, fino adebollizioneFase 2: * Velocità: 0Temperatura*: 90-95°C* Potenza termica:può cambiareautomaticamente secondo il volume,la temperatura e ilcibo * Timer: 3h * Predefinito timer 3h, regolabileda * 1-12h Se lasciata inattiva per 10 minuti dopo ilcompletamento del programma,la macchina entreràautomaticamente in modalità'caldo'. *Cottura lenta VAPORE * Velocità: 0 *Temperatura: 120°C* Potenza termica:10 * Timer: 20min * Tempo regolabile da * 15-60mSe lasciata inattiva per 10minuti dopo il completamentodel programma, la macchinacentrerà automaticamente inmodalità 'caldo'. * 500 g di acqua perogni 30 minuti dicottura a vapore *20min verdure; carne30min ZUPPA DENSA Fase 1: * Velocità: 0Temperatura*: 120* Potenza termica:10 * Timer: Fino adebollizioneFase 2: * Velocità: 0* Temperatura:100°C* Potenza termica: 4* Timer: 29.5minFase 3: * Velocità: 0Temperatura*: 0°C* Potenza termica: 0* Timer: ilraffreddamento a80°CFase 4: * Velocità: lenta 6-10 * Temperatura: 0°C* Potenza termica: 0* Timer: 1 min * Adatto per la zuppa di carne,per tagliare e poi cucinare emescolare. Timer regolabile da15-60m. * Se lasciata inattivaper 10 minuti dopo ilcompletamento del programma,la macchina entreràautomaticamente in modalità'caldo'. * * La dimensionesuggerita per tritareper gli ingredienti duricome la carota o lacarne è di1-2cm. * èconsigliabilemettere inpausa e aggiungere lafarfalla dopo la fase 1. ZUPPA VELOCE Fase 1: * Velocità: 10 Temperatura*: 0* Potenza Termica: 0* Timer: 30sFase 2: * Velocità: 2* Temperatura: 120°C* Potenza Termica: 10* Timer: Fino a ebollizioneFase 3: * Velocità: 2* Temperatura: 100°C* Potenza Termica: 10* Timer: 19.5min * Adatto per minestre di verdura, tagliozzare e poi cucinare e mescolare. Timer regolabile da 15-60m. * Se lasciata inattiva per 10 minuti dopo il completamento del programma, la macchina entrerà automaticamente in modalità 'caldo'. * La dimensione suggerita per tritare per gli ingredienti duri come la carota o la carne è di1-2cm. * è consigliabilemettere in pausa e aggiungere la farfalla dopo la fase 1 MESCOLARE * Velocità: 2* Temperatura: 100°C* Potenza Termica: 10* Timer: 30min * Velocità regolabile da livello 0-3; * Temperatura regolabile 90-120°C. * Tempo regolabile da * 5-60m Se lasciata inattiva per 10 minuti dopo il completamento del programma, la macchina entrerà automaticamente in modalità 'caldo'. * Utilizzare farfalla o la lama impastatrice IMPASTARE Fase 1: * Velocità: 3* Temperatura: 0* Potenza Termica: 0* Timer: 3minFase 2: * Velocità: 2* Temperatura: 0* Potenza Termica: 0* Timer: 7 min * Velocità regolabile da livello 2-3; * Temperatura regolabile a 0 o 37°C per la diffusione. * Tempo regolabile da * 3-20m Se lasciata inattiao per 10 minuti dopo il completamento del programma, la macchina si spegne automaticamente * Impasto per il pane: acqua 330g + 500g di farina + altri ingredienti; 10min impastare con impostazione predefinita * Impasto per la tagliatelle: acqua 200g + 400g di farina; impastare 3min alla velocità 2 *Settare la temperatura a 37°C per la stesura, e se non si stende abbastanza, impostare 37°C per altri 30min senza velocità RISOTTO Passo 1:* Velocità: 0 *temperautre: 100°C* Potenza Termica:6 * Timer: Fino a ebollizionePasso 2:* Velocità: 1 *temperautre: 965°C* Potenza termica: 4* Timer: 18 minpotenza termica & temporizzatore: possono essere regolati automaticamente a seconda della temperatura e del volume *Tutti * non regolabiliSe lasciata inattiva per 10 minuti dopo il completamento del programma, la macchina entrerà automaticamente in modalità 'caldo'. * Volume consigliato (max): 500g di riso + 800g di acqua, RICE gestito da impostazione predefinita. . Il riso frma una crosta sul fondo * o usare la cottura a vapore, impostazione: riso 400g nel cestello, 2L di acqua, scegliere BOIL; versare un pò d'acqua lasciando lo spazio per 1 litro, scegliere la cottura a vapore per 20 minuti SMOOTHIE * Velocità: 10Temperatura *: 0 *Potenza Termica: 0* Timer: 30s *Tutte le impostazioni non sono regolabili, eseguire una volta di più, fino ad ottenere la consistenza desiderata. * Se lasciata inattiva per 10 minuti dopo il completamento del programma, la macchina si spegne automaticamente La dimensione suggerita per tritare per gli ingredienti duri come la carota o la carne è di1-2cm YOGURT * Velocità: 1 l primi primo 30 minuti, e poi stop *Temperatura: 37-39°C* Potenza Termica:1 * Timer: 6h * Tempo regolabile da * 3-12hSe lasciata inattiva per 10 minuti dopo il completamento del programma, la macchina si spegne automaticamente * Volume consigliato: 1 tazza di yogurt + 1L latte fresco + zucchero, 6-12h a seconda dellaconsistenzadesiderata
Velocità e capacità suggerita per ogni componente:
Utensili Immagine Funzione Velocità Capacità tempo di funzionamento Lama tagliente 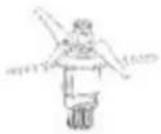
Taglia ma non frulla 5 2L max, il cibo deve essere tagliato in pezzi da 1-2cm prima del funzionamento 1 minuto Taglia il più fine possibile 10 2L max, il cibo deve essere tagliato in pezzi da 1-2cm prima del funzionamento 1 minuto Lama impastatrice 
Impasto per pasta, pane, pizza, ecc 2-3 800g di farina max 5-10 Impasto per tagliatelle 2 500g di farina max 3min Farfalla 
Agitare 1-3 2L max 30 minuti Montare albumi o panna 4 2L max 10 minuti Vaporiera 
Verdure a vapore N / A 3.5L max 15 minuti Carne di vapore N / A 3.5L max 20-30 minuti
RISOLUZIONE DEI PROBLEMI
\- Le informazioni di errore qui di seguito appaiono sullo schermo normalmente. Se il problema persiste dopo aver agito secondo la soluzione qui di seguito, si prega di contattare il nostro centro di assistenza clienti.
Codice errore Descrizione Possibili ragioni Soluzione E1 Interruttore di sicurezza non fissato Brocca o coperchio brocca non è ben fissati. Rimontare il coperchio brocca e la brocca, assicurarsi che tutte le parti siano assemblate correttamente e strettamente E2 Sensore di temperatura mancante La brocca non è a posto, o il collegamento del sensore di temperatura alla base brocca è danneggiato Rimontare la brocca e assicurarsi che sia ben fissata E3 Motore bloccato Brocca eccessivamente carica Diminuire il volume del cibo nella brocca, o tagliare il cibo in piccoli pezzi e riavviare la macchina. E4 Temperatura troppo elevata Niente cibo nella brocca, o molto poco cibo con una regolazione temperatura elevata per troppo tempo. Aggiungere il cibo nella brocca E5 Temperatura motore troppo elevata La macchina sta funionando a carico elevato per troppo tempo Arrestare e lasciare che la macchina si raffreddi prima di riavviare E7 Fallimento di trasferimento Velocità Velocità di passaggio da livello basso (1-5) ad alto (6-10) bloccata Rimuovere la brocca, ruotare la frizione inferiore manualmente, rifissare la brocca e riavviare. E8 Motore NTC mancante Collegamento del sensore di temperatura del motore allentato o danneggiati Smettere di usare e inviare al centro di assistenza tecnica per risolvere il problema E11 Impossibile utilizzare Pulse La temperatura nella brocca supera il 90°C Raffreddare il cibo eattivare la modalità Pulse di nuovo, o utilizzare una velocità inferiore a 4
Pulizia dell'apparecchio
1. Non lavare nessuna parte dell'apparecchio in lavastoviglie. Lavare sempre la brocca a fondo dopo ogni uso, o se non è stata utilizzata per un periodo prolungato.
2. Scollegare la spina dalla presa di corrente e lasciare raffreddare l'unità prima della pulizia.
3. Lavare la pentola estraibile con acqua calda e sapone. Risciacquare e asciugare accuratamente.
4. Pulire corpo principale con un panno umido. Se resti di residui di cibo, inumidire un panno con acqua calda e sapone prima di pulire. Non immergere MAI il corpo principale in acqua o altro liquido. Pulire la pentola se necessario per rimuovere qualsiasi prodotto alimentare.
5. Al fine di mantenere elevate le prestazioni dell'apparecchio, Il fondo della pentola di cottura amovibile deve essere controllato e pulito, se necessario, dopo ogni uso. Pulire con un panno morbido inumidito e asciugare prima dell'uso.
6. Se l'apparecchio non viene utilizzato per un certo periodo di tempo, si prega di staccare la spina e tenere in luogo fresco e pulito.

TROVA TUTTE LE NOSTRE RICETTE:
http://dl.hkoenig.com/SiteHkoenig/Livrederecettes\_HK8.pdf
Oppure scansiona il codice QR:

GARANZIA
Il periodo di garanzia per i nostri prodotti è di 2 anni, se non diversamente stabilito dalla legge, a partire dalla data di acquisto iniziale o di consegna.
Se avete problemi o domande, potete facilmente accedere alle nostre pagine di aiuto, consigli per la risoluzione dei problemi, FAQ e manuali d'uso sul nostro sito post-vendita: https://sav.hkoenig.com.
Digitando il nome di riferimento del tuo dispositivo nella barra di ricerca, puoi accedere a tutto il supporto online disponibile, progettato per soddisfare al meglio le tue esigenze.
Se ancora non riesci a trovare una risposta alla tua domanda o al tuo problema, allora clicca su "La risposta ha risolto il tuo problema? Questo vi porterà al modulo di richiesta di supporto post-vendita, che potete completare per convalidare la vostra richiesta e ottenere aiuto.
CONDIZIONI DI GARANZIA
La garanzia copre tutti i guasti derivanti da un uso normale, in conformità con gli usi e le specifiche del manuale utente.
Questa garanzia non si applica a problemi di imballaggio o di trasporto durante la spedizione del prodotto da parte del proprietario. Non include inoltre la normale usura del prodotto, né la manutenzione o la sostituzione delle parti di consumo.
ESCLUSIONE DELLA GARANZIA
- Accessori e parti soggette a usura (\*).
- Normale manutenzione dell'apparecchio.
- Tutti i guasti derivanti da un uso improprio (urti, mancato rispetto delle raccomandazioni sull'alimentazione, cattive condizioni d'uso, ecc.), da una manutenzione inadeguata o da un uso improprio dell'apparecchio, nonché dall'uso di accessori inadeguati.
- Danni di origine esterna: incendio, danni d'acqua, sovratensione elettrica, ecc.
- Qualsiasi attrezzatura che sia stata smontata, anche parzialmente, da persone diverse da quelle autorizzate a farlo (in particolare l'utente).
- Prodotti per i quali il numero di serie è mancante, danneggiato o illeggibile, il che non permetterebbe la sua identificazione.
- Prodotti soggetti a noleggio, dimostrazione o esposizione.
(\*) Alcune parti del suo apparecchio, note come parti soggette a usura o materiali di consumo, si deteriorano con il tempo e la frequenza d'uso del suo apparecchio. Questa usura è normale, ma può essere accentuata da cattive condizioni d'uso o di manutenzione del vostro apparecchio. Queste parti non sono quindi coperte dalla garanzia.
Anche gli accessori forniti con l'apparecchio sono esclusi dalla garanzia. Non possono essere scambiati o rimborsati. Tuttavia, alcuni accessori possono essere acquistati direttamente dal nostro sito web: https://sav.hkoenig.com/.
AMBIENTE
ATTENZIONE:

Corretto smaltimento del prodotto
Questo simbolo indica che il prodotto non deve essere smaltito con altri rifiuti domestici in tutta l'UE. Per evitare eventuali danni all'ambiente o alla salute umana causati dallo smaltimento dei rifiuti, riciclare in maniera responsabile per favorire il riutilizzo sostenibile delle risorse materiali. Per consegnare il dispositivo usato, utilizzare i sistemi di raccolta o contattare il rivenditore presso il quale il prodotto è stato acquistato. I rivenditori possono ritirare questo prodotto per riciclarlo in totale sicurezza ambientale
Adeva SAS / H.Koenig Europe - 8 rue Marc Seguin, 77290 Mitry-Mory, France www.hkoenig.com - https://assistenza.hkoenig.com - Tél: +33 1 64 67 00 05
PORTUGUES
Instruções Importantes de Segurança
As seguintes precauções dessegurança devem ser sempre seguidas, para reduzir o risco de choques elétricos, ferimentos pessoais ou incêndio. E importante ler cuidadosamente todas estas instruções de utilizar o produto e guardá-las para referência futura ou para novos utilizadores.
- Este equipamento pode ser utilizado por pessoas com capacidades físicas, sensoriais ou mentais reduzidas, ou com falta de experiência ou conhecimento, desde que sejam supervisionadas ou instruídas na utilização segura do equipamento e compreendam plenamente os perigos potenciais.
- Este aparelho não deve ser utilizado pelas crianças. Mantenha o aparelho e o cabo de alimentação fora do alcance das crianças.
- Aviso: lesões potências por utilização indevida. Deve ter muito cuidado ao manusear as lâminas cortantes afiadas quando vazar o recipiente e durante a limpeza.
- Desligue o aparelho no botão e da fonte de alimentação antes de trocar acessórios ou antes de se aproximar das peças que se movimentam em utilização. Desligue sempre o aparelho da fonte de alimentação se não estiver a utilizá-lo e antes da montagem, desmontagem ou limpeza.
- Se o cabo de alimentação estiver danificado, deve ser substituído pelo fabricante, fornecedor de serviços ou pessoas com qualificação semelhante, com a finalidade de evitar riscos.
- Os acessórios, outros que não os fornecidos com o aparelho, devem incluir instruções para a sua utilização segura.
- AVISO: Não remova a tampa enquanto a água estiver a ferver. Não defina a velocidade acima do nível 4 quando a temperatura for superior a 90 graus centígrados.
- O aparelho não deve ser submerso.
- Este aparelho destina-se a ser utilizado em aplicações domésticas e similares, tais como :
- áreas de cozinha em lojas, escritórios e outros
ambientes de trabalho
- casas de campo
- em hotéis, motéis e outros ambientes residenciais
- quartos de hóspedes.
\- Por favor, coloque a unidade numa mesa estável e plana que não fique quente e verifique se está a uma distância segura da orla da mesa para evitar que o aparelho caia. Quando o aparelho é utilizado para amassar a massa ou para cortar alimentos, a unidade pode mover-se devido às vibrações. Portanto, não utilize o aparelho sem a supervisão de pessoas, para evitar que o equipamento caia no chão.
\- Por favor, remova a ficha quando limpar o aparelho ou quando o guardar por um longo período de tempo.
\- Verifique regularmente se a estrutura principal, o recipiente, o vaporizador ou outros componentes estão ou não danificados. As peças danificadas diminuirão a segurança da utilização do aparelho. Quando encontrar algo errado, por favor pare de utilizar o aparelho e entre em contato com o centro de serviços pós-venda.
\- Se o aparelho parar inesperadamente ou parecer apresentar um mau funcionamento, desligue a fonte de alimentação, remova a ficha da tomada elétrica e pare de o utilizar imediatamente. Procure aconselhamento profissional para corrigir a falha ou para fazerem reparações.
\- O copo de medida é a única peça que pode ser usada
para tapar o orifício redondo na tampa do recipiente.
Por favor, não utilize um pano ou coisas semelhantes para tapar o orifício.
\- Não toque na orla das lâminas. Por favor, tenha cuidado e segure a parte superior quando fizer a montagem ou a remoção das lâminas.
\- Preste atenção à marca de capacidade no recipiente de cozinhar.
\- Abra a tampa quando os alimentos que se encontram dentro do recipiente de cozinhar pararem de girar.
\- Preste atenção aos alimentos de alta temperatura quando abrir a tampa do recipiente de cozinhar. Por favor, coloque o copo de medida no orifício da tampa do recipiente corretamente quando processar alimentos.
\- Não toque no recipiente de cozinhar quando processar alimentos quentes a mais de 60°C.
\- Certifique-se de que o vaporizador e o recipiente de cozinhar estão bem encaixados quando estiver a utilizar o vaporizador.
\- Preste atenção para que o vapor saia através da parte superior ou pelas laterais da tampa.
\- Quando em funcionamento, não toque em nenhuma parte do vaporizador, exceto nas pegas.
\- Não utilize o vaporizador sem a tampa correspondente no devido lugar.
\- Quando abrir a tampa do vaporizador, tenha cuidado para não se queimar com o vapor.
\- Quando utilizar as configurações de vapor e fervura, preste atenção porque o vapor sairá através da boca do recipiente de cozinhar quando mover o vaporizador.
\- Verifique constantemente se o orifício de ventilação na tampa do vaporizador está desbloqueado, caso contrário o vapor pode estar a sair por outro lado qualquer.
\- Por favor, coloque o aparelho e as peças quentes
após utilização num local for a do alcance das crianças e avise as mesmas que a unidade ficará quente e que não lhe podem tocar.
\- Fuga de alimentos: verifique se o anel de vedação da lâmina está bem colocado e se o conjunto de lâminas está firmemente fixado pelo suporte de fixação na parte inferior. Uma falha na instalação causará fuga de alimentos que danificarão o aparelho.
\- Danos devido a ventilação insuficiente: certifique-se de que as aberturas de ventilação na parte traseira da estrutura principal não estão bloqueadas por quaisquer artigos, caso contrário o equipamento será danificado.
\- O recipiente de cozinhar e todos os outros acessórios são para ser utilizados apenas com o suporte fornecido. Não utilize acessórios que não tenham sido fornecidos pelo fabricante e que são estranhos a esta máquina.
\- Preste atenção para evitar derrames sobre as ligações e conexões do aparelho.
\- O récipiente de cozinhaí ainda estará quente após utilização devido ao calor residual, tenha cuidado para não se queimar.
\- Este aparelhô pode ser utilizado por crianças com pelo menos 8 anos de idade, desde que supervisionadas e tenham recebido instruções sobre a utilização segura do aparelho e que estejam plenamente conscientes dos perigos envolvidos.
\- A limpeza e manutenção não devem ser realizadas por crianças, a menos que tenham pelo menos 8 anos de idade e sejam supervisionadas por um adulto.
\- Mantenha o aparelho e o cabo de alimentação fora do alcance de crianças com menos de 8 anos de idade.
\- Quando utilizar eletrodomésticos (aparelhos eléctricos), devem ser sempre seguidas as precauções básicas de segurança para evitar o risco de incêndio, choque elétrico e/ou ferimentos em caso de utilização indevida.
- Verifique se a voltagem nominal na placa de identificação corresponde à voltagem principal da sua instalação. Se não for este o caso, entre em contato com o revendedor e não ligue a unidade à corrente.
- Nunca deixe o aparelho sem vigilância enquanto estiver em funcionamento.
- Nunca se posicione em frente ao aparelho quando o abrir, posicione-se sempre ligeiramente para o lado para evitar queimar-se com o vapor.
- O aparelho não deve ser utilizado se tiver caído, se forem visíveis sinais óbvios de danificação ou se houver fugas.
- Não utilizé este aparelho se tiver um cabo ou uma ficha danificada, se não funcionar corretamente ou se foi danificado ou caiu. Se o cabo de alimentação estiver danificado, deve ser substituído pelo fabricante, fornecedor de serviços ou pessoas com qualificação semelhante com a finalidade de evitar riscos.
VERIFICAÇÃO DA EMBALAGEM
Quando abrir a embalagem, retire todos os acessórios e verifique-os de acordo com a lista de componentes. As peças de reposição são as seguintes:
1 Estrutura principal 7 Tampa do Vaporizador
2 Recipiente de cozinhar 8 Cesto Filtro
3 Tampa do recipiente de 9 Borboleta cozinhar
4 Copo de medida 10 Espátula
5 Vaporizador pequeno 11 Livro de receitas
6 Vaporizador grande

ACESSÓRIOS
Conjunto de Recipiente de Cozinhar:
Existem marcas referentes à capacidade do recipiente de cozinhar num dos lados do referido recipiente. A capacidade máxima do recipiente de cozinhar é de 2 L.

Aviso
A quantidade de alimentos colocados no recipiente não deve exceder os 2 L; caso contrário, os alimentos podem sair ou salpicar para fora do recipiente e causar perigo.
Coloque a tampa no recipiente de cozinhar, rode a tampa no sentido horário para a fixar no recipiente, caso contrário o motor não pode começar a funcionar.

natural_image
Three-step diagram showing mechanical component assembly with arrows indicating direction (no text or symbols)
Coloque o recipiente de cozinhar na estrutura principal do aparelho, na posição correcta e encaixado apropriadamente, caso contrário o motor não pode começar a funcionar.

natural_image
Line drawings of two kitchen appliances: a blender and a four-thrower (no text or symbols)
Conjunto de Lâminas:
Fixe o anel de vedação no conjunto das lâminas, coloque-o no orifício existente no fundo do recipiente, segure firmemente a metade superior da lâmina e vire a parte inferior para cima, utilize o suporte de fixação para fixar a lâmina rodando no sentido horário. Faça o oposto para removê-lo do recipiente de cozinhar. Não perca o anel de vedação da lâmina entre a lâmina e o fundo do recipiente.

natural_image
Line drawing of a mechanical component with three blades and a central hub (no text or symbols)

natural_image
Technical line drawing of a mechanical component with no visible text or symbols

natural_image
Technical line drawing of a mechanical component with no visible text or symbols

natural_image
Technical line drawing of a mechanical component with no visible text or symbols
AVISO
\- As lâminas são muito afiadas. Por favor, embrulhe as lâminas com um pano quando montar ou remover a base das lâminas.
\- Por favor, segure firmemente o conjunto de lâminas e retire-o com cuidado, para garantir que o conjunto de lâminas não caia e cause perigo.
\- Por favor, verifique se o suporte de fixação e o anel de vedação estão no lugar apropriado e travados firmemente com o conjunto de lâminas. Se o anel de vedação não estiver bem colocado, pode existir uma fuga dos alimentos que estão a ser misturados ou cozinhados e danificar o aparelho.
Conjunto de Eixo de Amassar:
Retire as lâminas, fixe o eixo de amassar da mesma forma que fixa as lâminas. Pode ser utilizado para amassar, mexer e misturar sem cortar os alimentos.


natural_image
Technical line drawing of a mechanical component with no visible text or symbols

natural_image
Technical line drawing of a mechanical component with no visible text or symbols
AVISO
- Não utilize o Eixo de Amassar com velocidades acima de 3; caso contrário, causará uma grande vibração na máquina o que, consequentemente, causa riscos.
- Como a menor distância entre o conjunto de agitação e a parede do recipiente de cozinhar é de apenas 1 cm, às vezes os alimentos podem ficar presos e o motor pode parar de funcionar por autoproteção. Utilize a espátula para misturar e remover os alimentos presos e o motor funcionará novamente sem problemas.
- Por favor, verifique se o suporte de fixação e o anel de vedação estão no lugar apropriado e travados firmemente com o conjunto de lâminas. Se o anel de vedação não estiver bem colocado, pode existir uma fuga dos alimentos que estão a ser misturados ou cozinhados e danificar o aparelho.
Copo de Medida:
- O copo de medida tem muitas funções: faz parte da tampa para impedir a perda de calor ou salpicos; é um copo de medida para medir os ingredientes com uma capacidade total de 150 ml.
- Coloque o copo de medida no orifício da tampa, rode no sentido horário para fixá-lo na tampa.

natural_image
Technical line drawing of a mechanical component with a cylindrical top and flange base (no text or symbols)

natural_image
Technical line drawing of a mechanical component with concentric circles and a handle (no text or symbols)
AVISO
- O copo de medida é o único acessório que pode ser utilizado para tapar o orifício redondo existente na tampa
- Não tape o orifício com outros artigos para evitar os salpicos dos alimentos, isto causa perigo
Espátula:
- A espátula é o único acessório que deve ser utilizado para raspar os alimentos que se encontram dentro do recipiente de cozinhar. Os outros artigos/ acessórios podem causar danos ao revestimento antiaderente dentro do recipiente de cozinhar.
- Existe uma pequena ranhura na pega da espátula, use-a para segurar o cesto filtro.

natural_image
Technical line drawings of two kitchen utensils and a bucket (no text or symbols)
AVISO
- Não utilize para misturar e/ou raspar os alimentos dentro do recipiente quando as lâminas estiverem a funcionar.
- Não utilize a espátula se a borboleta estiver dentro do recipiente de cozinhar.
• Fixe bem a pega da espátula no cesto filtro antes de levantá-lo.
Cesto Filtro:
O cesto tem muitas funções:
- Filtro: filtrar frutas e o caldo de vegetais. Depois de moer ou fazer sumo de frutas com o aparelho, coloque o cesto no recipiente de cozinhar para ajudar a servir o sumo.
- Cozinhar alimentos leves, como massas ou macarrão;
- Cozinhar acompanhamentos, como arroz e batatas.

natural_image
Line drawings of two kitchen utensils, one with a lid and handle, the other with a handle and handle (no text or symbols)
AVISO
- Utilize a pega da espátula no orifício existente na orla do cesto para colocá-lo ou retirá-lo do recipiente de cozinhar.
- Se você quiser diminuir a água nos alimentos, como tomates, retire o copo de medida e tape o recipiente com o cesto. A água pode ser facilmente removida.
Borboleta:
- Instalada na lâmina, a borboleta pode ajudar a misturar os alimentos, mas impede que os alimentos sejam cortados pelas lâminas e que fiquem colados, e deixa que os alimentos continuem a misturar-se.
- Fixe a borboleta no conjunto de lâminas pelo orifício e pressione-a com força suficiente para encaixar bem, rode a barra da borboleta no sentido anti-horário para travá-la na lâmina.

natural_image
Technical line drawing of a mechanical component with no visible text or symbols

natural_image
Line drawing of a symmetrical architectural structure with a central tower and surrounding walls (no text or symbols)
AVISO
- Não ligue o aparelho até que a borboleta esteja fixa no posicionamento adequado.
- Não utilize a Borboleta com velocidades acima 4.
- Não utilize a espátula quando estiver a utilizar a borboleta.
- Não adicione ingredientes ao recipiente quando o aparelho estiver a funcionar com a borboleta, caso contrário a borboleta poderá ser danificada ou bloqueada.
Conjunto de Vaporizador:
Existem três partes do vaporizador: Vaporizador pequeno, Vaporizador grande, Tampa do Vaporizador. A tampa pode ser colocada em ambos os vaporizadores, pequeno e grande, e o vaporizador grande pode ser encaixado no vaporizador pequeno.
Retire a tampa do recipiente de cozinhar e coloque o vaporizador.

AVISO
- Por favor, certifique-se de que a tampa do vaporizador está colocada antes de começar a cozinhar.
- O vaporizador não pode ser utilizado num forno micro-ondas ou em outros aparelhos elétricos.
- Não toque nem se aproxime dos orifícios da tampa do vaporizador para evitar ferimentos que podem ser causados pelo vapor quente.
- Não cubra nem bloqueie os orifícios da tampa do vaporizador com qualquer objeto, caso contrário o vapor pode sair pelas orlas ou por outros locais e causar perigo.
INSTRUÇÕES DE UTILIZAÇÃO
Na fase inicial de utilização deste aparelho, haverá um leve cheiro proveniente do motor, o que é um fenómeno normal. Após um período de tempo, este tipo de cheiro desaparecerá.
\- Por favor, coloque o aparelho numa mesa limpa, estável e plana. Não o coloque muito perto da orla da mesa e mantenha-o afastado de armários embutidos ou suportes suspensos.
\- Para sua conveniência, é melhor colocar o aparelho num local fixo.
\- Por favor, limpe o aparelho de forma exaustiva antes de o utilizar.
\- O som "Beep" mostra que o botão entrou em vigor.


STOP / CANCEL (PARAR / CANCELAR)
\- Ligue o aparelho, ligue o interruptor na parte traseira do aparelho, o aparelho emite um sinal sonoro “Beep” uma vez, mas não é mostrado.

natural_image
Pure technical line drawing of a mechanical joint or bracket (no text or symbols)
\- Pressione este botão e todas as luzes de fundo acendem e entram em modo de espera. Você pode selecionar as funções que desejar.
\- Pressione este botão durante o período de configuração, todas as configurações são apagadas e voltam ao modo de
espera.
- Pressione este botão durante o processo de funcionamento, o aparelho pára de funcionar imediatamente e volta ao modo de espera.
- Pressione este botão durante o processo de gravação DIY, o aparelho pára de funcionar e cancela a gravação.
- O aparelho será desligado automaticamente após 30 segundos sob o modo de espera sem operações.
KNOB (START/ PAUSE) BOTÃO (INICIAR / PAUSA)
- Após selecionar a configuração ou o programa desejado, pressione este botão para começar a funcionar imediatamente.
- Pressione este botão durante o processo de funcionamento, o aparelho fará uma pausa no funcionamento e espera, o LCD mostra. (R# USE consumidor pode abrir a tampa, tirar o recipiente de cozinhar, etc. Mas deve colocar e fixar tudo muito bem novamente antes de reiniciar). Pressione novamente o botão e o aparelho começa a funcionar novamente.
- O aparelho será desligado automaticamente após 10 minutos sob o modo de pausa (PAUSE) sem operações.
\- Também é um botão para definir o tempo, velocidade, temperatura, potência de calor, aumentando ao rodar o botão no sentido horário e diminuindo ao rodar o botão no sentido anti-horário ou escolher um de entre os 15 programas automáticos.

TIMER (TEMPORIZADOR)
- O ecrã do LCD mostra 88:88:88, isto significa: horas: minutos: segundos.
- Pressione o botão temporizador e o sinal dos minutos pisca no LCD; Rode o botão para ajustar os minutos. Pressione-o novamente e o sinal dos segundos pisca no LCD; Rode o botão para ajustar os segundos. Pressione-o novamente e o sinal das horas pisca no LCD; Rode o botão para ajustar as horas de 1 a 12h.
- Pressione o temporizador durante o processo de funcionamento, o aparelho começa diretamente a contagem regressiva.
- 60 minutos é o máximo na configuração manual; 3 horas é o máximo sob a configuração DIY. O limite do temporizador para cada programa, por favor consulte o capítulo "MENU" abaixo.
- Função programável
Pressione e segure o botão de tempo 📊 por 3 segundos para entrar no modo de programação. O ícone do tempo e o ícone de programação começarão a piscar. Proceda da mesma maneira que para ajustar a hora do relógio e ajuste a duração de 30 minutos à 12 horas.
O modo programação só pode ser utilizado com DIY e MENU. Primeiro selecione DIY ou MENU, aperte o botão para começar a contagem regressiva. Para anular a ação, pressione o botão RESET

SPEED (VELOCIDADE)
\- Pressione este botão no modo de espera ou durante o processo de funcionamento (exceto alguns programas automáticos que têm o ajuste da velocidade bloqueado), o aparelho entrará no modo d configuração de velocidade. O sinal pisca no LCD e a velocidade é ajustável. Rode o botão para selecionar a velocidade desejada.
\- Escala da velocidade do nível 1 ao 10.
\- Pressione este botão durante o processo de mistura e aquecimento, se a configuração da temperatura ou a temperatura real for superior a 60°C, a velocidade poderá ser ajustada apenas da velocidade 1 a 4. Se o aparelho estiver a funcionar em alta velocidade, passará para a velocidade 4 automaticamente.
\- Há uma transferência de velocidade na estrutura, portanto, é normal ouvir pouco barulho antes do motor começar a funcionar ou quando transfere a velocidade entre o nível 5 e o nível 6.
\- Para triturar ou cortar alimentos duros ou um grande volume de alimentos, é recomendável selecionar primeiro a velocidade 5 e depois passar para a
velocidade 10, para evitar vibrações e obter um desempenho perfeito.
\- Por favor, não use a velocidade 8,9,10 mais de 5 minutos de cada vez; por favor, não use a velocidade 5,6,7 mais de 10 minutos de cada vez.

TEMPERATURA
\- Pressione este botão no modo de espera ou durante o processo de aquecimento (exceto alguns programas automáticos que têm o ajuste da temperatura bloqueado), o aparelho entrará no modo de configuração de temperatura. O sinal ☑ pisca no LCD e a temperatura é ajustável. Rode o botão para selecionar a temperatura desejada.
\- Escala da temperatura: 37-120°C
•
DE CALOR)
HEAT POWER (PÔTÊNCIA
\- Pressione este botão no modo de espera ou durante o processo de aquecimento (exceto alguns programas automáticos que têm o ajuste da potência de calor bloqueado), o aparelho entrará no modo de configuração de temperatura. O sinal pisca no LCD e a potência de calor é ajustável. Rode o botão para selecionar a potência de calor desejada.
\- Escala da potência de calor do nível 1 ao 10.
\- Para alguns alimentos viscosos, é recomendável selecionar uma potência de calor baixa para evitar que se queimem no fundo.
- Se o volume de alimentos for pequeno e exigir uma temperatura precisa, é recomendável selecionar uma potência de calor baixa.
- A Baixa potência proporcionará um controlo mais preciso; A Alta potência aquecerá mais rapidamente.
- Não funcionará se selecionar apenas a potência de calor, deve selecionar a temperatura para que funcione. É recomendável seguir a configuração padrão quando escolher diferentes níveis de temperatura.

SELF-CLEANING (AUTO-
- Este programa é para fins de limpeza após utilização.
- Adicione água, de 500 ml a 1 litro.
- Um pouco de detergente será útil.
- Todo o processo demora cerca de 10 minutos.

TURBO
- Pressione e segure este botão no modo de espera, o aparelho começa a funcionar na velocidade máxima. Quando solta o botão, o aparelho pára imediatamente.
- Quando a temperatura no recipiente de cozinhar estiver acima de 60°C, a função PULSE (IMPULSIONAR) não pode ser usada e o ecrã mostrará E11.
- Há uma transferência de velocidade na estrutura, portanto, é normal ouvir pouco barulho antes do motor começar a funcionar no primeiro impulso.
- O tempo máximo de operação para a
função Pulse (Impulsionar) é de 3 minutos e depois descansa durante 10 minutos.

MENU
\- Este botão é para escolher um de entre os 10 programas automáticos abaixo.

natural_image
Grid of ten food and kitchen icons in standard boxes, including cooking utensils, steaming dishes, and drinks (no text or symbols)
- CHOP ( HACHER )
(CORTAR/TRITURAR)
- STEW (MIJOTE2) (COZINHAR)
- STEAM (VAPEUR)
(VAPORIZAR)
• THICK SOUP (VELOUTE) (SOPA ESPESSA)
- QUICK SOUP (SOUPE) (SOPA RÁPIDA)
• STIR ( SAUCE)
(MEXER/MISTURAR)
• KNEAD (PETRIR) (AMASSAR)
• RISOTTO (Rice) (ARROZ)
• SMOOTHIE (BATIDO)
• YOGURT (YAOURT) (IOGURTE)
\- Pressione este botão no modo de espera, o sinal de SMOOTHIE (BATIDO) começa a piscar no LCD. Rode o botão para selecionar o programa desejado.
• Após os programas QUICK SOUP (SOPA RÁPIDA), THICK SOUP (SOPA
ESPESSA), STIR(MEXER/MISTURAR), STEW (VAPORIZAR), RICE (ARROZ), estarem concluídos, será mostrada a palavra "End" "Fim".
QUENTE) automaticamente durante 12 horas até parar manualmente.
Algumas configurações padrão do programa são ajustáveis e mostram os dados reais no ecrã; alguns deles estão bloqueados e são mostrados no ecrã da seguinte forma "--".
Se não houver operações após 10 minutos, o aparelho passará para a função KEEP WARM (MANTER
Programas ConfiguraçãoPadrão Configuração Conselhos CORTAR/TRITURAR *Velocidade: 5*Temperatura: 0*Potência de Calor: 0*Temporizador: 1min *Para esmagar, mas não para ser batido. Tempo ajustável de 1 seg. a 5 min. para a consistência desejada.*Se ficar inativo durante 10 minutos após a conclusão do programa, o aparelho desligará automaticamente. *O corte/triturado sugerido de ingredientes com artigos duros como cenouras, carne, é de 1 a 2 cm.*Se precisar de esmagar os alimentos para que fiquem mais finos, por favor, utilize o programa SMOOTHIE (BATIDO) COZINHAR Passo 1:*Velocidade: 0*Temperatura:100°C*Potência de Calor: 10*Temporizador: sem limite, até ferverPasso 2:*Velocidade: 0*Temperatura: 90-95°C*Potência de Calor: não é certo, pode mudar automaticamente de acordo com a temperatura e ovolume de alimentos*Temporizador: 3 h *Tempo padrão 3 h, ajustável de 1 a 12 horas*Se ficar inativo durante 10 minutos após a conclusão do programa, o aparelho entrará automaticamente no modo ‘WARM’ “QUENTE”. *Cozinhar lentamente VAPORIZAR *Velocidade: 0*Temperatura:120°C*Potência de Calor:10*Temporizador: 20 min *Tempo ajustável de 15 a 60 min.*Se ficar inativo durante 10 minutos após a conclusão do programa, o aparelho entrará automaticamente no modo ‘WARM’“QUENTE”. *500 g de água por cada 30 minutos de vapor*Vegetais 20 min;carne 30 min SOPA ESPESSA Passo 1:*Velocidade: 0*Temperatura: 120*Potência de Calor:10*Temporizador: até ferverPasso 2:*Velocidade: 0*Temperatura:100°C*Potência de Calor:4*Temporizador: 29,5 minPasso 3:*Velocidade: 0*Temperatura: 0°C*Potência de Calor:0*Temporizador:arrefecimento até 80°CPasso 4:*Velocidade:lentamente de 6 a 10*Temperatura: 0°C*Potência de Calor: 0*Temporizador: 1 min *Adequado para sopa de carne. Primeiro esmague e depois mexa. Tempo ajustável de 15 a 60 min.*Se ficar inativo durante 10 minutos após a conclusão do programa, o aparelho entrará automaticamente no modo ‘WARM’“QUENTE”. *O corte/triturado sugerido de ingredientes com artigos duros como cenouras, carne, é de 1 a 2 cm.*Sugerimos que faça uma pausa e adicione a borboleta após o Passo 1. SOPA RÁPIDA Passo 1:*Velocidade: 10*Temperatura: 0*Potência de Calor: 0*Temporizador: 30 seg.Passo 2:*Velocidade: 2*Temperatura: 120°C*Potência de Calor: 10*Temporizador: até ferverPasso 3:*Velocidade: 2*Temperatura: 100°C*Potência de Calor: 10*Temporizador: 19,5 min *Adequado para sopa de legumes. Primeiro esmague e depois cozinhe e mexa. Tempo ajustável de 15 a 60 min.*Se ficar inativo durante 10 minutos após a conclusão do programa, o aparelho entrará automaticamente no modo ‘WARM’ “QUENTE”. *O corte/triturado sugerido de ingredientes com artigos duros como cenouras, carne, é de 1 a 2 cm.*Sugerimos que faça uma pausa e adicione a borboleta após o Passo 1. MEXER/MISTURAR *Velocidade: 2*Temperatura: 100°C*Potência de Calor: 10*Temporizador: 30 min *Velocidade ajustável do nível 0 ao 3;*Temperatura ajustável de 90-120°C.*Tempo ajustável de 5 a 60 min*Se ficar inativo durante 10 minutos após a conclusão do programa, o aparelho entrará automaticamente no modo ‘WARM’ “QUENTE”. *Use a borboleta ou a lâmina de amassar AMASSAR Passo 1:*Velocidade: 3*Temperatura: 0*Potência de Calor: 0*Temporizador: 3 minPasso 2:*Velocidade: 2*Temperatura: 0*Potência de Calor: 0*Temporizador: 7 min *Velocidade ajustável do nível 2 ao 3;*Temperatura ajustável em 0 ou 37°C para difundir.*Tempo ajustável de 3 a 20 min.*Se ficar inativo durante 10 minutos após a conclusão do programa, o aparelho desligará automaticamente. *Amassar para fazer pão: 330 g de água + 500 g de farinha + outros ingredientes; amasse durante 10 minutos na configuração padrão.*Amassar para fazer macarrão: 200 g de água + 400 g de farinha; amasse durante 3 min na velocidade 2.*Defina a temperatura 37°C para difundir e, se não ficar difundido o suficiente, selecione 37°C durante mais 30 min sem velocidade. RISOTTO/ARROZ Passo 1:*Velocidade: 0*Temperatura:100°C*Potência de Calor: 6*Temporizador: até ferverPasso 2:*Velocidade: 1*Temperatura: 96,5°C*Potência de Calor: 4*Temporizador: 18 minPotência de Calor & Temporizador: não é certo, pode ser ajustado automaticamente de acordo com a temperatura e o volume *Todas as configurações não ajustáveis*Se ficar inativo durante 10 minutos após a conclusão do programa, o aparelho entrará automaticamente no modo ‘WARM’ “QUENTE”. *Volume sugerido (max.): 500 g de arroz + 800 g de água. Selecione a configuração padrão para RICE (ARROZ).Será formada, na parte inferior, uma crosta de arroz.*Ou arroz a vapor, definindo: 400 g de arroz no Cesto filtro, 2 L de água, escolha BOIL (FERVURA); em seguida, deite alguma água fora até ficar com 1 L, e selecione STEAM (VAPORIZAR) durante 20 min. BATIDO *Velocidade: 10*Temperatura: 0*Potência de Calor: 0*Temporizador: 30 seg. *Todas as configurações não ajustáveis, executa mais uma vez se não estiver bom o suficiente.*Se ficar inativo durante 10 minutos após a conclusão do programa, o aparelho desligará automaticamente. *O corte/triturado sugerido de ingredientes com artigos duros como cenouras, carne, é de 1 a 2 cm. IOGURTE *Velocidade: 1 nos primeiros 30 minutos e depois pare.*Temperatura: 37-39°C*Potência de Calor: 1*Temporizador: 6 horas *Tempo ajustável de 3 a 12 horas* Se ficar inativo durante 10 minutos após a conclusão do programa, o aparelho desligará automaticamente. *Volume sugerido: 1 copo de iogurte + 1 L de leite fresco + açúcar. 6 a 12 horas de acordo com a consistência desejada
Velocidade e capacidade sugeridas para cada componente:
Acessórios Imagem Função Velocidade Capacidade Tempo de Funcionamento Lâmina de Cortar 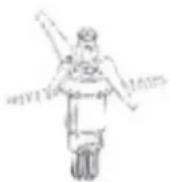
CORTAR/TRITURA R mas não ficar batido 5 2 L max., corte/triture com 1 a 2 cm de medida antes da operação 1 min CORTAR/TRITURA R para ficar mais fino 10 2 L max., corte/triture com 1 a 2 cm de medida antes da operação 1 min Lâmina de Amassar 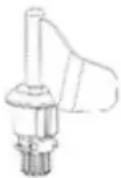
Amassar a massa para fazer pão, pizza, etc. 2-3 800 g de farinha no máximo 5-10 min Amassar a massa para fazer macarrão 2 500 g de farinha no máximo 3 min Borboleta 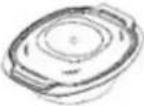
Mexer/Misturar 1-3 2 L no máximo 30 min Bater as claras ou o creme de ovos 4 2 L no máximo 10 min Vaporizador 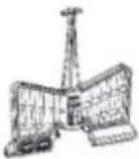
Legumes a vapor N/A 3,5 L no máximo 15 min Carne a vapor N/A 3,5 L no máximo 20-30 min
RESOLUÇÃO DE PROBLEMAS
\- As informações de erro abaixo indicadas, e que aparecem no ecrã do LCD, são normais. Se o problema persistir após você ter agido de acordo com a solução abaixo, por favor, entre em contato com o nosso centro de atendimento ao cliente.
Código de Erro Descrição Motivos possíveis Solução E1 O interruptor de segurança não está fixo O recipiente ou a tampa do recipiente não está fixo/a apropriadamente. Remonte o recipiente e a tampa do mesmo, verifique se todas as peças estão montadas correta e firmemente. E2 Sensor de temperatura ausente O recipiente não está no lugar ou a conexão do sensor de temperatura na base do recipiente está danificado. Remonte o recipiente e verifique se está correcta e firmemente fixado. E3 Motor bloqueado Demasiado peso ou volume no recipiente Diminua o volume/peso dos alimentos no recipiente ou corte-os em pedaços mais pequenos e reinicie o aparelho. E4 Temperatura muito alta Não existem alimentos no recipiente ou muito poucos alimentos com uma temperatura altadefinida durante muito tempo. Adicione alimentos ao recipiente. E5 Temperatura do motor muito alta O aparelho funcionou com demasiado volume/peso durante muito tempo. Pare o aparelho e deixe-o arrefecer antes de reiniciar. E7 Falha na transferência de velocidade A alteração de velocidade entre o nível baixo (1-5) e o nível alto (6-10) está bloqueada. Remova o recipiente, rode o aperto inferior manualmente, fixe o recipiente e reinicie. E8 NTC do motor ausente Conexão do sensor de temperatura solta ou danificada Pare de utilizar o aparelho e envie-o ao centro de serviço pós-venda para ser reparado E11 Não é possível usar a função Pulse (Impulsionar) A temperatura no recipiente está acima dos 90°C Arrefeça os alimentos e Pulse (Impulsione) novamente ou use uma velocidade mais baixa 4
Limpeza do seu aparelho
7. NÃO lave nenhuma parte/peça do seu aparelho de cozinhar na máquina de lavar loiça. Lave sempre o aparelho de cozinhar cuidadosamente após cada utilização ou quando não foi utilizado durante um longo período de tempo.
8. Desligue o aparelho da tomada elétrica e deixe-o arrefecer antes de limpar.
9. Lave o recipiente de cozinhar removível com água morna e sabão. Enxague e seque rigorosamente.
10. Limpe a estrutura principal com um pano limpo e húmido. Se permanecerem alguns alimentos, humedeça o pano com água morna e sabão antes de limpar. ÑNUNCA submerja a estrutura principal em água ou qualquer outro líquido. Limpe o recipiente estacionário conforme necessário para remover
qualquer produto alimentar.
11. Para manter o bom desempenho do seu aparelho de cozinhar, o fundo do recipiente removível deve ser inspecionado e limpo, se necessário, após cada utilização. Limpe com um pano húmido e macio e seque-o rigorosamente antes de utilizar.
12. Se o aparelho de cozinhar não for utilizado durante um longo período de tempo, por favor, desligue-o e mantenha-o numa zona fresca e limpa.

ENCONTRE TODAS AS NOSSAS RECEITAS:
http://dl.hkoenig.com/SiteHkoenig/Livrederecettes\_HK8.pdf
Oppure scansiona il codice QR:

ELIMINAÇÃO E AMBIENTE
Se o seu aparelho elétrico precisar de ser substituído ou não tem utilidade, por favor, pense em proteger o meio ambiente. Entre em contato com as autoridades locais para obter conselhos, dado que muitas têm instalações para a eliminação ambientalmente segura.
Descarte correto deste produto

Esta marcação indica que este produto não deve ser eliminado/descartado com outros resíduos domésticos em toda a UE. Para impedir possíveis danos ao meio ambiente ou à saúde humana decorrentes da eliminação/descarte não controlado de resíduos, recicle-o com responsabilidade para promover a reutilização sustentável dos recursos
materiais. Para devolver o seu aparelho usado, por favor, utilize os sistemas de devolução e recolha ou entre em contato como revendedor onde o produto foi adquirido. Eles podem recolher este produto para reciclagem ambientalmente segura.
DIREITOS DE AUTOR (COPYRIGHT)
A nossa empresa manterá o direito da documentação, design e descrição de imagem. Sem a autorização do proprietário dos direitos autorais, a publicação não deve ser reimpressa ou comunicada na forma de informações eletrónicas (fotografia ou vídeo).
Adeva SAS / H.Koenig Europe - 8 rue Marc Seguin, 77290 Mitry-Mory, France www.hkoenig.com - https://en.hkoenig.com - Tél: +33 1 64 67 00 05
POLSKI
Ważna instrukcja dotycząca bezpieczeństwa
Należy zawsze przestrzegać poniższych środków ostrożności, aby zmniejszyć ryzyko porażenia prądem, obrażeń ciała lub pożaru. Ważne jest, aby uważnie przeczytać wszystkie instrukcje przez użyciem urządzenia oraz zachować je do wykorzystania w przyszłości lub dla nowych użytkowników.
\- Sprzęt ten może być używany przez osoby o ograniczonych zdolnościach fizycznych, sensorycznych lub umysłowych, lub osoby nie posiadające doświadczenia lub wiedzy, pod warunkiem, że są one nadzorowane lub poinstruowane w zakresie bezpiecznego użytkowania sprzętu i w pełni rozumieją potencjalne zagrożenia. To urządzenie nie powinno być używane przez dzieci. Przechowuj urządzenie i jego przewód w miejscu dla nich niedostępnym.
\- Ostrzeżenie: ryzyko obrażeń spowodowanych niewłaściwym użytkowaniem. Należy zachować ostrożność podczas obsługi ostrych noży tnących opróżniając kielich i podczas czyszczenia.
\- Wyłącz urządzenie i odłącz od źródła zasilania przed zmianą akcesoriów lub zbliżeniem się do części, które poruszają się podczas użytkowania. Zawsze odłączaj urządzenie od zasilania, jeśli jest pozostawione bez nadzoru oraz przed montażem, demontażem lub czyszczeniem.
\- Jeśli przewód żasilający jest uszkodzony, musi zostać wymieniony przez producenta, jego przedstawiciela serwisowego lub podobnie wykwalifikowaną osobę w celu uniknięcia zagrożenia.
\- Akcesoria inne niż dołączone do urządzenia powinny zawierać instrukcje dotyczącą ich bezpiecznego użytkowania.
\- OSTRZEŻENIE: Nie zdejmuj pokrywki, gdy woda się gotuje. Nie ustawiaj prędkości większej niż poziom 4, gdy temperatura jest wyższa niż 90 stopni Celsjusza.
\- Nie wolno zanurzać urządzenia w wodzie lub innym płynie.
\- Tó urządzenie jest przeznaczone do użytku w warunkach domowych i podobnych, takich jak :
\- kuchnie w sklepach, biurach i innych miejscach pracy
\- w budynkach gospodarczych
\- w hotelach, motelach i innych obszarach mieszkalnych
\- w pokojach gościnnych. Proszę postawić urządzenie na stabilnym, płaskim stole, który nie będzie się nagrzewał.
• 'Należy' mieć pewność, że znajduje się w bezpiecznej odległości od krawędzi, aby uniknąć upadku. Gdy sprzęt jest używany do wyrabiania ciasta lub krojenia żywności, urządzenie może się poruszyć z powodu wibracji. Dlatego proszę nie używać go bez nadzoru ludzi, aby uniknąć jego upadku na podłogę.
\- Proszę wyciągnąć wtyczkę podczas czyszczenia urządzenia lub gdy sprzęt nie będzie używany przez dłuższy czas.
\- Reğularnie sprawdzaj, czy główny korpus, kielich, parowar lub inne części nie są uszkodzone. Uszkodzone części zmniejszą bezpieczeństwo użytkowania. Po znalezieniu czegoś niepokojącego, nie używaj urządzenia i skontaktuj się z naszym centrum obsługi posprzedażnej.
\- Jeśli urządzenie niespodziewanie przestaje działać lub wydaje się, że działa nieprawidłowo, wyłącz zasilanie, wyjmij wtyczkę z gniazdka i natychmiast przestań go używać. Zasięgnij fachowej porady, aby usunąć usterkę lub dokonać naprawy.
\- Miarka jest jedyną częścią, której można użyć do zakrycia okrągłego otworu w pokrywce kielicha. Nie
używaj szmatki ani podobnych rzeczy do zakrywania otworu.
\- Nie dotykaj krawędzi ostrzy. Zachowaj ostrożność i trzymaj za górną część podczas montażu lub demontażu ostrzy.
\- Zwróć uwagę na oznaczenie pojemności na kielichu urządzenia.
\- Otwórz pokrywkę dopiero wtedy, gdy żywność w kielichu przestanie się obraćać.
\- Zwróć uwagę na żywność o wysokiej temperaturze podczas otwierania pokrywki kielicha. Podczas przygotowywania żywności należy prawidłowo umieścić miarkę w otworze pokrywki kielicha.
\- Nie dotykaj kielicha podczas przygotowywania gorącej żywności o temperaturze wyższej niż 60°C.
\- Upewnij się, że parowar i kielich są dobrze połączone podczas korzystania z parowaru.
\- Zwróć uwagę, aby para wypłynęła przez górę lub boki pokrywy.
\- Podczas pracy nie dotykaj żadnego miejsca na parowarze poza jego uchwytami.
\- Nie używaj urządzenia do gotowania na parze bez założonej pokrywy.
\- Podczas ołówierania pokrywy parowaru uważaj, aby nie poparzyć się parą.
\- Używając ustawienia gotowania na parze i gotowania, należy zwrócić uwagę, aby para wypłynęła przez otwór w kielichu podczas poruszania parowarem.
\- Sprawdzaj, czy otwór wentylacyjny w pokrywie urządzenia do gotowania na parze jest odblokowany, w przeciwnym razie para może wydostać się z innego miejsca.
\- Proszę po użyciu umieścić urządzenie i jego gorące części w miejscu, które jest poza zasięgiem dzieci i ostrzec je, że urządzenie jest nagrzane, zatem nie należy go dotykać.
• Wyciek jedzenia: Upewnij się, że pierścień
uszczelniający ostrza jest dobrze przymocowany, a zespół ostrza jest mocno przytwierdzony za pomocą wspornika mocującego na dole. Awaria instalacji może spowodować wyciek żywności, który uszkodzi urządzenie.
\- Śłaba wentylacja: Upewnij się, że otwory wentylacyjne z tytu korpusu głównego nie są zablokowane przez żadne przedmioty, w przeciwnym razie sprzęt zostanie uszkodzony.
\- Kielich i wszystkie akcesória należy używać wyłącznie z dostarczonym stojakiem. Nie używaj nie oryginalnych części w tej maszynie.
\- Zwróć uwagę, aby uńiknąć rozlania czegokolwiek na złącze.
\- Kielich będzie nadal gorący z powodu ciepła resztkowego po użyciu, należy uważać, aby się nie poparzyć.
\- Niniejsze urządzenie może być używane przez dzieci w wieku co najmniej 8 lat, o ile są one nadzorowane i otrzymały instrukcje dotyczące bezpiecznego korzystania z urządzenia oraz są w pełni świadome związanych z tym zagrożeń.
\- Czyszczenie i konserwacja nie powinny być wykonywane przez dzieci, chyba że mają co najmniej 8 lat i są nadzorowane przez osobę dorosłą.
\- Trzymaj urządzenie i jego przewód zasilające poza zasięgiem dzieci poniżej 8 roku życia.
\- Podczas korzystania ze sprzętu elektrycznego należy zawsze zachować środki ostrożności, aby zapobiec ryzyku pożaru, porażenia prądem i/lub obrażeń w przypadku niewłaściwego użytkowania.
\- Upewnij się, że napięcie znamionowé na tabliczce znamionowej odpowiada napięciu głównemu w Twojej instalacji. Jeśli tak nie jest, skontaktuj się ze sprzedawcą i nie podłączaj urządzenia
• Nigdy nie pozostawiaj pracującego urządzenia bez nadzoru.
\- Nigdy nie otwieraj urządzenia od przodu, zawsze
ustawiaj się nieco z boku, aby uniknąć poparzenia para.
\- Urządzenie nie może być używane, jeśli zostało upuszczone, posiada widoczne oznaki uszkodzenia lub jeśli jest nieszczelne.
\- Nie używaj tego urządzenia, jeśli ma uszkodzony przewód lub wtyczkę, jeśli nie działa prawidłowo lub jeśli zostało uszkodzone lub upuszczone. Jeśli przewód zasilający jest uszkodzony, musi zostać wymieniony przez producenta lub jego przedstawiciela serwisowego lub osobę o podobnych kwalifikacjach, aby uniknąć zagrożenia.
ZAWARTOŚĆ OPAKOWANIA
Otwierając opakowanie, wyjmij wszystkie akcesoria i zapoznaj się z nimi zgodnie z listą elementów. Części zamienne są następujące
1 Główny korpus 7 Pokrywa parownicy 2 Kielich z ostrzami 8 Koszyczek 3 Pokrywka do kielicha 9 Motylek 4 Miarka 10 Szpatułka 5 Mała parownica 11 Książka z przepisami 6 Duża parownica

Akcesoria
Kielich z ostrzami
Po jednej stronie kielicha znajdują się oznaczenia jego pojemności. Maksymalna pojemność to 2L.

natural_image
Line drawing of a trash bin with lid and side handles (no text or symbols)


natural_image
Simple line drawing of a cylindrical object with a curved line extending from it (no text or symbols)
Uwaga
Ilość jedzenia włożonego do kielicha nie powinna przekraczać 2,0 l, w przeciwnym razie jedzenie może wypłynąć lub rozprysnąć się, powodując niebezpieczeństwo.
Załóż pokrywkę na kielich, naciśnij wyłącznik bezpieczeństwa, obróć pokrywkę zgodnie z ruchem wskazówek zegara, aby przymocować pokrywkę do kielicha, w przeciwnym razie nie będzie można uruchomić silnika. (Zawsze najpierw naciskaj wyłącznik bezpieczeństwa, aby zablokować lub otworzyć pokrywę).

natural_image
Three-step diagram showing a mechanical component with rotational arrows indicating motion (no text or symbols)
Umieść kielich na głównym korpusie we właściwym kierunku i odóż prawidłowo, w przeciwnym razie silnik nie będzie mógł zostać uruchomiony.

natural_image
Line drawing of a blender with a digital display and control panel (no text or symbols)

natural_image
Line drawing of a kitchen blender with digital display (no text or symbols)
Montaż ostrza:
Zamocuj pierścień uszczelniający na zespole ostrza, włóż go do otworu w dnie kielicha, mocno trzymaj połowę górnej części ostrza i obróć dolną część do góry, użyj wspornika mocującego, aby zamocować ostrze, obracając zgodnie z ruchem wskazówek zegara. Robiąc odwrotnie, wyjmij go z kielicha. Nie przegap pierścienia uszczelniającego ostrze między ostrzem a dnem kielicha.

natural_image
Simple line drawing of a mechanical component with three blades (no text or symbols)

natural_image
Mechanical component diagram showing a gear and housing with no visible text or symbols

natural_image
Technical diagram of a mechanical component with concentric rings and mounting holes (no text or symbols)

natural_image
Line drawing of a hand holding a circular mechanical component with five blades (no text or symbols)
Uwaga
- Noże są bardzo ostre. Proszę owinąć je ściereczką podczas montażu lub demontażu podstawy ostrza.
- Proszę mocno trzymać zespół ostrzy i wyjąć go ostrożnie, aby upewnić się, że nie spadnie i nie spowoduje zagrożenia.
- Upewnij się, że wspornik mocujący i pierścień uszczelniający znajdują się na swoim miejscu i są mocno zablokowane za pomocą zespołu ostrza. Jeśli pierścień uszczelniający nie jest dobrze umieszczony, miksowana lub gotowana żywność może wyciec i uszkodzić urządzenie.
Montaż wałka ugniatającego:
Wyjmij ostrze, zamocuj wałek ugniatający w taki sam sposób, jak mocowanie ostrza. Może być używany do ugniatania lub mieszania i miksowania bez krojenia żywności.

Uwaga
- Nie używaj go z prędkością powyżej 3, w przeciwnym razie spowoduje to duże wibracje maszyny i może być ryzykowne.
- Ponieważ najmniejsza odległość między zespołem mieszającym a ścianą kielicha wynosi tylko 1 cm, czasami żywność może się zakleszczyć, a silnik może się zatrzymać. Za pomocą szpatułk wymieszai i usuń zakleszczony materiał, a wszystko będzie znów sprawnie działać.
- Upewnij się, że wspornik mocujący i pierścień uszczelniający znajdują się na swoim miejscu i są mocno zablokowane za pomocą zespołu ostrza. Jeśli pierścień uszczelniający nie jest dobrze umieszczony, mieszana lub gotowana żywność może wyciekać i uszkodzić urządzenie.
Miarka:
- Miarka spełnia wiele funkcji: jest częścią wieczka zapobiegającą utracie ciepła lub rozpryskiwaniu; to miarka do odmierzania składników o pełnej pojemności 150ml.
- Włóż miarkę do otworu w pokrywce, obróć ją zgodnie z ruchem wskazówek zegara, aby ją zamocować.
Uwaga

natural_image
Simple line drawing of a top hat with a decorative base (no text or symbols)

natural_image
Technical line drawing of a mechanical component with concentric circles and a handle (no text or symbols)
Uwaga
- Miarka jest jedyną częścią, której można użyć do zakrycia okrągłego otworu w pokrywce.
- Nie zakrywaj otworu żadnymi innymi przedmiotami, aby uniknąć wypłynięcia żywności i spowodowania zagrożenia.
Szpatułka:
\- Szpatułka jest jedynym sprzętem, którego należy używać do zeskrobywania żywności z kielicha. Inne sprzęty mogą spowodować uszkodzenie wewnętrznej powłoki zapobiegającej przywieraniu.
\- Na uchwycie szpatułki znajduje się mały rowek, użyj go w razie potrzeby do przytrzymania koszyczka.

natural_image
Technical line drawings of two tools: a ladle and a bucket with a brush (no text or symbols)
Uwaga
• Nie używaj jej do mieszania w kielichu, gdy działa ostrze.
- Nie używaj szpatułki, jeśli w środku jest motylek.
- Dokładnie dopasuj rowek do koszyczka przed jego podniesieniem.
Koszyczek:
Koszyczek spełnia wiele funkcji:
- Sitko. Przefiltruj sok owocowy i warzywny. Po rozdrobieniu warzyw lub owoców lub zrobieniu soku owocowego, włóż koszyczek do kielicha, aby ułatwić jego nalanie.
- Gotowanie potraw, takich jak makaron czy kluski;
• Gotowanie dodatków, takich jak ryż i ziemniaki.

natural_image
Line drawings of two kitchen utensils, one with a handle and the other with a pan (no text or symbols)
Uwaga
- Do włożenia lub wyjęcia koszyczka użyj rączki łopatki.
- Jeśli chcesz zmniejszyć zawartość wody w żywności, takiej jak pomidory, zdejmij miarkę i przykryj ją koszyczkiem. Wodę można łatwo odlać.
Motylek:
- Zainstalowany na ostrzu motylek może pomóc w mieszaniu żywności, ale zapobiega jej siekaniu przez ostrza oraz sklejaniu się żywności. Pozwala na dalsze mieszanie żywności.
- Zamocuj motylek na zespole ostrza za otwór i dociśnij go używając wystarczającej siły, aby zapewnić dobre połączenie. Obróć listwę motylkową w kierunku przeciwnym do ruchu wskazówek zegara, aby zablokować go na ostrzu.

natural_image
Technical line drawing of a mechanical component with no visible text or symbols

natural_image
Line drawing of a mechanical device with a central pin and two vertical supports (no text or symbols)
Uwaga
- Nie uruchamiaj urządzenia, dopóki motylek nie zostanie zamocowany.
- Nie używaj prędkości powyżej 4 podczas korzystania z motylka.
• Nie używaj szpatułki podczas korzystania z motylka.
- Nie dodawaj składników do kielicha, gdy urządzenie pracuje z motylkiem, w przeciwnym razie motylek może zostać uszkodzony lub zablokowany.
Parowar:
Parowar składa się z trzech części: mały parowar, duży parowar i pokrywka. Pokrywkę można umieścić zarówno na małym, jak i dużym naczyniu do gotowania na parze, a duże naczynie do gotowania na parze może być postawione na małym.
Zdejmij pokrywkę kielicha, położ na kielichu parowar.

natural_image
Line drawing of a square-shaped container with handles and a circular top (no text or symbols)

natural_image
Illustration of a cooking pan with three panes and a lid, showing interior layers (no text or symbols)

natural_image
Black kitchen toaster with digital display and side panel (no visible text or symbols)
Uwaga
- Przed gotowaniem na parze upewnij się, że pokrywa urządzenia do gotowania na parze jest przykryta.
- Parowaru nie można używać w kuchence mikrofalowej ani innych urządzeniach elektrycznych.
- Nie dotykaj ani nie zbliżaj się do otworów w pokrywie urządzenia do gotowania na parze, aby uniknąć poparzenia.
- Nie zakrywaj ani nie zasłaniaj otworów pokrywy urządzenia do gotowania na parze żadnymi przedmiotami, ponieważ para może wydostawać się z krawędzi lub innych miejsc i stwarzać zagrożenie.
INSTRUKCJA UŻYCIA
Na wczesnym etapie użytkowania urządzenia, z urządzenia będzie wydobywać się lekki zapach, co jest normalnym zjawiskiem. Po pewnym czasie zjawisko to zniknie.
• Proszę postawić urządzenie na czystym, stabilnym i płaskim stole. Nie umieszczaj go zbyt blisko krawędzi i trzymaj go z dala od zabudowanej szafy lub uchwytów.
• Dla wygody lepiej jest umieścić urządzenie w jakimś stałym miejscu.
• Proszę dokładnie wyczyścić urządzenie przed użyciem.
• Dźwięk „beep” oznacza, że przycisk został uruchomiony i działa prawidłowo.


STOP/ ANULUJ
\- Podłącz urządzenie, włącz przełącznik z tyłu urządzenia, urządzenie wyda jeden sygnał dźwiękowy, ale bez wyświetlania czegokolwiek.

natural_image
Pure mechanical diagram showing a pipe joint and connecting rod (no text or symbols)
- Naciśnij ten przycisk, a wszystkie tylne światła zapalą się i przejdą w tryb gotowości, możesz wybrać żądane funkcje.
- Naciśnij ten przycisk w czasie ustawiania, wszystkie ustawienia zostaną skasowane i wrócisz do trybu czuwania.
- Naciśnij ten przycisk podczas procesu pracy, a urządzenie natychmiast przestanie działać i powróci do trybu czuwania.
- Naciśnij ten przycisk podczas procesu nagrywania DIY, a urządzenie przestanie działać i anuluje nagrywanie.
- Urządzenie wyłączyć się automatycznie po 30 sekundach bez pracy w trybie czuwania.
POKRETŁO (START/ PAUZA)
- Po wybraniu żądanego ustawienia lub programu, naciśnij ten przycisk, aby natychmiast rozpocząć pracę.
• Naciśnij ten przycisk podczas procesu
pracy, maszyna wstrzymuje pracę i stan czuwania, wyświetlacz LCD pokazuje PRUSE. (Użytkownik może otworzyć pokrywkę, ale musi być dobrze zamontowana przed ponownym uruchomieniem). Naciśnij pokrętło ponownie, aby wznowić pracę.
\- Urządzenie wyłączy się automatycznie po 10 minutach bez działania w stanie PAUSE.
\- Jest także pokrętem do ustawiania timera, prędkości, temperatury, mocy cieplnej, z rosnącym, gdy obracasz pokrętem zgodnie z ruchem wskazówek zegara i malejącym, gdy obracasz pokrętem przeciwnie do ruchu wskazówek zegara, lub wybierając spośród 15 programów automatycznych.
TIMER
- Ekran LCD wskazuje 88:88:88, co oznacza godziny:minuty:sekundy.
- Naciśnij przycisk timera, a na wyświetlaczu LCD zacznie migać sygnał minut; Obróć pokrętło, aby ustawić minuty. Naciśnij go ponownie, drugi sygnał na LCD migocze, obróć pokrętło, aby ustawić sekundy. Naciśnij go ponownie, sygnał godziny na LCD migocze, obróć pokrętło, aby ustawić godziny od 1-12h.
- Naciśnij timer podczas pracy, maszyna zacznie odliczać czas.
- Maksymalnie 60 min przy ustawieniu ręcznym; max 3h w ustawieniu DIY. Limit czasowy każdego programu można znaleźć w rozdziale „MENU” poniżej.
Programowanie
Wciśnij przycisk

przytrzymaj przez 3 sekundy aby przejść do trybu ustawień wstępnych/spotkań. Migać będzie cyfra czasu i logo. W ten sam sposób ustaw czas od 30 minut do 12 godzin.
Tryb ustawień wstępnych działa tylko w trybie DIY lub Menu. Wybierz więc najpierw DIY lub Menu. Naciśnij pokrętło po ustawieniu, a następnie rozpocznie się odliczanie.
Wciśnij Preset aby anulować.

PRĘDKOŚĆ
\- Naciśnij ten przycisk w trybie czuwania lub podczas pracy (z wyjątkiem niektórych programów automatycznych, które nie posiadają regulacji prędkości), urządzenie przechodzi w tryb ustawiania prędkości.

Kontrolka na LCD migocze, a następnie prędkość może być regulowana. Obróć pokrętło, aby wybrać żądaną prędkość.
• Zakres prędkości to od 1-10.
- Naciśnij ten przyciskł w procesie mieszania i podgrzewania, jeśli ustawienie temperatury lub rzeczywista temperatura przekracza 60 °C, prędkość można regulować tylko w zakresie od 1 do 4. Jeśli urządzenie pracowało z dużą prędkością, automatycznie spadnie do prędkości 4.
\- Na konstrukcji występuje zmiana prędkości, więc to normalne, że słychać niewielki hałas przed uruchomieniem silnika lub zmianą prędkości między poziomem 5 a
poziomem 6.
• W przypadku kruszenia lub siekania twardych produktów spożywczych lub dużych ilości żywności, zaleca się najpierw wybrać prędkość 5, a następnie prędkość 10, aby uniknąć wibracji i osiągnąć doskonałą wydajność.
- Proszę nie używać prędkości 8,9,10 przez 5 minut w sposób ciągły; proszę nie używać prędkości 5,6,7 przez 10 minut w sposób ciągły.

TEMPERATURA
\- Naciśnij ten przycisk w trybie czuwania lub podczas procesu podgrzewania (z wyjątkiem niektórych programów automatycznych, które nie posiadają regulacji temperatury), urządzenie przechodzi w tryb ustawiania temperatury. Kontrolka na LCD migocze, a następnie temperatura jest regulowana. Obróć pokrętło, aby wybrać żądaną temperaturę.
• Zakres regulacji temperatury: 37-120°C

MOC CIEPŁA
\- Naciśnij ten przycisk w trybie czuwania lub podczas procesu podgrzewania (z wyjątkiem niektórych programów automatycznych, które nie posiadają regulacji mocy ciepła), urządzenie przechodzi w tryb ustawiania mocy ciepła.
Kontrolka na wyświetlaczu LCD miga, następnie moc cieplna jest regulowana. Przekręć pokrętło, aby wybrać
żadana moc ciepła.
- Zakres regulacji mocy ciepła od 1-10.
- W przypadku niektórych lepkich potraw zaleca się wybrać niską moc grzewczą, aby uniknąć przypalenia na dole
- Jeśli objętość żywności jest mała i wymagana jest dokładna temperatura, zaleca się wybór niskiej mocy ciepła.
- Niska moc będzie bardziej precyzyjniej kontrolowana; Wysoka moc nagrzewa się szybciej.
- Nie będzie działać, jeśli wybierzesz tylko moc grzewczą, ale nie wybierzesz temperatury. Przy wyborze różnych poziomów temperatury sugeruje się przestrzeganie ustawień domyślnych.

SAMOCZYSZCZENIE
- Ten program służy do czyszczenia po użyciu.
• Dodaj wody od 500 ml do 1 litra.
• Możesz użyć trochę detergentu.
• Cały proces trwa około 10 minut.

TURBO
- Naciśnij i przytrzymaj ten przycisk w trybie gotowości, maszyna zacznie działać z maksymalną prędkością, zwolnij, a natychmiast się zatrzyma
- Gdy temperatura w kielichu przekracza 60°C, TURBO nie może być użyte, a na ekranie pojawi się E11.
- Na konstrukcji występuje zmiana prędkości, więc to normalne, że słychać niewielki hałas, zanim silnik zacznie pracować przy pierwszym impulsie.
- Maksymalny czas pracy w trybie TURBO to 3 minuty, a następnie 10 minut
odpoczynku.

MENU
• Ten przycisk służy do wyboru jednego z 10 różnych programów automatycznych.

natural_image
Grid of 12 simple food icons including cooking utensils, steaming dishes, and snacks (no text or labels)
KROJENIE (HACHER)
GULASZ (MIJOTE2)
PAROWAE (VAPEUR)
• ZUPA (VELOUTE)
• SZYBKA ZUPA (SOUPE)
• MIESZANIE (SAUCE)
WYRABIANIE (PETRIR)
• RISOTTO (Rice)
SMOOTHIE
• JOGURT (YAOURT)
- Naciśnij ten przycisk w trybie czuwania, kontrolka SMOOTHIE na LCD zacznie migotać, przekręć pokrętłem aby wybrać żądany program.
• W przypadku programów SZYBKA ZUPA, ZUPA, MIESZANIE, GULASZ, RISOTTO, po zakończeniu zostanie wyświetlony komunikat „End”. Jeśli po 10 minutach nie zostanie wykonana żadna operacja, urządzenie automatycznie przełączy się na KEEP WARM na 12 godzin, aż do ręcznego zatrzymania.
Niektóre domyśle ustawienia są regulowane -", jak pokazano poniżej.
co można zobaczyć ekranie, niektóre z nich
nie są dostępne, a na ekranie pojawia się "-
Program Ustawienia domyślne Ustawienia Wskazówki Krojenie *Prędkość: 5*Temperatura: 0*Moc grzania: 0*Timer: 1min *Krojenie, ale nie do konsystencji płynnej. Czas regulowany od 1s-5min dla pożądanej konsystencji .*Jeśli urządzenie pozostanie bezczynne przez 10 minut po zakończeniu programu, urządzenie wyłączy się automatycznie. *Sugerowana wielkość posiekanych składników w przypadku twardych artykułów, takich jak marchewka, mięso to 1-2 cm.*Jeśli chcesz pokroić jedzenie, aby było jak najdrobniejsze, użyj SMOOTHIE. GULASZ Krok 1:*Prędkość: 0*Temperatura:100°C*Moc grzania: 10*Timer: bez limituKrok 2:*Prędkość: 0*Tempeatura: 90-95°C*Moc grzania: brak*Timer: 3h *Domyślny timer 3h, regulowany w zakresie 1-12h*Jeśli urządzenie pozostanie bezczynne przez 10 minut po zakończeniu programu, automatycznie przejdzie w tryb „CIEPŁY”. *Wolne gotowanie PAROWAR *Prędkość: 0*Temperatura: 120°C*Moc grzania: 10*Timer: 20min *Czas regulowany od 15-60m*Jeśli urządzenie pozostanie bezczynne przez 10 minut po zakończeniu programu, automatycznie przejdzie w tryb „CIEPŁY”. *500g wody na każde 30 minut gotowania na parze *Warzywo 20min; mięso 30min ZUPA Krok 1:*Prędkość: 0*Temperatura: 120*Moc grzania: 10*Timer: Do czasu ugotowania.Krok 2:*Prędkość: 0*Temperatura: 100°C*Moc grzania: 4*Timer: 29.5minKrok 3:*Prędkość: 0*Temperatura: 0°C*Moc grzania: 0*Timer: Chłodzenie do 80°CKrok 4:*Prędkość: wolno od 6 to 10*Temperatura: 0°C*Moc grzania: 0*Timer: 1 min *Nadaje się do zupy mięsnej, najpierw rozdrobnić, a następnie ugotować i wymieszać. Timer regulowany od 15-60m.*Jeśli urządzenie pozostanie bezczynne przez 10 minut po zakończeniu programu, automatycznie przejdzie w tryb „CIEPŁY”. *Sugerowana wielkość posiekanych składników w przypadku twardych artykułów, takich jakmarchewka, mięso to 1-2 cm.*Zasugeruj wstrzymanie i dodanie motyla po kroku 1. SZYBKA ZUPA Krok 1:*Prędkość: 10*Temperatura: 0*Moc grzania: 0*Timer: 30sKrok 2:*Prędkość: 2*Temperatura: 120°C*Moc grzania: 10*Timer: aż do ugotowaniaKrok 3:*Prędkość: 2*Temperatura: 100°C*Moc grzania: 10*Timer: 19.5min *Nadaje się do zupy warzywnej, najpierw rozdrobnić, a następnie ugotować i wymieszać. Timer regulowany od 15-60m.*Jeśli urządzenie pozostanie bezczynne przez 10 minut po zakończeniu programu, automatycznie przejdzie w tryb „CIEPŁY”. *Sugerowana wielkość posiekanych składników w przypadku twardych artykułów, takich jak marchewka, mięso to 1-2 cm*Zasugeruj wstrzymanie i zamontowanie motylka po kroku 1. MIESZANIE *Prędkość: 2*Temperatura: 100°C*Moc grzania: 10*Timer: 30min *Prędkość regulowana od poziomu 0-3;* Temperatura regulowana w zakresie 90-120 °C.*Czas regulowany od 5-60m *Jeśli urządzenie pozostanie bezczynne przez 10 minut po zakończeniu programu, automatycznie przejdzie w tryb „CIEPŁY”. *Użyj motylka lub elementu do wyrabiania WYRABIANIE Krok 1:*Prędkość: 3*Temperatura: 0*Moc grzania: 0*Timer: 3minKrok 2:*Prędkość: 2*Temperatura: 0*Moc grzania: 0*Timer: 7min * Prędkość regulowana od poziomu 2-3;*Temperaturę rozprowadzania można regulować na 0 lub 37°C.*Czas regulowany od 3-20m*Jeśli urządzenie pozostanie bezczynne przez 10 minut po zakończeniu programu, wyłączyć się automatycznie *Wyrabiać chleb: 330g wody + 500g mąki + inne składniki; ugniataj 10 minut domyślnie; *Zagnieść na makaron: 200g wody + 400g mąki; ugniataj 3 min z prędkością 2*Ustaw temperaturę 37°C do wyrobienia, a jeśli nie wyrobiło się wystarczająco, wybierz 37°C przez 30 minut dłużej bez prędkości RISOTTO Krok 1:*Prędkość: 0*Temperatura:100°C*Moc grzania: 6*Timer: aż do ugotowaniaKrok 1:*Prędkość: 1*Temperatura:96.5°C*Moc grzania: 4*Timer: 18 MinMoc grzania i timer: nieustawione, mogą być dostosowywane automatycznie w zależności od temperatury i objętości * Wszystkie ustawienia bez regulacji*Jeśli urządzenie pozostanie bezczynne przez 10 minut po zakończeniu programu, automatycznie przejdzie w tryb „CIEPŁY”. *Sugerowana objętość (maks.): 500g ryżu + 800g wody, domyślnie uruchom RYZ.*Lub ryż na parze, ustawiając: 400g ryżu w koszyku filtra, 2L wody, wybierz GOTOWANIE; następnie wylej trochę wody z 1L pozostałego, wybierz PARA przez 20min SMOOTHIE *Prędkość: 10*Temperatura: 0*Moc grzania: 0*Timer: 30s * Wszystkie ustawienia nie można regulować, uruchom ponownie, jeśli nie jest wystarczająco dobrze.*Jeśli urządzenie pozostanie bezczynne przez 10 minut po zakończeniu programu, wyłączyć się automatycznie Sugerowana wielkość posiekanych składników w przypadku twardych artykułów, takich jak marchewka, mięso to 1-2 cm JOGURT *Prędkość: 1 przez pierwsze 30min*Temperatura: 37-39°C*Moc grzania: 1*Timer: 6h *Czas regulowany od 3-12h*Jeśli urządzenie pozostanie bezczynne przez 10 minut po zakończeniu programu, wyłączyć się automatycznie *Sugerowana objętość: 1 szklanka jogurtu + 1L świeżego mleka + cukier, 6-12h w zależności od pożądanej konsystencji
Sugerowana prędkość i pojemność:
Narzędzie Obrazek Funkcja Prędkość Pojemność Czas pracy Ostrza 
Siekanie 5 2L max, pokroić na 1-2cm kawałki przed wrzuceniem 1min Krojenie na drobno 10 2L max, pokroić na 1-2cm kawałki przed wrzuceniem 1min Element do wyrabiania 
Wyrabianie ciasta na chleb, pizzę itd. 2-3 Max 800g mąki 5-10min Wyrabianie makaronu 2 Max 500g mąki 3min Motylek 
Mieszanie 1-3 2L max 30min Ubijanie białek lub śmietany 4 2L max 10min Parowar 
Gotowanie warzyw na parze N/D 3.5L max 15min Gotowanie mięsa na parze N/D 3.5L max 20-30min
ROZWIĄZYWANIE PROBLEMÓW
\- Poniższe informacje o błędzie pojawiające się na ekranie są normalne. Jeśli problem nadal występuje po wykonaniu poniższych czynności, skontaktuj się z naszym centrum obsługi klienta.
Kodbłędu Opis Możliwy powód Rozwiązanie E1 Wyłącznikbezpieczeństwa nie jest zamocowany Kielich lub pokrywa kielicha nie są prawidłowo założone Ponownie zamontuj kielich i pokrywkę kielicha, upewnij się, że wszystkie części są prawidłowo i szczelnie zmontowane E2 Brak czujnika temperatury Kielich nie jest na swoim miejscu lub połączenie czujnika temperatury na podstawie kielicha jest uszkodzone Ponownie zamontuj kielich, upewnij się, że wszystkie części są prawidłowo i szczelnie zmontowane E3 Zablokowanie silnika Za dużo produktów w kielichu Zmniejsz ilość żywności w kielichu lub pokrój żywność na mniejsze kawałki i ponownie uruchom urządzenie. E4 Za wysoka temperatura Brak jedzenia w kielichu lub bardzo mało jedzenia przy ustawieniu wysokiej temperatury przez zbyt długi czas. Dodaj jedzenie do kielicha E5 Za wysoka temperatura silnika Maszyna zbyt długo pracuje przy dużym obciążeniu Zatrzymaj urządzenie i pozwól mu ostygnąć przed ponownym włączeniem E7 Bład napędu Zmiana prędkości między niskim (1-5) a wysokim (6-10) zablokowana Wyjmij słoik, ręcznie obróć dolne sprzęgło i zamocuj kielich i uruchom ponownie. E8 Brak silnika NTC Luźne lub uszkodzone połączenie czujnika temperatury silnika Przestań używać i wyślij do centrum obsługi posprzedażnej, aby to naprawić E11 Nie można używać trybu pulsowania Temperatura przekroczyła 90°C Ostudź jedzenie i ponownie uruchom pulsację lub użyj niższej prędkości 4
Czyszczenie urządzenia
1. Nie myj urządzenia ani jego części w zmywarce. Umyj dokładnie urządzenie po każdym użyciu lub przechowywaniu przez dłuższy czas.
2. Odłącz urządzenie od gniazdka i pozwól mu ostygnąć przed czyszczeniem.
3. Umyj wyjmowany kielich ciepłą wodą z mydłem.
Dokładnie spłucz i osusz.
4. Wytrzyj główny korpus czystą wilgotną szmatką. Jeśli pozostaną resztki jedzenia, zwilż szmatkę ciepłą wodą z mydłem przed wytaricem. NIGDY nie zanurzaj korpusu w wodzie lub innej cieczy. W razie potrzeby wytrzyj kielich, aby usunąć wszelkie produkty spożywcze.
5. Aby utrzymać dobrą wydajność urządzenia, dno wyjmowanego kielicha należy sprawdzać i czyścić, jeśli to konieczne, po każdym użyciu. Wytrzeć miękką wilgotną szmatką i dokładnie wysuszyć przed użyciem.
6. Jeśli urządzenie nie jest używane przez pewien czas, odłącz je i przechowuj w chłodnym i czystym miejscu.

ZNAJDŹ WSZSYSTKIE NASZE PRZEPISY:
PRAWA AUTORSKIE
Nasza firma posiada prawo do dokumentacji, projektu i opisu. Bez zgody właściciela praw autorskich publikacja nie powinna być przedrukowywana lub przekazywana w jakiejkolwiek formie (zdjęcia lub wideo).
GWARANCJA
Okres gwarancji na nasze produkty wynosi 2 lata, chyba że zaznaczono inaczej, licząc od daty pierwszego zakupu lub daty dostawy.
Jeśli masz jakiekolwiek problemy lub pytania, możesz łatwo uzyskać dostęp do naszych stron pomocy, wskazówek dotyczących rozwiązywania problemów, często zadawanych pytań i instrukcji obsługi na naszej stronie serwisowej: https://sav.hkoenig.com.
Wpisując nazwę referencyjną swojego urządzenia w pasku wyszukiwania, możesz uzyskać dostęp do całej dostępnej pomocy online, zaprojektowanej tak, aby najlepiej odpowiadała Twoim potrzebom.
Jeśli nadal nie możesz znaleźć odpowiedzi na swoje pytanie lub problem, kliknij „Czy odpowiedź rozwiązała Twój problem? Spowoduje to przejście do Formularza zgłoszenia do obsługi klienta, który możesz wypełnić, aby zweryfikować swoją prośbę i uzyskać pomoc.
WARUNKI GWARANCJI
Gwarancja obejmuje wszelkie awarie powstałe podczas normalnego użytkowania, zgodnie z zastosowaniami i specyfikacjami zawartymi w instrukcji obsługi.
Niniejsza gwarancja nie dotyczy problemów z pakowaniem lub transportem podczas wysyłki produktu przez właściciela. Nie obejmuje również normalnego zużycia produktu, konserwacji ani wymiany części eksploatacyjnych.
WYŁĄCZENIE GWARANCJI
\- Akcesoria i części zużywające się (\*).
\- Normalna konserwacja urządzenia.
\- Wszelkie awarie wynikające z niewłaściwego użytkowania (wstrząsy, niezastosowanie się do zaleceń dotyczących zasilania, złę warunki użytkowania itp.), niedostatecznej konserwacji lub niewłaściwego użytkowania urządzenia, a także stosowania nieodpowiednich akcesoriów.
\- Uszkodzenia pochodzenia zewnętrznego: pożar, zalanie, przepięcie itp.
\- Wszelki sprzęt, który został zdemontowany, nawet częściowo, przez osoby inne niż upoważnione do tego (w szczególności użytkownika).
\- Produkty, których numeru seryjnego brakowało, uległyby zniszczeniu lub byłyby nieczytelne, co uniemożliwiałoby ich identyfikację.
\- Produkty podlegające wynajęciu, demonstracji lub ekspozycji
(\*) Niektóre części urządzenia, zwane częściami zużywającymi się lub materiałami eksploatacyjnymi, ulegają pogorszeniu wraz z upływem czasu i częstotliwością użytkowania urządzenia. Takie zużycie jest normalne, ale może być spotęgowane złymi warunkami użytkowania lub konserwacji urządzenia. Części te nie są zatem objęte gwarancją.
Akcesoria dostarczone z urządzeniem również nie są objęte gwarancją. Nie podlegają wymianie ani zwrotowi. Jednak niektóre akcesoria można kupić bezpośrednio na naszej stronie internetowej: https://sav.hkoenig.com/.
ŚRODOWISKO
UWAGA:

Nie wyrzucaj tego produktu z innymi produktami gospodarstwa domowego. Obowiązuje segregacja tego produktu odpadowego, należy zapytać lokalne władze o miejsca, w których można oddać ten produkt. Urządzenia elektryczne i elektroniczne zawierają niebezpieczne substancje, które mają szkodliwy wpływ na środowisko lub zdrowie ludzkie i powinny zostać poddane recyklingowi. Powyższy symbol wskazuje, że sprzęt elektryczny i elektroniczny należy odpowiednio segregować.
Adeva SAS / H.Koenig Europe - 8 rue Marc Seguin, 77290 Mitry-Mory, France
www.hkoenig.com - https://en.hkoenig.com - Tél: +33 1 64 67 00 05
Instruction Manual
Manuel d'instructions Bedienungsanleitung Gebruiksaanwijzing Manual de instrucciones Manuale d'uso Manual do usuario Instrukcja obstugi natural_image
Exterior view of a modern kitchen blender with digital display (no visible text or symbols)Kitchen robot
Robot culinaire chauffant Küchenmaschine Food processor Procesador de alimentos Robot da cucina Processador de alimentos Robot kuchenny ENGLISH
Important Safety Instruction
\- The following safety precautions should always be followed, to reduce the risk of electric shock, personal injury or fire. It is important to read all of these instructions carefully before using the product, and to save them for future reference or new users. \- This appliance may be used by persons with reduced physical, sensory or mental capabilities or lack of experience or knowledge, provided that they are supervised or instructed in the safe use of the appliance and that they fully understand the potential hazards. \- This appliance shall not be used by children. Keep the appliance and its cord out of reach of children. \- Warning: potential injury from misuse. Care shall be taken when handling the sharp cutting blades emptying the bowl and during cleaning. \- Switch off the appliance and disconnect from supply code before changing accessories or approaching parts that move in use. Always disconnect the appliance from the supply if it is left unattended and before assembling, disassembling or cleaning. \- If the supply cord is damaged, it must be replaced by the manufacturer, its service agent or similarly qualified persons in order to avoid a hazard. \- Accessories, other than those supplied with the appliance, shall include instructions for their safe use. \- WARNING: Do not remove the lid while the water is boiling. Do not set speed more than level 4 when temperature higher than 90 degree centigrade. \- The appliance must not be immersed. \- Your appliance has been designed for domestic use only. It is not intended for use in the following situations which are not covered by the warranty: - in staff kitchen areas in shops, offices and other professional environments, - in farm hostels, - by guests in hotels, motels and other residential environments, - in bed and breakfast type environments. \- Please put the unit on stable, flat table which will not become hot and ensure it is in safe distance from the edge to avoid falling down. When it is used to knead the dough or cut food, the unit may move because of vibration. So please do not use it without super vision of people so as to avoid the equipment falling down to the floor. \- Please pull out the plug when cleaning the appliance or put it away for a long time. \- Regularly check whether the main body, jar, steamer or other components are damaged or not. The damaged parts will decrease the safety of use. Once something wrong is found, please stop using and contact our after-sales service center. \- If the appliance stops unexpectedly or appears to malfunction, switch off the power supply, unplug from the mains and stop using immediately. Seek professional advice to rectify the fault or make repairs. \- The measuring cup is the only part which can be used to cover the round hole in the jar lid. Please do not use cloth or similar things to cover the hole. \- Do not touch the edge of blades. Please be careful and hold the top part when you assemble or remove the blade. \- Pay attention to the capacity mark on the blender jar. \- Open the lid until the food in the jar stops rotating. \- Pay attention to the high-temperature food when you open the jar lid. Please put the measuring cup at the hole of jar lid correctly when processing food. - Do not touch the jar when processing hot food of more than 60°C. • Make sure that steamer and the jar are connected well when using steamer. - Pay attention that vapor will outflow through the cover top or sides. - In operation, do not touch any place of the steamer except its handles. - Do not use the steamer without the steamer lid in place. - When opening the steamer lid, be careful not to be scalded by vapor. - When using steaming and boiling setting, pay attention that vapor will outflow through jar mouth when move the steamer. - Keep on checking that the vent hole on the steamer lid is unblocked, or else the vapor may come out somewhere else. - Please put the appliance and its hot after-use parts in the place which is out of the children's reach and warn the children that the unit will become hot and do not touch it. - The leakage of food: Make sure that the blade sealing ring is placed well and the blade assembly is tightly fixed by the fixing bracket on the bottom. The failure of installation will cause the food leakage which will damage the appliance. - Damage of poor ventilation: Ensure that the vents on the back of the main body are not blocked by any articles, or else the equipment will be damaged. - The jug and all the accessories are to be used only with the stand provided. Do not use the foreign parts on this machine. • Pay attention to avoid spillage on the connector. - The jug will be still hot due to residual heat after use, take care not to get burnt. - This appliance may be used by children of at least 8 years of age, as long as they are supervised and have been given instructions about using the appliance safely and are fully aware of the dangers involved. \- Cleaning and maintenance should not be carried out by children unless they are at least 8 years of age and are supervised by an adult. \- Keep the appliance and its power cord out of reach of children under 8 years of age. \- When using electrical equipment, safety precautions must always be taken to prevent the risk of fire, electric shock and/or injury in the event of misuse. \- Make sure that the voltage rating on the type plate corresponds to your main voltage of your installation. If this is not the case, contact the dealer and do not connect the unit \- Never leave the unit unattended while in operation. \- Never open the appliance from the front, always position yourself slightly to the side to avoid burning yourself with steam. \- The device must not be used if it has been dropped, it obvious signs of damage are visible or if it has leaks. \- Do not operate this appliance if it has a damaged cord or plug, if it is not working properly or if it has been damaged or dropped. If the supply cord is damaged, it must be replaced by the manufacturer or its service agent or a similarly qualified person in order to avoid a hazard.PACKAGE CHECKING
When opening the packing box, take out all the accessories and get to know them according to the components list. The spare parts are as follows: 1 Main body 7 Steamer lid 2 Blending jar 8 Filter basket 3 Jar lid 9 Butterfly 4 Measuring cup 10 Spatula 5 Small steamer 11 Recipe book 6 Big steamer ACCESSORIES
Blending Jar assembly:
There are jar capacity marks on one side of the jar. The maximum capacity of the jar is 2L. natural_image
Line drawing of a trash bin with handle and side slots (no text or symbols)natural_image
Simple line drawing of a cylindrical object with an oval top and a curved line extending upward (no text or symbols)Notice
The quantity of food put into the jar should not exceed 2.0L, or else the food may outflow or splash out to cause danger. Put the lid on the jar, press the safety switch, turn the lid clockwise to fix the lid onto the jar, or else the motor can not be started. (Always push the safety switch first to lock or open the lid) natural_image
Mechanical component diagram showing a circular assembly with rotational arrows (no text or symbols)natural_image
Technical line drawing of a mechanical component with a central hub and an arrow indicating direction (no text or symbols)natural_image
Technical line drawing of a mechanical component with an arrow indicating direction (no text or symbols)natural_image
Line drawing of a blender and toaster (no text or symbols)natural_image
Line drawing of a kitchen blender with digital display (no text or symbols)Blade assembly:
Fix the sealing ring on the blade assembly, put it into the through the hole of the jar bottom, hold the half top of the blade tightly and turn bottom upside, use the fixing bracket to fix the blade by turning clockwise. Doing oppositely to remove it from the jar. Do not miss the blade sealing ring between the blade and the jar bottom.  natural_image
Line drawing of a mechanical component with a central hub and four blades (no text or symbols)Notice
- The blade is very sharp. Please wrap the blade with washcloth when assembling or removing the blade base. - Please hold the blade assembly firmly and take it out carefully so as to ensure that blade assembly will not fall down and cause danger. - Please make sure that the fixing bracket and the sealing ring is in place and locked tightly with blade assembly. If the sealing ring isn't well placed, the food being mixed or cooked may leak out and damage the appliance.Kneading shaft assembly:
Remove the blade, fix the kneading shaft the same way as fixing the blade. It can be used for kneading, or stirring and mixing without cutting the food. Notice
• Do not use it for speed over 3, otherwise it will cause big vibration to the machine and cause risk. - As the smallest distance between the stirring assembly and the jar wall is only 1cm, sometimes the food may stuck and the motor may stop for self protection. Use the spatula to mix and remove the stuck and it will be smoothly working again. - Please make sure that the fixing bracket and the sealing ring is in place and locked tightly with blade assembly. If the sealing ring isn't well placed, the food being mixed or cooked may leak out and damage the applianceMeasuring cup:
- The measuring cup has many functions: it is a part of the lid to prevent losing heat or splashing; it is a measuring cup to measure the ingredients with full capacity 150ml. - Put the measuring cup into the hole of the lid, turn it clockwise to fix it on the lid. natural_image
Simple line drawing of a cylindrical object with a flared base (no text or symbols)natural_image
Technical line drawing of a mechanical component with concentric circles and handle (no text or symbols)Notice
• The measuring cup is the only part which can be used to cover the round hole of the lid - Do not cover the hole by any other articles to avoid splash of the food to cause dangerSpatula:
- The spatula is the only comp on ent to be used to scrape the food in the jar. The other articles may cause damage to the non-stick coating inside of the jar. • There is a small groove on the handle of the spatula, use it to hold the filler basket natural_image
Technical line drawing of a mechanical tool or tool component (no text or symbols)natural_image
Line drawing of a cleaning brush with a circular base and handle (no text or symbols)Notice
- Do not use it to mix in the jar when the blade is working. - Do not use the spatula if butterfly is inside. - Do fix closely the handle with the filter basket before lifting it.Filter basket:
The basket has many functions: \- Sieve. Filter fruit and Vegetable juice. After grinding or making fruit sauce with the appliance, put the basket into thejar to help pour out the juice. \- Stew soft food such as pasta or noodles; • Cook side dishes, such as rice and potatoes. natural_image
Line drawings of two containers with different internal patterns, one showing a handle and the other a handle (no text or symbols)Notice
• To use the spatula handle to the hole of the edge of the basket to put it into or take out of the jar. \- If you want to decrease the water in the food, such as tomatoes, then take the measuring cup away and cover with the basket instead. The water can be easily removed.Butterfly:
\- Installed on the blade, the butterfly can help to mix the food but preventing from cutting by blades, and prevent the food from being adhesive together and let the food keep on mixing. • Fix the butterfly on the blade assembly by the hole, and press it with enough force for good connection, turn the butterfly bar counterclockwise to make it locked onthe blade. natural_image
Technical line drawings of a mechanical device and a multi-story building (no text or symbols)Notice
- Do not start the appliance until the butterfly is fixed in place. • Do not use above speed 4when using butterfly. - Do not use spatula when using butterfly. - Do not add ingredients into the jar when the appliance is working with the butterfly, orelse the butterfly may be damaged or blocked.Steamer Assembly:
There are three parts of the steamer: Small steamer, Big steamer and lid. The lid can put on both the small steamer and big steamer, and the big steamer can sit on the small steamer. Remove the jar lid, sit the steamer on the jar. natural_image
Simple line drawing of a square pot with handles and a circular center (no text or symbols)natural_image
Illustration of a cooking pan with three views showing different interior designs (no text or symbols)natural_image
Black kitchen blender with digital display and control panel (no visible text or symbols)Notice
- Please make sure that the steamer lid is covered before steaming. • The steamer cannot be used in microwave oven or other electric appliances. • Do not touch or get close to the holes of the steamer lid to avoid hurt by hot steam. - Do not cover or block the holes of the steamer lid by any articles or else the steam may come out from the edge or other places and cause danger.INSTRUCTION FOR USE
INSTRUCTION FOR USE
At the early stage of using this unit, there will be light smell from the motor which is normal phenomenon. After a period of time, this kind of smell will disappear. \- Please put the appliance on clean, stable and flat table. Do not put it too close to the edge, and keep it away from the built-in wardrobe or hanging bracket. • It is better to put the appliance on some fixed place for your convenience. \- Please thoroughly clean the appliance before using. \- "Beep" sound shows the button has brought into effect. .   STOP/ CANCEL
• Get the machine plugged ,turn on the switch at the back of the machine, the machine beeps once but no display. natural_image
Line drawing of a mechanical or electrical component with no visible text or symbolsKNOB (START/ PAUSE)
• After selected the desired setting or program, press this button to start working immediately. - Press this button during working process, the machine pause working and standby, LCD shows. (The USE consumer can open the lid, take away the jar, etc. But it must be fixed well again before re-starting). Press it again and it starts again. - The machine will turn off automatically in 10min without operation under PAUSE status. - It is also a knob for setting timer, speed, temperature, heat power, with increasing when turn the knob clockwise, and decreasing when turn the knob anti-clockwise, or choosing among the 15 auto programs. TIMER
- The LCD screen shows , it 88:88:88 means hour: minute: second. - Press timerbutton and the minute signal on LCD flicker; Turn the knob to adjust the minutes. Press it again, the second signal on LCD flicker, turn the knob to adjust the seconds. Press it again, the hour signal on LCD flicker, turn the knob to adjust the hours from 1-12h. - Press the timer during working process, the machine starts to count down directly. - Max 60min by manual setting; max 3h under DIY setting. The timer limit of each program please refer to chapter "MENU" below. Preset   Press Timer button ⏻ and hold 3 seconds to enter preset / appointment setting mode. Time digit flicking together with preset logo. Use same way to set preset time from 30 minutes to 12 hours. Preset mode only goes with DIY or Menu. Set DIY or choose Menu firstly. Press knob after setting then time start to count down, Press preset  to cancel. SPEED
\- Press this button in stand-by mode or during working process (except some auto programs locked the speed adjustment), the appliance gets into speed setting mode.  The signal on LCD flicker, then speed is adjustable. Turn the knob to select desired speed. - Speed range from level 1-10. - Press this button in blending & heating process, if the temperature setting or the actual temperature is over 60^ , the speed can be only adjustable from speed 1 to 4. If it was working at high speed, it will drop to speed 4 automatically. - There is a speed transfer on the structure, so it's normal to hear little noise before the motor start working, or transferring the speed between level 5 and level 6. - For crushing or chopping hard food or big volume of food, it is suggested to select speed 5 first and then turn to speed 10, to avoid vibration and achieve perfect performance. - Please do not use speed 8,9,10 over 5 minutes each time; please do not use speed 5,6,7 over 10 minutes each time. TEMPERATURE
\- Press this button in stand-by mode or during heating process (except some auto programs locked the temperature adjustment), the appliance gets into temperature setting mode. The signal on LCD flicker, then temperature is adjustable. Turn the knob to select desired temperature. • Temperature range: 37-120°C HEAT POWER
\- Press this button in stand-by mode or during heating process (except some auto programs locked the heat power adjustment), the appliance gets into temperature setting mode.  The signal on LCD flicker, then heat power is adjustable. Turn the knob to select desired heat power. • Heat power range from level 1-10. \- For some sticky food, it is suggested to select low heat power to avoid being burnt at the bottom. \- If food volume is small and it requires precise temperature, it is suggested to select low heat power. \- Low power will be more precise control; High power will heat quicker. \- It will not work if just select the heat power but no temperature selected. It is suggested to follow the default setting when choosing different temperature levels. SELF-CLEANING
\- This program is for cleaning purpose after use. \- Add water from 500ml to 1 liter. • Some detergent will be helpful • Whole process takes around 10 minutes TURBO
\- Press and hold this button at standby mode, the machine starts working at maximum speed, release and it stop immediately \- When the temperature in the jar is over 60°C, PULSE cannot be used, and the screen will show E11. • There is a speed transfer on the structure, so it's normal to hear little noise before the motor start working at the first pulse. • Maximum operation time for Pulse is 3 min and then rest for 10 minutes MENU
• This button is to choose among the below 10 auto programs. natural_image
Grid of ten simple food icons including kitchen utensils, cooking pot, steaming bowl, sauce bowl, seafood dish, hot pot, plate with meat, drink, and soda (no text or symbols)| Programs | Default setting | Setting | Tips |
| CHOP | *Speed: 5*Temperature: 0*Heat power: 0*Timer: 1min | *To crush but not to be smoothie. Time adjustable from 1s-5min for desired consistency.*If left idle for 10 minutes after program completion, machine will turn off automatically | *Suggested chopped size of the ingredients with hard articles like carrot, meat is 1-2cm.*If you need to crush the food to be the finest, please use SMOOTHIE |
| STEW | Step 1:*Speed: 0*Temperautre:100°C*Heat power: 10*Timer: no limit, until boilStep 2:*Speed: 0*Temperature: 90-95°C*Heat power: no certain, may change automatically according to the temperature and food volume*Timer: 3h | *Default timer 3h, adjustable from 1-12h*If left idle for 10 minutes after program completion, machine will automatically enter ‘WARM’ mode. | *Slow cook |
| STEAM | *Speed: 0*Temperature: 120°C*Heat power: 10*Timer: 20min | *Time adjustable from 15-60m*If left idle for 10 minutes after program completion, machine will automatically enter ‘WARM’ mode. | *500g of water for every 30 minutes of steaming*Vegetable 20min; meat 30min |
| THICK SOUP | Step 1:*Speed: 0*Temperature: 120*Heat power: 10*Timer: Till BoilStep 2:*Speed: 0*Temperature: 100°C*Heat power: 4*Timer: 29.5minStep 3:*Speed: 0*Temperature: 0°C*Heat power: 0*Timer: Cooling down to 80°CStep 4:*Speed: slowly from 6 to 10*Temperature: 0°C*Heat power: 0*Timer: 1 min | *Suitable for meat soup, crush first and then cook and stir. Timer adjustable from 15-60m.*If left idle for 10 minutes after program completion, machine will automatically enter ‘WARM’ mode. | *Suggested chopped size of the ingredients with hard articles like carrot, meat is 1-2cm*Suggest to pause and add butterfly after Step 1. |
| QUICK SOUP | Step 1:*Speed: 10*Temperature: 0*Heat power: 0*Timer: 30sStep 2:*Speed: 2*Temperature: 120°C*Heat power: 10*Timer: Till boilingStep 3:*Speed: 2*Temperature: 100°C*Heat power: 10*Timer: 19.5min | *Suitable for vegetable soup, crush first and then cook and stir. Timer adjustable from 15-60m.*If left idle for 10 minutes after program completion, machine will automatically enter ‘WARM’ mode. | *Suggested chopped size of the ingredients with hard articles like carrot, meat is 1-2cm*Suggest to pause and add butterfly after Step 1. |
| STIR | *Speed: 2*Temperature: 100°C*Heat power: 10*Timer: 30min | *Speed adjustable from level 0-3;*Temperature adjustable from 90-120°C.*Time adjustable from 5-60m*If left idle for 10 minutes after program completion, machine will automatically enter 'WARM' mode. | *Use butterfly or kneading blade |
| KNEAD | Step 1:*Speed: 3*Temperature: 0*Heat power: 0*Timer: 3minStep 2:*Speed: 2*Temperature: 0*Heat power: 0*Timer: 7min | *Speed adjustable from level 2-3;*Temperature adjustable at 0 or 37°C for spreading.*Time adjustable from 3-20m*If left idle for 10 minutes after program completion, machine will turn off automatically | *Knead for bread: 330g water + 500g flour + other ingredients; knead 10min by default setting*Knead for noodle: 200g water + 400g flour; knead 3min by speed 2*Set temperature 37°C for spreading, and if it doesn't spread enough, choose 37°C for 30min more without speed |
| RISOTTO | Step 1:*Speed: 0*Temperautre:100°C*Heat power: 6*Timer: Till boilingStep 1:*Speed: 1*Temperautre:965°C*Heat power: 4*Timer: 18 MinHeat power & Timer: not certain, may adjust automatically according to the temperature and volume | *All setting non-adjustable*If left idle for 10 minutes after program completion, machine will automatically enter 'WARM' mode. | *Suggested volume (max): 500g rice + 800g water, run RICE by default setting.Rice crust will form at the bottom.*Or steam rice by setting: 400g rice in the filter basket, 2L water, choose BOIL;then pour out some water with 1L left, choose STEAM for 20min |
| SMOOTHIE | *Speed: 10*Temperature: 0*Heat power: 0*Timer: 30s | *All setting non-adjustable, run once more if not fine enough.*If left idle for 10 minutes after program completion, machine will turn off automatically | Suggested chopped size of the ingredients with hard articles like carrot, meat is 1-2cm |
| YOGURT | *Speed: 1 at the first 30min, and then stop*Temperature: 37-39°C*Heat power: 1*Timer: 6h | *Time adjustable from 3-12h*If left idle for 10 minutes after program completion, machine will turn off automatically | *Suggested volume: 1 cup yogurt + 1L fresh milk + sugar, 6-12h according to desired consistency |
| Tools | Picture | Function | Speed | Capacity | Operation time |
| Cutting blade | | CHOP but not being smoothie | 5 | 2L max, chop to be 1-2cm size before operation | 1min |
| CHOP to be finest | 10 | 2L max, chop to be 1-2cm size before operation | 1min | ||
| Kneading blade | | Knead dough for bread, pizza, etc | 2-3 | 800g flour max | 5-10min |
| Knead dough for noodles | 2 | 500g flour max | 3min | ||
| Butterfly | | Stir | 1-3 | 2L max | 30min |
| whisk egg whites or cream | 4 | 2L max | 10min | ||
| Steamer | | Steam vegetables | N/A | 3.5L max | 15min |
| Steam meat | N/A | 3.5L max | 20-30min |
TROUBLE-SHOOTING
\- The below error information appeared on the screen is normal. If it still appears the problem after you acted according to the solution below, please contact our customer service center.| Error code | Description | Possible reasons | Solution |
| E1 | Safety switch not fixed | Jar or jar lid is not fixed properly. | Re-assemble the jar and jar lid, make sure all the parts are assembled properly and tightly |
| E2 | Temperature sensor missing | The jar is not in place, or connection of the temperature sensor at the jar base is damaged | Re-assemble the jar and make sure it is fixed properly and tightly |
| E3 | Motor blocked | Too big loading in the jar | Decrease the volume of the food in the jar, or cut the food to smaller pieces and re-start the machine. |
| E4 | Too high temperature | No food in the jar, or very little food with high temperature setting for too long time. | Add food in the jar |
| E5 | Motor temperature too high | The machine works at high loading for too long time | Stop and let the machine to cool before re-started |
| E7 | Speed transfer failure | Speed changing between low level (1-5) and high level (6-10) blocked | Remove the jar, turn the lower clutch manually and fix the jar and restart. |
| E8 | Motor NTC missing | Motor temperature sensor connection loose or damaged | Stop using and send to after sales service center to fix it |
| E11 | Cannot use Pulse | The temperature in the jar is over 90°C | Cool down the food and Pulse again, or use lower speed 4 |
Cleaning your appliance
1. DO NOT was any parts of your cooker in a dishwasher. Always wash the cooker thoroughly after every use, or it has not been used for an extended period of time. 2. Unplug the appliance from the wall outlet and let the unit cool before cleaning. 3. Wash the removable cooking pot with warm soapy water. Rinse and dry thoroughly. 4. Wipe main body with a clean damp cloth. If food residue remains, dampen cloth in warm soapy water before wiping. NEVER submerge the main body in water or other liquid. Wipe the stationary pot as necessary to remove any food product. 5. In order to maintain good performance of you ...soup maker, the bottom of the removable cooking pot should be inspected and cleaned, if necessary, after each use. Wipe with a soft damp cloth and dry thoroughly before using. 6. If the soup maker is not used for a period of time, please unplug it and keep in cool and clean area. http://dl.hkoenig.com/SiteHkoenig/Livrederecettes\_HK8.pdf Or scan here: WARRANTY
The warranty period for our products is 2 years, unless otherwise stated, starting from the date of initial purchase or the date of delivery. If you have any problems or questions, you can easily access our help pages, troubleshooting tips, FAQ, and user manuals on our service site: https://sav.hkoenig.com. By typing the reference name of your device in the search bar, you can access all available online support, designed to best meet your needs. If you still cannot find an answer to your question or problem, then click on “Did the answer solve your problem?”. This will direct you to the Customer Support Request Form, which you can fill out to validate your request and get help.WARRANTY CONDITIONS
The warranty covers all failures occurring under normal use, in accordance with the usage and specifications in the user's manual. This warranty does not apply to packaging or transportation problems during shipment of the product by the owner. It also does not include normal wear and tear of the product, nor maintenance or replacement of consumable parts.EXCLUSION OF WARRANTY
- Accessories and wearing parts (\*). - Normal maintenance of the device. - All breakdowns resulting from improper use (shocks, failure to comply with power supply recommendations, poor conditions of use, etc.), insufficient maintenance or misuse of the device, as well as the use of unsuitable accessories. - Damage of external origin: fire, water damage, electrical surge, etc. - Any equipment that has been disassembled, even partially, by persons other than those authorized to do so (notably the user). - The products whose serial number would be missing, deteriorated or illegible that would not allow its identification. - The products subjected to leasing, demonstration, or exhibition. (\*) Some parts of your device, called wear parts or consumables, deteriorate with time and frequency of use of your device. This wear and tear are normal but can be accentuated by poor conditions of use or maintenance of your device. These parts are therefore not covered by the warranty. The accessories supplied with the device are also excluded from the warranty. They cannot be exchanged or refunded. However, some accessories can be purchased directly through our website: https://sav.hkoenig.com/.DISPOSAL AND ENVIRONMENT
If your electrical appliance requires replacement or is of no further use, please think of protecting the environment. Contact your local authority for advice as many have facilities for environmentally safe disposal  This marking indicates that this product should not be disposed with other household wastes throughout the EU. To prevent possible harm to the environment or human health from uncontrolled waste disposal, recycle it responsibly to promote the sustainable reuse of material resources. To return your used device, please use the return and collection systems or contact the retailer where the product was purchased. They can take this product for environmental safe recycling. Adeva SAS / H.Koenig Europe - 8 rue Marc Seguin, 77290 Mitry-Mory, France www.hkoenig.com - https://en.hkoenig.com - Tél: +33 1 64 67 00 05FRANÇAIS
Instructions de sécurité importantes
Les précautions de sécurité suivantes doivent toujours être suivies afin de réduire le risque d'électrocution, de blessure ou d'incendie. Lisez attentivement toutes ces instructions avant d'utiliser le produit et conserver le mode d'empoi en lieu sûr. \- Cet appareil peut être utilisé par des personnes dont les capacités physiques, sensorielles ou mentales sont réduites ou dont l'expérience ou les connaissances ne sont pas suffisantes, à condition qu'elles bénéficient d'une surveillance ou qu'elles aient reçu des instructions quant à l'utilisation de l'appareil en toute sécurité et qu'elles en comprennent bien les dangers potentiels. \- Cet appareil ne doit pas être utilisé par des enfants. Ne laissez pas l'appareil et son cordon d'alimentation à la portée des enfants. \- Il existe un risque de blessure en cas de mauvaise utilisation. Des précautions doivent être prises lors de la manipulation des lames coupantes, du vidage du bocal et pendant le nettoyage. \- Éteignez et débranchez l'appareil avant de remplacer les accessoires ou de toucher les pièces qui sont mobiles quand l'appareil fonctionne. Débranchez toujours l'appareil de la prise électrique s'il est laissé sans surveillance, mais aussi avant l'assemblage, le démontage ou le nettoyage. \- Si le cordon d'alimentation est endommagé, il doit être remplacé par le fabricant, son agent de service ou bien toute personne qualifiée afin d'éviter tout accident. \- Les accessoires, autres que ceux fournis avec l'appareil, doivent inclure des instructions pour une utilisation en toute sécurité. - AVERTISSEMENT: ne retirez pas le couvercle pendant que l'eau bout. Ne réglez pas la vitesse au-dessus du niveau 4 lorsque la température est supérieure à 90 degrés centigrades. • L'appareil ne doit pas être plongé dans un liquide. - Cet appareil est destiné à être utilisé dans un cadre domestique et dans des contextes similaires tels que : – coin-cuisine réservé au personnel de magasins, bureaux et autres lieux de travail ; \- les exploitations agricoles ; \- par les clients dans les hôtels, les motels et les autres lieux à caractère résidentiel ; \- les hébergements de type chambre d'hôtes. \- Veuillez placer l'appareil sur une table plane et stable qui ne deviendra pas chaude et assurez-vous qu'il soit à une distance sûre du bord pour éviter de tomber. Lorsqu'il est utilisé pour petrir la pâte ou couper des aliments, l'appareil peut bouger à cause des vibrations. Donc, soyez vigilant afin d'éviter qu'il ne tombe au sol. \- Veuillez retirer la fiche lors du nettoyage de l'appareil ou le ranger lorsque vous ne l'utilsez pas durant une longue période. \- Vérifiez régulièrement si le bloc-moteur, le bocal, le cuiseur-vapeur ou d'autres composants sont endommagés ou non. Les pièces abîmées augmentent le risque d'accident. Une fois que quelque chose ne va pas, veuillez cesser d'utiliser l'appareil et contactez notre service après-vente. • Si l'appareil s'arrête de façon inattendue ou fonctionne mal, éteignez-le et débranchez-le du secteur immédiatement. Demandez conseil à un professionnel pour corriger le défaut ou effectuer des réparations. • Le récipient à mesurer est la seule partie qui peut être utilisée pour recouvrir le trou rond dans le couvercle du bocal. Veuillez ne pas utiliser de tissu ou des objets similaires pour recouvrir le trou. - Ne touchez pas le tranchant des lames. Soyez prudent et tenez la partie supérieure lorsque vous assemblez ou retirez les lames. • Tenez compte du repère de capacité sur le bocal. - Ouvrez le couvercle quand les aliments dans le bocal ont cessé de tourner. - Faites attention aux aliments chauds lorsque vous ouvrez le couvercle du bocal. Veuillez placer correctement le récipient à mesurer dans le trou du couvercle du bocal lors du traitement des aliments. - Ne touchez pas le bocal lorsqu'il s'y trouve des aliments qui sont à plus de 60 °C. - Assurez-vous que le cuiseur-vapeur et le bocal soient bien assemblés lorsque vous utilisez le cuiseur-vapeur. - Faites attention à ce que la vapeur s'écoule par le haut ou les côtés du couvercle. - Pendant le fonctionnement, ne touchez pas le cuiseur à vapeur à l'exception de ses poignées. - N'utilisez pas le cuiseur à vapeur sans son couvercle bien en place. - Lorsque vous soulevez le couvercle du cuiseur, veillez à ne pas vous ébouillanter avec la vapeur. - Lorsque vous faites une cuisson à la vapeur ou à l'eau bouillante, faites attention à ce que la vapeur s'écoule par le bec du bocal lorsque vous déplacez le cuiseur-vapeur. - Vérifiez souvent que le trou d'aération du couvercle du cuiseur-vapeur n'est pas obstrué, sinon la vapeur pourrait sortir ailleurs. - Après utilisation, veuillez mettre l'appareil et ses accessoires chauds dans un endroit hors de portée des enfants. - Le débordement de nourriture : assurez-vous que la bague d'étanchéité de la lame soit bien placée et que l'ensemble des lames soit fermement fixé au support en dessous. Si ce n'est pas le cas, cela entraînera un débordement de nourriture qui endommagera l'appareil. \- Dégâts dus à une mauvaise ventilation : assurez-vous que les évents à l'arrière du bloc-moteur ne soient pas bouchés, sinon l'appareil sera endommagé. \- Le bocal et tous les accessoires doivent être utilisés uniquement avec le support fourni. N'utilisez pas de pièces qui ne soient pas d'origine. \- Faites attention à ne pas renverser le bocal sur le branchement. \- Après utilisation de l'appareil, le bocal reste chaud un certain temps, donc veillez à ne pas vous brûler. \- Cet appareil peut être utilisé par des enfants d'au moins 8 ans s'ils sont surveillés, qu'ils ont reçu des instructions pour utiliser l'appareil en toute sécurité et qu'ils sont pleinement conscients des dangers encourus. \- Le nettoyage et l'entretien ne doivent pas être effectués par des enfants à moins qu'ils aient au moins 8 ans et qu'ils soient surveillés par un adulte. \- Gardez l'appareil et son cordon d'alimentation hors de portée des enfants de moins de 8 ans. \- Lors de l'utilisation d'appareils électriques, des précautions de sécurité doivent toujours être prises pour éviter les risques d'incendie, de choc électrique et / ou de blessure en cas de mauvaise utilisation. • Assurez-vous que la tension nominale indiquée sur la plaque signalétique corresponde à la tension principale de votre installation. Si ce n'est pas le cas, contactez le revendeur et ne branchez pas l'appareil. \- Ne laissez jamais l'appareil sans surveillance pendant son fonctionnement. • N'ouvrez jamais l'appareil devant vous ; placez-vous toujours légèrement sur le côté pour éviter de vous brûler avec la vapeur. • L'appareil ne doit pas être utilisé s'il est tombé, s'il présente des signes évidents de dommages ou des fuite • N'utilisez pas cet appareil si son cordon ou sa fiche est abîmée, s'il ne fonctionne pas correctement, s'il a été endommagé ou est tombé par terre. Afin d'écarter tout danger en cas de cordon d'alimentation endommagé, celui-ci doit être remplacé par le fabricant, son représentant ou toute personne de même qualification. \- Votre appareil a été conçu pour un usage domestique seulement. Elle n'a pas été conçue pour être utilisée dans les cas suivants qui ne sont pas couverts par la garantie : - dans des coins de cuisines réservés au personnel dans des magasins, bureaux et autres environnements professionnels, - dans des fermes aubèrges, - par les clients des hôtels, motels et autres environnements à caractère résidentiel, – dans des environnements de type chambres d'hôtes.DESCRIPTION DE L'APPAREIL
Lors de l'ouverture du carton d'emballage, sortez tous les accessoires et vérifiez qu'ils correspondent à la liste des composants. Les pièces détachées sont les suivantes : 1 Bloc-moteur 7 Couvercle 2 Bocal 8 Panier 3 Couvercle du bocal 9 Papillon 4 Récipient à mesurer 10 Spatule 5 Petit cuiseur à vapeur 11 Livre de recettes 6 Grand cuiseur à vapeur ACCESSOIRES
Assemblage du bocal mélangeur :
Il y a des repères concernant les volumes du bocal sur une des parois. La capacité maximale du bocal est de 21. Avis
La quantité de nourriture placée dans le bocal ne doit pas dépasser 2l, faute de quoi la nourriture pourrait déborder et causer un danger. Mettez le couvercle sur le bocal, appuyer sur l'interrupteur de sécurité et tournez-le vers la droite pour le fixer, sinon le moteur ne peut pas démarrer. (Toujours appuyer sur l'interrupteur de sécurité pour vérouiller ou ouvrir le couvercle) natural_image
Three-step diagram showing a mechanical component with arrows indicating rotation or assembly (no text or symbols present)natural_image
Line drawings of two kitchen appliances: a blender and a four-kg toaster (no text or symbols)Assemblage des lames :
Fixez la bague d'étanchéité sur les lames, placez le tout dans le trou au fond du bocal, maintenez fermement la partie haute de l'ensemble et tournez la partie basse à l'envers. Utilisez le support de fixation pour fixer les lames en tournant dans le sens des aiguilles d'une montre. Faites l'inverse pour le retirer du bocal. N'oubliez pas de mettre la bague d'étanchéité entre les lames et le fond du bocal.  natural_image
Line drawing of a hand holding a circular mechanical component with three blades (no text or symbols)Avis
- Les lames sont très pointues. Veuillez les envelopper avec un gant de toilette lors de l'assemblage ou du démontage. - Veuillez tenir fermement les lames et les retirer avec précaution pour qu'elles ne tombent pas ni ne vous blessent. - Veuillez vous assurer que le support de fixation et la bague d'étanchéité sont en place et bien verrouillés avec l'ensemble des lames. Si la bague d'étanchéité n'est pas bien placée, les aliments mélangés ou cuits peuvent déborder et endommager l'appareil.Assemblage de l'arbre de pétrissage :
Retirez les lames, fixez l'arbre de pétrissage de la même manière que pour la fixation des lames. Il peut être utilisé pour pétrir ou remuer et mélanger sans couper les aliments.  natural_image
Diagram of a mechanical component with concentric rings and a curved arrow indicating rotation (no text or symbols)natural_image
Technical diagram of a mechanical component with concentric rings and mounting holes (no text or symbols)Avis
- N'utilisez pas une vitesse supérieure à 3, sinon cela provoquera de fortes vibrations de l'appareil et entraînera des risques. - Comme la plus petite distance entre l'accessoire de pétrissage et la paroi du bocal n'est que de 1 cm, parfois la nourriture peut se coincer et le moteur peut s'arrêter par sécurité. Utilisez alors la spatule et retirer ce qui coince pour que l'appareil fonctionne à nouveau en douceur. - Veuillez vous assurer que le support de fixation et la bague d'étanchéité sont en place et bien verrouillés avec l'ensemble des lames. Si ce n'est pas le cas, les aliments mélangés ou cuits peuvent déborder et endommager l'appareil.Récipient à mesurer
Le récipient à mesurer a de nombreuses fonctions : il fait partie du couvercle pour éviter la perte de chaleur ou les éclaboussures; c'est un récipient pour mesurer les ingrédients avec une capacité totale de 150 ml. Mettez le récipient à mesurer dans le trou du couvercle, tournez-le dans le sens des aiguilles d'une montre pour le fixer. natural_image
Simple line drawing of a top hat with a flared base (no text or symbols)natural_image
Technical line drawing of a mechanical component with concentric circles and a handle (no text or symbols)Avis
• Le récipient à mesurer est la seule pièce qui peut être utilisée pour recouvrir le trou du couvercle \- Ne recouvrez pas le trou avec d'autres accessoires afin d'éviter les éclaboussures de nourriture pouvant provoquer un danger.Spatule :
Spatule
- La spatule est le seul accessoire à utiliser pour gratter les aliments dans le bocal. Les autres pièces peuvent endommager le revêtement anti-adhésif à l'intérieur du bocal. - Il y a une petite rainure sur le manche de la spatule, utilisez-la pour tenir le panier. natural_image
Line drawings of two kitchen utensils: a handle and a brush (no text or symbols)natural_image
Line drawing of a bucket with a handle and side rack (no text or symbols)Avis
- Ne l'utilisez pas pour mélanger les aliments lorsque les lames tournent. - N'utilisez pas la spatule si le papillon est à l'intérieur. - Fixez bien le manche avec le panier avant de le soulever.Panier-filtre
Le panier a de nombreuses fonctions : • Passoire pour jus de fruits et de légumes Après avoir broyé ou fait une sauce aux fruits avec l'appareil, placez le panier dans le bocal pour verser le jus. - Ragoût d'aliments mous comme des pâtes ou des nouilles; • Cuisson de plats d'accompagnement, comme du riz ou des pommes de terre. natural_image
Line drawings of two mechanical components with no visible text or symbolsAvis
- Mettez le manche de la spatule dans le trou du bord du panier pour le mettre ou le sortir du bocal. - Si vous souhaitez réduire l'eau contenue dans les aliments, comme les tomates, retirez le récipient à mesurer et mettez-y le panier. L'eau peut être facilement éliminée.Papillon :
• Installé sur les lames, le papillon permet de mélanger les aliments mais sans les couper, et empêche les aliments de coller ensemble. - Placez le papillon sur l'ensemble des lames et appuyez dessus avec suffisamment de force, puis tournez le papillon dans le sens inverse des aiguilles d'une montre pour bien le verrouiller. natural_image
Technical line drawing of a mechanical component with no visible text or symbolsnatural_image
Line drawing of a mechanical assembly with a conical component and structural supports (no text or symbols)Avis
- Ne démarrez pas l'appareil tant que le papillon n'est pas en place. • N'utilisez pas le papillon au-dessus de la vitesse 4. - N'utilisez pas de spatule lorsque vous employez un papillon. - N'ajoutez pas d'ingrédients dans le bocal lorsque l'appareil fonctionne avec le papillon, sinon il pourrait être endommagé ou se bloquer.Assemblage du cuiseur à vapeur :
Le cuiseur est constitué de trois parties : petit vapeur, grand vapeur et couvercle. Le couvercle peut se placer sur le petit et le grand vapeur, celui-ci peut se mettre sur le petit vapeur. Retirez le couvercle du bocal et placez le cuiseur-vapeur sur le bocal. natural_image
Simple line drawing of a square container with handles and a central circular hole (no text or symbols)natural_image
Diagram of three stacked circular containers with concentric rings, no text or symbols presentnatural_image
Black kitchen blender with digital display and control panel (no visible text or symbols)Avis
\- Veuillez vous assurer que le couvercle du cuiseur-vapeur est recouvert avant de cuire à la vapeur. \- Le cuiseur-vapeur ne peut pas être utilisé dans un four à micro-ondes ou d'autres appareils électriques. \- Ne touchez pas et ne vous approchez pas des trous du couvercle du cuiseur-vapeur pour éviter de vous brûler avec la vapeur. \- Ne recouvrez pas et ne boucher pas les trous du couvercle du cuiseur-vapeur, sinon la vapeur pourrait sortir par d'autres endroits et provoquer un danger.INSTRUCTIONS D'UTILISATION
Lors de l'utilisation de cet appareil pour la première fois, il y aura une légère odeur provenant du moteur, ce qui est un phénomène normal. Après un certain temps, cette odeur disparaîtra. - Veuillez placer l'appareil sur une table propre, stable et plane. Ne le mettez pas trop près du bord ni dans une armoire encastrée. • Il est préférable de placer l'appareil à un endroit défini pour plus de commodité. • Veuillez nettoyer soigneusement l'appareil avant de l'utiliser. - Le son «bip» indique que l'appareil est allumé.  ARRÊTER / ANNULER
\- Branchez l'appareil, allumez l'interrupteur situé à l'arrière, l'appareil émet un bip mais n'affiche rien. natural_image
Pure mechanical diagram showing a lever and connecting rod (no text or symbols)BOUTON DÉMARRAGE/PAUSE
\- Après avoir sélectionné le réglage ou le programme souhaité, appuyez sur ce bouton pour commencer à travailler. \- Quand vous appuyez sur ce bouton pendant le fonctionnement, il cesse de fonctionner et revient en mode veille ; l'écran LCD affiche (US utilisateur peut ouvrir le couvercle, retirer le bocal, etc. Mais il faut bien tout remettre en place avant de recommencer). Appuyez à nouveau et il repart. - L'appareil s'éteindra automatiquement au bout de 10 minutes sans utilisation s'il est en mode PAUSE. - Ce bouton sert aussi à régler la minuterie, la vitesse, la température, la puissance thermique, avec une augmentation lorsque vous tournez le bouton vers la droite et une diminution lorsque vous le tournez vers la gauche. Vous pouvez aussi choisir parmi les 15 programmes automatiques. MINUTERIE
• L'écran LCD affiche 88:88,89 ce qui veut dire heure: minute: seconde :. \- Appuyez sur le bouton minuterie et les minutes clignotent sur l'écran LCD. Tournez le bouton pour régler les minutes. Appuyez à nouveau, ce sont alors les secondes qui s'affichent. Tournez le bouton pour régler les secondes. Appuyez à nouveau, ce sont alors les heures qui s'affichent. Tournez le bouton pour régler de 1 à 12 heures. - Quand vous appuyez sur la minuterie pendant le fonctionnement, l'appareil commence à décompter aussitôt. - 60min max par réglage manuel; 3h par réglage DIY. La limite de minuterie de chaque programme est indiquée dans le chapitre ci-dessous. Fonction programmable
 Appuyez sur le bouton de l'horloge et maintenez-le enfoncé durant 3 secondes pour accéder au mode programmable. L'icône de l'horloge et l'icône de programmation se mettent à clignoter. Procédez de la même manière que pour régler l'heure, et ajustez la durée de 30 minutes à 12 heures. Le mode programmable ne peut être utilisé qu'avec DIY et MENU. Sélectionnez d'abord DIY ou MENU, appuyez sur la molette, et le temps commence à décompter. Appuyez sur le bouton de réinitialisation pour annuler l'action. VITESSE
\- Quand vous appuyez sur ce bouton en mode veille ou pendant le fonctionnement (attention, certains programmes automatiques ont verrouillé le réglage de la vitesse), l'appareil passe en mode de réglage de la vitesse et le symbole clignote sur l'écran LCD. Tournez le bouton pour sélectionner la vitesse souhaitée. - Plage de vitesse de 1 à 10. - Quand vous appuyez sur ce bouton pendant le processus de mélange ou de chauffage, si le réglage de la température ou la température réelle est supérieure à 60 °C, vous ne pouvez sélectionner que les vitesses de 1 à 4. Si l'appareil fonctionnait à grande vitesse, il passerait automatiquement à la vitesse 4. \- Il y a un changement de vitesse, il est donc normal d'entendre un peu de bruit avant que le moteur ne commence à fonctionner ou lors du changement de vitesse entre le niveau 5 et le niveau 6. \- Pour broyer ou hacher des aliments durs ou de gros volumes de nourriture, il est suggéré de sélectionner d'abord la vitesse 5, puis de passer à la vitesse 10 pour éviter les vibrations et obtenir les meilleures performances. \- Veuillez ne pas utiliser les vitesses 8,9,10 pendant plus de 5 minutes à chaque fois ni les vitesses 5,6,7 pendant plus de 10 minutes. TEMPÉRATURE
\- Quand vous appuyez sur ce bouton en mode veille ou pendant le processus de chauffage (attention, certains programmes automatiques ont verrouillé le réglage de la température), l'appareil passe en mode de réglage de la température. Le symbole clignote sur l'écran LCD. Tournez alors le bouton pour sélectionner la température souhaitée. • Plage de température : 37-120 °C PUISSANCE THERMIQUE
\- Quand vous appuyez sur ce bouton en mode veille ou pendant le processus de chauffage (attention, certains programmes automatiques ont verrouillé le réglage de la puissance thermique), l'appareil passe en mode de réglage de température et le symbole 📋 clignote sur l'écran. Tournez le bouton pour sélectionner la puissance thermique souhaitée. \- Plage de puissance : 1-10. \- Pour certains aliments collants, il est suggéré de sélectionner une faible puissance thermique pour éviter de brûler le fond. \- Si le volume des aliments est petit et nécessite une température précise, il est suggéré de sélectionner une puissance thermique faible. \- Cela permettra un contrôle plus précis. \- Cela ne fonctionnera pas si vous choisissez simplement la puissance thermique sans sélectionner une température. Il est suggéré de suivre le réglage par défaut lors du choix de différents niveaux de température. AUTO-NETTOYAGE
\- Ce programme est destiné au nettoyage après l'utilisation. \- Ajoutez de l'eau de 500 ml à 1 litre. \- Un détergent sera utile • L'ensemble du processus prend environ 10 minutes TURBO
\- Appuyez et maintenez ce bouton en mode veille, l'appareil commence à fonctionner à la vitesse maximale, relâchez et il s'arrête \- Lorsque la température dans le bocal est supérieure à 60 °C, PULSE ne peut pas être utilisé et l'écran affichera E11. \- Il y a un changement de vitesse, il est donc normal d'entendre un peu de bruit avant que le moteur ne commence à fonctionner à la première impulsion. \- Le temps de fonctionnement maximum pour Pulse est de 3 min avec ensuite une pause de 10 mn. MENU
\- Ce bouton permet de choisir parmi les 10 programmes automatiques ci-dessous : natural_image
Grid of ten simple food icons including cooking utensils, steaming dishes, and beverages (no text or labels)| Programmes | Réglages par défaut | Réglages | Conseils |
| HACHER | Vitesse : 5 Température :0 Puissance thermique:0 Minuterie : 1 min | Pour écraser mais pas pour être smoothie. Temps réglable de 1s à 5 min pour la consistence souhaitée.Si non utilisé pendant 10 minutes après la fin du programme, l'appareil s'éteindra automatiquement | La taille suggérée des ingrédients durs comme la carotte, la viande est de 1 à 2 cm.Si vous avez besoin d'écraser les aliments pour qu'ils soient plus fins, veuillez utiliser SMOOTHIE |
| MIJOTER | Étape 1:Vitesse: 0 Température:100 °CPuissance thermique:10Minuterie: pas de limite, jusqu'à ébullitionÉtape 2: Vitesse: 0Température: 90-95 °CPuissance thermique: pas certain, peut changer automatiquement selon la température et le volume des aliments.Minuterie: 3 h | Minuterie par défaut de 3 h, réglable de 1 à 12h.Si non utilisé pendant 10 minutes après la fin du programme, l'appareil entrera automatiquement en mode WARM. | Cuisson lente |
| VAPEUR | Vitesse: 0Température: 120 °CPuissance thermique:10Minuterie: 20 min | Temps réglable de 15 à 60 minSi non utilisé pendant 10 minutes après la fin du programme, l'appareil entrera automatiquement en mode WARM | 500 ml d'eau pour 30 minutes de cuisson à la vapeurLégumes 20 minViande 30 min |
| SOUPE ÉPAISSE | Étape 1:Vitesse: 0Température: 120°CPuissance thermique: 10Minuterie: jusqu'à ébullitionÉtape 2:Vitesse: 0 Température:100 °C Puissance thermique: 4 Minuterie:29,5 minÉtape 3:Vitesse: 0 Température:0 °C Puissance thermique: 0 Minuterie:refroidissement jusqu'à80 °CEtape 4:Vitesse: lentement de 6 à10Température: 0 °CPuissance thermique: 0Minuterie: 1 min | Convient pour la soupe de viande, écraser d'abord, puis cuire et remuer.Minuterie réglable de 15 à 60 minutes.Si non utilisé pendant 10 minutes après la fin du programme, l'appareil entrera automatiquement en mode WARM | Taille suggérée des ingrédients hachés avec des aliments durs comme la carotte, la viande est de 1 à 2 cmSuggéré de faire une pause et d'ajouter le papillon après l'étape 1. |
| SOUPE RAPIDE | Étape 1:Vitesse: 10 Température:0 Puissance thermique: 0Minuterie: 30 sÉtape 2:Vitesse: 2 Température:120 °C Puissance thermique: 10Minuterie: jusqu'àébullitionÉtape 3:Vitesse: 2 Température:100 °C Puissance thermique: 10Minuterie: 19,5 min | Convient pour la soupe aux légumes, écraser d'abord, puis cuire et remuer.Minuterie réglable de 15 à60 minutes.Si non utilisé pendant 10minutes après la fin duprogramme, l'appareilentrera automatiquement en mode WARM. | Taille suggérée des ingrédients hachés avec des aliments durs comme la carotte, la viande est de 1 à 2 cmSuggéré de faire une pause et d'ajouter le papillon après l'étape 1. |
| SAUCE | Vitesse: 2 Température:100 °C Puissance thermique: 10Minuterie: 30 min | Vitesse réglable du niveau0-3. Température réglable de 90 à 120 °C.Temps réglable de 5-60 minutesSi non utilisé pendant 10minutes après la fin duprogramme, l'appareilentrera automatiquement en mode WARM. | Utilisez un papillon ou une lame de pétrissage |
| PÉTRIR | Étape 1:Vitesse: 3 Température:0 Puissance thermique: 0Minuterie: 3 minÉtape 2:Vitesse: 2 Température:0 Puissance thermique:0 Minuterie: 7 min | Vitesse réglable du niveau 2-3; Température réglable à 0 ou 37 °C pour répartir.Temps réglable de 3 à 20 minutesSi non utilisé pendant 10 minutes après la fin du programme, l'appareil s'éteindra automatiquement | Pétrissage du pain: 330 ml d'eau + 500 g de farine + autres ingrédients; pétrir 10 min par défaut Pétrissage des nouilles:200 ml d'eau + 400 g de farine; pétrir 3 min à la vitesse 2Régler la température à 37 °C pour répartir, et si ce n'est pas suffisant, choisir 37 °C pour 30 min de plus sans vitesse |
| RISOTTO | Étape 1 :Vitesse: 0 Température: 100 °CPuissance thermique: 6 Minuterie: jusqu'à ébullitionÉtape 1 :Vitesse: 1 Température : 965 °CPuissance thermique: 4 Minuterie: 18 minPuissance thermique et minuterie: incertain, peut s'ajuster automatiquement en fonction de la température et du volume | Tous les paramètres ne sont pas réglablesSi non utilisé pendant 10 minutes après la fin du programme, l'appareil entrera automatiquement en mode WARM. | Volume suggéré (max): 500 g de riz + 800 ml d'eau, exécutez RICE par défaut.Une croûte de riz se formera au fond.Ou bien cuire du riz à la vapeur en réglant : 400 g de riz dans le panier-filtre, avec 2 l d'eau, choisissez BOIL puis enlevez un peu d'eau en conservant 1 l, choisissez VAPEUR pendant 20 min |
| SMOOTHIE | Vitesse: 10 Température:0 Puissance thermique:0 Minuterie: 30 s | Tous les paramètres ne sont pas réglables,recommencez une fois de plus si ce n'est pas assez fin.Si non utilisé pendant 10 minutes après la fin du programme, l'appareil entrera automatiquement en mode WARM. | Taille suggérée des ingrédients hachés avec des aliments durs comme la carotte, la viande est de 1 à 2 cm |
| YOGOURT | Vitesse: 1 pendant 30 min, puis s'arrêteTempérature: 37-39 °CPuissance thermique: 1 Minuterie: 6 h | Temps réglable de 3-12hSi non utilisé pendant 10 minutes après la fin du programme, l'appareil s'éteindra automatiquement | Volume suggéré:1 tasse de yaourt + 1 l de lait frais + sucre, 6-12 h selon la consistance souhaitée |
| Outil | Schéma | Fonction | Vitesse | Capacité | Durée |
| Lame de coupe | | HACHER mais sans être smoothie | 5 | 2 l max, découper pour avoir une taille de 1 à 2 cm avant l'opération | 1 min |
| HACHER pour être plus fin | 10 | 2 l max, couper pour avoir une taille de 1 à 2 cm avant l'opération | 1 min | ||
| Lame de pétrissage | | Pétrir la pâte pour le pain, la pizza, etc. | 2-3 | 800 g de farine max | 5-10 min |
| Pétrir la pâte pour les nouilles | 2 | 500 g de farine max | 3 min | ||
| Papillon | | Remuer | 1-3 | 2 l max | 30 min |
| Fouetter les blancs d'œuf ou la crème | 4 | 2 l max | 10 min | ||
| Cuiseur vapeur | | Légumes vapeur | N/A. | 3,5 l max | 15 min |
| Viande vapeur | N/A | 3,5 l max | 20-30 min |
GUIDE DE DÉPANNAGE
\- Les informations d'erreur ci-dessous, qui apparaissent à l'écran, sont normales. Si le problème persiste après que vous avez agi conformément aux recommandations ci-dessous, veuillez contacter notre service clientèle.| Code d'erreur | Description | Causes possibles | Solution |
| E1 | Interrupteur de sécurité non fixé | Le bocal et/ou son couvercle ne sont pas bien fixés | Réassemblez le bocal et son couvercle, assurez-vous que toutes les pièces soient correctement et fermement fixées |
| E2 | Sonde de température manquante | Le bocal n'est pas en place ou la connexion de la sonde de température au fond du bocal est endommagée | Remonter le bocal et assurez-vous qu'il soit correctement et fermement fixé |
| E3 | Moteur bloqué | Bocal surchargé | Diminuez le volume des aliments dans le bocal ou coupez-les en plus petits morceaux et redémarrez l'appareil. |
| E4 | Température trop élevée | Pas d'aliment dans le bocal ou très peu à une température élevée pendant trop longtemps. | Rajoutez des aliments dans le bocal |
| E5 | Température du moteur trop élevée | L'appareil fonctionne à forte charge pendant trop longtemps | Arrêtez et laissez l'appareil refroidir avant de le redémarrer |
| E7 | Changement de vitesse impossible | Changement de vitesse entre les niveaux bas (1-5) et les niveaux haut (6-10) bloqué | Retirez le bocal, tournez l'embrayage inférieur manuellement, replacez le bocal et redémarrez. |
| E8 | Moteur NTC manquant | La connexion de la sonde de température du moteur est lâche ou endommagée | Cessez de l'utiliser et envoyez-le au service après-vente pour le réparer |
| E11 | Impossible d'utiliser Pulse | La température du bocal est supérieure à 90°C | Laissez refroidir les aliments et appuyez de nouveau sur Pulse ou utiliser la vitesse 4 |
Nettoyage de l'appareil
1. NE LAVEZ PAS les accessoires de votre appareil dans un lave-vaisselle. Lavez toujours l'appareil à fond après chaque utilisation ou s'il n'a pas été utilisé pendant une période prolongée. 2. Débranchez l'appareil de la prise murale et laissez-le refroidir avant de le nettoyer. 3. Lavez le bocal à l'eau chaude savonneuse. Rincez et séchez-le soigneusement. 4. Essuyez le bloc-moteur avec un chiffon propre et humide. S'il reste des résidus de nourriture, humidifier le chiffon à l'eau chaude savonneuse avant de l'essuyer. N'immergez JAMAIS le bloc-moteur dans de l'eau ou un autre liquide. Essuyez le support du bocal si nécessaire pour éliminer tout résidus alimentaire. 5. Afin de maintenir le bon fonctionnement de votre appareil, le fond du bocal doit être inspecté et nettoyé, si nécessaire, après chaque utilisation. Essuyez-le avec un chiffon doux et humide et séchez-le soigneusement avant de l'utiliser. 6. Si l'appareil n'est pas utilisé pendant un certain temps, veuillez le débrancher et le conserver dans un endroit frais et propre.  RETROUVEZ TOUTES NOS RECETTES : http://dl.hkoenig.com/SiteHkoenig/Livrederecettes\_HK8.pdf Ou scannez le QR code : GARANTIE
La durée de garantie de nos produits est de 2 ans, sauf décret en vigueur, à compter de la date d'achat initiale ou la date de livraison. En cas de problèmes ou d'interrogations, vous pouvez facilement accéder à nos pages d'aides, conseils de dépannage, FAQ et modes d'emplois sur notre site SAV : https://sav.hkoenig.com. En tapant le nom de référence de votre appareil dans la barre de recherche, vous accédez à tous les supports en ligne disponibles, conçus pour vous répondre au mieux à vos besoins. Si vous ne trouvez toujours pas de réponse à votre question ou votre problème, alors cliquez sur « Est-ce que la réponse a résolu votre problème ? ». Vous accéderez alors au formulaire de demande d'assistance SAV, qu'il vous suffira de compléter pour valider votre demande et obtenir de l'aide.CONDITIONS DE GARANTIE
La garantie couvre l'ensemble des pannes survenant dans le cadre d'une utilisation normale, conforme aux usages et spécifications présentes sur le manuel d'utilisation. Cette garantie ne s'applique pas aux problèmes d'emballage ou de transport pendant l'expédition du produit par son propriétaire. Elle n'inclut également pas l'usure normale du produit, ni la maintenance ou le remplacement de pièces consommables.EXCLUSION DE GARANTIE
- Les accessoires et les pièces d'usure (\*). - L'entretien normal de l'appareil. - Toutes pannes survenant par suite d'une mauvaise utilisation (chocs, non-respect des préconisations d'alimentation électrique, mauvaises conditions d'utilisation, etc.), d'un entretien insuffisant ou d'un détournement de fonction de l'appareil, ainsi que l'usage d'accessoires non appropriés. - Les dommages d'origine externe : incendie, dégâts des eaux, surtension électrique, etc. - Tout matériel qui aura été démonté même partiellement par des personnes autres que celles habilitées (notamment l'utilisateur). - Les produits dont le numéro de série serait absent, détérioré ou illisible que ne permettrait pas son identification. - Les produits soumis à la location, à la démonstration ou à l'exposition. (\*) Certaines pièces de votre appareil dites pièces d'usure ou consommables se détériorent avec le temps et la fréquence d'usage de votre appareil. Cette usure est normale, mais peut être accentuée par des mauvaises conditions d'utilisation ou entretien de votre appareil. Ces pièces ne sont donc pas couvertes par la garantie. Les accessoires fournis avec l'appareil sont également exclus du champ de la garantie. Ils ne peuvent donc être ni échangés, ni remboursés. Toutefois, certains accessoires peuvent être directement achetés via notre site : https://sav.hkoenig.com/.ENVIRONNEMENT
ATTENTION :  Ce logo indique que ce produit ne doit pas être éliminé avec d'autres déchets ménagers dans toute l'UE. Pour éviter les éventuels dommages à l'environnement ou à la santé humaine dus à l'élimination incontrôlée des déchets, il faut le recycler de manière responsable afin de promouvoir la réutilisation durable des ressources matérielles. Pour vous débarrasser de votre appareil usagé, veuillez utiliser les systèmes de retour et de collecte ou contacter le détaillant chez qui le produit a été acheté. Ils peuvent prendre ce produit pour le recycler sans nuire à l'environnement. Adeva SAS / H.Koenig Europe - 8 rue Marc Seguin, 77290 Mitry-Mory, France www.hkoenig.com - https://sav.hkoenig.com - Tél: +33 1 64 67 00 05DEUTSCH
Wichtige Sicherheitsanweisungen
Die folgenden Sicherheitsanweisungen müssen immer befolgt werden, um das Risiko eines Stromschlages, einer Körperverletzung oder eines Brandes zu verringern. Es ist wichtig, alle diese Anweisungen sorgfältig vor der Nutzung des Produktes zu lesen, und diese als künftige Referenz für neue Besitzer aufzubewahren. \- Das Gerät kann von Personen mit eingeschränkten physischen, sensorischen oder geistigen Fähigkeiten oder mangels Erfahrung und Wissen benutzt werden, wenn sie beaufsichtigt werden oder die Anweisungen zur sicheren Nutzung des Gerätes und den damit verbundenen Gefahren erhalten haben. Kinder dürfen mit dem Gerät nicht spielen. • Dieses Gerät kann von Personen mit eingeschränkten körperlichen, sensorischen oder geistigen Fähigkeiten oder mangelnder Erfahrung und Kenntnis benutzt werden, vorausgesetzt, dass sie beaufsichtigt oder in der sicheren Benutzung des Gerätes unterwiesen werden und die möglichen Gefahren vollständig verstehen. \- Schalten Sie das Gerät aus und trennen Sie dieses von der Stromversorgung, bevor Sie das Zubehör aufladen oder bevor Sie bewegliche Teile während des Betriebs herangehen. Trennen Sie das Gerät immer vom Netz, wenn es unbeaufsichtigt ist oder während der Montage, Demontage oder Reinigung. \- Wenn das Stromkabel beschädigt ist, muss es von dem Hersteller, seinem Dienstleister oder einer ähnlich qualifizierten Person ersetzt werden, um Gefahren zu vermeiden. \- Das Zubehör, das nicht mit dem Gerät geliefert wurde, muss eine Anleitung zu seiner sicheren Nutzung haben. \- WARNUNG: Nehmen Sie den Deckel während das Wasser kocht nicht ab. Stellen Sie die Geschwindigkeit nicht höher als auf die Stufe 4 ein, wenn die Temperatur 90 Grad Celsius übersteigt. \- Das Gerät darf nicht in Flüssigkeiten getäucht werden. \- Das Gerät ist für die Haushaltsnutzung und ähnliche Anwendungsbereiche bestimmt, wie zum Beispiel: \- Küchenbereiche in Geschäften, Büros und anderen Arbeitsumgebungen; • Bauernhäuser; \- Bei Kunden in Hotels, Motels, und anderen Wohnumgebungen; \- Bed und Breakfast Einrichtungen; \- Platzieren Sie bitte das Gerät auf einem stabilen, flachen Tisch, der nicht heiß wird, und stellen Sie sicher, dass dieses einen sicheren Abstand zu der Kante hat, um das Herunterfallen zu vermeiden. Bei der Nutzung des Gerätes zum Kneten von Teig oder zum Schneiden von Lebensmitteln kann es sich wegen der Vibrationen bewegen. Benutzen Sie das Gerät deswegen nicht unbeaufsichtigt, um das Herunterfallen zu vermeiden. \- Ziehen Sie bitte den Stecker, wenn Sie das Gerät reinigen oder dieses für eine längere Zeit nicht benutzen. \- Überprüfen Sie regelmäßig, ob die Haupteinheit, der Mixbehälter, der Dampfer oder andere Komponente beschädigt sind. Die beschädigten Teile können die Sicherheit der Nutzung beeinträchtigen. Wenn Ihnen etwas Verdächtiges aufgefallen ist, benutzen Sie das Gerät nicht und kontaktireren Sie unseren Kundendienst. \- Wenn das Gerät den Betrieb plötzlich einstellt oder, eine Fehlfunktion zu haben scheint, schalten Sie dieses aus, trennen Sie es von der Stromversorgung und benutzen Sie das Gerät nicht mehr. Lassen Sie sich fachlich beraten, um den Mangel zu beseitigen und Reparaturen durchzuführen. \- Der Messbecher ist der einzige Teil, der zu der Abdeckung der runden Öffnung in dem Behälterdeckel benutzt werden kann. Benutzen Sie bitte, keine Stoffe oder ähnlichen Gegenstände, um die Öffnung abzudecken. \- Fassen Sie die Spitzen der Klingen nicht an. Seien Sie bitte vorsichtig und greifen Sie am Oberteil, wenn Sie die Klingen montieren oder abnehmen. \- Achten Sie auf die Kapazitätsmarkierung auf dem Mixbehälter. \- Offnen Sie den Deckel erst wenn die Lebensmittel in dem Mixbehälter stillstehen. \- Achten Sie auf heiße Lebensmittel, wenn Sie den Behälterdeckel öffnen. Platzieren Sie bitte den Messbecher in der Öffnung des Behälterdeckels korrekt, wenn Sie die Produkte verarbeiten. \- Fassen Sie den Mixbehälter nicht an, wenn Sie über 60°C heiße Lebensmittel von verarbeiten. \- Stellen Sie sicher, dass der Dampfer und der Mixbehälter gut verbunden sind, wenn Sie den Dampfer benutzen. \- Achten Sie auf den Dampf, der oben durch den Deckel oder an den Seiten entweichen kann. \- Während des Betriebs berühren Sie keine Teile des Dampfers außer der Griffe. \- Benutzen Sie den Dampfer nicht ohne den aufgesetzten Dampfdeckels. \- Seien Sie vorsichtig, wenn Sie den Deckel des Dampfers öffnen, es besteht Verbrühungsgefahr. \- Wenn Sie die Dampf- und Kocheinstellungen benutzen, auchten Sie darauf, dass der Dampf durch die Behältermündung entweichen wird, wenn Sie den Dampfer bewegen. \- Überprüfen Sie regelmäßig, dass die Entlüftungsöffnung auf dem Dampfdeckel frei ist, ansonsten wird der Dampf aus anderen Stellen entweichen. - Platzieren Sie bitte das Gerät und seine heiße Komponenten nach der Nutzung außer Reichweite von Kindern und warnen Sie Kinder darüber, dass das Gerät heiß wird und nicht berührt werden darf. - Das Austreten von Lebensmitteln: Vergewissern Sie sich, dass der Klingen-Dichtungsring richtig platziert ist und die Klingen-Baugruppe an dem Haltewinkel auf dem Boden gut befestigt ist. Eine fehlerhafte Installation kann zum Austreten von Lebensmitteln führen, welches das Gerät beschädigen kann. \- Beschädigungen durch eine schlechte Belüftung: Vergewissern Sie sich, dass die Entlüftungsöffnungen auf der Rückseite der Haupteinheit durch keine Gegenstände blokiert sind, ansonsten kann das Gerät beschädigt werden. \- Der Mixbehälter und anderes Zubehör darf ausschließlich mit dem zur Verfügung gestellten Stand benutzt werden. Benutzen Sie keine fremden Komponente mit diesem Gerät. \- Vermeiden Sie das Auslaufen auf den Stecker. \- Achten Sie bitte darauf, dass der Mixbehälter nach der Nutzung wegen der Restwärme immer noch heiß bleiben wird, um Verbrennungen zu vermeiden. \- Dieses Gerät darf von Kindern ab 8 Jahre benutzt werden, solange sie beaufsichtigt werden oder Anweisungen erhielten, wie das Gerät sicher zu benutzen ist, und kennen die damit verbundenen Gefahren. • Die Reinigung und Wartung dürfen nicht von Kindern durchgeführt werden, es sei den sie sind über 8 Jahre alt und werden von einem Erwachsenen beaufsichtigt. \- Halten Sie das Gerät und sein Stromkabel außer Reichweite von Kindern unter 8 Jahren. \- Während der Nutzung des elektrischen Gerätes müssen die grundliegenden Vorsichtsmaßnahmen immer befolgt werden, um das Risiko eines Stromschlages, eines Brandes und/oder einer Körperverletzung im Falle eines Missbrauchs zu vermeiden. - Vergewissern Sie sich, dass der Spannungswert auf dem Typenschild mit der Hauptspannung Ihrer Einrichtung übereinstimmt. Wenn dies nicht der Fall ist, kontaktieren Sie den Händler und schließen Sie das Gerät nicht an. - Lassen Sie das Gerät im Betrieb niemals unbeaufsichtigt. - Bedienen Sie das Gerät niemals von vorne, stellen Sie sich immer etwas seitlich, um Dampfverbrennungen zu vermeiden. - Das Gerät darf nicht benutzt werden, wenn es fallen gelassen wurde, wenn es sichtbare Anzeichen einer Beschädigung aufweist oder eine Leckage hat. - Bedienen Sie das Gerät nicht, wenn das Kabel oder der Stecker beschädigt sind, wenn es nicht richtig funktioniert, beschädigt oder fallen gelassen wurde. Wenn das Stromkabel beschädigt ist, muss es von dem Hersteller, seinem Dienstleister oder einer ähnlich qualifizierten Person ersetzt werden, um Gefahren zu vermeiden. - Dieses Gerät ist für die Verwendung in Haushalten und ähnlichen Bereichen vorgesehen, wie z. B. - Küchenbereiche in Geschäften, Büros und anderen Arbeitsumgebungen - in Bauernhäusern - in Hotels, Motels und anderen Wohnbereichen - Gästezimmern. •VERPACKUNGSKONTROLLE
Nach dem Öffnen der Verpackung, entnehmen Sie bitte das gesamte Zubehör und überprüfen Sie dieses gemäß der Komponentenliste. Die folgenden Teile sind dabei: 1 Hauptteil 7 Dampfdeckel 2 Mixbehälter 8 Filterkorb 3 Behälterdeckel 9 Schmetterling 4 Messbecher 10 Spatel 5 Kleiner Dampfer 11 Rezeptbuch 6 Großer Dampfer ZUBEHÖR
Mixbehälter-Baugruppe:
Der Behälter verfügt über Kapazitätsmarkierungen an den Seiten. Die maximale Kapazität des Behälters beträgt 2L. Hinweis
Die Lebensmittelmenge im Mixbehälter darf 2.0L nicht überschreiten, ansonsten können die Lebensmittel austreten oder herausspritzen, was zu Gefahren führen kann. Setzen Sie den Deckel auf den Behälter, drücken Sie den Sicherheitsschalter, drehen Sie den Deckel nach rechts, um diesen auf dem Behälter zu befestigen, sonst wird der Motor nicht starten. (Drücken Sie immer zuerst den Sicherheitsschalter, um den Deckel zu verriegeln oder zu öffnen) natural_image
Three-step diagram showing a mechanical component with arrows indicating rotation or assembly (no text or symbols present)natural_image
Line drawings of two kitchen appliances: a blender and a four-tiered blender (no text or symbols)Klingen-Baugruppe:
Befestigen Sie den Dichtungsring auf der Klingen-Baugruppe, setzen Sie diese durch die Öffnung in dem Behälterboden ein, halten Sie den oberen Teil der Klingen fest und drehen Sie diese mit der Bodenseite nach oben um, benutzen Sie den Haltewinkel, um die Klingen zu befestigen, indem Sie diese rechtläufig drehen. Führen Sie die Schritte in der umgekehrten Reihenfolge aus, wenn Sie die Klingen von dem Behälter abnehmen. Vergessern Sie den Dichtungsring zwischen der Klinge und dem Behälterboden nicht. natural_image
Simple line drawing of a mechanical component with no text or symbolsnatural_image
Diagram of a mechanical component with concentric rings and a curved arrow indicating rotation (no text or symbols)natural_image
Cross-sectional diagram of a mechanical component with no visible text or symbolsnatural_image
Line drawing of a hand holding a circular mechanical component with four blades (no text or symbols)Hinweis
• Die Klinge ist sehr scharf. Wickeln Sie die Klinge bitte mit einem Tuch um, wenn Sie die Klingengrundlage montieren oder abnehmen. \- Halten Sie bitte die Klingen-Baugruppe fest und entnehmen Sie diese vorsichtig, um sicherzustellen, dass diese nicht herunterfällt und keine Gefahren verursacht. \- Vergewissern Sie sich bitte, dass der Haltewinkel und der Dichtungsring eingesetzt und an der Klingen-Baugruppe fest angeschlossen sind. Wenn der Dichtungsring nicht korrekt platziert ist, können die zubereitenden Lebensmittel austreten und das Gerät beschädigen.Knetwelle-Baugruppe:
Entnehmen Sie die Klingen, befestigen Sie die Knetwelle auf die gleiche Weise wie die Klingen. Diese kann zum Kneten, Umrühren oder Mischen benutzt werden, ohne dass die Produkte geschnitten werden.  natural_image
Diagram of a mechanical component with concentric rings and a curved arrow indicating rotation (no text or symbols)natural_image
Technical diagram of a mechanical component with concentric rings and mounting holes (no text or symbols)Hinweis
- Benutzen Sie keine höheren Geschwindigkeitsstufen als 3, ansonsten kann dies starke Vibrationen des Gerätes verursachen und zu Risiken führen. - Da der kleinste Abstand zwischen der Knetwelle und dem Behälter nur 1 cm beträgt, können die Produkte manchmal stecken bleiben, wobei der Motor aus Selbstschutz anhalten kann. Benutzen Sie den Spatel, um die Verstopfung umzurühren und zu entfernen, danach wird alles wieder normal funktionieren. - Vergewissern Sie sich bitte, dass der Haltewinkel und der Dichtungsring eingesetzt und an der Klingen-Baugruppe fest angeschlossen sind. Wenn der Dichtungsring nicht korrekt platziert ist, können die zubereitenden Lebensmittel austreten und das Gerät beschädigen.Messbecher:
\- Der Messbecher hat folgende Funktionen: Er misst bis zu 150ml und ist ein Teil des Deckels, um den Hitzeverlust oder Spritzer vorzubeugen. \- Setzen Sie den Messbecher in die Öffnung des Deckels ein, drehen Sie diesen nach rechts, um ihn zu verriegeln. natural_image
Simple line drawing of a cylindrical object with a flange base and two labeled points (a and b) on its top surface (no text or symbols beyond labels)natural_image
Technical line drawing of a mechanical component with concentric circles and handle (no text or symbols)Hinweis
\- Der Messbecher ist der einzige Komponent, der zum Abdecken der runden Öffnung in dem Deckel benutzt werden kann. \- Bedecken Sie die Öffnung nicht mit anderen Gegenständen, um das Spritzen von Lebensmitteln zu vermeiden, dies kann zu Gefahren führen.Spatel:
- Der Spatel ist der einzige Komponent, der zum Abkratzen von Produkte in dem Behälter benutzt werden kann. Andere Gegenstände können die Antihaftbeschichtung des Behälters beschädigen. - Der Spatelgriff verfügt über eine kleine Rille, die zur Befestigung an dem Filterkorb dient. natural_image
Line drawings of two kitchen utensils and a bucket with a brush (no text or symbols)Hinweis
- Benutzen Sie den Spatel nicht zum Mischen, wenn die Klinge im Einsatz ist. - Benutzen Sie den Spatel nicht, wenn der Schmetterling drinnen ist. • Befestigen Sie den Griff sicher an dem Filterkorb, bevor Sie diesen anheben.Filterkorb:
Der Korb hat viele Funktionen: \- Sieb. Um den Obst- und Gemüsesaft abzusieben. Nach dem Mahlen, oder nachdem Sie mit dem Gerät Obstsaft gemacht haben, legen Sie den Korb in den Behälter, um den Saft besser auszugießen. \- Um weiche Lebensmittel wie Pasta oder Nudeln zu dünsten; \- Um Beilagen wie z.B. Reis oder Kartoffeln zuzubereiten natural_image
Line drawings of two mechanical components with no visible text or symbolsHiweis
- Setzen Sie den Spatelgriff in die Öffnung an der Kante des Korbes ein, um diesen in den Behälter einzusetzen oder ihn zu entnehmen. - Wenn Sie den Wasserinhalt in den Produkten wie z.B. Tomaten reduzieren möchten, entnehmen Sie den Messbecher und setzen Sie den Korb an diese Stelle ein, So kann das Wasser einfach entfernt werden.Schmetterling:
• Installiert auf der Klinge, kann der Schmetterling helfen, die Produkte zu mischen, ohne diese durch die Klingen zu schneiden, das Zusammenkleben zu verhindern und die Lebensmittel immer weiter zu vermengen. - Befestigen Sie den Schmetterling auf der Klingen-Baugruppe an der Öffnung, und drücken Sie diesen mit ausreichend Kraft für eine gute Verbindung, drehen Sie die Schmetterlings-Stange linksläufig, damit diese an der Klinge verriegelt wird. natural_image
Technical line drawing of a mechanical component with no visible text or symbolsnatural_image
Line drawing of a mechanical device with a central tower and surrounding compartments (no text or symbols)Hinweis
- Starten Sie das Gerät nicht, bevor der Schmetterling fixiert ist. - Benutzen Sie die Geschwindigkeitsstufen nicht höher als 4 mit dem Schmitterling. - Benutzen Sie keinen Spatel, wenn der Schmetterling im Einsatz ist. - Fügen Sie keine Zutaten in den Behälter hinzu, wenn der Schmetterling im Einsatz ist, ansonsten kann der Schmetterling beschädigt oder blockiert werden.Dampfer-Baugruppe:
Der Dampfer besteht aus drei Teilen: der kleine Dampfer, der große Dampfer und der deckel. Der deckel passt zu dem kleinen und dem großen Dampfer, und der große Dampfer kann in den kleinen eingesetzt werden. Nehmen Sie den Behälterdeckel ab, setzen Sie den Dampfer auf den Behälter auf. natural_image
Line drawing of a square pot with handles and central circular opening (no text or symbols)natural_image
Illustration of three open cooking panes with different interior designs (no text or symbols)natural_image
Black kitchen blender with digital display and control panel (no visible text or symbols)Hinweis
• Vergewissern Sie sich bitte vor dem Dampfen, dass der Dampfdeckel aufgesetzt ist. • Der Dampfer kann nicht in einer Mikrowelle oder anderen elektrischen Geräten verwendet werden. - Berühren Sie die Öffnungen des Dampfdeckels nicht und kommen Sie nicht zu nah heran, um Verletzungen durch heißen Dampf zu vermeiden. - Bedecken oder blockieren Sie die Öffnungen auf dem Dampfdeckel mit keinen Gegenständen, sonst kann der Dampf aus dem Rand oder anderen Stellen kommen und Gefahren verursachen.GEBRAUCHSANLEITUNG
Am Anfang der Nutzung dieses Gerätes kann von dem Motor ein leicher Geruch kommen, was normal ist. Mit der Zeit wird dieser Geruch verschwinden. - Platzieren Sie das Gerät bitte an einem sauberen, stabilen und flachen Tisch. Stellen Sie das Gerät nicht zu nah am Rand, und halten Sie es von Einbauschränken und Aufhängebügel fern. - Bequemlichkeitshalber wird es empfohlen, das Gerät an einem festen Platz zu haben. - Reinigen Sie bitte das Gerät sorgfältig vor der Nutzung. • .Ein Piepton bedeutet, dass die Taste betätigt wurde.  STOPP/ ABBRUCH
\- Schließen Sie das Gerät an, schalten Sie den Schalter auf der Rückseite des Gerätes ein, ein Piepton ertönt, aber auf dem Display wird nichts angezeigt. natural_image
Pure mechanical diagram showing a rope and cable assembly without any text, numbers, or symbolsKNOPF (START/ PAUSE)
- Nachdem Sie die gewünschte Einstellung oder das Programm gewählt haben, drücken Sie auf die Taste, um direct loszulegen. - Drücken Sie auf diese Taste während des Betriebsvorgangs, das Gerät wird den Betrieb unterbrechen und den Ruhemodus betreten, das LCD zeigt an (Der Nutzer kann den Deckel abnehmen, den Behälter entnehmen usw., aber alles muss vor dem Neustart richtig eingesetzt werden.) Drücken Sie auf diese Taste erneut, um den Betrieb aufzunehmen. - Das Gerät wird nach 10 Sekunden ohne Bedienung im PAUSE-Modus automatisch ausgeschaltet. Der Knopf dient auch dazu, den Timer, die Geschwindigkeit, die Temperatur, die Hitzestärke einzustellen, wobei diese beim Drehen rechtsläufig erhöht, und linksläufig verringt werden, oder eine unter 15 automatischen Programmen zu wählen. TIMER
• Das LCD Display zeigt ☎ 88:88:88 an, dies bedeutet Stunden:Minuten:Sekunden. - Drücken Sie auf die Timer-Taste und das Minuten-Signal auf dem LCD wird flimmern; Drehen Sie den Knopf, um die Minuten einzustellen. Drücken Sie die Taste erneut, das zweite Signal auf dem LCD wird flimmern; Drehen Sie den Knopf, um die Sekunden einzustellen. Drücken Sie auf die Taste erneut, das Stunden-Signal wird flimmern, drehen Sie den Knopf, um die Stunden von 1 bis 12 einzustellen. - Drücken Sie auf die Timer-Taste während des Betriebs, das Gerät wird sofort beginnen herunterzuzählen - Max 60 Min bei der manuellen Einstellung; max 3 Stunden bei der DIY Einstellung. Für die Timerbegrenzungen für jedes Programm beziehen Sie sich bitte auf das untenstehende Kapitel "Menü".  Timer-Funktion Halten Sie die  3  Sekunden lang gedrückt um den Timer-Modus aufzurufen. Das  Zeitsymbol blinkt gleichzeitig mit dem Timer-Symbol auf. Auf die gleiche Weise wie Sie die Zeit einstellen, stellen Sie den Timer. Möglich zwischen 30 Minuten und 12 Stunden. Der Timer-Modus kann nur mit DIY und MENU verwendet werden. Stellen Sie zuerst DIY ein oder wählen Sie MENU, drücken Sie den Knopf und der Timer ist aktiviert. Drücken Sie die Reset-Taste um den Vorgang abzubrechen.  GESCHWINDIGKEIT - Drücken Sie auf diese Taste im Ruhemodus oder während des Betriebs (außer einigen Autoprogrammen, wo die Geschwindigkeitseinstellung gesperrt ist), das Gerät betritt den Geschwindigkeits-Einstellmodus. Das Signal auf dem LCD wird flimmern, nun kann die Geschwindigkeit eingestellt werden. Drehen Sie den Knopf, um die gewünschte Geschwindigkeit zu wählen. - Der Geschwindigkeitsbereich besteht aus Stufen 1-10. - Drücken Sie auf diese Taste beim Misch-& Heizvorgang, wenn die Temperatur 60°C übersteigt, können nur die Stufen 1 bis 4 gewählt werden. Wenn eine höhere Geschwindigkeit eingestellt war, wird das Gerät automatisch bis Stufe 4 entschleunigen. - Das Gerät verfügt über ein Transfergetriebe, es ist normal, ein kleines Geräusch zu hören, bevor der Motor startet, oder die Geschwindigkeit zwischen Stufen 5 und 6 wechselt. - Zum Zerkleinern und Hacken von kleinen Produkten oder großen Mengen von Zutaten wird es empfohlen, zuerst die Geschwindigkeit 5 einzustellen, und dann auf die Geschwindigkeit 10 zu wechseln, um Vibrationen zu vermeiden und die beste Leistung zu erzielen. - Benutzen Sie bitte die Stufen 8,9,10 für nicht länger als 5 Minuten auf einmal; benutzen Sie bitte die Stufen 5,6,7 für nicht länger als 10 Minuten auf einmal; \- Drücken Sie auf diese Taste im Ruhemodus oder während des Heizvorgangs (außer einigen Autoprogrammen, wo die Temperatureinstellung gesperrt ist), das Gerät betritt den 888 Einstellmodus. Das Signal 📁 auf dem LCD wird flimmern, nun kann die Temperatur eingestellt werden. Drehen Sie den Knopf, um die gewünschte Temperatur zu wählen. • Der Temperaturbereich: 37-120°C HITZE-POWER
\- Drücken Sie auf diese Taste im Ruhemodus oder während des Heizvorgangs (außer einigen Autoprogrammen, wo die Hitze-Powereinstellung gesperrt ist), das Gerät betritt den Temperatur-Einstellmodus. Das Signal 📁 auf dem LCD wird flimmern, nun kann die Hitze eingestellt werden. Drehen Sie den Knopf, um die gewünschte Hitze-Power zu wählen. • Die Hitze-Power besteht aus Stufen 1-10. - Für manche klebrige Produkte wird es empfohlen, eine niedrige Hitze zu wählen, um das Anbrennen auf dem Boden zu vermeiden. - Wenn die Zutatenmenge gering ist und diese eine bestimmte Temperatur benötigen, empfehlen wir Ihnen, eine niedrige Hitze zu wählen. - Eine niedrige Hitze kann genauer kontrolliert werden; eine höhe Hitze-Power heizt schneller auf. - Es wird nicht funktionieren, wenn Sie nur die Hitze-Power wählen, aber keine Temperatur eingestellt haben. Es wird empfohlen, die Standardeinstellung zu befolgen, wenn Sie zwischen verschiedenen Temperaturstufen wählen. SELBSTREINIGUNG
• Dieses Programm dient zu Reinigungszwecken nach der Nutzung. - Fügen Sie Wasser ab 500ml bis 1 Liter hinzu. - etwas Reinigungsmittel kann hilfreich sein. - Der ganze Vorgang dauert ca. 10 Minuten. TURBO
- Halten Sie diese Taste im Ruhemodus gedrückt, das Gerät wird auf der höchsten Geschwindigkeit funktionieren, es halt sofort an, sobald Sie die Taste loslassen. - Wenn die Temperatur im Behälter 60°C übersteigt, PULS kann nicht benutzt werden, auf dem Bildschirm wird E11 angezeigt. - Das Gerät verfügt über ein Transfergetriebe, es ist normal, ein kleines Geräusch zu hören, bevor der Motor mit dem ersten Puls startet. • Die maximale Laufzeit für Puls ist 3 Minuten, mit einer 10-minütigen Pause. • Mithilfe dieser Taste können Sie zwischen 10 folgenden automatischen Programmen wählen.   HACKEN (HACHER) • DÜNSTEN (MIJOTE2) • DAMPFEN (VAPEUR) • DICKFLÜSSIGE SUPPE(VELOUTE)
• SCHNELLE SUPPE(SOUPE)
• RÜHREN (SAUCE) • KNETEN (PETRIR) • RISOTTO (Rice) SMOOTHIE • JOGHURT (YAOURT) - Drücken Sie auf diese Taste im Ruhemodus, das SMOOTHIE Signal auf dem LCD fängt an zu flimmern, drehen Sie den Knopf, um das gewünschte Programm zu wählen. • Nach der Beendung der Programmen SCHNELLE SUPPE; DICKFLÜSSIGE SUPPE, RÜHREN, DÜNSTEN, REIS wird "End" angezeigt. Wenn das Gerät innerhalb von 10 Minuten nicht bedient wird, geht es automatisch in WARM HALTEN für 12 Stunden, bis Sie das Programm manuell stoppen. Manche Voreinstellungen des Programms sind einstellbar, auf dem Display werden tatsächliche Daten angezeigt; manche sind gesperrt, es wird „--“ auf dem Display angezeigt| Programme | Standardeinstellung | Einstellung | Hinweise |
| HACKEN | *Geschwindigkeit: 5*Temperatur: 0*Hitzestärke: 0*Timer: 1 Min | * Zum Zerkleinern, aber nicht zu einem Smoothie machen. Einstellbare Zeit, 1 Sek - 5 Min für die erforderliche Konsistenz * Nach 10 Minuten der Nichtnutzung nach der Programmbeendung geht das Gerät automatisch aus. | *Die empfohlene Stückengröße der Zutaten bei festen Produkten wie Möhren oder Fleisch ist 1-2 cm.*Wenn Sie die Produkte am feinsten zerkleinern möchten, benutzen Sie bitte SMOOTHIE |
| DÜNSTEN | Schritt 1:* Geschwindigkeit : 0*Temperautr:100°C* Hitzestärke : 10*Timer: keine Begrenzung, bis es aufkochtSchritt 2:* Geschwindigkeit : 0*Temperatur: 90-95°C*Hitzestärke : keine genaue Angaben, kann sich je nach Temperatur und Essensmenge automatisch ändern*Timer: 3 St | *Voreingestellte Zeit beträgt 3 Stunden, einstellbar von 1-12 St* Nach 10 Minuten der Nichtnutzung nach der Programmbeendung geht das Gerät automatisch in “WARM” Modus. | *Langsam kochen |
| DAMPFEN | * Geschwindigkeit : 0*Temperatur: 120°C*Hitzestärke : 10*Timer: 20 Min | *Einstellbare Zeit 15-60 Min.*Nach 10 Minuten der Nichtnutzung nach der Programmbeendung geht das Gerät automatisch in “WARM” Modus. | *500g Wasser für jede 30 Minuten des Dampfens.*Gemüse 20 Min; Fleisch 30 Min. |
| DICKFLÜSSIGESUPPE | Schritt 1:* Geschwindigkeit : 0*Temperatur: 120*Hitzestärke : 10*Timer: bis es aufkochtSchritt 2:* Geschwindigkeit : 0*Temperatur: 100°C*Hitzestärke : 4*Timer: 29.5 MinSchritt 3:* Geschwindigkeit : 0*Temperatur: 0°C*Hitzestärke : 0*Timer: Bis 80°CabkühlenSchritt 4:* Geschwindigkeit : langsam von 6 bis 10*Temperatur: 0°C*Hitzestärke: 0*Timer: 1 Min | * Passt zu einer Fleischsuppe, erst zerkleindern und dann kochen und umrühren.Einstellbare Zeit von 15-60 Min.*Nach 10 Minuten der Nichtnutzung nach der Programmbeendung geht das Gerät automatisch in “WARM” Modus. | *Die empfohlene Stückengröbe der Zutaten bei festen Produkten wie Möhren oder Fleisch ist 1-2 cm.* Es empfehlt sich, nach dem Schritt 1 das Programm zu pausieren und den Schmetterling einzusetzen. |
| SCHNELLESUPPE | Schritt 1:* Geschwindigkeit : 10*Temperatur: 0*Hitzestärke: 0*Timer: 30 SekSchritt 2:* Geschwindigkeit : 2*Temperatur: 120°C*Hitzestärke: 10*Timer: bis es aufkochtSchritt 3:* Geschwindigkeit : 2*Temperatur: 100°C*Hitzestärke: 10*Timer: 19.5 Min | * Passt zu einer Gemüsesuppe, erst zerkleindern und dann kochen und umrühren. Einstellbare Zeit von 15-60 Min.*Nach 10 Minuten der Nichtnutzung nach der Programmbeendung geht das Gerät automatisch in “WARM” Modus. | * Die empfohlene Stückengröbe der Zutaten bei festen Produkten wie Möhren oder Fleisch ist 1-2 cm.* Es empfehlt sich, nach dem Schritt 1 das Programm zu pausieren und den Schmetterling einzusetzen. |
| RÜHREN | * Geschwindigkeit : 2*Temperatur: 100°C*Hitzestärke: 10*Timer: 30 Min | * Einstellbare Geschwindigkeit, Stufen 0-3.*Einstellbare Temperatur, 90-120°C.*Einstellbare Zeit, 5-60 Min* Nach 10 Minuten der Nichtnutzung nach der Programmbeendung geht das Gerät automatisch in “WARM” Modus. | * Benutzen Sie den Schmetterling oder die Knetschaufel |
| KNETEN | Schritt 1:* Geschwindigkeit : 3*Temperatur: 0*Hitzestärke: 0*Timer: 3 MinSchritt 2:* Geschwindigkeit : 2*Temperatur: 0*Hitzestärke: 0*Timer: 7 Min | *Einstellbare Geschwindigkeit, Stufen 2-3;*Einstellbare Temperatur bei 0 oder 37°C zum Ausdehnen.*Einstellbare Zeit, 3-20 Min* Nach 10 Minuten der Nichtnutzung nach der Programmbeendung geht das Gerät automatisch aus. | *Brotteig kneten:330g Wasser +500g Mehl +andere Zutaten; 10Min bei der Voreinstellung kneten.*Nudelteig kneten: 200g Wasser + 400g Mehl; 3 Minuten bei Geschwindigkeit 2 kneten.*Die eingestellte Temperatur zum Ausdehnen ist 37°C, wenn es nicht gut dehnt, wählen Sie 37°C für weitere 30 Minuten ohne der Geschwindigkeit. |
| RISOTTO | Schritt 1:* Geschwindigkeit : 0*Temperautr:100°C*Hitzestärke: 6*Timer: bis es aufkochtSchritt 1:* Geschwindigkeit : 1*Temperautr:965°C*Hitzestärke: 4*Timer: 18 MinHitzestärke & Timer: keine genaue Angaben, kann sich je nach Temperatur und Menge automatisch ändern | *Alle Einstellungen sind nicht einstellbar.*Nach 10 Minuten der Nichtnutzung nach der Programmbeendung geht das Gerät automatisch in “WARM” Modus. | *Empfohlene Menge (max): 500g Reis +800g Wasser, lassen Sie REIS bei der Voreinstellung laufen. Eine Reiskruste wird auf dem Boden entstehen.* Oder Reis bei der folgenden Einstellung dampfen: 400g Reis in den Filterkorb, 2L Wasser, wählen Sie KOCHEN, dann gießen Sie etwas Wasser aus, damit 1L bleibt, und wählen Sie DAMPF für 20 Min. |
| SMOOTHIE | * Geschwindigkeit : 10*Temperatur: 0*Hitzestärke: 0*Timer: 30 Sek | *Alle Einstellungen sind nicht einstellbar, lassen Sie das Gerät noch Mal laufen, wenn die Konsistenz nicht fein genug ist.* Nach 10 Minuten der Nichtnutzung nach der Programmbeendung geht das Gerät automatisch aus. | Die empfohlene Stückengröße der Zutaten bei festen Produkten wie Möhren oder Fleisch ist 1-2 cm. |
| JOGHURT | * Geschwindigkeit : 1 bei den ersten 30 Min, dann stoppen*Temperatur: 37-39°C*Hitzestärke: 1*Timer: 6 St. | *Einstellbare Zeit, 3-12 St.* Nach 10 Minuten der Nichtnutzung nach der Programmbeendung geht das Gerät automatisch aus. | * Empfohlene Menge: 1 Becher Joghurt + 1L frische Milch + Zucker, 6-12 Sunden je nach der gewünschten Konsistenz. |
| Tools | Abbildung | Funktion | Geschwin. | Kapazität | Betriebszeit |
| Schneideklinge | | HACKEN, aber nicht bis zum Smoothie Zustand | 5 | 2L max, in 1-2cm große Stücke vor dem Betrieb hacken | 1 Min |
| Zu kleinsten Stücken HACKEN | 10 | 2L max, in 1-2cm große Stücke vor dem Betrieb hacken | 1 Min | ||
| Knetschaufel | | Den Teig für Brot, Pizza usw. kneten | 2-3 | 800g Mehl max | 5-10 Min |
| Den Teig für Nudeln kneten | 2 | 500g Mehl max | 3 Min | ||
| Schmetterling | | Umrühren | 1-3 | 2L max | 30 Min |
| Eisweiß oder Sahne aufschlagen | 4 | 2L max | 10 Min | ||
| Dampfer | | Gemüse dämpfen | K/A | 3.5L max | 15 Min |
| Fleisch dämpfen | K/A | 3.5L max | 20-30 Min |
FEHLERSUCHE
\- Das Erscheinen der unten aufgeführten Fehlermeldungen ist normal. Wenn der Fehler immer noch besteht, nachdem Sie gemäß der vorgeschlagenen Lösung gehandelt haben, kontaktieren Sie bitte unsere Kundendienst.| Fehlercode | Beschreibung | Mögliche Ursachen | Lösung |
| E1 | Der Sicherheitsschalter ist nicht fixiert. | Der Behälter oder der Behälterdeckel sind nicht richtig fixiert. | Fixieren Sie den Behälter und den Behälter-Deckel erneut, vergewissern Sie sich, dass alle Teile richtig und fest montiert sind. |
| E2 | Das Temperatur-Sensor fehlt. | Der Behälter ist nicht eingesetzt oder die Verbindung zwischen dem Temperatursensor und der Behälter-Grundlage ist beschädigt. | Montieren Sie den Behälter erneut und vergewissern Sie sich, dass dieser ordentlich und fest fixiert ist. |
| E3 | Der Motor ist blokiert. | Der Behälter ist überladen. | Verringern Sie die Essensmenge in dem Behälter, oder schneiden Sie die Zutaten in kleinere Stücke, und starten Sie das Gerät neu. |
| E4 | Die Temperatur ist zu hoch. | Keine Lebensmittel in dem Behälter oder zu wenig Zutaten bei einer höhen Temperatureinstellung für zu lange. | Fügen Sie die Lebensmittel in den Behälter hinzu. |
| E5 | Die Motortemperatur ist zu hoch. | Das Gerät läuft bei einer höheren Einstellung für zu lange. | Pausieren Sie das Gerät und lassen Sie es abkühlen, bevor Sie es neustarten. |
| E7 | Fehler in der Übertragungsgeschwindigkeit. | Der Geschwindigkeitswechsel zwischen unteren Stufen (1-5) und höheren Stufen (6-10) ist blokiert. | Entnehmen Sie den Behälter, drehen Sie die untere Kupplung manuell, befestigen Sie den Behälter und starten Sie das Gerät erneut. |
| E8 | Der Motor NTC fehlt. | Die Verbindung mit dem Motor-Temperatursensor ist unterbrochen. | Benutzen Sie das Gerät nicht und schicken Sie dieses zu einer Kundendienst-Servicestelle zur Reparatur. |
| E11 | “Puls” kann nicht benutzt werden. | Die Temperatur im Behälter ist über 90°C. | Kühlen Sie die Zutaten ab und schalten Sie “Puls” erneut ein, oder benutzen Sie die niedrigere Geschwindigkeit 4. |
Ihr Gerät reinigen
1. Reinigen Sie KEINE Teile des Gerätes in einer Spülmaschine. Reinigen Sie das Gerät immer sorgfältig nach jedem Gebrauch, oder wenn es für eine längere Zeit nicht benutzt wird. 2. Trennen Sie das Gerät vom Netz und lassen Sie dieses vor der Reinigung abkühlen. 3. Reinigen Sie den abnehmbaren Kochtopf mit warmem Seifenwasser. waschen Sie ihm ab und trocknen Sie deisen gut. 4. Wischen Sie die Haupteinheit mit einem sauberen feuchten Tuch ab. Wenn Essensreste daran bleiben, befeuchten Sie das Tuch vorm Abwischen in Seifenwasser. Tauchen Sie die Haupteinheit NIEMALS in Wasser oder andere Flüssigkeiten. Wischen Sie den stationären Topf wie notwendig ab, um jegliche Essensreste zu entfernen. 5. Um eine gute Leistung Ihres Suppenbereiters aufrechtzuerhalten, muss der Boden des abnehmbaren Kochtopfes kontrolliert und, wenn nötig, nach jedem Gebrauch gereinigt werden, Wischen Sie diesen mit einem weichen feuchten Tuch ab und trocknen Sie ihn sorgfältig vor der Nutzung. 6. Wenn der Suppenbereiter für eine längere Zeit nicht benutzt wird, trennen Sie diesen von der Stromversorgung und bewahren Sie das Gerät an einem trockenen und sauberen Ort auf.  FINDEN SIE ALLE UNSERE REZEPTE: http://dl.hkoenig.com/SiteHkoenig/Livrederecettes\_HK8.pdf Oder scannen Sie den QR-Code: GARANTIE
Die Garantiezeit für unsere Produkte beträgt 2 Jahre, sofern keine anderen Bestimmungen gelten, ab dem Datum des ursprünglichen Kaufs oder ab dem Lieferdatum. Bei Problemen oder Fragen können Sie sich an unsere Hilfeseiten, Tipps zur Fehlerbehebung, FAQs und Bedienungsanleitungen auf unserer Kundendienst-Website wenden: https://sav.hkoenig.com. Wenn Sie den Referenznamen Ihres Geräts in die Suchleiste eingeben, erhalten Sie Zugang zu allen verfügbaren Online-Supports. Wenn Sie immer noch keine Antwort auf Ihre Frage oder Ihr Problem finden, dann klicken Sie auf "Hat die Antwort Ihr Problem gelöst?". Sie können dieses Formular ausfüllen, um Ihre Anfrage zu bestätigen und Hilfe zu erhalten.GARANTIEBEDINGUNGEN
Die Garantie deckt alle Defekte ab, die bei normalem, bestimmungsgemäßem Gebrauch und den in der Bedienungsanleitung enthaltenen Spezifikationen auftreten. Diese Garantie gilt nicht für Probleme mit der Verpackung oder dem Transport während des Versands des Produkts durch den Eigentümer. Sie umfasst auch nicht den normalen Verschleiß des Produkts, die Wartung oder den Austausch von Verschleißteilen.AUSSCHLUSS DER GARANTIE
- Zubehör und Verschleißteile (\*). - Die normale Wartung des Geräts. - Alle Defekte, die durch unsachgemäßen Gebrauch (Stöße, Nichteinhaltung der empfohlenen Stromzufuhr, schlechte Nutzungsbedingungen usw.), unzureichende Wartung oder Zweckentfremdung des Geräts auftreten, sowie die Verwendung von ungeeignetem Zubehör. - Schäden durch äußere Einflüsse: Brand, Wasserschäden, elektrische Überspannung usw. - Alle Geräte, die von anderen als den befugten Personen (insbesondere dem Nutzer) auch nur teilweise auseinandergebaut wurden. - Produkte, deren Seriennummer fehlt, beschädigt oder unleserlich ist, sodass sie nicht identifiziert werden können. - Produkte, die vermietet, vorgeführt oder ausgestellt werden. (\*) Einige Teile Ihres Geräts, die als Verschleißteile oder Verbrauchsmaterialien bezeichnet werden, verschleiben mit der Zeit und der Häufigkeit der Nutzung Ihres Geräts. Diese Abnutzung ist normal, kann aber durch falsche Nutzung oder Pflege Ihres Geräts noch verstärkt werden. Diese Teile sind daher nicht durch die Garantie abgedeckt. Das mit dem Gerät gelieferte Zubehör ist ebenfalls von der Garantie ausgeschlossen. Sie können daher weder umgetauscht noch erstattet werden. Einige Zubehörteile können jedoch direkt über unsere Website https://sav.hkoenig.com/ erworben werden.ERSETZUNG DER KLINGE
 Diese Markierung zeigt an, dass dieses Produkt in der EU nicht zusammen mit anderen Hausabfällen entsorgt werden sollte. Um schädliche Auswirkungen auf Umwelt oder Gesundheit durch unsachgemäße Entsorgung zu verhindern, führen Sie es einer fachgerechten Entsorgung zu, um die umweltverträgliche Wiederverwendung von Materialressourcen zu fördern. Verwenden Sie zur Rückgabe Ihres gebrauchten Gerätes bitte die entsprechenden Rückgabe- und Sammelsysteme, oder wenden Sie sich an den Händler, bei dem das Produkt gekauft wurde. Er kann dieses Produkt annehmen und einer umweltfreundlichen Wiederverwertung zuführen.NEDERLANDS
Belangrijke veiligheidsinstructies
De volgende veiligheidsvoorzorgsmaatregelen dienen altijd te worden opgevolgd, om het risico op elektrische schok, verwondingen of vuur te verkleinen. Het is belangrijk om al deze instructies zorgvuldig te lezen voordat u het product gebruikt, en bewaar ze voor toekomstig gebruik of voor nieuwe gebruikers. \- Dit apparaat kan gebruikt worden door personen met beperkte geestelijke of lichamelijke capaciteiten, of met een gebrek aan ervaring en kennis, zolang ze toezicht krijgen of instructies voor veilig gebruik van dit apparaat hebben gehad en ze de bijbehorende gevaren begrijpen. Kinderen mogen er niet mee spelen. \- Dit apparaat kan worden gebruikt door personen met verminderde fysieke, zintuiglijke of mentale vermogens of met gebrek aan ervaring of kennis, op voorwaarde dat zij onder toezicht staan of instructies hebben gekregen over het veilige gebruik van het apparaat en dat zij de mogelijke gevaren volledig begrijpen. \- Waarschuwing: verkeerd gebruik kan tot verwondingen leiden. U dient voorzichtig te zijn met de scherpe messen bij het legen en tijdens het schoonmaken. \- Schakel het apparaat uit en haal de stekker uit het stopcontact voor het wisselen van accessoires en als u in de buurt van onderdelen komt die tijdens gebruik bewegen. Altijd de stekker uit het stopcontact halen als het apparaat onbeheerd wordt achtergelaten en voor assemblage, uit elkaar halen of het schoonmaken. \- Als de stroomkabel beschadigd is, moet het worden vervangen door de fabrikant, een monteur of een gekwalificeerd persoon om gevaren te vermijden. - Accessoires, naast de meegeleverde, moeten voorzien zijn van instructies voor veilig gebruik. - WAARSCHUWING: Niet de deksel verwijderen als het water kookt. Gebruik geen hogere snelheid dan niveau 4 als de temperatuur hoger is dan 90 graden Celsius. - Het apparaat mag niet ondergedompeld worden. - Dit apparaat is bedoeld voor gebruik in huishoudens en soortgelijke ruimten, zoals: \- keukenruimten in winkels, kantoren en andere werkomgevingen \- in boerderijen \- in hotels, motels en andere woonwijken \- gastenkamers. \- Plaats het apparaat op een stabiele, vlakke tafel die niet heet wordt en zorg voor voldoende ruimte tot de rand zodat het er niet af kan vallen. Als het gebruikt wordt voor het kneden van deeg of het hakken van voedsel, kan het apparaat zich verplaatsen door de trillingen. Dus gebruik het niet zonder toezicht van een persoon om zo te voorkomen dat er iets op de grond valt. \- Trek de stekker uit het stopcontact bij het schoonmaken of als het langere tijd niet gebruikt wordt. \- Controleer regelmatig of de basis, kan, stomer of andere onderdelen niet beschadigd zijn. Beschadigde onderdelen zorgen voor minder veilig gebruik. Als er een mankement is gevonden, gebruik het dan niet meer en neem contact op met onze klantenservice. \- Als het apparaat onverwachts stopt of niet goed lijkt te werken, schakel het dan uit en haal de stekker uit het stopcontact en gebruik het niet meer. Zoek professioneel advies om het mankement te verhelpen of voor reparaties. \- De maatbeker is het enige onderdeel dat gebruikt kan worden om het gat in de deksel te dichten. Gebruik geen doek of andere dingen om het gat af te dichten. \- Raak niet de randen van de messen aan. Wees voorzichtig en houd het bovenste stuk vast als u het mes plaatst of weghaalt. \- Let op de capaciteitsmarkering op de kan. \- Open de deksel pas als het voëdsel in de kan niet meer draait. \- Let op bij het hete voedsel als u de deksel opent. Plaats de maatbeker correct op de deksel als bij het bewerken van voedsel. \- Raak de kan niet aan bij voedsel met een temperatuur boven 60°C. \- Zörg dat de stomer en de kan goed zijn aangesloten bij gebruik van de stomer. \- Let op dat er stoom zal ontsnappen bij de deksel of langs de zijkanten. \- Tijdens gebruik mag de stomer alleen aangeraakt worden bij de handgrepen. \- Niet de stomer gebruiken zonder dat de stomerdeksel geplaatst is. \- Bij het openen van de stomerdeksel moet u oppassen dat u zich niet verbrandt door de stoom. \- Bij de stoom- en kookfunctie dient u er rekening mee te houden dat stoom uit de mond van de kan zal komen als u de stomer verplaatst. \- Controleer dat de ventilatieopening op de stomerdeksel niet geblokkeerd is, anders kan de stoom ergens anders ontsnappen. \- Plaats het apparaat en zijn hete onderdelen na gebruik op een plek buiten het bereik van kinderen en waarschuw ze dat het apparaat heet zal zijn en dat ze het niet mogen aanraken. \- Lekkage van voedsel: Zorg dat de afdichtring van het mes goed geplaatst is en het mes stevig vastzit door het plaatsen van de klem onderop. Het niet goed plaatsen leidt tot lekkage van voedsel, wat leidt tot schade aan het apparaat. \- Schade door slechte ventilatie: Zorg dat de ventilatieopeningen aan de achterkant van de behuizing niet geblokkeerd worden, anders kan het apparaat beschadigd raken. \- De kan en alle accessoires dienen alleen te worden gebruikt met de meegeleverde houder. Gebruik geen andere onderdelen van andere apparaten. • Let op dat u vermijdt te morsen op de aansluiting. \- De kan zal nog steeds heet zijn na gebruik, pas op dat u zich niet verbrandt. \- Dit apparaat mag gebruikt worden door kinderen van minimaal 8 jaar als er toezicht wordt gehouden en ze instructies hebben gehad over hoe ze het apparaat moeten gebruiken en ze de gevaren begrijpen. \- Het schoonmaken en onderhoud mag niet worden uitgevoerd door kinderen tenzij ze 8 jaar of ouder zijn en er toezicht is. \- Houd het apparaat en de stroomkabel uit de buurt van kinderen jonger dan 8 jaar. \- Bij het gebruik van elektrische apparaten moeten altijd de standaard veiligheidsinstructies worden opgevolgd om de kans op vuur, elektrische schokken en/of verwondingen te voorkomen. \- Controleer dat de aangegeven spanning op het typeplaatje overeenkomt met de spanning van uw voedingsbron. Als dit niet het geval is, neem dan contact op met de dealer en sluit het apparaat niet aan. \- Laat het apparaat nooit onbeheerd achter tijdens gebruik. \- Nooit het apparaat van voren openen, plaats uzelf iets naar de zijkant om te vermijden dat u zich verbrandt door stoom. \- Het apparaat mag niet gebruikt worden als het gevallen is, als er duidelijk zichtbare schade is of als het lekt. \- Niet het apparaat gebruiken als deze een beschadigde kabel of stekker heeft, als het niet goed werkt of beschadigd of gevallen is. Als de stroomkabel beschadigd is, moet het worden vervangen door de fabrikant, een servicemonteur of een gelijkwaardig gekwalificeerd persoon om gevaren te vermijden.CONTROLEER INHOUD
Haal na het openen van de doos alle accessoires eruit en leer ze kennen aan de hand van de onderdelenlijst. De onderdelenlijst ziet er als volgt uit: 1 Hoofdbehuizing 7 Stomerdeksel 2 Mengkan 8 Filtermand 3 Deksel van de kan 9 Vlinder 4 Maatbeker 10 Spatel 5 Kleine stomer 11 Receptenboek 6 Grote stomer ACCESSOIRES
Assemblage mengkan:
Er staan capaciteitsmarkeringen op één zijde van de kan. De maximale capaciteit van de kan is 2 liter.  Opmerking De hoeveelheid voedsel in de kan mag niet de 2 liter overschrijden, anders kan het voedsel overstromen en voor gevaar zorgen. Plaats de deksel op de kan, druk op de veiligheidsschakelaar, draai de deksel tegen de klok in op de kan, anders kan de motor niet ingeschakeld worden. (Druk altijd eerst op de veilidheidsschakelaar om het deksel te vergrendelen of te openen) natural_image
Three-step mechanical assembly diagram showing progressive assembly of a cylindrical component (no text or labels)natural_image
Line drawings of two kitchen appliances: a blender and a toaster, both with digital display screens (no text or symbols)Assemblage mes :
Plaats de afdichtring bij de assemblage van het mes, plaats het door het gat in de bodem van de kan, houd het mes goed vast en draai deze andersom, gebruik de klem om het mes vast te zetten door met de klok mee te draaien. Doe het tegenovergestelde om het van de kan te verwijderen. Vergeet niet de afdichtring te plaatsen tussen het mes en de bodem van de kan.  natural_image
Line drawing of a mechanical component with a central hub and four blades (no text or symbols)Opmerking
- Het mes is zeer scherp. Dek het mes af met een doek bij de assemblage of het verwijderen. - Houd het mes stevig vast en haal deze er voorzichtig uit om te zorger dat het niet zal vallen of voor gevaar zorgt. - Zorg dat de klem en de afdichtring stevig op hun plek zitten bij de plaatsing van het mes. Als de afdichtring niet juist geplaatst is, kan er gemixte of gekookte voedsel weglekken en het apparaatAssemblage kneed-as:
Verwijder het mes, plaats de kneed-as op dezelfde manier als het mes. Het kan gebruikt worden voor kneden, roeren of mixen zonder het voedsel te malen. Opmerking
\- Gebruik geen hogere snelheid dan 3, anders kunnen de vibraties een risico vormen voor het apparaat. \- Omdat de kleinste afstand bij het mixen tussen de roerder en de wand van de kan maar 1 cm is, kan het voedsel soms vast komen te zitten en dan stopt de motor uit zelfbescherming. Gebruik een spatel om het vastzittende voedsel los te maken en het zal weer werken. \- Zorg dat de klem en de afdichtring stevig op hun plek zitten bij de plaatsing van het mes. Als de afdichtring niet juist geplaatst is, kan er gemixte of gekookte voedsel weglekken en het apparaat beschadigen.Maatbeker:
\- De maatbeker heeft veel functies: het hoort bij de deksel om gespetter en verlies van warmte te voorkomen; je kunt er ingrediënten mee meten tot een capaciteit van 150 ml. \- Plaat de maatbeker in het dekselgat, draai hem met de klok mee op de deksel. Opmerking
\- De maatbeker is het enige onderdeel dat gebruikt kan worden om het ronde gat in de deksel af te dichten. • Dicht het gat niet af met andere voorwerpen om gespetter tegen teSpatel:
\- Alleen de spatel mag gebruikt worden om voedsel uit de kan te schrapen. Andere voorwerpen kunnen de antihechtlaag in de kan beschadigen. • Er zit een inkeping in de handgreep van de spatel waarmee die in de filtermand past. natural_image
Line drawings of two kitchen utensils: a handle and a measuring tool (no text or symbols)natural_image
Line drawing of a small bowl with a spoon, no text or symbols presentOpmerking
- Gebruik hem niet om te roeren als het mes draait. - Gebruik de spatel niet als de vlinder in het apparaat zit.Filtermand:
De mand heeft vele functies: \- Zeven. Filter sap van fruit en groente. Na het persen of het maken van fruitsaus met het apparaat plaats u de mand in de kan om het sap eruit te gieten. \- Stoven van zacht voedsel zoals pasta of noedels; \- Bereid bijgerechten zoals rijst en aardappeltjes. natural_image
Technical line drawing of a mechanical component with two views (top and side), no text or symbols present.Opmerking
\- Gebruik de handgreep van de spatel aan de rand van de mand om deze te plaatsen of te verwijderen. \- Als u wat water bij het voedsel wil verwijderen, zoals bij tomaten, neem dan de maatbeker weg en dek het af met de mand. Het water kan dan eenvoudig worden verwijderd.Vlinder:
\- Geplaatst op het mes, kan de vlinder helpen bij het mixen van voedsel zonder dat de messen het hakken, en het voorkomt dat het voedsel samenklontert en het blijft mengen. \- Plaats de vlinder op het mes door het gat en druk er stevig op voor een goede verbinding, draai de vlinder tegen de klok in om hem vast te zetten op het mes. natural_image
Technical line drawing of a mechanical component with no visible text or symbolsnatural_image
Line drawing of a mechanical device with a central tower and two adjacent panels (no text or symbols)Opmerking
\- Start het apparaat niet voordat de vlinder goed op zijn plek zit. \- Gebruik geen hogere snelheid dan 4 bij gebruik van de vlinder. \- Gebruik geen spatel bij gebruik van de vlinder. \- Voeg geen ingrediënten toe in de kan als het apparaat in werking is met de vlinder, anders kan de vlinder beschadigd of geblokkeerd raken.Assemblage stomer:
De stomer bestaat uit drie onderdelen: Kleine stomer, grote stomer, deksel. De deksel past op zowel de kleine stomer als de grote stomer, en de grote stomer past op de kleine stomer. Verwijder deksel van de kan, plaats de stomer op de kan. natural_image
Line drawing of a square-shaped container with handles and a central circular hole (no text or symbols)natural_image
Illustration of a cooking pan with three panes and a lid (no text or symbols)natural_image
Black kitchen blender with digital display and control panel (no visible text or symbols)Opmerking
- Controleer dat de stomerdeksel goed geplaatst is voor het stomen. - De stomer mag niet gebruikt worden in een magnetron of andere elektrische apparaten. - Kom niet in de buurt van de stoomopeningen van de stomerdeksel om te voorkomen dat de hete stoom u verwondt. - Dek de openingen van de stomer niet af, want anders kan de stoom bij de rand of andere plekken ontsnappen en zo voor gevaar zorgen.INSTRUCTIES VOOR GEBRUIK
Bij de eerste keren dat u dit apparaat gebruikt, kan er een lichte geur vrijkomen van de motor, dat is normaal. Na een tijdje verdwijnt deze geur vanzelf. - Plaats het apparaat op een lege, stabiele en vlakke tafel. Plaats het niet te dicht bij de rand en houdt het weg bij ophangbeugels. - Het is beter om het apparaat op een vaste ondergrond te plaatsen. - Maak het apparaat grondig schoon voor gebruik. - Een 'piep' geeft aan dat een knop is ingedrukt.  STOP/ CANCEL
\- Steek de stekker in het stopcontact, schakel het apparaat in met de knop op de achterkant, het apparaat piept maar het display brandt niet. natural_image
Pure mechanical diagram showing a rope and cable assembly without any text, numbers, or symbolsKNOP (START/PAUSE)
- Na het selecteren van de gewenste instelling of programma drukt u op deze knop om meteen te beginnen. - Druk op deze knop als het apparaat in werking is en het stopt en gaat in standby-modus, het display toont PRA (De gebruiker kan de deksel openen, de kan weghalen, etc. Maar alles moet weer terug zijn geplaatst voor een herstart). Druk nog een keer en het apparaat werkt weer. - Het apparaat schakelt automatisch uit na 10 minuten in pauze-stand. - Het is ook een knop voor het instellen van de timer, snelheid, temperatuur, warmtevermogen. Met de klok mee verhoogt het en tegen de klok verlaagt het, of kies een van 15 automatische programma's. • TIMER
- Het display toont ☐ 00:00:00, dit geeft uren: minuten: seconden aan. - Druk op de timer knop en de minuten op het display gaan knipperen; draai de knop om de minuten aan te passen. Druk nog een keer en het tweede getal op het display gaat knipperen, draai de knop om de seconden aan te passen. Druk nog een keer en de uren op het display gaan knipperen, draai de knop om de uren tussen 1 en 12 te kiezen. - Druk op de timer als het apparaat in werking is en deze gaat meteen aftellen. • Max 60 min bij een standaard- instelling; max 3 uur bij een zelf ingesteld programma. De timerlimiet voor elk programma kunt vinden bij hoofdstuk 'MENU' hieronder.  Afspraak functie   Houd de tijdknop 3 seconden ingedrukt om de reserveringsmodus te openen. De tijd knippert met het afspraakpictogram. Op dezelfde manier ingesteld om de tijd in te stellen, is de duur 30 minuten tot 12 uur. Afspraakmodus kan alleen worden gebruikt met DIY en MENU. Stel eerst DIY in of selecteer MENU, druk op de knop en de tijd begint af te tellen. Druk op de resetknop om te annuleren SNELHEID
- Druk op deze knop tijdens stand-by-modus of als het apparaat in werking is (op sommige programma's na waar de snelheid vaststaat), het apparaa gaat dan in snelheidinstellingmodus. Het +teken op het display knippert, dan is de snelheid aanpasbaar. Draai aan de knop voor de gewenste snelheid. - De snelheid is instelbaar tussen 1 en 10. - Druk op deze knop tijdens het mengen & verwarmen, als de ingestelde of huidige temperatuur boven 60°C is, kan alleen snelheden 1 tot 4 worden gekozen. Als het apparaat sneller draaide, vertraagt hij automatisch naar 4. - Er zit een snelheidsoverbrenging in het apparaat, dus is het normaal wat te horen voordat de motor draait, of bij een verhoging van 5 naar 6. - Bij het malen of hakken van hard voedsel of van grote volumes wordt aanbevolen eerst snelheid 5 te gebruiken en dan te verhogen naar 10 om vibraties te vermijden en voor het beste resultaat. - Gebruik snelheden 8, 9 en 10 niet langer dan 5 minuten; gebruik snelheden 5, 6 en 7 niet langer dan 10 minuten. TEMPERATUUR
\- Druk op deze knop tijdens stand-by-modus of als het apparaat opwarmt (op sommige programma's na waar de temperatuur vaststaat), het apparaat gaat dan in temperatuurinstellingmodus. Het teken op het display knippert, dan is de temperatuur aanpasbaar. Draai de knop naar de gewenste temperatuur. • Temperatuurbereik: 37-120°C WARMTEVERMOGEN
\- Druk op deze knop tijdens stand-by-modus of als het apparaat verwarmt (op sommige programma's na waar het warmtevermogen vaststaat), het apparaat gaat dan in temperatuurinstellingmodus. Het teken op het display knippert, dan is het warmtevermogen aanpasbaar. Draai de knop naar het gewenste warmtevermogen. - Het warmtevermogen is aanpasbaar tussen 1 en 10. - Kies bij plakkerig voedsel een laag warmtevermogen, zodat niets aanbrandt op de bodem. - Als er weinig voedsel is en een precieze temperatuur gewenst is, kiest u een laag warmtevermogen. - Laag warmtevermogen is beter te controleren; Hoog warmtevermogen verwarmt sneller. - Het werkt niet als er naast het warmtevermogen geen temperatuur wordt geselecteerd. Het wordt aangeraden de standaard instelling te gebruiken bij het kiezen van andere temperaturen. ZELFREINIGEND
- Dit programma is bedoeld voor reiniging na gebruik. • Voeg een hoeveelheid water toe tussen 500ml en 1 liter. - Wat schoonmaakmiddel kan helpen. - Het hele proces duurt 10 minuten. TURBO
- Houdt deze knop ingedrukt in stand-by-modus, de machine werkt dan op maximale snelheid, laat hem los en het stopt meteen. - Als de temperatuur in de kan boven de 60°C is, kan PULSE niet gebruikt worden, dan wordt E11 getoond. - Er zit een snelheidsoverbrenging in het apparaat, het is normaal wat te horen voordat de motor draait. - De maximale gebruikstijd bij Pulse is 3 minuten en voor de rest 10. MENU
\- Met deze knop kunt u uit de 10 standaard programma's kiezen. geblokkeerd en tonen ‘-’ op het scherm zoals hieronder  • HAKKEN (HACHER) • STOVEN (MIJOTE2) • STOOM (VAPEUR) • DIKKE SOEP (VELOUTE) • SNELLE SOEP (SOUPE) - ROEREN (SAUCE) - KNEDEN (PETRIR) • RISOTTO (Rice) - SMOOTHIE • YOGHURT (YAOURT \- Druk op deze knop in stand-by-modus, het SMOOTHIE-teken op het display brandt, draai aan de knop voor het juiste programma. \- Bij de programma's SNELLE SOEP, DIKKE SOEP, ROEREN, STOVEN, RISOTTO wordt na volbrenging 'Einde' getoond. Na 10 minuten zonder actie, wordt WARM HOUDEN ingeschakeld voor maximaal 12 uur, tenzij u het stopt. Sommige standaard instellingen zijn aanpasbaar, er wordt dan echte info op het display getoond; sommige zijn| Programma's | Standaard instelling | Stand | Tips |
| HAKKEN | *Snelheid: 5*Temperatuur: 0*Warmtevermogen: 0*Timer: 1min | *Om te hakken, maar niet voor een smoothie. Tijd instelbaar tussen 1s en 5m afhankelijk van dikte.*Na 10 minuten zonder actie, schakelt het apparaat automatisch uit | *Aanbevolen grootte van harde ingrediënten zoals wortels en vlees is 1-2 cm.*Als het voedsel zo fijn mogelijk moet, gebruik dan SMOOTHIE |
| STOVEN | Stap 1:*Snelheid: 0*Temperatuur:100°C*Warmtevermogen: 10*Timer: geen limiet, tot kookpuntStap 2:*Snelheid: 0*Temperatuur: 90-95°C*Warmtevermogen: staat niet vast, kan automatisch veranderen naar gelang temperatuur en voedselvolume*Timer: 3 uur | *Standaard timer 3u, instelbaar tussen 1-12u*Na 10 minuten zonder actie, gaat het apparaat automatisch in ‘WARM’-modus. | *Langzaam garen |
| STOOM | *Snelheid: 0*Temperatuur: 120°C*Warmtevermogen: 10*Timer: 20min | *Tijd instelbaar tussen 15-60m*Na 10 minuten zonder actie, gaat het apparaat automatisch in ‘WARM’-modus. | *500g water voor elke 30 minuten stomen*Groente 20min; vlees 30min |
| DIKKE SOEP | Stap 1:*Snelheid: 0*Temperatuur: 120*Warmtevermogen: 10*Timer: Tot kookpuntStap 2:*Snelheid: 0*Temperatuur:100°C*Warmtevermogen:4*Timer: 29,5minStap 3:*Snelheid: 0*Temperatuur: 0°C*Warmtevermogen:0*Timer: Afkoelen tot80°CStap 4:*Snelheid:langzaam van 6 tot10*Temperatuur: 0°C*Warmtevermogen:0*Timer: 1 min | *Geschikt voor vleessoep, eerst hakken en dan koken en roeren. Timer instelbaar tussen 15 en 60m.*Na 10 minuten zonder actie, gaat het apparaat automatisch in ‘WARM’-modus. | *Aanbevolen grootte van harde ingrediënten zoals wortels en vlees is 1-2 cm.*Aanbevolen om te pauzeren en vlinder toe te voegen na stap 1. |
| SNELLESOEP | Stap 1:*Snelheid: 10*Temperatuur: 0*Warmtevermogen:0*Timer: 30sStap 2:*Snelheid: 2*Temperatuur:120°C*Warmtevermogen:10*Timer: TotkookpuntStap 3:*Snelheid: 2*Temperatuur:100°C*Warmtevermogen:10*Timer: 19,5min | *Geschikt voor vegetarische soep, eerst hakken en dan koken en roeren. Timer instelbaar tussen 15 en 60m.*Na 10 minuten zonder actie, gaat het apparaat automatisch in ‘WARM’-modus. | *Aanbevolen grootte van harde ingrediënten zoals wortels en vlees is 1-2 cm.*Aanbevolen om te pauzeren en vlinder toe te voegen na stap 1. |
| ROEREN | *Snelheid: 2*Temperatuur:100°C*Warmtevermogen:10*Timer: 30min | *Snelheid instelbaar van 0 tot 3;*Temperatuur instelbaar van 90 tot120°C.*Tijd instelbaar tussen 5-60m*Na 10 minuten zonder actie, gaat het apparaat automatisch in 'WARM'-modus. | *Gebruik vlinder of kneedmes |
| KNEDEN | Stap 1:*Snelheid: 3*Temperatuur: 0*Warmtevermogen:0*Timer: 3minStap 2:*Snelheid: 2*Temperatuur: 0*Warmtevermogen:0*Timer: 7min | *Snelheid instelbaar van 2 tot 3;*Temperatuur instelbaar van 0 tot 37°C.*Tijd instelbaar tussen 3-20m*Na 10 minuten zonder actie, schakelt het apparaat zich automatisch uit. | *Kneden voor brood: 330g water + 500g bloem + andere ingrediënten;kneed 10 min op standaard instelling*Kneden voor noedels: 200g water + 400g bloem; kneed 3min met snelheid 2*Gebruik temperatuur 37°C voor het rijzen en als het niet genoeg rijst, kies 37°C voor 30min zonder snelheid |
| RISOTTO | Stap 1:*Snelheid: 0*Temperatuur:100°C*Warmtevermogen:6*Timer: Tot kookpuntStap 1:*Snelheid: 1*Temperatuur:65°C*Warmtevermogen:4*Timer: 18 minutenWarmtevermogen en timer: staan niet vast, is automatisch aanpasbaar aantemperatuur en volume | *Alle instellingen zijn niet instelbaar*Na 10 minuten zonder actie, gaat het apparaat automatisch in 'WARM'-modus. | *Aanbevolen volume (max): 500g rijst + 800g water, gebruik RIJST in de standaard instelling. Een rijstkorst vormt zich op de bodem.*Of stoom rijst: 400g rijst in het mandje, 2L water, kies KOKEN; giet vervolgens water eruit zodat er 1L overblijft, kies STOMEN voor 20min |
| SMOOTHIE | *Snelheid: 10*Temperatuur: 0*Warmtevermogen: 0*Timer: 30s | *Alle instellingen zijn niet instelbaar, herhaal het programma als het niet voldoende is.*Na 10 minuten zonder actie, schakelt het apparaat automatisch uit | Aanbevolen grootte van harde ingrediënten zoals wortels en vlees is 1-2 cm |
| YOGHURT | *Snelheid: 30 min op 1, dan stoppen*Temperatuur: 37-39°C*Warmtevermogen: 1*Timer: 6u | *Tijd instelbaar tussen 3-12h*Na 10 minuten zonder actie, schakelt het apparaat zich automatisch uit. | *Aanbevolen volume : 1 kop yoghurt + 1L verse melk + suiker, 6-12u volgens de gewenste dikte |
| Accessoire | Tekening | Functie | Snelheid | Capaciteit | Gebruikstijd |
| Hakmes | | HAK maar niet voor een smoothie | 5 | 2L max, hak tot 1-2cm voor gebruik | 1min |
| HAK zo fijn mogelijk | 10 | 2L max, hak tot 1-2cm voor gebruik | 1min | ||
| Kneedmes | | Kneed deeg voor brood, pizza, etc. | 2-3 | 800g bloem max | 5-10min |
| Kneed deeg voor noedels | 2 | 500g bloem max | 3min | ||
| Vlinder | | Roeren | 1-3 | 2L max | 30min |
| klop eiwit of room | 4 | 2L max | 10min | ||
| Stomer | Groente stomen | nvt | 3,5L max | 15min |
| Vlees stomen | nvt | 3,5L max | 20-30min |
PROBLEEMOPLOSSING
\- Als de onderstaande melding op het display wordt getoond dan is dat normaal. Als het blijft terugkomen als u de onderstaande oplossing heeft opgevolgd, neem dan contact op met onze klantenservice.| Foutcode | Beschrijving | Mogelijke redenen | Oplossing |
| E1 | Veiligheidsschakelaar niet ingedrukt | De kan of de deksel ervan is niet juist geplaatst. | Herplaats de kan en de deksel, zorg 91a talles juist geplaatst is |
| E2 | Temperatuursensor wordt niet gevonden | De kan is niet geplaatst, of de verbinding met de temperatuursensor in de kan is beschadigd. | Herplaats de kan en zorg 91a talles juist en stevig geplaatst is. |
| E3 | Motorblokkade | De druk in de kan is te groot | Haal voedsel uit de kan, of snij het in kleinere stukjes en start opnieuw. |
| E4 | Te hogetemperatuur | Geen voedsel in de kan, of weinig met een hoge temperatuurinstelling gedurende te lange tijd. | Voeg voedsel toe in de kan |
| E5 | De motortemperatuur is te hoog | Het apparaat heeft te lang te veel druk moeten uitoefenen. | Laat het apparaat afkoelen en ga dan verder |
| E7 | Snelheidsoverdracht werkt niet | De veranderen van lage snelheid (1-5) naar hoge (6-10) is geblokkeerd | Verwijder de kan, schakel naar lagere snelheid, herplaats de kan en herstart |
| E8 | NTC van de motor wordt niet gevonden | De temperatuursensor van de motor is los of beschadigd | Gebruik het apparaat niet meer en laat het repareren |
| E11 | Kan pulse niet gebruiken | De temperatuur in de kan is hoger dan 90°C | Laat het afkoelen en gebruik pulse weer, of gebruik een lagere snelheid dan 4 |
Schoonmaken van uw apparat
1. WAS GEEN onderdelen van uw koker in een vaatwasser. Was de koker altijd grondig na elk gebruik, of als deze langere tijd niet gebruikt is. 2. Haal de stekker uit het stopcontact en laat het afkoelen voor de schoonmaak. 3. Was de verwijderbare kan met een warm zeepwater. Spoel en droog grondig af. 4. Maak de basis schoon met een schone vochtige doek. Als er voedselresten achterblijven, maak dan een doek vochtig in warm zeepwater voor het schoonvegen. NOOIT de basis in water of een andere vloeistof onderdompelen. Veeg de vaste basis schoon indien nodig als er voedselresten op zitten. 5. Om het apparaat in goede conditie te blijven houden, moet de basis, indien nodig, na elk gebruik grondig worden nagekeken en schoongemaakt. Veeg schoon met een vochtige doek en droog het goed af voor gebruik. 6. Als het apparaat langere tijd niet gebruikt wordt, haal dan de stekker eruit en bewaar hem in een droge schone ruimte.  VIND AL ONZE RECEPTEN: http://dl.hkoenig.com/SiteHkoenig/Livrederecettes\_HK8.pdf Of scan de QR-code: GARANTIE
De garantieperiode op onze producten is 2 jaar, tenzij anders vermeld, beginnend vanaf de datum van de initiele aankoop of bezorgdatum. Als u problemen of vragen heeft, kunt u eenvoudig onze hulppagina's bezoeken voor tips om problemen op te lossen, de FAQ's en andere gebruikershandleidingen op onze website: https://sav.hkoenig.com. Door de referentienaam van uw apparaat in de zoekbalk te typen, krijgt u toegang tot alle beschikbare online hulpmiddelen, ontworpen om aan uw behoeften te voldoen. Als u toch niet geen antwoord op uw vraag kunt vinden, klik dan op "Heeft het antwoord uw probleem opgelost? Hierdoor gaat u naar het Aanvraagformulier voor Klantenondersteuning, dat u in kunt vullen om uw verzoek te valideren en hulp te ontvangen.GARANTIEVOORWAARDEN
De garantie dekt alle mankementen die voortkomen uit normaal gebruik, volgens de sectie gebruik en specificaties in de gebruikershandleiding. Deze garantie omvat niet verpakkings- of transportproblemen tijdens het vervoer van het product door de eigenaar. Het omvat ook niet de normale slijtage van het product, noch het onderhoud of vervangen van verbruiksartikelen.UITSLUITINGEN VAN DE GARANTIE
- Accessoires en verbruiksartikelen (\*). - Normaal onderhoud van het apparaat. - Alle mankementen veroorzaakt door verkeerd gebruik (schokken, het niet opvolgen van de aanbevolen stroomvoorziening, in slechte omstandigheden gebruiken, etc.), onvoldoende onderhoud of ondeugdelijk gebruik van het apparaat, alsook het gebruik van ongeschikte accessoires. - Schade van buitenaf: vuur, waterschade, elektrische stroompiek, etc. - Apparaten die uit elkaar zijn gehaald, ook gedeeltelijk, door personen die niet er niet gekwalificeerd voor zijn (zoals de gebruiker). - Producten waarvan het serienummer verdwenen, beschadigd of onleesbaar is, waardoor we het niet kunnen identificeren. - Producten die verhuurd werden of ter demonstratie of showmodel waren. (\*) Sommige onderdelen van uw apparaat, genaamd verbruiksartikelen, slijten naar verloop van tijd en bij veel gebruik van uw apparaat. Deze slijtage is normaal, maar kan verergerd worden door slechte omstandigheden of onderhoud van uw apparaat. Deze onderdelen worden daarom niet gedekt door de garantie. De accessoires meegeleverd met het apparaat zijn ook uitgesloten van de garantie. Ze kunnen niet vervangen of gerestitueerd worden. Echter, sommige accessoires zijn te koop via onze website: https://sav.hkoenig.com/. MILIEU ATTENTIE:  Voer dit apparaat op de juiste manier af. Dit symbool geeft aan dat dit product niet mag worden weggegooid bij het normale huishoudelijk afval in de EU. Om mogelijke schade voor mens en milieu te vermijden door de verkeerde afvoer van afval, recycle dit product verantwoord om het gebruik van materiaal te promoten. Om uw gebruikte product te brengen, volg de protocollen op deze terug te brengen of neem contact op met de verkoper. Zij kunnen dit product milieuvriendelijk afvoeren. Adeva SAS / H.Koenig Europe - 8 rue Marc Seguin, 77290 Mitry-Mory, France www.hkoenig.com - https://en.hkoenig.com - Tél: +33 1 64 67 00 05ESPANOL
INSTRUCCIONES DE SEGURIDAD IMPORTANTES
Para reducir el riesgo de descargas eléctricas, lesiones personales o incendios, siempre se deben tomar las precauciones de seguridad que se indican a continuación. Es importante leer cuidadosamente todas las instrucciones del manual antes de usar su electrodoméstico, y guardarlo para referencias futuras o dárselo a un nuevo propietario. - Este aparato puede ser utilizado por personas con capacidades físicas, sensoriales o mentales reducidas o con falta de experiencia o conocimientos, siempre que sean supervisadas o instruidas en el uso seguro del aparato y que entiendan perfectamente los peligros potenciales. - Este aparato no debe ser utilizado por niños. Mantenga el aparato y su cable de alimentación fuera del alcance de los niños. - ADVERTENCIA: riesgo de lesiones por causa de manipulación incorrecta. Tenga sumo cuidado al manipular las cuchillas mientras vacía la jarra y durante la limpieza. - Apague el aparato y desconecte el cable del tomacorriente antes de cambiar accesorios o tocar las partes móviles. Siempre desenchufe el aparato del tomacorriente cuando no lo pueda atender y antes de montarlo, desmontarlo o limpiarlo. - Si el cable de alimentación está dañado, deberá ser reemplazado por el fabricante, su agente de servicios técnicos o personas con calificación similar para evitar riesgos. - Otros accesorios que no sean los suministrados con este aparato deben incluir instrucciones para su uso seguro. - ADVERTENCIA: no abra la tapa mientras el agua esté hirviendo. No aumente la velocidad más allá del nivel 4 cuando la temperatura esté por encima de 90 grados centígrados. - No sumerja el aparato en agua ni otros líquidos. - Este aparato está diseñado para el uso doméstico y aplicaciones similares tales como: \- Áreas de cocina para el personal de tiendas, oficinas y otros entornos de trabajo. \- En casas de campo. A disposición de huéspedes en hoteles, moteles y otras instalaciones de tipo residencial. En establecimientos como posadas o pensiones. \- Coloque el aparato sobre una mesa estable, nivelada y resistente al calor; asegúrese de dejarlo a una distancia segura del borde de la mesa para evitar que se caiga. Durante el uso como amasador de masas o cortador de alimentos, el aparato puede deslizarse por la vibración. Por lo tanto, asegúrese de que siempre esté siendo vigilado por alguna persona para evitar que se caiga al suelo. \- Retire el enchufe del tomacorriente para limpiar el aparato o cuando no vaya a usarlo por algún tiempo. \- Compruebe regularmente el estado de la unidad principal, la jarra, el vaporizador y otros accesorios. Cualquier componente defectuoso compromete la seguridad del uso. Si detecta un desperfecto, no use más el aparato y comuníquese con nuestro centro de asistencia. \- Si el aparato se detiene inesperadamente o parece no funcionar bien, apáguelo, desenchufe el cable del tomacorriente y deje de usarlo inmediatamente. Acuda a un profesional con el aparato para que lo inspeccione y repare si es necesario. \- La taza medidora es el único accesorio que sirve de tapón para el orificio redondo en la tapa de la jarra. Le pedimos que no use tela, nylon ni cosas similares para tapar taponear este orificio. \- No toque el filo de las cuchillas. Sostenga la parte superior del mecanismo con cuidado al montar o desmontar las cuchillas. \- Obedezca la marca de capacidad máxima en la jarra. \- Abra la tapa de la jarra y espere hasta que los alimentos paren de girar. \- Tenga extremo cuidado al abrir la tapa de la jarra llena de alimentos a alta temperatura. Coloque la taza medidora correctamente en el orificio de la tapa cuando procese alimentos. \- No toque la jarra cuando procese alimentos calientes a más de 60°C. \- Asegúrese de que el vaporizador y la jarra estén bien acoplados cuando use esa función. \- Preste especial atención al vapor que saldrá a través de la tapa o los bordes laterales. \- En funcionamiento, no toque ninguna otra parte del vaporizador que no sea su asa. \- No use el vaporizador sin la tapa en su lugar. \- Tenga extremo cuidado al abrir la tapa del vaporizador para no quemarse con el vapor. \- Preste atención cuando use las funciones vapor y ebullición ya que el vapor saldrá por la boca de la jarra cuando mueva el vaporizador. \- Siempre asegúrese de que el orificio de circulación en la tapa del vaporizador no esté obstruido, o de lo contrario el vapor puede salir por otra parte. \- Después del uso, coloque el aparato y sus accesorios calientes en un lugar seguro fuera del alcance de los niños y adviértalos de que la unidad está caliente y que no la toquen. \- Daños por fuga de alimentos: asegúrese de que la junta del mecanismo de corte esté bien montada y que la cuchilla esté firmemente unida al soporte de fijación en el fondo. Una mala instalación provocará fugas de alimentos que pueden dañar al aparato. \- Daños por ventilación deficiente: asegúrese de que las rejillas de ventilación de la unidad principal estén libres de objetos, de lo contrario el aparato puede dañarse por obstrucciones. \- La unidad principal es compatible apenas con la jarra y todos los accesorios suministrados. No use otros componentes ni accesorios extraños en este electrodoméstico. \- Preste atención para evitar derrames calientes sobre el cable de alimentación. \- La jarra permanecerá caliente después del uso debido al calor residual, cuídese de quemaduras. \- Este electrodoméstico puede ser utilizado por niños con al menos 8 años de edad, siempre y cuando sean supervisados o hayan sido instruidos para usar el aparato de manera segura y estén plenamente conscientes de los peligros involucrados. \- La limpieza y el mantenimiento no deben ser realizados por niños, a menos que tengan 8 o más años de edad y sean vigilados por un adulto. \- Mantenga el aparato y su cable de alimentación fuera del alcance de niños menores de 8 años. \- Al utilizar cualquier electrodoméstico, siempre se deben tomar las precauciones básicas de seguridad para evitar el riesgo de incendio, descarga eléctrica y/o lesiones por mal uso. \- Asegúrese de que tensión informada en la placa de características del aparato se corresponde con la de su red eléctrica. Si este no es el caso, no use el aparato y comuníquese con su distribuidor. \- Nunca deje el aparato desatendido mientras esté en funcionamiento. \- Nunca abra la tapa estando directamente al frente, siempre colóquese ligeramente a un lado para evitar quemaduras con el vapor. \- No use el aparato luego de haberse caído, o si presenta señales evidentes de daños o fugas. \- No opere el aparato con su cable de alimentación o enchufe dañados, desperfectos, mal funcionamiento o luego de caídas. Si el cable de alimentación está dañado, deberá ser reemplazado por el fabricante, su agente de servicios técnicos o personas con calificación similar para evitar riesgos. \- Este aparato está destinado al uso en hogares y áreas similares, como : \- zonas de cocina en tiendas, oficinas y otros entornos de trabajo \- en casas de campo \- en hoteles, moteles y otras zonas residenciales \- habitaciones de huéspedes. ●CONTENIDO DE LA CAJA
Al abrir la caja del producto, saque todos los accesorios e identifíquelos con ayuda de la lista a continuación: 1 Unidad principal 7 Tapa del vaporizador 2 Jarra 8 Cesta coladora 3 Tapa de la jarra 9 Mariposa 4 Taza medidora 10 Espátula 5 Vaporizador pequeño 11 Libro de recetas 6 Vaporizador grande ACCESORIOS
Jarra
La jarra tiene marcas por un lado para observar la capacidad. La capacidad máxima de la jarra es de 2 litros. Observación:
La cantidad de alimentos en la jarra no debe exceder la marca máxima de 2 L, de lo contrario, la preparación puede derramarse o salpicar causando un peligro. Coloque la tapa en la jarra, presione el interruptor de seguridad y gírela en el sentido de las agujas del reloj para fijarla correctamente en la jarra, de lo contrario, el motor no podrá arrancar. (Siempre presione primero el interruptor de seguridad para bloquear o abrir la tapa) natural_image
Three-step mechanical assembly diagram showing progressive assembly of a cylindrical component (no text or labels)natural_image
Line drawings of two kitchen appliances: a blender and a four-tiered blender (no text or symbols)Cuchilla
Coloque la junta en el mecanismo e insértelo por el orificio en el fondo de la jarra, sostenga firmemente la cuchilla por dentro de la jarra y gire la parte inferior hacia arriba, use el soporte de fijación para fijar la cuchilla girándola en sentido horario. Siga el procedimiento inverso para desmontar la cuchilla del mecanismo. Cuidado para no perder la junta de sellado entre la cuchilla y el fondo de la jarra. natural_image
Technical line drawings of a mechanical component showing three views: front, top, and side (no text or symbols)natural_image
Technical line drawing of a mechanical component with no visible text or symbolsObservaciones:
\- La cuchilla es muy afilada. Envuelva la cuchilla con una toallita para montarla o desmontarla del mecanismo. - Agarre bien el mecanismo de corte y sáquelo de la jarra con cuidado para evitar que la cuchilla se caiga y pueda causar un peligro. \- Asegúrese de que el soporte de fijación y la junta estén bien montados y bloqueados correctamente en el mecanismo de corte. Si la junta de sellado no está bier montada, los alimentos que están siendo cortados o cocidos pueden gotear o filtrarse hacia el interior de la unidad y provocarle daños al aparato.Amasador
Retire la cuchilla del mecanismo y monte el eje con la paleta amasadora siguiendo el mismo procedimiento que para la cuchilla. Este tipo de montaje se puede usar para amasar, remover o y mezclar alimentos sin cortarlos  natural_image
Diagram of a mechanical or electrical component with concentric rings and directional arrows indicating rotation (no text or symbols)natural_image
Technical diagram of a mechanical component with concentric rings and mounting holes (no text or symbols)Observaciones:
\- No use el mecanismo amasador a velocidades arriba del nivel 3 ya que esto puede causar vibraciones fuertes en el aparato y provocar un peligro. \- La parte baja de la paleta amasadora queda a solo 1 cm de distancia de la pared de la jarra, esto hace que a veces los alimentos se atasquen y el motor se detenga automáticamente por seguridad. Use la espátula para revolver los alimentos atascados y el aparato volverá a funcionar sin problemas. \- Asegúrese de que el soporte de fijación y la junta estén bien montados y bloqueados correctamente en el mecanismo. Si la junta de sellado no está bien montada, los alimentos que están siendo mezclados o amasados pueden gotear filtrarse hacia el interior de la unidad y provocarle daños al aparato.Taza medidora
\- La taza medidora tiene varias funciones: es un componente de la tapa de la jarra para evitar la pérdida de calor o salpicaduras de alimentos; es un recipiente graduado para medir la cantidad de ingredientes, con capacidad máxima de 150 mL. \- Coloque la taza medidora en el orificio de la tapa y gírela en sentido de las manecillas del reloj para fijarla y bloquearla en la tapa. natural_image
Simple line drawing of a cylindrical object with a flange base (no text or symbols)natural_image
Technical line drawing of a mechanical component with concentric circles and handle (no text or symbols)Observaciones:
\- La taza medidora es el único accesorio que sirve para tapar el orificio redondo de la tapa. \- No cubra este orificio con ningún otro objeto para evitar salpicaduras de alimentos y posibles peligros.Espátula
- La espátula es el único accesorio que puede ser utilizado para raspar y remover los alimentos dentro de la jarra. Cualquier otro artículo le puede causar daños al revestimiento antiadherente dentro de la jarra. - Hay una pequeña ranura en el mango de la espátula, úsela para sostener la cesta coladora como se muestra en la figura: natural_image
Technical line drawing of two mechanical components (no text or symbols)natural_image
Line drawing of a bowl with a spoon, no text or symbols presentObservaciones:
- No use la espátula para revolver nada dentro de la jarra cuando la cuchilla esté en funcionamiento. • No use la espátula con la mariposa adentro de la jarra. - Asegúrese de que la cesta coladora esté bien enganchada en la ranura de la espátula antes de levantarla.Cesta coladora
La cesta coladora tiene varias funciones: - Tamiz. Para filtrar el jugo de frutas y verduras. Después de moler o hacer pulpa de frutas con el aparato, coloque la cesta en la jarra para ayudar a verter el jugo. - Estofado. Para estofar alimentos blandos como pastas, espaguetis o fideos; • Cocción. Para cocinar guarniciones, tales como arroz y papas. natural_image
Line drawings of two kitchen utensils, one with a handle and the other with a fork (no text or symbols)Observaciones:
- Introduzca el mango de la espátula en el orificio del borde de la cesta para colocarla o sacarla de la jarra. - Si desea reducir la cantidad de agua en los alimentos (como tomates), retire la taza medidora y coloque la cesta en la jarra. Así el agua se evapora fácilmente.Mariposa
- Instalada en la cuchilla, la mariposa puede ayudar a mezclar los alimentos sin cortarlos con la cuchilla y al mismo tiempo evita que los alimentos se peguen formado aglomerados, por lo que la mezcla queda más homogénea. - Inserte la mariposa en el mecanismo de corte por el orificio y presiónela con fuerza suficiente para encajarla, luego gire las aspas de la mariposa en sentido anti horario para bloquearla en la cuchilla. natural_image
Technical line drawings of a mechanical device and its corresponding schematic view (no text or symbols)Observaciones:
- No encienda la unidad hasta que la mariposa esté fija en su lugar. - No use velocidades arriba del nivel 4 cuando esté utilizando la mariposa. - No use la espátula mientras usa la mariposa. - No agregue ingredientes en la jarra cuando esté trabajando con la mariposa, ya que esto puede dañar o trabar la mariposa.Vaporizador
El conjunto de vaporización cuenta con tres componentes: un vaporizador pequeño, un vaporizador grande y una tapa. La tapa se puede colocar tanto en el vaporizador pequeño como en el grande, y el vaporizador pequeño se puede montar por dentro del grande para ciertos usos. Retire la tapa de la jarra y coloque un vaporizador para utilizarlo. natural_image
Product display of a black 3D kitchen grater with digital display and various kitchen cutouts (no visible text or symbols)Observaciones:
\- Asegúrese de que la tapa del vaporizador esté bien colocada antes de cocer alimentos al vapor. \- Los vaporizadores que acompañan este aparato no se pueden usar en microondas u otros equipos eléctricos. \- No toque ni se acerque a los orificios de la tapa del vaporizador para evitar quemaduras a causa del vapor caliente. \- No cubra ni obstruya los orificios de la tapa del vaporizador con ningún objeto, de lo contrario, el vapor puede salir por el borde de la tapa u otros lugares del aparato y causar peligro.INSTRUCCIONES DE USO
Durante los primeros usos de este electrodoméstico podrá sentir un ligero olor proveniente del motor. Esto es completamente normal y desaparecerá paulatinamente con el uso. - Instale el aparato sobre una mesa limpia, estable y nivelada. No coloque la unidad principal demasiado cerca del borde y manténgala lejos de armarios empotrados o estantes suspendidos y soportes colgantes. - Es mejor instalar el aparato en un lugar fijo de su conveniencia para uso continuado. • Limpie bien y completamente el aparato antes de usarlo. - El sonido de un "bip" le indicará que la unidad principal está encendida y activa.  nte y  r el interruptor en la un pitido pero todavía  DETENER/CA Enchufe el c no se activará la pantalla LCD. natural_image
Simple line drawing of a rope knot and connecting rod (no text or symbols)PERILLA (INICIO/ PAUSA)
- Después de seleccionar la función o programa deseado, presione este botón para iniciar la operación de inmediato. - Presione este botón durante cualquier ciclo de trabajo para pausar el aparato y entrar en modo de espera, la pantalla LCD mostrará PRUSE. (Usted puede abrir la tapa, quitar la jarra, etc., pero asegúrese de volver a montar todo correctamente antes de recomenzar). Presione el botón nuevamente para reiniciar la operación. - La unidad se apagará automáticamente si no hace nada durante 10 minutos en el modo de PAUSA. \- Este botón también es la perilla de control para el temporizador, velocidad, temperatura y potencia. Para aumentar se gira la perilla en sentido horario y para disminuir en sentido anti-horario. Con este botón se escoge uno entre los 15 programas automáticos. TEMPORIZADOR
- La pantalla LCD muestra 88:88:88, que es el tiempo en hora:minutos:segundos. - Presione el botón del temporizador y la señal de minutos parpadeará en la pantalla; gire la perilla para ajustar los minutos. Presione el botón nuevamente y parpadearán los segundos, gire la perilla para ajustar los segundos. Vuelva a presionar el botón y gire la perilla para ajustar la hora entre 1 y 12. - Presione el botón durante un ciclo de trabajo y el aparato comenzará la cuenta regresiva automáticamente desde la hora configurada. - Máximo 60 minutos por ajuste manual y 3 horas con el ajuste de bricolaje (DIY). Consulte el límite del temporizador para cada programa en la sección “MENÚ”. FUNCIÓN PREESTABLECIDA
 Presione el botón del temporizador durante 3 segundos para entrar en el modo preseleccionado. El tiempo visualizado parpadeará junto con el icono de preselección. Después, ajuste la hora con el ajuste correspondiente, el rango es entre 30 minutos y 12 horas. El modo de reserva sólo puede ser usado junto con DIY y MENU. Ponga primero DIY o seleccione MENU, pulse el mando y el tiempo empezará a contar. Presione el botón de reestablecer para cancelar. VELOCIDAD
\- Presione este botón en modo de espera o durante un ciclo de trabajo (excepto en algunos programas automáticos que bloquean este ajuste) y el aparato entrará en el modo ajuste de velocidad. El ícono -parpadeará en la pantalla y podrá ajustar la velocidad girando la perilla de control. • La velocidad varía del nivel 1 al 10. \- Presione este botón durante un proceso de mezcla, vaporización o calentamiento, si la temperatura ajustada o la real es superior a 60 °C, la velocidad solo puede llegar al nivel 4. Si fija un nivel superior, caerá al nivel 4 automáticamente. \- Hay transferencia de energía en la estructura, por lo que es normal escuchar ruidos mientras el motor sube la velocidad del nivel 5 y al nivel 6. \- Para triturar o picar alimentos duros o grandes volúmenes de alimentos, se sugiere seleccionar primero la velocidad 5 y luego pasar a la velocidad 10, para evitar vibraciones y obtener la máxima eficiencia y rendimiento. \- No use las velocidades 8, 9 o 10 por 5 minutos seguidos ni las velocidades 5, 6 o 7 durante 10 minutos seguidos. TEMPERATURA
\- Presione este botón en modo de espera o durante un calentamiento (excepto para algunos programas automáticos que bloquean este ajuste) y el aparato entrará en el modo ajuste de temperatura. El ícono 📁 parpadeará en la pantalla y podrá ajustar la temperatura girando la perilla de control. • El rango de temperatura es 37-120 °C. POTENCIA DE CALOR
\- Presione este botón en modo de espera o durante un calentamiento (excepto para algunos programas automáticos que bloquean este ajuste) y el aparato entrará en el modo ajuste de potencia. El ícono parpadeará en la pantalla y podrá ajustar la potencia de calor girando la perilla de control. • El rango de potencia es de 1 a 10. \- Para algunos alimentos pegajosos, se recomienda empezar a potencias bajas para evitar quemaduras o adherencia. \- Si la cantidad de alimentos es poca y requieren una temperatura precisa, se sugiere fijar la potencia más baja. \- Las potencias bajas permiten un control de temperatura más preciso; y las potencias altas calientan más rápido. \- El aparato no funcionará si solo fija la potencia de calor pero no fija una temperatura. Se recomienda usar la configuración predeterminada al cambiar los niveles de temperatura. AUTOLIMPIEZA
\- Este programa es para fines de limpieza después de usar el aparato. \- Agregue agua de 500 ml a 1 litro. \- Algún detergente puede ser útil. \- Todo el proceso dura unos 10 minutos. PULSO
\- En modo de espera, presione y asegure este botón para que el aparato empiece a funcionar a la velocidad máxima; suéltelo para detener el aparato. \- Cuando la temperatura en la jarra es superior a 60 °C, el botón PULSO no se puede usar y la pantalla mostrará "E11". \- Hay transferencia de energía en la estructura, por lo que es normal escuchar ruidos mientras el motor empieza a funcionar con el primer pulso. \- El tiempo máximo de operación usando el pulso es de 3 minutos y luego debe descansar durante 10 minutos. MENÚ
\- Este botón es para elegir entre los siguientes 10 programas automáticos. - SOPA RÁPIDA • MEZCLAR • AMASAR • ARROZ • BATIDO - YOGURT           \- Presione este botón en modo de espera y la función BATIDO parpadeará en la pantalla LCD, gire la perilla para elegir el programa automático deseado. \- Para los programas SOPA RÁPIDA, SOPA GRUESA, REMOVER, COCER y ARROZ, una vez completado el proceso la pantalla mostrará “Fin”. Si no se realiza ninguna operación después de 10 minutos, el aparato cambiará al modo MANTENER CALIENTE de forma automática por 12 horas hasta que se detenga el proceso manualmente. \- La configuración de algunos programas predeterminados puede variar durante el proceso, como se indica en la siguiente tabla, y los datos reales se mostrarán en pantalla. Los programas patrones con ajustes bloqueados mostrarán “—” en la pantalla.| Programa | Configuración patrón | Ajustes | Recomendaciones |
| CORTAR | - Velocidad: 5- Temperatura: 0- Potencia: 0- Tiempo: 1 min. | - Para triturar pero sin llegar a un batido. Tiempo ajustable de 1 s a 5 min para obtener la consistencia deseada.- Si se deja inactivo durante 10 min después de finalizar el programa, el aparato se apagará automáticamente. | - Cortar alimentos consistentes o duros como zanahoria o carne en trozos de 1 cm a 2 cm.- Si necesita hacer puré fino use la función BATIDO. |
| COCER | Etapa 1:- Velocidad: 0- Temperatura: 100 °C- Potencia: 10- Tiempo: sin límite, hasta que hierva.Etapa 2:- Velocidad: 0- Temperatura: 90-95 °C- Potencia: variable, cambia automáticamente según la temperatura y la cantidad de alimentos.- Tiempo: 3 h. | - El tiempo de la etapa 2 es ajustable de 1 a 12 h.- Si se deja inactivo durante 10 min después de finalizar el programa, el aparato entrará en el modo CALENTAR automáticamente. | - La cocción es equivalente a fuego lento. |
| VAPOR | - Velocidad: 0- Temperatura: 120 °C- Potencia: 10- Tiempo: sin límite, hasta que hierva. | - El tiempo es ajustable de 15 a 60 min.- Si se deja inactivo durante 10 min después de finalizar el programa, el aparato entrará en el modo CALENTAR automáticamente. | - 500 g de agua por cada 30 min de vaporización.- Para vegetales use 20 min y para carne use 30 min. |
| SOPA GRUESA | Etapa 1:- Velocidad: 0- Temperatura: 120 °C- Potencia: 10- Tiempo: sin límite, hasta que hierva.Etapa 2:- Velocidad: 0- Temperatura: 100 °C- Potencia: 4- Tiempo: 29,5 minEtapa 3:- Velocidad: 0- Temperatura: 0- Potencia: 0- Tiempo: enfriar la sopa hasta 80 °CEtapa 4:- Velocidad: aumento lento de 6 a 10.- Temperatura: 0- Potencia: 0- Tiempo: 1 min. | - Programa apropiado para sopa de carne: primero corta los ingredientes y después cocina y mezcla. El tiempo es ajustable de 15 a 60 min.- Si se deja inactivo durante 10 min después definalizar el programa, el aparato entrará en el modo CALENTAR automáticamente. | - Cortar alimentos consistentes o duros como zanahoria o carne en trozos de 1 cm a 2 cm.- Se recomienda pausar y colocar la mariposa después de laetapa 1. |
| SOPA RÁPIDA | Etapa 1:- Velocidad: 10- Temperatura: 0- Potencia: 0- Tiempo: 30 s.Etapa 2:- Velocidad: 2- Temperatura: 120 °C- Potencia: 10- Tiempo: sin límite, hasta que hierva.Etapa 3:- Velocidad: 2- Temperatura: 100 °C- Potencia: 10- Tiempo: 19,5 min. | - Programa apropiado para sopa de vegetales: primero corta los ingredientes y después cocina y mezcla. El tiempo es ajustable de 15 a 60 min.- Si se deja inactivo durante 10 min después de finalizar el programa, el aparato entrará en el modo CALENTAR automáticamente. | - Cortar alimentos consistentes o duros como zanahoria o carne en trozos de 1 cm a 2 cm.- Se recomienda pausar y colocar la mariposa después de la etapa 1. |
| MEZCLAR | - Velocidad: 2- Temperatura: 100 °C- Potencia: 10- Tiempo: 30 min. | - La velocidad es ajustable del nivel 0 al 3.- Temperatura es ajustable de 90 a 120 °C.- El tiempo es ajustable de 5 a 60 min.- Si se deja inactivo durante 10 min después de finalizar el programa, el aparato entrará en el modo CALENTAR automáticamente. | - Se recomienda usar la mariposa o el conjunto amasador. |
| AMASAR | Etapa 1:- Velocidad: 3- Temperatura: 0- Potencia: 0- Tiempo: 3 min.Etapa 2:- Velocidad: 2- Temperatura: 0- Potencia: 0- Tiempo: 7 min. | - La velocidad es ajustable del nivel 2 al 3.- Temperatura ajustable de 0 a 37 °C para esparcir la masa.- El tiempo es ajustable de 3 a 20 min.- Si se deja inactivo durante 10 min después de finalizar el programa, el aparato se apagará automáticamente. | - Masa para pan: 330 g de agua + 500 g de harina + otros ingredientes; amasar 10 min por defecto.- Masa para fideos: 200 g de agua + 400 g de harina; amasar 3 min a velocidad 2.- Fije la temperatura en 37 °C para esparcir la masa, y si no se extiende lo suficiente, amase 30 min más a 37 °C pero sin velocidad. |
| ARROZ | Etapa 1:- Velocidad: 0- Temperatura: 100 °C- Potencia: 6- Tiempo: sin límite, hasta que hierva.Etapa 2:- Velocidad: 1- Temperatura: 965 °C- Potencia: 4- Tiempo: 18 min.Potencia y Tiempo:variables, cambianautomáticamente según latemperatura y la cantidad dealimentos. | - Ninguna configuraciónes ajustable.- Si se deja inactivodurante 10 min después definalizar el programa, elaparato entrará en el modoCALENTARAutomáticamente. | - Volumen máximosugerido: 500 g de arroz+ 800 g de agua, cocinecon el programa ARROZpredeterminado. Seformará corteza en elfondo.- Puede vaporizarel arroz usando: 400 gde arroz en la cesta coladora, 2 L de agua, yla función COCINAR;luego vierta un poco deagua hasta dejar 1 L,use ahora VAPORDurante 20 min. |
| BATIDO | - Velocidad: 10- Temperatura: 0- Potencia: 0- Tiempo: 30 s. | - Ninguna configuraciónes ajustable, repita elprograma si lo desea.- Si se deja inactivodurante 10 min después definalizar el programa, elaparato se apagaráautomáticamente. | - Cortar alimentos consistentes o duroscomo zanahoria o carneen trozos de 1 cm a 2cm. |
| YOGURT | - Velocidad: 1 durantelos primeros 30 min, luego detener.- Temperatura: 37-39°C- Potencia: 1- Tiempo: 6 h. | - El tiempo es ajustablede 3 a 12 h.- Si se deja inactivodurante 10 min después definalizar el programa, elaparato se apagaráautomáticamente. | - Volumensugerido: 1 baso deyogurt + 1 L de lechefresca + azúcar a gusto,de 6 a 12 h según laconsistencia deseada. |
| Accesorio | Imagen | Función | Velocidad | Capacidad | Tiempo de operación |
| Cuchilla de corte | | Cortar sin triturar al punto de llegar a un batido. | 5 | Máximo 2 L; corte los ingredientes en pedazos de 1-2 cm antes. | 1 min |
| Cortar bien fino. | 10 | Máximo 2 L; corte los ingredientes en pedazos de 1-2 cm antes. | 1 min | ||
| Paleta de amasar | | Amasar masa para pan, pizza, etc. | 2-3 | Máximo 800 g de harina | 5-10 min |
| Amasar masa para fideos. | 2 | Máximo 500 g de harina | 3 min | ||
| Mariposa | | Mezclar o batir | 1-3 | Máximo 2 L | 30 min |
| Batir claras de huevo o cremas. | 4 | Máximo 2 L | 10 min | ||
| Vaporizador | | Vaporizar vegetales | N/A | Máximo 3,5 L | 15 min |
| Vaporizar carnes | N/A | Máximo 3,5 L | 20-30 min |
GUÍA DE SOLUCIÓN DE PROBLEMAS
Es normal que el aparato muestre los siguientes códigos de error en la pantalla. Si el error sigue apareciendo después de ejecutar las acciones de la Guía de Solución de Problemas, comuníquese con nuestro centro de atención al cliente.| Error | Descripción | Posible problema | Posible solución |
| E1 | La trabade seguridad no está bloqueada. | La jarra o la tapa de la jarra no están montados correctamente. | Vuelva a montar la jarra y la tapa de la jarra, asegúrese de que todas las trabas estén bloqueadas. |
| E2 | Sensor de temperatura ausente. | La jarra no está en su lugar, o la conexión del sensor de temperatura en la base de la jarra está dañada. | Vuelva a montar la jarra y asegúrese de que esté bien trabada en su lugar. |
| E3 | Motor trabado o bloqueado. | La jarra está demasiado llena o pesada. | Disminuya la cantidad dealimentos o córtelos en trozos más pequeños y reinicie el proceso. |
| E4 | Temperatura demasiado alta. | No hay alimentos en la jarra, o poca cantidad con temperatura alta durante mucho tiempo. | Agregue más alimentos en la jarra. |
| E5 | Temperatura del motor muy alta. | El aparato funcionó por mucho tiempo con demasiados alimentos. | Pare y espere que el aparato se enfríe antes de reiniciar el proceso. |
| E7 | Falla en la transferencia de velocidades. | El aumento de velocidad del nivel bajo (1-5) al nivel alto (6-10) está bloqueado. | Retire la jarra, gire el mecanismo manualmente, vuelva a colocar la jarra y reinicie el proceso. |
| E8 | Motor NTC ausente. | La conexión del sensor de temperatura del motor está floja o rota. | Pare de usar el aparato y llévelo al centro de atención al cliente para revisarlo. |
| E11 | No se puede usar el Pulso. | La temperatura en la jarra supera los 90 °C. | Espere que se enfríe su preparación y pulse nuevamente, o use una velocidad más baja (4). |
LIMPIEZA Y MANTENIMIETO
1. NO lave ninguna pieza o accesorio de su robot en el lavavajillas. Siempre limpie su aparato después de cada uso, o cuando no lo haya utilizado durante un largo período de tiempo. 2. Desenchufe el cable del tomacorriente y espere que la unidad se enfríe antes de limpiarla. 3. Lave las cestas coladoras con agua jabonosa tibia. Enjuague y seque completamente. 4. Limpie la unidad principal con un paño limpio y húmedo. Si quedan restos de comida, humedezca el paño en agua jabonosa tibia y limpie de nuevo. NUNCA sumerja la unidad en agua u otro líquido. Limpie la jarra con cuidado cuando sea necesario para eliminar restos de alimentos adheridos. 5. Con el fin de mantener la alta eficiencia de su robot de cocina, debe inspeccionar el fondo de la jarra y los vaporizadores con frecuencia y limpiarlos después de cada uso si es necesario. Límpielos con un paño suave húmedo y séquelos completamente antes del próximo uso. 6. Si no pretende utilizar el aparato por un largo período, desenchúfelo del tomacorriente y guárdelo en un lugar seguro, fresco y limpio.  ENCUENTRA TODAS NUESTRAS RECETAS: http://dl.hkoenig.com/SiteHkoenig/Livrederecettes\_HK8.pdf O escanee el código QR: GARANTÍA
El periodo de garantía de nuestros productos es de 2 años, salvo que la ley estipule lo contrario, a partir de la fecha de la compra inicial o de la fecha de entrega. Si tiene algún problema o pregunta, puede acceder fácilmente a nuestras páginas de ayuda, consejos para solucionar problemas, preguntas frecuentes y manuales de usuario en nuestro sitio de servicio: https://sav.hkoenig.com. Al escribir el nombre de referencia de su dispositivo en la barra de búsqueda, puede acceder a toda la asistencia en línea disponible, diseñada para satisfacer mejor sus necesidades. Si sigue sin encontrar una respuesta a su pregunta o problema, haga clic en "¿La respuesta ha resuelto su problema? Esto le llevará al formulario de solicitud de asistencia posventa, que puede rellenar para validar su solicitud y obtener ayuda.CONDICIONES DE GARANTÍA
La garantía cubre todos los fallos que se produzcan en el contexto de un uso normal, de acuerdo con los usos y especificaciones del manual de usuario. Esta garantía no se aplica a los problemas de embalaje o transporte durante el envío del producto por parte del propietario. Tampoco incluye el desgaste normal del producto, ni el mantenimiento o la sustitución de piezas consumibles.EXCLUSIÓN DE GARANTÍA
- Accesorios y piezas de desgaste (\*). - Mantenimiento normal del aparato. - Todas las averías derivadas de un uso incorrecto (golpes, incumplimiento de las recomendaciones de alimentación eléctrica, malas condiciones de uso, etc.), de un mantenimiento insuficiente o de un mal uso del aparato, así como del uso de accesorios inadecuados. - Daños de origen externo: incendio, daños por agua, sobrecarga eléctrica, etc. - Cualquier equipo que haya sido desmontado, incluso parcialmente, por personas que no estén autorizadas a hacerlo (en particular el usuario). - Productos cuyo número de serie falte, esté dañado o sea ilegible, lo que no permitiría su identificación. - Productos sujetos a alquiler, demostración o exposición. (\*) Algunas piezas de su aparato, conocidas como piezas de desgaste o consumibles, se deterioran con el tiempo y la frecuencia de uso de su aparato. Este desgaste es normal, pero puede acentuarse por las malas condiciones de uso o de mantenimiento de su aparato. Por lo tanto, estas piezas no están cubiertas por la garantía. Los accesorios suministrados con el aparato también están excluidos de la garantía. No se pueden cambiar ni reembolsar. No obstante, algunos accesorios pueden adquirirse directamente en nuestro sitio web: https://sav.hkoenig.com/MEDIO AMBIENTE
 Esta marca significa que este aparato no se debe desechar con los residuos domésticos comunes en ninguna parte de la Unión Europea. Para evitarle posibles daños al medio ambiente o la salud humana por causa de la eliminación descontrolada de residuos, recíclelo con responsabilidad para promover el aprovechamiento sostenible de recursos materiales. Utilice los sistemas de devolución y recolección de su localidad o comuníquese con su distribuidor; ellos pueden recibir este producto para reciclarlo de forma segura para el medio ambiente. Adeva SAS / H.Koenig Europe - 8 rue Marc Seguin, 77290 Mitry-Mory, France www.hkoenig.com - https://sac.hkoenig.com - Tél: +33 1 64 67 00 05ITALIANO
Informazioni importanti sulla sicurezza
Le seguenti precauzioni di sicurezza devono essere sempre seguite per ridurre il rischio di scosse elettriche, lesioni personali o incendi. È importante leggere tutte le istruzioni prima di utilizzare il prodotto ed è necessario conservarle per riferimento futuro o nuovi utenti. \- Questo apparecchio può essere usato da persone con ridotte capacità fisiche, sensoriali o mentali o con mancanza di esperienza o conoscenza, a condizione che siano sorvegliate o istruite sull'uso sicuro dell'apparecchio e che comprendano pienamente i potenziali pericoli. \- Questo apparecchio non deve essere utilizzato da bambini. Mantenere l'apparecchio e il cavo fuori dalla portata dei bambini. \- Attenzione: Possibilità di lesioni da uso improprio. Si deve fare attenzione quando si maneggiano le lame taglienti durante lo svuotamento del recipiente e durante la pulizia. \- Spegnere l'apparecchio e scollegare dall'alimentazione prima di cambiare gli accessori o prima di avvicinarsi alle parti in movimento durante il funzionamento. Scollegare l'apparecchio dalla rete se viene lasciato incustodito e prima del montaggio, lo smontaggio e la pulizia. \- Se il cavo di alimentazione è danneggiato, esso deve essere sostituito dal produttore, dal suo servizio assistenza o da personale qualificato, per evitare rischi. \- Accessori, diversi da quelli forniti con l'apparecchio, devono includere le istruzioni per il loro uso sicuro. \- ATTENZIONE: non rimuovere il coperchio mentre l'acqua bolle. Non impostare una velocità suoeriore al livello 4 quando la temperatura è superiore a 90 gradi centigradi. \- L'apparecchio non deve essere immerse in acqua o altri liquidi. \- Questo apparecchio è destinato all'uso in ambienti domestici e simili, come : \- cucine di negozi, uffici e altri ambienti di lavoro \- in case coloniche \- in alberghi, motel e altre aree residenziali \- nelle camere degli ospiti. \- Si prega di posizionare l'unità su una superficie piana e stabile che non si surriscalda e assicurarne la distanza di sicurezza dal bordo per evitare che l'apparecchio possa cadere. Quando è usato per impastare o sminuzzare, l'unità può muoversi a causa delle vibrazioni. Quindi per favore non utilizzarla senza super-visione in modo da evitare l'apparecchiatura possa cadere. \- Si prega di staccare la spina quando si pulisce l'apparecchio o lo si ripone per un lungo periodo di tempo. \- Controllare regolarmente se il corpo principale, la brocca, la vaporiera o altri componenti sono danneggiati. Le parti danneggiate possono diminuire la sicurezza d'uso. Se di individuano alterazioni, si prega di smettere di usare l'apparecchio e rivolgersi al centro di assistenza post-vendita. \- Se l'apparecchio si arresta improvvisamente o si verifica un qualsiasi malfunzionamento, spegnere l'appaecchio, scollegare l'alimentazione, ed inviare immediatamente al centro assistenza. Cercare una consulenza professionale per le riparazioni dei guasti. \- La coppa di misurazione è l'unica parte che può essere utilizzata per coprire il foro rotondo nel coperchio. Si prega di non utilizzare un panno o cose simili per coprire il buco. - Non toccare il bordo delle lame. Si prega di prestare molta attenzione e tenere la parte superiore quando si monta o si rimuove la lama. - Prestare attenzione al segno di capacità massima sulla coppa. • Non aprire il coperchio fino a quando il cibo nella brocca non smette di ruotare. - Prestare attenzione al cibo ad alta temperatura quando si apre il coperchio brocca. Si prega di mettere il misurino nel foro del coperchio della brocca in modo corretto durante l'elaborazione degli alimenti. - Non toccare la brocca durante l'elaborazione di cibi caldi oltre I 60° C. • Assicurarsi che la vaporiera e la brocca sono collegati bene quando si utilizza il vapore. - Préstare attenzione alla fuoriuscita di vapore d'attraverso il coperchio superiore o dai lati. - Durante il funzionamento, non toccare nessuna parte della vaporiera, tranne le maniglie. - Non utilizzare la vaporiera senza che il coperchio sia al suo posto. - Quando si apre il coperchio della vaporiera, fare attenzione a non scottarsi con il vapore. - Quando si utilizza l'impostazione vapore, fare attenzione al vapore che potrebbe uscire attraverso la bocca della brocca quando spostare il vapore bollente. • Assicuratei sempre che il foro di sfiato sul coperchio vapore sia sbloccato, altrimenti il vapore potrebbe venire fuori da qualche altra parte. - Dopo l'uso si prega di posizionare l'apparecchio e gli accessori caldi fuori dalla portata dei bambini e mettere in guardia i bambini sul fatto che l'unità si surriscalda e di non toccarla. - La fuoriuscita di cibo: Assicurarsi che l'anello di tenuta della lama sia posizionato bene e che la lama sia saldamente fissata dalla staffa di fissaggio sul fondo. Il montaggio non corretto potrebbe causare trafilamenti cibo che potrebbero danneggiare l'apparecchio. - Danni da scarsa ventilazione: Assicurarsi che le aperture sul retro del corpo principale non siano bloccati da qualsiasi oggetto, oppure l'apparecchio potrebbe danneggiarsi. - La brocca e tutti gli accessori devono essere utilizzati solo con il supporto fornito. Non utilizzare parti non originali su questo pparecchio. - Prestare attenzione ad evitare perdite sul connettore. - La brocca sarà ancora calda a causa di calore residuo dopo l'uso, fare attenzione a non scottarsi. - Questo apparecchio può essere utilizzato da bambini di almeno 8 anni di età, purché siano controllati e gli siano state date istruzioni su come usare l'apparecchio in modo sicuro e sono pienamente consapevoli dei pericoli. - La pulizia e la manutenzione non devono essere eseguite da bambini a meno che non abbiano almeno 8 anni di età e siano sorvegliati da un adulto. - Mantenere l'apparecchio e il cavo di alimentazione fuori dalla portata dei bambini sotto gli 8 anni di età. - Quando si utilizzano apparecchiature elettriche, devono sempre essere prese misure di sicurezza per prevenire il rischio di incendi, scosse elettriche e o lesioni in caso di uso improprio. • Assicurarsi che la tensione sulla targhetta corrisponda alla tensione principale del vostro impianto elettrico. Se così non fosse, contattare il rivenditore e non collegare l'unità - Non lasciare mai incustodita l'unità mentre è in funzione. • Non aprire mai l'apparecchio stando sulla parte anteriore, posizionarsi sempre un po' di lato per evitare di scottarsi con il vapore. - Il dispositivo non deve essere utilizzato se è stato fatto cadere, ha danni evidenti o se ha perdite. • Non utilizzare l'apparecchio se ha il cavo o la spina danneggiati, se non funziona correttamente o se è stato danneggiato o è caduto. Se il cavo di alimentazione è danneggiato, esso deve essere sostituito dal costruttore, da un suo agente di servizio o da una persona qualificata per evitare rischi.CONTROLLO DEL CONTENUTO
Quando si apre la scatola di imballaggio, togliere tutti gli accessori e verificarli in base alla lista dei componenti. I component sono i seguenti: 1 Corpo principale 7 Coperchio Vaporiera 2 Manico brocca 8 Cestello 3 Coperchio Brocca 9 Farfalla 4 Misurino 10 Spatola 5 Vaporiera piccola 11 Ricettario 6 Vaporiera Grande ACCESSORI
Assemblaggio brocca:
Su un lato della brocca sono segnate le capacità. La capacità massima della brocca è 2L.  Avviso La quantità di cibo nella brocca non deve superare 2.0L, in caso contrario il cibo potrebbe fuoriuscire e causare pericolo. Mettere il coperchio sulla brocca, premi l'interruttore di sicurezza, ruotare il coperchio in senso orario per fissarlo sulla brocca, in caso contrario il motore non può essere avviato. (Premere sempre prima l'interruttore di sicurezza per bloccare o aprire il coperchio) natural_image
Three-step diagram showing mechanical component assembly (no text or symbols)natural_image
Line drawings of two kitchen appliances: a blender and a toaster, both with digital display cases (no text or symbols)Montaggio lama:
Fissare l'anello di tenuta sulla lama, posizionarlo attraverso il foro sul fondo della brocca, tenere saldamente la metà superiore della lama e rovesciare il fondo, utilizzare la staffa di fissaggio per fissare la lama ruotando in senso orario. Effettuare la stessa procedura in modo inverso per rimuoverlo dalla brocca. Non dimenticate l'anello di tenuta della lama tra la lama e il fondo brocca. natural_image
Technical line drawing of a mechanical component with four blades (no text or symbols)natural_image
Technical diagram of a mechanical component with no visible text or symbolsnatural_image
Technical line drawing of a mechanical component with no visible text or symbolsnatural_image
Line drawing of a hand holding a circular mechanical component with four blades (no text or symbols)Avviso
- La lama è molto affilata. Si prega di avvitare la lama utilizzando un panno in fase di montaggio o rimozione. - Si prega di tenere la lama saldamente ed estrarla con attenzione in modo da non farla scivolare causano pericolo. • Assicurarsi che staffa e l'anello di tenuta siano a posto e blocca strettamente con lama montaggio. Se l'anello di tenuta non è ben posizionato, il cibo potrebbe fuoriuscire causando danni all'apparecchio.Montaggio impastatrice:
Rimuovere la lama, fissare l'impastatrice all'albero nello stesso modo in cui fissa la lama. Può essere usato per impastare, mecolare e miscelare senza tagliare il cibo.  natural_image
Diagram of a mechanical or electrical component with concentric rings and directional arrows indicating motion (no text or symbols)natural_image
Cross-sectional diagram of a mechanical component with no visible text or symbolsAvviso
• Non utilizzarlo per la velocità sueriori a 3, altrimenti causerà una eccessiva e rischiosa vibrazione. - Dato che la distanza minima tra l'impastatrice e la parete della brocca è di soltanto 1cm a volte il cibo può incastrarsi e il motore potrebbe fermarsi per auto protezione. Utilizzare la spatola per miscelare e rimuovere il cibo bloccato per far funzionare di nuovo l'apparecchio. • Assicurarsi che staffa e l'anello di tenuta siano a posto e bloccati strettamente con lama montaggio. Se l'anello di tenuta non è ben posizionato, il cibo potrebbe fuoriuscire causando danni all'apparecchio.Misurino:
\- Il misurino ha molte funzioni: una parte del coperchio per evitare di perdere il calore o schizzi; una tazza di misurazione per misurare gli ingredienti con 150ml di capacità. \- Mettere il misurino nel foro del coperchio, ruotarlo in senso orario per fissarlo sul coperchio. natural_image
Simple line drawing of a cylindrical object with a flared base (no text or symbols)natural_image
Technical line drawing of a mechanical component with concentric circles and a handle (no text or symbols)Avviso
\- Il misurino è l'unica parte che può essere utilizzata per coprire il foro rotondo del coperchio \- Non coprire il buco con qualsiasi altrpo oggetto per evitare schizzi di cibo pericolosi.Spatola:
\- La spatola è l'unico componente da utilizzare per raschiare il cibo nella brocca. Gli altri oggetti possono danneggiare il rivestimento antiaderente all'interno della brocca. • C'è una piccola scanalatura sul manico della spatola, utilizzarla per tenere il cestello. natural_image
Technical line drawings of three mechanical components: a tool, a fan, and a brush (no text or symbols)Avviso
• Non usarlo per mescolare quando la lama è in funzione. • Non usare la spatola se la farfalla è al suo interno. • Fissare saldamente la maniglia con il cestello prima di sollevarlo.Filtro a cestello:
Il cestello ha molte funzioni: - Setaccio. Filtro per succhi di frutta e verdura. Dopo aver macinato o aver estratto il succo di frutta con l'apparecchio, inserire il cestello nella brocca per facilitare l'uscita del succo • Cottura di cibi morbidi come la pasta o tagliatelle; • Cucinare piatti come il riso e le patate. natural_image
Technical line drawing of a mechanical component with two views (top and side), no text or symbols present.Avviso
• Utilizzare il manico della la spatola per estrarre il cestello dalla brocca. - Se si vuole diminuire l'acqua presente nel cibo, come ad esempio i pomodori, togliere il misurino e coprire con il cestello. In questo modo l'acqua può essere facilmente rimossa.Farfalla:
• Installata sulla lama, la farfalla può aiutare a mescolare il cibo, ma impedisce il taglio delle lame, previene che il cibo si appiccichi e ne consente la miscelazione. • Fissare la farfalla sulla lama, e premere con forza sufficiente per fissarla correttamente, ruotare la farfalla in senso antiorario per bloccarla sulla lama. natural_image
Technical line drawing of a mechanical component with no visible text or symbolsnatural_image
Line drawing of a mechanical device with a central tower and two adjacent panels (no text or symbols)Avviso
• Non avviare l'apparecchio fino a quando la farfalle non è fissata in posizione. • Non usare una velocità superiore a 4 quando si utilizza farfalla. • Non usare la spatola quando si utilizzala farfalla. - Non aggiungere gli ingredienti nella brocca quando l'apparecchio è in funzione con la farfalla, altrimenti la farfalla potrebbe danneggiarsi o bloccarsi.Montaggio vaporiera:
Ci sono tre parti della vaporiera: vaporiera piccolo. Vaporiera grande e coperchio. Il coperchio può essere usato sia sulla vaporiera piccolo che sulla grande, e la vaposiera grande poggiata su euella piccolo. Togliere il coperchio brocca, poggiare la vaporiera sulla brocca. natural_image
Three product line drawings: a microwave oven, a closed air fryer with lid, and a modern K-froder (no text or symbols)Avviso
- Si prega di assicurarsi che il coperchio della vaporiera sia chiuso prima della cottura a vapore. • La caporiera non può essere usata nel forno a microonde o altri apparecchi elettrici. - Non toccare o avvicinarsi ai fori del coperchio della vaporiera per evitare ferite da vapore caldo. - Non coprire o bloccare i fori del coperchio, altrimenti il vapore potrebbe uscire pericolosamente dal bordo o da altri posti.ISTRUZIONI PER L'USO
Nella fase iniziale di utilizzo di questa unità, ci sarà odore un odore proveniente dal motore, il che è un fenomeno normale. Dopo un certo periodo di tempo, questo tipo odore scomparirà. \- Si prega di posizionare l'apparecchio su una superfice pulita, stabile e piana. Non metterlo troppo vicino al bordo, nn posizionarlo all'interno di mobiletti o su staffe di sostegno. - È conveniente posizionare l'apparecchio su un posto fisso a vosta scelta. • Si prega di pulire a fondo l'apparecchio prima di utilizzarlo. • Il “Bip” segnala che il pulsante è stato attivato.   STOP / ANNULLA
\- Collegare liapparecchio, accendere l'interruttore sul retro, la macchina emette un segnale acustico, ma il display rimane spento. natural_image
Pure technical line drawing of a mechanical joint or fastener assembly (no text or symbols)Manopola (AVVIO / PAUSA)
\- Dopo aver selezionato l'impostazione o il programma desiderato, premere questo tasto per avviare l'apparecchio immediatamente. \- Premendo questo pulsante durante il processo di lavoro, l'apparecchio va in pausa, e sul led LCD appare . (Paus E questo momento è possibile aprire il coperchio, togliere la brocca, ecc Ma deve essere fissata bene prima di riavviare l'apparecchio). Premere di nuovo per ricominciare. \- La macchina si spegne automaticamente dopo 10 minuti senza funzionamento in stato di PAUSA. - C'è anche una manopola per l'impostazione del timer, velocità, temperatura, potenza termica, che aumenta quando si ruota la manopola in senso orario, e diminuisce quando si ruota la manopola in senso antiorario, o per scegliere tra i 15 programmi automatici. TIMER
\- I simboli sul dispaly LCD, 88:88:88 Significa ora: minuti: secondi. \- Premete il pulsante timer e per far lampeggiare il timer sul display LCD; Ruotare la manopola per regolare i minuti. Premere nuovamente il pulsante LCD, ruotare la manopola per regolare i secondi. Premetr di nuovo, il pulsante LCD, ruotare la manopola per regolare le ore da 1 a 12h. \- Premere il timer durante il processo di lavoro, la macchina inizia il conteggio direttamente. \- Max 60min dalla regolazione manuale; 3h max sotto impostazione fai da te. Il limite del timer di ciascun programma è riportato nel capitolo "MENU" che troverete di seguito.   Funzione programmabile ☑ Tenere premuto il pulsante dell'ora per ⏻ 3 secondi per accedere alla modalità di programmazione. L' icona dell' orologio e l' icona della programmazione inizieranno a lampeggiare. Procedete nello stesso modo che per regolare l' ora, potrete scegliere la durata da 30 minuti a 12 ore. La modalità programmabile puo usarsi solamente con DIY e MENU. Per prima cosa bisognerá quindi selezionare DIY o MENU, premete sulla manopola ed il tempo iniziera a scorrere. Premere il pulsante di ripristino per annullare. VELOCITÀ
\- Premere questo pulsante in stand-by o durante il processo di lavoro (ad eccezione di alcuni programmi con blocco della regolazione della velocità), l'apparecchio entra in modalità 88 impostazione della velocità. Il simbolo + lampeggia sul display LCD, ora è possibile regolare la velocità. Ruotare la manopola per selezionare la velocità desiderata. \- Le velocità vanno da livello 1 a 10. - Premere questo pulsante nel in fase di riscaldamento, se la temperatura impostata o la temperatura effettiva è superiore a 60^ , La velocità può essere impostato soltanto da 1 a 4. Se si è operato ad alta velocità, si scenderà a velocità 4 automaticamente. \- Vi è un trasferimento di velocità sulla struttura, quindi è normale sentire del rumore prima che il motore inizi a lavorare, o aumentando la velocità tra il livello 5 e 6 livello. - Per schiacciare o tagliare cibi duri o una grande quantità di cibo, si suggerisce di selezionare la velocità 5 e poi girare a velocità 10, per evitare vibrazioni e ottenere prestazioni perfette. - Si prega di non usare la velocità 8,9,10 più di 5 minuti ogni volta; Si prega di non utilizzare la velocità 5,6,7 oltre 10 minuti ogni volta. TEMPERATURA
- Premere questo pulsante in stand-by o durante il processo di riscaldamento (ad eccezione di alcuni programmi con blocco della regolazione della temperatura), l'apparecchio entra in modalità di impostazione della temperatura. Ilsimbolo lampeggia sul display LCD, ora è possibile regolare la temperatura. Ruotare la manopola per selezionare la temperatura desiderata. • Range di temperatura: 37-120°C POTENZA TERMICA
\- Premere questo pulsante in stand-by o durante il processo di riscaldamento (ad eccezione di alcuni programmi cn blocco della regolazione della potenza termica), l'apparecchio entra in modalità di impostazione della temperatura. Il simbolo lampeggia sul display LCD, or ail calore è regolabile. Ruotare la manopola per selezionare la potenza di cottura desiderata. - La gamma di potenza termica va dal livello 1 al10. - Per del cibo appiccicoso, si suggerisce di selezionare una potenza di fuoco basao per evitare che si bruci sul fondo. - Se il volume cibo è piccolo e richiede una temperatura precisa, si suggerisce di selezionare una potenza termica bassa. - Una bassa potenza darà un controllo più preciso; Ad alta potenza si riscalda più velocemente. - Non funzionerà se si seleziona solo la potenza di calore, senza la temperatura selezionata. Si consiglia di utilizzare l'impostazione predefinita quando si scelgono diversi livelli di temperatura. AUTOPULIZIA
- Questo programma è per la pulizia dopo l'uso. - Aggiungere acqua da 500 ml a 1 litro. - Un po' di detergente sarà utile • L'intero processo dura circa 10 minuti TURBO
\- Tenere premuto il pulsante in modo qualità standby, per la velocità massima, rilasciare per arrestare immediatamente l'apparecchio - Quando la temperatura nella brocca è superiore a 60°C, la modalità PULSE non può essere utilizzata, e lo schermo mostrerà E11. \- Vi è un trasferimento di velocità sulla struttura, quindi è normale sentire rumore prima che il motore inizi a lavorare al primo impulso. \- Il tempo massimo di funzionamento per la modalità Pulse è di 3 minuti e poi è necessario attendere per 10 minuti MENÙ
\- Questo pulsante è quello per scegliere tra i 10 programmi automatici           • COLTELLO (Hächer) - STUPATO (MIJOTE2) - VAPORE (VAPEUR) • ZUPPA DENSA (VELOUTE) • ZUPPA VELOCE (SOUPE) • SALSA (SAUCE) • IMPASTARE(Pétrir) • RISOTTO (Rice) - SMOOTHIE - Yogurt (YAOURT) \- Premendo questo tasto in modalità standby, il segnale SMOOTHIE sul display LCD inizia a lampeggiare, ruotare la manopola per scegliere il programma desiderato. • \- Per i programmi QUICK SOUP, THICK SOUP, STIR, STEW, RICE, quando il processo è completato, il display mostrerà la dicitura "End". Se nessuna operazione viene effettuata entro 10 minuti, l'apparecchio si spegne automaticamente per mantenere la preparazione calda per 12 ore fino all'arresto manuale. Alcune impostazione di default del programma sono regolabili, ed è possibile vederli sullo schermo; alcune di esse sono bloccate e sullo schermo appare il simbolo "-"| Programmi | Impostazione predefinita | Impostazioni | Suggerimenti |
| SMINUZZARE | * Velocità: 5Temperatura *: 0 *Potenza Termica: 0* Timer: 1 min | * Per schiacciare, ma non frullare. Tempo regolabile da 1s-5min a seconda della consistenza desiderata. * Se lasciata inattiva per 10 minuti dopo il completamento del programma, la macchina si spegne automaticamente | * La dimensione suggerita per tritare per gli ingredienti duri come la carota o la carne è di1-2cm. * Se è necessario elaborare il cibo il più sottile possibile, è possibile utilizzare SMOOTHIE |
| STUFATO | Fase 1: * Velocità: 0* temperautra:100°C* Potenza Termica:10 * Timer: nessun limite, fino adebollizioneFase 2: * Velocità: 0Temperatura*: 90-95°C* Potenza termica:può cambiareautomaticamente secondo il volume,la temperatura e ilcibo * Timer: 3h | * Predefinito timer 3h, regolabileda * 1-12h Se lasciata inattiva per 10 minuti dopo ilcompletamento del programma,la macchina entreràautomaticamente in modalità'caldo'. | *Cottura lenta |
| VAPORE | * Velocità: 0 *Temperatura: 120°C* Potenza termica:10 * Timer: 20min | * Tempo regolabile da * 15-60mSe lasciata inattiva per 10minuti dopo il completamentodel programma, la macchinacentrerà automaticamente inmodalità 'caldo'. | * 500 g di acqua perogni 30 minuti dicottura a vapore *20min verdure; carne30min |
| ZUPPA DENSA | Fase 1: * Velocità: 0Temperatura*: 120* Potenza termica:10 * Timer: Fino adebollizioneFase 2: * Velocità: 0* Temperatura:100°C* Potenza termica: 4* Timer: 29.5minFase 3: * Velocità: 0Temperatura*: 0°C* Potenza termica: 0* Timer: ilraffreddamento a80°CFase 4: * Velocità: lenta 6-10 * Temperatura: 0°C* Potenza termica: 0* Timer: 1 min | * Adatto per la zuppa di carne,per tagliare e poi cucinare emescolare. Timer regolabile da15-60m. * Se lasciata inattivaper 10 minuti dopo ilcompletamento del programma,la macchina entreràautomaticamente in modalità'caldo'. | * * La dimensionesuggerita per tritareper gli ingredienti duricome la carota o lacarne è di1-2cm. * èconsigliabilemettere inpausa e aggiungere lafarfalla dopo la fase 1. |
| ZUPPA VELOCE | Fase 1: * Velocità: 10 Temperatura*: 0* Potenza Termica: 0* Timer: 30sFase 2: * Velocità: 2* Temperatura: 120°C* Potenza Termica: 10* Timer: Fino a ebollizioneFase 3: * Velocità: 2* Temperatura: 100°C* Potenza Termica: 10* Timer: 19.5min | * Adatto per minestre di verdura, tagliozzare e poi cucinare e mescolare. Timer regolabile da 15-60m. * Se lasciata inattiva per 10 minuti dopo il completamento del programma, la macchina entrerà automaticamente in modalità 'caldo'. | * La dimensione suggerita per tritare per gli ingredienti duri come la carota o la carne è di1-2cm. * è consigliabilemettere in pausa e aggiungere la farfalla dopo la fase 1 |
| MESCOLARE | * Velocità: 2* Temperatura: 100°C* Potenza Termica: 10* Timer: 30min | * Velocità regolabile da livello 0-3; * Temperatura regolabile 90-120°C. * Tempo regolabile da * 5-60m Se lasciata inattiva per 10 minuti dopo il completamento del programma, la macchina entrerà automaticamente in modalità 'caldo'. | * Utilizzare farfalla o la lama impastatrice |
| IMPASTARE | Fase 1: * Velocità: 3* Temperatura: 0* Potenza Termica: 0* Timer: 3minFase 2: * Velocità: 2* Temperatura: 0* Potenza Termica: 0* Timer: 7 min | * Velocità regolabile da livello 2-3; * Temperatura regolabile a 0 o 37°C per la diffusione. * Tempo regolabile da * 3-20m Se lasciata inattiao per 10 minuti dopo il completamento del programma, la macchina si spegne automaticamente | * Impasto per il pane: acqua 330g + 500g di farina + altri ingredienti; 10min impastare con impostazione predefinita * Impasto per la tagliatelle: acqua 200g + 400g di farina; impastare 3min alla velocità 2 *Settare la temperatura a 37°C per la stesura, e se non si stende abbastanza, impostare 37°C per altri 30min senza velocità |
| RISOTTO | Passo 1:* Velocità: 0 *temperautre: 100°C* Potenza Termica:6 * Timer: Fino a ebollizionePasso 2:* Velocità: 1 *temperautre: 965°C* Potenza termica: 4* Timer: 18 minpotenza termica & temporizzatore: possono essere regolati automaticamente a seconda della temperatura e del volume | *Tutti * non regolabiliSe lasciata inattiva per 10 minuti dopo il completamento del programma, la macchina entrerà automaticamente in modalità 'caldo'. | * Volume consigliato (max): 500g di riso + 800g di acqua, RICE gestito da impostazione predefinita. . Il riso frma una crosta sul fondo * o usare la cottura a vapore, impostazione: riso 400g nel cestello, 2L di acqua, scegliere BOIL; versare un pò d'acqua lasciando lo spazio per 1 litro, scegliere la cottura a vapore per 20 minuti |
| SMOOTHIE | * Velocità: 10Temperatura *: 0 *Potenza Termica: 0* Timer: 30s | *Tutte le impostazioni non sono regolabili, eseguire una volta di più, fino ad ottenere la consistenza desiderata. * Se lasciata inattiva per 10 minuti dopo il completamento del programma, la macchina si spegne automaticamente | La dimensione suggerita per tritare per gli ingredienti duri come la carota o la carne è di1-2cm |
| YOGURT | * Velocità: 1 l primi primo 30 minuti, e poi stop *Temperatura: 37-39°C* Potenza Termica:1 * Timer: 6h | * Tempo regolabile da * 3-12hSe lasciata inattiva per 10 minuti dopo il completamento del programma, la macchina si spegne automaticamente | * Volume consigliato: 1 tazza di yogurt + 1L latte fresco + zucchero, 6-12h a seconda dellaconsistenzadesiderata |
| Utensili | Immagine | Funzione | Velocità | Capacità | tempo di funzionamento |
| Lama tagliente | | Taglia ma non frulla | 5 | 2L max, il cibo deve essere tagliato in pezzi da 1-2cm prima del funzionamento | 1 minuto |
| Taglia il più fine possibile | 10 | 2L max, il cibo deve essere tagliato in pezzi da 1-2cm prima del funzionamento | 1 minuto | ||
| Lama impastatrice | | Impasto per pasta, pane, pizza, ecc | 2-3 | 800g di farina max | 5-10 |
| Impasto per tagliatelle | 2 | 500g di farina max | 3min | ||
| Farfalla | | Agitare | 1-3 | 2L max | 30 minuti |
| Montare albumi o panna | 4 | 2L max | 10 minuti | ||
| Vaporiera | | Verdure a vapore | N / A | 3.5L max | 15 minuti |
| Carne di vapore | N / A | 3.5L max | 20-30 minuti |
RISOLUZIONE DEI PROBLEMI
\- Le informazioni di errore qui di seguito appaiono sullo schermo normalmente. Se il problema persiste dopo aver agito secondo la soluzione qui di seguito, si prega di contattare il nostro centro di assistenza clienti.| Codice errore | Descrizione | Possibili ragioni | Soluzione |
| E1 | Interruttore di sicurezza non fissato | Brocca o coperchio brocca non è ben fissati. | Rimontare il coperchio brocca e la brocca, assicurarsi che tutte le parti siano assemblate correttamente e strettamente |
| E2 | Sensore di temperatura mancante | La brocca non è a posto, o il collegamento del sensore di temperatura alla base brocca è danneggiato | Rimontare la brocca e assicurarsi che sia ben fissata |
| E3 | Motore bloccato | Brocca eccessivamente carica | Diminuire il volume del cibo nella brocca, o tagliare il cibo in piccoli pezzi e riavviare la macchina. |
| E4 | Temperatura troppo elevata | Niente cibo nella brocca, o molto poco cibo con una regolazione temperatura elevata per troppo tempo. | Aggiungere il cibo nella brocca |
| E5 | Temperatura motore troppo elevata | La macchina sta funionando a carico elevato per troppo tempo | Arrestare e lasciare che la macchina si raffreddi prima di riavviare |
| E7 | Fallimento di trasferimento Velocità | Velocità di passaggio da livello basso (1-5) ad alto (6-10) bloccata | Rimuovere la brocca, ruotare la frizione inferiore manualmente, rifissare la brocca e riavviare. |
| E8 | Motore NTC mancante | Collegamento del sensore di temperatura del motore allentato o danneggiati | Smettere di usare e inviare al centro di assistenza tecnica per risolvere il problema |
| E11 | Impossibile utilizzare Pulse | La temperatura nella brocca supera il 90°C | Raffreddare il cibo eattivare la modalità Pulse di nuovo, o utilizzare una velocità inferiore a 4 |
Pulizia dell'apparecchio
1. Non lavare nessuna parte dell'apparecchio in lavastoviglie. Lavare sempre la brocca a fondo dopo ogni uso, o se non è stata utilizzata per un periodo prolungato. 2. Scollegare la spina dalla presa di corrente e lasciare raffreddare l'unità prima della pulizia. 3. Lavare la pentola estraibile con acqua calda e sapone. Risciacquare e asciugare accuratamente. 4. Pulire corpo principale con un panno umido. Se resti di residui di cibo, inumidire un panno con acqua calda e sapone prima di pulire. Non immergere MAI il corpo principale in acqua o altro liquido. Pulire la pentola se necessario per rimuovere qualsiasi prodotto alimentare. 5. Al fine di mantenere elevate le prestazioni dell'apparecchio, Il fondo della pentola di cottura amovibile deve essere controllato e pulito, se necessario, dopo ogni uso. Pulire con un panno morbido inumidito e asciugare prima dell'uso. 6. Se l'apparecchio non viene utilizzato per un certo periodo di tempo, si prega di staccare la spina e tenere in luogo fresco e pulito. TROVA TUTTE LE NOSTRE RICETTE:
http://dl.hkoenig.com/SiteHkoenig/Livrederecettes\_HK8.pdf Oppure scansiona il codice QR: GARANZIA
Il periodo di garanzia per i nostri prodotti è di 2 anni, se non diversamente stabilito dalla legge, a partire dalla data di acquisto iniziale o di consegna. Se avete problemi o domande, potete facilmente accedere alle nostre pagine di aiuto, consigli per la risoluzione dei problemi, FAQ e manuali d'uso sul nostro sito post-vendita: https://sav.hkoenig.com. Digitando il nome di riferimento del tuo dispositivo nella barra di ricerca, puoi accedere a tutto il supporto online disponibile, progettato per soddisfare al meglio le tue esigenze. Se ancora non riesci a trovare una risposta alla tua domanda o al tuo problema, allora clicca su "La risposta ha risolto il tuo problema? Questo vi porterà al modulo di richiesta di supporto post-vendita, che potete completare per convalidare la vostra richiesta e ottenere aiuto.CONDIZIONI DI GARANZIA
La garanzia copre tutti i guasti derivanti da un uso normale, in conformità con gli usi e le specifiche del manuale utente. Questa garanzia non si applica a problemi di imballaggio o di trasporto durante la spedizione del prodotto da parte del proprietario. Non include inoltre la normale usura del prodotto, né la manutenzione o la sostituzione delle parti di consumo.ESCLUSIONE DELLA GARANZIA
- Accessori e parti soggette a usura (\*). - Normale manutenzione dell'apparecchio. - Tutti i guasti derivanti da un uso improprio (urti, mancato rispetto delle raccomandazioni sull'alimentazione, cattive condizioni d'uso, ecc.), da una manutenzione inadeguata o da un uso improprio dell'apparecchio, nonché dall'uso di accessori inadeguati. - Danni di origine esterna: incendio, danni d'acqua, sovratensione elettrica, ecc. - Qualsiasi attrezzatura che sia stata smontata, anche parzialmente, da persone diverse da quelle autorizzate a farlo (in particolare l'utente). - Prodotti per i quali il numero di serie è mancante, danneggiato o illeggibile, il che non permetterebbe la sua identificazione. - Prodotti soggetti a noleggio, dimostrazione o esposizione. (\*) Alcune parti del suo apparecchio, note come parti soggette a usura o materiali di consumo, si deteriorano con il tempo e la frequenza d'uso del suo apparecchio. Questa usura è normale, ma può essere accentuata da cattive condizioni d'uso o di manutenzione del vostro apparecchio. Queste parti non sono quindi coperte dalla garanzia. Anche gli accessori forniti con l'apparecchio sono esclusi dalla garanzia. Non possono essere scambiati o rimborsati. Tuttavia, alcuni accessori possono essere acquistati direttamente dal nostro sito web: https://sav.hkoenig.com/. AMBIENTE ATTENZIONE:  Corretto smaltimento del prodotto Questo simbolo indica che il prodotto non deve essere smaltito con altri rifiuti domestici in tutta l'UE. Per evitare eventuali danni all'ambiente o alla salute umana causati dallo smaltimento dei rifiuti, riciclare in maniera responsabile per favorire il riutilizzo sostenibile delle risorse materiali. Per consegnare il dispositivo usato, utilizzare i sistemi di raccolta o contattare il rivenditore presso il quale il prodotto è stato acquistato. I rivenditori possono ritirare questo prodotto per riciclarlo in totale sicurezza ambientale Adeva SAS / H.Koenig Europe - 8 rue Marc Seguin, 77290 Mitry-Mory, France www.hkoenig.com - https://assistenza.hkoenig.com - Tél: +33 1 64 67 00 05PORTUGUES
Instruções Importantes de Segurança
As seguintes precauções dessegurança devem ser sempre seguidas, para reduzir o risco de choques elétricos, ferimentos pessoais ou incêndio. E importante ler cuidadosamente todas estas instruções de utilizar o produto e guardá-las para referência futura ou para novos utilizadores. - Este equipamento pode ser utilizado por pessoas com capacidades físicas, sensoriais ou mentais reduzidas, ou com falta de experiência ou conhecimento, desde que sejam supervisionadas ou instruídas na utilização segura do equipamento e compreendam plenamente os perigos potenciais. - Este aparelho não deve ser utilizado pelas crianças. Mantenha o aparelho e o cabo de alimentação fora do alcance das crianças. - Aviso: lesões potências por utilização indevida. Deve ter muito cuidado ao manusear as lâminas cortantes afiadas quando vazar o recipiente e durante a limpeza. - Desligue o aparelho no botão e da fonte de alimentação antes de trocar acessórios ou antes de se aproximar das peças que se movimentam em utilização. Desligue sempre o aparelho da fonte de alimentação se não estiver a utilizá-lo e antes da montagem, desmontagem ou limpeza. - Se o cabo de alimentação estiver danificado, deve ser substituído pelo fabricante, fornecedor de serviços ou pessoas com qualificação semelhante, com a finalidade de evitar riscos. - Os acessórios, outros que não os fornecidos com o aparelho, devem incluir instruções para a sua utilização segura. - AVISO: Não remova a tampa enquanto a água estiver a ferver. Não defina a velocidade acima do nível 4 quando a temperatura for superior a 90 graus centígrados. - O aparelho não deve ser submerso. - Este aparelho destina-se a ser utilizado em aplicações domésticas e similares, tais como : - áreas de cozinha em lojas, escritórios e outros ambientes de trabalho - casas de campo - em hotéis, motéis e outros ambientes residenciais - quartos de hóspedes. \- Por favor, coloque a unidade numa mesa estável e plana que não fique quente e verifique se está a uma distância segura da orla da mesa para evitar que o aparelho caia. Quando o aparelho é utilizado para amassar a massa ou para cortar alimentos, a unidade pode mover-se devido às vibrações. Portanto, não utilize o aparelho sem a supervisão de pessoas, para evitar que o equipamento caia no chão. \- Por favor, remova a ficha quando limpar o aparelho ou quando o guardar por um longo período de tempo. \- Verifique regularmente se a estrutura principal, o recipiente, o vaporizador ou outros componentes estão ou não danificados. As peças danificadas diminuirão a segurança da utilização do aparelho. Quando encontrar algo errado, por favor pare de utilizar o aparelho e entre em contato com o centro de serviços pós-venda. \- Se o aparelho parar inesperadamente ou parecer apresentar um mau funcionamento, desligue a fonte de alimentação, remova a ficha da tomada elétrica e pare de o utilizar imediatamente. Procure aconselhamento profissional para corrigir a falha ou para fazerem reparações. \- O copo de medida é a única peça que pode ser usada para tapar o orifício redondo na tampa do recipiente. Por favor, não utilize um pano ou coisas semelhantes para tapar o orifício. \- Não toque na orla das lâminas. Por favor, tenha cuidado e segure a parte superior quando fizer a montagem ou a remoção das lâminas. \- Preste atenção à marca de capacidade no recipiente de cozinhar. \- Abra a tampa quando os alimentos que se encontram dentro do recipiente de cozinhar pararem de girar. \- Preste atenção aos alimentos de alta temperatura quando abrir a tampa do recipiente de cozinhar. Por favor, coloque o copo de medida no orifício da tampa do recipiente corretamente quando processar alimentos. \- Não toque no recipiente de cozinhar quando processar alimentos quentes a mais de 60°C. \- Certifique-se de que o vaporizador e o recipiente de cozinhar estão bem encaixados quando estiver a utilizar o vaporizador. \- Preste atenção para que o vapor saia através da parte superior ou pelas laterais da tampa. \- Quando em funcionamento, não toque em nenhuma parte do vaporizador, exceto nas pegas. \- Não utilize o vaporizador sem a tampa correspondente no devido lugar. \- Quando abrir a tampa do vaporizador, tenha cuidado para não se queimar com o vapor. \- Quando utilizar as configurações de vapor e fervura, preste atenção porque o vapor sairá através da boca do recipiente de cozinhar quando mover o vaporizador. \- Verifique constantemente se o orifício de ventilação na tampa do vaporizador está desbloqueado, caso contrário o vapor pode estar a sair por outro lado qualquer. \- Por favor, coloque o aparelho e as peças quentes após utilização num local for a do alcance das crianças e avise as mesmas que a unidade ficará quente e que não lhe podem tocar. \- Fuga de alimentos: verifique se o anel de vedação da lâmina está bem colocado e se o conjunto de lâminas está firmemente fixado pelo suporte de fixação na parte inferior. Uma falha na instalação causará fuga de alimentos que danificarão o aparelho. \- Danos devido a ventilação insuficiente: certifique-se de que as aberturas de ventilação na parte traseira da estrutura principal não estão bloqueadas por quaisquer artigos, caso contrário o equipamento será danificado. \- O recipiente de cozinhar e todos os outros acessórios são para ser utilizados apenas com o suporte fornecido. Não utilize acessórios que não tenham sido fornecidos pelo fabricante e que são estranhos a esta máquina. \- Preste atenção para evitar derrames sobre as ligações e conexões do aparelho. \- O récipiente de cozinhaí ainda estará quente após utilização devido ao calor residual, tenha cuidado para não se queimar. \- Este aparelhô pode ser utilizado por crianças com pelo menos 8 anos de idade, desde que supervisionadas e tenham recebido instruções sobre a utilização segura do aparelho e que estejam plenamente conscientes dos perigos envolvidos. \- A limpeza e manutenção não devem ser realizadas por crianças, a menos que tenham pelo menos 8 anos de idade e sejam supervisionadas por um adulto. \- Mantenha o aparelho e o cabo de alimentação fora do alcance de crianças com menos de 8 anos de idade. \- Quando utilizar eletrodomésticos (aparelhos eléctricos), devem ser sempre seguidas as precauções básicas de segurança para evitar o risco de incêndio, choque elétrico e/ou ferimentos em caso de utilização indevida. - Verifique se a voltagem nominal na placa de identificação corresponde à voltagem principal da sua instalação. Se não for este o caso, entre em contato com o revendedor e não ligue a unidade à corrente. - Nunca deixe o aparelho sem vigilância enquanto estiver em funcionamento. - Nunca se posicione em frente ao aparelho quando o abrir, posicione-se sempre ligeiramente para o lado para evitar queimar-se com o vapor. - O aparelho não deve ser utilizado se tiver caído, se forem visíveis sinais óbvios de danificação ou se houver fugas. - Não utilizé este aparelho se tiver um cabo ou uma ficha danificada, se não funcionar corretamente ou se foi danificado ou caiu. Se o cabo de alimentação estiver danificado, deve ser substituído pelo fabricante, fornecedor de serviços ou pessoas com qualificação semelhante com a finalidade de evitar riscos.VERIFICAÇÃO DA EMBALAGEM
Quando abrir a embalagem, retire todos os acessórios e verifique-os de acordo com a lista de componentes. As peças de reposição são as seguintes: 1 Estrutura principal 7 Tampa do Vaporizador 2 Recipiente de cozinhar 8 Cesto Filtro 3 Tampa do recipiente de 9 Borboleta cozinhar 4 Copo de medida 10 Espátula 5 Vaporizador pequeno 11 Livro de receitas 6 Vaporizador grande ACESSÓRIOS
Conjunto de Recipiente de Cozinhar:
Existem marcas referentes à capacidade do recipiente de cozinhar num dos lados do referido recipiente. A capacidade máxima do recipiente de cozinhar é de 2 L. Aviso
A quantidade de alimentos colocados no recipiente não deve exceder os 2 L; caso contrário, os alimentos podem sair ou salpicar para fora do recipiente e causar perigo. Coloque a tampa no recipiente de cozinhar, rode a tampa no sentido horário para a fixar no recipiente, caso contrário o motor não pode começar a funcionar. natural_image
Three-step diagram showing mechanical component assembly with arrows indicating direction (no text or symbols)natural_image
Line drawings of two kitchen appliances: a blender and a four-thrower (no text or symbols)Conjunto de Lâminas:
Fixe o anel de vedação no conjunto das lâminas, coloque-o no orifício existente no fundo do recipiente, segure firmemente a metade superior da lâmina e vire a parte inferior para cima, utilize o suporte de fixação para fixar a lâmina rodando no sentido horário. Faça o oposto para removê-lo do recipiente de cozinhar. Não perca o anel de vedação da lâmina entre a lâmina e o fundo do recipiente. natural_image
Line drawing of a mechanical component with three blades and a central hub (no text or symbols)natural_image
Technical line drawing of a mechanical component with no visible text or symbolsnatural_image
Technical line drawing of a mechanical component with no visible text or symbolsnatural_image
Technical line drawing of a mechanical component with no visible text or symbolsAVISO
\- As lâminas são muito afiadas. Por favor, embrulhe as lâminas com um pano quando montar ou remover a base das lâminas. \- Por favor, segure firmemente o conjunto de lâminas e retire-o com cuidado, para garantir que o conjunto de lâminas não caia e cause perigo. \- Por favor, verifique se o suporte de fixação e o anel de vedação estão no lugar apropriado e travados firmemente com o conjunto de lâminas. Se o anel de vedação não estiver bem colocado, pode existir uma fuga dos alimentos que estão a ser misturados ou cozinhados e danificar o aparelho.Conjunto de Eixo de Amassar:
Retire as lâminas, fixe o eixo de amassar da mesma forma que fixa as lâminas. Pode ser utilizado para amassar, mexer e misturar sem cortar os alimentos.  natural_image
Technical line drawing of a mechanical component with no visible text or symbolsnatural_image
Technical line drawing of a mechanical component with no visible text or symbolsAVISO
- Não utilize o Eixo de Amassar com velocidades acima de 3; caso contrário, causará uma grande vibração na máquina o que, consequentemente, causa riscos. - Como a menor distância entre o conjunto de agitação e a parede do recipiente de cozinhar é de apenas 1 cm, às vezes os alimentos podem ficar presos e o motor pode parar de funcionar por autoproteção. Utilize a espátula para misturar e remover os alimentos presos e o motor funcionará novamente sem problemas. - Por favor, verifique se o suporte de fixação e o anel de vedação estão no lugar apropriado e travados firmemente com o conjunto de lâminas. Se o anel de vedação não estiver bem colocado, pode existir uma fuga dos alimentos que estão a ser misturados ou cozinhados e danificar o aparelho.Copo de Medida:
- O copo de medida tem muitas funções: faz parte da tampa para impedir a perda de calor ou salpicos; é um copo de medida para medir os ingredientes com uma capacidade total de 150 ml. - Coloque o copo de medida no orifício da tampa, rode no sentido horário para fixá-lo na tampa. natural_image
Technical line drawing of a mechanical component with a cylindrical top and flange base (no text or symbols)natural_image
Technical line drawing of a mechanical component with concentric circles and a handle (no text or symbols)AVISO
- O copo de medida é o único acessório que pode ser utilizado para tapar o orifício redondo existente na tampa - Não tape o orifício com outros artigos para evitar os salpicos dos alimentos, isto causa perigoEspátula:
- A espátula é o único acessório que deve ser utilizado para raspar os alimentos que se encontram dentro do recipiente de cozinhar. Os outros artigos/ acessórios podem causar danos ao revestimento antiaderente dentro do recipiente de cozinhar. - Existe uma pequena ranhura na pega da espátula, use-a para segurar o cesto filtro. natural_image
Technical line drawings of two kitchen utensils and a bucket (no text or symbols)AVISO
- Não utilize para misturar e/ou raspar os alimentos dentro do recipiente quando as lâminas estiverem a funcionar. - Não utilize a espátula se a borboleta estiver dentro do recipiente de cozinhar. • Fixe bem a pega da espátula no cesto filtro antes de levantá-lo.Cesto Filtro:
O cesto tem muitas funções: - Filtro: filtrar frutas e o caldo de vegetais. Depois de moer ou fazer sumo de frutas com o aparelho, coloque o cesto no recipiente de cozinhar para ajudar a servir o sumo. - Cozinhar alimentos leves, como massas ou macarrão; - Cozinhar acompanhamentos, como arroz e batatas. natural_image
Line drawings of two kitchen utensils, one with a lid and handle, the other with a handle and handle (no text or symbols)AVISO
- Utilize a pega da espátula no orifício existente na orla do cesto para colocá-lo ou retirá-lo do recipiente de cozinhar. - Se você quiser diminuir a água nos alimentos, como tomates, retire o copo de medida e tape o recipiente com o cesto. A água pode ser facilmente removida.Borboleta:
- Instalada na lâmina, a borboleta pode ajudar a misturar os alimentos, mas impede que os alimentos sejam cortados pelas lâminas e que fiquem colados, e deixa que os alimentos continuem a misturar-se. - Fixe a borboleta no conjunto de lâminas pelo orifício e pressione-a com força suficiente para encaixar bem, rode a barra da borboleta no sentido anti-horário para travá-la na lâmina. natural_image
Technical line drawing of a mechanical component with no visible text or symbolsnatural_image
Line drawing of a symmetrical architectural structure with a central tower and surrounding walls (no text or symbols)AVISO
- Não ligue o aparelho até que a borboleta esteja fixa no posicionamento adequado. - Não utilize a Borboleta com velocidades acima 4. - Não utilize a espátula quando estiver a utilizar a borboleta. - Não adicione ingredientes ao recipiente quando o aparelho estiver a funcionar com a borboleta, caso contrário a borboleta poderá ser danificada ou bloqueada.Conjunto de Vaporizador:
Existem três partes do vaporizador: Vaporizador pequeno, Vaporizador grande, Tampa do Vaporizador. A tampa pode ser colocada em ambos os vaporizadores, pequeno e grande, e o vaporizador grande pode ser encaixado no vaporizador pequeno. Retire a tampa do recipiente de cozinhar e coloque o vaporizador. AVISO
- Por favor, certifique-se de que a tampa do vaporizador está colocada antes de começar a cozinhar. - O vaporizador não pode ser utilizado num forno micro-ondas ou em outros aparelhos elétricos. - Não toque nem se aproxime dos orifícios da tampa do vaporizador para evitar ferimentos que podem ser causados pelo vapor quente. - Não cubra nem bloqueie os orifícios da tampa do vaporizador com qualquer objeto, caso contrário o vapor pode sair pelas orlas ou por outros locais e causar perigo.INSTRUÇÕES DE UTILIZAÇÃO
Na fase inicial de utilização deste aparelho, haverá um leve cheiro proveniente do motor, o que é um fenómeno normal. Após um período de tempo, este tipo de cheiro desaparecerá. \- Por favor, coloque o aparelho numa mesa limpa, estável e plana. Não o coloque muito perto da orla da mesa e mantenha-o afastado de armários embutidos ou suportes suspensos. \- Para sua conveniência, é melhor colocar o aparelho num local fixo. \- Por favor, limpe o aparelho de forma exaustiva antes de o utilizar. \- O som "Beep" mostra que o botão entrou em vigor.  STOP / CANCEL (PARAR / CANCELAR)
\- Ligue o aparelho, ligue o interruptor na parte traseira do aparelho, o aparelho emite um sinal sonoro “Beep” uma vez, mas não é mostrado. natural_image
Pure technical line drawing of a mechanical joint or bracket (no text or symbols)TIMER (TEMPORIZADOR)
- O ecrã do LCD mostra 88:88:88, isto significa: horas: minutos: segundos. - Pressione o botão temporizador e o sinal dos minutos pisca no LCD; Rode o botão para ajustar os minutos. Pressione-o novamente e o sinal dos segundos pisca no LCD; Rode o botão para ajustar os segundos. Pressione-o novamente e o sinal das horas pisca no LCD; Rode o botão para ajustar as horas de 1 a 12h. - Pressione o temporizador durante o processo de funcionamento, o aparelho começa diretamente a contagem regressiva. - 60 minutos é o máximo na configuração manual; 3 horas é o máximo sob a configuração DIY. O limite do temporizador para cada programa, por favor consulte o capítulo "MENU" abaixo. - Função programável Pressione e segure o botão de tempo 📊 por 3 segundos para entrar no modo de programação. O ícone do tempo e o ícone de programação começarão a piscar. Proceda da mesma maneira que para ajustar a hora do relógio e ajuste a duração de 30 minutos à 12 horas. O modo programação só pode ser utilizado com DIY e MENU. Primeiro selecione DIY ou MENU, aperte o botão para começar a contagem regressiva. Para anular a ação, pressione o botão RESET SPEED (VELOCIDADE)
\- Pressione este botão no modo de espera ou durante o processo de funcionamento (exceto alguns programas automáticos que têm o ajuste da velocidade bloqueado), o aparelho entrará no modo d configuração de velocidade. O sinal pisca no LCD e a velocidade é ajustável. Rode o botão para selecionar a velocidade desejada. \- Escala da velocidade do nível 1 ao 10. \- Pressione este botão durante o processo de mistura e aquecimento, se a configuração da temperatura ou a temperatura real for superior a 60°C, a velocidade poderá ser ajustada apenas da velocidade 1 a 4. Se o aparelho estiver a funcionar em alta velocidade, passará para a velocidade 4 automaticamente. \- Há uma transferência de velocidade na estrutura, portanto, é normal ouvir pouco barulho antes do motor começar a funcionar ou quando transfere a velocidade entre o nível 5 e o nível 6. \- Para triturar ou cortar alimentos duros ou um grande volume de alimentos, é recomendável selecionar primeiro a velocidade 5 e depois passar para a velocidade 10, para evitar vibrações e obter um desempenho perfeito. \- Por favor, não use a velocidade 8,9,10 mais de 5 minutos de cada vez; por favor, não use a velocidade 5,6,7 mais de 10 minutos de cada vez. TEMPERATURA
\- Pressione este botão no modo de espera ou durante o processo de aquecimento (exceto alguns programas automáticos que têm o ajuste da temperatura bloqueado), o aparelho entrará no modo de configuração de temperatura. O sinal ☑ pisca no LCD e a temperatura é ajustável. Rode o botão para selecionar a temperatura desejada. \- Escala da temperatura: 37-120°C •DE CALOR)
HEAT POWER (PÔTÊNCIA
\- Pressione este botão no modo de espera ou durante o processo de aquecimento (exceto alguns programas automáticos que têm o ajuste da potência de calor bloqueado), o aparelho entrará no modo de configuração de temperatura. O sinal pisca no LCD e a potência de calor é ajustável. Rode o botão para selecionar a potência de calor desejada. \- Escala da potência de calor do nível 1 ao 10. \- Para alguns alimentos viscosos, é recomendável selecionar uma potência de calor baixa para evitar que se queimem no fundo. - Se o volume de alimentos for pequeno e exigir uma temperatura precisa, é recomendável selecionar uma potência de calor baixa. - A Baixa potência proporcionará um controlo mais preciso; A Alta potência aquecerá mais rapidamente. - Não funcionará se selecionar apenas a potência de calor, deve selecionar a temperatura para que funcione. É recomendável seguir a configuração padrão quando escolher diferentes níveis de temperatura. SELF-CLEANING (AUTO-
- Este programa é para fins de limpeza após utilização. - Adicione água, de 500 ml a 1 litro. - Um pouco de detergente será útil. - Todo o processo demora cerca de 10 minutos. TURBO
- Pressione e segure este botão no modo de espera, o aparelho começa a funcionar na velocidade máxima. Quando solta o botão, o aparelho pára imediatamente. - Quando a temperatura no recipiente de cozinhar estiver acima de 60°C, a função PULSE (IMPULSIONAR) não pode ser usada e o ecrã mostrará E11. - Há uma transferência de velocidade na estrutura, portanto, é normal ouvir pouco barulho antes do motor começar a funcionar no primeiro impulso. - O tempo máximo de operação para a função Pulse (Impulsionar) é de 3 minutos e depois descansa durante 10 minutos. MENU
\- Este botão é para escolher um de entre os 10 programas automáticos abaixo. natural_image
Grid of ten food and kitchen icons in standard boxes, including cooking utensils, steaming dishes, and drinks (no text or symbols)| Programas | ConfiguraçãoPadrão | Configuração | Conselhos |
| CORTAR/TRITURAR | *Velocidade: 5*Temperatura: 0*Potência de Calor: 0*Temporizador: 1min | *Para esmagar, mas não para ser batido. Tempo ajustável de 1 seg. a 5 min. para a consistência desejada.*Se ficar inativo durante 10 minutos após a conclusão do programa, o aparelho desligará automaticamente. | *O corte/triturado sugerido de ingredientes com artigos duros como cenouras, carne, é de 1 a 2 cm.*Se precisar de esmagar os alimentos para que fiquem mais finos, por favor, utilize o programa SMOOTHIE (BATIDO) |
| COZINHAR | Passo 1:*Velocidade: 0*Temperatura:100°C*Potência de Calor: 10*Temporizador: sem limite, até ferverPasso 2:*Velocidade: 0*Temperatura: 90-95°C*Potência de Calor: não é certo, pode mudar automaticamente de acordo com a temperatura e ovolume de alimentos*Temporizador: 3 h | *Tempo padrão 3 h, ajustável de 1 a 12 horas*Se ficar inativo durante 10 minutos após a conclusão do programa, o aparelho entrará automaticamente no modo ‘WARM’ “QUENTE”. | *Cozinhar lentamente |
| VAPORIZAR | *Velocidade: 0*Temperatura:120°C*Potência de Calor:10*Temporizador: 20 min | *Tempo ajustável de 15 a 60 min.*Se ficar inativo durante 10 minutos após a conclusão do programa, o aparelho entrará automaticamente no modo ‘WARM’“QUENTE”. | *500 g de água por cada 30 minutos de vapor*Vegetais 20 min;carne 30 min |
| SOPA ESPESSA | Passo 1:*Velocidade: 0*Temperatura: 120*Potência de Calor:10*Temporizador: até ferverPasso 2:*Velocidade: 0*Temperatura:100°C*Potência de Calor:4*Temporizador: 29,5 minPasso 3:*Velocidade: 0*Temperatura: 0°C*Potência de Calor:0*Temporizador:arrefecimento até 80°CPasso 4:*Velocidade:lentamente de 6 a 10*Temperatura: 0°C*Potência de Calor: 0*Temporizador: 1 min | *Adequado para sopa de carne. Primeiro esmague e depois mexa. Tempo ajustável de 15 a 60 min.*Se ficar inativo durante 10 minutos após a conclusão do programa, o aparelho entrará automaticamente no modo ‘WARM’“QUENTE”. | *O corte/triturado sugerido de ingredientes com artigos duros como cenouras, carne, é de 1 a 2 cm.*Sugerimos que faça uma pausa e adicione a borboleta após o Passo 1. |
| SOPA RÁPIDA | Passo 1:*Velocidade: 10*Temperatura: 0*Potência de Calor: 0*Temporizador: 30 seg.Passo 2:*Velocidade: 2*Temperatura: 120°C*Potência de Calor: 10*Temporizador: até ferverPasso 3:*Velocidade: 2*Temperatura: 100°C*Potência de Calor: 10*Temporizador: 19,5 min | *Adequado para sopa de legumes. Primeiro esmague e depois cozinhe e mexa. Tempo ajustável de 15 a 60 min.*Se ficar inativo durante 10 minutos após a conclusão do programa, o aparelho entrará automaticamente no modo ‘WARM’ “QUENTE”. | *O corte/triturado sugerido de ingredientes com artigos duros como cenouras, carne, é de 1 a 2 cm.*Sugerimos que faça uma pausa e adicione a borboleta após o Passo 1. |
| MEXER/MISTURAR | *Velocidade: 2*Temperatura: 100°C*Potência de Calor: 10*Temporizador: 30 min | *Velocidade ajustável do nível 0 ao 3;*Temperatura ajustável de 90-120°C.*Tempo ajustável de 5 a 60 min*Se ficar inativo durante 10 minutos após a conclusão do programa, o aparelho entrará automaticamente no modo ‘WARM’ “QUENTE”. | *Use a borboleta ou a lâmina de amassar |
| AMASSAR | Passo 1:*Velocidade: 3*Temperatura: 0*Potência de Calor: 0*Temporizador: 3 minPasso 2:*Velocidade: 2*Temperatura: 0*Potência de Calor: 0*Temporizador: 7 min | *Velocidade ajustável do nível 2 ao 3;*Temperatura ajustável em 0 ou 37°C para difundir.*Tempo ajustável de 3 a 20 min.*Se ficar inativo durante 10 minutos após a conclusão do programa, o aparelho desligará automaticamente. | *Amassar para fazer pão: 330 g de água + 500 g de farinha + outros ingredientes; amasse durante 10 minutos na configuração padrão.*Amassar para fazer macarrão: 200 g de água + 400 g de farinha; amasse durante 3 min na velocidade 2.*Defina a temperatura 37°C para difundir e, se não ficar difundido o suficiente, selecione 37°C durante mais 30 min sem velocidade. |
| RISOTTO/ARROZ | Passo 1:*Velocidade: 0*Temperatura:100°C*Potência de Calor: 6*Temporizador: até ferverPasso 2:*Velocidade: 1*Temperatura: 96,5°C*Potência de Calor: 4*Temporizador: 18 minPotência de Calor & Temporizador: não é certo, pode ser ajustado automaticamente de acordo com a temperatura e o volume | *Todas as configurações não ajustáveis*Se ficar inativo durante 10 minutos após a conclusão do programa, o aparelho entrará automaticamente no modo ‘WARM’ “QUENTE”. | *Volume sugerido (max.): 500 g de arroz + 800 g de água. Selecione a configuração padrão para RICE (ARROZ).Será formada, na parte inferior, uma crosta de arroz.*Ou arroz a vapor, definindo: 400 g de arroz no Cesto filtro, 2 L de água, escolha BOIL (FERVURA); em seguida, deite alguma água fora até ficar com 1 L, e selecione STEAM (VAPORIZAR) durante 20 min. |
| BATIDO | *Velocidade: 10*Temperatura: 0*Potência de Calor: 0*Temporizador: 30 seg. | *Todas as configurações não ajustáveis, executa mais uma vez se não estiver bom o suficiente.*Se ficar inativo durante 10 minutos após a conclusão do programa, o aparelho desligará automaticamente. | *O corte/triturado sugerido de ingredientes com artigos duros como cenouras, carne, é de 1 a 2 cm. |
| IOGURTE | *Velocidade: 1 nos primeiros 30 minutos e depois pare.*Temperatura: 37-39°C*Potência de Calor: 1*Temporizador: 6 horas | *Tempo ajustável de 3 a 12 horas* Se ficar inativo durante 10 minutos após a conclusão do programa, o aparelho desligará automaticamente. | *Volume sugerido: 1 copo de iogurte + 1 L de leite fresco + açúcar. 6 a 12 horas de acordo com a consistência desejada |
| Acessórios | Imagem | Função | Velocidade | Capacidade | Tempo de Funcionamento |
| Lâmina de Cortar | | CORTAR/TRITURA R mas não ficar batido | 5 | 2 L max., corte/triture com 1 a 2 cm de medida antes da operação | 1 min |
| CORTAR/TRITURA R para ficar mais fino | 10 | 2 L max., corte/triture com 1 a 2 cm de medida antes da operação | 1 min | ||
| Lâmina de Amassar | | Amassar a massa para fazer pão, pizza, etc. | 2-3 | 800 g de farinha no máximo | 5-10 min |
| Amassar a massa para fazer macarrão | 2 | 500 g de farinha no máximo | 3 min | ||
| Borboleta | | Mexer/Misturar | 1-3 | 2 L no máximo | 30 min |
| Bater as claras ou o creme de ovos | 4 | 2 L no máximo | 10 min | ||
| Vaporizador | | Legumes a vapor | N/A | 3,5 L no máximo | 15 min |
| Carne a vapor | N/A | 3,5 L no máximo | 20-30 min |
RESOLUÇÃO DE PROBLEMAS
\- As informações de erro abaixo indicadas, e que aparecem no ecrã do LCD, são normais. Se o problema persistir após você ter agido de acordo com a solução abaixo, por favor, entre em contato com o nosso centro de atendimento ao cliente.| Código de Erro | Descrição | Motivos possíveis | Solução |
| E1 | O interruptor de segurança não está fixo | O recipiente ou a tampa do recipiente não está fixo/a apropriadamente. | Remonte o recipiente e a tampa do mesmo, verifique se todas as peças estão montadas correta e firmemente. |
| E2 | Sensor de temperatura ausente | O recipiente não está no lugar ou a conexão do sensor de temperatura na base do recipiente está danificado. | Remonte o recipiente e verifique se está correcta e firmemente fixado. |
| E3 | Motor bloqueado | Demasiado peso ou volume no recipiente | Diminua o volume/peso dos alimentos no recipiente ou corte-os em pedaços mais pequenos e reinicie o aparelho. |
| E4 | Temperatura muito alta | Não existem alimentos no recipiente ou muito poucos alimentos com uma temperatura altadefinida durante muito tempo. | Adicione alimentos ao recipiente. |
| E5 | Temperatura do motor muito alta | O aparelho funcionou com demasiado volume/peso durante muito tempo. | Pare o aparelho e deixe-o arrefecer antes de reiniciar. |
| E7 | Falha na transferência de velocidade | A alteração de velocidade entre o nível baixo (1-5) e o nível alto (6-10) está bloqueada. | Remova o recipiente, rode o aperto inferior manualmente, fixe o recipiente e reinicie. |
| E8 | NTC do motor ausente | Conexão do sensor de temperatura solta ou danificada | Pare de utilizar o aparelho e envie-o ao centro de serviço pós-venda para ser reparado |
| E11 | Não é possível usar a função Pulse (Impulsionar) | A temperatura no recipiente está acima dos 90°C | Arrefeça os alimentos e Pulse (Impulsione) novamente ou use uma velocidade mais baixa 4 |
Limpeza do seu aparelho
7. NÃO lave nenhuma parte/peça do seu aparelho de cozinhar na máquina de lavar loiça. Lave sempre o aparelho de cozinhar cuidadosamente após cada utilização ou quando não foi utilizado durante um longo período de tempo. 8. Desligue o aparelho da tomada elétrica e deixe-o arrefecer antes de limpar. 9. Lave o recipiente de cozinhar removível com água morna e sabão. Enxague e seque rigorosamente. 10. Limpe a estrutura principal com um pano limpo e húmido. Se permanecerem alguns alimentos, humedeça o pano com água morna e sabão antes de limpar. ÑNUNCA submerja a estrutura principal em água ou qualquer outro líquido. Limpe o recipiente estacionário conforme necessário para remover qualquer produto alimentar. 11. Para manter o bom desempenho do seu aparelho de cozinhar, o fundo do recipiente removível deve ser inspecionado e limpo, se necessário, após cada utilização. Limpe com um pano húmido e macio e seque-o rigorosamente antes de utilizar. 12. Se o aparelho de cozinhar não for utilizado durante um longo período de tempo, por favor, desligue-o e mantenha-o numa zona fresca e limpa.  ENCONTRE TODAS AS NOSSAS RECEITAS: http://dl.hkoenig.com/SiteHkoenig/Livrederecettes\_HK8.pdf Oppure scansiona il codice QR: ELIMINAÇÃO E AMBIENTE
Se o seu aparelho elétrico precisar de ser substituído ou não tem utilidade, por favor, pense em proteger o meio ambiente. Entre em contato com as autoridades locais para obter conselhos, dado que muitas têm instalações para a eliminação ambientalmente segura.Descarte correto deste produto
 Esta marcação indica que este produto não deve ser eliminado/descartado com outros resíduos domésticos em toda a UE. Para impedir possíveis danos ao meio ambiente ou à saúde humana decorrentes da eliminação/descarte não controlado de resíduos, recicle-o com responsabilidade para promover a reutilização sustentável dos recursos materiais. Para devolver o seu aparelho usado, por favor, utilize os sistemas de devolução e recolha ou entre em contato como revendedor onde o produto foi adquirido. Eles podem recolher este produto para reciclagem ambientalmente segura.DIREITOS DE AUTOR (COPYRIGHT)
A nossa empresa manterá o direito da documentação, design e descrição de imagem. Sem a autorização do proprietário dos direitos autorais, a publicação não deve ser reimpressa ou comunicada na forma de informações eletrónicas (fotografia ou vídeo). Adeva SAS / H.Koenig Europe - 8 rue Marc Seguin, 77290 Mitry-Mory, France www.hkoenig.com - https://en.hkoenig.com - Tél: +33 1 64 67 00 05POLSKI
Ważna instrukcja dotycząca bezpieczeństwa
Należy zawsze przestrzegać poniższych środków ostrożności, aby zmniejszyć ryzyko porażenia prądem, obrażeń ciała lub pożaru. Ważne jest, aby uważnie przeczytać wszystkie instrukcje przez użyciem urządzenia oraz zachować je do wykorzystania w przyszłości lub dla nowych użytkowników. \- Sprzęt ten może być używany przez osoby o ograniczonych zdolnościach fizycznych, sensorycznych lub umysłowych, lub osoby nie posiadające doświadczenia lub wiedzy, pod warunkiem, że są one nadzorowane lub poinstruowane w zakresie bezpiecznego użytkowania sprzętu i w pełni rozumieją potencjalne zagrożenia. To urządzenie nie powinno być używane przez dzieci. Przechowuj urządzenie i jego przewód w miejscu dla nich niedostępnym. \- Ostrzeżenie: ryzyko obrażeń spowodowanych niewłaściwym użytkowaniem. Należy zachować ostrożność podczas obsługi ostrych noży tnących opróżniając kielich i podczas czyszczenia. \- Wyłącz urządzenie i odłącz od źródła zasilania przed zmianą akcesoriów lub zbliżeniem się do części, które poruszają się podczas użytkowania. Zawsze odłączaj urządzenie od zasilania, jeśli jest pozostawione bez nadzoru oraz przed montażem, demontażem lub czyszczeniem. \- Jeśli przewód żasilający jest uszkodzony, musi zostać wymieniony przez producenta, jego przedstawiciela serwisowego lub podobnie wykwalifikowaną osobę w celu uniknięcia zagrożenia. \- Akcesoria inne niż dołączone do urządzenia powinny zawierać instrukcje dotyczącą ich bezpiecznego użytkowania. \- OSTRZEŻENIE: Nie zdejmuj pokrywki, gdy woda się gotuje. Nie ustawiaj prędkości większej niż poziom 4, gdy temperatura jest wyższa niż 90 stopni Celsjusza. \- Nie wolno zanurzać urządzenia w wodzie lub innym płynie. \- Tó urządzenie jest przeznaczone do użytku w warunkach domowych i podobnych, takich jak : \- kuchnie w sklepach, biurach i innych miejscach pracy \- w budynkach gospodarczych \- w hotelach, motelach i innych obszarach mieszkalnych \- w pokojach gościnnych. Proszę postawić urządzenie na stabilnym, płaskim stole, który nie będzie się nagrzewał. • 'Należy' mieć pewność, że znajduje się w bezpiecznej odległości od krawędzi, aby uniknąć upadku. Gdy sprzęt jest używany do wyrabiania ciasta lub krojenia żywności, urządzenie może się poruszyć z powodu wibracji. Dlatego proszę nie używać go bez nadzoru ludzi, aby uniknąć jego upadku na podłogę. \- Proszę wyciągnąć wtyczkę podczas czyszczenia urządzenia lub gdy sprzęt nie będzie używany przez dłuższy czas. \- Reğularnie sprawdzaj, czy główny korpus, kielich, parowar lub inne części nie są uszkodzone. Uszkodzone części zmniejszą bezpieczeństwo użytkowania. Po znalezieniu czegoś niepokojącego, nie używaj urządzenia i skontaktuj się z naszym centrum obsługi posprzedażnej. \- Jeśli urządzenie niespodziewanie przestaje działać lub wydaje się, że działa nieprawidłowo, wyłącz zasilanie, wyjmij wtyczkę z gniazdka i natychmiast przestań go używać. Zasięgnij fachowej porady, aby usunąć usterkę lub dokonać naprawy. \- Miarka jest jedyną częścią, której można użyć do zakrycia okrągłego otworu w pokrywce kielicha. Nie używaj szmatki ani podobnych rzeczy do zakrywania otworu. \- Nie dotykaj krawędzi ostrzy. Zachowaj ostrożność i trzymaj za górną część podczas montażu lub demontażu ostrzy. \- Zwróć uwagę na oznaczenie pojemności na kielichu urządzenia. \- Otwórz pokrywkę dopiero wtedy, gdy żywność w kielichu przestanie się obraćać. \- Zwróć uwagę na żywność o wysokiej temperaturze podczas otwierania pokrywki kielicha. Podczas przygotowywania żywności należy prawidłowo umieścić miarkę w otworze pokrywki kielicha. \- Nie dotykaj kielicha podczas przygotowywania gorącej żywności o temperaturze wyższej niż 60°C. \- Upewnij się, że parowar i kielich są dobrze połączone podczas korzystania z parowaru. \- Zwróć uwagę, aby para wypłynęła przez górę lub boki pokrywy. \- Podczas pracy nie dotykaj żadnego miejsca na parowarze poza jego uchwytami. \- Nie używaj urządzenia do gotowania na parze bez założonej pokrywy. \- Podczas ołówierania pokrywy parowaru uważaj, aby nie poparzyć się parą. \- Używając ustawienia gotowania na parze i gotowania, należy zwrócić uwagę, aby para wypłynęła przez otwór w kielichu podczas poruszania parowarem. \- Sprawdzaj, czy otwór wentylacyjny w pokrywie urządzenia do gotowania na parze jest odblokowany, w przeciwnym razie para może wydostać się z innego miejsca. \- Proszę po użyciu umieścić urządzenie i jego gorące części w miejscu, które jest poza zasięgiem dzieci i ostrzec je, że urządzenie jest nagrzane, zatem nie należy go dotykać. • Wyciek jedzenia: Upewnij się, że pierścień uszczelniający ostrza jest dobrze przymocowany, a zespół ostrza jest mocno przytwierdzony za pomocą wspornika mocującego na dole. Awaria instalacji może spowodować wyciek żywności, który uszkodzi urządzenie. \- Śłaba wentylacja: Upewnij się, że otwory wentylacyjne z tytu korpusu głównego nie są zablokowane przez żadne przedmioty, w przeciwnym razie sprzęt zostanie uszkodzony. \- Kielich i wszystkie akcesória należy używać wyłącznie z dostarczonym stojakiem. Nie używaj nie oryginalnych części w tej maszynie. \- Zwróć uwagę, aby uńiknąć rozlania czegokolwiek na złącze. \- Kielich będzie nadal gorący z powodu ciepła resztkowego po użyciu, należy uważać, aby się nie poparzyć. \- Niniejsze urządzenie może być używane przez dzieci w wieku co najmniej 8 lat, o ile są one nadzorowane i otrzymały instrukcje dotyczące bezpiecznego korzystania z urządzenia oraz są w pełni świadome związanych z tym zagrożeń. \- Czyszczenie i konserwacja nie powinny być wykonywane przez dzieci, chyba że mają co najmniej 8 lat i są nadzorowane przez osobę dorosłą. \- Trzymaj urządzenie i jego przewód zasilające poza zasięgiem dzieci poniżej 8 roku życia. \- Podczas korzystania ze sprzętu elektrycznego należy zawsze zachować środki ostrożności, aby zapobiec ryzyku pożaru, porażenia prądem i/lub obrażeń w przypadku niewłaściwego użytkowania. \- Upewnij się, że napięcie znamionowé na tabliczce znamionowej odpowiada napięciu głównemu w Twojej instalacji. Jeśli tak nie jest, skontaktuj się ze sprzedawcą i nie podłączaj urządzenia • Nigdy nie pozostawiaj pracującego urządzenia bez nadzoru. \- Nigdy nie otwieraj urządzenia od przodu, zawsze ustawiaj się nieco z boku, aby uniknąć poparzenia para. \- Urządzenie nie może być używane, jeśli zostało upuszczone, posiada widoczne oznaki uszkodzenia lub jeśli jest nieszczelne. \- Nie używaj tego urządzenia, jeśli ma uszkodzony przewód lub wtyczkę, jeśli nie działa prawidłowo lub jeśli zostało uszkodzone lub upuszczone. Jeśli przewód zasilający jest uszkodzony, musi zostać wymieniony przez producenta lub jego przedstawiciela serwisowego lub osobę o podobnych kwalifikacjach, aby uniknąć zagrożenia.ZAWARTOŚĆ OPAKOWANIA
Otwierając opakowanie, wyjmij wszystkie akcesoria i zapoznaj się z nimi zgodnie z listą elementów. Części zamienne są następujące| 1 | Główny korpus | 7 | Pokrywa parownicy |
| 2 | Kielich z ostrzami | 8 | Koszyczek |
| 3 | Pokrywka do kielicha | 9 | Motylek |
| 4 | Miarka | 10 | Szpatułka |
| 5 | Mała parownica | 11 | Książka z przepisami |
| 6 | Duża parownica |
Akcesoria
Kielich z ostrzami
Po jednej stronie kielicha znajdują się oznaczenia jego pojemności. Maksymalna pojemność to 2L. natural_image
Line drawing of a trash bin with lid and side handles (no text or symbols)natural_image
Simple line drawing of a cylindrical object with a curved line extending from it (no text or symbols)Uwaga
Ilość jedzenia włożonego do kielicha nie powinna przekraczać 2,0 l, w przeciwnym razie jedzenie może wypłynąć lub rozprysnąć się, powodując niebezpieczeństwo. Załóż pokrywkę na kielich, naciśnij wyłącznik bezpieczeństwa, obróć pokrywkę zgodnie z ruchem wskazówek zegara, aby przymocować pokrywkę do kielicha, w przeciwnym razie nie będzie można uruchomić silnika. (Zawsze najpierw naciskaj wyłącznik bezpieczeństwa, aby zablokować lub otworzyć pokrywę). natural_image
Three-step diagram showing a mechanical component with rotational arrows indicating motion (no text or symbols)natural_image
Line drawing of a blender with a digital display and control panel (no text or symbols)natural_image
Line drawing of a kitchen blender with digital display (no text or symbols)Montaż ostrza:
Zamocuj pierścień uszczelniający na zespole ostrza, włóż go do otworu w dnie kielicha, mocno trzymaj połowę górnej części ostrza i obróć dolną część do góry, użyj wspornika mocującego, aby zamocować ostrze, obracając zgodnie z ruchem wskazówek zegara. Robiąc odwrotnie, wyjmij go z kielicha. Nie przegap pierścienia uszczelniającego ostrze między ostrzem a dnem kielicha. natural_image
Simple line drawing of a mechanical component with three blades (no text or symbols)natural_image
Mechanical component diagram showing a gear and housing with no visible text or symbolsnatural_image
Technical diagram of a mechanical component with concentric rings and mounting holes (no text or symbols)natural_image
Line drawing of a hand holding a circular mechanical component with five blades (no text or symbols)Uwaga
- Noże są bardzo ostre. Proszę owinąć je ściereczką podczas montażu lub demontażu podstawy ostrza. - Proszę mocno trzymać zespół ostrzy i wyjąć go ostrożnie, aby upewnić się, że nie spadnie i nie spowoduje zagrożenia. - Upewnij się, że wspornik mocujący i pierścień uszczelniający znajdują się na swoim miejscu i są mocno zablokowane za pomocą zespołu ostrza. Jeśli pierścień uszczelniający nie jest dobrze umieszczony, miksowana lub gotowana żywność może wyciec i uszkodzić urządzenie.Montaż wałka ugniatającego:
Wyjmij ostrze, zamocuj wałek ugniatający w taki sam sposób, jak mocowanie ostrza. Może być używany do ugniatania lub mieszania i miksowania bez krojenia żywności. Uwaga
- Nie używaj go z prędkością powyżej 3, w przeciwnym razie spowoduje to duże wibracje maszyny i może być ryzykowne. - Ponieważ najmniejsza odległość między zespołem mieszającym a ścianą kielicha wynosi tylko 1 cm, czasami żywność może się zakleszczyć, a silnik może się zatrzymać. Za pomocą szpatułk wymieszai i usuń zakleszczony materiał, a wszystko będzie znów sprawnie działać. - Upewnij się, że wspornik mocujący i pierścień uszczelniający znajdują się na swoim miejscu i są mocno zablokowane za pomocą zespołu ostrza. Jeśli pierścień uszczelniający nie jest dobrze umieszczony, mieszana lub gotowana żywność może wyciekać i uszkodzić urządzenie.Miarka:
- Miarka spełnia wiele funkcji: jest częścią wieczka zapobiegającą utracie ciepła lub rozpryskiwaniu; to miarka do odmierzania składników o pełnej pojemności 150ml. - Włóż miarkę do otworu w pokrywce, obróć ją zgodnie z ruchem wskazówek zegara, aby ją zamocować. Uwaga natural_image
Simple line drawing of a top hat with a decorative base (no text or symbols)natural_image
Technical line drawing of a mechanical component with concentric circles and a handle (no text or symbols)Uwaga
- Miarka jest jedyną częścią, której można użyć do zakrycia okrągłego otworu w pokrywce. - Nie zakrywaj otworu żadnymi innymi przedmiotami, aby uniknąć wypłynięcia żywności i spowodowania zagrożenia.Szpatułka:
\- Szpatułka jest jedynym sprzętem, którego należy używać do zeskrobywania żywności z kielicha. Inne sprzęty mogą spowodować uszkodzenie wewnętrznej powłoki zapobiegającej przywieraniu. \- Na uchwycie szpatułki znajduje się mały rowek, użyj go w razie potrzeby do przytrzymania koszyczka. natural_image
Technical line drawings of two tools: a ladle and a bucket with a brush (no text or symbols)Uwaga
• Nie używaj jej do mieszania w kielichu, gdy działa ostrze. - Nie używaj szpatułki, jeśli w środku jest motylek. - Dokładnie dopasuj rowek do koszyczka przed jego podniesieniem.Koszyczek:
Koszyczek spełnia wiele funkcji: - Sitko. Przefiltruj sok owocowy i warzywny. Po rozdrobieniu warzyw lub owoców lub zrobieniu soku owocowego, włóż koszyczek do kielicha, aby ułatwić jego nalanie. - Gotowanie potraw, takich jak makaron czy kluski; • Gotowanie dodatków, takich jak ryż i ziemniaki. natural_image
Line drawings of two kitchen utensils, one with a handle and the other with a pan (no text or symbols)Uwaga
- Do włożenia lub wyjęcia koszyczka użyj rączki łopatki. - Jeśli chcesz zmniejszyć zawartość wody w żywności, takiej jak pomidory, zdejmij miarkę i przykryj ją koszyczkiem. Wodę można łatwo odlać.Motylek:
- Zainstalowany na ostrzu motylek może pomóc w mieszaniu żywności, ale zapobiega jej siekaniu przez ostrza oraz sklejaniu się żywności. Pozwala na dalsze mieszanie żywności. - Zamocuj motylek na zespole ostrza za otwór i dociśnij go używając wystarczającej siły, aby zapewnić dobre połączenie. Obróć listwę motylkową w kierunku przeciwnym do ruchu wskazówek zegara, aby zablokować go na ostrzu. natural_image
Technical line drawing of a mechanical component with no visible text or symbolsnatural_image
Line drawing of a mechanical device with a central pin and two vertical supports (no text or symbols)Uwaga
- Nie uruchamiaj urządzenia, dopóki motylek nie zostanie zamocowany. - Nie używaj prędkości powyżej 4 podczas korzystania z motylka. • Nie używaj szpatułki podczas korzystania z motylka. - Nie dodawaj składników do kielicha, gdy urządzenie pracuje z motylkiem, w przeciwnym razie motylek może zostać uszkodzony lub zablokowany.Parowar:
Parowar składa się z trzech części: mały parowar, duży parowar i pokrywka. Pokrywkę można umieścić zarówno na małym, jak i dużym naczyniu do gotowania na parze, a duże naczynie do gotowania na parze może być postawione na małym. Zdejmij pokrywkę kielicha, położ na kielichu parowar. natural_image
Line drawing of a square-shaped container with handles and a circular top (no text or symbols)natural_image
Illustration of a cooking pan with three panes and a lid, showing interior layers (no text or symbols)natural_image
Black kitchen toaster with digital display and side panel (no visible text or symbols)Uwaga
- Przed gotowaniem na parze upewnij się, że pokrywa urządzenia do gotowania na parze jest przykryta. - Parowaru nie można używać w kuchence mikrofalowej ani innych urządzeniach elektrycznych. - Nie dotykaj ani nie zbliżaj się do otworów w pokrywie urządzenia do gotowania na parze, aby uniknąć poparzenia. - Nie zakrywaj ani nie zasłaniaj otworów pokrywy urządzenia do gotowania na parze żadnymi przedmiotami, ponieważ para może wydostawać się z krawędzi lub innych miejsc i stwarzać zagrożenie.INSTRUKCJA UŻYCIA
Na wczesnym etapie użytkowania urządzenia, z urządzenia będzie wydobywać się lekki zapach, co jest normalnym zjawiskiem. Po pewnym czasie zjawisko to zniknie. • Proszę postawić urządzenie na czystym, stabilnym i płaskim stole. Nie umieszczaj go zbyt blisko krawędzi i trzymaj go z dala od zabudowanej szafy lub uchwytów. • Dla wygody lepiej jest umieścić urządzenie w jakimś stałym miejscu. • Proszę dokładnie wyczyścić urządzenie przed użyciem. • Dźwięk „beep” oznacza, że przycisk został uruchomiony i działa prawidłowo.   STOP/ ANULUJ
\- Podłącz urządzenie, włącz przełącznik z tyłu urządzenia, urządzenie wyda jeden sygnał dźwiękowy, ale bez wyświetlania czegokolwiek. natural_image
Pure mechanical diagram showing a pipe joint and connecting rod (no text or symbols)POKRETŁO (START/ PAUZA)
- Po wybraniu żądanego ustawienia lub programu, naciśnij ten przycisk, aby natychmiast rozpocząć pracę. • Naciśnij ten przycisk podczas procesu pracy, maszyna wstrzymuje pracę i stan czuwania, wyświetlacz LCD pokazuje PRUSE. (Użytkownik może otworzyć pokrywkę, ale musi być dobrze zamontowana przed ponownym uruchomieniem). Naciśnij pokrętło ponownie, aby wznowić pracę. \- Urządzenie wyłączy się automatycznie po 10 minutach bez działania w stanie PAUSE. \- Jest także pokrętem do ustawiania timera, prędkości, temperatury, mocy cieplnej, z rosnącym, gdy obracasz pokrętem zgodnie z ruchem wskazówek zegara i malejącym, gdy obracasz pokrętem przeciwnie do ruchu wskazówek zegara, lub wybierając spośród 15 programów automatycznych.TIMER
- Ekran LCD wskazuje 88:88:88, co oznacza godziny:minuty:sekundy. - Naciśnij przycisk timera, a na wyświetlaczu LCD zacznie migać sygnał minut; Obróć pokrętło, aby ustawić minuty. Naciśnij go ponownie, drugi sygnał na LCD migocze, obróć pokrętło, aby ustawić sekundy. Naciśnij go ponownie, sygnał godziny na LCD migocze, obróć pokrętło, aby ustawić godziny od 1-12h. - Naciśnij timer podczas pracy, maszyna zacznie odliczać czas. - Maksymalnie 60 min przy ustawieniu ręcznym; max 3h w ustawieniu DIY. Limit czasowy każdego programu można znaleźć w rozdziale „MENU” poniżej.Programowanie
Wciśnij przycisk  przytrzymaj przez 3 sekundy aby przejść do trybu ustawień wstępnych/spotkań. Migać będzie cyfra czasu i logo. W ten sam sposób ustaw czas od 30 minut do 12 godzin. Tryb ustawień wstępnych działa tylko w trybie DIY lub Menu. Wybierz więc najpierw DIY lub Menu. Naciśnij pokrętło po ustawieniu, a następnie rozpocznie się odliczanie. Wciśnij Preset aby anulować. PRĘDKOŚĆ
\- Naciśnij ten przycisk w trybie czuwania lub podczas pracy (z wyjątkiem niektórych programów automatycznych, które nie posiadają regulacji prędkości), urządzenie przechodzi w tryb ustawiania prędkości.  Kontrolka na LCD migocze, a następnie prędkość może być regulowana. Obróć pokrętło, aby wybrać żądaną prędkość. • Zakres prędkości to od 1-10. - Naciśnij ten przyciskł w procesie mieszania i podgrzewania, jeśli ustawienie temperatury lub rzeczywista temperatura przekracza 60 °C, prędkość można regulować tylko w zakresie od 1 do 4. Jeśli urządzenie pracowało z dużą prędkością, automatycznie spadnie do prędkości 4. \- Na konstrukcji występuje zmiana prędkości, więc to normalne, że słychać niewielki hałas przed uruchomieniem silnika lub zmianą prędkości między poziomem 5 a poziomem 6. • W przypadku kruszenia lub siekania twardych produktów spożywczych lub dużych ilości żywności, zaleca się najpierw wybrać prędkość 5, a następnie prędkość 10, aby uniknąć wibracji i osiągnąć doskonałą wydajność. - Proszę nie używać prędkości 8,9,10 przez 5 minut w sposób ciągły; proszę nie używać prędkości 5,6,7 przez 10 minut w sposób ciągły. TEMPERATURA
\- Naciśnij ten przycisk w trybie czuwania lub podczas procesu podgrzewania (z wyjątkiem niektórych programów automatycznych, które nie posiadają regulacji temperatury), urządzenie przechodzi w tryb ustawiania temperatury. Kontrolka na LCD migocze, a następnie temperatura jest regulowana. Obróć pokrętło, aby wybrać żądaną temperaturę. • Zakres regulacji temperatury: 37-120°C MOC CIEPŁA
\- Naciśnij ten przycisk w trybie czuwania lub podczas procesu podgrzewania (z wyjątkiem niektórych programów automatycznych, które nie posiadają regulacji mocy ciepła), urządzenie przechodzi w tryb ustawiania mocy ciepła. Kontrolka na wyświetlaczu LCD miga, następnie moc cieplna jest regulowana. Przekręć pokrętło, aby wybrać żadana moc ciepła. - Zakres regulacji mocy ciepła od 1-10. - W przypadku niektórych lepkich potraw zaleca się wybrać niską moc grzewczą, aby uniknąć przypalenia na dole - Jeśli objętość żywności jest mała i wymagana jest dokładna temperatura, zaleca się wybór niskiej mocy ciepła. - Niska moc będzie bardziej precyzyjniej kontrolowana; Wysoka moc nagrzewa się szybciej. - Nie będzie działać, jeśli wybierzesz tylko moc grzewczą, ale nie wybierzesz temperatury. Przy wyborze różnych poziomów temperatury sugeruje się przestrzeganie ustawień domyślnych. SAMOCZYSZCZENIE
- Ten program służy do czyszczenia po użyciu. • Dodaj wody od 500 ml do 1 litra. • Możesz użyć trochę detergentu. • Cały proces trwa około 10 minut. TURBO
- Naciśnij i przytrzymaj ten przycisk w trybie gotowości, maszyna zacznie działać z maksymalną prędkością, zwolnij, a natychmiast się zatrzyma - Gdy temperatura w kielichu przekracza 60°C, TURBO nie może być użyte, a na ekranie pojawi się E11. - Na konstrukcji występuje zmiana prędkości, więc to normalne, że słychać niewielki hałas, zanim silnik zacznie pracować przy pierwszym impulsie. - Maksymalny czas pracy w trybie TURBO to 3 minuty, a następnie 10 minut odpoczynku. MENU
• Ten przycisk służy do wyboru jednego z 10 różnych programów automatycznych. natural_image
Grid of 12 simple food icons including cooking utensils, steaming dishes, and snacks (no text or labels)| Program | Ustawienia domyślne | Ustawienia | Wskazówki |
| Krojenie | *Prędkość: 5*Temperatura: 0*Moc grzania: 0*Timer: 1min | *Krojenie, ale nie do konsystencji płynnej. Czas regulowany od 1s-5min dla pożądanej konsystencji .*Jeśli urządzenie pozostanie bezczynne przez 10 minut po zakończeniu programu, urządzenie wyłączy się automatycznie. | *Sugerowana wielkość posiekanych składników w przypadku twardych artykułów, takich jak marchewka, mięso to 1-2 cm.*Jeśli chcesz pokroić jedzenie, aby było jak najdrobniejsze, użyj SMOOTHIE. |
| GULASZ | Krok 1:*Prędkość: 0*Temperatura:100°C*Moc grzania: 10*Timer: bez limituKrok 2:*Prędkość: 0*Tempeatura: 90-95°C*Moc grzania: brak*Timer: 3h | *Domyślny timer 3h, regulowany w zakresie 1-12h*Jeśli urządzenie pozostanie bezczynne przez 10 minut po zakończeniu programu, automatycznie przejdzie w tryb „CIEPŁY”. | *Wolne gotowanie |
| PAROWAR | *Prędkość: 0*Temperatura: 120°C*Moc grzania: 10*Timer: 20min | *Czas regulowany od 15-60m*Jeśli urządzenie pozostanie bezczynne przez 10 minut po zakończeniu programu, automatycznie przejdzie w tryb „CIEPŁY”. | *500g wody na każde 30 minut gotowania na parze *Warzywo 20min; mięso 30min |
| ZUPA | Krok 1:*Prędkość: 0*Temperatura: 120*Moc grzania: 10*Timer: Do czasu ugotowania.Krok 2:*Prędkość: 0*Temperatura: 100°C*Moc grzania: 4*Timer: 29.5minKrok 3:*Prędkość: 0*Temperatura: 0°C*Moc grzania: 0*Timer: Chłodzenie do 80°CKrok 4:*Prędkość: wolno od 6 to 10*Temperatura: 0°C*Moc grzania: 0*Timer: 1 min | *Nadaje się do zupy mięsnej, najpierw rozdrobnić, a następnie ugotować i wymieszać. Timer regulowany od 15-60m.*Jeśli urządzenie pozostanie bezczynne przez 10 minut po zakończeniu programu, automatycznie przejdzie w tryb „CIEPŁY”. | *Sugerowana wielkość posiekanych składników w przypadku twardych artykułów, takich jakmarchewka, mięso to 1-2 cm.*Zasugeruj wstrzymanie i dodanie motyla po kroku 1. |
| SZYBKA ZUPA | Krok 1:*Prędkość: 10*Temperatura: 0*Moc grzania: 0*Timer: 30sKrok 2:*Prędkość: 2*Temperatura: 120°C*Moc grzania: 10*Timer: aż do ugotowaniaKrok 3:*Prędkość: 2*Temperatura: 100°C*Moc grzania: 10*Timer: 19.5min | *Nadaje się do zupy warzywnej, najpierw rozdrobnić, a następnie ugotować i wymieszać. Timer regulowany od 15-60m.*Jeśli urządzenie pozostanie bezczynne przez 10 minut po zakończeniu programu, automatycznie przejdzie w tryb „CIEPŁY”. | *Sugerowana wielkość posiekanych składników w przypadku twardych artykułów, takich jak marchewka, mięso to 1-2 cm*Zasugeruj wstrzymanie i zamontowanie motylka po kroku 1. |
| MIESZANIE | *Prędkość: 2*Temperatura: 100°C*Moc grzania: 10*Timer: 30min | *Prędkość regulowana od poziomu 0-3;* Temperatura regulowana w zakresie 90-120 °C.*Czas regulowany od 5-60m *Jeśli urządzenie pozostanie bezczynne przez 10 minut po zakończeniu programu, automatycznie przejdzie w tryb „CIEPŁY”. | *Użyj motylka lub elementu do wyrabiania |
| WYRABIANIE | Krok 1:*Prędkość: 3*Temperatura: 0*Moc grzania: 0*Timer: 3minKrok 2:*Prędkość: 2*Temperatura: 0*Moc grzania: 0*Timer: 7min | * Prędkość regulowana od poziomu 2-3;*Temperaturę rozprowadzania można regulować na 0 lub 37°C.*Czas regulowany od 3-20m*Jeśli urządzenie pozostanie bezczynne przez 10 minut po zakończeniu programu, wyłączyć się automatycznie | *Wyrabiać chleb: 330g wody + 500g mąki + inne składniki; ugniataj 10 minut domyślnie; *Zagnieść na makaron: 200g wody + 400g mąki; ugniataj 3 min z prędkością 2*Ustaw temperaturę 37°C do wyrobienia, a jeśli nie wyrobiło się wystarczająco, wybierz 37°C przez 30 minut dłużej bez prędkości |
| RISOTTO | Krok 1:*Prędkość: 0*Temperatura:100°C*Moc grzania: 6*Timer: aż do ugotowaniaKrok 1:*Prędkość: 1*Temperatura:96.5°C*Moc grzania: 4*Timer: 18 MinMoc grzania i timer: nieustawione, mogą być dostosowywane automatycznie w zależności od temperatury i objętości | * Wszystkie ustawienia bez regulacji*Jeśli urządzenie pozostanie bezczynne przez 10 minut po zakończeniu programu, automatycznie przejdzie w tryb „CIEPŁY”. | *Sugerowana objętość (maks.): 500g ryżu + 800g wody, domyślnie uruchom RYZ.*Lub ryż na parze, ustawiając: 400g ryżu w koszyku filtra, 2L wody, wybierz GOTOWANIE; następnie wylej trochę wody z 1L pozostałego, wybierz PARA przez 20min |
| SMOOTHIE | *Prędkość: 10*Temperatura: 0*Moc grzania: 0*Timer: 30s | * Wszystkie ustawienia nie można regulować, uruchom ponownie, jeśli nie jest wystarczająco dobrze.*Jeśli urządzenie pozostanie bezczynne przez 10 minut po zakończeniu programu, wyłączyć się automatycznie | Sugerowana wielkość posiekanych składników w przypadku twardych artykułów, takich jak marchewka, mięso to 1-2 cm |
| JOGURT | *Prędkość: 1 przez pierwsze 30min*Temperatura: 37-39°C*Moc grzania: 1*Timer: 6h | *Czas regulowany od 3-12h*Jeśli urządzenie pozostanie bezczynne przez 10 minut po zakończeniu programu, wyłączyć się automatycznie | *Sugerowana objętość: 1 szklanka jogurtu + 1L świeżego mleka + cukier, 6-12h w zależności od pożądanej konsystencji |
| Narzędzie | Obrazek | Funkcja | Prędkość | Pojemność | Czas pracy |
| Ostrza | | Siekanie | 5 | 2L max, pokroić na 1-2cm kawałki przed wrzuceniem | 1min |
| Krojenie na drobno | 10 | 2L max, pokroić na 1-2cm kawałki przed wrzuceniem | 1min | ||
| Element do wyrabiania | | Wyrabianie ciasta na chleb, pizzę itd. | 2-3 | Max 800g mąki | 5-10min |
| Wyrabianie makaronu | 2 | Max 500g mąki | 3min | ||
| Motylek | | Mieszanie | 1-3 | 2L max | 30min |
| Ubijanie białek lub śmietany | 4 | 2L max | 10min | ||
| Parowar | | Gotowanie warzyw na parze | N/D | 3.5L max | 15min |
| Gotowanie mięsa na parze | N/D | 3.5L max | 20-30min |
ROZWIĄZYWANIE PROBLEMÓW
\- Poniższe informacje o błędzie pojawiające się na ekranie są normalne. Jeśli problem nadal występuje po wykonaniu poniższych czynności, skontaktuj się z naszym centrum obsługi klienta.| Kodbłędu | Opis | Możliwy powód | Rozwiązanie |
| E1 | Wyłącznikbezpieczeństwa nie jest zamocowany | Kielich lub pokrywa kielicha nie są prawidłowo założone | Ponownie zamontuj kielich i pokrywkę kielicha, upewnij się, że wszystkie części są prawidłowo i szczelnie zmontowane |
| E2 | Brak czujnika temperatury | Kielich nie jest na swoim miejscu lub połączenie czujnika temperatury na podstawie kielicha jest uszkodzone | Ponownie zamontuj kielich, upewnij się, że wszystkie części są prawidłowo i szczelnie zmontowane |
| E3 | Zablokowanie silnika | Za dużo produktów w kielichu | Zmniejsz ilość żywności w kielichu lub pokrój żywność na mniejsze kawałki i ponownie uruchom urządzenie. |
| E4 | Za wysoka temperatura | Brak jedzenia w kielichu lub bardzo mało jedzenia przy ustawieniu wysokiej temperatury przez zbyt długi czas. | Dodaj jedzenie do kielicha |
| E5 | Za wysoka temperatura silnika | Maszyna zbyt długo pracuje przy dużym obciążeniu | Zatrzymaj urządzenie i pozwól mu ostygnąć przed ponownym włączeniem |
| E7 | Bład napędu | Zmiana prędkości między niskim (1-5) a wysokim (6-10) zablokowana | Wyjmij słoik, ręcznie obróć dolne sprzęgło i zamocuj kielich i uruchom ponownie. |
| E8 | Brak silnika NTC | Luźne lub uszkodzone połączenie czujnika temperatury silnika | Przestań używać i wyślij do centrum obsługi posprzedażnej, aby to naprawić |
| E11 | Nie można używać trybu pulsowania | Temperatura przekroczyła 90°C | Ostudź jedzenie i ponownie uruchom pulsację lub użyj niższej prędkości 4 |
Czyszczenie urządzenia
1. Nie myj urządzenia ani jego części w zmywarce. Umyj dokładnie urządzenie po każdym użyciu lub przechowywaniu przez dłuższy czas. 2. Odłącz urządzenie od gniazdka i pozwól mu ostygnąć przed czyszczeniem. 3. Umyj wyjmowany kielich ciepłą wodą z mydłem. Dokładnie spłucz i osusz. 4. Wytrzyj główny korpus czystą wilgotną szmatką. Jeśli pozostaną resztki jedzenia, zwilż szmatkę ciepłą wodą z mydłem przed wytaricem. NIGDY nie zanurzaj korpusu w wodzie lub innej cieczy. W razie potrzeby wytrzyj kielich, aby usunąć wszelkie produkty spożywcze. 5. Aby utrzymać dobrą wydajność urządzenia, dno wyjmowanego kielicha należy sprawdzać i czyścić, jeśli to konieczne, po każdym użyciu. Wytrzeć miękką wilgotną szmatką i dokładnie wysuszyć przed użyciem. 6. Jeśli urządzenie nie jest używane przez pewien czas, odłącz je i przechowuj w chłodnym i czystym miejscu. ZNAJDŹ WSZSYSTKIE NASZE PRZEPISY:
PRAWA AUTORSKIE
Nasza firma posiada prawo do dokumentacji, projektu i opisu. Bez zgody właściciela praw autorskich publikacja nie powinna być przedrukowywana lub przekazywana w jakiejkolwiek formie (zdjęcia lub wideo).GWARANCJA
Okres gwarancji na nasze produkty wynosi 2 lata, chyba że zaznaczono inaczej, licząc od daty pierwszego zakupu lub daty dostawy. Jeśli masz jakiekolwiek problemy lub pytania, możesz łatwo uzyskać dostęp do naszych stron pomocy, wskazówek dotyczących rozwiązywania problemów, często zadawanych pytań i instrukcji obsługi na naszej stronie serwisowej: https://sav.hkoenig.com. Wpisując nazwę referencyjną swojego urządzenia w pasku wyszukiwania, możesz uzyskać dostęp do całej dostępnej pomocy online, zaprojektowanej tak, aby najlepiej odpowiadała Twoim potrzebom. Jeśli nadal nie możesz znaleźć odpowiedzi na swoje pytanie lub problem, kliknij „Czy odpowiedź rozwiązała Twój problem? Spowoduje to przejście do Formularza zgłoszenia do obsługi klienta, który możesz wypełnić, aby zweryfikować swoją prośbę i uzyskać pomoc.WARUNKI GWARANCJI
Gwarancja obejmuje wszelkie awarie powstałe podczas normalnego użytkowania, zgodnie z zastosowaniami i specyfikacjami zawartymi w instrukcji obsługi. Niniejsza gwarancja nie dotyczy problemów z pakowaniem lub transportem podczas wysyłki produktu przez właściciela. Nie obejmuje również normalnego zużycia produktu, konserwacji ani wymiany części eksploatacyjnych.WYŁĄCZENIE GWARANCJI
\- Akcesoria i części zużywające się (\*). \- Normalna konserwacja urządzenia. \- Wszelkie awarie wynikające z niewłaściwego użytkowania (wstrząsy, niezastosowanie się do zaleceń dotyczących zasilania, złę warunki użytkowania itp.), niedostatecznej konserwacji lub niewłaściwego użytkowania urządzenia, a także stosowania nieodpowiednich akcesoriów. \- Uszkodzenia pochodzenia zewnętrznego: pożar, zalanie, przepięcie itp. \- Wszelki sprzęt, który został zdemontowany, nawet częściowo, przez osoby inne niż upoważnione do tego (w szczególności użytkownika). \- Produkty, których numeru seryjnego brakowało, uległyby zniszczeniu lub byłyby nieczytelne, co uniemożliwiałoby ich identyfikację. \- Produkty podlegające wynajęciu, demonstracji lub ekspozycji (\*) Niektóre części urządzenia, zwane częściami zużywającymi się lub materiałami eksploatacyjnymi, ulegają pogorszeniu wraz z upływem czasu i częstotliwością użytkowania urządzenia. Takie zużycie jest normalne, ale może być spotęgowane złymi warunkami użytkowania lub konserwacji urządzenia. Części te nie są zatem objęte gwarancją. Akcesoria dostarczone z urządzeniem również nie są objęte gwarancją. Nie podlegają wymianie ani zwrotowi. Jednak niektóre akcesoria można kupić bezpośrednio na naszej stronie internetowej: https://sav.hkoenig.com/.ŚRODOWISKO
UWAGA:
 Nie wyrzucaj tego produktu z innymi produktami gospodarstwa domowego. Obowiązuje segregacja tego produktu odpadowego, należy zapytać lokalne władze o miejsca, w których można oddać ten produkt. Urządzenia elektryczne i elektroniczne zawierają niebezpieczne substancje, które mają szkodliwy wpływ na środowisko lub zdrowie ludzkie i powinny zostać poddane recyklingowi. Powyższy symbol wskazuje, że sprzęt elektryczny i elektroniczny należy odpowiednio segregować. Adeva SAS / H.Koenig Europe - 8 rue Marc Seguin, 77290 Mitry-Mory, France www.hkoenig.com - https://en.hkoenig.com - Tél: +33 1 64 67 00 05
Inhoudsopgave
Klik op een titel om deze te openen
- H
- Instruction Manual
- Kitchen robot
- ENGLISH
- Important Safety Instruction
- PACKAGE CHECKING
- ACCESSORIES
- Blending Jar assembly:
- Notice
- Blade assembly:
- Kneading shaft assembly:
- Measuring cup:
- Spatula:
- Filter basket:
- Butterfly:
- Steamer Assembly:
- INSTRUCTION FOR USE
- STOP/ CANCEL
- KNOB (START/ PAUSE)
- TIMER
- SPEED
- TEMPERATURE
- HEAT POWER
- SELF-CLEANING
- TURBO
- MENU
- TROUBLE-SHOOTING
- Cleaning your appliance
- WARRANTY
- WARRANTY CONDITIONS
- EXCLUSION OF WARRANTY
- DISPOSAL AND ENVIRONMENT
- FRANÇAIS
- Instructions de sécurité importantes
- DESCRIPTION DE L'APPAREIL
- ACCESSOIRES
- Assemblage du bocal mélangeur :
- Avis
- Assemblage des lames :
- Assemblage de l'arbre de pétrissage :
- Récipient à mesurer
- Spatule :
- Spatule
- Panier-filtre
- Papillon :
- Assemblage du cuiseur à vapeur :
- INSTRUCTIONS D'UTILISATION
- ARRÊTER / ANNULER
- BOUTON DÉMARRAGE/PAUSE
- MINUTERIE
- Fonction programmable
- VITESSE
- TEMPÉRATURE
- PUISSANCE THERMIQUE
- AUTO-NETTOYAGE
- GUIDE DE DÉPANNAGE
- Nettoyage de l'appareil
- GARANTIE
- CONDITIONS DE GARANTIE
- EXCLUSION DE GARANTIE
- ENVIRONNEMENT
- DEUTSCH
- Wichtige Sicherheitsanweisungen
- VERPACKUNGSKONTROLLE
- ZUBEHÖR
- Mixbehälter-Baugruppe:
- Hinweis
- Klingen-Baugruppe:
- Knetwelle-Baugruppe:
- Messbecher:
- Spatel:
- Filterkorb:
- Hiweis
- Schmetterling:
- Dampfer-Baugruppe:
- GEBRAUCHSANLEITUNG
- STOPP/ ABBRUCH
- KNOPF (START/ PAUSE)
- HITZE-POWER
- SELBSTREINIGUNG
- (VELOUTE)
- (SOUPE)
- FEHLERSUCHE
- Ihr Gerät reinigen
- GARANTIEBEDINGUNGEN
- AUSSCHLUSS DER GARANTIE
- ERSETZUNG DER KLINGE
- NEDERLANDS
- Belangrijke veiligheidsinstructies
- CONTROLEER INHOUD
- Assemblage mengkan:
- Assemblage mes :
- Opmerking
- Assemblage kneed-as:
- Maatbeker:
- Filtermand:
- Vlinder:
- Assemblage stomer:
- INSTRUCTIES VOOR GEBRUIK
- KNOP (START/PAUSE)
- SNELHEID
- TEMPERATUUR
- WARMTEVERMOGEN
- ZELFREINIGEND
- PROBLEEMOPLOSSING
- Schoonmaken van uw apparat
- GARANTIEVOORWAARDEN
- UITSLUITINGEN VAN DE GARANTIE
- ESPANOL
- INSTRUCCIONES DE SEGURIDAD IMPORTANTES
- CONTENIDO DE LA CAJA
- ACCESORIOS
- Jarra
- Observación:
- Cuchilla
- Observaciones:
- Amasador
- Taza medidora
- Espátula
- Cesta coladora
- Mariposa
- Vaporizador
- INSTRUCCIONES DE USO
- PERILLA (INICIO/ PAUSA)
- TEMPORIZADOR
- FUNCIÓN PREESTABLECIDA
- VELOCIDAD
- TEMPERATURA
- POTENCIA DE CALOR
- AUTOLIMPIEZA
- PULSO
- MENÚ
- GUÍA DE SOLUCIÓN DE PROBLEMAS
- LIMPIEZA Y MANTENIMIETO
- GARANTÍA
- CONDICIONES DE GARANTÍA
- EXCLUSIÓN DE GARANTÍA
- MEDIO AMBIENTE
- ITALIANO
- Informazioni importanti sulla sicurezza
- CONTROLLO DEL CONTENUTO
- ACCESSORI
- Assemblaggio brocca:
- Montaggio lama:
- Avviso
- Montaggio impastatrice:
- Misurino:
- Spatola:
- Filtro a cestello:
- Farfalla:
- Montaggio vaporiera:
- ISTRUZIONI PER L'USO
- STOP / ANNULLA
- Manopola (AVVIO / PAUSA)
- VELOCITÀ
- POTENZA TERMICA
- AUTOPULIZIA
- MENÙ
- RISOLUZIONE DEI PROBLEMI
- Pulizia dell'apparecchio
- TROVA TUTTE LE NOSTRE RICETTE:
- GARANZIA
- CONDIZIONI DI GARANZIA
- ESCLUSIONE DELLA GARANZIA
- PORTUGUES
- Instruções Importantes de Segurança
- VERIFICAÇÃO DA EMBALAGEM
- ACESSÓRIOS
- Conjunto de Recipiente de Cozinhar:
- Aviso
- Conjunto de Lâminas:
- Conjunto de Eixo de Amassar:
- Copo de Medida:
- Espátula:
- Cesto Filtro:
- Borboleta:
- Conjunto de Vaporizador:
- INSTRUÇÕES DE UTILIZAÇÃO
- STOP / CANCEL (PARAR / CANCELAR)
- TIMER (TEMPORIZADOR)
- SPEED (VELOCIDADE)
- DE CALOR)
- HEAT POWER (PÔTÊNCIA
- SELF-CLEANING (AUTO-
- RESOLUÇÃO DE PROBLEMAS
- Limpeza do seu aparelho
- ELIMINAÇÃO E AMBIENTE
- Descarte correto deste produto
- DIREITOS DE AUTOR (COPYRIGHT)
- POLSKI
- Ważna instrukcja dotycząca bezpieczeństwa
- ZAWARTOŚĆ OPAKOWANIA
- Akcesoria
- Kielich z ostrzami
- Uwaga
- Montaż ostrza:
- Montaż wałka ugniatającego:
- Miarka:
- Szpatułka:
- Koszyczek:
- Motylek:
- Parowar:
- INSTRUKCJA UŻYCIA
- STOP/ ANULUJ
- POKRETŁO (START/ PAUZA)
- Programowanie
- PRĘDKOŚĆ
- MOC CIEPŁA
- SAMOCZYSZCZENIE
- ROZWIĄZYWANIE PROBLEMÓW
- Czyszczenie urządzenia
- ZNAJDŹ WSZSYSTKIE NASZE PRZEPISY:
- PRAWA AUTORSKIE
- GWARANCJA
- WARUNKI GWARANCJI
- WYŁĄCZENIE GWARANCJI
- ŚRODOWISKO
- UWAGA:
Handleidingassistent
Aangedreven door Anthropic
Wachten op uw bericht
Productinformatie
Merk : H.KOENIG
Model : HK8
Categorie : Keukenmachine