
GeoVision 5800 iGo - Gps PRESTIGIO - Free user manual and instructions
Find the device manual for free GeoVision 5800 iGo PRESTIGIO in PDF.


| Product Type | GPS Navigation with DVR |
| Model | GeoVision 5800 iGo (GV5800BTHDDVR) |
| Brand | Prestigio |
| Display Size | 5 inches |
| Display Resolution | 800 x 480 pixels |
| Display Type | TFT Touch Screen |
| Processor | SiRF Atlas V, 664 MHz |
| RAM | 128 MB DDR2 |
| Internal Storage | 4 GB MLC Flash |
| Expansion Slot | microSD Card (max 8 GB), T-flash for DVR |
| Battery Type | Lithium-polymer, 1000 mAh |
| Charging Time | Approximately 4 hours |
| Operating System | Windows CE .NET 6.0 |
| Navigation Software | iGO Primo |
| DVR | 120 degree, 720p, 1.0 MP, IR Light, 30 FPS |
| Bluetooth | Yes (hands-free calling, phonebook) |
| FM Transmitter | Yes (requires car charger) |
| Video Formats | MPEG4, WMV, AVI, ASF, MP4, MPG, 3GP |
| Audio Formats | WMA, MP3, WAV, M4A, OGG, AAC |
| Connections | USB 2.0, Earphone jack (3.5mm), Video-IN |
| Power Supply | Car charger (12V), USB charging from PC |
| Operating Temperature | 0°C to +50°C |
| Cleaning and Maintenance | Wipe with a soft, dry cloth. Do not use harsh chemicals. |
| Safety Precautions | Do not disassemble; avoid exposure to liquids or extreme temperatures. |
Frequently Asked Questions - GeoVision 5800 iGo PRESTIGIO
User questions about GeoVision 5800 iGo PRESTIGIO
0 question about this device. Answer the ones you know or ask your own.
Ask a new question about this device
Download the instructions for your Gps in PDF format for free! Find your manual GeoVision 5800 iGo - PRESTIGIO and take your electronic device back in hand. On this page are published all the documents necessary for the use of your device. GeoVision 5800 iGo by PRESTIGIO.
USER MANUAL GeoVision 5800 iGo PRESTIGIO
Important Safety Instructions
CAUTION
RISK OF ELECTRIC SHOCK DO NOT OPEN!


The exclamation point within an equilateral triangle is intended to alert the user to the presence of important operating and maintenance (servicing) instructions in the literature accompanying the appliance.
CAUTION
- To reduce the risk of electric shock, do not remove the cover (or back). No user-serviceable parts inside. Refer servicing to qualified service personnel.
- The manufacturer should not hold responsibility for the damage caused by any substitutions and modifications of the product without authorization from the manufacturer or authorized unit
WARNING
The device should not be exposed to dripping or splashing and no objects filled with liquids should be placed on the device.
Accessories
Prestigio GeoVision 5800BTHDDVR-Accessories List
| ITEM | NAME |
| Car Charger 1 | |
| USB Cable 1 | |
| Car Mount 1 | |
| Stylus Pen 1 | |
| User Manual 1 | |
| Warranty Card 1 | |
| Driver/Document CD 1 |
View of Main Unit
Prestigio GeoVision 5800BTHDDVR
Front and Side View

1. LCD Touch Screen
Tap the screen with touch pen or finger to select menu commands or to enter information.
2. Battery Status Indicator
The indicator glows in bright green color when battery is fully charged and in red color when charging.
3. Earphone Jack
Connects to earphones or headsets.
4. microSD Slot
Receiving micro SD memory card for data access or memory expansion.
5. Video-IN Jack
- mini USB Port
Connection to USB Cable for data access or battery charging
7. Microphone
Records sound
View of Main Unit
Prestigio GeoVision 5800BTHDDVR
Rear and Top View
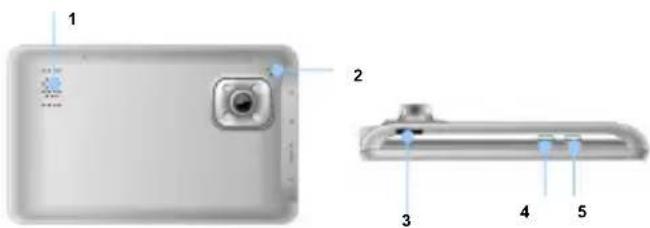
1. Speaker
Emits sound, voice or music.
2. Reset Button
Press to reboot the device.
3. T-flash slot for DVR
Receiving micro SD card for recording video
4. Power Button
Press to power the device ON/OFF.
5. Lock Button
Press to lock the current video
Device Connections
Inserting microSD Card

- To insert a microSD card, place the connector towards the device and the card label towards the front side of the device.
- To remove a microSD card, gently press the edge of the card to release the safety lock and pull the card out of the slot.

NOTE:
Please always make sure that no application is accessing the microSD card before extraction.
Connecting to External USB Device (Charging)
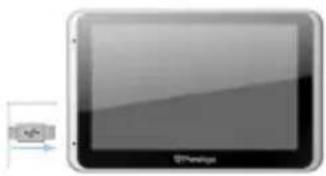
- Insert the USB connector into the appropriate USB port.
- Insert the other USB connector into the USB port on PC to start charging.
Device Connections
Connecting to Car Charger

- Insert the USB connector into the appropriate USB port.
- Insert car charger connector into vehicle 12V accessory/cigarette socket to start charging.

NOTE:
Please connect the car charger to vehicle 12V accessory/cigarette socket after the vehicle engine is started to protect the device from sudden surges in current.
Cautions on Battery Charging
About Rechargeable Battery
The device is equipped with a built-in rechargeable battery. Please fully charge the battery (for at least 5 hours) before initial use. The battery status indicator glows in red color when charging and turns bright green color when charging is complete. Charging time is approximately 4 hours.
Working conditions and precautions for the rechargeable battery
● Devices with new batteries should be fully charged before initial use.
- It is not necessary to start charging the device before the battery is fully discharged.
Getting Started
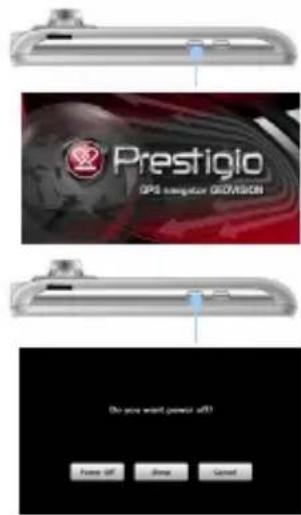
- Press and hold Power Button to turn on the device.
- Shortly after the greeting screen is shown, the main menu will be displayed.
- Tap the corresponding buttons with touch pen included to navigate through various functions.
- Press and hold Power Button to turn the device off or to allow the device to enter sleep mode.
- Tap Sleep icon to put the device to sleep mode or Power Off icon to turn the device off.
Device Settings
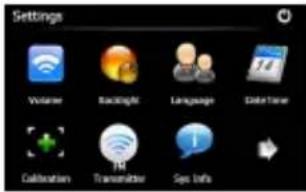
- In the main menu, tap on 📄 to enter the device settings.
- Tap to display other settings.
| Volume | Adjust sound volume, mute device, or enable warning messages. |
| Backlight | Adjust the brightness of touch screen, enable/disable auto backlight. |
| Language Select desired language. | |
| DateTime Set up Time Zone/Date/Time. | |
| Calibration Calibrate the screen when position deviation occurs. | |
| FM transmitter Transmit audio signals from the navigator to radio sets. | |
| USB | Set the data transmission mode(Active sync or Mass Storage) between the navigator and computer. |
| Factory Reset Restore all system settings to its factory default values. | |
DVR Function


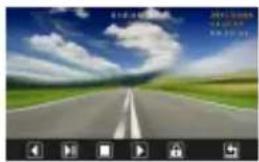
- Tap on DVR icon on the main menu to start using DVR function.
- Tap on 📄 to start or stop video recording; Tap on 📋 to play the recorded video; Tap on 🔍 to lock the recording video.
- Tap on 📋 to format the TF card & start-up method of video; Tap on 📋 to exit the DVR function.
- Tap on 📋 to enter the setting interface as left picture; Tap on 📋 and 📋, the device will run the DVR function automatically when power on; Tap on 📋 and 📋, the IR lights will be running automatically during the dark; Tap on 📋 to exit the setting interface.
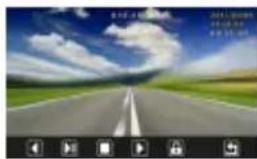
- Tap on ▶ to enter the playback interface as left picture.
- Tap on ☐ to play the previous video; Tap on ☐ to pause or continue playing; Tap on ☐ to stop playing the current video; Tap on ☐ to play the next video of previous videos; Tap on ☐ to lock&unlock current video; Tap on ☐ to return the DVR main interface.
(Note: For DVR, it's a must to use TF card with Class4 at least)
ADR player of DVR
The ADR player will be automatically generated after TF format. The file will be shown on the screen once open the TF card by computer. Click ADR Player, the interface will be as below: (Note: for more detailed info about ADR player, please refer to CD)

① Video Display Area: Display the current playing video
② GPS Information Display Area: Display the GPS information of the current video including GPS coordinates and driving speed
③ Map Display Area: When ADR Player has connected to Google Map via network and the current playing video has GPS information record, the area will display the drive route
④ G-Sensor Display Area: Display G-Sensor information.
⑤ Progress Slider Bar: Show the progress of playing video and end user can drag mouse to any desired location on slider bar for playing video
⑥ Video Group List: Display all video groups in the SD Card; Video group is a combination of continuous video clips.
⑦ Video Clip List: Display all video clips in the SD Card; ADR Player lists videos in clips

- Select a video group and press save video button, the interface will be as left figure; Check the checkbox you want on the clip IDs or check "Save All" checkbox and press" Save File" button to export and save video clips to AVI files.
Bluetooth Function


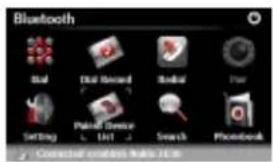
- Tap on Bluetooth icon on the main menu to start using Bluetooth function.
- The link status is shown at the bottom of the interface.
- Tap function to exit the current
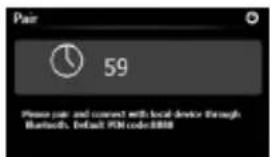
- Tap in Bluetooth interface to start pairing with mobile phone device with GPRS function.
- Please make sure Bluetooth function on mobile phone is detectable by other devices.
- "Connected established" will be displayed upon the successful pairing.
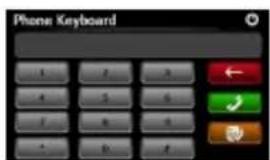
- Tap in Bluetooth interface to enter the Phone Keyboard.
- Tap on digit buttons and tap on 📋 Start Dialing, Backspace, and enter Dial Re
Bluetooth Function

9.
Tap


/ to adjust the
volume. Tap on

end call.

10
Tap

to enter call record.


pad. Tap on


call to mobile


11
e call fails to connect as
illustrated
12
Tap


to return to Phone
Keyboard interface.
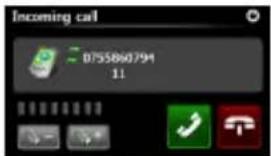
13
lling number will be displayed on the Incoming Call.
Bluetooth Function
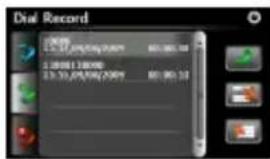


14


15


Dialed Call list, Received Call list, and Missed Call list. Tap on 📄 to start dialing.
16
delete a desired phone
number in the list, select the number and tap on Tap on to delete all numbers in the list.
17


interface to redial the last dialed number.
18


19


20


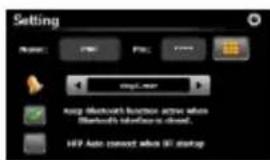
Bluetooth function. Tap on 📄 to enable/disable automatic HFP connection.
Bluetooth Function
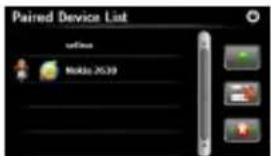
- Tap in Bluetooth interface to enter Paired Device List function.
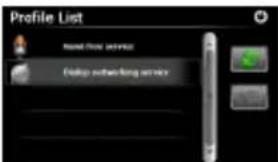
- Tap on to delete mobile phone name from the list. Tap on to disconnect the PND (Personal Navigation Device) from the mobile phone. Select mobile phone name from Paired Device List and tap on to enter Profile list.
- Tap on to re-connect from previously connected mobile phone. Tap on to disconnect the PND (Personal Navigation Device) from the mobile phone.
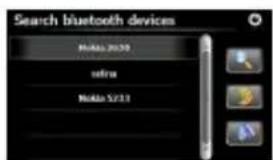
- Tap in Bluetooth interface to start searching process.
- Pairing devices(mobile phones) will be displayed in the list when search is completed.
- Tap on the mobile phone name and tap on to pair. Tap on to enter Paired Device List.
Bluetooth Function

- Tap on 📄 to enter Phonebook.
- Tap 📄 to download the phone numbers of the mobile phone to the PND (Personal Navigation Device).
- Tap 📄 to dial the phone number.
- Tap on 📄 to delete mobile phone name from the list.
FM Function
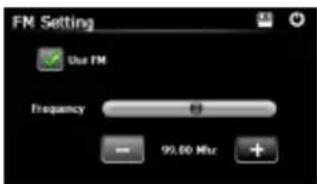
- Tap on Function icon on the main menu.
- Tap on FM icon to start using Bluetooth function.
- Tap on □ or drag the cursor to tune FM frequency down/up.
- Tap on □ to save current FM station.
- Tap on □ Use FM to enable the FM function.
- Tap on □ to exit.
(Note: Please make sure GPS is connected to the car charger before using FM Transmitter)
Initialization and Software Activation

When using the navigation software for the first time, an initial setup process starts automatically. Do as follows:
Select the program language. If your preferred language does not appear on the screen, tap / or drag the list up or down with your finger to view all available languages. Tap English (EN) to select your preferred language. Tap Done confirm your selection, and proceed to the next page.
Read the Software and Database End User Licence Agreement, and tap if you agree with the terms of use.
The Configuration wizard starts in the selected language. Tap continue.
Select the voice guidance language profile. If your preferred language does not appear on the screen, scroll the list for other available profiles. Tap any item in the list for a short voice sample. Tap 📋 to confirm your selection, and proceed to the next page.
Initialization and Software Activation
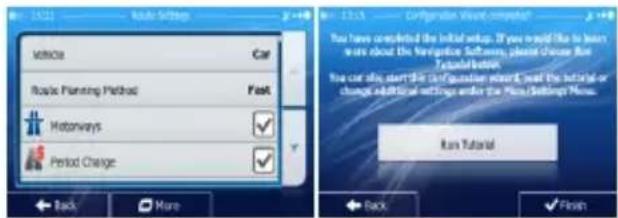
Set your preferred time format and units. Tap to confirm your preferences.
Set your preferred route planning options. Tap to confirm your preferences.
You are offered to watch the tutorial that leads you through the basic steps of navigation. Tap Run Tutorial if you would like to get an instant understanding of the functions of your software. You can run it later if you choose ✅ Push
You are now asked whether you allow the software to collect usage information and GPS logs that may be used for improving the application and the quality and coverage of maps. Tap Yes to allow the anonymous statistics or No this function.
The initial setup is now complete. The application starts.
Navigation
Introduction

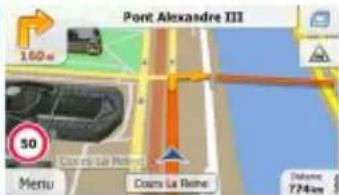
After the initial setup, and whenever the software is started, the Navigation menu appears. You have the following options:
- Tap to select your destination by entering an address or selecting a place of interest, a location on the map or one of your Favourite destinations. You can also look up your recent destinations from the Smart History, enter a coordinate or use the location saved in a photo.
- Tap My Route to display the route parameters. You can view the route in its full length on the map. You can also perform route-related actions such as editing or cancelling your route, setting a start point for the route, picking route alternatives, avoiding parts of the route, simulating navigation or adding the destination to your Favourites.
- Tap Max. to customize the way the navigation software works, watch the Tutorial, simulate demo routes, or to run some additional applications.
- Tap Show Map to start navigating on the map.
- Tap to stop navigation and exit the software.
EN-10
Navigation
Destination Menu
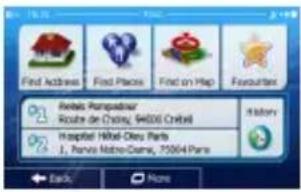

In the Navigation menu, tap Find The Find menu provides you with the following options:
- Tap to specify an address as your destination.
- Tap [icon] to select a place of interest as your destination.
- Tap Find on Map to navigate to a location selected on the map.
- Tap 🧑️ to choose from the list of your favourite destinations.
- Tap ☐ or ☑ to navigate to the recent destination that is shown on the button.
- Tap to choose from the list of all recent destinations.
- Tap More to navigate to a coordinate or to a location saved in a photo.
Navigation
Navigating to An Address

In the Navigation menu, tap 📄, then tap 📋. By default, the screen proposes the city or town where you are located.
If needed, change the country. Tap the button showing the name of the country.
-
Use the keyboard to enter the name of the country.
-
After entering a couple of characters, the list of countries that match the entered string appears. Tap the country of your choice.
If needed, change the city/town. Tap the button showing the name of the city/town, and use the keyboard to enter a part of its name. As you enter letters, the most likely city/town name is always shown in the input field. You have the following options:
- Tap to select the city/town that is offered in the input field.
- Tap ← to correct your entry.
- Tap Results to browse the list of city/town names matching your input. Select a city/town from the list.
Navigation
Navigating to An Address
![CONTESSE DE SEGUR (ALLÉE DE LA) Q E R T Y U I P S D G H L C _ N N Back Name Results [181]](/content/2026/05/989476/images/71c34131b0855454c9972e57bf5151502d9cc3055bb1445e32160e23c9b616b7.jpg)

Enter the street name:
- Tap .
-
Use the keyboard to enter a part of the street name.
-
Tap to select the street that is offered in the input field or tap to browse the list of all streets matching your input. Select a street from the list.
Enter the house number:
- Tap : volume Numbers
- Use the keyboard to enter the house number.
- Tap √ Down to finish entering the address.
The map appears with the selected destination in the middle. Tap another map location if necessary, then tap ▼ Not to confirm the destination.
After a short summary of the route parameters, the map appears showing the entire route. Wait for a few seconds or tap Go! and start navigating.
Navigation
Navigating to a Place of Interest (POI)
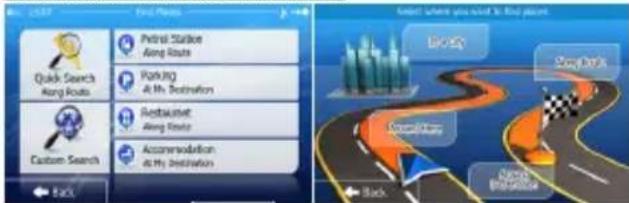
On the Map screen, tap Menu to return to the Navigation menu. In the Navigation menu, tap find, then tap . You are offered the following preset search categories:
- Tap Petrol Station to get a list of petrol stations along the route or if it is not available, around your current position or your last known position.
- Tap Parking At My Destination to get a list of parking lots near the destination or if it is not available, around your current position or your last known position.
- Tap Restaurant Along Route to get a list of restaurants along the route, around your current position or your last known position.
- Tap Accommodation Ac My Destination to get a list of accommodation near the destination, around your current position or your last known position.
You can also tap 📄 and search for a place by entering its name.
EN-12
Navigation
Navigating to a Place of Interest (POI)
If none of the above is appropriate, tap to find a place of interest at the following locations:
- Tap Around From to search around the current position or if it is not available, around the last know position.
- Tap In a City to search for a place within a selected city or town.
- Tap Around Destination to search for a place around the destination of the active route.
- Tap Along Route to search along the active route, and not around a given point. This is useful when you search for a later stopover that results in a minimal detour only, such as searching for upcoming petrol stations or restaurants.
Navigation
Example for Navigating to a Place of Interest
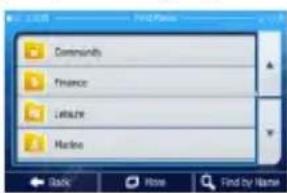
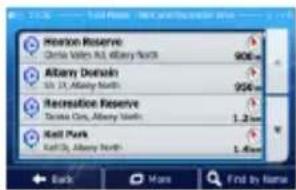
Example: To find a park around your destination, do as follows (starting from the Navigation menu):


After a short summary of the route parameters, the map appears showing the entire route. Wait for a few seconds or tap → Go and start navigating.
More Menu

The Map screen is the most important and frequently used screen of the software. The Vehimarker (a blue arrow by default) represents your current position, and the orange line shows the recommended route. There are screen buttons and data fields on the screen to help you navigate. During navigation, the screen shows route information.
- At the top of the screen, you see your heading and the house numbers on left and right if you have not selected a route destination. When navigating a route, you see the next manoeuvre and the next street/road on your route. Tap either of them to open the route itinerary.
- Tap to open the Quick menu with a selection of functions that are useful during navigation.
- Tap the map anywhere to explore the map around your current position. Additional map control buttons appear.
- Tap distance 16.9 = to open three data fields on the map. Tap any of them to suppress the others. The default values (you can change them in Map settings):
• the remaining distance to the destination,
• the estimated time of the arrival at the destination, and
• the remaining time of the trip. - Tap Menu to return to the Navigation menu.
More Screen

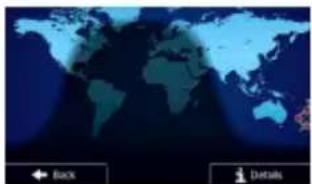
The 'More' menu provides you with various options and additional applications. In the Navigation menu, tap

Fine-tune route planning options, change the look of the Map screen, or off warnings, or restart the Configuration wizard, etc.

Visit www.naviextras.com to get additional content, such as new maps or ndmarks and useful applications.

Access multimedia applications: the Picture Viewer or the Music Player.

Access travel applications: the unit converter, the clothing size converter
entry information.

Access other useful applications: the calculator, the fuel and maintenance or, sunrise and sunset information or the trip and track log monitor.

Read the Tutorial to get instant understanding of the functions of your are, or run the Demo to watch sample route simulations to see how ration works.
EN -14
Settings


In the Navigation menu, tap 📄, then tap 📋. The Settings menu provides you with the following options (scroll the list to see all):

Adjust the different sound volumes, change the voice guidance able and set up warnings.
Change the function buttons in the Quick menu of the Map screen.

Before selecting one of the Lorry profiles as the Vehicle type used, set up the editable lorry attribute profile with the parameters. These parameters will be used in route calculation.

You can turn Smart Routes on or off, select whether to take traffic consideration when calculating the route or you can change the

Select the type of vehicle you are driving, the road types used in g, and the route planning method.

These settings determine how Green routes will be calculated.
Settings
They are also used to display the cost and CO2 emission of routes.
- Adjust map related settings: change the daytime and night colour schemes, change the default zoom level, switch between 2D and 3D map, suppress buildings or change the Vehimarker.
- Change the values of the data fields on the Map screen, show or suppress junction views and signpost or display a route progress bar on the left of the map.
- Tum the menu animations on or off, select a different skin for the application, adjust the display backlight.
• Regional: Change the program language, the time format and units or the
time zone.
- Tum the automatic trip or track log saving on or off, check the current size of the trip database.
- Log Collection. The application collects usage information and GPS logs that may be used for improving the application and the quality and coverage of maps. Here you can enable or disable collecting these logs.
- Modify the basic software parameters set during the initial setup process.
• Load to Defaults: Delete all saved data and reset all settings to their factory defaults.
Troubleshooting
Take steps described in the tables below to solve simple problems before contacting customer service.

NOTE:
Immediately turn off the device and disconnect the power adapter if the device is not working properly. Never try to repair the unit without authorized professionals for it may damage the unit.
PROBLEM
POSSIBLE CAUSE
POSSIBLE SOLUTION
Users cannot tum on the unit.
The adaptor is not connected well.
Connect the adaptor correctly.
The built-in rechargeable battery is weak.
Use the adaptor to supply power or charge the battery.
There is no sound.
The volume may be turned down or mute.
Turn up the volume or turn on the sound output.
There is no picture.
The brightness may be turned down.
Adjust the brightness of the LCD.
The unit cannot receive satellite signals or cannot orient.
The unit work may be obstructed by buildings or metal blocks.
Make sure to use the unit outdoors; if in vehicle, you can use the external GPS antenna to solve this problem.
Troubleshooting
PROBLEM
Irregularity or instability in signal receiving.
POSSIBLE CAUSE
POSSIBLE SOLUTION
| The built-in rechargeable battery is weak. | Use the adaptor to supply power or charge the battery. |
| The unit may be obstructed by material, such as heat insulation paper. | Remove the material. |
| The movement of the unit is too strong. | Avoid any movement of the unit. |
Technical Specifications
| MODEL GV5800BTHDDVR | |
| Navigation Software IGO Primo | |
| GPS Chipset SiRF Atlas V, 664MHz | |
| DVR 120 degrees/720P/1.0 MP/IR Light/30FPS | |
| Antenna Internal | |
| Interface USB | |
| Display size 5" | |
| Resolution 800*480 | |
| Display type TFT, Touch screen | |
| RAM 128MB, DDR2 | |
| Flash 4GB, MLC | |
| Expansion slot Micro SD-Card slot, max 8GB | |
| Battery type/capacity Li-poly/1000mAh | |
| Operating system Windows CE .NET 6.0 | |
| Speaker Built-in, 1W | |
| Video formats supported | MPEG4,WMV, AVI,ASF,MP4, MPG,3GP (not support RM,RMB) |
| Audio formats supported | WMA, MP3,WAV,M4A,OGG, AAC |
| Earphone jack | 3.5mm |
| Operating Temperature | 0C ~ +50°C |
| Operating humidity | 10% to 90% non-condensing |


9.
Докоснете

10.
Докоснете

за да влезете в
11.


14.
Докоснете иконата

B on
The image is too blurry to recognize any text content.





Inicializace a aktivace softwaru


The Ground Truth image displays a single, solid horizontal line, which is a stylistic or background element (like a rule line on paper). According to Rule 2, such lines must be ignored by the OCR result. The provided OCR content is "____", which consists of underscores. Underscores are not equivalent to a solid line and are not permitted under the “Stylistic/Background Lines (Ignore)” rule. Outputting underscores for a stylistic line is incorrect because it misinterprets the line as a placeholder fill-in-the-blank area. Since the OCR output incorrectly rendered a stylistic line as underscores (which should be ignored), this violates the rule. Therefore, the OCR result is inconsistent with the Ground Truth.
广力云智慧零售收银系统
...
e1 v
2.1.3
ani
1 + u/1 - u/1 = ( 1 + u) u1 < u/1 = u
Avidon
∴ m = 3/11
in
izac
(1) 2017年
to default
∴ m = 3/11
广力云智慧零售收银系统
voni
VCM
[Non-Text]
Řešení problémů
Olulised ohutusjuhised




9.
Helitugevuse
reguleerimiseks
puudutage ikooni

11
Kõne
ühendamine
ebaönnestus

14
Puudutage

Bluetooth-liideses, et siseneda
kõnede ajalukku.
15
Puudutage


//, et
∴ m = 3/11
- IMPORTANT SAFETY INSTRUCTIONS
- CAUTION
- RISK OF ELECTRIC SHOCK DO NOT OPEN
- WARNING
- ACCESSORIES
- VIEW OF MAIN UNIT
- PRESTIGIO GEOVISION 5800BTHDDVR
- LCD TOUCH SCREEN
- BATTERY STATUS INDICATOR
- EARPHONE JACK
- MICROSD SLOT
- VIDEO-IN JACK
- MICROPHONE
- SPEAKER
- RESET BUTTON
- T-FLASH SLOT FOR DVR
- POWER BUTTON
- LOCK BUTTON
- DEVICE CONNECTIONS
- CAUTIONS ON BATTERY CHARGING
- ABOUT RECHARGEABLE BATTERY
- WORKING CONDITIONS AND PRECAUTIONS FOR THE RECHARGEABLE BATTERY
- GETTING STARTED
- DEVICE SETTINGS
- DVR FUNCTION
- ADR PLAYER OF DVR
- BLUETOOTH FUNCTION
- FM FUNCTION
- INITIALIZATION AND SOFTWARE ACTIVATION
- NAVIGATION
- INTRODUCTION
- DESTINATION MENU
- NAVIGATING TO A PLACE OF INTEREST (POI)
- MORE MENU
- MORE SCREEN
- EN -14
- SETTINGS
- TROUBLESHOOTING
- NOTE
- TECHNICAL SPECIFICATIONS
- INICIALIZACE A AKTIVACE SOFTWARU
- ŘEŠENÍ PROBLÉMŮ
- OLULISED OHUTUSJUHISED
Brand : PRESTIGIO
Model : GeoVision 5800 iGo
Category : Gps