
GeoVision 5150 Navitel - Gps PRESTIGIO - Free user manual and instructions
Find the device manual for free GeoVision 5150 Navitel PRESTIGIO in PDF.


| Product Type | Portable GPS Navigator |
| Brand | Prestigio |
| Model | GeoVision 5150 Navitel |
| Display Size | 5.0 inches |
| Display Type | Touchscreen TFT LCD |
| Dimensions | 140 x 85 x 15 mm |
| Weight | 180 g |
| Battery Type | Rechargeable lithium-ion |
| Battery Life | Up to 4 hours |
| Power Input | 5V DC via USB or car charger |
| Maps | Preloaded Navitel maps |
| Functions | GPS navigation, route planning, points of interest |
| Connectivity | USB 2.0, microSD slot (up to 32GB) |
| Maintenance | Clean screen with soft cloth; avoid moisture |
| Safety | Do not use while driving; mount securely |
| Spare Parts | Car charger, USB cable, suction mount available |
| Repairability | Battery and SD card replaceable; professional service recommended |
Frequently Asked Questions - GeoVision 5150 Navitel PRESTIGIO
User questions about GeoVision 5150 Navitel PRESTIGIO
0 question about this device. Answer the ones you know or ask your own.
Ask a new question about this device
Download the instructions for your Gps in PDF format for free! Find your manual GeoVision 5150 Navitel - PRESTIGIO and take your electronic device back in hand. On this page are published all the documents necessary for the use of your device. GeoVision 5150 Navitel by PRESTIGIO.
USER MANUAL GeoVision 5150 Navitel PRESTIGIO
Important Safety Instructions
CAUTION
RISK OF ELECTRIC SHOCK DO NOT OPEN!


The exclamation point within an equilateral triangle is intended to alert the user to the presence of important operating and maintenance (servicing) instructions in the literature accompanying the appliance.
CAUTION
- To reduce the risk of electric shock, do not remove the cover (or back). No user-serviceable parts inside. Refer servicing to qualified service personnel.
- The manufacturer should not hold responsibility for the damage caused by any substitutions and modifications of the product without authorization from the manufacturer or authorized unit
WARNING
The device should not be exposed to dripping or splashing and no objects filled with liquids should be placed on the device.
To prevent the GPS from being damaged, be sure to keep the GPS out of direct sunlight or heat. Maintain well-ventilated conditions around the unit to avoid overheating.
Accessories
Accessories List
| ITEM | NAME |
| Car Charger 1 | |
| Mounting Cradle 1 | |
| USB Cable 1 | |
| Stylus Pen 1 | |
| Leather Carrying Case (GV5150 only) | |
| Driver/Documentation CD 1 | |
| User Manual 1 | |
| Warranty Card |
View of Main Unit
Front and Side View

- LCD Touch Screen
Tap the screen with a finger to select commands or use the included stylus.
- Battery Status Indicator
The indicator glows in bright amber color when battery is fully charged and in red color when charging.
- microSD Slot
Insert the SD card into the slot. Used for Mapping Data or user's music, photo or video.
- Mini-USB Port
Connects to USB Cable for data access or battery charging
- Headphone Port
Connect an earphone for private listening. When an earphone jack is plugged in, the speaker will be turned off automatically.
- Reset Button
Used to reset the device.
- Power Button
Press to power ON/OFF device.
- Speaker
Emits sound, voice or music.
- Stylus Pen
Used for writing on the LCD Touch Screen.
- Backlight Button
Auto adjust the screen brightness level
EN - 2
Device Connection
Inserting microSD Card
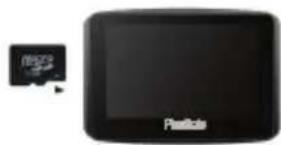
- To insert a microSD card, place connector towards device and card label towards the front side of the device.
- To remove a microSD card, gently press the edge of the card to release the safety lock and pull the card out of the slot.

NOTE:
Please always make sure that no application is accessing the microSD card before extraction.
Charging
-
Connecting to External USB Device
-
Flip open the protective rubber cover towards the front of the device.
- Insert USB connector into the appropriate USB port.
- Insert the other USB connector into USB port on PC to start charging.
Device Connection
2. Connecting to Car Charger
- Flip open the protective rubber cover towards the left side of the device.
- Insert USB connector into the appropriate USB port.
- Insert car charger connector into vehicle 12V accessory/cigarette socket to start charging.

NOTE:
Please connect the car charger to vehicle 12V accessory/cigarette socket after vehicle engine is started to protect the device from sudden surges in current.
Connecting to Earphones
- Flip open the protective rubber cover towards the front of the device.
- Insert earphone plug (not included) into the appropriate earphone port to switch audio output from device speaker to earphone.

NOTE:
Excessively loud volume is potentially detrimental to hearing. Please turn down the volume before connecting the earphone and gradually turn up the volume to a comfortable level.
Cautions on Battery Charging
About Rechargeable Battery
The device is equipped with a built-in rechargeable battery. Please fully charge the battery (for at least 8 hours) before initial use. The battery status indicator glows in red color when charging and turns bright amber color when charging is complete. Charging time is approximately 2 hours.
Working conditions and precautions for the rechargeable battery
● Device with new battery should be fully charged before initial use.
- It is not necessary to start charging the device before the battery is fully discharged.
Using Mounting
Device Mounting Procedures
The device can be securely mounted on vehicle dashboard or windshield with the mounting cradle included. Please follow procedures below to operate mounting cradle:
- Select an appropriate location on windshield or dashboard where the device and mounting cradle will not obstruct driver field of vision.
- Please also make sure that the device has a clear view of sky to attain best GPS reception.

natural_image
Black rectangular electronic device with a scroll wheel and display screen (no visible text or symbols)- Place device on the bracket with bottom positioned on the appropriate socket.
- Push on the top edge to securely install device onto the cradle.
- Lift the suction cup lever and press the suction cup at desired location.
- Press down the suction cup lever to secure the mounting cradle on the surface.
- Rotate the knob to adjust device to desired viewing angle.
To Dismount Device
- Push the tap on top of the mounting cradle to release the device.
- Lift the suction cup lever to easily remove the suction cup from windshield or dashboard.
Getting Started
natural_image
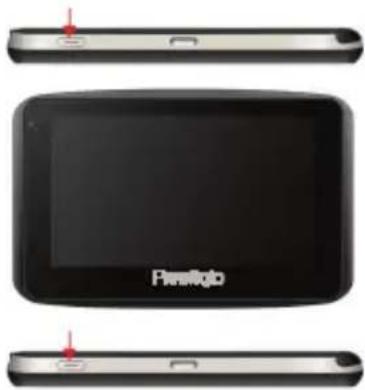
Top-down view of a black device labeled 'Pisifikob' with two side panels showing front and back views (no additional text or symbols visible)- Press and hold Power Button to turn on device.
- Shortly after the startup screen is shown, the main menu will be displayed.
- Tap the corresponding buttons with touch pen included to navigate various functions.
- Press and hold Power Button to turn off the device or to allow device to enter sleep mode.
Program interface

| No. | Name | Function |
| 1 | Information panel | A sign of the upcoming manoeuvre. There are various turns, distance to the next maneuver in metres or kilometres, etc. on a gray background. Clicking on the sign stops the route guidance and more route options. |
| 2 | Compass | Context menu opens by pressing this button. In this menu switches the orientation of the map («North up» - lock icon is next to the compass, «Rotate in accordance with the movement» - route is next to the compass), the type of card (Flat view «2D» and the Panoramic view of the «3D») and the skins («Night», «Day», «Auto»). When driving the compass always points to the North. |
| 3 | Sound Sound menu opens by pressing this button | |
| 4 | Information panel | The estimated total time in a way, the total length of the route, time of arrival at the final point of the route.The active |
| 5 | Route The active route. | |
| 6 | Navitel. Events Event management button. | |
| 7 | GPS-cursor Your location indicator. | |
| 8 | Menu Main menu opens by pressing this button. | |
Program interface
No. Name Function
| 9 | Information panel | Shows the name of the street you are currently driving along. Available only if GPS/GLONASS connection is established. If there is no street name, the direction will be shown. |
| 10 | 2D/3D Switches 2D/3D format. | |
| 11 | Traffic lane | Displays the traffic lanes with a valid maneuvers at the next intersection. |
| 12 | Scale button | Zoom out. |
| 13 | Scale button | Zoom in. |
| 14 | Information panel | Following street. |
| 15 | Battery | Icon shows the level of battery charge. Press it to see the remaining memory. |
| 16 | GPS | GPS/GLONASS connection icon. If the indicator is grey — receiver is disabled, red — switched on, but the connection is not established, yellow - poor connection, green - connection established. There is a number of the satellites in the dot. |
Program interface
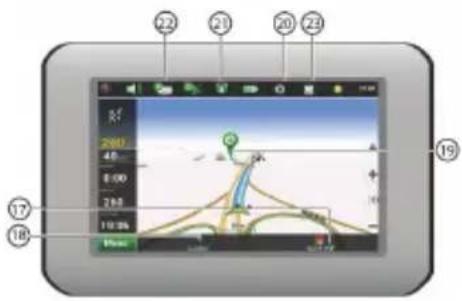

No. Name Function
17 «Save» Saves current marc on map as a waypoint.
18 «Cursor» Shows the mark menu.
Program interface
No. Name Function
| 19 | Mark on the map | You can set the mark by taping on the map. You can save this mark as a waypoint, add it to the route or see object's characteristics the mark was set on. |
| 20 | Track record | Track record. Red dot means that the track is recording, grey dot means that the record stopped. |
| 21 | Traffic Jams | Shows the current traffic jams on a 10-point scale. |
| 22 | Navitel.SMS | This button is intended to read/send SMS-messages. Near the icon you can see the number of unread messages. |
| 23 | Software update | Shows available updates. |
| 24 | «Go!» | Marks the current position on the map as the end of the route |
| 25 | «Route through» | Mark becomes the start point on the route. You should turn off your GPS/GLONASS receiver. |
| 26 | «Set start» Mark becomes the middle point of the route. | |
| 27 | «Set finish» | Mark on the map becomes the end of the route. And previous end of the route becomes the middle point. |
| 28 | Map Back to map. | |
Autorouting
Route to the objects.
To create a route to the object with known address, press the «Menu» button at the lower left corner of the screen [1]. Then select «Find», «By address» [2]. Press the «Select country» button and enter its name [4]. To minimize the keyboard, press the icon at the right top of the screen. Select the required country[5]. Menus «Select city», «Select street» and «Select building» will become active [6]. After choosing the required information press «Go!» to create a route. The route will be shown on the map [8]. You can follow this route or start simulation by pressing the «Demo route» button.
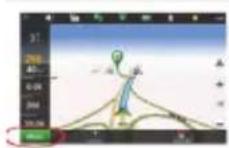

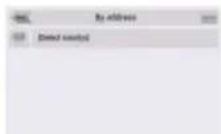

Fig. 4


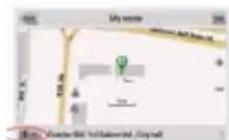
Fig.7

Fig. B
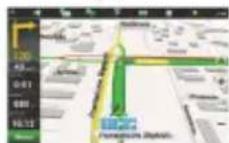
Fig.9
Autorouting
Route to the selected point on the map.
You can set the route to any point on the map. This point will be the end of the route, your current position will become the start of the route. Create a mark on the route by pressing any place on the map[1]. Press the «Cursor», then «Go!»[2]. The route is created[3].
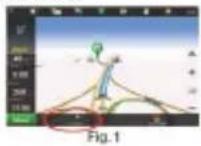
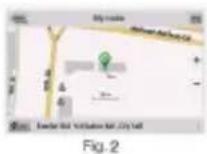

Route from point to point.
If you want to create a route from point to point you should create a point on the map[1]. Then set this button as a start route by pressing «Cursor» > «Go!». If you didn't turn off your GPS receiver, the system will ask you to do it[3]. The start point will be marked by green flag[4]. Then find the finish point, tap on map and press «Cursor» > «Go!»[5]. The route will be created from point to point.
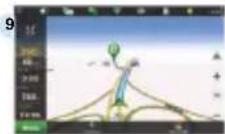

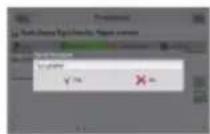
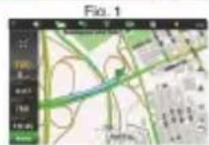
Fig.4
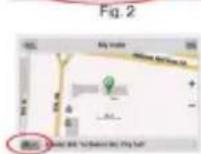
Fig.5

Fig. 6
Additional features
If your device has GSM/GPRS module, you will be able to use some «Navitel Navigator» software features like «Navitel. Traffic Jams» and «Navitel .SMS» services.
Navitel.Traffic
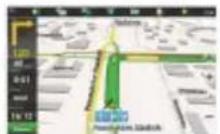
Fig.1

Fig.2
Using this service you can see the information about the traffic jams. To set the service go to «Settings > «Online services» > «Traffic jams». When the service is active the roads are painted in different colors.
Red - traffic jam, Orange - traffic is bad, Yellow - traffic is a bit difficult, Green - normal traffic[1].
Navitel.SMS
The special window will appear on the screen when you receive the Navitel.SMSI2]. Select "Hide" to hide it or "Accept" to see options.
Note:
For more detailed information regarding the functionality of Navitel software, please, refer to the complete user manual on CD, or to www.prestigio.com.
Music Mode

NOTE:
Do NOT store audio files in the built-in flash storage for it may result in system malfunction. The flash storage is used to store system data and should not be tempered at anytime.
Reminders regarding music playback function
● Audio files should be loaded in the SD card before connecting to device.
- Audio files can be imported to the SD card from PC by a variety of programs such as Windows Media Player.
● The loading process should be performed independently from the device.
- Do NOT attempt to use the device as a card reader device.
Playing Music


- Insert SD card with audio files loaded before powering on the device.
- Shortly after the greeting screen is shown, main menu will be displayed automatically.
- Tap on MultiMedia icon to enter submenu.
Music Mode

- Tap on Music icon to enter music files list.
During Music Playback

- Tap on 📄 / 🐆 to return to previous/skip to next song.
Tap on to play.
Tap on to pause.
Tap to stop playback. - Tap on / to select random/repeat playback.
- Tap on to adjust volume.
- Tap to return to music files list.
Video Mode

NOTE:
Do NOT store video files in the built-in flash storage for it may result in system malfunction. The flash storage is used to store system data and should not be tempered at anytime.
Reminders regarding video playback function
- Video files should be loaded in the SD card before connecting to device.
● The loading process should be performed independently from the device. - Do NOT attempt to use the device as a card reader device.
Playing Video
- Insert SD card with video files loaded before powering on the device.
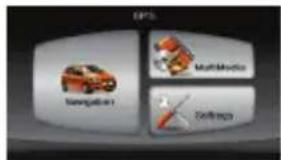
- Shortly after the greeting screen is shown, main menu will be displayed automatically.
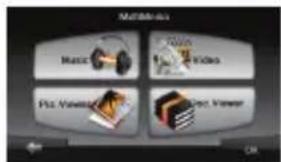
- Tap on MultiMedia icon to enter submenu.
Video Mode

- Tap on the Video icon to enter video files list.
During Video Playback

- Tap to return to video files list.
Tap on to play. - Tap to stop playback.
Tap on to pause - Tap on 📄 / 🕒 to return to previous / skip to next video.
- Tap on to adjust volume.
- Tap on 📂 to turn to full-screen mode.
Picture Mode

NOTE:
Do NOT store photo files in the built-in flash storage for it may result in system malfunction. The flash storage is used to store system data and should not be tempered at anytime.
Reminders regarding photo viewing function
- High resolution image files may considerably slow down device reading speed. Image files with resolution 640 X 480 or lower is recommended.
- Image files should be loaded in the SD card before connecting to device.
● The loading process should be performed independently from the device. - Do NOT attempt to use the device as a card reader device.
Viewing Photo
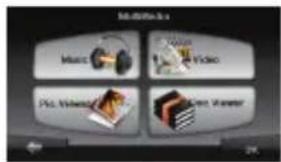
- Insert SD card with image files loaded before powering on the device.
- Tap on Picture Viewer icon to enter photo list and select the desired file.
Picture Mode
During Photo Viewing

natural_image
Scenic outdoor scene with a wooden cabin surrounded by red and white flowers, no visible text or symbols.- Tap on to zoom image in / out.
- Tap or to rotate image.
- Tap on 📄 to display in full-screen mode. Double tap the screen to resume.
- Tap on 📄 / 🕒 to return to previous / skip to next image file.
Document Mode

NOTE:
Do NOT store document files in the built-in flash storage for it may result in system malfunction. The flash storage is used to store system data and should not be tempered at anytime.
Reminders regarding Document Viewer function
- Document files should be loaded in the SD card before connecting to device.
● The loading process should be performed independently from the device.
- Do NOT attempt to use the device as a card reader device.
● The device supports the format of .TXT only.
Reading Text
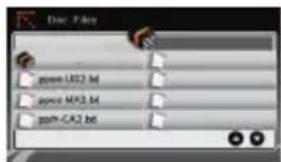
- Insert SD card with text files loaded before powering on the device.
- Tap on Document Files icon to enter document files list.
- Select the desired text.
Document Mode
During Document Playback

- Tap to return to document files list.
- Tap on 📄 / 🥞 to return to previous / skip to next page.
Settings

Language
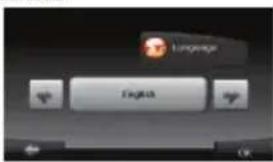
- Tap on Settings icon to enter submenu.
- Tap on on submenu to enter language setting.
- Tap on / to cycle through language options.
- Tap on / to cancel / confirm.
Date/Time

- Tap on to enter date / time
- Tap on / to adjust the corresponding date / time. - Tap on / to cancel / confirm.
Volume
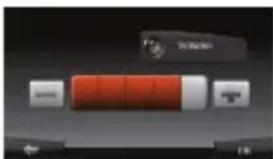
- Tap on to enter volume setting.
- Tap on / to adjust volume.
- Tap on / to cancel / confirm.
Settings
Backlight
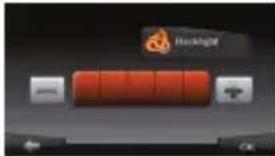
- Tap on ____ on submenu to enter backlight setting.
- Tap on / to adjust backlight brightness.
- Tap on / to cancel / confirm.
Calibrator

- Tap on Calibration icon on submenu to enter the screen calibrating menu.
- Tap the center of "+" as it moves around the screen. Tap the screen as instructed after "+" has moved through a cycle (Center → Top left corner → bottom left corner → bottom right corner → top right corner).
Troubleshooting
Take steps described in the tables below to solve simple problems before contacting customer service.

NOTE:
Immediately turn off the device and disconnect the power adapter if the device is not working properly. Never try to repair the unit without authorized professionals for it may damage the unit.
PROBLEM
POSSIBLE CAUSE
POSSIBLE SOLUTION
Users can't turn on the unit.
The adaptor doesn't connect well.
Connect the adaptor correctly.
The built-in rechargeable battery is weak.
Use the adaptor to supply power or charge the battery.
There is no sound.
The volume may be turned down or mute.
Turn up the volume or turn on the sound output.
There is no picture.
The brightness may be turned down.
Adjust the brightness of the LCD.
The unit can't receive satellite signals or can't orient.
The unit may be obstructed by buildings or metal block.
Make sure to use the unit out of room; if in the vehicle, you can use the external GPS antenna to solve this problem.
Troubleshooting
PROBLEM
The unit can receive signals now but can't then; signals received are not stable.
POSSIBLE CAUSE
| The built-in rechargeable battery is weak. | Use the adaptor to supply power or charge the battery. |
| The unit may be obstructed by veil, such as heat insulation paper. | Remove the veil. |
| Swing of the unit is too great. | Avoid great swing of the unit. |
PC Connection
To establish connection with PC for data access and synchronization, please execute setup file included in the Driver/Documentation CD or download the file from Microsoft website to install:
Microsoft Active Sync® software for operating system Microsoft XP or earlier versions
(http://www.microsoft.com/windowsmobile/en-us/downloads/microsoft/activesync-download.mspx)
and/or
Microsoft Mobile Device Center® software for operating system Microsoft Vista (http://www.microsoft.com/windowsmobile/en-us/downloads/microsoft/device-center-download.mspx).
Please refer to its user manual for more detailed instructions.
Technical specifications
| MODEL | GV4150 | GV5150 |
| Navigation Software | Navitel | Navitel |
| GPS Chipset | Atlas V 6640MHz | Atlas V 664MHz |
| Channels | 64 | 64 |
| Antenna | Internal | Internal |
| Interface | USB | USB |
| Display size | 4.3" | 5" |
| Resolution | 480*272 | 480*272 |
| Display type | TFT Touch screen | TFT Touch screen |
| RAM | 128MB, DDR2 | 128MB, DDR2 |
| Flash | 4GB | 4GB |
| Expansion slot | Micro SD-Card slot, max | Micro SD-Card slot, max |
| 8GB | 8GB | |
| Battery type/capacity | Li-polymer 950mAh | Li-polymer 950mAh |
| Operating System | Microsoft Window CE6.0 | Microsoft Window CE6.0 |
| Speaker | 1w 8ohm built-in speaker | 1w 8ohm built-in speaker |
| Video formats supported | AVI,WMV,3GP, MOV,MP4,MPG | AVI,WMV,3GP, MOV,MP4,MPG |
Technical specifications
| MODEL | GV4150 | GV5150 |
| Audio formats supported | MP3,WMA MP3,WMA | |
| Earphone jack | 2.5mm mini jack 2.5mm mini jack | |
| Operating Temperature | 0~60°C | 0~60°C |
| Operating humidity | 10% to 90% non-condensing | 10% to 90% non-condensing |
Disclaimer
As the Prestigio products are constantly updated and improved, your device may have a slightly different appearance or modified functionality than presented in this Quick start Guide.
- Important Safety Instructions
- CAUTION
- WARNING
- Accessories
- View of Main Unit
- Front and Side View
- Device Connection
- Inserting microSD Card
- NOTE:
- Charging
- Connecting to Car Charger
- Connecting to Earphones
- Cautions on Battery Charging
- About Rechargeable Battery
- Working conditions and precautions for the rechargeable battery
- Using Mounting
- Device Mounting Procedures
- To Dismount Device
- Getting Started
- Program interface
- No. Name Function
- Autorouting
- Route to the objects.
- Route to the selected point on the map.
- Route from point to point.
- Additional features
- Navitel.Traffic
- Navitel.SMS
- Music Mode
- Reminders regarding music playback function
- Playing Music
- Video Mode
- Reminders regarding video playback function
- Picture Mode
- Reminders regarding photo viewing function
- Document Mode
- Reminders regarding Document Viewer function
- During Document Playback
- ISOFT proproo system-configuration file
- best view with Tabzepwidth of 2
- Settings
- Troubleshooting
- PROBLEM
- POSSIBLE CAUSE
- POSSIBLE SOLUTION
- PC Connection
- Disclaimer
Brand : PRESTIGIO
Model : GeoVision 5150 Navitel
Category : Gps