View - Security Camera Hive - Free user manual and instructions
Find the device manual for free View Hive in PDF.


| Product type | Indoor/outdoor smart security camera |
| Brand | Hive |
| Model | View |
| Video resolution | 1080p Full HD |
| Viewing angle | 130° |
| Night vision | Yes, up to 10 meters |
| Power supply | USB mains adapter (5V/1A) |
| Dimensions (W x D x H) | 65 x 65 x 110 mm |
| Weight | 150 g |
| Connectivity | Wi-Fi 2.4 GHz |
| Two-way audio | Yes, built-in microphone and speaker |
| Motion detection | Yes, with push notifications |
| Storage | Hive Cloud (subscription) or microSD card (up to 128 GB) |
| Voice assistant | Compatible with Amazon Alexa and Google Assistant |
| Protection rating | IP65 (weather-resistant) |
| Operating temperature | -20°C to 40°C |
| Maintenance and cleaning | Clean the lens with a soft, dry cloth. Avoid chemical products. |
| Security | AES 128-bit encryption, two-factor authentication |
| Spare parts and repairability | Hive support, optional mains adapter. Repair by authorized center. |
| General information | 2-year warranty. Hive Home app required. |
Frequently Asked Questions - View Hive
User questions about View Hive
0 question about this device. Answer the ones you know or ask your own.
Ask a new question about this device
Download the instructions for your Security Camera in PDF format for free! Find your manual View - Hive and take your electronic device back in hand. On this page are published all the documents necessary for the use of your device. View by Hive.
USER MANUAL View Hive
Capture life as it happens with our smart indoor camera
natural_image
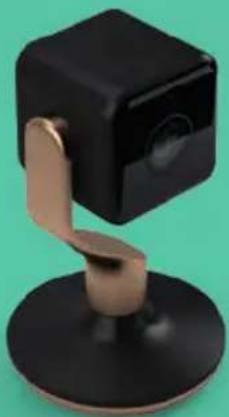
3D rendered image of a black square camera mount with a golden handle, mounted on a black base against a green background (no text or symbols)© 2017 Centrica Connected Home Limited.
Registered in England (No. 5782908). Registered office:
Millstream, Maidenhead Road, Windsor, Berkshire SL4 5GD. All rights reserved.
© 2017 Centrica Connected Home US Inc. 12 Greenway Plaza,
Ste 250, Houston TX 77046. All rights reserved.
© 2017 Centrica Connected Home Canada, Inc. Suite 1850,
10303 Jasper Avenue, Edmonton AB, T5J 3N6. All rights reserved.
© Copyright Centrica Connected Home Limited con sede in Millstream,
Maidenhead Road, Windsor, Berkshire, SL4 5GD, UK. Tutti i diritti riservati.
User guide
Guía del usuario | Guide d'utilisation | Manuale d'uso

HIVE
Welcome to Hive
This guide tells you everything you need to know to set up your Hive View.
We're ready to set up your account for you.
It's really simple. Just visit hivehome.com/register and enter a few details.
Once you've done this, we'll send you an email to activate your account, just follow the instructions and you're ready to go.
As soon as we've activated your account, we'll send you an email confirming your login details. You'll need your account details to install and use Hive products and services.
If you already have an account with us, of course, you can skip this part.
Getting started:

Install your Hive View
Start by downloading the Hive app:

If you are new to Hive, log into your Hive app, tap Camera and follow the on-screen instructions to install.
If you already have other Hive products, log into the app, tap Menu, then Install Devices and follow the on-screen instructions.
Tips for installing the camera:
- Your Hive View uses Bluetooth® to connect to your smartphone or tablet during install and will need to maintain this connection throughout.
- Keep your smartphone or tablet within 1-2 metres (3-6 feet) of the camera during install.
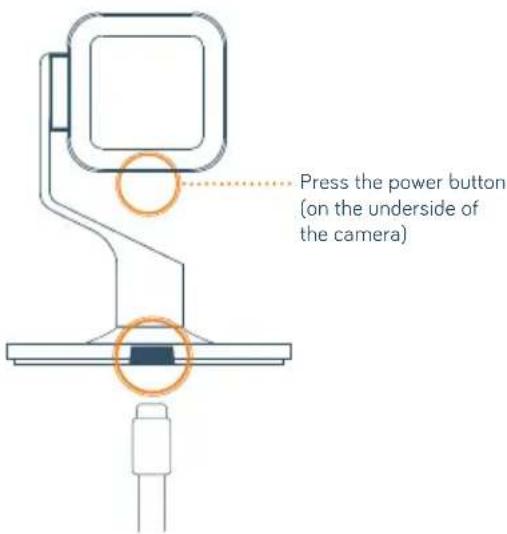
- If the camera doesn't turn on once plugged in, turn it on by holding the power button for 2-3 seconds. The light ring on the camera will glow white to let you know it's powering on.

Choose a location
- Now you need to find a place that has a good view of the area you want to monitor. Make sure it's near enough to a power socket and your broadband router to stay connected to Wi-Fi®.
- You can attach your camera to a metal surface using the magnet in the bottom of the base or mount it to another surface using the screws and base plate provided. Or you can place the camera on a table or shelf.
- Your camera can detect activity up to 7m (23 ft) away and has a 130° wide angle field of view.
- Please be sensible and thoughtful in terms of where you place cameras, and respect your neighbours' privacy.
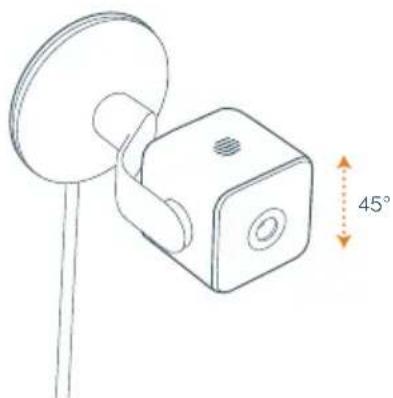
- For optimum performance, do not choose a position that requires the camera to be tilted off centre by more than 45^ up or down.
natural_image
Technical line drawing of a mechanical device with a 45-degree angle标注 (no text or symbols on the device itself)
Fix it in place (only if mounting)
Check the live stream and Wi-Fi signal in the app before fixing it in place. The Wi-Fi signal can be found under Settings. This is to ensure you have the desired field of view and Wi-Fi signal strength.
If the live stream appears upside down, you can rotate the camera's view 180° in the app under Settings.
When mounting the camera:
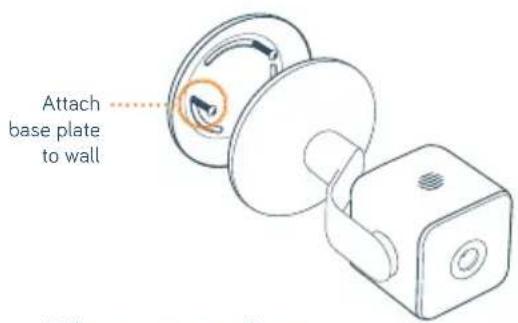
• Take the base plate from the box and use it to mark out where the screws will need to go on the surface where you are mounting it.
- Drill holes where you have marked and insert the wall plugs (anchors) from the box into the holes.
• Take the screws from the box and screw in the base plate, taking note of which way the recess for the power cable is facing.
- Attach the camera to the base plate. The magnet in the bottom of the base will secure it in place.
Information
- Your camera can be used on battery power temporarily. For it to work correctly it must be kept plugged in or have its battery charged, and it must be switched on.
- Your camera uses a non-removable, rechargeable lithium-ion battery which will charge when the camera is connected to mains power.
- Your camera can also be detached from the arm.
- The rechargeable battery is intended for occasional use and should not be used as the primary method of powering the camera.
- Your camera, its power supply and its power cable should be kept out of reach of children.
- For indoor use only.
- Keep away from heat sources such as direct sunlight or radiators to avoid overheating or damaging the camera.
- Place in an open area which allows for ventilation.
• 0-35°C operating temperature. - Not intended for use as a security system, for medical monitoring, or to replace personal supervision of children.
- May not work as expected in certain circumstances.
-
Must only be used with the power supply and cable provided.
-
Power supply must be used with a regular household electric supply.
- Use your camera as instructed to prevent damage to the battery. Do not physically damage the camera, expose to fire or short the charging points.
- Disconnect and switch off before cleaning.
- Keep away from water and other liquids at all times.
- Does not contain any serviceable parts so do not attempt to open it.
This device is an advanced remote monitoring tool that collects data. Please see our Privacy Notice on hivehome.com for details. By setting up a Hive account and using any Hive product you are deemed to accept our terms and conditions, which can be found at hivehome.com/terms
Centrica Connected Home Limited declares that the radio equipment type HCI001 complies with Directive 2014/53/EU. Full declaration text available at: hivehome.com/compliance
Max Radiated Power: <20dbm.
Frequency: 2402 - 2480 MHz, 5180 - 5725 MHz
The Bluetooth ^® word mark and logos are registered trademarks owned by the Bluetooth SIG, Inc. and any use of such marks by Centrica Connected Home is under license. Other trademarks and trade names are those of their respective owners.
Wi-Fi ^® is a registered trademark of Wi-Fi Alliance ^® .

natural_image
Solid teal-colored abstract shape with a curved bottom edge on white background (no text or symbols)Can we help?
You can view our handy how-to-use videos along with hints and tips at hivehome.com/support
If for any reason you need to return your Hive View, please contact us at the following for instructions:
hivehome.com/contact-us
Any return is subject to the retailer's refund policy so please don't forget to check the retailer's refund policy too.
natural_image
Technical line drawing of a mechanical component with a 45-degree angle标注 (no text or symbols beyond the angle indicator)
natural_image
Technical line drawing of a mechanical component with a circular inset showing internal features (no text or symbols)natural_image
Solid teal-colored geometric shape with a curved base and white border (no text or symbols)¿Podemos ayudarte?
natural_image
Technical line drawing of a mechanical clamp or bracket with a 45-degree angle标注 (no text or symbols beyond the angle indicator)
natural_image
Technical line drawing of a mechanical component with a circular knob and a rectangular housing (no text or symbols)natural_image
Solid teal-colored geometric shape with a curved base and white border (no text or symbols)Besoin d'aide?
natural_image
Technical line drawing of a mechanical component with a 45-degree angle标注 (no text or symbols beyond the angle indicator)
natural_image
Technical line drawing of a mechanical component with a circular housing and a square base (no text or symbols)To avoid environmental and health problems due to hazardous substances in electrical and electronic goods, appliances marked
with a crossed out wheeled bin should not be placed into your household rubbish bin. Instead, when they are unable to be re-used, they should be recycled. Your local authority will be able to advise you on the location of the nearest recycling centre that is authorised to accept this type of waste. Please recycle responsibly.
Brand : Hive
Model : View
Category : Security Camera