
XRM 34 - Hi-Fi System MPMAN - Free user manual and instructions
Find the device manual for free XRM 34 MPMAN in PDF.


User questions about XRM 34 MPMAN
0 question about this device. Answer the ones you know or ask your own.
Ask a new question about this device
Download the instructions for your Hi-Fi System in PDF format for free! Find your manual XRM 34 - MPMAN and take your electronic device back in hand. On this page are published all the documents necessary for the use of your device. XRM 34 by MPMAN.
USER MANUAL XRM 34 MPMAN
To achieve the utmost in enjoyment and performance, please read this manual carefully before attempting to operate the unit in order to become familiar with its features, and assure you years of faithful, trouble free performance and listening pleasure.
Important Notes
This safety and operating instruction should be retained for future reference.
The apparatus shall not be exposed to dripping or splashing and no objects filled with liquids, such as vases, shall be placed on the apparatus. Avoid installing the unit in locations described below:
-
- Places exposed to direct sunlight or close to heat radiating appliances such as electric heaters, on top of other stereo equipment that radiate too much heat.
-
- Places blocking ventilation or dusty places.
-
- Places subject to constant vibration, humid or moist places.
No naked flame sources such as lighted candles should be placed on the unit.
Attention should be drawn to the environmental aspects of battery disposal.
Make sure not to obstruct the ventilation openings, a minimum of 10cm should be kept around the apparatus for ventilation.
The ventilation should not be impeded by covering the ventilation openings with items such as newspaper, table-cloths, curtains, etc. Use apparatus in moderate climates only.
Operate tuning controls and switches as instructed in the manual.
Before turning on the power for the first time, make sure the power cord is properly installed.
The mains plug is used as the disconnect device and it must remain readily operable. To completely disconnect the power input, the mains plug of the apparatus must be disconnected from the mains.
The normal function of the product may be disturbed by Strong Electro Magnetic Interference. If so, simply reset the product to resume normal operation by following the instruction manual. In case the function could not resume, please use the product in other location.
Do not attempt to remove any screws, or open the casing of the unit; there are no user serviceable parts inside, refer all servicing to qualified service personnel.

CAUTION
RISK OF ELECTRIC SHOCK

CAUTION : TO REDUCE THE RISK OF ELECTRIC SHOCK DO NOT REMOVE COVER(OR BACK), NO USER SERVICEABLE PARTS INSIDE, REFER SERVICING TO QUALIFIED SERVICE PERSONNEL.

DANGEROUS VOLTAGE
Conductor dangerous voltage, that may be of sufficient magnitude to constitute a risk of electric shock to persons is present within this product's enclosure.

ATTENTION
The owner's manual contains important operating and maintenance instructions, for your safety, it is necessary to refer To the manual.
WARNING :TO PREVENT FIRE OR SHOCK HAZARD. DO NOT EXPOSE THIS APPLIANCE TO DRIPPING OR SPLASHING.
Note: This unit will become warm when used for a long period of time. This is normal and does not indicate a problem with the unit. This unit includes micro-processors which may malfunction as a result of external electrical interference/ noise or electrostatic discharge. If the unit is not working properly, disconnect the power source and then reconnect it. Excessive sound pressure from earphones and headphones can cause hearing loss.
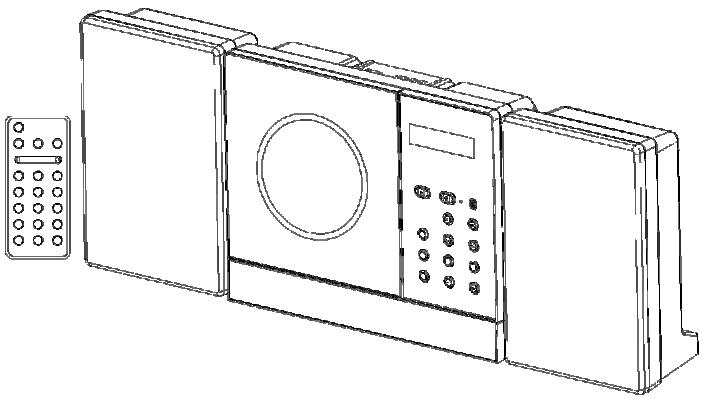
Assembly Drawing of Unit and speaker
1. fixing the board for wall mounting
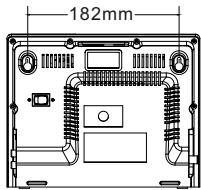
Fix the two nails(Size:3.5*25BA) into the wall and they should parallel each other. (The distance between the two nails should be 182mm)
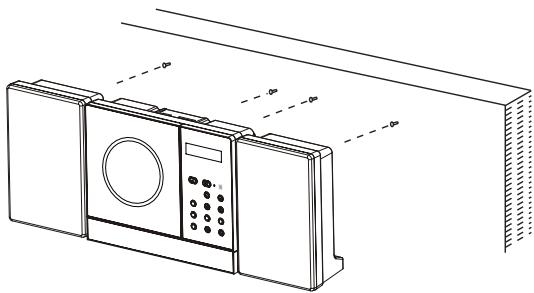
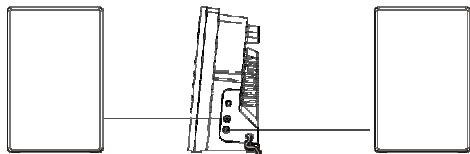
2. Speakers connection
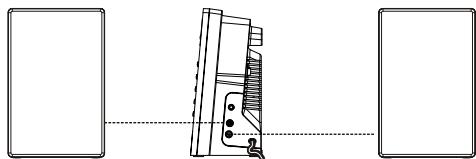
Max connection distance is 2 metres
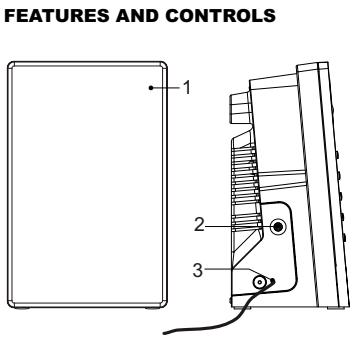
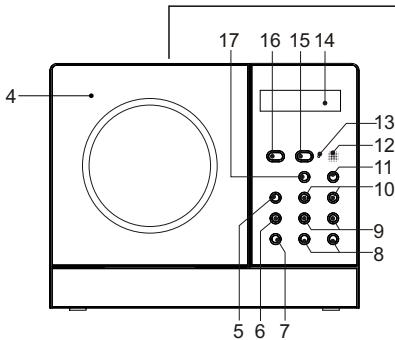
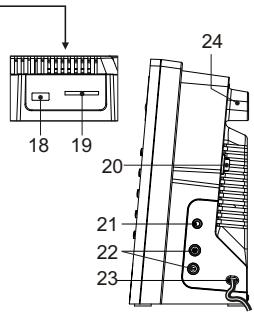
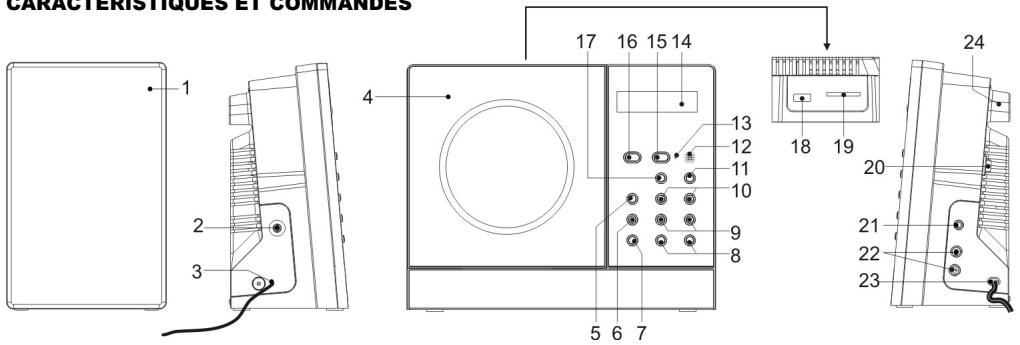
- SPEAKER
- LINE IN JACK
3 EMANTENNA
4.CDOOR - FUNCTION BUTTON
- MEM/C-ADJ.BUTION
- TIMER BUTTON
- VOLUME (+ or -) BUTTON
- PRESET/FOLDER
(UP or DOWN) BUTTON
- SKIP/TUNE SEARCH
(UP or DOWN) BUTTON - PLAY/PAUSE BUTTON
- IR SENSOR
- STANDBY LED INDICATOR
- LCD DISPLAY
- STANDBY/ON BUTTON
-
OPEN/CLOSE BUTTON
-
STOP BUTTON
- USB DEVICE IN PORT
- SD/MMC MEMORY CARD IN SLOT
- AC POWER MAIN SWITCH
- HEADPHONES JACK
- SPEAKER OUT (L & R) JACK
- AC CORD
- HITCHING HOLE
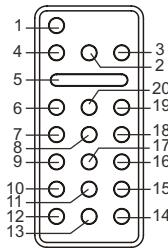
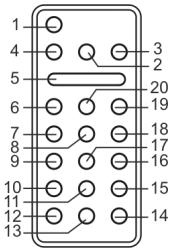
REMOTE CONTROL
- STANDBY/ON BUTTON
- ID3/MO./ST.BUTTON
- OPEN/CLOSE BUTTON
- TIMER BUTTON
- FUNCTION BUTTON
- MEM/C-ADJ.BUTION
- SLEEP BUTTON
- SKIP/TUNE SEARCH DOWN BUTTON
- INTRO BUTTON
10.EQ BUTTON
11.REPEAT BUTTON
12.MUTE BUTTON
13.VOLUME“-”BUTTON
14.VOLUME“+”BUTTON
15.RANDOM BUTTON
16.PRESET/FOLDERUPBUTTON
17.PRESET/FOLDERDOWNBUTTON
18.SKIP/TUNE SEARCH UP BUTTON
19.PLAY/PAUSE BUTTON
20.STOP BUTTON
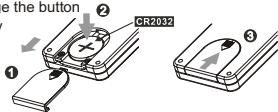
PUTTING THE BATTERY INTO THE REMOTE CONTROL UNIT
Press down the compartment cover, and slide the cover off to open it. Place the button battery (CR2032) into it according to the polarity markings with the "+" sign facing up. Place the cover over the compartment, push it upward until it snaps on.
Note :Do not mix normal batteries with rechargeable battery. When the batteries become weak, remote control will not function and replace with new batteries.
BUTTON BATTERY INCLUDED
Please remove safety strip before using the unit.
Change the button battery
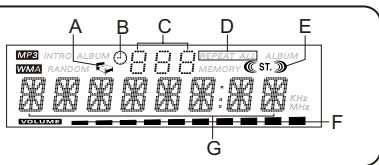
LCD DISPLAY WINDOW
A. SLEEP INDICATOR
B. TIMER INDICATOR
C. ALBUM/RADIO MEMORY NUMBER INDICATOR
D. REPEAT 1 & ALL INDICATOR
E. STEREO INDICATOR
F. VOLUME HIGH/LOW INDICATOR
G. TRACK/NUMBER/TIME INDICATOR
COMPACT DISC
-
Always use a compact discs bearing the mark as shown.
-
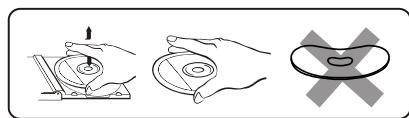
Notes on handling discs
Removing the disc from its storage case and loading it.
- Do not touch the reflective recorded surface.
- Do not stick paper or write anything on the surface.
-
Do not bend the disc.
-
Storage
-
Store the disc in its case.
-
Do not expose discs to direct sunlight or high temperatures, high humidity or dusty places.
-
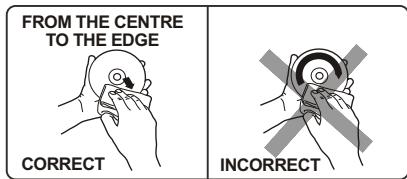
Cleaning a disc
-
Should the disc become soiled, wipe off dust, dirt and fingerprints with a soft cloth.
- The disc should be cleaned from the center to the edge.
- Never use benzene, thinners, record cleaner fluid or anti static spray.
- Be sure to close the CD door so the lens is not contaminated by dust.
- Do not touch the lens.
OPERATING THE UNIT
When you first plug the unit into the AC outlet, the unit will be in standby mode before turn ON the main switch on the rear of the unit. You can press the STANDBY/ON button on the unit or on the remote control to switch the unit ON or STANDBY. Turn off the main switch of the unit and pull the AC plug out of the wall socket if you want to switch off completely.
POWER/STANDBY
- Press the STANDBY/ON button on the unit or on the remote control to switch the unit on.
- Select the sound source (CD, USB, SD CARD, AUX or TUNER) by pressing the FUNCTION button. The corresponding display will light up.
- Adjust the volume with the VOLUME (+ or -) button on the unit or VOLUME (+ or -) button on the remote control.
- Press the STANDBY/ON button again to turn off the unit.
Note:
- If there is no signal under the CD/USB DEVICES/ SD & MMC CARD mode, the main unit will be switched off within 15 minutes automatically.
- During in standby mode, press any button/ key can make the display light for 10 seconds.
- Please turn the main switch off to save energy, when you do not use the unit.
CLOCK SETTING
During in the STANDBY mode.
- Press and hold the MEM/C-ADJ. button until the time displays will change to 12-hour(or 24-hour) digit and flash.
- Press the SKIP/TUNE SEARCH(UP or DOWN) button to adjust 12-hour or 24-hour digit.
- Press the MEM/C-ADJ. button again, the HOUR digit will flash on the display, press the SKIP/TUNE SEARCH (UP or DOWN) button to adjust HOUR digit.
- Press the MEM/C-ADJ. button once more, the MINUTE digit will flash on the display, press the SKIP/TUNE SEARCH (UP or DOWN) button to adjust MINUTE digit.
- Press the MEM/C-ADJ. button again to confirm the time.
- Each enable state as shown above will be cleared if the key is not pushed in 10 seconds.
TIMER SETTING
During in the STANDBY OFF/ON mode.
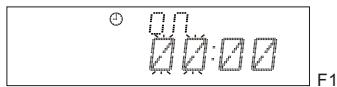
- After adjusting clock, press the TIMER button for a few seconds, "ON" and "00:00" appears on the display and the HOUR digit flashes.(F1)
- Press the SKIP/TUNE SEARCH(UP or DOWN) button to adjust it.
- Press the TIMER button again, the MINUTE digit will start flashing, adjust it by pressing the SKIP/TUNE SEARCH (UP or DOWN) button.
- Press the TIMER button once more to confirm and order TIMER ON time.
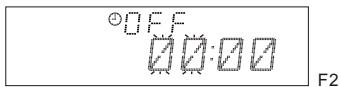
- After adjusting "TIMER ON", "OFF" appears on the display and the HOUR digit flashes.(F2)
- Repeat the above steps 2 to 3, and then press the TIMER button once more to confirm and order TIMER OFF time.
- Now the "TUNER" appears on the display with flashing, adjust "TUNER, CD, USB or SD CARD" by pressing the SKIP/TUNE SEARCH(UP or DOWN) button.
- Press the TIMER button again, the timer "VOL" indicator appears on the display and flashes, adjust the timer volume high or low by pressing the TUNING/SKIP (UP or DOWN) button.
- Each enable state as shown above will be cleared if the button is not pushed in 10 seconds.
- After adjusting "TIMER ON" and "TIMER OFF", press the TIMER button, " " appears on the display.
- The unit will be switched on automatically at "TIMER ON" order and start playing, the unit will be switched off automatically at "TIMER OFF" order.
Note: If the display shows "ERROR" while you set the "TIMER ON", it means both "TIMER ON" and "TIMER OFF" is the same. In this case, please go to "TIMER OFF" to set the off time first.
EQ CONTROL(on the remote control)
EQ shows the present sound tone. When you press the EQ button, the sound tone changes as below:

TO SET SLEEP FUNCTION(on the remote control)
- If you want to fall asleep to music, press the SLEEP button.
- You may select the TUNER, CD/MP3, USB, SD/MMC or AUX mode in sleep function to play from 90, 80, 70 up to 10 minutes of music before shutting itself off automatically.

FUNCTION SELECT
The function is that when it presses the button the mode is changed. Display changes as below:

RADIO OPERATION
- Press the FUNCTION button on the main unit (or remote control) to select the TUNER mode that to select the FM operation.
- Select the desired frequency with the SKIP/TUNE SEARCH(UP or DOWN) button on the main unit (or remote control).
Mono/Stereo Select
This unit can receive the FM mode only.
- When you want to select FM stereo station, press the ID3/MO./ST. button once on the remote control only. The "CST." indicator will appear on the display that the reception is at its best.
- When you press the ID3/MO./ST. button once again, the FM STEREO indicator will turn off & switch to MONO FM status.
Automatic Tuning
- Press the SKIP/TUNE SEARCH (UP or DOWN) button for a few seconds, then release the button. The timer will automatically search the first station of sufficient signal strength.
- Repeat above procedure if you wish to select another station.
Programming preset stations
You can also preset stations of your choice and store up 30 FM stations in its memory.
- Tune to the required station.
- Press the MEM/C-ADJ. button.
- Press the PRESET/FOLDER(UP or DOWN) button for your desired station number.
- Press the MEM/C-ADJ. Button again to confirm your selection.
- To program more stations into memory, repeat the above steps 2 to 4.
- To change the stored preset stations, repeat the above steps 2 to 4.
Notes:
- Storing a new station into a preset location will erase the previously stored station in that location.
- Power off will not erase the memory of preset stations. Perform the stations presetting procedures again to store the stations.
- During the unit in STANDBY mode, press and hold the PLAY/PAUSE button to erase all preset memory.
Selecting the Preset Stations
- Press the PRESET/FOLDER(UP or DOWN) button to select the desired preset station number.
- The numeric location of that preset station is displayed along with the corresponding frequency.
FM Antenna
Extend the FM antenna for better FM reception.
-
Press the FUNCTION button on the unit to select the CD mode.
-
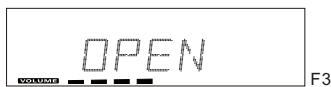
Press the OPEN/CLOSE button on the main unit(or remote control), and then the CD door will open automatically.(F3)
-
Insert the CD/MP3 disc into the CD compartment, press the OPEN/CLOSE button again to close the CD door. The main unit will read the CD/MP3 disc automatically.
NOTE: (1) This unit can play CD, CD-R, CD-RW, MP3 and WMA discs.
(2) It can read " 8 cm " and " Multi Section " MP3 DISC.
(3) The "Playback Transfer Rate" in MP3 and WMA. (a). In MP3, transfer bit rate: 8 - 256 kbps. (b). In WMA, transfer bit rate: 8 - 192 kbps.
(4) The "Max Readable 99 folders and 999 tracks"
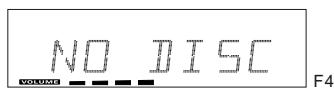
(5) If no disc or can't read TOC, NO DISC will be displayed.(F4)
Playing The Entire CD/MP3/WMA
-CD
- Insert the CD disc into the CD compartment, the main unit will automatically read the total number of the folders and tracks at the same time.
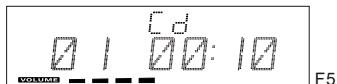
- Press the PLAY/PAUSE button, the unit will play the first track of the CD disc automatically.(F5)
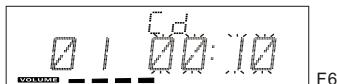
- Press the PLAY/PAUSE button once again, the time elapsed indicator will flash.(F6)
- Press SKIP/TUNE SEARCH (UP or DOWN) button once to change Track NO., press and hold the SKIP/TUNE SEARCH (UP or DOWN) button once to skip fast forward or backward of each song.
- To resume playback, press the PLAY/PAUSE button once more again.
- To stop playback, press the STOP button once on the unit (or remote control).
MP3/WMA
- Insert the MP3/WMA disc into the CD compartment, the main unit will automatically read the total number of the folders and tracks at the same time.
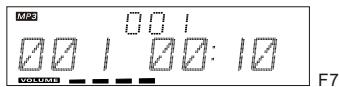
- Press the PLAY/PAUSE button, the unit will play the first track of the CD disc automatically.(F7)
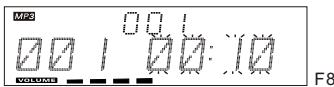
- Press the PLAY/PAUSE button once again, the time elapsed indicator will flash.(F8)
- To change Track NO., Press SKIP/TUNE SEARCH(UP or DOWN) button once. Press and hold the SKIP/TUNE SEARCH (UP or DOWN) button once to skip fast forward or backward each song.
-
To resume playback, press the PLAY/PAUSE button once more again.
-
To change the ALBUM NO., press the PRESET/FOLDER (UP or DOWN) button once.
- To stop playback, press the STOP button once on the unit (or remote control).
Note: If the main unit is not working properly, disconnect the power source and then reconnect it again
ID3 OPERATION (on the remote control)
During in the MP3/WMA mode
- Press the ID3/MO./ST. button once to open the ID3 function.
- If the MP3/WMA file is written "ID3", it will automatically search the information of "TITLE NAME", "ARTIST NAME" and "ALBUM NAME" indicated on the display.
- Press the ID3/MO./ST. button on the remote again. Then the unit will resume to play normally.

During in the STANDBY mode
- Insert the USB DEVICE or SD/MMC CARD, and then press the STANDBY button on the main unit (or remote control) to power"ON" the unit.
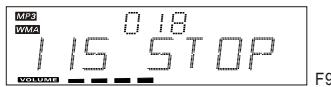
- Press the FUNCTION button on the main unit (or remote control) to select the USB or SD/MMC mode. The main unit will automatically read the total number of the folders and tracks at the same time. (F9)
- If the USB memory device more than one folder.
a. Press the PRESET/FOLDER (UP or DOWN) button to select each folder.
b. Press the SKIP/TUNE SEARCH(UP or DOWN) button to select current track in desired folder. - If the MP3 and WMA are written in "ID3".
a. During the unit in the MP3 or WMA playing. Press the ID3/MO./ST. button once. The display will show a "ID3 ON", and then it will automatically search more than 64 letters for "TITLE NAME", "ARTIST NAME" or "ALBUM NAME" which move from the right corner to the left corner on the display continuously.
b. Press the ID3/MO./ST. button once again. The display will show a "ID3 OFF", and then the main unit will play normally.
Note: 1. The main unit can play MP3 and WMA only in this mode.
- This unit can support most of USB devices and SD/MMC/SDHC cards (up-to 32GB memory capacity for SDHC). It cannot access (or, need longer time to access) those devices with big memory capacity.
- It can support USB version 1.1 and 2.0.
- Not support all kinds of "dual voltage-MMC" card nor "MMC-Plus" card.
- The main unit does not support the WMA file which is protected "DRM FILE".
Playing The Entire flash disc
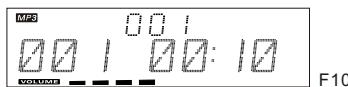
- Playback will start by pressing the PLAY/PAUSE button. Playback starts with the first track. The display shows the current track number and its elapsed time.(F10)
- To interrupt playback, press the PLAY/PAUSE button. The time elapsed indicator will flash.(F11)
- To resume playback, press the PLAY/PAUSE button again.
- To stop playback, press the STOP button.

Note : In any time, the USB DEVICE or SD CARD must be fixed well under in the STANDBY mode to avoid the main unit and USB DEVICE or SD CARD were damaged.
REPEAT PLAY(on the remote control)
-
CD
-
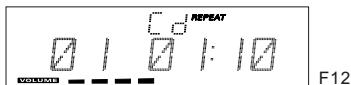
Press the REPEAT button once, REPEAT is displayed. The main unit will play the current track repeatedly.(F12)
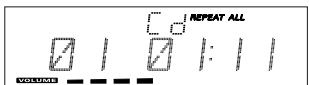
- Press the REPEAT button twice, REPEAT ALL is displayed. The main unit will play all tracks repeatedly.(F13)
- Press the REPEAT button thrice, REPEAT function will be off.
F13
MP3/WMA
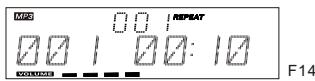
- Press the REPEAT button once, then REPEAT is displayed. It will play the current track repeatedly.(F14)
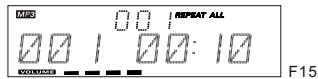
- Press the REPEAT button twice, REPEAT ALL is displayed. It will play all tracks repeatedly.(F15)
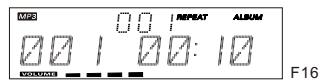
- Press the REPEAT button thrice, then REPEAT ALBUM is displayed. It will play repeatedly the current album. (F16)
- Press the REPEAT button four times, then REPEAT function will be off.
RANDOM PLAY(on the remote control)
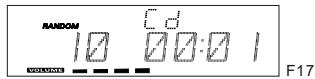
- Press the RANDOM button once, and then RANDOM is displayed.(F17)
- Press the RANDOM button once again, and then resume to normally play.
INTRO PLAY(on the remote control)
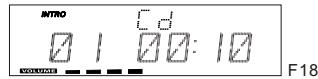
- Press the INTRO button once, and then INTRO is displayed. The main unit will play the first 10 seconds of each track.(F18)
- Press the INTRO button twice, and then resume to normal play.
PROGRAM MODE
User can make the program up to 32 tracks in CD mode or 64 tracks in MP3/WMA/USB/SD CARD mode in any desired order. Program mode is activated while in stop mode.
1. How to play the program
- CD
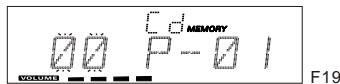
1) Press the MEM/C-ADJ. button, shift to PROGRAM mode.(F19)
2) Press the SKIP/TUNER SEARCH(UP or DOWN) button, the track number will be changed.
3) Press the MEM/C-ADJ. button to confirm the track number.
MP3/WMA/USB/SD CARD
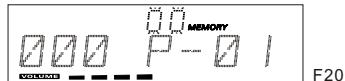
1) Press the MEM/C-ADJ. button, shift to PROGRAM mode. The album number is flashing. (F20)
2) Press the PRESET/FOLDER button, the album number will be changed.
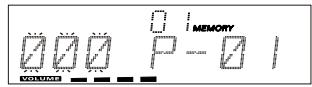
3) Press the MEM/C-ADJ. button, the track number is flashing.(F21)
4) Press the SKIP/TUNER SEARCH button, the track number will be changed.
5) Press the MEM/C-ADJ. button to confirm the track number.
F21
2.PROGRAM PLAY
Press the PLAY/PAUSE button on the unit (or remote control), it will be play starting with the first track of the program. When all tracks have been played, the unit display will show the number of tracks and the playing time of the CD/MP3/WMA tracks.
3. CANCEL PROGRAM
- Press the STOP button once, or open the CD tray door and close it again then the memory will be erased.
- Set a new program, the existing one will be cleared.
Note: During in the program mode.
- Press the "REPEAT" button once, the "REPEAT" indicator will light on the display. Then the main unit will repeat the current track.
- Press the "REPEAT" button twice, the "REPEAT ALL" will light on the display. Then the main unit will repeat all the total number of tracks.
- Press the "REPEAT" button once more again. The main unit will return to play the program normally.
AUX IN PLAY
The AUX input is located on the left hand side of the unit. Use a 3.5mm stereo jack cable to connect audio equipment through the LINE IN jack.
- To select the AUX input function, repeatedly press the FUNCTION button on the unit (or remote control) until the AUX is indicated on the display.
- Press the VOLUME (+ or -) button to adjust the sound output level.
Note: LINE in cable not included.
MUTE SETTING(on the remote control)
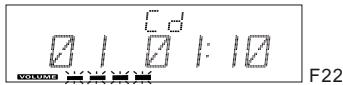
- When you press the MUTE button once on the remote control, the volume level will flash and the audio output will be temporarily terminated.(F22)
- Press the MUTE button again, the volume level and the audio output will return to normal.
LISTEN TO THE MUSIC BY USING HEADPHONE
Plug your headphones (3.5mm mini-stereo plug) into the headphones jack on the right hand side of the unit. The sound will be heard through the headphones, not the speaker.
SPECIFICATION
POWER SUPPLY :
OUTPUT POWER :
UNIT DIMENSION :
Ventilation warning : " The normal ventilation of the product shall not be impeded for intended use."
Micro-chaine Hi-Fi
CONSIGNES DE SÉCURITÉ
Distance maximale deraccordement : 2 metres
CHARACTERISTIQUES ET COMMANDES
- HAUT-PARLEUR
- PRISE JACK AUX-IN
3.ANTENNE FM - VOLET CD
- TOUCHE DE FONCTION
- MEM/REGLAGE HORLOGE BOUTON
- TOUCHETEMPORISATEUR
- TOUCHE VOLUME (+ ou -)
-
REREGLAGE/DOSSIER TOUCHE UP (haut) ou DOWN(bas)
-
SYNTONISATION/SAUT TOUCHE UP (haut) ou DOWN (bas)
- TOUCHE DE LECTURE/PAUSE
- CAPTEUR INFRAROUGE
- INDICATEUR LED DE VEILLE
- ÉCRAN LCD
- TOUCHE STANDBY/ON (veille/marche)
- TOUCHE OUVERTURE/FERMETURE
-
TOUCHE D'ARRET
-
CONNECTEUR PORT USB
- FENTE D'INSERTION DE CARTE MEMOIRE SD/MMC
20.COMMUTATEUR
D'ALIMENTATION SECTEUR
- PRISE JACK CASQUE D'ÉCOUTE
- SORTIE JACK HAUT-PARLEUR (G/D)
- CORDON D'ALIMENTATION CA
- TROU DE FIXATION
TELECOMMANDE
- TOUCHE STANDBY/ON (veille/marche)
- TOUCHE ID3/MO./STEREO
- TOUCHE OUVERTURE/FERMETURE
- TOUCHETEMPORISATEUR
- TOUCHE DE FONCTION
- MEM/RéGLAGE HORLOGE BOUTON
- TOUCHE DE MINUTERIE SOMMEIL
- TOUCHE DE SAUT / RECHERCHE BAS
- TOUCHE INTRO
-
TOUCHE EQ (égaliseur)
-
TOUCHE DE RÉPÉTITION
- TOUCHE MUTE (copure son))
- TOUCHE VOLUME «-»
- TOUCHE VOLUME «+»
- TOUCHE LECTURE ALEATOIRE
- TOUCHE PRÉRÉGLAGE/DOSSIER MONTÉE
- TOUCHE PRÉRÉGLAGE/DOSSIER DESCENTE
- TOUCHE DE SAUT / RECHERCHE HAUT
- TOUCHE DE LECTURE/PAUSE
- TOUCHE D'ARRET
MISE EN PLACE DES PILES DANS LA TÉLECOMMANDE
232 (I) X 89,5 (P) X 186 (H) mm.
120 (I) X 80 (P) X 186 (H) mm.
2,0 kg
FM 87.5-108 MHz
LASER 3 FAISCEAUX
100Hz - 16kHz
CHARACTERISTIQUES SUJETTÉS À MODIFICATION SANS AVIS PREALABLE.
120 (L) x 80 (P) x 186 (A) mm
2.0 kg
FM 87.5-108MHz