
MP-FUB32 - Digital audio player MPMAN - Free user manual and instructions
Find the device manual for free MP-FUB32 MPMAN in PDF.


User questions about MP-FUB32 MPMAN
0 question about this device. Answer the ones you know or ask your own.
Ask a new question about this device
Download the instructions for your Digital audio player in PDF format for free! Find your manual MP-FUB32 - MPMAN and take your electronic device back in hand. On this page are published all the documents necessary for the use of your device. MP-FUB32 by MPMAN.
USER MANUAL MP-FUB32 MPMAN
Downloading and Transferring Files
| Install the digital audio player CD software | 4 - 5 |
| Safely remove your player from the computer | 6 |
| Transferring files | 7 |
Operation
| Listening to Music | 8 |
| Using the MAIN MENU | 8 - 9 |
| MUSIC | 8 |
| FM RADIO | 9 |
| VOICE REC | 9 |
Customizing the Player
| Using the SETTING MENU | 10 |
| REC RESOLUTION | 10 |
| CONTRAST | 10 |
| EQUALIZER | 10 |
| PLAY TIMER | 10 |
| REPEAT | 11 |
| LIGHT TIMER | 11 |
| LANGUAGE | 11 |
| AUTO SCAN | 11 |
Additional Information
| Precautions | 12 |
| Trouble Shooting | 13 |
| Technical Specifications | 14 |
| Care and Maintenance | 15 |
Getting Started
INTRODUCTION
Your DAP is a device that stores and plays multi-format digital audio files including MP3, WMA and WAV files. Download hours of music onto your PC and transfer them to your DAP digital audio player. Use your DAP to record those quick reminder memos or even lengthy business meetings or lectures. Record programs or songs directly from an FM radio station or just use it to listen to your favorite FM station.
MPFUB 3X Series:
There are several versions of the FUB 3X Series of Digital Audio Players. This Manual covers the entire series, so please keep in mind some features may not apply to your particular model. Please see the different features below for each model:
MPFUB32: No FM Tuner
MPFUB33: With FM Tuner
KEY FEATURES
Multi-format player supports MP3, WMA and WAV files.
- MP3: (MPEG1 LAYER3) is an audio compression format that enables a WAV file to be compressed to about 1/12 of its original size, while maintaining the original sound quality.
- WMA: (Windows Media Audio) is Microsoft's music file compression format that enables WAV files to about 1/6 of its original size while maintaining the original sound quality.
- WAV: (ADPCM encoding) is the file format for voice or FM tuner recordings.
USB data transfer: Use the supplied USB cable to move MP3, WMA and WAV files from your computer to your unit.#
Windows Plug & Play support for Windows ME, 2000 and XP.
Windows 98 SE compatible: Install the driver with the enclosed CD-ROM so that your computer will recognize the device.
Built in FM tuner with auto scan and 10 station memory.
FM tuner records FM radio programs and stores them as WAV files.
Internal microphone for voice recording with adjustable quality level settings (select high, normal or low quality levels).
Upgradeable Firmware
- Update the latest features via free downloads from our website: www.mpmaneurope.com
- Windows 98 SE operating systems may need to upgrade the Windows OS before upgrading the firmware.
Power equalizing allows you to set the frequency level according to 6 music categories: Normal, Rock, Ultra Bass, Jazz, Classic and Pop.
Full Graphic LCD for displaying information with blue-color backlight.
Power saving feature automatically turns off when the player is idle for 3 minutes.
Low battery level indicator.
PACKAGE CONTENTS
Check that you have the following accessories:
Stereo Earphones
USB Cable
Installation CD-ROM with Windows 98SE Driver and User Manual
Quick Start Guide
One AAA Alkaline Battery
INSTALLING THE BATTERY
Press the button and then push the battery compartment door in the direction the button is pointing. Insert the battery with the correct polarity as shown. Close the battery compartment door.
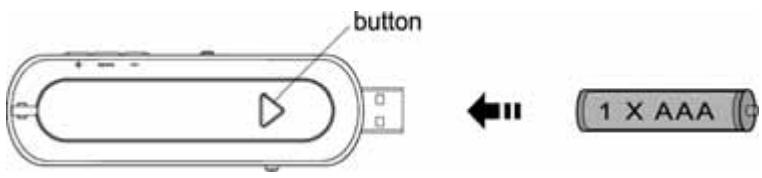
- To avoid battery leakage or corrosion, remove the battery from the player if the player is not to be used for a long time.
- Remove dead battery from the player immediately to avoid damaging the player.
- When corrosion occurs, wipe the battery compartment immediately with a dry cloth and insert a new battery.
PARTS DESCRIPTION
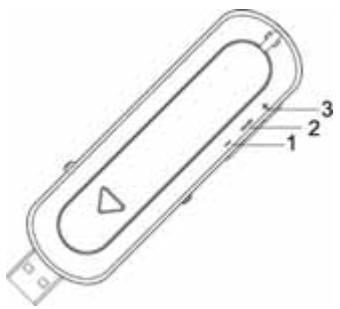
- Press to decrease the volume.
Press and hold the button down to decrease the volume rapidly.
- Press and hold to access the SETTINGS menu.
Press to access the MAIN MENU.
- Press to increase the volume.
Press and hold the button to increase the volume rapidly.
CONTROLS
Control Keys
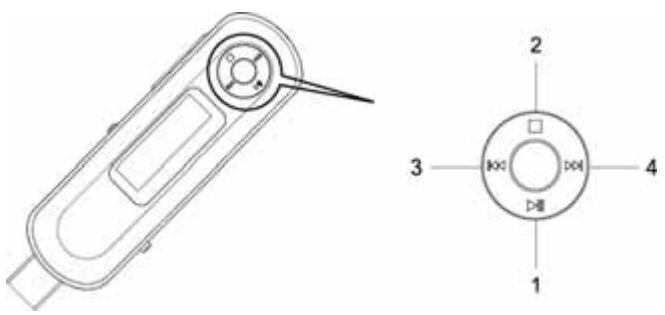
There is a NAVI button that controls several key functions. Moving it up, down, right or left will achieve the following actions.
- Press to turn on the power.
Press to play or pause.
- Press and hold to turn off the power.
Press to stop.
- Press to select the previous file or track.
Press and hold the button to rewind.
- Press to select the next file or track.
Press and hold the button to fast forward.
LCD SCREEN
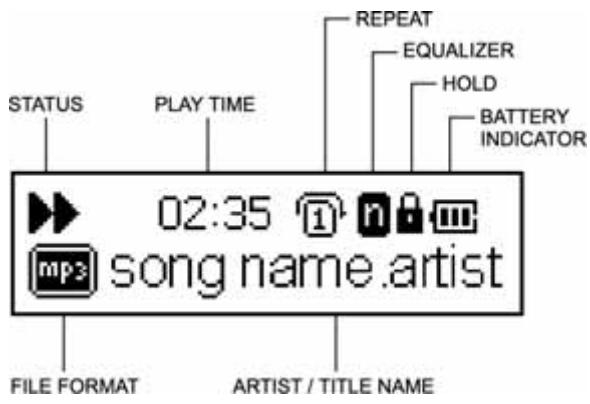
INSTALL THE DIGITAL AUDIO PLAYER CD SOFTWARE
For Windows 98SE:
Windows 98SE will not recognize the player until you have installed the driver using the included installation CD-ROM. Follow the instructions detailed in this section to activate the USB mass storage function so you will be able to transfer files from your computer to your player.
For Windows ME, Windows 2000 or Windows XP:
These version of Windows will automatically detect your player after connection with USB port is established. In order to format the player, update or uninstall the software, you will need to install the software on the included CD-ROM.
Procedure to Install Digital Audio Player Software
When connecting your player to your computer for the first time, please follow these instructions:
- Insert the Installation CD-ROM into the CD Drive. The Auto-run program will start to install the player driver automatically as shown.
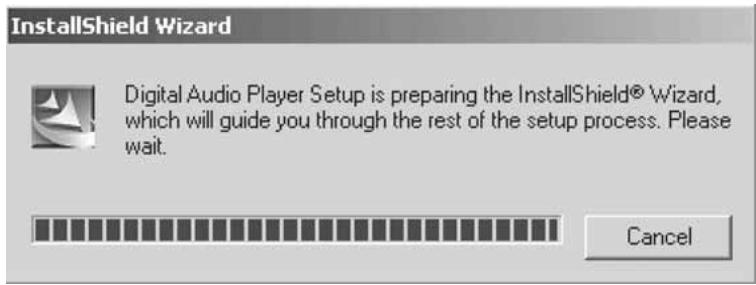
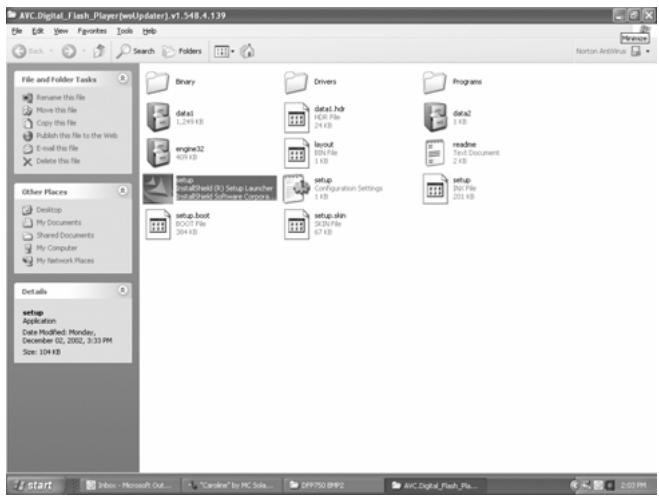
NOTE: If the setup does not start, please run the setup.exe under your CD-ROM Drive directory. Double click "setup" in the installation CD.
- Follow the on screen instructions to install the software.
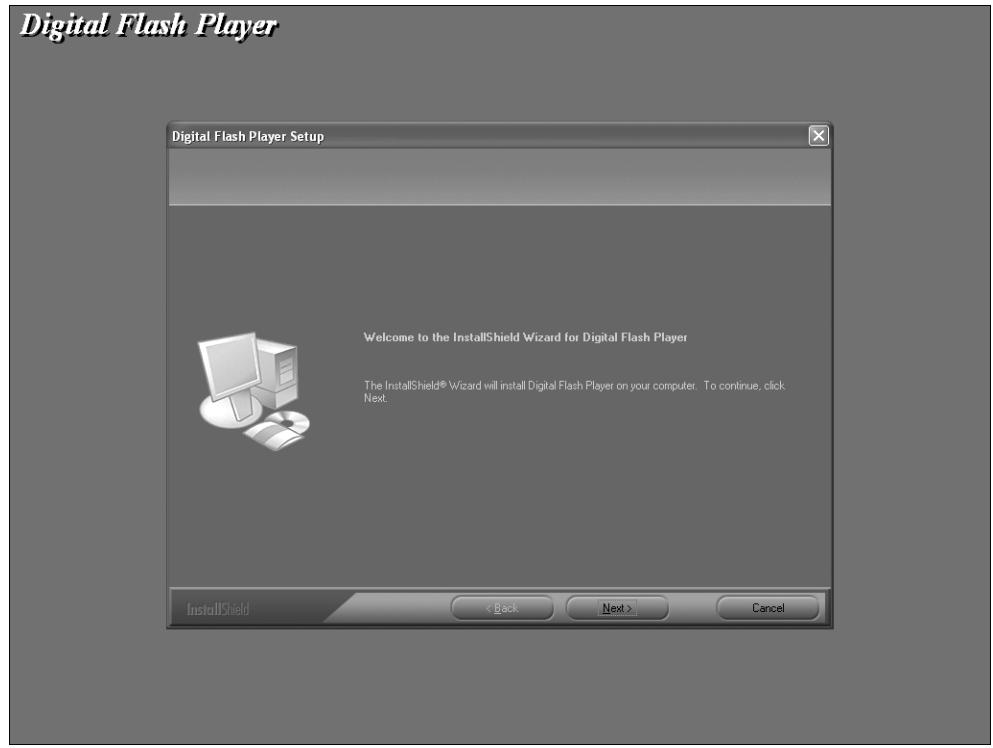
- After successfully installing the software, the "Digital Flash Player" program will appear in the "Start" menu.
SAFELY REMOVE YOUR PLAYER FROM THE COMPUTER
NOTE : To avoid damage to your player or data loss, always follow the procedure listed below before disconnecting the USB cable from your computer or disconnecting the player from the USB cable.
Using your mouse, double click the "Safely Remove Hardware" icon on the task bar
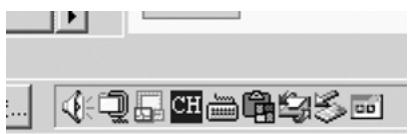
From the "Safely Remove Hardware" window, select "USB Mass Storage Device" and click the "Stop" button. The "Stop a Hardware Device" window will pop up as shown.
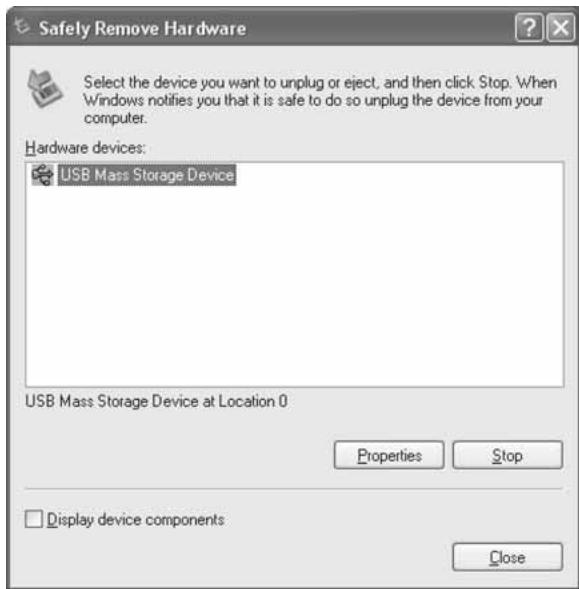
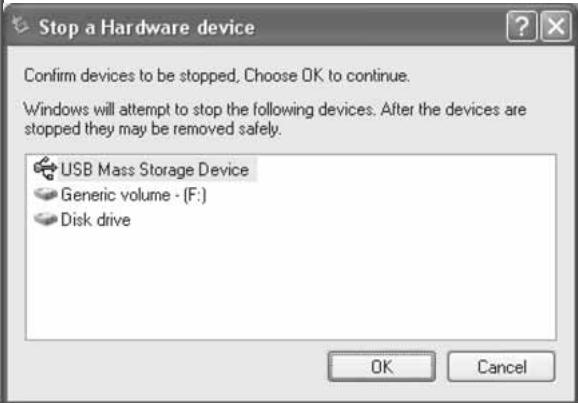
Click "OK" and when a "Safe to Remove Hardware" window is displayed you may remove the player from the USB cable or remove the USB cable from the computer.
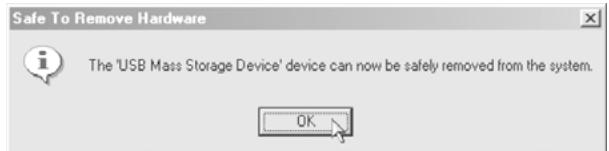
Remarks: If you do not see the "Safely Remove Hardware" icon on the task bar. Please go to my computer, right click on "Removable Disk", double click "eject". The "Safely Remove Hardware" window will pop up and follow the step on the above.
TRANSFERRING FILES
Push the USB button and then slide it to the left in order to expose the USB Plug. Then connect the unit to your computer either directly or by using the supplied USB cable.
Press the button to turn the player on. The following will be displayed in the LCD:
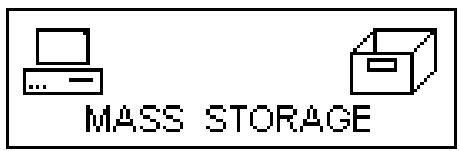
A "Removable Disk" window will appear in "My Computer".
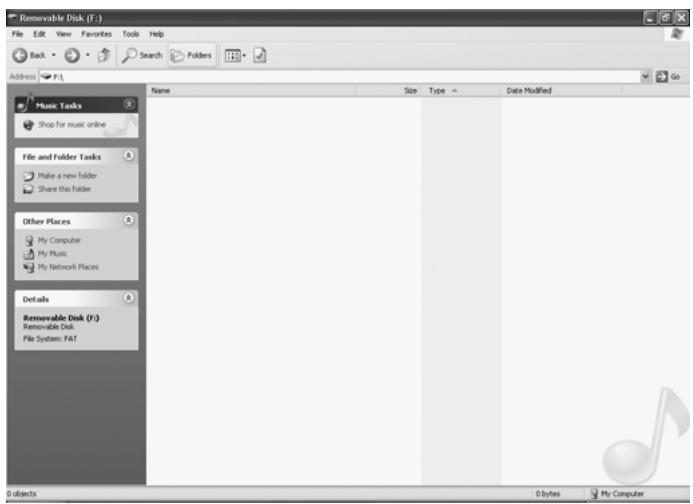
Locate the files you wish to copy from your computer to your player. Drag and drop MP3, WMA or WAV files on your computer into the "Removable Disk" window. These files will now be copied onto your player.
NOTE : When you are finished transferring files, please follow the Safely Remove Hardware Procedure on the previous page before disconnecting your player.
Operation
LISTENING TO MUSIC
After you have transferred MP3, WMA or WAV files from your computer to your player, you can start listening to music while you learn how to use all of the features.
With the battery installed, insert the earphones into the earphone jack of player.
Press the button to turn the player on.
Use the control keys and the NAVI button to pause, play, stop, fast forward or reverse and adjust the volume.
USING THE MAIN MENU
Press the mode button to access the MAIN MENU. The following menu will be displayed on the LCD screen:
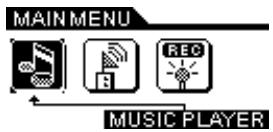
Using the NAVI button, press or until your desired selection is highlighted and press the button down to select.
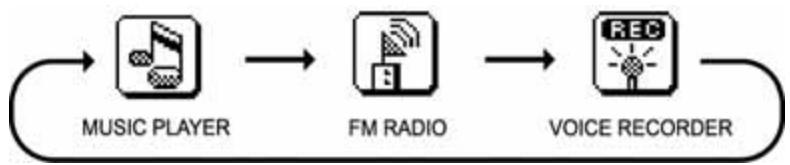
MUSIC PLAYER
To listen to any of the files or songs stored in your player or run the program list, you can select the MUSIC PLAYER mode.
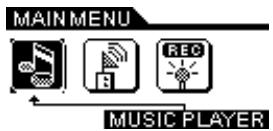
Using the control buttons
- Press button to play or pause playback.
- Press button to stop.
- Press and hold button to turn off the power.
- Scroll up + to increase the volume and scroll down - to decrease the volume.
- Push to select the next track. Push to select the previous track.
- Push and hold for fast rewind. Push and hold for fast forward.
- Slide hold button to the right to lock all buttons and slide hold to the left to unlock all functions and return to normal playback.
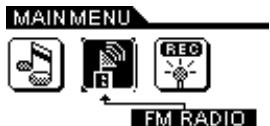
FM RADIO
The unit has a built in FM tuner with auto scan and ten station memory. In addition to listening to your favorite station, you can also record a song or program.
Press the mode button to access the MAIN MENU. The following menu will be displayed on the LCD screen, highlight the icon as shown and press the button to confirm.
Using the preset channels
-
In order to use the preset function, you must first complete an Autoscan. Please see the "Autoscan Setting" in the "Using the Setting Menu Section" for details.
-
Press the preset or button to display the PRESET icon.
- Use the to select the next preset station and use the to select the previous preset station.
Recording an FM radio station
- Press the button to start recording.
- Press the button to stop recording.
- The recorded file can be played by returning to the Music Player mode.
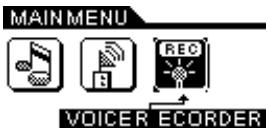
VOICE REORDER
Use your unit to record quick reminder memos or even lengthy business meetings or lectures. Press the mode button to access the MAIN MENU. The following menu will be displayed in the LCD screen, highlight the icon as shown and press the button to confirm.
Recording a voice message
- Press the button to start recording.
- Press the button to stop recording.
- The recorded file is saved as WAV format.
Playing the Recorded File
- Press the button to play the recorded file.
- Press the button to stop.
- Push to select the previous recorded file.
- Push to select the next recorded file.
NOTE :
- The volume is not controlled during recording.
- You may select three different quality levels to record. Please see the Recording Resolution in the Customizing Your Player section.
Customizing Your Player
USING THE SETTING MENU
You have the option to change the way your player displays, records and plays the files you have stored.
Press and hold the mode button to display the SETTING Menu on the LCD screen.

Use the or to select one of the following setting options: Recording Resolution, Contrast, Equalizer, Play Timer, Repeat, Back Light Timer, Language or Auto Scan.
Press the button to confirm and enter each setting.
To exit the SETTING Menu, press the mode button.
Recording Resolution Setting
Use to select one of the three voice recording resolution settings: High, Normal or Low.

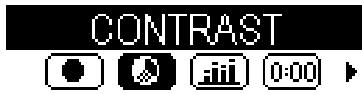
Contrast Setting
Use to adjust the LCD contrast level.
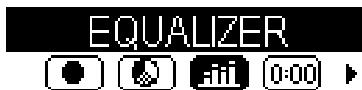
Equalizer Setting
Use to select one of the six music equalizer effects: Normal, Rock, Ultra Bass, Jazz, Classic or Pop.
Play Timer Setting
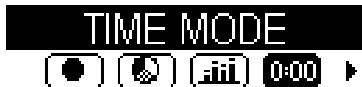
Use to display the song timer as ELAPSED TIME or REMAINING TIME.
Repeat Setting
Use to select between Normal, Repeat Track, Repeat All, Shuffle or Shuffle Repeat.
REPEAT


Back Light Timer Setting
Use to set the duration of LCD backlight timer.
Select: OFF, 5 sec, 10 sec, 15 sec or always.
BACKLIGHT TIMER


Languages
Select one of the available languages.
LANGUAGE


Auto Scan
While in FM Mode select Autoscan in order to save the 10 strongest stations as preset channels.
AUTO SCAN


PRECAUTIONS
Copyright
Making copies of MP3 tracks or files without permission is a violation of the international copyright laws.
Safety
Vibration experienced during walking or exercising will not affect the player. However, dropping the player or dropping a heavy object on the player may result in damage or sound distortion.
Avoid spilling any liquid onto or into the player.
- Do not leave the player in a location near extreme heat sources or in a car with the windows closed during excessive heat. Do not leave in a place subject to direct sunlight, excessive dust or sand, moisture, or rain.
On Headphones and Earphones
Road Safety
Do not use the headphones/earphones while driving, cycling, or operating any motorized vehicle. It may create a traffic hazard and is illegal in some areas. It can also be potentially dangerous to play your headsets at high volume while walking, especially at pedestrian crossing. You should exercise extreme caution or discontinue use in potentially hazardous situations.
Preventing Hearing damage
Avoid using the headphones/earphones at high volume. Hearing experts advise not to play loud music for a long period of time. If you should experience ringing in your ears, reduce the volume or discontinue to use.
Consideration for others
- Keep the volume at a moderate level. This allows you to hear the sound and still be considerate to the people around you.
TROUBLE SHOOTING
Should any problem persist after you have checked these symptoms, consult your dealer or contact the support site at www.mpmaneurope.com
| Symptom | Possible Reason | Actions |
| No Power | - Check whether the battery is exhausted - Check whether the battery has not been installed properly | - Replace with a new battery. - Re-install the battery according to the polarity. |
| No Sound from the earphones | - Check whether the jack is detached from the unit. - Check whether the VOLUME is set to "0". - Check whether the battery is exhausted. - Check whether the plug is contaminated / oxidized. - Corrupted MP3 or WMA file. | - Re-install the earphones again. - Increase the volume. - Replace with a new battery. - Clean the jack. - Download the files again. |
| Invalid Character on LCD | - The language isn't supported. | - Visit our website to see whether a new revision firmware is released. |
| Poor FM Reception | - Weak signal. - Electrical interference by other electrical appliances. | - Adjust the position of player and earphones. - Turn off the electrical appliances. - Walk away from the interference sources. |
| Failed to download or upload of MP3/WMA/WAV file | - Check whether the battery is exhausted. - Check the connection of USB cable. - Damaged USB cable. - Memory is full. | - Replace with a new battery. - Re-plug the cable at both ends. - Replace a new USB cable. - Release some memory space by deleting some files. |
| Cannot record Voice or FM Tuner | - Memory is full. | - Release some memory space by deleting some files. |
TECHNICAL SPECIFICATIONS
| Category | Item | Specification |
| Audio | Frequency Range | 20Hz - 20KHz |
| Headphone Output | 20mW, 16ohm (Max.Vol) | |
| S/N Ratio | 85dB (MP3) | |
| File Support | File Type | MPEG 1/2/2.5 Layer 3, WMA, WAV (ADPCM) |
| Bit Rate | 8kbps - 320kbps | |
| Tag Info | ID3 Tag | |
| FM Tuner | FM Frequency range | 87.5MHz - 108MHz |
| Antenna | Headphone / Earphone Cord Antenna | |
| Dimension | 97mm x 30mm x 21.5mm | |
| Weight | 35g (Without battery) | |
| Battery | 1 x AAA Alkaline Battery | |
| LCD | Full Graphic with Blue Color Backlight | |
| USB | USB 2.0 | |
| Built-in Memory | 128 MB / 256 MB / 512MB | |
| Max. Playtime | Approx. 10 hours (128kbps, MP3) | |
| Supported OS | Win ME, Win 2000, Win XP, Mac OS 10.2.8 or higher | |
| Win 98 SE (Driver is required) | ||
| Firmware Upgradeable | Yes | |
| Operating Temperature | 23 to 104 (-5 to 40 ) |
CARE AND MAINTENANCE
Your Digital Audio Player is a precision electronic device, and should not be subjected to rough handling or exposed to extreme temperatures or moisture. Do not use chemical agents or liquids to clean the unit, as they may damage the plastic. Be sure to remove the batteries before cleaning the unit. Weak batteries should be replaced promptly, since they can leak and damage the player. Please also note the following, regarding the use of batteries.
Caution: Use only alkaline or zinc carbon batteries. Do not mix different types of batteries or new and used batteries. Be sure to observe the correct polarity when installing the batteries.
Worn out batteries should be removed from the unit promptly.
Do not short circuit the supply terminals.
Please retain this information for future reference.
The manufacturer reserves the right to make technical changes without notice in the interest of progress.
Declaration
Our company will not be responsible for any mistakes in this manual. Prior notices will not be given in case of any amendments within the manual. The mentioned trademarks and names are owned by the corresponding companies.
Microsoft Windows Media and Windows Logo are registered trademarks in the US and/or other countries. WinAmp and WinAmp logo are registered trademarks of Nullsoft company. All other products are the trademarks or registered trademarks of their owners.
The player may lock up or temporary lose its function due to electrostatic discharge or other electrical disturbance, but it resumes its normal function by resetting the device.
Reset Function
The player may lock up or temporary lose its function due to electrostatic discharge or other electrical disturbance, but normal function resumes when the device is reset. Reset the device by removing the battery from the player and reinserting the battery into the player observing the correct polarity.