TEL-225 - Telephone Steren - Free user manual and instructions
Find the device manual for free TEL-225 Steren in PDF.


| Product Type | Caller ID corded telephone |
| Display | 16-digit LCD with blue backlight |
| Caller ID Memory | 99 entries (date, time, number) |
| Programmable Alarms | 5 alarms (3 daily repeat, 2 once) |
| Dialing Modes | Pulse (rotary) and Tone (DTMF) |
| Speakerphone | Full-duplex handsfree with volume control (4 levels) |
| One-Touch Memory | 2 keys (M1, M2) for direct dial |
| Two-Touch Memory | 10 locations (0-9) via STORE/RECALL + key |
| Redial | Last number redial, baby call auto-dial |
| Flash Time | Selectable 100, 300, 600, or 1000 ms |
| Hold Music | 3 melodies with volume control |
| PABX Support | Configurable prefix code for external lines |
| Secret Code / Remote Monitor | 4-digit PIN; remote handsfree monitor if last digit is # |
| Baby Call | Auto-dial preset number on keypress (except REDIAL) |
| Call Reject | Press DEL to mute ringer during incoming call |
| Clock / Calendar | Set via menu; displays date and time |
| LCD Contrast | 16 levels, adjustable via FLASH key or menu |
| Ring Tones & Volume | 16 tones (including off); volume 1-8 |
| Power Supply | Phone line (-48 V) and 3 AA batteries (4.5 V) |
| Warranty | 1 year against defects in materials/workmanship |
| Maintenance | Clean with dry cloth; do not use solvents |
| Safety | Do not open, avoid moisture, extreme temperatures, and drops |
| Reparability | Contact authorized dealer or Steren service center |
Frequently Asked Questions - TEL-225 Steren
User questions about TEL-225 Steren
0 question about this device. Answer the ones you know or ask your own.
Ask a new question about this device
Download the instructions for your Telephone in PDF format for free! Find your manual TEL-225 - Steren and take your electronic device back in hand. On this page are published all the documents necessary for the use of your device. TEL-225 by Steren.
USER MANUAL TEL-225 Steren
natural_image
Front view of a black electronic device with a blue arrow pointing to the left side (no text or symbols visible)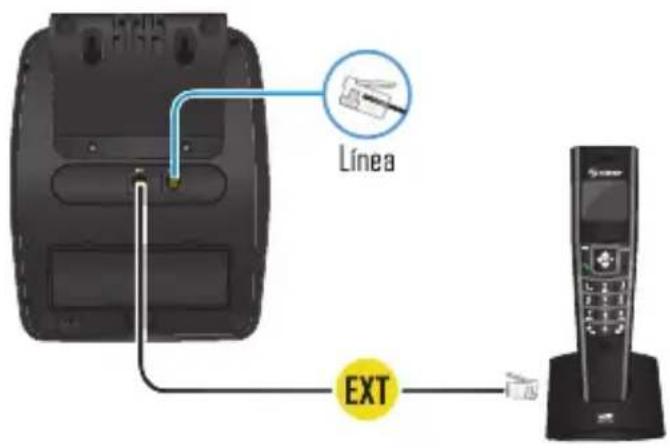
4. OPERACIÓN

- Remarcado
- Consultar
natural_image
Close-up of a finger pressing a black button labeled 'FLASH' with a white asterisk, enclosed in a circular frame (no additional text or symbols)-
Pulse STORE/RECALL.
-
Pulse M1 ó M2.
STEREN PRODUCTO EMPACADO S.A. DE C.V.
Biólogo Maximino Martínez No. 3408 Int. 3 y 4, San Salvador Xochimanca, México, D.F. 02870, RFC: SPE941215H43
ELECTRÓNICA STEREN DEL CENTRO, S.A. DE C.V. Rep. del Salvador 20 A y B, Centro, 06000, México. D.F RFC: ESC9610259N4
ELECTRÓNICA STEREN DE GUADALAJARA, S.A.
López Cotilla No. 51, Centro, 44100, Guadalajara, Jal. RFC: ESG810511HT6
ELECTRÓNICA STEREN DE MONTERREY, S.A.
Colón 130 Pte., Centro, 64000, Monterrey, N.L. RFC: ESM830202MF8
ELECTRÓNICA STEREN DE TIJUANA, S.A. de C.V.
Calle 2a, Juárez 7636, Centro, 22000, Tijuana, B.C.N. RFC: EST980909NU5

STEREN
TEL-225
Caller ID corded phone
Instruction manual
V0812b
S4-B
CALLER ID CORDED PHONE
TEL-225
Thank You on purchasing your new Steren product.
This manual includes all the feature operations and troubleshooting necessary to install and operate your new Steren's Caller ID corded phone.
Please review this manual thoroughly to ensure proper installation and operation of this product. For support, shopping, and everything new at Steren, visit our website:
www.steren.com

The instructions of this manual are for reference about the product. There may be differences due to updates.
Please check our web site (www.steren.com) to obtain the latest version of the instruction manual.
IMPORTANT
- Do not try to open the device, may cause damages and warranty will be void.
- Do not expose to extreme temperatures.
- Do not use or store the equipment near wet places. May cause malfunction or shock hazard.
- Avoid dropping the unit as this may cause damage.
- Do not place the device or accessories on surfaces that are tilted, unstable or subject to vibration.
- Do not put heavy objects on the device or accessories.
- Do not expose the device or accessories to dust, smoke or steam.
- Do not use solvents or other chemicals to clean the exterior of the device.
INDEX
- HIGHLIGHTS 5.
- CONTROLS 6.
- GETTING STARTED .8
- OPERATION 9.
4.1 Receiving a call 9
4.2 Making a call 10
4.3 Reviewing, calling back and deleting incoming/ outgoing numbers 11
- MENU 13
5.1 Set 1 Date (Setting date & time) 13
5.2 Set 2 Code (Setting Local Area Code and Long Distance Code) 13
5.3 Adjusting LCD Contrast 14
5.4 Setting Flash time 14
- SETTINGS .15
6.1 Setting PABX code 15
6.2 Setting Alarm Clock 15
6.3 Secret code setting and remote monitor function 16
6.4 Setting ringing tone and adjust ringing volume 17
6.5 Rejecting a call 17
6.6 Adjust handsfree volume 17
6.7 Selecting pulse or tone dialing mode 18
6.8 Hold on music 18
6.9 One-touch memory operation 19
6.10 Two touch memory operation 19
6.11 Pause function 20
6.12 BABYCALL 20
- SPECIFICATIONS 21
1. HIGHLIGHTS
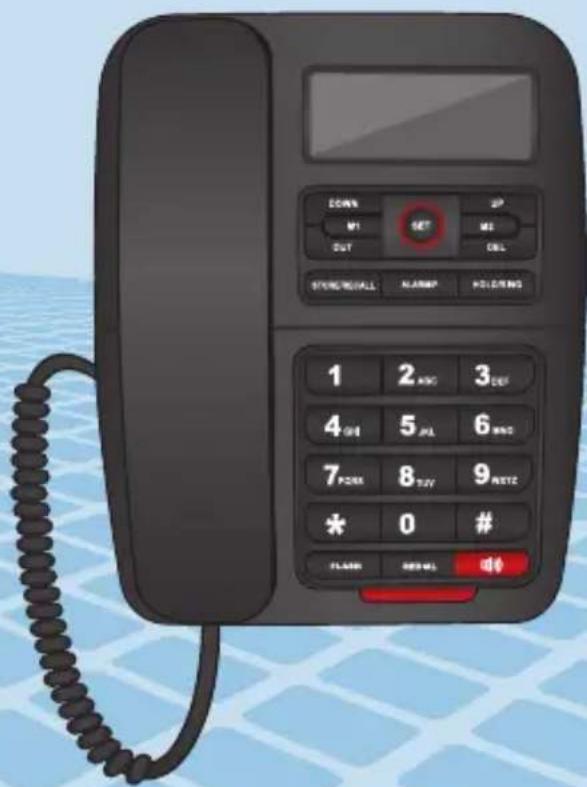
This corded phone has handsfree (speaker), 16 digit LCD screen with blue backlight. The base can be installed on the wall, place it on the table or any flat surface.
It features redial, volume set, call transfer, pause, clock and calendar. Due to the size of the keys and the special design, it is very easy to dial.
- Speaker
• 99 memories for caller ID - Backlight
- 5 programmable alarms
2. CONTROLS
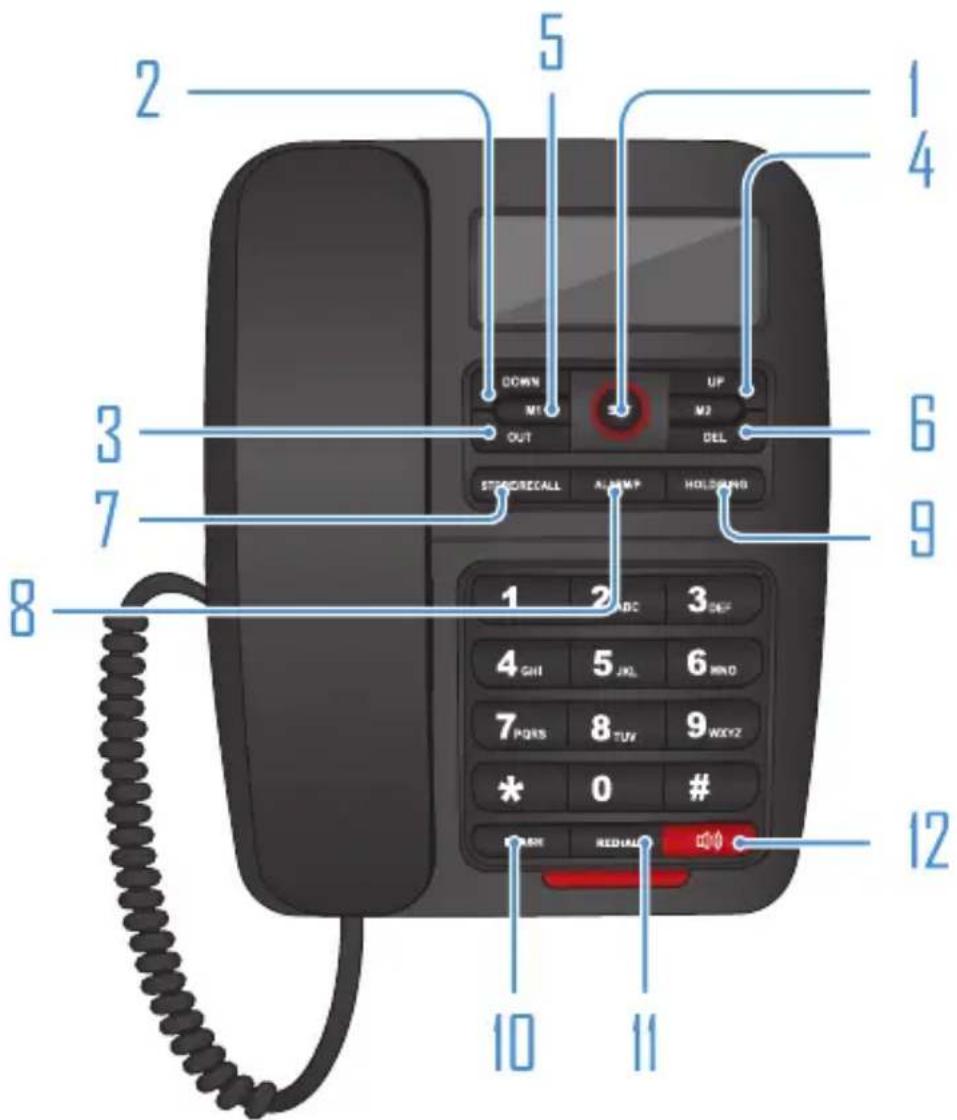
- SET: entry to the menu functions from idle mode. Confirming (OK) selections & actions.
- DOWN: used to navigate through menus, if the speaker mode is selected it increases the volume level. In standby mode, press to view incoming calls.
- OUT: in standby mode, press to see dialed numbers.
- UP: used to navigate through menus, if the speaker mode is selected it increases the volume level.
- M1 y M2: use to dial numbers saved in the memory.
- DEL: the key is used to delete memory. Use this key to correct a mistake made while dialing a number.
- Store/Recal: allow to set a number in memories M1 and M2.
- Alarm: the key will perform PAUSE function if pressed after any digit input both in talk mode and in standby mode. In standby mode press to set one of the 5 available alarms.
- HOLD/RING: press to select a ring and set volume level.
- FLASH: in standby mode, press to select one of the 16 levels of LCD contrast. Transfer between two phone calls.
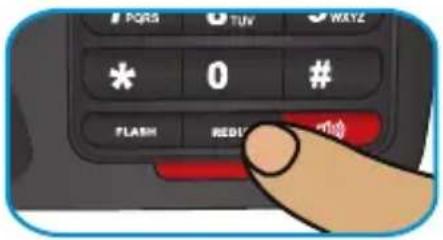
- REDIAL: in talk mode once pressing to redial the last dialed number. Press and hold set the Baby call function.
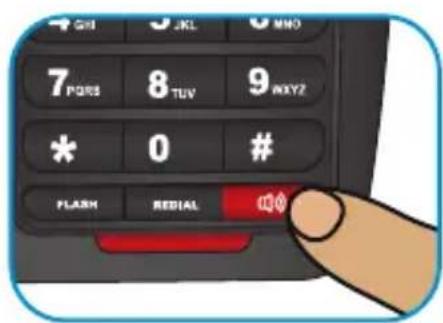
- Press this key to enter speakerphone mode.
3. GETTING STARTED
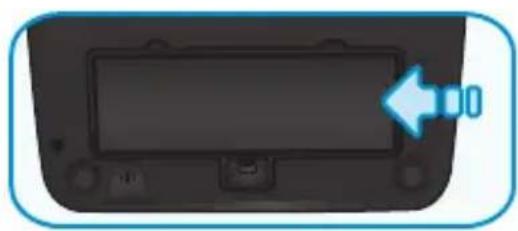
- The unit requires 3 AA batteries. Open the battery compartment cover and insert the batteries in the right polarity, then close the cover (alkaline batteries are suggested). There should be time display on the liquid crystal screen after the batteries are inserted.
natural_image
Interior view of a car dashboard with a blue arrow pointing to the left side (no text or symbols visible)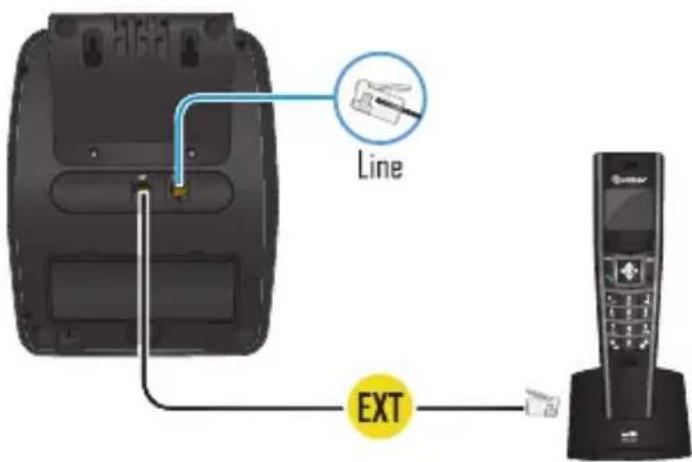
-
Insert one end of the line cord to the line jack of the base and the other end to the wall outlet.
-
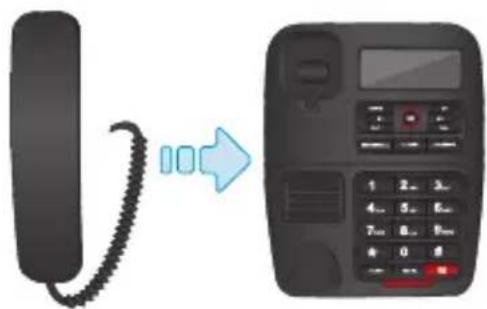
Connect the handset and the unit with coiled line.
4. OPERATION
4.1 Receiving a call
- When a call comes, the telephone rings, the RING LED flickers and LCD displays the number of the call, the date, time and the NEW icon.
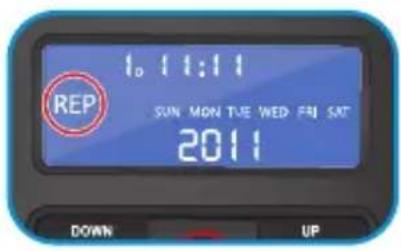
- For a repeated incoming call, the LCD displays REP icon.
When the incoming memory is full, the latest incoming number replaces the oldest number in the memory.
- For the phone to display incoming number and other information, you must have an active Caller ID subscription with your local telephone exchange company.
- From handset
- Pick up the handset and talk from anywhere.
- When finished, return the handset to the base.
- Switching to speakerphone
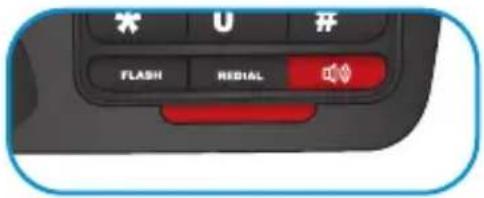
- When using the handset, press key and return the handset to the base.
- When finished, press key again.
- From speakerphone
-
When the telephone rings, press 🔒 key and talk to the caller. For the other party to hear your voice clearly, speak into the speaker from a distance of 32cm or less.
-
When finished, press key again.
4.2 Making a call
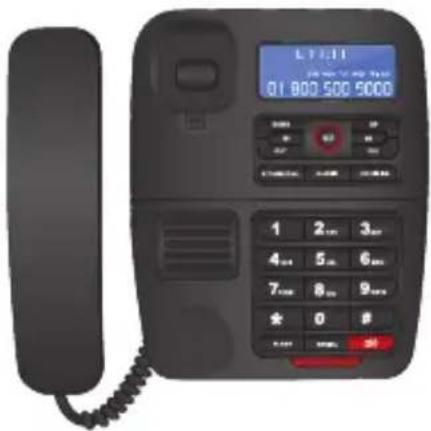
- From handset
-
Pick up the handset.
-
When you hear the dial tone, dial the desired number. Note that the screen displays the dial process.
-
When finished, return the handset to the base.
- From Speakerphone
-
Press key.
-
When you hear the dial tone, dial the desired number.
-
The unit will start to tim the conversation after 6 seconds.
-
When finished, press key again.
- Pre-dialing function
- When the handset is on the base, dial the desired number.
- If there are mistakes, use the DEL key to edit.
- Press key or pick up the handset and the number will be dialed automatically.
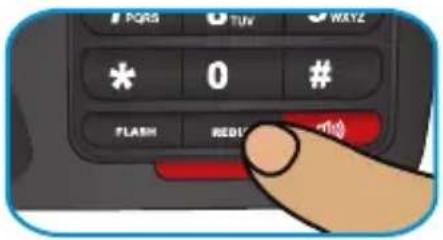
- Redial
- Pick up the handset or press key.
- Press REDIAL key, the last dialed number will be dialed again.
4.3 Reviewing, calling back and deleting incoming/ outgoing numbers
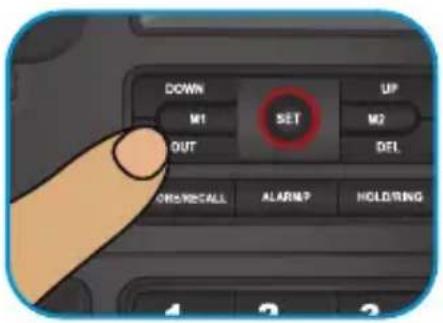
- Reviewing
In on-hook state, press UP or DOWN (incoming calls) or OUT (outgoing calls) key to scroll and review the numbers.
- Deleting
When the desired number is shown, press DEL key, thenumberisdeleted.PressandholdDELkeyfor3 seconds, all the incoming numbers are deleted.
- Calling back
-
Scroll to the desired number, press key or pick up the handset, and the number is dialed out, or
-
Press REDIAL key, LCD displays PICK UP, press key or pick up the handset.
-
Press and hold REDIAL key till PICK UP flashing, press 🔊 key or pick up the handset, the number is dialed out. If the long distance code is set, the telephone will automatically detect and add the long distance code ahead the number and then dial back.
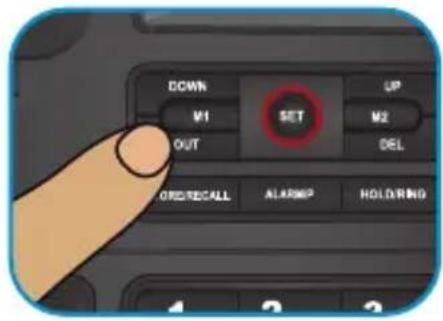
5. MENU

Press SET to confirm.
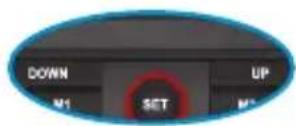
Use to navigate: UP and DOWN.

Press DEL to exit.
5.1 Set 1 Date (Setting date & time)
- With the phone on the hook, press SET key, LCD display SET 1 DATE, and press SET key again, the value for the year flashes.
- Press DOWN (+) / UP (-) key to edit the year.
- Press SET key to confirm and enter the next value month setting.
- Repeat the above steps for day and time setting.
5.2 Set 2 Code (Setting Local Area Code and Long Distance Code)
- With the phone on the hook, press SET key and press UP key, LCD display SET 2 CODE, and press SET key again, LCD displays CODE 0 ---- and the long distance code "0" flashes.
- Press DOWN (+) / UP (-) key to edit the flashing code.
- Press SET key to confirm and enter the next flashing code setting. Repeat the above steps for the rest code setting.
5.3 Adjusting LCD Contrast
- With the phone on the hook, press SET key and press UP key twice, LCD display SET 3 LCD, and press SET key again, LCD displays LCD 08
- Press DOWN (+) / UP (-) key to adjust the LCD contrast, total 16 levels can be selected.
- Press SET key to confirm and exit.

At on-hook state, press FLASH key to enter LCD contrast setting directly, then, press this key continuously to adjust the LCD contrast.
5.4 Setting Flash time
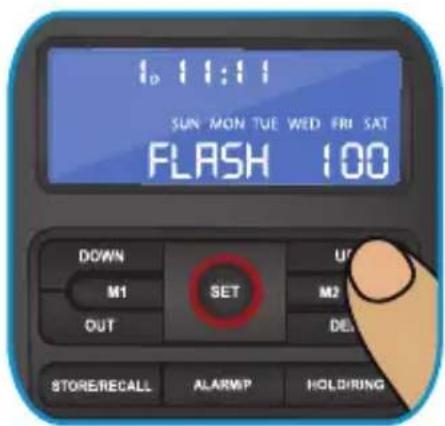
- With the phone on the hook, press SET key and press UP key three times, LCD display SET 4 FLASH, and press SET key again, LCD displays FLASH 100.
- Press DOWN (+) / UP (-) key to edit the Flash time to 100, 300, 600 or 1000ms.
- Press SET to confirm.
6. SETTINGS
6.1 Setting PABX code
When using behind a PABX that requires dialing a separate number to connect to external lines. This PABX code when set will automatically insert to the front part of the normal telephone number when you make a call.
- With the phone on the hook, press and hold DEL key for 3 seconds to set PABX code, LCD displays
SET PCODE - and the “-” flashes. - Press UP or DOWN key to set PABX code from 0 to 9 or -.
- If choose “-”, it means no PABX code has been set.
- Press SET key to confirm and exit.
6.2 Setting Alarm Clock
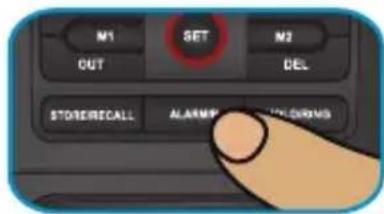
- In on-hook state, press ALARM/P key once, LCD displays 12-00 AL1.
- Press UP or DOWN key to select ON or OFF. LCD displays "ALM" icon when the alarm is set to ON.
-
Press SET key, value "12" starts to flash.
-
Press UP or DOWN key to set the alarm hour and press SET key to confirm and enter alarm minute setting.
- Press UP or DOWN key to edit alarm minute and press SET key to confirm and go to next group alarm clock setting.
- Repeat the above steps to set additional alarms.
The first 3 groups alarm clock setting will be repeated periodically every day while the last
2 groups alarm clock settings are activated only once
6.3 Secret code setting and remote monitor function
- Set the ringer to OFF. (Please refer to section "SETTING RINGING TONE AND ADJUST RINGING VOLUME").
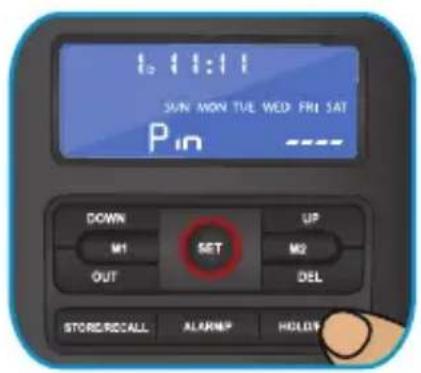
- With the phone on the hook, press and hold HOLD/RING key for 3 seconds, LCD displays Pin ----.
- Input a 4-digit of PIN using the numeric keys, or press DEL to delete. Press SET to confirm.
- When the last digit of the secret code is #, the telephone will activate remote monitor function.
- Usage
This function is useful only when the telephone ringer is set to OFF. The caller must know the secret code in order to dial through the line.
- Secret code: When caller calls this telephone, he/she will hear the usual ringing tone (when the line gets through) three times or four times. However, the telephone unit will not ring. The caller will hear a short "di" sound, which means that the caller needs to key the secret code. Once the caller keys in the correct code, the telephone unit will ring. Press key or pick up the handset to have the conversation with the caller.
- Remote monitor: If the last digit of the secret code is #, after the caller keys in the correct secret code, the telephone unit will go into hands free mode automatically and quit after about 50 seconds.
If the caller dials the wrong code, he/she will have to call again and enter in the correct secret PIN code.
6.4 Setting ringing tone and adjust ringing volume
There are 16 kinds of ring tone and ring OFF to select from:
- In on-hook state, press HOLD/RING key once, LCD displays ring 02 db8
- Press HOLD/RING key continually to select the desired ring or set ring OFF.
- Press UP or DOWN key to set ringing volume.
- Press SET to confirm and exit.
The volume ranges from 1db-8db, with 8db being the loudest. Ring OFF is "Do Not Disturb" mode. If the phone is set to this mode, the telephone will not ring when there is an incoming call.
6.5 Rejecting a call
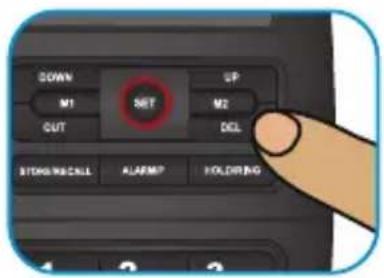
When a call comes and the telephone is ringing, press DEL key, the ringing will stop.
6.6 Adjust handsfree volume
In hands-free mode, press UP or DOWN to adjust the hands-free volume, LCD displays the volume level and there are a total of 4 levels.
6.7 Selecting pulse or tone dialing mode
-
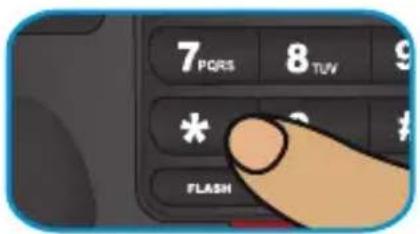
With the phone on the hook, press and hold * key for 3 seconds, LCD displays P, then dialing mode is set as Pulse.
-
Press 📷 key twice and hold * key for 3 seconds again, LCD displays 7, then dialing mode is set as Tone.
6.8 Hold on music
- Hold music selection
There are 3 kinds of hold music for selection.
- At off-hook state or hands-free, press HOLD/RING key
- Press OUT key continually to select the desired hold music. It plays the music at same time.
- Press UP or DOWN key to select the 4 steps volume of hold music.
- Press HOLD/RING key to quit.
When talking over handset, press HOLD/RING key to enter the hold mode and the hold music is sent out. In hold mode:
- Press HOLD/RING key to release hold mode and continue to talk over handset.
- Or hang up handset, it enters hands-free hold mode.
When talking at hands-free mode, press HOLD/RING key to enter the hold mode and the hold music is sent out. In hold mode:
- Pick up handset to talk over handset.
- Or press a key to quit hold mode and talk at hands-free mode.
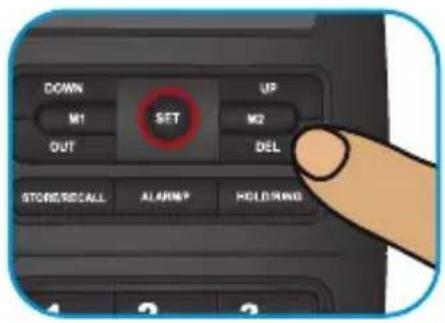
6.9 One-touch memory operation
- Storing the number in one-touch memory
- Pre-dial the desired number or checking incoming and outgoing number that you want to store.
-
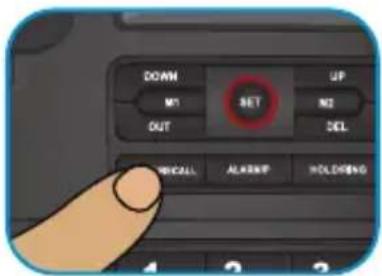
Press STORE/RECALL
-
Press M1 or M2
• Make a call from one-touch memory
In off-hook or on-hook situation, press M1 or M2 key to dial the stored number out.
6.10 Two touch memory operation
- Store the number in two-touch memory
-
Pre-dial the desired number or checking incoming and outgoing number that you want to store.
-
Press STORE/RECALL key.
-
Press one of numeric keys (0-9)
• Make a call from two-touch memory
In off-hook or hands-free state, press STORE/RECALL + numeric key (0-9), the relevant number will be dialed out.
6.11 Pause function
During pre-dialing or one-touch memory programming, press RD/P (handset) or REDIAL/P (base) key inserts a 3.6 second pause into the dialing sequence.
For example: 11P11 where P represents a 3.6 second pause.
This pause is needed to access an outside line on PABX systems.
6.12 BABYCALL
At on-hook state, press and hold REDIAL key for 3 seconds to come into baby call function setting.
LCD displays BABYCALL OFF, press REDIAL key to set it ON, press SET key. LCD displays NO CODE (or the preset baby call number, press DEL key to cancel), input baby call number using numerical key and press SET key to confirm.
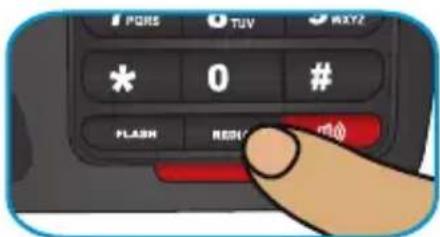
After set baby call function to ON state, pressing any key except REDIAL key or picking up handset will dial out the baby call number automatically.
When baby call function is ON state, you can still answer the incoming call.
7. SPECIFICATIONS
Input: -48 V---(phone line)
4.5 V---(3xAA)
Product design and specifications are subject to change, without notice.
Product: Caller ID corded phone
Part number: TEL-225
Brand: Steren
WARRANTY

This Steren product is warranted under normal usage against defects in workmanship and materials to the original purchaser for one year from the date of purchase.
CONDITIONS
1.-Thiswarrantycardwithalltherequiredinformation,invoice,productboxor package, and product, must be presented when warranty service is rec
2.- If the product stills on the warranty time, the company will repair it free of charge.
3.- The repairing time will not exceed 30 natural days, from the day the claim was received.
4.- Steren sell parts, components, consumables and accessories to customer, as well as warranty service, at any of the addresses mentioned later.
THIS WARRANTY IS VOID IN THE NEXT CASES:
If the product has been damaged by an accident, act so of God, mishandling, leaky batteries, failure to follow enclosed instructions, improper repair by unauthorized personnel, improper safe keeping, among others.
a) The consumer can also claim the warranty service in the purchase establishment. b) If you lose the warranty card, we can reissue it, if you show the invoice or purchase ticket.
RETAILER INFORMATION
Name of the retailer
Address
Product
Brand
Part number ____
Serial number ____
Date of delivery ____

In case your product fails or have questions, please contact your nearest dealer. If you are in Mexico, please give a call to our Call Center.
01 800 500 9000

STEREN
Help us to improve this instruction manual, call us:

01800 500 9000
Customer Service Center
www.steren.com

- OPERACIÓN
- - Remarcado
- - Consultar
- Caller ID corded phone
- IMPORTANT
- INDEX
- HIGHLIGHTS
- CONTROLS
- GETTING STARTED
- OPERATION
- Receiving a call
- - From handset
- - Switching to speakerphone
- - From speakerphone
- Making a call
- - Pre-dialing function
- - Redial
- Reviewing, calling back and deleting incoming/ outgoing numbers
- - Reviewing
- - Deleting
- - Calling back
- MENU
- Set 1 Date (Setting date & time)
- Set 2 Code (Setting Local Area Code and Long Distance Code)
- Adjusting LCD Contrast
- Setting Flash time
- SETTINGS
- Setting PABX code
- Setting Alarm Clock
- Secret code setting and remote monitor function
- - Usage
- Setting ringing tone and adjust ringing volume
- Rejecting a call
- Adjust handsfree volume
- Selecting pulse or tone dialing mode
- Hold on music
- - Hold music selection
- One-touch memory operation
- - Storing the number in one-touch memory
- Two touch memory operation
- Pause function
- BABYCALL
- SPECIFICATIONS
- WARRANTY
- CONDITIONS
- THIS WARRANTY IS VOID IN THE NEXT CASES:
- RETAILER INFORMATION
- STEREN
Brand : Steren
Model : TEL-225
Category : Telephone