
NVR-8077-32RD2S-SMA-N - Television NEVIR - Free user manual and instructions
Find the device manual for free NVR-8077-32RD2S-SMA-N NEVIR in PDF.


| Product Type | Television |
| Brand | Nevir |
| Model | NVR-8077-32RD2S-SMA-N |
| Screen Size | 32 inches (81 cm) |
| Display Technology | DLED HD |
| Resolution | HD (1366 x 768) |
| Tuners | DVB-T2, DVB-S2 |
| HDMI Inputs | 1 |
| USB Ports | 1 (USB 2.0, 500 mA max) |
| Other Connections | RJ45 (Ethernet), CI slot, AV IN, Mini YPbPr, Coaxial digital audio out, Earphone jack |
| Power Supply | AC 100-240V, 50/60Hz |
| Power Consumption (Typical) | 50 W |
| Standby Power | < 0.5 W |
| Weight (Approx.) | 5.5 kg (without stand) |
| Dimensions (W x H x D, Approx.) | 732 x 436 x 76 mm (without stand) |
| Remote Control | Yes (includes dedicated buttons for REC, MTS, Home, Browser, Subtitles) |
| Operating System | Proprietary (not Android, but does have Home page and apps) |
| Media Playback | Photo, Music, Video via USB |
| Picture Modes | User, Standard, Dynamic, Mild |
| Sound Modes | User, Standard, Music, Cinema |
| Safety Features | Class II double insulation, auto power-off after 30 sec power cut, ventilation warnings |
| Maintenance | Clean with soft dry cloth; do not use liquid cleaners; avoid direct sunlight |
| Environment | WEEE compliant; do not dispose with household waste |
Frequently Asked Questions - NVR-8077-32RD2S-SMA-N NEVIR
User questions about NVR-8077-32RD2S-SMA-N NEVIR
0 question about this device. Answer the ones you know or ask your own.
Ask a new question about this device
Download the instructions for your Television in PDF format for free! Find your manual NVR-8077-32RD2S-SMA-N - NEVIR and take your electronic device back in hand. On this page are published all the documents necessary for the use of your device. NVR-8077-32RD2S-SMA-N by NEVIR.
USER MANUAL NVR-8077-32RD2S-SMA-N NEVIR
natural_image
Illustration of a computer monitor with a crossed-out arrow and lightning bolts, symbolizing cloud or explosion (no text or symbols present)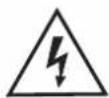
Precaución
natural_image
Simple line drawing of a computer monitor with a blue X mark and a hanging curtain (no text or symbols)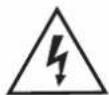
Precaución
natural_image
Illustration of a computer monitor with a 'X' symbol and decorative sparkles above it (no text or symbols present)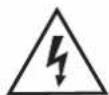
Precaución
natural_image
Simple line drawing of a computer monitor with a 'X' symbol and a battery on top (no text or labels)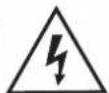
Precaución
Precaución
natural_image
Illustration of a computer monitor with a blue X mark and lightning bolts, placed on a table (no text or symbols)
Precaución
natural_image
Illustration of a person walking near a computer monitor and a bug symbol (no text or labels)
Precaución
natural_image
Simple line drawing of a hammer striking a surface with radiating lines (no text or symbols)
Precaución

Edición de canal
- Installation
- Warning
- Caution
● Main Unit Description - Remote Control
- Menu Operation
- Home Page
● Media Play - Trouble Shooting
Installation
① Locate the TV in a room where direct light does not strike the screen. Total darkness or a reflection on the picture screen can cause eyestrain. Soft and indirect lighting is recommended for comfortable viewing.
② Allow enough space between the receiver and the wall to permit ventilation.
③ Avoid excessively warm locations to prevent possible damage to the cabinet or premature component failure.
④ Do not install the TV in a location near heat sources such as radiator, air ducts, direct sunlight, or in a place somewhere like close compartment and close area. Do not cover the ventilation openings when using the TV.
⑤ The indicator light will last about 30 seconds to go out after cutting off the electricity, during this period, you cannot repower it on until the indicator light goes out, thanks a lot for your attention!


To prevent the spread of fire, keep candles or other open flames away from this product at all times.
Warning

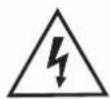
CAUTION RISK OF ELECTRIC SHOCK DO NOT OPEN

CAUTION: TO AVOID THE RISK OF ELECTRIC SHOCK.
DO NOT REMOVE COVER (OR BACK).
NO USER- SERVICEABLE PARTS INSIDE.
REFER SERVICING TO QUALIFIED SERVICE PERSONNEL.
This symbol is intended to alert the user to avoid the risk of electric shock, do not disassemble this equipment by anyone except a qualified service personnel.

This symbol is intended to alert the user to the presence of important operating and maintenance instructions in the literature accompanying the equipment.

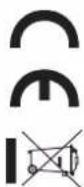
This equipment is a Class II or double insulated electrical appliance. It has been designed in such a way that it does not require a safety connection to electrical earth.
Caution
natural_image
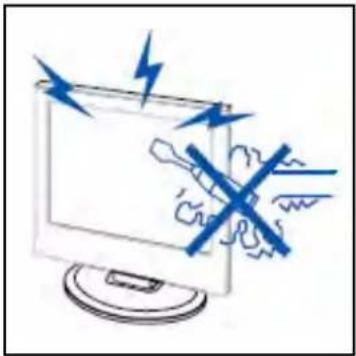
Illustration of a computer monitor with a crossed-out screw and lightning bolts, symbolizing electrical hazard (no text or symbols present)
High voltages are used in the operation of this product. Do not open the product's casing. Refer servicing to qualified service personnel.
natural_image
Simple line drawing of a computer monitor with a blue X mark and a hanging curtain (no text or symbols)
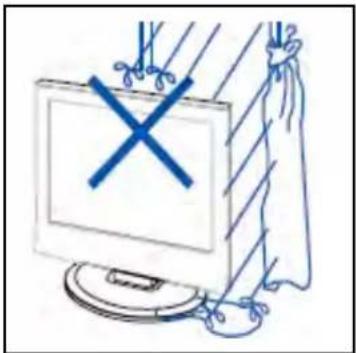
To prevent fire or electrical shock hazard, do not expose the main unit to rain or moisture, do not place objects filled with liquids, such as vases, on the apparatus.
natural_image
Illustration of a computer monitor with a 'X' symbol and decorative stars above it (no text or symbols present)
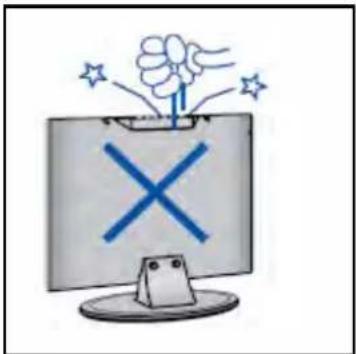
Do not drop or push objects into the television cabinet slots or openings. Never spill any kind of liquid on the television receiver.
natural_image
Simple line drawing of a box with a cross symbol inside, placed on a base with a small object nearby (no text or symbols)
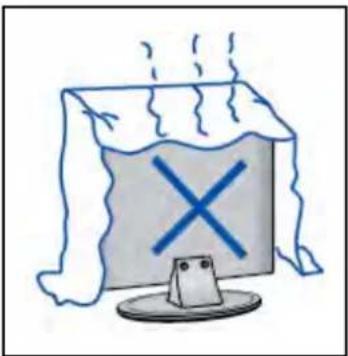
Avoid exposing the main unit to direct sunlight and other sources of heat. Do not stand the television receiver directly on other products which give off heat. E. g. video cassette players, Audio amplifiers. Do not block the ventilation holes in the back cover. Ventilation is essential to prevent failure of electrical component. Do not squash power supply cord under the main unit or other heavy objects.

Caution
Caution
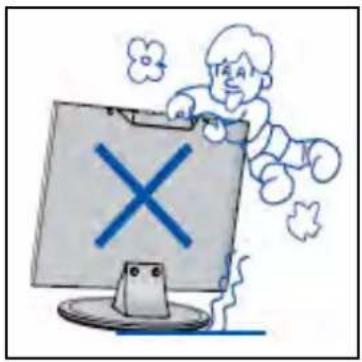
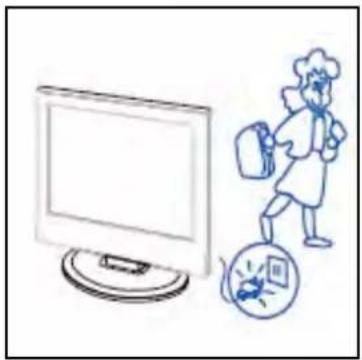
Never stand on, lean on, push suddenly the product or its stand. You should Pay special attention to children.
natural_image
Illustration of a computer monitor with an X mark and lightning bolts, no text or symbols present
Caution
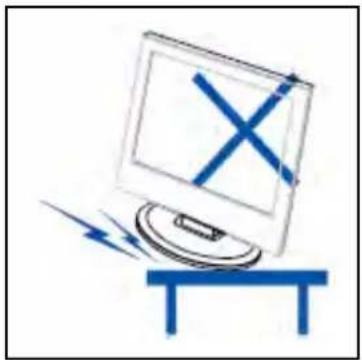
Do not place the main unit on an unstable cart stand, shelf or table. Serious injury to an individual, and damage to the television, may result if it should fall.
natural_image
Illustration of a person standing next to a computer monitor and a small globe with a bird (no text or symbols)
Caution
When the product is not used for an extended period of time, it is advisable to disconnect the AC power cord from the AC outlet.
natural_image
Simple line drawing of a hammer striking a screen with radiating lines (no text or symbols)
Caution
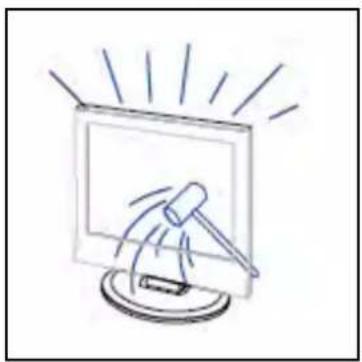
The LED panel used in this product is made of glass. Therefore, it can break when the product is dropped or applied with impact. Be careful not to be injured by broken glass pieces in case the LED panel breaks.
Main unit description
Control Panel Button Function
SOURCE : Select the input signal.
MENU : Press to select the main menu.
VOL+: Volume up.
VOL- : Volume down.
CH+: TV channel up.
CH- : TV channel down.
POWER : Turn the TV on or off.
TV Terminal Connections
| Connector | Function | Description |
 | COAX | Connection for Digital Coaxial input for Audio Amplifier. |
 | HDMI | Connect to equipment with HDMI output. |
 | RJ45 | Connect to the Internet. |
 | DVB-T2 | Antenna Input terminalConnect to equipment with antenna output or wall antenna socket. |
 | DVB-S2 | DVB-S2 Input Terminal.Connect to LNBF. |
| CI | Slot for Common Interface device(Decoder). | |
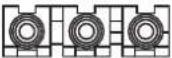 | AV IN | Video and Audio(L/R)input Terminal.Audio(L/R)can be used as YPbPr Audio input. |
 | USB | Insert USB . |
| [H5WS] | EARPHONE | Connects audio amplifier or other device with that audio input. |
 | Mini YPbPr | YPBPR Input terminaleConnect to equipment with component video output. |
Optional Configuration as below:
Connect the USB to the USB jack on the set.
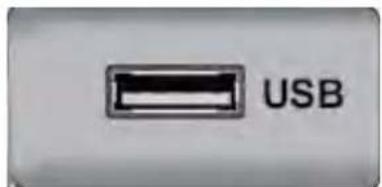
NOTE
- It is only 500 mA MAX of DC current output when you connect with USB jack
- To ensure the Mobile HD works well, you should use other power supply for the Mobile HD. And do not use the USB jack in the same time.
Remote control
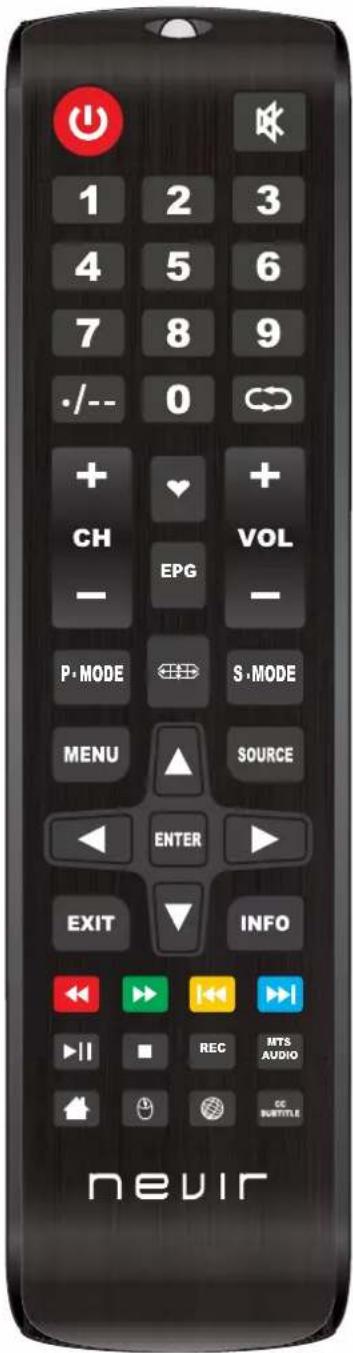
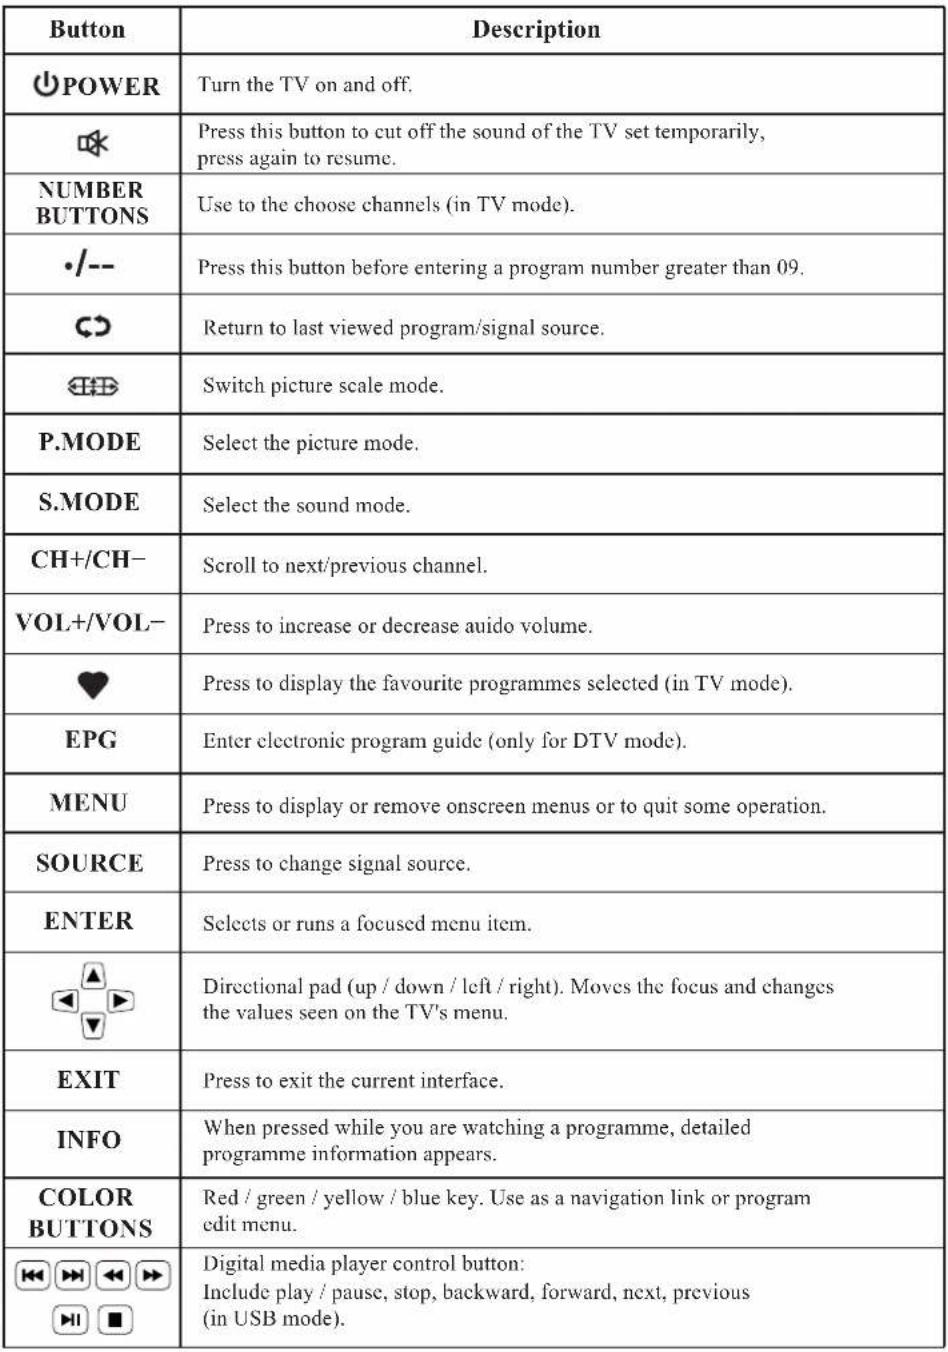 |
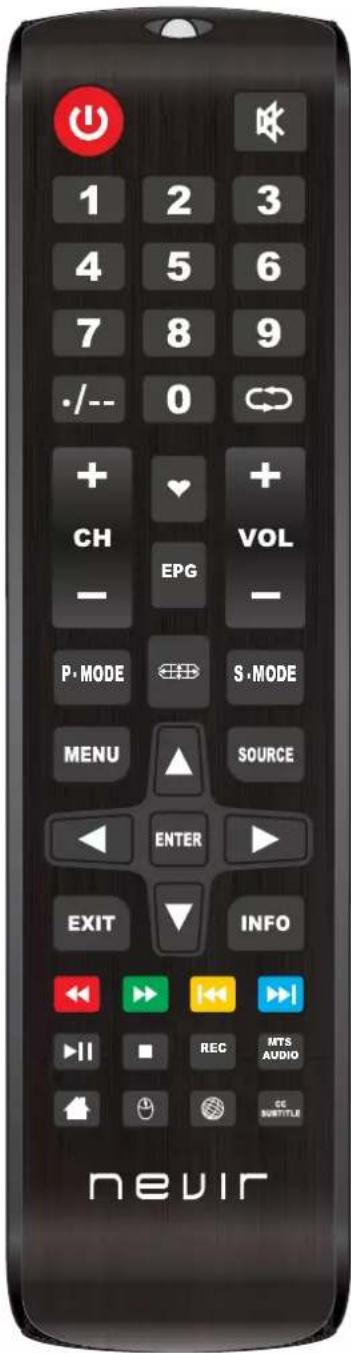
| REC | To start Record Channel. Press to start recording channels stream to your USB flash disk. |
| MTS/AUDIO | Press this button to display and select different TV audio systems or language. |
| Press this button to Home.(Android Mode) | |
| On/Off mouse mode. | |
| Press this button to Browser.(Android Mode) | |
| CC/SUBTITLE | Press the button to display available subtitles (in DTV mode). |
Note:
◆ All picture in this manual are examples, only for reference, actual product may differ from the picture.
◆ The button not mentioned here are not used.
Menu Operation
SELECT INPUT SOURCE
Press SOURCE button to display the input source input list;
Press ▲/▼ button to select the input source you want to watch;
Press ENTER button to enter the input source;
After entering the source, for example DTV:
* Press MENU button to display the MAIN OSD MENU;
* Press ▲/▼ button to select the MENU you want;
* Press ENTER button to enter the sub menu, and press EXIT button to return back to the previous menu.
* Press ▲/▼ button to select the option and then press ENTER button or ▶ button to enter the submenu, press ◀/▶ button to adjust the value or press ◀/▶ button to select in the sub menu;
* You can press MENU button to save and return back to the previous menu, and press EXIT button to exit the entire menu.
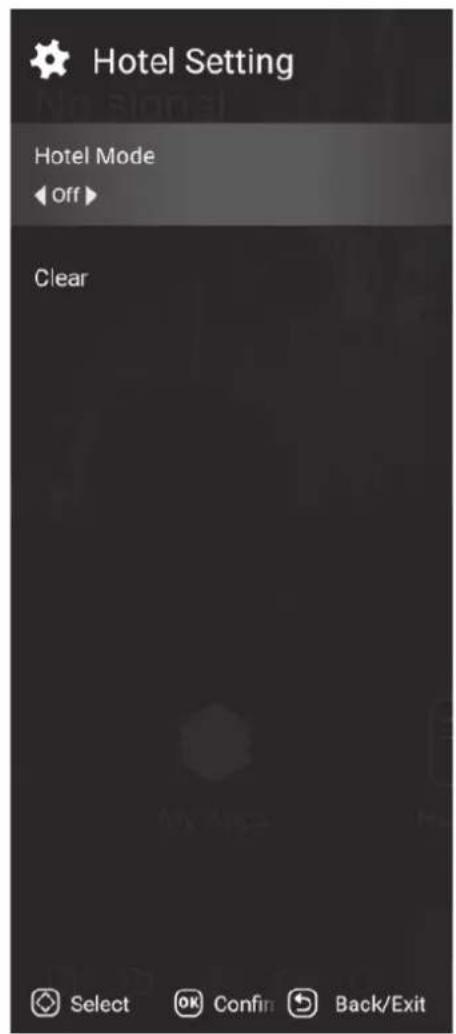
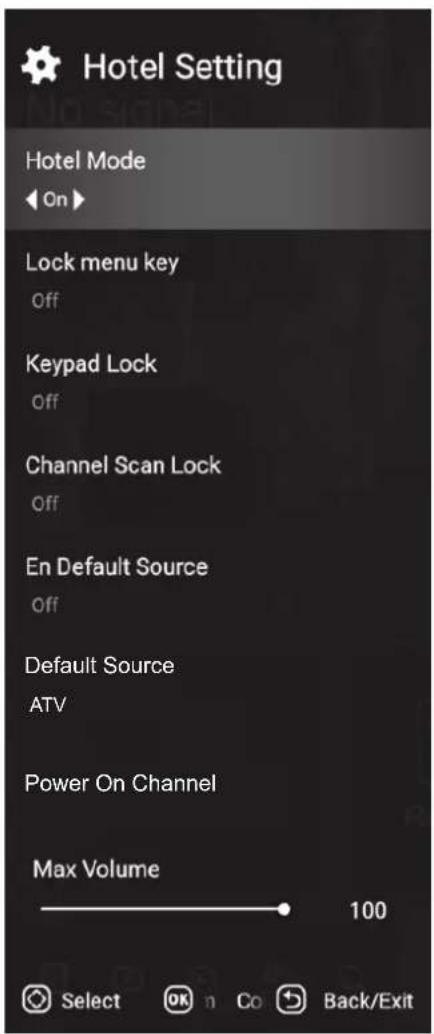
Hotel mode
Press SOURCE button and 4588, then enter hotel mode.
Picture Menu
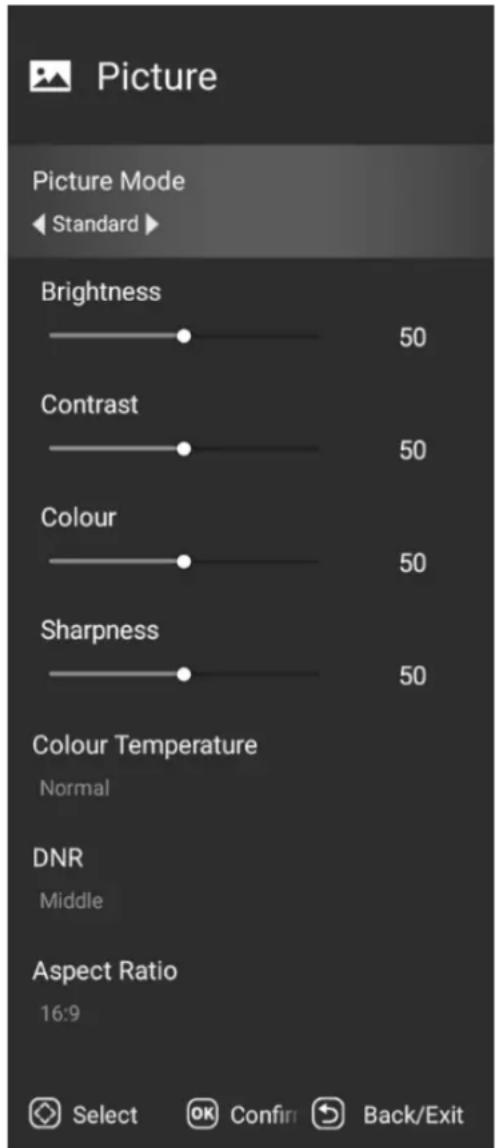
Press TV MENU button to display the main menu.
Press ▲/▼ button to select Picture in the main menu, and then press ENTER button to enter.
- Press ▲/▼ button to select the option that you want to adjust in the Picture menu, and then press ENTER button or ▶ button to enter.
- Press ◀/▶ button to adjust or press ▲/▼ button to select. And press ENTER button to select the sub menu.
- After finishing your adjustment, press MENU button to save and return back to the previous menu, and press EXIT button to exit the entire menu.
Picture Mode
Press ▲/▼ button to select Picture Mode, then press ENTER button to enter and press ◀/▶ button to select. (Available Picture Mode: User, Standard, Dynamic, Mild) You only can change the value of brightness, contrast, sharpness, color, when the picture is in User mode.
Colour Temperature
Press ▲/▼ button to select Colour Temperature, then press ENTER button to enter and ◀/▶ button to select Standard, Cool, Warm.
Aspect Ratio
Press ▲/▼ button to select Aspect Ratio, then press ENTER button to enter and press ◀/▶ button to adjust. Then press MENU button to return back the previous menu directly.
Sound Menu
Press MENU button to display the main menu.
Press ▲/▼ button to select Sound in the main menu, and then press ENTER button or ▶ button to enter.
- Press ▲/▼ button to select the option that you want to adjust in the Sound menu, then press ENTER button to enter.
- press ◀/▶ button to adjust or press ▲/▼ to select, and press ENTER button to select submenu.
- After finishing your adjustment, Press MENU button to save and return back to the previous menu, or press EXIT button to exit the entire menu.
Sound mode
Press ▲/▼ button to select Sound mode, and then press ENTER button to enter. And then press ◀/▶ button to select. (Available Sound mode: User, Standard, Music, cinema).
You can change the value of bass and treble, Balance and EQ, when the sound is in User mode.
Balance
Press ▲/▼ button to select Balance, then press ENTER button to enter and press ◀/▶ button to adjust.
Then press MENU button to return back the previous menu directly.
Surround
Press ▲/▼ button to select surround, then press ENTER button to enter and press ◀/▶ button to adjust.
Then press MENU button to return back the previous menu directly.
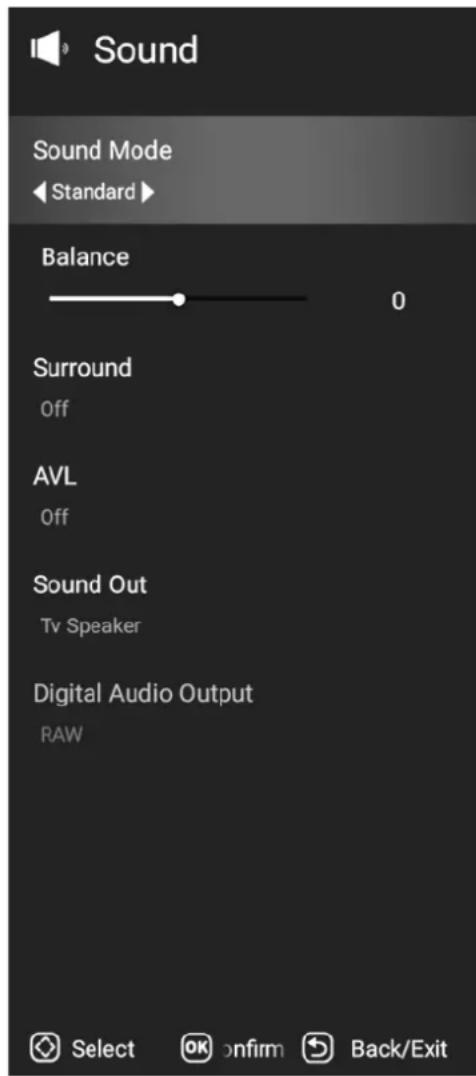
Digital Audio output
Press ▲/▼ button to select SPDIF Output, then press ENTER button to enter and press ◀/▶ button to select. (Available SPDIF mode: RAW, PCM, OFF)
Then press ENTER button or ▶ button to enter and press ◀/▶ button to adjust, then press MENU button to return back the previous menu directly.
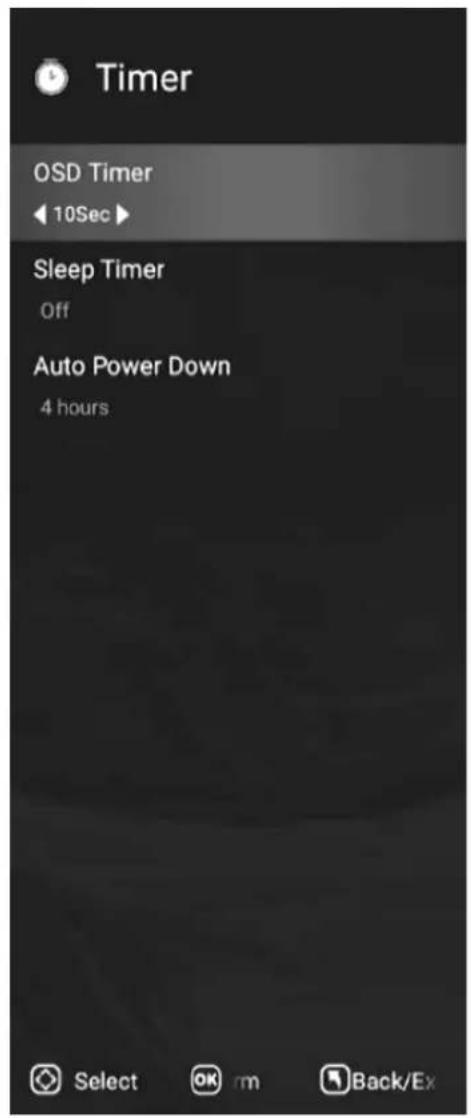
Timer Menu
Press ▲/▼ button to select Timer, then press ENTER button to enter and press ◀/▶ button to adjust. Then press MENU button to return back the previous menu directly.
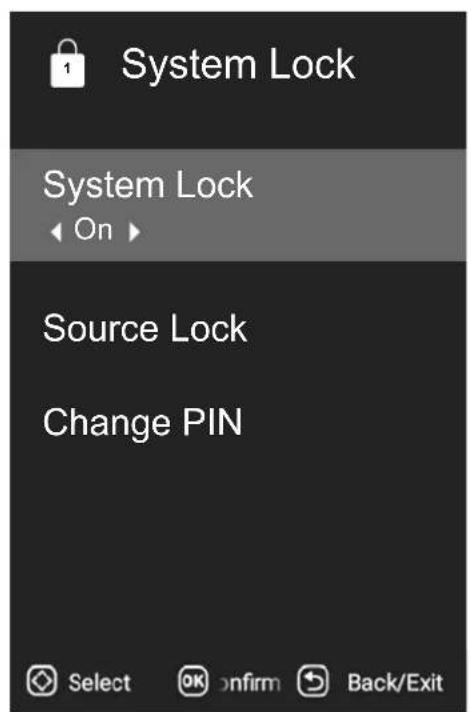
System lock
Press ▲/▼ button to select System Lock, then press ENTER button to enter and press ◀/▶ button to adjust. Then press MENU button to return back the previous menu directly.
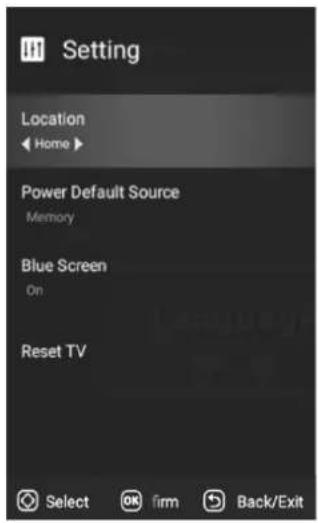
Setting Menu
Press MENU button to display the main menu.
Press ▲/▼ button to select SETTING in the main menu, and then press ENTER button to enter.
- Press ▲/▼ button to select the option that you want to adjust in the SETTING menu, and then press ENTER button to enter.
- Press ◀/▶ button to select and press ENTER button to select the sub menu.
- After finishing your adjustment, press MENU button to save and return back to the previous menu, or press EXIT button to exit the entire menu.
Channel Menu
Press MENU button to display the main menu.
Press ▲/▼ button to select setup in the main menu, then press ENTER to enter.
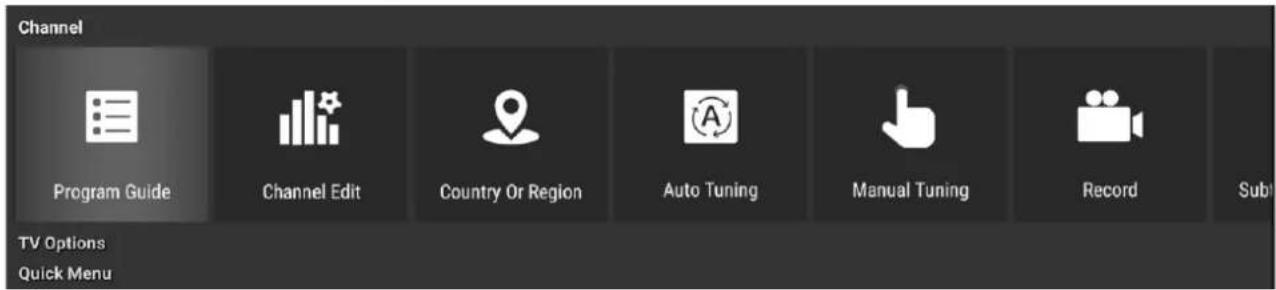
- Press ▲/▼ button to select the option that you want to adjust in the Channel menu, then press ENTER or ▶ button to enter.
- Press ◀/▶ button to adjust or press ▲/▼ button to select.
- After finishing your adjustment, press MENU button to save and return back to the previous menu and press EXIT button to exit the entire menu.
Program Guide
In the DTV source, you can start channel information function by pressing Program Guide button on the remote control. The prompt window will appear as follows:
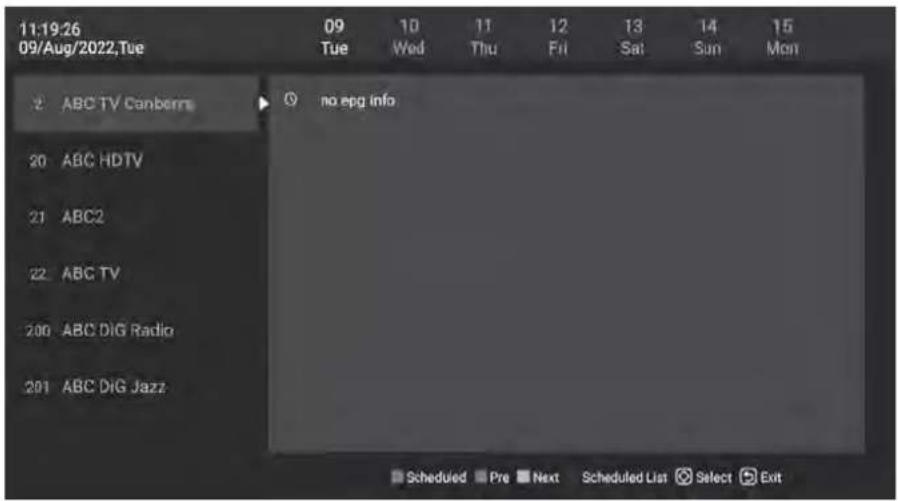

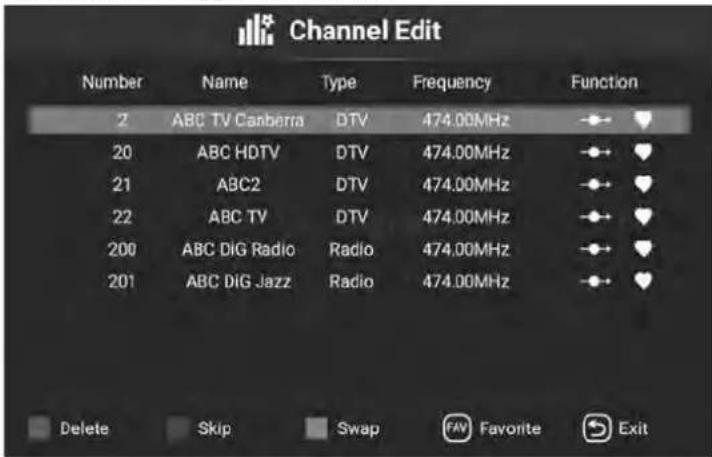
Channel Edit
Press ◀/▶ button to select Channel Edit, and then press ENTER button to play the channel selected. The menu will appear as follows:
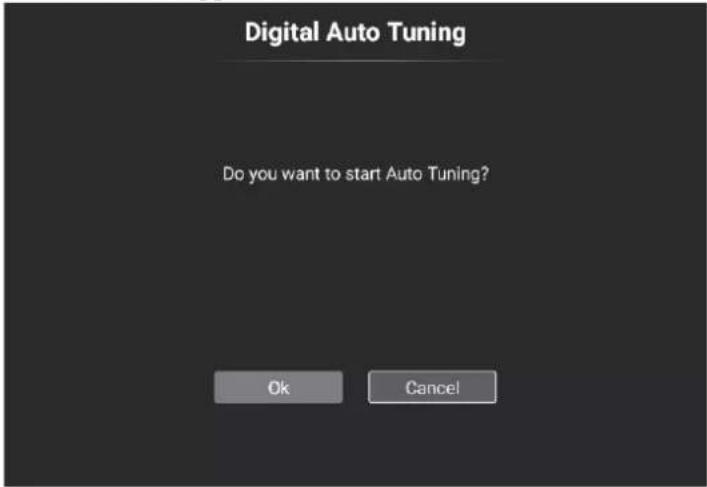
Auto Tuning
Press ◀/▶ button to select Auto Search, and then press ENTER button to enter. Select OK to search, The menu will appear as follows:
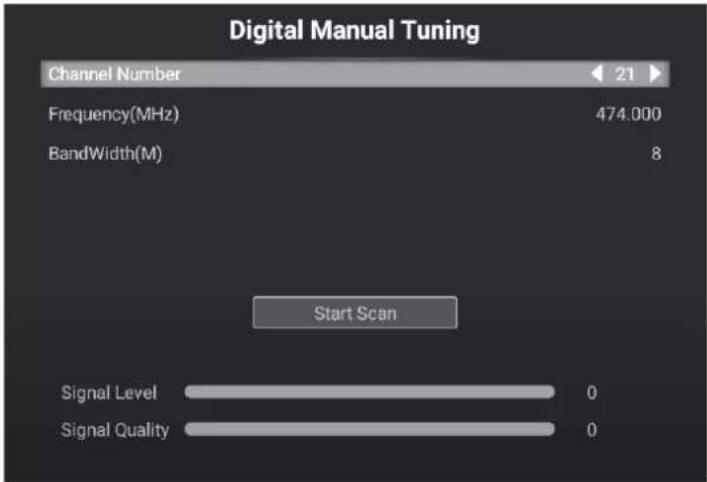
Manual Tuning
Press ◀/▶ button to select Manual Tuning, and then press ENTER button to enter. Select Start Scan to search The menu will appear as follows:
Home Page
Press MENU button to display the main menu.
Press ◀/▶ button to select HOME and press ENTER button to select the sub menu.
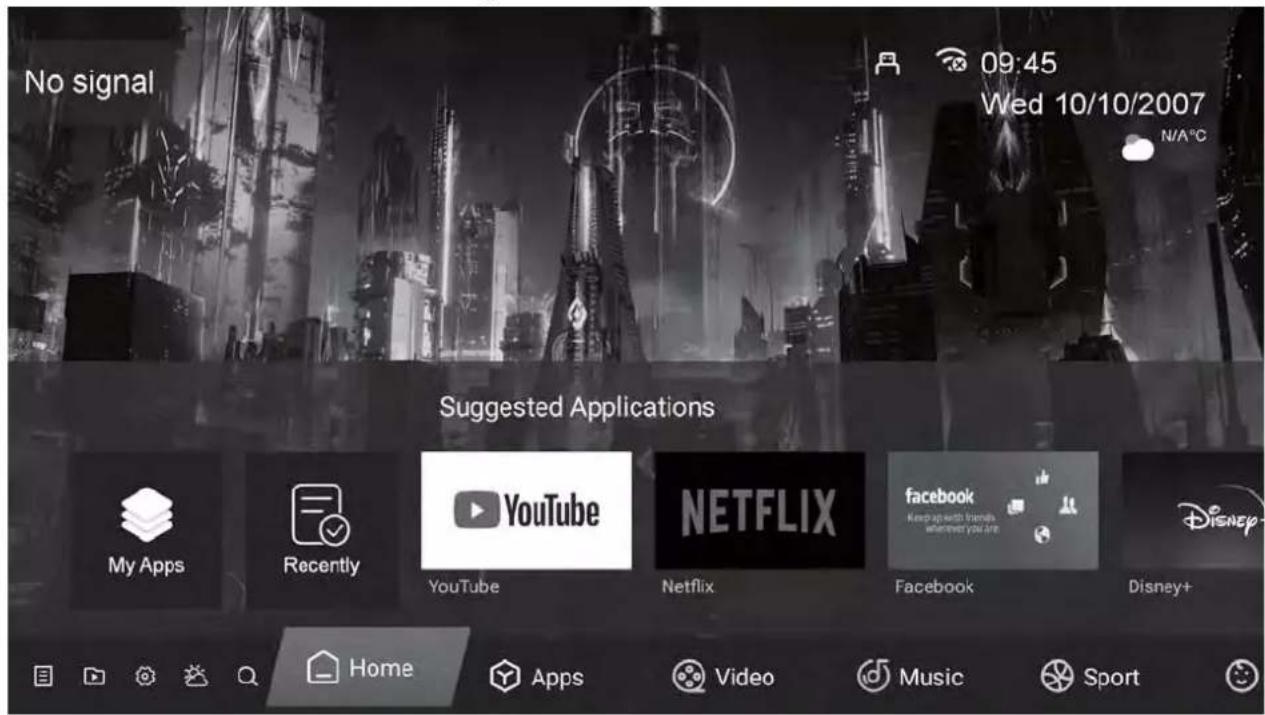
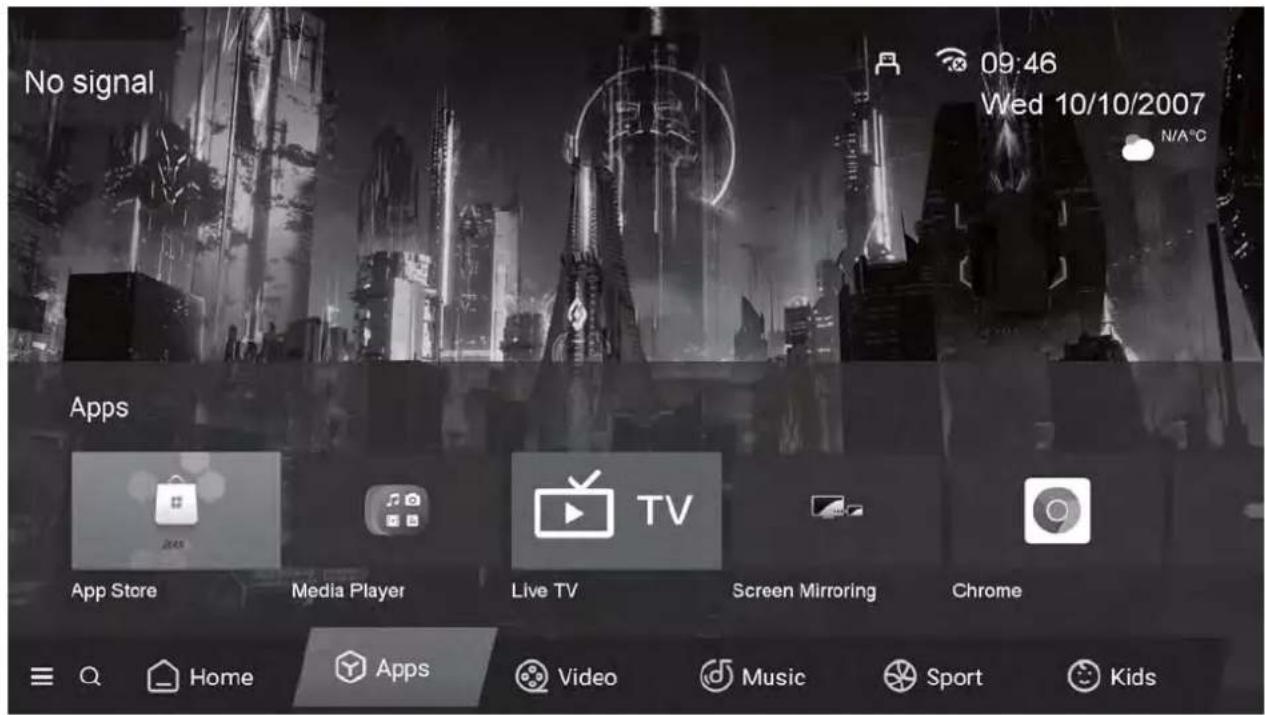
Press ▲/▼ button to select Apps in the Source Menu, and then press ENTER or ▶ to enter.
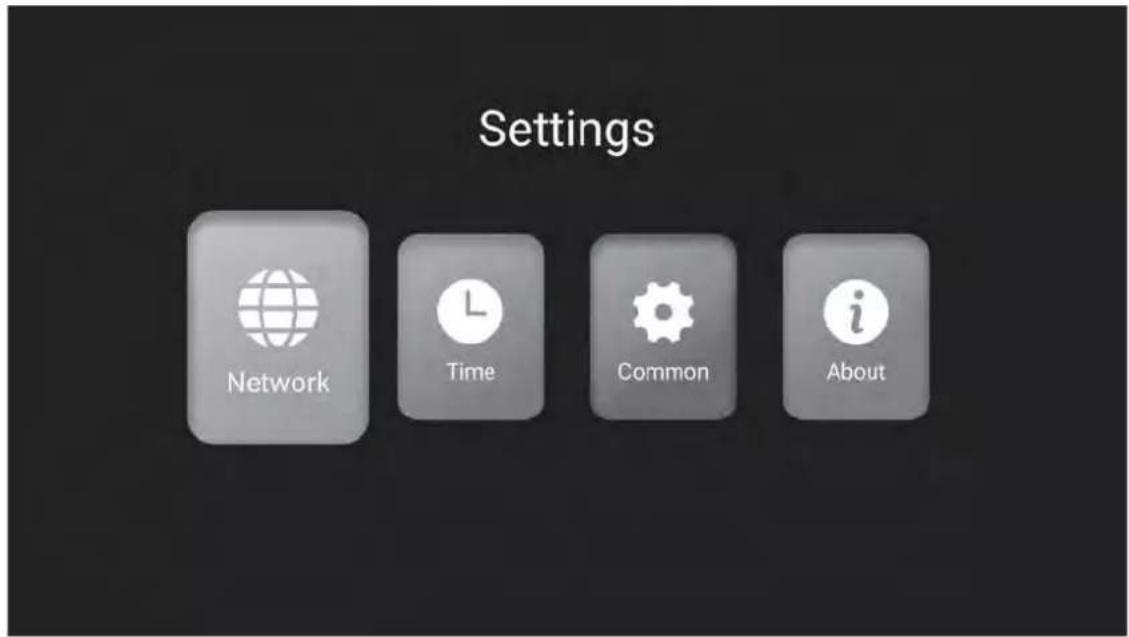
Setting
Press ▲/▼ button to select Setting in the Source Menu, and then press ENTER or ▶ to enter.
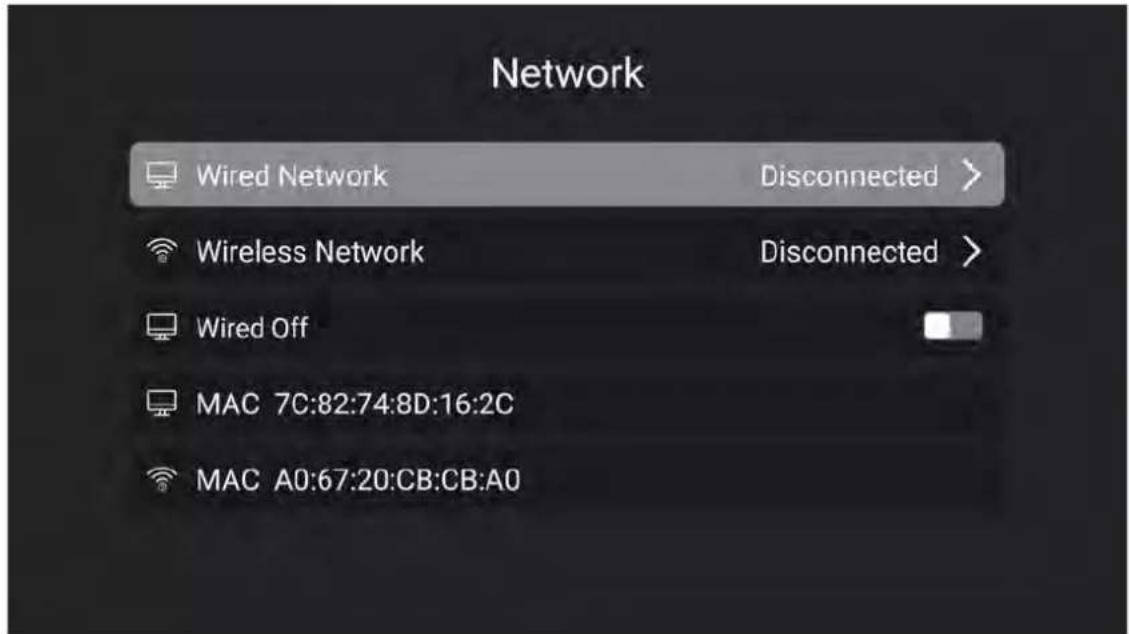
Press ▲/▼button to select the Network Setting that you can open the Wi-Fi. As the figure shows.
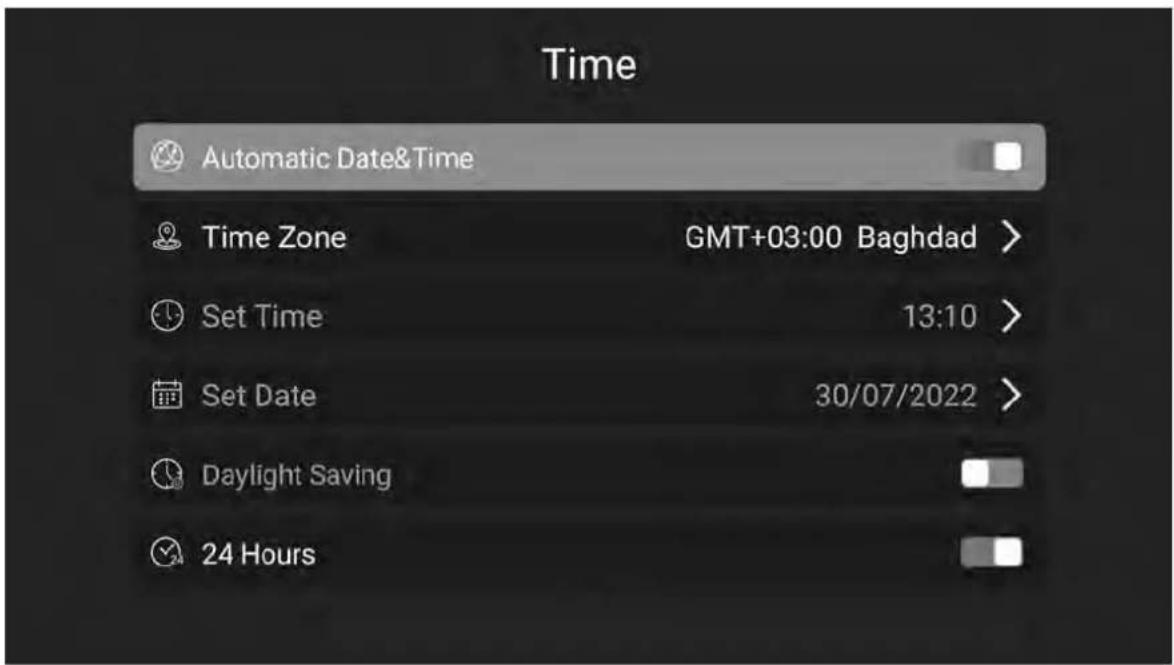
Press ◀/▶ button to select the Time Setting. As the figure shows.
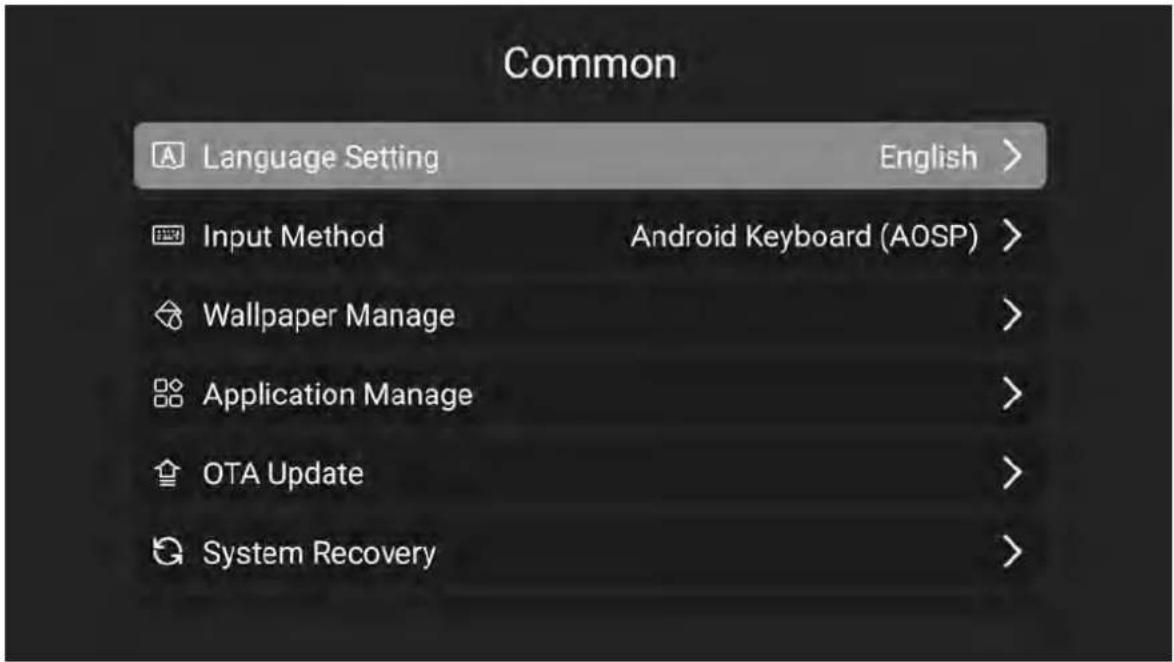
Press ◀/▶ button to select the Common. As the figure shows.
Media Play
FileManager
Click the usb icon in the upper right corner of the home page to enter the file manager page.
As shown below:


Photo
Press ◀/▶ button to select Photos in the main menu, and then press ENTER button to enter.
Press EXIT button to return back to the previous menu.
Music
Press ◀/▶ button to select Music in the main menu, and then press ENTER button to enter.
Press EXIT button to return back to the previous menu.
Video
Press ◀/▶ button to select Video in the main menu, then press ENTER button to enter.
Press EXIT button to return back to the previous menu.
Applications
Press ◀/▶ button to select Applications in the main menu, then press ENTER button to enter.
Press EXIT button to return back to the previous menu.
Trouble Shooting
Before consulting service personnel, check the following chart for possible solutions.
| PROBLEM | SOLUTION |
| TV will not turn on | Make sure the power cord is plugged in.The batteries in the remote control may be Exhausted; replace the batteries. |
| No picture, no sound | Check the cable between TV and antenna/ external AV device.Press the power button on the remote.Press the SOURCE button the remote, then press the “▲/▼”button repeatedly to select the TV source. |
| Poor picture, sound OK | Check the cable between TV and antenna/ external AV device.Try another channel, the station may have broadcast difficulties.Adjust the brightness/contrast in the Video menu. Check that the unit is set to PAL |
| Audio noise | Move any infrared equipment away from the TV. |
The TFT LED panel uses a panel consisting of sub pixels which requires sophisticated technology to produce. However, there may be a small number of bright or dark pixels on the screen. These pixels will have no impact on the performance of the product.
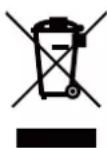
If at any time in the future you should need to dispose of this product please note that: Waste electrical products should not be disposed pf with household waste. Please recycle where facilities exist. Check with your Local Authority or retailer for recycling advice. (Waste Electrical and Electronic Equipment Directive)
NVR-8077-32RD2S-SMA-N
TELEVISOR DLED HD 32" (81cm) com TDT
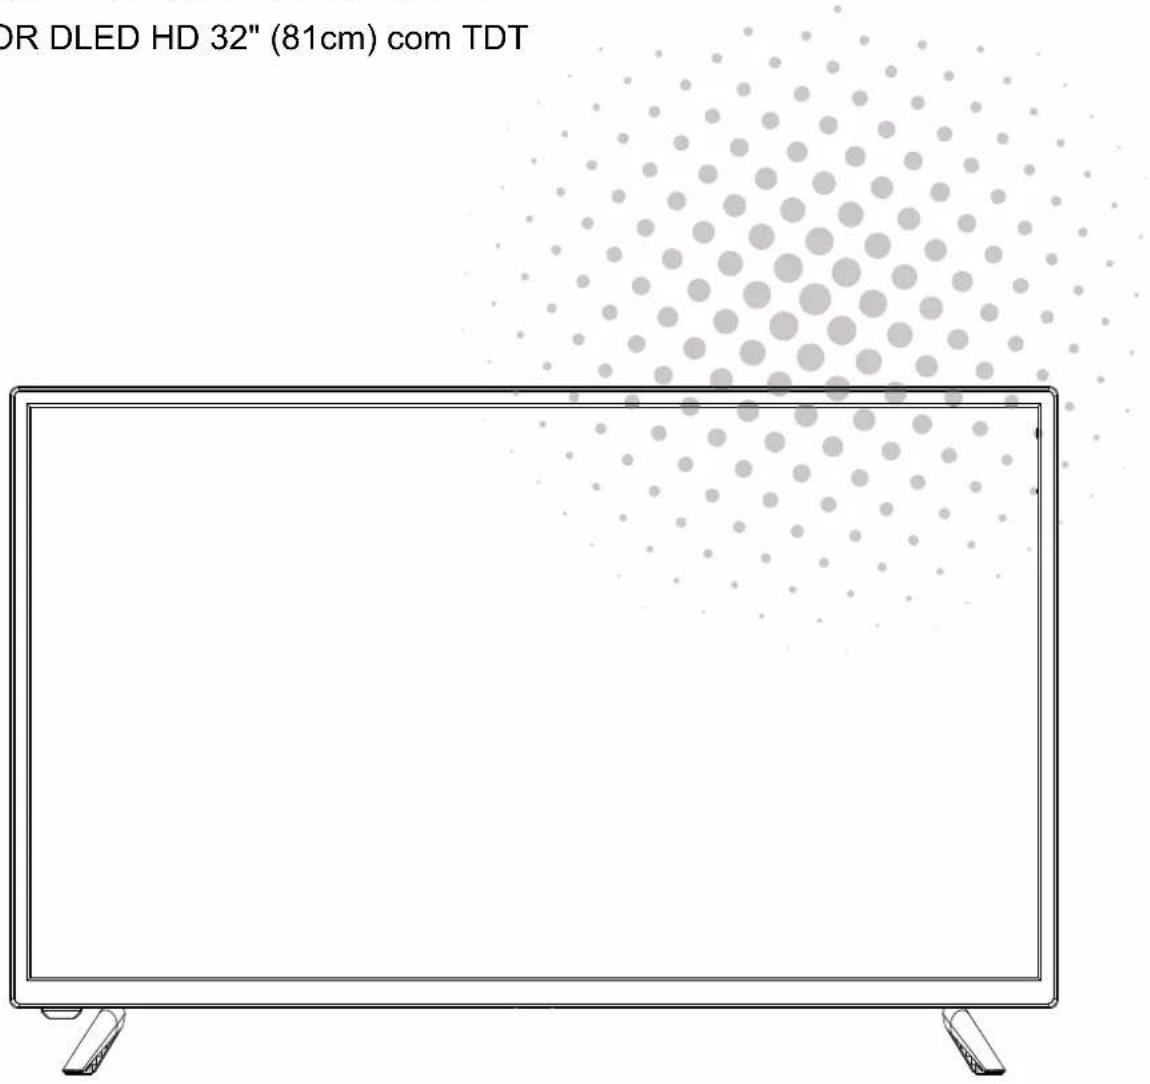
MANUAL DE USUARIO
USER MANUAL
MANUAL DO UTILIZATOR
Índice
natural_image
Illustration of a computer monitor with a crossed-out antenna and lightning bolts, symbolizing electrical hazard (no text or symbols present)
natural_image
Simple line drawing of a computer monitor with a blue X mark and a hanging curtain (no text or symbols)
natural_image
Illustration of a computer monitor with a 'X' symbol and decorative stars above it (no text or symbols present)
natural_image
Simple line drawing of a computer monitor with a 'X' symbol on its screen and a small battery on the base (no text or symbols)
Cuidado
natural_image
Illustration of a computer monitor with a blue X mark and a blue lightning bolt, resting on a table (no text or symbols)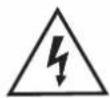
Cuidado
natural_image
Illustration of a person walking near a computer monitor and a bug symbol (no text or symbols present)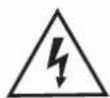
Cuidado
natural_image
Simple line drawing of a hammer striking a computer monitor with radiating lines (no text or symbols)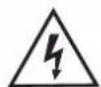
Cuidado

Edição de Canal
EN IEC 62368-1:2020+A11:2020
EN IEC 62311:2020
EN 50665:2017
DIRECTIVA ROHS
2011/65/EU
- Precaución
- Edición de canal
- Installation
- Warning
- Caution
- Main unit description
- Control Panel Button Function
- TV Terminal Connections
- Optional Configuration as below:
- NOTE
- Remote control
- Note:
- Menu Operation
- SELECT INPUT SOURCE
- Hotel mode
- Picture Menu
- Picture Mode
- Colour Temperature
- Aspect Ratio
- Sound Menu
- Sound mode
- Balance
- Surround
- Digital Audio output
- Timer Menu
- System lock
- Setting Menu
- Channel Menu
- Program Guide
- Channel Edit
- Auto Tuning
- Manual Tuning
- Home Page
- Setting
- Media Play
- FileManager
- Photo
- Music
- Video
- Applications
- Trouble Shooting
- NVR-8077-32RD2S-SMA-N
- Índice
- Cuidado
- Edição de Canal
- DIRECTIVA ROHS
Brand : NEVIR
Model : NVR-8077-32RD2S-SMA-N
Category : Television