
ATT-09 - Turntable AKAI - Free user manual and instructions
Find the device manual for free ATT-09 AKAI in PDF.


| Product Type | Turntable with Built-In Speakers |
| Brand | AKAI |
| Model | ATT-09 |
| Dimensions | 420 x 376 x 102 mm |
| Weight | 3.00 kg |
| Power Supply | DC 5V 1A (adapter input: 115V/230V selectable) |
| Power Consumption | 5 W |
| Speeds | 33 1/3, 45, 78 RPM |
| Drive Method | Belt drive |
| Motor | DC motor |
| Turntable Platter | 198 mm diameter, plastic |
| Tone Arm Type | Ceramic stereo cartridge with ruby stylus |
| Stylus Replacement | Recommended every 250 hours |
| Built-in Speakers | 2 x 0.8 W RMS |
| Bluetooth Version | 5.0 |
| Audio Outputs | RCA (left and right channels) |
| Record Compatibility | 7", 10", 12" records |
| Auto-Stop Function | Yes, with ON/OFF switch |
| 45 RPM Adaptor | Included |
| Accessories | User manual, warranty card, DC 5V 1A adaptor |
| Cleaning | Wipe with a damp cloth; clean stylus with soft brush and alcohol |
| Safety | Keep away from water and heat; unplug during storms |
Frequently Asked Questions - ATT-09 AKAI
User questions about ATT-09 AKAI
0 question about this device. Answer the ones you know or ask your own.
Ask a new question about this device
Download the instructions for your Turntable in PDF format for free! Find your manual ATT-09 - AKAI and take your electronic device back in hand. On this page are published all the documents necessary for the use of your device. ATT-09 by AKAI.
USER MANUAL ATT-09 AKAI
Turntable with Built-In Speakers

natural_image
Black-and-white photo of a vintage rotary disc with visible power and buttons, no text or symbols on the device itself.ATT-09
INSTRUCTION MANUAL
IMPORTANT SAFETY INSTRUCTIONS
- Read Instrucons – All the safety and operating instrucons should be read before this product is operated.
- Retain Instrucons — The safety and operating instrucons should be retained for future reference.
- Heed Warnings — All warnings on the appliance and in the operang instrucons should be adhered to.
- Follow Instrucons — All operang and use instrucons should be followed.
- Water and Moisture — The appliance should not be used near water - for example, near a bathtub, washbowl, kitchen sink, laundry tub, in a wet basement, or near a swimming pool, and the like.
- Carts and Stands — The appliance should be used only with a cart or stand that is recommended by the manufacturer. An appliance and cart combinaon should be moved with care. Quick stops, excessive force, and uneven surfaces may cause the appliance and cart combinaon to overturn.
- Wall or Ceiling Mounng — The product should not be mounted to a wall or ceiling.
- Heat — The appliance should be situated away from heat sources such as radiators, heat registers, stoves, or other appliances (including amplifiers) that produce heat.
- Power Sources – This product should be operated only from the type of power source indicated on the rang label. If you are not sure of the type of power supply to your home, consult your product dealer or local power company. For products intended to operate from baery power, or other sources, refer the operang instrucons.
- Power-Cord Protecon — Power-supply cords should be routed so that they are not likely to be walked on or pinched by items placed upon or against them, paying parcular aenon to the cord in correspondence of plugs, convenience receptacles, and the point where they exit from the appliance.
- Cleaning - The appliance should be cleaned only as recommended by the manufacturer. Clean by wiping with a cloth slightly damp with water. Avoid geng water inside the appliance.
- Non-use Periods — The power cord of the appliance should be unplugged from the outlet when le unused for a long period of me.
- Object and Liquid Entry—Care should be taken so that objects do not fall and liquids are not spilled into the enclosure through openings.
- Damage Requiring Service—The appliance should be serviced by qualified service personnel when:
A. The power-supply cord or the plug has been damaged; or
B. Objects have fallen, or liquid has been spilled into the appliance; or
C. The appliance has been exposed to rain; or
D. The appliance does not appear to operate normally or exhibits a marked change in performance; or
E. The appliance has been dropped, or the enclosure damaged. - Servicing — The user should not aempt any service to the appliance beyond that described in the operang instrucons. All other servicing should be referred to qualified service personnel.
- Venlaon – Slots and openings in the cabinet are provided for venlaon and to ensure reliable operaon of the product and to protect it from overheang, and these openings must not be blocked or covered. The openings should never be blocked by placing the product on a bed, sofa, rug, or other similar surface. This product should not be placed in a built-in installation such as a bookcase or rack unless proper venlaon is the manufacturer's instrucons have been adhered to.
- Attachments – do not use aachments not recommended by the product manufacturer as they may cause hazards.
- Accessories – Do not place this product on an unstable cart, stand, tripod, bracket, or table. The product may fall, causing serious injury to a child or adult, and serious damage to the product. Use only with a cart, stand, tripod, bracket, or table recommended by the manufacturer, or sold with the product. Any moung of the product should follow the manufacturer's instrucons, and should use a moung accessory recommended by the ,manufacturer.
- Lightning – For added protecon for this product during a lightning storm, or when it is le unaended and unused for long periods of me, unplug it from the wall outlet and disconnect the antenna or cable system. This will prevent damage to the product due to lightning and power-line surges.
- Replacement Parts – When replacement parts are required, be sure the service technician has used
replacement parts specified by the manufacturer or have the same characteristics as the original part. Unauthorized substituents may result in re, electric shock, or other hazards.
- Safety Check – Upon compleon of any service or repairs to this product, ask the service technician to perform safety checks to determine that the product is in proper operang condion.
SPECIFICATIONS
GENERAL
| Model: | ATT-09 |
| Dimensions: | 420 (W) x 376(D) x 102(H)mm |
| Weight: | 3.00Kg |
| Power supply: | Dual Voltage: DC 115V~60Hz/230V~50Hz, User Selectable |
| Power consumpon: | 5W |
| Standard test condion: | Ambient Temperature: 23 +/- 2 degC |
| Relave Humidity: | 65% +/- 5% |
| BT version : | 5.0 |
| BT channel emission power: | 2 dbm |
NOTE: Measurements can be carried out between 5 degC to 35 degC and 45% to 85% relave humidity.
TURNTABLE SECTION:
| Type | 3-speed full manual |
| Motor | DC motor |
| Driving Method | Belt drive |
| Turntable Plaer (Plasc) | 198mm dia. |
| Speeds | 33 1 / 3, 45, 78rpm |
| S/N Rao | More than 50dB |
| Starng Time | Less than 1 sec with 33 1 / 3 |
| Braking Time | Less than 1 sec. with 33 1 / 3 |
| Time for Speed Change | Less than 1 sec. from 33 1 / 3 to 45 rpmLess than 1 sec. from 45 to 78 rpm |
TONE ARM SECTION:
| Type | Ceramic stereo cartridge with ruby stylus |
| Applicable Cartridge Weight | 3.5~8.5g |
| An-skang Range | 0-4g |
| Frequency Response | 20Hz-20KHz |
| Channel Separaon | More than 15dB |
| Recommended stylus | 4 to 6 grams |
| pressure Channel Separaon | More than 15dB |
| Channel balance (at 1kHz) below 1 dB | |
| Tracking Force adjustment Range 3~4g | |
FUNCTIONS:
- Playback speed: 33.3, 45, 78 RPM
- Built-in Stereo Speaker
- RCA audio out
- Plays 7", 10" & 12" Records
- Bluetooth function
MAIN TECHNICAL SPECIFICATIONS
Speaker output : 2x0.8W (RMS)
Charging input voltage : DC 5V 1A
Size : 420 * 376 * 62 mm
3 speeds : 33 1/3 , 45, 78 RPM
DESCRIPTION

- 45-rpm Adaptor
- Tone arm li
- Auto stop control
- Speed selecon - Three speed for choice: 33,45,78 RPM
- Tone arm
- Speaker
- Cartridge
- Turntable Plaer
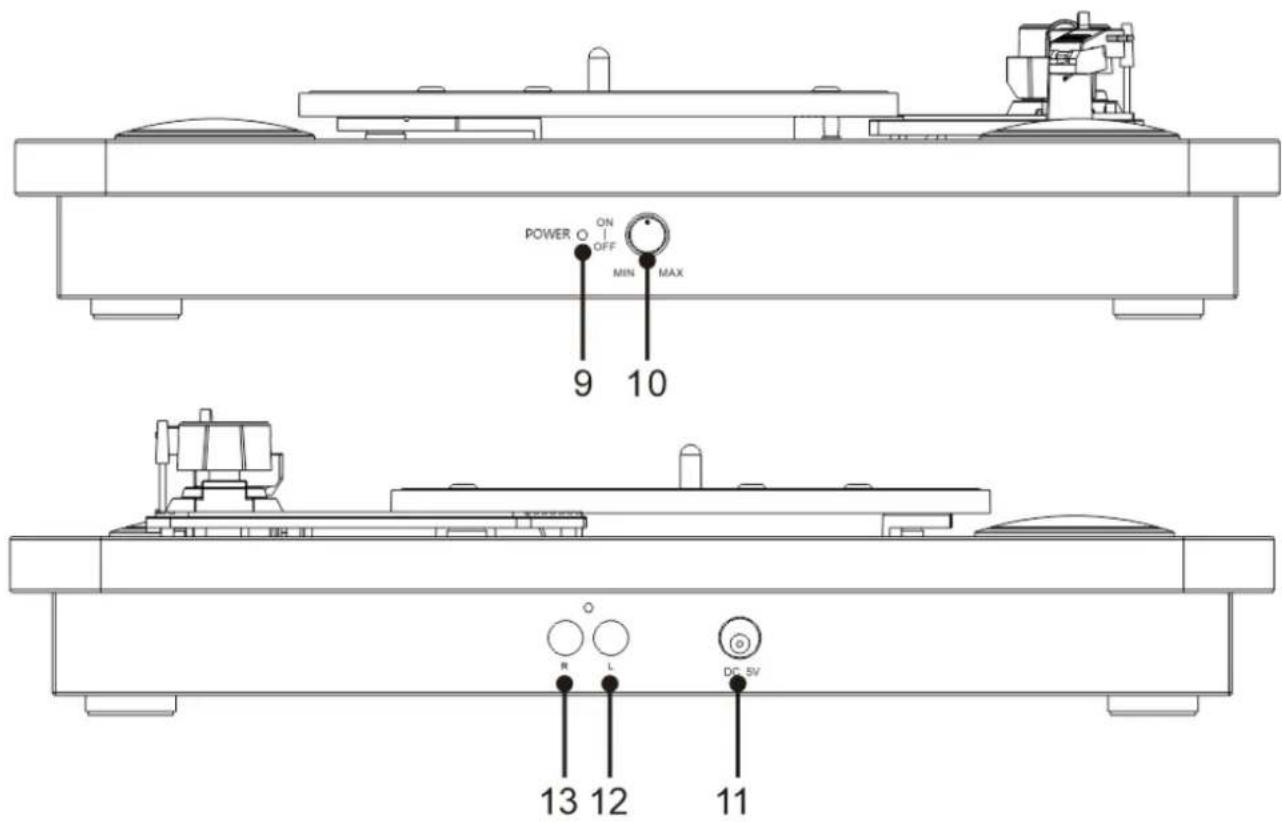
- Power light
- Power Switch/Volume control
- DC power jack
- L channel
- R channel
BLUETOOTH FUNCTION
(Lift up the tone arm and put it on the rest)
- Turn on the Rotary Power Switch, note that this also controls volume.
- Open up your Bluetooth settings and select Bluetooth mode, search "ATT-09" to connect.
- A sound prompt will indicate connection.
Under this function, turntable function will be stopped automatically.
MAINS CONNECTION
Ensure that the mains voltage of your home corresponds to the operang voltage of the unit. Your unit is ready to be connected to a mains voltage of 5V DC adaptor.
AMPLIFIER CONNECTION (if required)
Whilst you can listen to your new turntable using the built in speakers you may wish to connect it to your existing HiFi system. Connect the audio plugs to the Line input on your mixer or amplifier using an RCA cable (not supplied).
● Red plug into R channel input.
● White plug into L channel input.
PLAYING A RECORD
- Place the record of your choice on the turntable. If required, do not forget to place the adaptor on the record spindle.
- Choose the desired playing speed using the speed selecon switch between 33, 45 and 78rpm.
● Turn on the Rotary Power Switch, note that this also controls volume.
● Release the tone arm lock. - Raise the arm with your hand lightly.
- Place the stylus vercally over the rst track of the record, the turntable will start turning automacally.
● Put down the stylus slowly on to the record to play. - When a record comes to the end, the turntable will stop automacally if the auto-stop switch is in the ON posion. If the switch is in the o posion then it will keep revolving all the me.
● Li up the tone arm and put it on the rest when nished. - Replace the protective cap on the stylus and close the tone arm lock.
- Turn o power at mains.
MAINTENANCE
REPLACING THE STYLUS
-Refer to the gures 1-8
natural_image
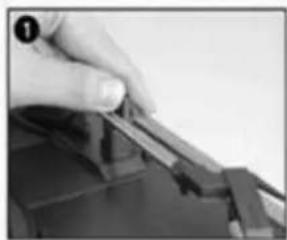
Close-up of a hand pressing down on a mechanical component (no visible text or symbols)Push the arm lock to release the tone-arm.

natural_image
Close-up of hands holding a small electronic component (no visible text or symbols)Take off cap of cartridge to expose the needle out.
natural_image
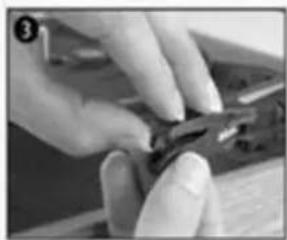
Close-up of hands using a tool to cut or apply material (no visible text or symbols)Separate the cartridge from the socket lightly.
natural_image
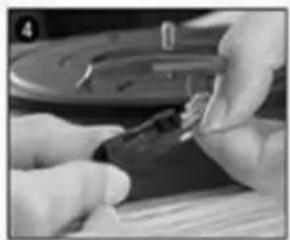
Close-up of hands performing a sewing or sewing process with a sewing machine (no visible text or symbols)Take off the audio-line from the cartridges completely.

natural_image
Close-up of hands assembling or adjusting a mechanical component (no visible text or symbols)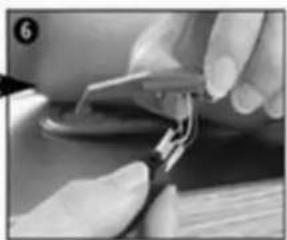
natural_image
Close-up of hands using a tool to adjust or install a small electronic component (no visible text or symbols)
natural_image
Close-up of hands using a tool to adjust or install a mechanical component (no visible text or symbols)
natural_image
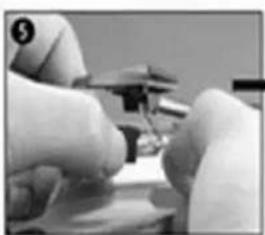
Close-up of hands assembling or repairing electronic components (no visible text or symbols)To t a new one just in opposite deals, insert the audio-line accordingly, and install the cartridge to the socket lightly. Note: Please exercise extreme care whilst performing this operaon so as to avoid the tone arm and audio line wires from any damage.
INSTALLING A NEW STYLUS CARTRIDGE
-Refer to the gures 5 & 6
natural_image
Close-up of gloved hands assembling or adjusting a mechanical component (no visible text or symbols)
natural_image
Close-up of hands using a tool to apply material or tools on a surface (no visible text or symbols)NOTES
We advise you to clean your records with an an-stac cloth to gain maximum enjoyment from them and to make them last.
We would also point out that for the same reason your stylus should be replaced periodically (approximately every 250 hours)
Dust the stylus from me to me using a very so brush dipped in alcohol (brushing from back to front of the cartridge)
WHEN TRANSPORTING YOUR RECORD PLAYER DO NOT FORGET TO:
- Replace the protective cap on the stylus.
● Put the rest clip into the pick-up arm.
ACCESSORIES
- User Manual - 1pc
- Warranty Card - 1pc
- DC 5V 1A Adaptor - 1pc
DISPOSAL OF WASTE ELECTRICAL AND ELECTRONIC EQUIPMENT

natural_image
Symbol of a trash bin crossed with a diagonal line and a horizontal bar below (no text or labels)This symbol on the product or packaging means that the product should not be treated as household waste. Do not throw garbage at the end of its life, but take it to a collection center for recycling. In this way you will help to protect the environment and be able to prevent any negative consequences that it would have on the environment and human health.
To find your nearest collection center:
- Contact local authorities;
- Access the website: www.mmediu.ro;
- Request additional information from the store where you purchased the product.
AKAI
Pick-up cu difuzoare incorporate

natural_image
Black-and-white photo of a vintage rotary disc with visible power and buttons, no text or symbols on the device itself.ATT-09
MANUAL DE UTILIZARE
INSTRUCTIUNI IMPORTANTE DE SIGURANTA
- Adaptor 45-rpm
- Ridicare brat de sunet
- Comanda de oprire automata
- Selectarea vitezei – Trei viteze: 33,45,78 RPM
- Brat de sunet
- Difuzor
- Doza
- Platan

- Indicator luminos de alimentare
- Comutator de alimentare /Control Volum
- Jack alimentare DC
- Canal L
- Canal R
FUNCTIA BLUETOOTH
natural_image
Close-up of a hand pressing down on a mechanical component (no visible text or symbols)natural_image
Close-up of gloved hands holding a small electronic component (no visible text or symbols)natural_image
Close-up of hands holding a small electronic component (no visible text or symbols)Separa usor doza de locasul de conectare

natural_image
Close-up of hands assembling a small electronic component (no visible text or symbols)Indeparta complet cablurile audio de la doza.

natural_image
Close-up of gloved hands using a precision tool to adjust or install a mechanical component (no visible text or symbols)
natural_image
Close-up of hands using a tool to adjust or install a small electronic component (no visible text or symbols)
natural_image
Close-up of hands using a tool to adjust or install a mechanical component (no visible text or symbols)
natural_image
Close-up of hands assembling or adjusting a small electronic component (no visible text or symbols)Pentru a xa o penita noua, repeta miscarile in sens opus, introduce cablurile audio in mod corespunzator si conecta usor, doza la mufa (locasul de conectare).
Nota : Va rugam sa efectua aceste operai cu multa grija, asel incat sa evitati sa deteriora bratul de ton sau cablurile audio.
INSTALAREA UNEI PENITE
natural_image
Two-step black-and-white photo showing hands using a tool to adjust or install a component, with no visible text or symbols.NOTA
natural_image
Black-and-white photo of a vintage AKAI Retro cassette tape generator with visible grille and buttons (no text or symbols on the device body)ATT-09
НАРЪЧНИК ЗА УПОТРЕБА
BG - БЪЛГАРСКИ
natural_image
Close-up of a hand pressing down on a mechanical component (no visible text or symbols)natural_image
Close-up of gloved hands holding a small electronic component (no visible text or symbols)natural_image
Close-up of hands using pliers to cut a small object (no visible text or symbols)natural_image
Close-up of hands performing a manual task with a tool, no visible text or symbolsnatural_image
Close-up of hands using a tool to adjust or install a mechanical component (no visible text or symbols)
natural_image
Close-up of hands using a tool to cut a metal component (no visible text or symbols)
natural_image
Close-up of hands using a tool to adjust or install a mechanical component (no visible text or symbols)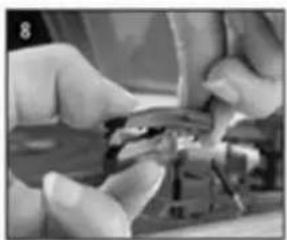
natural_image
Close-up of hands assembling or adjusting a mechanical component (no visible text or symbols)natural_image
Two-step black-and-white photo showing hands using a tool to adjust or repair a small object, with no visible text or symbols.ЗАБЕЛЕЖКА
natural_image
Black-and-white photo of a vintage AKAI Retro cassette tape generator with visible grille and buttons (no text or symbols on the device body)ATT-09
natural_image
Black-and-white photo of a vintage AKAI Retro cassette tape generator with visible grille and buttons (no text or symbols on the device body)ATT-09
INSTRUKCJA OBSŁUGI
PL - POLSKI
WAŻNE INSTRUKCJE BEZPIECZEŃSTWA
natural_image
Close-up of a hand holding a mechanical component, possibly a tool or part, with no visible text or symbols.natural_image
Close-up of hands using a tool to cut or apply a component (no visible text or symbols)natural_image
Close-up of hands holding a small electronic component (no visible text or symbols)natural_image
Close-up of hands using a sewing machine to adjust fabric (no visible text or symbols)natural_image
Close-up of gloved hands holding a small mechanical component (no visible text or symbols)
natural_image
Close-up of hands using a tool to adjust or install a small electronic component (no visible text or symbols)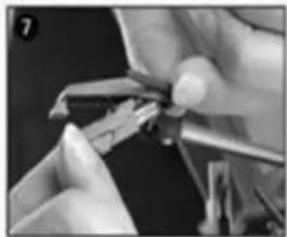
natural_image
Close-up of hands using a tool to adjust or install a mechanical component (no visible text or symbols)
natural_image
Close-up of hands assembling or adjusting a mechanical component (no visible text or symbols)natural_image
Two-step black-and-white photo showing hands using a tool to adjust or install a component, with no visible text or symbols.Uwaga
natural_image
Black-and-white photo of a vintage AKAI Retro cassette tape generator with visible grille and buttons (no text or symbols on the device body)ATT-09
UŽIVATELSKÁ PŘÍRUČKA
CZ - ČESKÝ
DŮLEŽITÉ BEZPEČNOSTNÍ POKYNY
natural_image
Close-up of a hand holding a mechanical component, possibly a tool or device (no visible text or symbols)natural_image
Close-up of hands using a tool to adjust or install a component (no visible text or symbols)natural_image
Close-up of hands using pliers to cut a piece of paper (no visible text or symbols)natural_image
Close-up of hands using a tool to adjust or install a small object (no visible text or symbols)natural_image
Close-up of hands assembling or adjusting a mechanical component (no visible text or symbols)
natural_image
Close-up of hands using a tool to adjust or install a small mechanical component (no visible text or symbols)
natural_image
Close-up of hands using a tool to adjust or install a mechanical component (no visible text or symbols)
natural_image
Close-up of hands assembling electronic components (no visible text or symbols)natural_image
Close-up of hands assembling or adjusting a mechanical component (no visible text or symbols)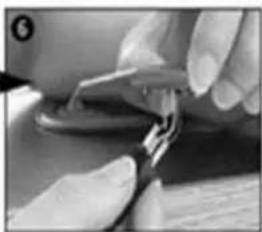
natural_image
Close-up of hands using a tool to adjust or install a small electronic component (no visible text or symbols)POZNÁMKA
natural_image
Black-and-white photo of a vintage AKAI Retro cassette tape generator with visible grille and buttons (no text or symbols on the device body)ATT-09
UŽÍVATELŠKÁ PRÍRUČKA
SK - SLOVENSKÝ
VÝZNAMNÉ BEZPEČNOSTNÉ POKYNY
-
Svetelný indiká tor napá jania
-
Prepínač napájania /Kontrola hlasitosti
-
Jack napá jania DC
-
Kaná 1 L
-
Kaná l R
FUNKCIA BLUETOOTH
(Zdvihnite rameno tónu a položte ho na zvyšok)
- Zapnite Rotary Power Switch, nezabudnite tým tiež ovládat’ hlasitost’.
- Otvorte svoje nastavenia Bluetooth a vyberte režim Bluetooth, vyhl'adajte výraz „ATT-09“ a pripojte sa.
- Zvuková výzva bude označovat' pripojenie.
Pri tejto funkcii sa funkcia gramofónu automaticky zastaví.
NAPOJENIE NA ZDROJ NAPÁJANIA
natural_image
Close-up of a hand holding a small electronic component (no visible text or symbols)natural_image
Close-up of gloved hands holding a small object on a dark surface (no visible text or symbols)natural_image
Close-up of hands using a pliers to cut metal parts (no visible text or symbols)natural_image
Close-up of hands assembling a small electronic component (no visible text or symbols)Úplne odstráňte audio ká ble od prenosky.

natural_image
Close-up of hands assembling or adjusting a small mechanical component (no visible text or symbols)
natural_image
Close-up of hands using a tool to cut a small object (no visible text or symbols)
natural_image
Close-up of hands using a tool to adjust or install a mechanical component (no visible text or symbols)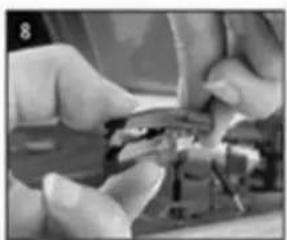
natural_image
Close-up of hands assembling or repairing a small electronic component (no visible text or symbols)natural_image
Two-step black-and-white photo showing hands using a sewing machine to adjust or repair a piece of fabric (no text or symbols visible)POZNÁMKA
Radíme Vám, aby ste čistili platne antistatickou handrou, aby ste sa mohli z nich maximálne tešit' a aby ste im predlžili životnosť.
EU DECLARATION OF CONFORMITY
Nr.INT 228/A
We, INTERVISION TRADING RO SRL, default importer (manufacturer), with registered office in Mosoia Commune, Smeura Village, 8 Fagetului Alley, declare under sole responsibility that the following products:
Brand name: AKAI
Type: ATT-09
Descriptions:
TURNTABLE
Lot: 0922070XXX
to which this declaration related is in conformity with the essential requirements of the following directives of the Council of the European Communities:
EUROPEAN COMMUNITY DIRECTIVE 2014/35/EU
EUROPEAN COMMUNITY DIRECTIVE 2014/53/EU
EUROPEAN COMMUNITY DIRECTIVE 2011/65/EU
AMD(EU)2015/863 SI (EU)2017/2012
The products are compliant with the following standards:
EN 62368-1:2014+A11:2017
EN 62479:2010
EN 300328 V2.1.1(2016-11)
EN 301 489-1 V2.2.1(2019-03)
EN 301 489-17 V3.2.0(2017-03)
EN 55032:2015/AC:2016
EN 55035:2017
EN 61000-3-2:2014
EN 61000-3-3:2013
Certificate of conformity issued based on the Certificate DDT-C19081614-1E1 ; DDT-R19081614-1E1 ; DDT-R19081614-1E2 ; DDT-R19081614-1E3 ; DDT-R19081614-1E4 ; DDT-R19081614-2S1 and UTLR20200405 from DONGGUAN DONGDIAN TESTING SERVICE Co., Ltd., No.17, Zongbu Road 2, Songshan Lake Sci&Tech, Industry Park and DONGGUAN UNIVERSAL TESTING TECHNOLOGY Co., Ltd., 3rd Floor, HuiHai Building, No.631 Yinlang South Road, Dalang Town, Dongguan City, Guangdond Province, China.
Intervision Trading Ro SRL,
Signature:

Printed name and Position:
CIOBANU DORIN – GENERAL MANAGER
Date: 19 ^th of April, 2022
Place: Pitesti, Romania
DECLARATIE DE CONFORMITATE UE
Nr.INT 228/A
Noi, Intervision Trading-RO SRL, avand sediul social in Com.Mosoia, Sat. Smeura, Aleea Fagetului, Nr.8, Jud.Arges, in calitate de representant autorizat al marcii AKAI, implicit importator (producator) declaram pe propria raspundere ca:
Marca: AKAI
Model: ATT-09
Descriere: PICK-UP
Lot: 0922070XXX
la care se refera aceasta declaratie, respecta cerintele de protectie cuprinse in urmatoarele documente normative :
EUROPEAN COMMUNITY DIRECTIVE 2014/35/EU
EUROPEAN COMMUNITY DIRECTIVE 2014/53/EU
EUROPEAN COMMUNITY DIRECTIVE 2011/65/EU
AMD(EU)2015/863 SI (EU)2017/2012



- IMPORTANT SAFETY INSTRUCTIONS
- SPECIFICATIONS
- FUNCTIONS:
- MAIN TECHNICAL SPECIFICATIONS
- DESCRIPTION
- BLUETOOTH FUNCTION
- MAINS CONNECTION
- AMPLIFIER CONNECTION (if required)
- PLAYING A RECORD
- MAINTENANCE
- REPLACING THE STYLUS
- INSTALLING A NEW STYLUS CARTRIDGE
- NOTES
- ACCESSORIES
- DISPOSAL OF WASTE ELECTRICAL AND ELECTRONIC EQUIPMENT
- AKAI
- INSTRUCTIUNI IMPORTANTE DE SIGURANTA
- FUNCTIA BLUETOOTH
- INSTALAREA UNEI PENITE
- NOTA
- ЗАБЕЛЕЖКА
- WAŻNE INSTRUKCJE BEZPIECZEŃSTWA
- DŮLEŽITÉ BEZPEČNOSTNÍ POKYNY
- POZNÁMKA
- VÝZNAMNÉ BEZPEČNOSTNÉ POKYNY
- FUNKCIA BLUETOOTH
- NAPOJENIE NA ZDROJ NAPÁJANIA
- EU DECLARATION OF CONFORMITY
- DECLARATIE DE CONFORMITATE UE
Brand : AKAI
Model : ATT-09
Category : Turntable