
GNA 3 5 Professional - Saw BOSCH - Free user manual and instructions
Find the device manual for free GNA 3 5 Professional BOSCH in PDF.


| Brand | Bosch |
| Model | GNA 3.5 Professional |
| Product type | Nibbler |
| Main use | Cutting of metal sheets and plates |
| Power supply | 220-240 V, 50-60 Hz (mains) |
| Power consumption | 550 W |
| Maximum cutting capacity (steel) | 3.5 mm |
| Blade stroke | 5 mm |
| No-load speed | 2000-2200 min⁻¹ |
| Weight | 1.5 kg |
| Dimensions (L x W x H) | 300 x 80 x 150 mm |
| Cable length | 2.5 m |
| Protection class | II (double insulation) |
| Sound pressure level | 85 dB(A) |
| Sound power level | 96 dB(A) |
| Vibrations (hand-arm) | 7.5 m/s² |
| Main features | Precise cutting without deformation, easy guidance, quick cutter change |
| Maintenance and cleaning | Regularly clean ventilation slots, grease cutting head |
| Safety | Wear protective gloves and goggles, unplug before maintenance |
| Spare parts and repairability | Replacement cutter (3.5 mm), cutter support, available from Bosch after-sales service |
| Package contents | Machine, cutting cutter, hex key, user manual |
Frequently Asked Questions - GNA 3 5 Professional BOSCH
User questions about GNA 3 5 Professional BOSCH
0 question about this device. Answer the ones you know or ask your own.
Ask a new question about this device
Download the instructions for your Saw in PDF format for free! Find your manual GNA 3 5 Professional - BOSCH and take your electronic device back in hand. On this page are published all the documents necessary for the use of your device. GNA 3 5 Professional by BOSCH.
USER MANUAL GNA 3 5 Professional BOSCH
German
Safety Instructions
www.bosch-pt.com/serviceaddresses
Disposal
General Power Tool Safety Warnings
WARNING
Read all safety warnings, instructions, illustrations and specifications.
tions provided with this power tool. Failure to follow all instructions listed below may result in electric shock, fire and/or serious injury.
Save all warnings and instructions for future reference.
The term "power tool" in the warnings refers to your mains-operated (corded) power tool or battery-operated (cordless) power tool.
▶ Keep work area clean and well lit. Cluttered or dark areas invite accidents. ▶ Do not operate power tools in explosive atmospheres, such as in the presence of flammable liquids, gases or dust. Power tools create sparks which may ignite the dust or fumes. ▶ Keep children and bystanders away while operating a power tool. Distractions can cause you to lose control.
▶ Keep work area clean and well lit. Cluttered or dark areas invite accidents. ▶ Do not operate power tools in explosive atmospheres, such as in the presence of flammable liquids, gases or dust. Power tools create sparks which may ignite the dust or fumes. ▶ Keep children and bystanders away while operating a power tool. Distractions can cause you to lose control.
▶ Power tool plugs must match the outlet. Never modify the plug in any way. Do not use any adapter plugs with earthed (grounded) power tools. Unmodified plugs and matching outlets will reduce risk of electric shock. ▶ Avoid body contact with earthed or grounded surfaces, such as pipes, radiators, ranges and refrigerators. There is an increased risk of electric shock if your body is earthed or grounded. ▶ Do not expose power tools to rain or wet conditions. Water entering a power tool will increase the risk of electric shock. ▶ Do not abuse the cord. Never use the cord for carrying, pulling or unplugging the power tool. Keep cord away from heat, oil, sharp edges or moving parts. Damaged or entangled cords increase the risk of electric shock. ▶ When operating a power tool outdoors, use an extension cord suitable for outdoor use. Use of a cord suitable for outdoor use reduces the risk of electric shock. ▶ If operating a power tool in a damp location is unavoidable, use a residual current device (RCD) protected supply. Use of an RCD reduces the risk of electric shock.
▶ Power tool plugs must match the outlet. Never modify the plug in any way. Do not use any adapter plugs with earthed (grounded) power tools. Unmodified plugs and matching outlets will reduce risk of electric shock. ▶ Avoid body contact with earthed or grounded surfaces, such as pipes, radiators, ranges and refrigerators. There is an increased risk of electric shock if your body is earthed or grounded. ▶ Do not expose power tools to rain or wet conditions. Water entering a power tool will increase the risk of electric shock. ▶ Do not abuse the cord. Never use the cord for carrying, pulling or unplugging the power tool. Keep cord away from heat, oil, sharp edges or moving parts. Damaged or entangled cords increase the risk of electric shock. ▶ When operating a power tool outdoors, use an extension cord suitable for outdoor use. Use of a cord suitable for outdoor use reduces the risk of electric shock. ▶ If operating a power tool in a damp location is unavoidable, use a residual current device (RCD) protected supply. Use of an RCD reduces the risk of electric shock.
Personal safety
▶ Stay alert, watch what you are doing and use common sense when operating a power tool. Do not use a power tool while you are tired or under the influence of drugs, alcohol or medication. A moment of inattention while operating power tools may result in serious personal injury. ▶ Use personal protective equipment. Always wear eye protection. Protective equipment such as a dust mask, non-skid safety shoes, hard hat or hearing protection used for appropriate conditions will reduce personal injuries. ▶ Prevent unintentional starting. Ensure the switch is in the off-position before connecting to power source and/or battery pack, picking up or carrying the tool. Carrying power tools with your finger on the switch or energising power tools that have the switch on invites accidents.
Remove any adjusting key or wrench before turning the power tool on. A wrench or a key left attached to a rotating part of the power tool may result in personal injury. ▶ Do not overreach. Keep proper footing and balance at all times. This enables better control of the power tool in unexpected situations. ▶ Dress properly. Do not wear loose clothing or jewellery. Keep your hair and clothing away from moving parts. Loose clothes, jewellery or long hair can be caught in moving parts. ▶ If devices are provided for the connection of dust extraction and collection facilities, ensure these are connected and properly used. Use of dust collection can reduce dust-related hazards. ▶ Do not let familiarity gained from frequent use of tools allow you to become complacent and ignore tool safety principles. A careless action can cause severe injury within a fraction of a second.
Power tool use and care
Do not force the power tool. Use the correct power tool for your application. The correct power tool will do the job better and safer at the rate for which it was designed. Do not use the power tool if the switch does not turn it on and off. Any power tool that cannot be controlled with the switch is dangerous and must be repaired. Disconnect the plug from the power source and/or remove the battery pack, if detachable, from the power tool before making any adjustments, changing accessories, or storing power tools. Such preventive safety measures reduce the risk of starting the power tool accidentally. Store idle power tools out of the reach of children and do not allow persons unfamiliar with the power tool or these instructions to operate the power tool. Power tools are dangerous in the hands of untrained users. Maintain power tools and accessories. Check for misalignment or binding of moving parts, breakage of parts and any other condition that may affect the power tool's operation. If damaged, have the power tool repaired before use. Many accidents are caused by poorly maintained power tools. Keep cutting tools sharp and clean. Properly maintained cutting tools with sharp cutting edges are less likely to bind and are easier to control. Use the power tool, accessories and tool bits etc. in accordance with these instructions, taking into account the working conditions and the work to be performed. Use of the power tool for operations different from those intended could result in a hazardous situation. Keep handles and grasping surfaces dry, clean and free from oil and grease. Slippery handles and grasping surfaces do not allow for safe handling and control of the tool in unexpected situations.
Service
Have your power tool serviced by a qualified repair person using only identical replacement parts. This will ensure that the safety of the power tool is maintained.
Safety instructions for nibblers
Hold the power tool by insulated gripping surfaces, when performing an operation where the cutting accessory may contact hidden wiring or its own cord. Cutting accessory contacting a "live" wire may make exposed metal parts of the power tool "live" and could give the operator an electric shock. This power tool is not suitable for bench-mounted use. It must not be clamped into a vice or fastened to a workbench, for example. Wear protective gloves during work and pay particular attention to the cord. Sharp burrs develop on the cut sheets; these can cause injury or damage the cord.
Products sold in GB only:
Your product is fitted with a BS 1363/A approved electric plug with internal fuse (ASTA approved to BS 1362). If the plug is not suitable for your socket outlets, it should be cut off and an appropriate plug fitted in its place by an authorized customer service agent. The replacement plug should have the same fuse rating as the original plug. The severed plug must be disposed of to avoid a possible shock hazard and should never be inserted into a mains socket elsewhere.
Hold the power tool firmly with both hands and make sure you have a stable footing. The power tool can be more securely guided with both hands.
Product Description and Specifications

Read all the safety and general instructions.
Failure to observe the safety and general instructions may result in electric shock, fire and/or serious injury.
Please observe the illustrations at the beginning of this operating manual.
Intended Use
The power tool is intended for cutting sheet metal without deforming the material and is suitable for straight cuts, cut-outs and narrow curves.
Product Features
The numbering of the product features refers to the diagram of the power tool on the graphics page.
(1) Screw for handle holder (2) Handle holder (3) Auxiliary handle (4) Hex key (5) On/off switch
(6) Thread for auxiliary handle (7) Screw for punch fastener (8) Hole on die holder (9) Screw for die (10) Punch (11) Guide plate (12) Hold-down device (13) Screw for hold-down device (14) Die (15) Die holder (16) Punch positioner (17) Handle (insulated gripping surface)
Technical Data
| Nibbler GNA 3,5 | ||
| Article number | 0 601 533 1.. | |
| Rated power input W 620 | ||
| Power output W 340 | ||
| No-load stroke rate n0 | min-1 | 1000 |
| Stroke speed under load min | -1 | 670 |
| Max. steel sheet cutting capacityA) | mm 3.5 | |
| Cutting width mm 6 | ||
| Smallest curve radius mm 70 | ||
| WeightB) | kg 3.5 | |
| Protection class | ☐/II | |
A) with reference to steel sheet of up to 400 N/mm² B) Weight without mains connection cable and without mains plug The specifications apply to a rated voltage [U] of 230 V. These specifications may vary at different voltages and in country-specific models. Values can vary depending on the product, scope of application and environmental conditions. To find out more, visit www.bosch-professional.com/wac.
Noise/Vibration Information
Noise emission values determined according to EN 62841-2-8.
Typically, the A-weighted noise levels of the power tool are: Sound pressure level 88 dB(A); sound power level 96 dB(A). Uncertainty K = 3 dB.
Wear hearing protection!
Vibration total values ah (triax vector sum) and uncertainty K determined according to EN 62841-2-8: ah = 7m / s2 K = 1.5m / s2
The vibration level and noise emission value given in these instructions have been measured in accordance with a standardised measuring procedure and may be used to compare power tools. They may also be used for a preliminary estimation of vibration and noise emissions.
The stated vibration level and noise emission value represent the main applications of the power tool. However, if the
power tool is used for other applications, with different accessories or is poorly maintained, the vibration level and noise emission value may differ. This may significantly increase the vibration and noise emissions over the total working period.
To estimate vibration and noise emissions accurately, the times when the tool is switched off or when it is running but not actually being used should also be taken into account. This may significantly reduce vibration and noise emissions over the total working period.
Implement additional safety measures to protect the operator from the effects of vibration, such as servicing the power tool and accessories, keeping their hands warm, and organising workflows correctly.
Assembly
Auxiliary handle
Screw the auxiliary handle (3) into the thread (6) on the left-or right-hand side of the housing.
You can use the handle holder (2) to extend the auxiliary handle and reposition it at any angle for a safe work posture that minimises fatigue.
If the auxiliary handle is already fitted, unscrew it from the thread (6). Use the screw (1) to screw the handle holder (2) in the thread at the required angle on the left- or right-hand side of the housing. Screw the auxiliary handle into the narrower end of the handle holder on the left- or right-hand side accordingly.
If you attach the handle holder on the left-hand side of the housing, make sure that it does not cover the on/off switch (5).
Operation
▶ Products that are only sold in AUS and NZ: Use a residual current device (RCD) with a nominal residual current of 30 mA or less.
Starting Operation
▶ Pay attention to the mains voltage. The voltage of the power source must match the voltage specified on the rating plate of the power tool.
Adjusting the hold-down device
Adjusting the hold-down device (12) to the thickness of the sheet being cut eliminates vibrations.
Hold the power tool so that the die (14) touches the underside of the sheet to be cut. Loosen the screws (13) on the hold-down device. Push the hold-down device (12) onto the sheet, leaving a little clearance (approx. 0.3 mm). Make sure that the hold-down device is straight and not at an angle. Retighten the screws (13).
Switching On and Off
To switch on the power tool, slide the on/off switch (5) forwards so that I appears on the switch.
To lock the on/off switch (5), push down on the front of the switch as well.
To switch off the power tool, release the on/off switch (5). When the on/off switch is locked, press down on the back of the switch and then release it.
Working Advice
▶ Pull the plug out of the socket before carrying out any work on the power tool. This power tool is not suitable for bench-mounted use. It must not be clamped into a vice or fastened to a workbench, for example. ▶ Wear protective gloves during work and pay particular attention to the cord. Sharp burrs develop on the cut sheets; these can cause injury or damage the cord. ▶ Exercise caution when handling the cutting chips. The chips have sharp tips that can cause injuries.
Apply the power tool to the workpiece only when switched on. Always hold the power tool vertical to the surface of the steel sheet and do not tilt it.
The cut is made as the punch moves downwards. Guide the power tool evenly, pushing it gently in the cutting direction. Applying too much pressure to the power tool will significantly reduce the service life of application tools and can damage the power tool.
The power tool operates more quietly when it is raised slightly during cutting. If the punch jams during cutting, switch the power tool off, lubricate the punch and release the sheet. Do not use force to do this, as this will damage the punch and the die.
Maximum steel sheet cutting capacity
The maximum steel sheet cutting capacity dmax depends on the strength properties of the material to be cut.
The power tool allows for cutting of metal sheet to the following thicknesses:
| Material max. strength(N/mm2) | dmax (mm) | |
| Steel 400 | 3.5 | |
| 600 | 2.4 | |
| 800 | 1.6 | |
| Aluminium 200 | 4.0 | |
Lubricating/cooling the punch
To extend the service life of the punch (10), a lubricating agent with good cooling properties (e.g. cutting oil) should be used.
Apply a line of lubricant to the top side of the metal sheet along the intended cutting line.
For long periods of continual use or for work with high frictional wear (e.g. when cutting aluminium), the application tool should be immersed in a container of lubricant at regular intervals.
Cutting along a scribe line or with a template
You can use the projection on the hold-down device (12) as the cut mark when cutting along a scribe line.
Straight cuts are carried out easier when the power tool is guided alongside a rule.
Contours can be cut by guiding the power tool along a template.
For inside cuts, a hole with a diameter of 41 mm must be pre-drilled.
Maintenance and Service
Maintenance and Cleaning
Pull the plug out of the socket before carrying out any work on the power tool. To ensure safe and efficient operation, always keep the power tool and the ventilation slots clean.
In order to avoid safety hazards, if the power supply cord needs to be replaced, this must be done by Bosch or by an after-sales service centre that is authorised to repair Bosch power tools.
Clean and lubricate the punch (10), die (14) and guide plate (11) after every three hours in operation.
Change the punch, die and guide plate in good time when worn. Only sharp tools achieve a good cutting quality and make the power tool last longer.
Changing the die
Loosen and remove the two screws (9). Insert a new die (14) and tighten it firmly with the screws.
Worn dies must not be reground.
Changing the guide plate
The guide plate (11) is used to protect the die holder (15).
To change the guide plate (11), remove the die (14) as described above. Then loosen and remove the screws (13) on the hold-down device. Remove the hold-down device (12) and the guide plate.
Insert a new guide plate (11). Secure the die (14) with the screws (9) and secure the hold-down device (12) with the screws (13). Tighten all screws firmly.
Changing the punch
Insert the hex key (4) into the screw head of the punch positioner (16). Turn the punch positioner until the screw (7) is in the exact centre of the hole (8) on the die holder. Remove the hex key from the punch positioner.
Remove the die (14), the hold-down device (12) and the guide plate (11) as described above.
Loosen the screw (7) on the punch fastener and pull the punch (10) downwards out of the tool. Thoroughly lubricate the new or reground punch and insert it from underneath.
Retighten the screw (7) on the punch fastener.
Attach the guide plate (11), the hold-down device (12) and the die (14) as described above.
Regrinding the punch
Regrinding the punch in good time (e.g. with a diamond grinding disc) can often prevent the punch (10) from chipping. Severely damaged punches must not be reground.
The punch must not be reground by more than 1 mm. Grinding must only be carried out on the cutting face and at exactly 90° to the centre axis.
Gently sharpen the cutting edges of the punch using a fine whetstone.
After-Sales Service and Application Service
Our after-sales service responds to your questions concerning maintenance and repair of your product as well as spare parts. You can find explosion drawings and information on spare parts at: www.bosch-pt.com
The Bosch product use advice team will be happy to help you with any questions about our products and their accessories.
In all correspondence and spare parts orders, please always include the 10-digit article number given on the nameplate of the product.
Great Britain
Robert Bosch Ltd. (B.S.C.)
P.O. Box 98
Broadwater Park
North Orbital Road
Denham Uxbridge
UB 9 5HJ
At www.bosch-pt.co.uk you can order spare parts or arrange the collection of a product in need of servicing or repair.
Tel. Service: (0344) 7360109
E-Mail: boschservicecentre@bosch.com
You can find further service addresses at:
www.bosch-pt.com/serviceaddresses
Disposal
The power tool, accessories and packaging should be recycled in an environmentally friendly manner.

Do not dispose of power tools along with household waste.
Only for EU countries:
Power tools that are no longer suitable for use must be disposed of separately. Use the designated collection systems. If disposed incorrectly, waste electrical and electronic equipment may have harmful effects on the environment and human health, due to the potential presence of hazardous substances.
Only for United Kingdom:
According to The Waste Electrical and Electronic Equipment Regulations 2013 (SI 2013/3113) (as amended), products that are no longer usable must be collected separately and disposed of in an environmentally friendly manner.
French
Robert Bosch (France) S.A.S.
www.bosch-pt.com/serviceaddresses
Calle Robert Bosch No. 405
www.bosch-pt.com/serviceaddresses
Disposal
www.bosch-pt.com/serviceaddresses
Disposal
www.bosch-pt.com/serviceaddresses
Disposal
www.bosch-pt.com/serviceaddresses
Disposal
Bosch Service Center
Telegrafvej 3
2750 Ballerup
Spare parts can be ordered online at www.bosch-pt.dk, or a repair order can be created.
Service Center phone: 44898855
Fax: 44898755
E-mail: vaerktoej@dk.bosch.com
www.bosch-pt.com/serviceaddresses
Disposal
Bosch Service Center
Telegrafvej 3
2750 Ballerup
Denmark
Tel.: (08) 7501820 (within Sweden)
Fax: (011) 187691
www.bosch-pt.com/serviceaddresses
Waste management
www.bosch-pt.com/serviceaddresses
Disposal
www.bosch-pt.com/serviceaddresses
Disposal
www.bosch-pt.com/serviceaddresses
Disposal
www.bosch-pt.com/serviceaddresses
Disposal
Robert Bosch Sp. z o.o.
www.bosch-pt.com/serviceaddresses
Waste disposal
Bosch Service Center PT
K Vápence 1621/16
692 01 Mikulov
www.bosch-pt.com/serviceaddresses
Disposal
Disposal
Removal
Disposal
Power tool service
Strada Horia Măcelariu Nr. 30-34, sector 1
013937 Bucharest
Disposal
Power tool service
Strada Horia Măcelariu Nr. 30-34, sector 1
013937 Bucharest, Romania
Disposal
Removal
Removal of waste
Disposal
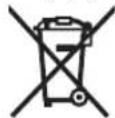
Power tools, accessories, and packaging must be recycled in an environmentally friendly manner.
Disposal
Removal
Robert Bosch Morocco SARL
www.bosch-pt.com/serviceaddresses
www.bosch-pt.com/serviceaddresses
- GERMAN
- SAFETY INSTRUCTIONS
- DISPOSAL
- GENERAL POWER TOOL SAFETY WARNINGS
- WARNING
- SAVE ALL WARNINGS AND INSTRUCTIONS FOR FUTURE REFERENCE
- KEEP WORK AREA CLEAN AND WELL LIT. CLUTTERED OR DARK AREAS INVITE ACCIDENTS. ▶ DO NOT OPERATE POWER TOOLS IN EXPLOSIVE ATMOSPHERES, SUCH AS IN THE PRESENCE OF FLAMMABLE LIQUIDS, GASES OR DUST. POWER TOOLS CREATE SPARKS WHICH MAY IGNITE THE DUST OR FUMES. ▶ KEEP CHILDREN AND BYSTANDERS AWAY WHILE OPERATING A POWER TOOL. DISTRACTIONS CAN CAUSE YOU TO LOSE CONTROL
- POWER TOOL PLUGS MUST MATCH THE OUTLET. NEVER MODIFY THE PLUG IN ANY WAY. DO NOT USE ANY ADAPTER PLUGS WITH EARTHED (GROUNDED) POWER TOOLS. UNMODIFIED PLUGS AND MATCHING OUTLETS WILL REDUCE RISK OF ELECTRIC SHOCK. ▶ AVOID BODY CONTACT WITH EARTHED OR GROUNDED SURFACES, SUCH AS PIPES, RADIATORS, RANGES AND REFRIGERATORS. THERE IS AN INCREASED RISK OF ELECTRIC SHOCK IF YOUR BODY IS EARTHED OR GROUNDED. ▶ DO NOT EXPOSE POWER TOOLS TO RAIN OR WET CONDITIONS. WATER ENTERING A POWER TOOL WILL INCREASE THE RISK OF ELECTRIC SHOCK. ▶ DO NOT ABUSE THE CORD. NEVER USE THE CORD FOR CARRYING, PULLING OR UNPLUGGING THE POWER TOOL. KEEP CORD AWAY FROM HEAT, OIL, SHARP EDGES OR MOVING PARTS. DAMAGED OR ENTANGLED CORDS INCREASE THE RISK OF ELECTRIC SHOCK. ▶ WHEN OPERATING A POWER TOOL OUTDOORS, USE AN EXTENSION CORD SUITABLE FOR OUTDOOR USE. USE OF A CORD SUITABLE FOR OUTDOOR USE REDUCES THE RISK OF ELECTRIC SHOCK. ▶ IF OPERATING A POWER TOOL IN A DAMP LOCATION IS UNAVOIDABLE, USE A RESIDUAL CURRENT DEVICE (RCD) PROTECTED SUPPLY. USE OF AN RCD REDUCES THE RISK OF ELECTRIC SHOCK
- PERSONAL SAFETY
- POWER TOOL USE AND CARE
- SERVICE
- SAFETY INSTRUCTIONS FOR NIBBLERS
- PRODUCTS SOLD IN GB ONLY
- PRODUCT DESCRIPTION AND SPECIFICATIONS
- READ ALL THE SAFETY AND GENERAL INSTRUCTIONS
- INTENDED USE
- PRODUCT FEATURES
- NOISE/VIBRATION INFORMATION
- WEAR HEARING PROTECTION
- ASSEMBLY
- AUXILIARY HANDLE
- OPERATION
- STARTING OPERATION
- ADJUSTING THE HOLD-DOWN DEVICE
- SWITCHING ON AND OFF
- WORKING ADVICE
- MAXIMUM STEEL SHEET CUTTING CAPACITY
- LUBRICATING/COOLING THE PUNCH
- CUTTING ALONG A SCRIBE LINE OR WITH A TEMPLATE
- MAINTENANCE AND SERVICE
- MAINTENANCE AND CLEANING
- CHANGING THE DIE
- CHANGING THE GUIDE PLATE
- CHANGING THE PUNCH
- REGRINDING THE PUNCH
- AFTER-SALES SERVICE AND APPLICATION SERVICE
- GREAT BRITAIN
- YOU CAN FIND FURTHER SERVICE ADDRESSES AT
- ONLY FOR EU COUNTRIES
- ONLY FOR UNITED KINGDOM
- FRENCH
- WASTE MANAGEMENT
- WASTE DISPOSAL
- REMOVAL
- REMOVAL OF WASTE
Brand : BOSCH
Model : GNA 3 5 Professional
Category : Saw