
Jet Set - Tumble dryer Klarstein - Free user manual and instructions
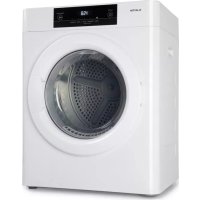
Find the device manual for free Jet Set Klarstein in PDF.


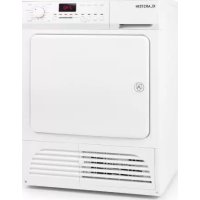
| Product Type | Vented Tumble Dryer |
| Brand | Klarstein |
| Model | Jet Set |
| Dimensions (W x D x H) | 49 x 47.5 x 69 cm |
| Maximum Capacity | 3 kg |
| Power Supply | 220-240 V ~ 50 Hz |
| Power | 1020 W |
| Installation Type | Floor or wall-mounted (frame not included) |
| Programs | Air Dry, Cool, Anti-wrinkle, Hot, Warm |
| Settings | Timer (up to 200 min), temperature selection |
| Filters | Lint filter, exhaust filter, air intake filter (removable) |
| Filter Cleaning | Soft brush or vacuum cleaner, do not damage |
| Safety | Automatic stop when door opened or power failure |
| Suitable Textiles | Only those with dryer symbol on label |
| Prohibited Textiles | Latex, rubber, foam, dry clean only, oil-stained |
| Distance to Walls | At least 15 cm |
| Distance to Ceiling | At least 50 cm |
| Ambient Temperature | Avoid direct sunlight, excessive humidity |
Frequently Asked Questions - Jet Set Klarstein
User questions about Jet Set Klarstein
0 question about this device. Answer the ones you know or ask your own.
Ask a new question about this device
Download the instructions for your Tumble dryer in PDF format for free! Find your manual Jet Set - Klarstein and take your electronic device back in hand. On this page are published all the documents necessary for the use of your device. Jet Set by Klarstein.
USER MANUAL Jet Set Klarstein
CLEANINGCI LEANINGLE ANINGLEAN NINGCLEAN NINGLEANINGCI GCLEANINGCI CLEANINGLE LEANINGLE ANINGLEAN

KLARSTEIN
www.klarstein.com

bar
| Category | Value | | :--- | :--- | | Category 1 | 100 | | Category 2 | 100 | | Category 3 | 100 | | Category 4 | 100 | | Category 5 | 100 | | Category 6 | 100 | | Category 7 | 100 | | Category 8 | 100 | | Category 9 | 100 | | Category 10 | 100 | | Category 11 | 100 | | Category 12 | 100 | | Category 13 | 100 | | Category 14 | 100 | | Category 15 | 100 | | Category 16 | 100 | | Category 17 | 100 | | Category 18 | 100 | | Category 19 | 100 | | Category 20 | 100 | | Category 21 | 100 | | Category 22 | 100 | | Category 23 | 100 | | Category 24 | 100 | | Category 25 | 100 | | Category 26 | 100 | | Category 27 | 100 | | Category 28 | 100 | | Category 29 | 100 | | Category 30 | 100 | | Category 31 | 100 | | Category 32 | 100 | | Category 33 | 100 | | Category 34 | 100 | | Category 35 | 100 | | Category 36 | 100 | | Category 37 | 100 | | Category 38 | 100 | | Category 39 | 100 | | Category 40 | 100 | | Category 41 | 100 | | Category 42 | 100 | | Category 43 | 100 | | Category 44 | 100 | | Category 45 | 100 | | Category 46 | 100 | | Category 47 | 100 | | Category 48 | 100 | | Category 49 | 100 | | Category 50 | 100 | | Category 51 | 100 | | Category 52 | 100 | | Category 53 | 100 | | Category 54 | 100 | | Category 55 | 100 | | Category 56 | 100 | | Category 57 | 100 | | Category 58 | 100 | | Category 59 | 100 | | Category 60 | 100 | | Category 61 | 100 | | Category 62 | 100 | | Category 63 | 100 | | Category 64 | 100 | | Category 65 | 100 | | Category 66 | 100 | | Category 67 | 100 | | Category 68 | 100 | | Category 69 | 100 | | Category 70 | 100 | | Category 71 | 100 | | Category 72 | 100 | | Category 73 | 100 | | Category 74 | 100 | | Category 75 | 100 | | Category 76 | 100 | | Category 77 | 100 | | Category 78 | 100 | | Category 79 | 100 | | Category 80 | 100 | | Category 81 | nan | | Category 82 | nan | | Category 83 | nan | | Category 84 | nan | | Category 85 | nan | | Category 86 | nan | | Category 87 | nan | | Category 88 | nan | | Category 89 | nan | | Category 90 | nan | | Category 91 | nan | | Category 92 | nan | | Category 93 | nan | | Category 94 | nan | | Category 95 | nan | | Category 96 | nan | | Category 97 | nan | | Category 98 | nan | | Category 99 | nan | | Total (Total) | nan | | Total (Category) | nan | | Total (Category) | nan | | Total (Category) | nan | | Total (Category) | nan | | Total (Category) | nan | | Total (Category) | nan | | Total (Category) | nan | | Total (Category) | nan | | Total (Category) | nan | | Total (Category) | nan | | Total (Category) | nan | | Total (Category) | nan | | Total (Category) | nan |INHALTSVERZEICHNIS
natural_image
Pure technical diagram of a rectangular component with four small circular features, no text or symbols presentINSTALLATION AN DER WAND
natural_image
Line drawing of a four-panel industrial enclosure with internal compartments and a power outlet (no text or symbols)natural_image
Technical line drawing of a mechanical device with mounting bracket and side panel (no text or symbols)natural_image
Hand holding a tool interacting with a circular grid-patterned plate (no text or symbols visible)Flusensieb

natural_image
Illustration of a hand holding a circular object with a pointed tip, no text or symbols presentFlusen
Abluftfilter Staubsauger
natural_image
Three-step diagram showing a fan blade being cut into a grid-patterned cover, then to form a circular object (no text or symbols)natural_image
Hand cleaning a curved surface with a cloth, no text or symbols visible
Filterrahmen

Einlassfilter
Member of Berlin Brands Group
Handwerkerstr. 11
15366 Dahlwitz-Hoppegarten
Deutschland
natural_image
Symbol of a trash bin crossed with a diagonal line, no text or numbers presentBerlin Brands Group UK Ltd
PO Box 1145
Oxford, OX1 9UW
United Kingdom
Dear Customer,
Congratulations on purchasing this device. Please read the following instructions carefully and follow them to prevent possible damages. We assume no liability for damage caused by disregard of the instructions and improper use. Scan the QR code to get access to the latest user manual and more product information.

CONTENT
Safety Instructions 18
Product Overview 20
Installation on the Floor 21
Installation on the Wall 21
Loading and Suitable Textiles 26
Operation 27
Cleaning and Care 28
Hints on Disposal 30
Producer 30
TECHNICAL DATA
| Item number 10034158, 10034512 | |
| Power supply 220-240 V ~ 50 Hz | |
| Power 1020 W | |
| Dimensions (mm) 490 x 475 x 690 mm | |
| Max. Filling 3 kg |
SAFETY INSTRUCTIONS
Protection against electric shock
- Have repairs carried out only by trained specialist personnel.
- Only connect the dryer to sockets that correspond to the specified voltage of the appliance.
- If the power cord is damaged, have it replaced by the manufacturer, customer service or a qualified person.
- Do not pull the plug out of the socket by the cable, but hold it firmly by hand when removing it.
- Do not use the power cord if the connection between the plug and the power cord has become loose.
- Do not handle the plug with wet hands. Remove dust and drops of water with a dry cloth.
- Do not bend the power cord excessively or place heavy objects on it.
- Do not use the plug, power cord, or outlet if any of these parts are damaged.
Protection against possible explosions
• Make sure that there are no flammable liquids in the vicinity of the device.
- Do not remove or insert the plug if petrol vapours or gas have escaped in the vicinity.
Fire and short-circuit protection
- Do not place the unit near heat sources or open fire.
- Do not place burning candles on the product.
- Do not place the unit in very humid or extremely wet locations.
- Be careful not to expose the product to direct sunlight, as plastic or rubber parts will age quickly.
- Do not sprinkle the dryer with water for cleaning. Do not use a high-pressure cleaner.
- To prevent the risk of fire due to intensive drying, do not dry cushions, quilts or similar items inside the appliance.
- Clothing and objects that have come into contact with vegetable and edible oil after washing must not be dried in the dryer.
- If you have treated your laundry with stain remover, it needs an additional rinse before drying.
- Before drying, make sure that there are no lighters left in the pockets of your clothes.
- Do not finish the drying process before the end of the program. Remove the garments quickly at the end of the program so that the accumulated heat can quickly escape.
Protection against injuries
- Children aged 8 and over, mentally, sensory and physically handicapped persons may only use the device if they have been thoroughly familiarised with its functions and safety precautions by a supervisor responsible for them and understand the associated risks.
- Keep the packaging materials out of the reach of children so that they do not injure themselves.
- Do not remove clothing from the drum until it has stopped spinning.
- Keep children and pets away from the appliance during the drying process to prevent them from being injured by the appliance or the drum.
Instructions for Proper Use
- This device is only suitable for private households and not for commercial use.
- Only clothes suitable for mechanical drying may be dried in this appliance. Follow the instructions on the washing label.
- Electrical work required to connect the appliance must be carried out by a specialist.
- If your dryer is standing on a carpet, adjust the feet so that the air can circulate under the dryer.
- Do not climb onto the dryer. Do not place heavy or water-filled objects or radiators on it.
- Do not put sharp or hard objects such as coins, safety pins, nails, scissors or stones into the dryer as they may damage the appliance.
- When installing the appliance, make sure that the power cord is not bent or pinched.
- Do not dry any latex, bathing cap, waterproof textile, rubber-coated article, or foam-filled cushion inside this unit.
- Unplug the appliance from the wall outlet after use and when cleaning or servicing.
- Do not overcharge the appliance. The maximum load is specified in the technical data.
- Do not put dripping wet clothes in the dryer. Before drying, the laundry must be spun dry.
- Do not dry clothes in the appliance that have come into contact with flammable liquids such as petroleum.
- Do not use the dryer if the power cord, the control panel, the work surface or the underside of the machine are damaged to such an extent that the inside of the machine is visible.
• The dryer is not suitable for dry-cleaned clothing.
- Clean the lint filter regularly and make sure that no lint accumulates around the dryer.
- Do not dry unwashed clothing.
- The final phase of the drying process is carried out with reduced heat so that the garments are not damaged.
- Do not remove your clothes until the drying program is complete.
PRODUCT OVERVIEW

INSTALLATION ON THE FLOOR
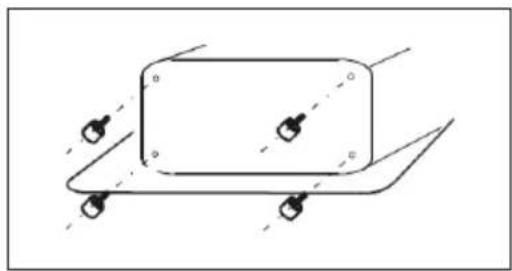
If the dryer is not installed on the wall, place it on a level surface. Do not place the dryer under combustible materials such as curtains and leave 15 cm of space around the dryer to walls and other objects.
The dryer is supplied with adjustable feet. Adjust the feet so that the dryer is fixed and level.
natural_image
Simple line drawing of a rectangular object with four small circular features on its surface, no text or symbols present.INSTALLATION ON THE WALL
Installation on a rack frame
If you want to install the dryer on the wall, you can alternatively place it on a rack frame (not included). Leave 15 cm space around the dryer for walls and other objects.

Important notes
- Leave at least 50 cm of space towards the ceiling so that you can install the unit correctly.
- If you install the appliance above a washing machine, leave enough space under the appliance to allow the air to circulate.
• Use a second person for installation.
Required tools for wall installation
- 3 mm drill (1x)
• Phillips screwdriver (1x)
• Wood screws ∅ 12 mm (4x)
OPTIONAL installation accessories for wall installation (Not included in delivery!)
| Decription Figure Pc. | ||
| Retaining clamps |  | 2 |
| Spacers | 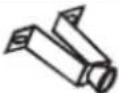 | 2 |
| Exhaust air connection |  | 1 |
| Screw 12 mm |  | 4 |
| Screw 25 mm |  | 4 |
Wall installation
| 1 |
 |
| Find a suitable position on the wall and mark drill holes for the retaining clamps. Then drill the holes. |
2

Timber (not included in scope of delivery)
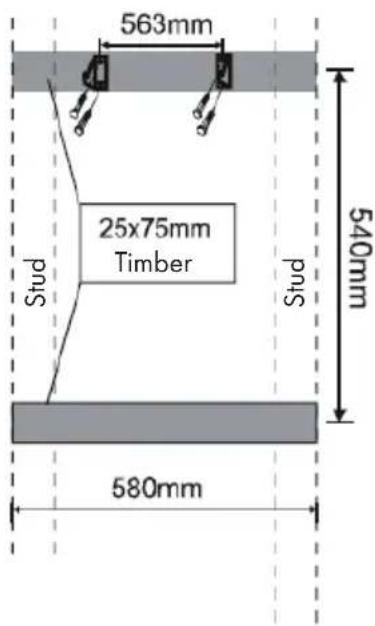
If possible, attach retaining clips to wooden posts or studs in the wall. If the distance between the studs is too large, attach the clamps to a timber and then attach the timber between the studs. Tighten the screws tightly.
Ceiling

3

natural_image
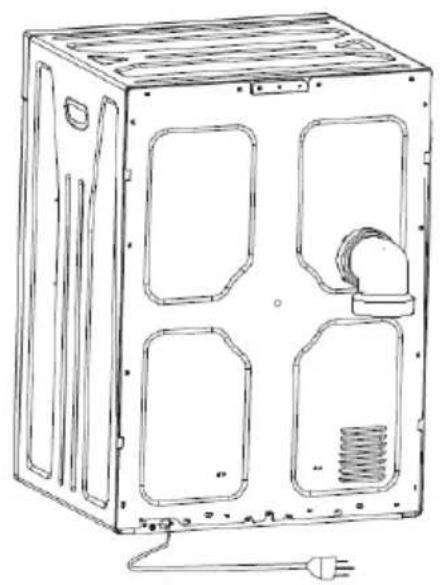
Line drawing of a four-panel industrial enclosure with internal compartments and a power outlet (no text or symbols)Fasten the exhaust air connection to the dryer by tightening it.
4

Spacers Screws 12 mm
Retaining clamp
mounting points
natural_image
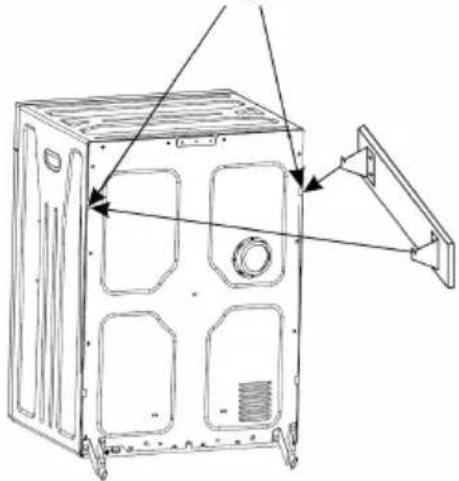
Technical line drawing of a multi-chamber air conditioner unit with mounting bracket and ventilation slots (no text or symbols)Fasten the spacers to the dryer with the 12 mm screws. Use the help of a second person to attach the dryer to the wall bracket.
LOADING AND SUITABLE TEXTILES
Loading
We recommend that you load the dryer with only one piece of laundry at a time so that the laundry dries evenly. Make sure that the laundry is not trapped in the door when you close it.
Suitable and unsuitable textiles
Before placing the garment in the dryer, check the symbols on the garment to see if it is suitable for drying in the tumble dryer. If any of the following symbols are on the laundry, the garment is not suitable for drying in the tumble dryer:
| — | Dry horizontally |
| Drying in the shade | |
| Do not dry in a dryer | |
| Hang to dry | |
| Hang damp to dry |
Before drying
- Make sure that there are no more objects, such as coins or pins, in or on the laundry.
- Close zippers and turn laundry to the left.
• Dry light and dark laundry separately. - Load the dryer only with laundry made of similar materials.
- Do not fill the dryer with more than 3 kg of laundry.
Loading and drying times
| Load Drying time | |
| 1 kg laundry ~ 60 Minuten | |
| 2 kg laundry ~ 120 Minuten | |
| 2.5 kg laundry ~ 150 Minuten | |
| 3 kg laundry ~ 200 Minuten |
OPERATION
Heat selector button
 HighLow HighLow | Choose a high temperature for large laundry or a high load.Choose a low temperature for small garments or a low load. |
Drying programs

donut
| Condition | Value | |---|---| | Air Dry: Runs with cool air and is suitable for laundry that needs to be refreshed (after long storage in a cupboard). | 80 | | Off: If the controller is set to Off, the device is off. Turn the knob clockwise to select a program. | 20 | | Cool: For laundry that has already been dried and thus prevents creasing. | 20 | | Anti-wrinkle: Suitable for heavy ironed garments such as cotton shirts or linen. Set the Heat button to Low and turn the knob to 30-60 minutes. When the cycle is finished, the clothes are still slightly damp and easier to iron. | 140 | | Hot: For large laundry or a high load. Set the heat button to high and the timer to >120 minutes. | 200 | | Warm: With this function the laundry is first heated and then cooled down to prevent creasing. Set the heat button to high and the timer to 60-120 minutes. | 160 |Start button
Start
After you have set the heat selection button and the timer, press the start button. The program starts. If the door is opened during drying or there is a power failure, the program stops. Close the door and press Start again to continue with the program.
Note: The Start button is only intended to start the dryer. If you press it during drying, the dryer will not pause. To stop the dryer, turn the knob to OFF.
CLEANING AND CARE
Note: Disconnect the plug from the socket before cleaning.
Removing the filter

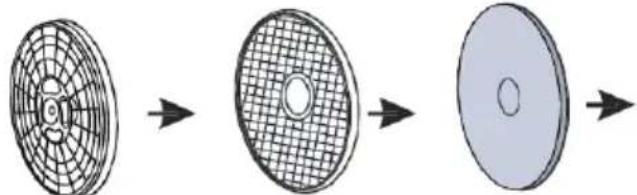
Filter cover Lint filter Exhaust filter
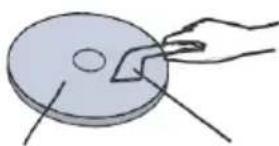
Remove the filter insert from the rear of the interior. The filter insert consists of 3 filters.
Filter cleaning

natural_image
Hand holding a small object over a circular grid-patterned plate, with no visible text or symbolsLint filter

natural_image
Simple line drawing of a hand holding a circular object with a handle, no text or symbols presentLints
Exhaust filter vacuum cleaner
Separate the filters. Clean the filter cover, lint filter and exhaust filter with a soft brush or vacuum cleaner. Be careful not to damage the filters.
Insert filter
natural_image
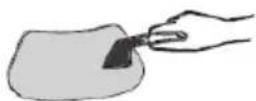
Three-step diagram showing a fan blade being cut into a circular component, with no text or symbols present.When you have cleaned the filters, replace them in reverse order. Make sure that the filters are firmly seated.
Clean air inlet filter

natural_image
Hand cleaning a curved surface with a cloth, no text or symbols visible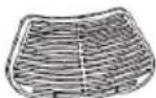
filter frame

Inlet filter
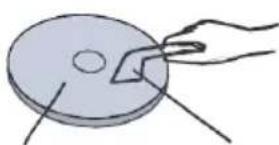
Clean the air inlet filter once a month. Remove the filter by holding the lower and upper ends of the frame and pulling it out. Clean the inlet filter with a soft brush. Then replace the filter in the frame and secure the frame.
Cleaning of the inner and outer surface
- Do not clean the device with running water.
- Do not use solvents, thinners or alcohol for cleaning.
- Clean the drum only with a damp cloth, do not use spray cleaners. Clean the drum before each use.
- Do not use scouring agents or abrasive sponges for cleaning, they will damage the surface of the unit.
DISPOSAL CONSIDERATIONS
natural_image
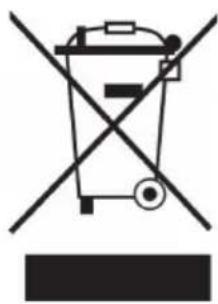
Symbol of a trash bin crossed with a diagonal line, no text or numbers presentIf there is a legal regulation for the disposal of electrical and electronic devices in your country, this symbol on the product or on the packaging indicates that this product must not be disposed of with household waste. Instead, it must be taken to a collection point for the recycling of electrical and electronic equipment. By disposing of it in accordance with the rules, you are protecting the environment and the health of your fellow human beings from negative consequences. For information about the recycling and disposal of this product, please contact your local authority or your household waste disposal service.
MANUFACTURER & IMPORTER (UK)
Manufacturer:
Chal-Tec GmbH, Wallstrasse 16, 10179 Berlin, Germany.
Importer for Great Britain:
Berlin Brands Group UK Ltd
PO Box 1145
Oxford, OX1 9UW
United Kingdom
Estimado cliente,
ÍNDICE
natural_image
Pure technical diagram of a rectangular component with mounting holes and dashed lines indicating alignment (no text or symbols)natural_image
Line drawing of a four-panel industrial enclosure with internal compartments and a power outlet (no text or symbols)natural_image
Technical line drawing of a mechanical device with mounting bracket and side panel (no text or symbols)natural_image
Hand holding a tool interacting with a circular grid-patterned plate (no text or symbols visible)Filtro de pelusas
natural_image
Illustration of a hand holding a circular object with a pointed tip, no text or symbols presentnatural_image
Three-step diagram showing a fan blade being cut into a circular component, with no text or symbols present.natural_image
Hand cleaning a curved surface with a textured object, no text or symbols visible
Marco del filtro
natural_image
Symbol of a trash bin crossed with a diagonal line, no text or numbers presentBerlin Brands Group UK Ltd
PO Box 1145
Oxford, OX1 9UW
United Kingdom
Chère cliente, cher client,
SOMMAIRE
Installation murale 49
natural_image
Pure technical diagram of a rectangular object with four small circular features, no text or symbols presentINSTALLATION MURALE
natural_image
Line drawing of a four-panel industrial enclosure with internal compartments and a power outlet (no text or symbols)natural_image
Technical line drawing of a mechanical device with mounting brackets and a side panel (no text or symbols)natural_image
Hand holding a tool interacting with a circular grid-patterned plate (no text or symbols visible)natural_image
Illustration of a hand holding a disc with a knife inserted, showing the blade and center (no text or symbols)natural_image
Three-step diagram showing a fan blade being cut into a circular component, with no text or symbols present.natural_image
Hand cleaning a curved surface with a textured object, no text or symbols visible
Cadre du filtre

Filtre d'admission
natural_image
Symbol of a trash bin crossed with a diagonal line, no text or numbers presentBerlin Brands Group UK Ltd
PO Box 1145
Oxford, OX1 9UW
United Kingdom
Gentile cliente,
INDICE
natural_image
Simple line drawing of a rectangular object with four small circular features on its surface, no text or symbols present.natural_image
Technical line drawing of a mechanical device with mounting brackets and a side panel (no text or symbols)natural_image
Hand holding a tool interacting with a circular grid-patterned plate (no text or symbols visible)Filtro dei peluzzi
natural_image
Illustration of a hand cutting a circular disc with a knife (no text or symbols)natural_image
Three-step diagram showing a fan blade being cut into a circular disc, with no text or symbols present.natural_image
Hand cleaning a curved pipe with a mesh material (no text or symbols visible)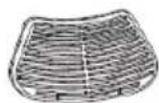
Telaio del filtro

Filtro di ingresso
natural_image
Symbol of a trash bin crossed with a diagonal line, no text or numbers presentPRODUTTORE E IMPORTATORE (UK)
Produttore:
Chal-Tec GmbH, Wallstraße 16, 10179 Berlino, Germania.
Berlin Brands Group UK Ltd
PO Box 1145
Oxford, OX1 9UW
United Kingdom

bar
| Category | Value | |---|---| | Category 1 | 100 | | Category 2 | 100 | | Category 3 | 100 | | Category 4 | 100 | | Category 5 | 100 | | Category 6 | 100 | | Category 7 | 100 | | Category 8 | 100 | | Category 9 | 100 | | Category 10 | 100 | | Category 11 | 100 | | Category 12 | 100 | | Category 13 | 100 | | Category 14 | 100 | | Category 15 | 100 | | Category 16 | 100 | | Category 17 | 100 | | Category 18 | 100 | | Category 19 | 100 | | Category 20 | 100 | | Category 21 | 100 | | Category 22 | 100 | | Category 23 | 100 | | Category 24 | 100 | | Category 25 | 100 | | Category 26 | 100 | | Category 27 | 100 | | Category 28 | 100 | | Category 29 | 100 | | Category 30 | 100 | | Category 31 | 100 | | Category 32 | 100 | | Category 33 | 100 | | Category 34 | 100 | | Category 35 | 100 | | Category 36 | 100 | | Category 37 | 100 | | Category 38 | 100 | | Category 39 | 100 | | Category 40 | 100 | | Category 41 | 100 | | Category 42 | 100 | | Category 43 | 100 | | Category 44 | 100 | | Category 45 | 100 | | Category 46 | 100 | | Category 47 | 100 | | Category 48 | 100 | | Category 49 | 100 | | Category 50 | 100 | | Category 51 | 100 | | Category 52 | 100 | | Category 53 | 100 | | Category 54 | 100 | | Category 55 | 100 | | Category 56 | 100 | | Category 57 | 100 | | Category 58 | 100 | | Category 59 | 100 | | Category 60 | 100 | | Category 61 | 100 | | Category 62 | 100 | | Category 63 | 100 | | Category 64 | 100 | | Category 65 | 100 | | Category 66 | 100 | | Category 67 | 100 | | Category 68 | 100 | | Category 69 | 100 | | Category 70 | 100 | | Category 71 | 100 | | Category 72 | 100 | | Category 73 | 100 | | Category 74 | 100 | | Category 75 | 100 | | Category 76 | 100 | | Category 77 | 100 | | Category 78 | 100 | | Category 79 | 100 | | Category 80 | 100 | | Category 81 | 100 | | Category 82 | 100 | | Category 83 | 100 | | Category 84 | 100 | | Category 85 | 100 | | Category 86 | 100 | | Category 87 | 100 | | Category 88 | 100 | | Category 89 | 100 | | Category 90 | 100 | | Category 91 | 100 | | Category 92 | 100 | | Category 93 | 100 | | Category 94 | 100 | | Category 95 | 100 | | Category 96 | 100 | | Category 97 | 100 | | Category 98 | 100 | | Category 99 | 100 | | Total (Total) = [sum of bars] / [values] * (sum of bars + bars) * (sum of bars + bars) * (sum of bars + bars). The values in the table represent the sum of the bars and the corresponding sum of the bars. There is no additional data series or categories specified in the code.
KLARSTEIN
- INHALTSVERZEICHNIS
- INSTALLATION AN DER WAND
- Member of Berlin Brands Group
- Handwerkerstr. 11
- Dahlwitz-Hoppegarten
- Deutschland
- Dear Customer,
- CONTENT
- SAFETY INSTRUCTIONS
- Protection against electric shock
- Protection against possible explosions
- Fire and short-circuit protection
- Protection against injuries
- Instructions for Proper Use
- PRODUCT OVERVIEW
- INSTALLATION ON THE FLOOR
- INSTALLATION ON THE WALL
- Installation on a rack frame
- Important notes
- Required tools for wall installation
- OPTIONAL installation accessories for wall installation (Not included in delivery!)
- Wall installation
- LOADING AND SUITABLE TEXTILES
- Loading
- Suitable and unsuitable textiles
- Before drying
- Loading and drying times
- OPERATION
- Heat selector button
- Drying programs
- Start button
- CLEANING AND CARE
- Removing the filter
- Filter cleaning
- Insert filter
- Clean air inlet filter
- Cleaning of the inner and outer surface
- DISPOSAL CONSIDERATIONS
- MANUFACTURER & IMPORTER (UK)
- Manufacturer:
- Importer for Great Britain:
- Estimado cliente,
- ÍNDICE
- SOMMAIRE
- INSTALLATION MURALE
- Gentile cliente,
- INDICE
- PRODUTTORE E IMPORTATORE (UK)
- Produttore:
- KLARSTEIN
Brand : Klarstein
Model : Jet Set
Category : Tumble dryer