
CHVF410 - Vacuum sealer Champion - Free user manual and instructions
Find the device manual for free CHVF410 Champion in PDF.


| Product Type | Vacuum Sealer |
| Brand | Champion |
| Model | CHVF410 |
| Color | Black and Silver |
| Vacuum & Seal Function | Automatic vacuuming and sealing with one button |
| Pulse Vacuum | Manual vacuum control by pressing and holding |
| Manual Seal | Seal bag without vacuum or stop vacuum early |
| Marinate Function | Quick marinate with 5 suction/release cycles |
| Canister Mode | Vacuum canisters, jars, and wine stoppers via hose |
| Sealing Time Settings | Dry (short), Moist, Extended |
| Vacuum Pressure Settings | Normal (high) and Gentle (low for delicate items) |
| Progress Display | LED numeric display showing vacuum progress and status |
| Built-in Bag Cutter | Sliding cutter on rack to cut bag roll to desired length |
| Cord Storage | Integrated compartment at the back |
| Cleaning | Wipe exterior with damp cloth and mild soap; do not immerse |
| Safety Features | Hot surface warning, automatic shut-off if seal activated within 15 seconds, super-vised children use |
| Origin | Designed in Sweden, Assembled in China |
Frequently Asked Questions - CHVF410 Champion
User questions about CHVF410 Champion
0 question about this device. Answer the ones you know or ask your own.
Ask a new question about this device
Download the instructions for your Vacuum sealer in PDF format for free! Find your manual CHVF410 - Champion and take your electronic device back in hand. On this page are published all the documents necessary for the use of your device. CHVF410 by Champion.
USER MANUAL CHVF410 Champion
natural_image
Exterior view of a modern electric vacuum cleaner with black and silver casing (no visible text or symbols)EN - English
SE - Svenska
NO - Norsk
DK - Danske
FI - Suomi
When using electrical appliances, basic safety precautions should always be followed, including the following:
EN
- Carefully read all instructions before using this appliance and save for future reference.
- Before plugging cord into wall outlet, or disconnecting, make sure that the cover of the machine is in unlocked condition, and unplug from outlet when not in use or before cleaning.
- This appliance is not a toy, when used by or near children, close attention is necessary, and store this appliance to a safe place, out of the reach of children.
- Do not use any bags or attachments not recommended or appointed, and don't use this appliance for other purpose except its intended use.
- Stop using the machine immediately if the cord is damaged, contact an authorized service center to have it repaired.
- Do not contact the hot sealing element located on edge of the top housing of this machine. It is hot and may cause injury.
- Do not try to repair this appliance by yourself.
- Don't use the appliance if it has been dropped or appear to be damaged.
- Avoid doing the following: pull or carry the appliance by the cord, use cord as a handle, close the lid on cord or pull cord around sharp edges or corners.
- Do not operate appliance if the cord or plug is wet.
- Keep away from hot gas, heated oven, electric burner or any other hot surfaces.
- Do not use this appliance on wet or hot surface or near a heat source.
- It's recommended not to use an extension cord with this unit. However, if one is used, it must have a rating equal to or exceeding the fating of this appliance.
- When disconnect, to avoid any injury, please unplug by grasp the plug, not the cord.
- Before plugging appliance in or operating, make sure your hands are dry.
- When he appliance is "ON" or in working position it should be placed on a stable surface, such as table or counter.
- There is no need to use any lubricant, such as lubricating oils or water, on this appliance.
- Do not immerse any part of this appliance, power cord or plug in water or any other liquid.
- Do not use this appliance outdoors or on a wet surface, it's recommended for household, indoor use only.
- This appliance can't be used by children aged from 8 years and above and persons with reduced physical, sensory or mental capabilities or lack of experience and knowledge if they have been given supervision or instruction concerning use of the appliance in a safe way and understand the hazards involved.
- Children should be supervised to ensure that they do not play with the appliance.
- If the supply cord is damaged, it must be replaced by the manufacturer, its service agent or similarly qualified persons to avoid a hazard.
- Cleaning and user maintenance shall not be made by children without supervision.
- For household use only.
- Save these instructions.
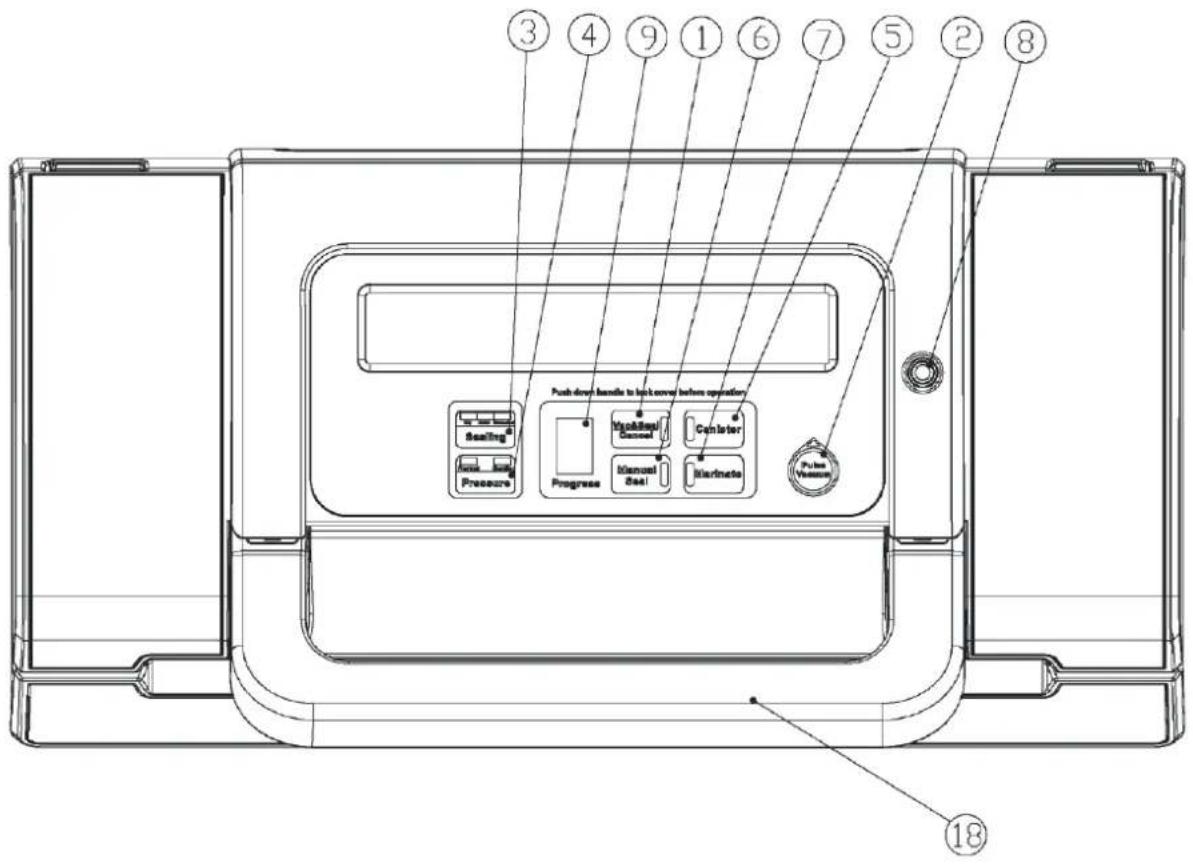
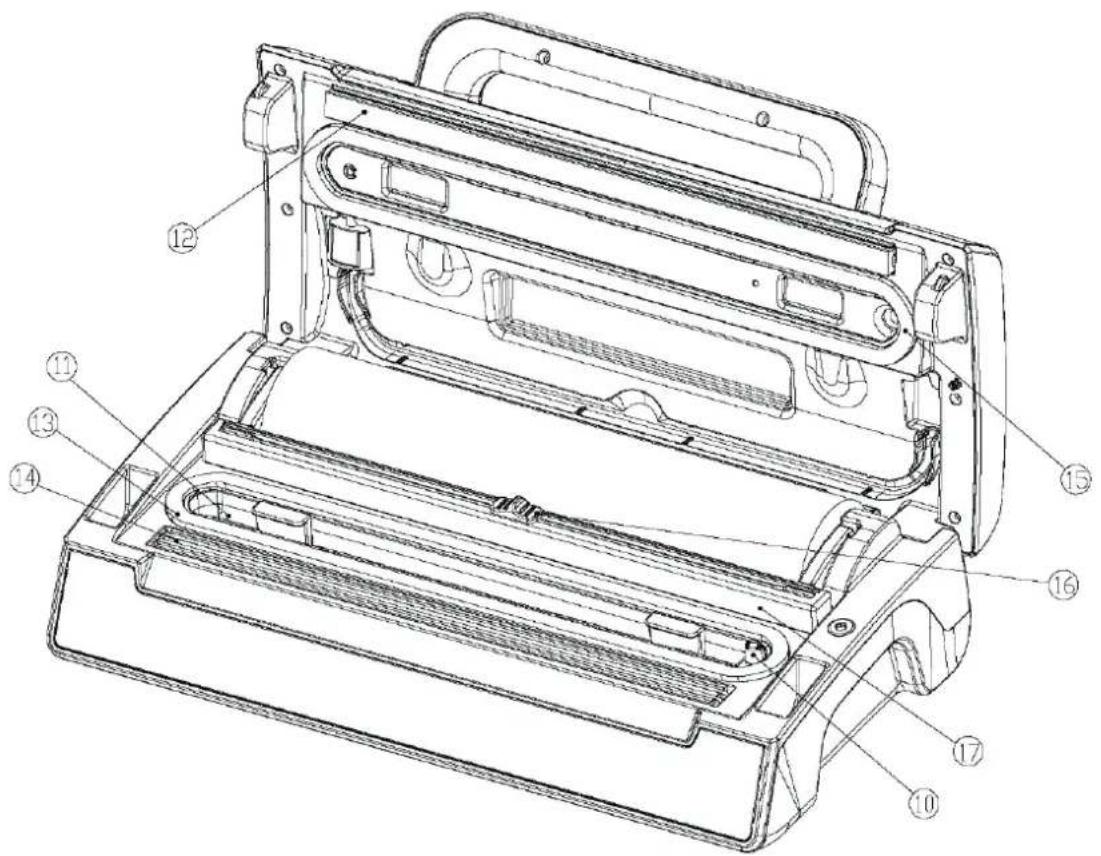
EN
-
Vac & Seal / Cancel: This button has two functions depending on the machine status; a) At stand-by condition, it starts the automatic operation of vacuuming the bag and then automatically seals the bag when vacuum is complete;
b) At working (vacuuming or sealing operations) condition, it stops the machine. -
Pulse vacuum: When this key is pressed, a vacuum is generated by pulsation. Air suction begins when the key is pressed and stops when the key is released.
-
Sealing time: Three setting for choosing the best bag sealing time. (Default setting is Normal setting for dry bags and shorter sealing time)
a) Dry button: for dry bags and items without moisture, with a shorter heat sealing time.
b) Moist button: for wet bags or foods with a little moisture, with a moist heat sealing time.
c) Extended button: for wet bags or foods with very moisture, with an extended heat sealing time.
- Pressure: Two buttons for choice of different vacuum pressure. (Default setting is normal and high vacuum pressure)
a) Normal button: for regular items storage in normal vacuum pressure.
b) Gentle button: for soft or easily crushable items storage where less vacuum pressure is desired.
-
Canister: To start vacuuming for canisters, jar lids, wine stoppers or other accessories through a hose.
-
Manual Seal: This button provides two functions:
a) To seal the open end of a bag without vacuuming air suction, used to make a bag from a bag roll.
b) When the automatic "Vacuum & seal" function is in operation, this button stops the motor pump and immediately starts to seal the bag so that less vacuum pressure inside the bag can be controlled by the operator to avoid crushing for delicate items.
-
Marinate: Press to marinate food in a marinating bowl. Press this key and the specific marinating cycle begins.
-
Hose port: To insert the hose for canister and wine stopper before “marinate” or “canister” operations.
-
Progress: This screen is the numeric display apparatus and provides two functions; a) Show the progress of vacuuming.
b) Shows that the device is on and the lid is closed. When the LED winkles, please wait until normal light, then you can start next operation.
-
Air intake: Air intake connects with vacuum chamber and pump. Do not cover this intake when placing bag for Vacuum & Seal operations.
-
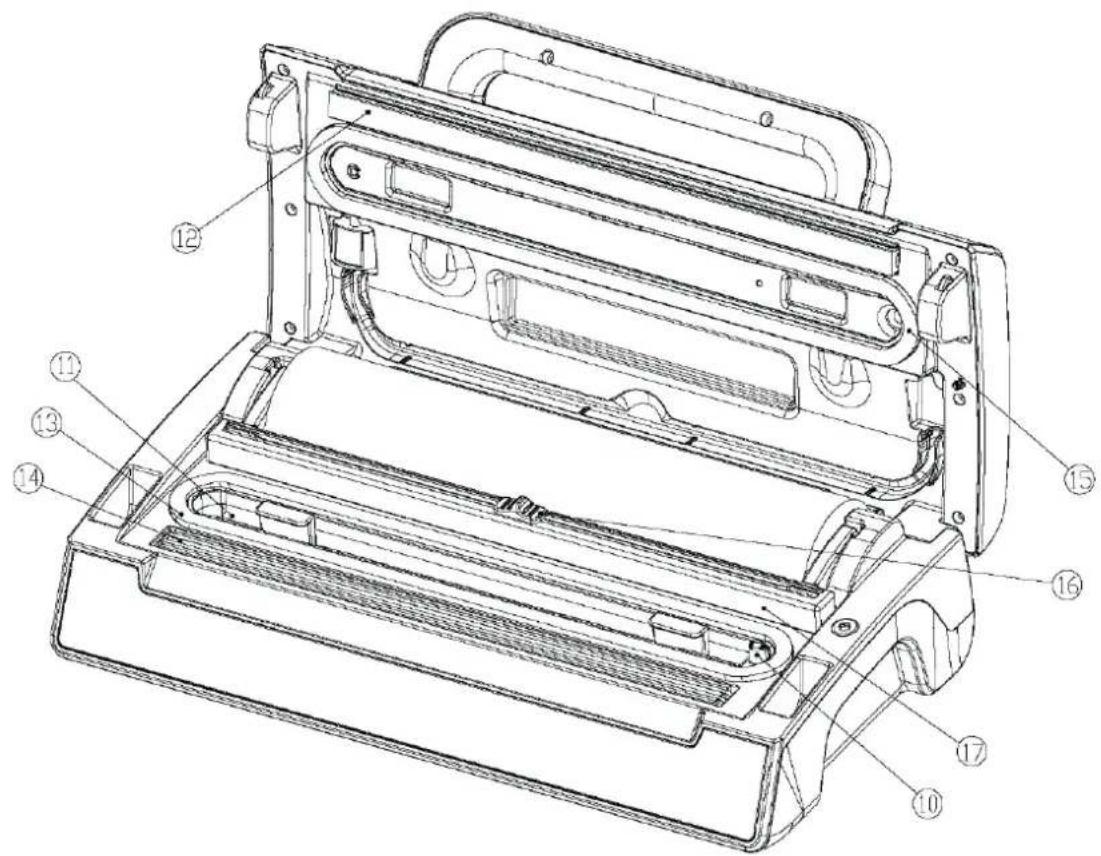
Vacuum chamber: Position the open end of the bag inside the chamber, draws air out of bag and catches any liquid overflow from the bag.
-
Sealing strip: Place the bag to be sealed over this strip. Clean and dry or replace it when distorted or broken.
-
Lower gasket: Keep air away by forming vacuum chamber with upper gasket in the vacuum chamber. Clean and dry or replace it when it is distorted or broken.
-
Sealing element: Teflon-coated heating element which is hot and seals the bag.
-
Upper gasket: Keep air away by forming vacuum chamber with lower gasket. Clean and dry or replace it when distorted or broken.
-
Bag Cutter: Press and slide in one direction or another to cut bags to a desired size.
-
Cutter rack: Support the cutter to slide along
-
Front handle: Press down to lock the cover, and rock to open the cover.
Operating instructions
Making a bag with bag roll
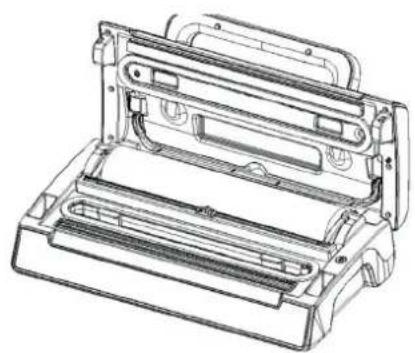
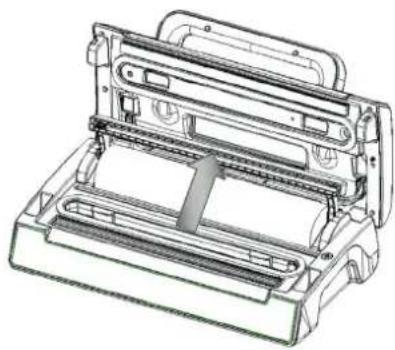
- Open the top cover. (Fig.1)
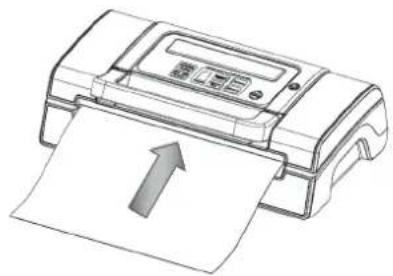
- Make sure the bag cutter is on one end of the cutter rack, then put the cutter rack to the back. (Fig.2)
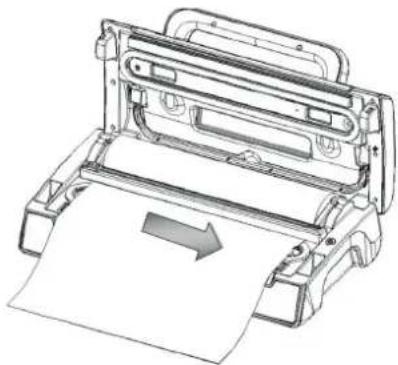
- Pull out the bag to the suitable length you want. (Fig.3)
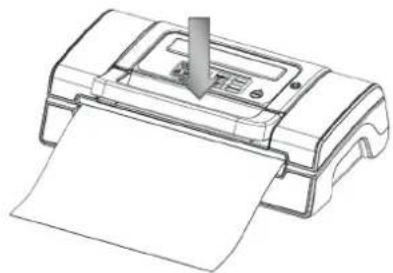
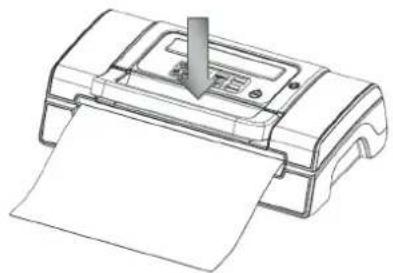
- Put down the cutter rack and make sure it is on the right place of the bags, then slide the cutter from one end to the other end to cut the bag. (Fig.4)
natural_image
Technical line drawing of a mechanical device with internal components (no text or symbols)Fig. 1 Fig. 2

natural_image
Technical line drawing of a mechanical device with an arrow indicating motion or assembly (no text or symbols present)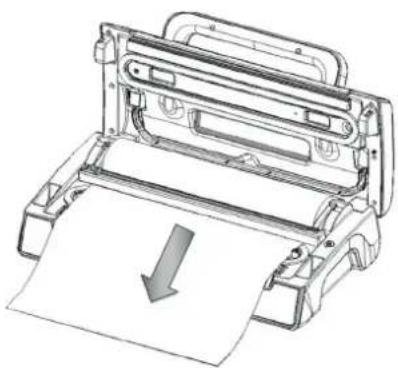
natural_image
Technical line drawing of a printer or printer with a paper roll and arrow indicating compression (no text or symbols present)Fig. 3

natural_image
Technical line drawing of a printer or printer with paper roll and arrow indicating compression (no text or symbols)Fig. 4
- Put one end of the bag on top of the sealing element into the bag fixture. (Fig.5)
- Close the top cover and press tightly till you hear it click in place on both sides. (Fig.6)
- Press "Manual Seal" button to start sealing the bags. (Fig.7)
- Press the handle to open the cover and take the bag out of the machine, the bag is finished and ready to be used. (Fig.8)

natural_image
Technical line drawing of a printer or printer with paper roll and paper sheet, no text or symbols presentFig. 5 Fig. 6

natural_image
Line drawing of a printer with paper and a paper holder (no text or symbols)
natural_image
Line drawing of a printer with paper and a paper holder (no text or symbols)Fig. 7 Fig. 8

natural_image
Line drawing of a printer with an arrow indicating paper movement (no text or symbols)Vacuum packaging with a bag
- Put the items inside the bag.
- Clean and straighten the open end of the bag, make sure there are no dust, wrinkle or ripples.
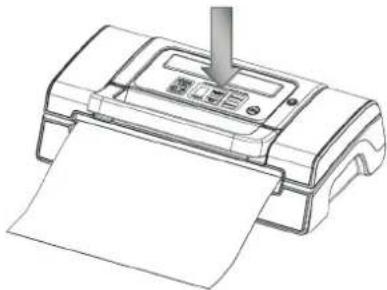
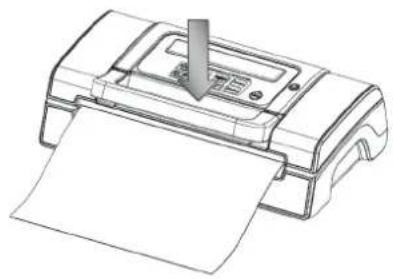
- Place the open end of the bag within the vacuum chamber area. Make sure the air intake is not covered by the bag. (Fig. 1)
- Put the top cover down and press front handle to lock the top cover. (Fig.2)
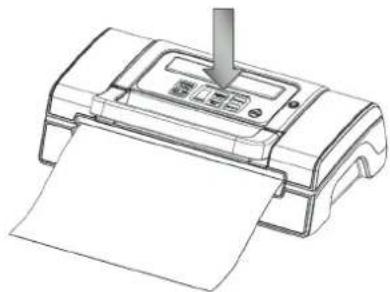
- Check the LED status of "Vac & Seal" and the "sealing time" to confirm sealing time depending on the moisture status of packed items (extended/moist/dry) and desired vacuum pressure (Normal/Gentle) according to the type of food.
- Then press "Vac & Seal" button, the unit start to vacuum and will seal the bag automatically. (Fig 3)
NOTE: This product provides very high vacuum pressure during vacuum packaging with a bag, to avoid crushing of the delicate item by the high vacuum pressure, observe the status of the vacuum pressure inside the bag and switch the "MANUAL SEAL" button immediately when the desired vacuum pressure is achieved. The pump will stop and change to heat-seal the bag.
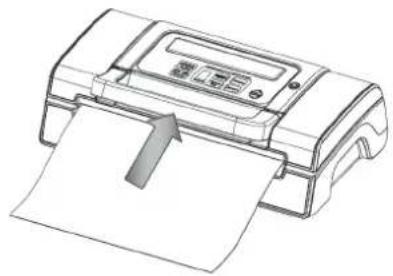
- The vacuum packaging is done. Rock the handle to open the cover and take out the packed bags. (Fig. 4)
NOTE:
- For best sealing effect, it is better to let the appliance cool down for 1 minute before using it again. Wipe out any excess liquid or food residue in the vacuum chamber after each bag packaged.
- Do not seal one after another continuously to avoid overheating the sealing element. The machine will reject if the "seal" button is activated within 15 seconds of the last activation.
- Your appliance can work only on the specific vacuum bags. Do not attempt to use other bags not intended for vacuum packaging.
- Cut the bag straight across with scissors to open a sealed bag.
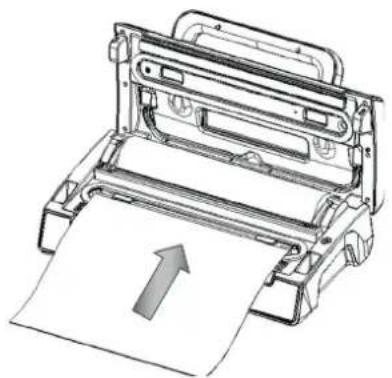
natural_image
Technical line drawing of a printer or printer with paper and paper roll, showing no text or symbolsFig. 1

natural_image
Line drawing of a printer with paper and a paper holder (no text or symbols)Fig. 2

natural_image
Line drawing of a printer with paper and a paper holder, no text or symbols presentFig. 3

natural_image
Line drawing of a printer with paper being inserted, showing paper sheet and printer cover (no text or symbols)Fig. 4
Vacuum packaging with a bag using Pulse Vacuum
-
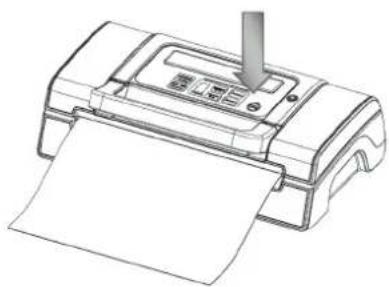
Press Pulse Vacuum button, the unit start to vacuum the bag, observe the status of the vacuum pressure inside the bag. Stop pressing the Pulse Vacuum button immediately when the desired vacuum pressure is achieved. (Fig. 1)
-
Press the Manual Seal button when the Vacuuming have been completed, the unit start to seal the bag automatically. (Fig.2)
natural_image
Line drawing of a printer with paper and a paper holder (no text or symbols)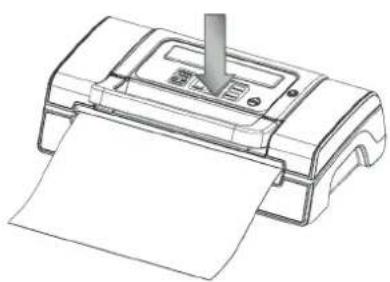
natural_image
Line drawing of a printer with paper and a paper holder (no text or symbols)Fig. 2Fig. 1
Vacuum package in a Canister & Vacuum Bowl
- Wipe canister cover, canister base and ensure they are clean and dry.
- Put the items into the canister and do not fill up too full so that the cover can be in good contact with the canister bowl rim. Clean the cover rim of the canister and bottom seal gasket of the canister cover.
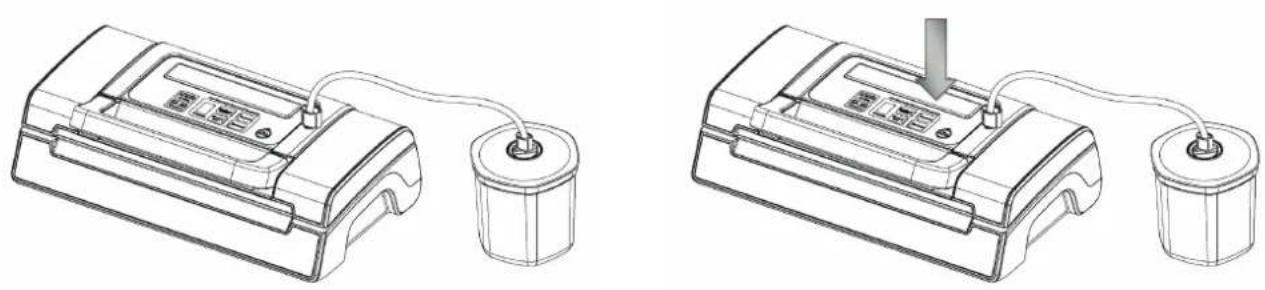
- Insert one end of the hose into the air intake and another end of the hose into the center hole of the canister cover. (Fig. 1)
- Check the LED status of "Vac & Seal" and make sure it is in "Normal" setting.
-
Press the canister button to start vacuuming. (Fig. 2) To ensure there is no air leaking between the cover and the canister, use your hand to push down the cover at the beginning of the vacuuming work. The machine will stop automatically when enough vacuum pressure is achieved.
-
Take out the hose tube from the canister or bowl immediately first after the job is completed.
EN
NOTE: When moist food is under vacuuming, moisture will be stored in adaptor. Remember to clean up the adaptor if there is water before vacuuming.
natural_image
Line drawings of two laboratory devices with connected tubing and a cylindrical container (no text or symbols)Open Canister after vacuum packaging
- To open the canister, you need to press the "Release" button on the canister cover.
NOTE:
- At the beginning of the vacuum packaging in a canister or a vacuum bowl, slightly press down the cover or on the hose adaptor to ensure no loose of the hose and to avoid air leaking through the gap between the cover and the canister top rim for a few seconds.
• To test vacuum, simply tug on the cover, it shall not move.
Marinate food with a Marinate Bowl
This function reduces the amount of time required to marinate food through 5 cycles, which alternate the suction and release of air inside the container.
- Fill the container and connect it to the machine as described above.
- Set the machine vacuum power according to the food being marinated.
- Hook the lid onto the base of the machine by lowering the lock handle.
- Press the "Marinate" key: the "PROGRESS" display will show the number 9 and the first air suction and release cycle will begin. The progress display will indicate the progress of the marinating cycle. Wait until the display reads "0" and the light turns off. The quick marinate process is completed.
- Remove the tube from the container and the machine.
- The machine can be stopped at any time by pressing "Automatic/stop".
- If the marinate process needs to be repeated, the air will need to be released from the container before reconnecting it to the machine.
Note:
- At the beginning of the vacuum packaging in a canister, slightly press down the canister cover or on the hose adaptor to ensure no loose of the hose and to avoid air leaking through the gap between the cover and the canister top rim for a few seconds.
• To test vacuum, simply tug on the cover. It shall not move. - Do not press any button to interfere with the whole process.
Cord storage box
- Put the power cord into the storage box when not use the machine which is in the back of the machine. Do not wrap the cord around the appliance.

natural_image
Line drawing of a mechanical device with clamps and a control panel (no text or symbols)Cleaning and Maintenance
Vacuum sealer
- Always unplug the unit before cleaning.
- Do not immerse in water or any other liquid.
- Avoid using abrasive products or material to clean the unit, for they will scratch the surface.
- Use a mild dishwashing soap and a warm, damp cloth to wipe away food residue or around components.
- Dry thoroughly before using again.
Note: The foam gaskets around the vacuum chamber should be dried thoroughly before re-assembling, when re-assembling, is careful to prevent any damage, and assemble as original position to ensure no vacuum leaking.
Vacuum bags
- Wash bags in warm water with a mild dishwashing soap.
- When wash bags in dishwasher, turn bags inside out and spread them over top rack of dishwasher, so entire surface is exposed to the washing water.
- Dry thoroughly before reusing.
IMPORTANT: To avoid possible illness, do not reuse bags after storing raw meats, raw fish or greasy foods. Do not reuse bags that have been microwaved or boiled.
Accessories
Washing all vacuum accessories in warm water with a mild dishwashing soap, do not immerse cover in water.
- Canister bases (not lids) are top rack dishwasher safe. But canister cover should be wiping down with a damp cloth.
- Ensure the accessories to be dry thoroughly before reusing.
- Canister and cover is not allowed to use in microwave or freezer.
Storing Your Vacuum Sealer
- Keep the unit in a flat and safe place, out of the reach of children.
- Make sure the lid of appliance is unlocked when not in use and in storage. Keep the cover locked will distort the foam gaskets causing leaking.
Nothing happens when I try to vacuum package:
EN
- Check power cord to see if it is firmly plugged into electrical outlet.
- Check switch to see if it's setting is "o".
- Examine power cord for any damages.
- See if electrical outlet is operative by plugging in another appliance.
- Twist the Fuse Cap off, then look at the clear tube to see if the Fuse is darkened. If the fuse is darkened, it will need to be replaced with a standard 10-amp Buss Fuse.
- If your appliance has a mode switch, make sure it is set to the correct mode. Refer to the above operating instructions
- Make sure bag is placed correctly inside Vacuum chamber and beneath the air intake.
Air is not removed from the bag completely:
- To seal properly, open end of bag should be resting entirely inside vacuum chamber area.
- Check sealing strip and the foam gasket beneath the lid for debris and position. Make sure no breaking or distortion of the foam seal gaskets on both the cover and on the base around the vacuum chamber. Wipe clean and smooth them back into place.
- Vacuum bag may have a leak. To test, seal the bag with some air in it, submerge in water, and apply pressure. Bubbles indicate a leak. Reseal or use another bag.
- Uses only the specific vacuum bag with vacuum channels provided by the manufacturer.
- Leaks along the seal which can be caused by wrinkles, debris crumbs, grease or liquids. Reopen bag, wipe the top inside of the bag and smooth it out along the sealing strip before resealing.
The machine does not turn to seal after vacuuming:
- There is a vacuum pressure sensor built in this machine. The machine will not turn to seal automatically if the vacuum pressure inside the bag is not able to reach to the predetermined vacuum pressure. Check sealing strip and the foam gasket beneath the lid for debris and correct position. Wipe clean and smooth them back into place, and try again.
- Make sure no breaking or distortion of the foam seal gaskets on both the cover and on the base around the vacuum chamber. Take it out from the groove, wash and dry it thoroughly; or replace with a new foam gasket.
- Vacuum bag may have a leak. To test, seal the bag with some air in it, submerge in water, and apply pressure. Bubbles indicate a leak. Re-seal or use another bag.
- Leaks along the seal which can be caused by wrinkles, debris crumbs, grease or liquids from the bag. Reopen bag, wipe the top inside of the bag and smooth it out along the sealing strip before re-sealing.
Air has re-entered into the bag after being sealed:
- Leaks along the seal which can be caused by wrinkles, debris crumbs, grease or liquids. Reopen bag, wipe the top inside of the bag and smooth it out along the sealing strip before re-sealing.
- The release of natural gases or fermentation form foods (such as fresh fruits and vegetables) may occur. Open bag, if you think food has begun to spoil, and discard food. Lack of refrigerator or fluctuating temperatures in the refrigerator can cause food to spoil. If the food which is not spoil. Consume food immediately.
- Check the bag for a puncture or hole which may have released the vacuum. Do not vacuum packaging hard items with sharp points (like bones or cracks of nut shell). Cushion sharp edges in the contents of the bag with paper towels.
The bag melts:
- Should sealing strip or sealing element be overheat and melt the bag, it may be necessary to lift the lid and allow sealing strip or heating element to cool for a few minutes.
The canister will not vacuum:
- Make sure the adaptor was well connected both to the appliance and the canister firmly.
- Check if the knob of the canister was on the position of "seal".
- Press the lids OR on the hose adaptor at the very beginning of vacuuming to avoid leaking from the cover seal.
- Check if there are significant damages or smashes, if yes, change it for a new one.
- Check the function of the vacuum sealer.
- Make sure the rim of the canister is clean enough. If all the above situations are excluded, please contact with the appointed service agency.
Storage guide
| In the fridge (5±2°C) No vacuum Vacuum | ||
| Red Meat 3-4 days 8-9 days | ||
| White Meat 2-3 days 6-8 days | ||
| Fish 1-3 days 4-5 days | ||
| Cooked Meat 3-5 days 10-15 days | ||
| Soft Cheese 5-7 days 20 days | ||
| Hard/Semi Hard Cheese 1-5 days 60 days | ||
| Fruits 5-7 days 14-20 days | ||
| Vegetables 1-3 days 7-10 days | ||
| Soup 2-3 days 8-10 days | ||
| Pasta/Rice leftover 2-3 days 6-8 days | ||
| Cream Desserts 2-3 days 8 days | ||
| Room Temp. (25 ± 2°C) | No vacuum | Vacuum |
| Fresh Bread | 1-2 days 8-10 | days |
| Biscuits | 4-6 months | 12 months |
| Uncooked Pasta/Rice | 5-6 months | 12 months |
| Flour | 4-6 months | 12 months |
| Dry Fruits | 3-4 months | 12 months |
| Ground Coffee | 2-3 months | 12 months |
| Loose Tea | 5-6 months | 12 months |
| Milk Tea | 1-2 months | 12 months |
| In the Freezer (-18±2°C) | No vacuum | Vacuum |
| Meat | 4-6 months | 15-20 months |
| Fish | 3-4 months | 10-12 months |
| Vegetables | 8-10 months | 8-24 months |
Correct Disposal of this product
This marking indicates that this product should not be disposed with other household wastes throughout the EU. To prevent possible harm to the environment or human health from uncontrolled waste disposal, recycle it responsibly to promote the sustainable reuse of material resources.


Champion®
Makadamgatan 14 | 254 64 Helsingborg | Sweden
Designed in Sweden | Assembled in China

SE
natural_image
Technical line drawing of a mechanical device with internal components (no text or symbols)Fig. 1 Fig. 2

natural_image
Technical line drawing of a printer holder with an arrow indicating compression or shift (no text or symbols present)
natural_image
Technical line drawing of a printer or printer with a paper roll and arrow indicating compression (no text or symbols present)Fig. 3

natural_image
Technical line drawing of a printer or printer with paper roll and arrow indicating print direction (no text or symbols)Fig. 4
natural_image
Technical line drawing of a printer with paper feed and an arrow indicating paper direction (no text or symbols)Fig. 5 Fig. 6

natural_image
Line drawing of a printer with paper and a paper holder (no text or symbols)
natural_image
Line drawing of a printer with paper and a paper holder (no text or symbols)Fig. 7 Fig. 8
natural_image
Line drawing of a printer with an arrow indicating paper movement (no text or symbols present)natural_image
Technical line drawing of a printer or printer with paper and paper roll, no text or symbols presentFig. 1

natural_image
Line drawing of a printer with paper and a paper holder (no text or symbols)Fig. 2

natural_image
Line drawing of a printer with paper and a paper holder (no text or symbols)Fig. 3

natural_image
Line drawing of a printer with paper and a paper sheet, no text or symbols presentFig. 4
natural_image
Line drawing of a printer with paper and a paper holder (no text or symbols)
natural_image
Line drawing of a printer with paper and a paper holder (no text or symbols)Fig. 2Fig. 1
natural_image
Line drawing of a portable electronic device connected to a cylindrical container (no text or symbols)
natural_image
Line drawing of a laboratory instrument with a test tube and connected tubing (no text or symbols)natural_image
Line drawing of a mechanical device with no visible text or symbolsSE
Designed in Sweden | Assembled in China



NO
NO
natural_image
Technical line drawing of a mechanical device with multiple ports and mounting brackets (no text or symbols)Fig. 1 Fig. 2

natural_image
Technical line drawing of a mechanical device with an arrow indicating motion or assembly (no text or symbols present)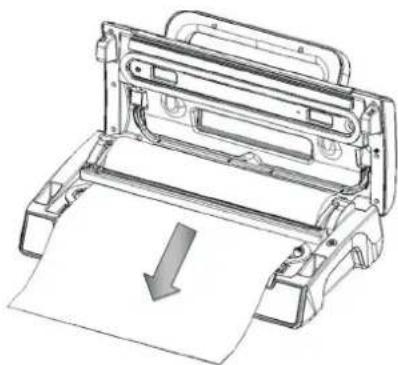
natural_image
Technical line drawing of a printer or printer with a paper roll and arrow indicating compression (no text or symbols present)Fig. 3

natural_image
Technical line drawing of a printer or printer with paper roll and arrow indicating print direction (no text or symbols)Fig. 4
natural_image
Technical illustration of a printer or printer with paper roll and paper sheet, showing no text or symbolsFig. 5 Fig. 6

natural_image
Line drawing of a printer with paper and a paper sheet, no text or symbols present
natural_image
Line drawing of a printer with paper and a paper holder (no text or symbols)Fig. 7 Fig. 8

natural_image
Line drawing of a printer with an arrow indicating paper movement (no text or symbols present)natural_image
Illustration of a printer or scanner with paper roll and paper sheet, no text or symbols presentFig. 1
natural_image
Line drawing of a printer with paper and a paper holder (no text or symbols)Fig. 2
natural_image
Line drawing of a printer with paper and a paper holder (no text or symbols)Fig. 3

natural_image
Line drawing of a printer with paper being inserted (no text or symbols)Fig. 4
natural_image
Line drawing of a printer with paper and a paper holder (no text or symbols)
natural_image
Line drawing of a printer with paper and a paper holder (no text or symbols)Fig. 2Fig. 1
Vakuumpakking i en beholder og vakuumbolle
natural_image
Line drawing of a medical device connected to a cup via tubing (no text or symbols)
natural_image
Line drawing of a portable electronic device connected to a cylindrical container (no text or symbols)natural_image
Line drawing of a mechanical device with a handle and cable (no text or symbols)NO
Designed in Sweden | Assembled in China



DK
DK
natural_image
Technical line drawing of a mechanical device with internal components (no text or symbols)Fig. 1 Fig. 2

natural_image
Technical illustration of a printer holder with an arrow indicating compression or shift (no text or symbols present)
natural_image
Illustration of a printer or printer with a paper roll and arrow indicating compression (no text or symbols present)Fig. 3

natural_image
Technical line drawing of a printer or printer with paper roll and arrow indicating compression (no text or symbols)Fig. 4
natural_image
Illustration of a printer or printer with paper roll and paper sheet, no text or symbols presentFig. 5 Fig. 6
natural_image
Line drawing of a printer with paper and a paper holder (no text or symbols)
natural_image
Line drawing of a printer with paper and a paper holder (no text or symbols)Fig. 7 Fig. 8

natural_image
Line drawing of a printer with an arrow indicating paper movement (no text or symbols)Vakuumlukning af pose
natural_image
Technical line drawing of a printer or printer with paper roll and paper sheet, no text or symbols presentFig. 1

natural_image
Line drawing of a printer with paper and a paper holder (no text or symbols)Fig. 2
natural_image
Line drawing of a printer with paper and a paper holder, no text or symbols presentFig. 3
natural_image
Line drawing of a printer with paper being inserted, no text or symbols presentFig. 4
Vakuumpakning af en pose med Puls-Vakuum
natural_image
Line drawing of a printer with paper and a paper holder (no text or symbols)
natural_image
Line drawing of a printer with paper and a paper holder (no text or symbols)Fig. 2Fig. 1
natural_image
Line drawing of a medical device connected to a cup via tubing (no text or symbols)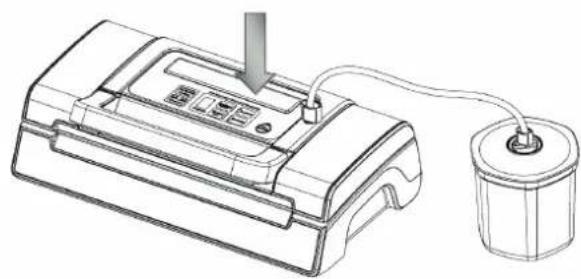
natural_image
Line drawing of a laboratory instrument with a test tube and connected tubing (no text or symbols)natural_image
Line drawing of a portable electronic device with control panel and cable (no text or symbols)DK
Designed in Sweden | Assembled in China


FI
natural_image
Technical line drawing of a mechanical device with internal components (no text or symbols)Fig. 1 Fig. 2
natural_image
Technical line drawing of a mechanical device with no visible text or symbols
natural_image
Technical line drawing of a printer or printer with a paper roll and arrow indicating compression (no text or symbols present)Fig. 3
natural_image
Technical line drawing of a printer or printer with a paper roll and arrow indicating print direction (no text or symbols present)Fig. 4
natural_image
Technical line drawing of a printer or printer with paper roll and paper sheet, no text or symbols presentFig. 5 Fig. 6

natural_image
Line drawing of a printer with paper and a paper holder (no text or symbols)
natural_image
Line drawing of a printer with paper and a paper sheet, no text or symbols presentFig. 7 Fig. 8

natural_image
Line drawing of a printer with an arrow indicating paper movement (no text or symbols present)natural_image
Technical line drawing of a printer or scanner with paper roll and paper sheet, no text or symbols presentFig. 1
natural_image
Line drawing of a printer with paper and a paper holder (no text or symbols)Fig. 2

natural_image
Line drawing of a printer with paper and a paper holder (no text or symbols)Fig. 3

natural_image
Line drawing of a printer with paper and arrow indicating print direction (no text or symbols)Fig. 4
natural_image
Line drawing of a printer with a paper sheet, no text or symbols present
natural_image
Line drawing of a printer with paper and a paper holder (no text or symbols)Fig. 2 Fig. 1
natural_image
Technical line drawings of two electronic devices connected by wires, one with a dial and the other with a plug (no text or symbols present)natural_image
Line drawing of a mechanical device with a clamped cable and a control panel (no text or symbols)FI
Puhdistus & Huolto
Tyhjiöpakkaaja
Designed in Sweden | Assembled in China


- When using electrical appliances, basic safety precautions should always be followed, including the following:
- EN
- Operating instructions
- Making a bag with bag roll
- Vacuum packaging with a bag
- NOTE:
- Vacuum packaging with a bag using Pulse Vacuum
- Vacuum package in a Canister & Vacuum Bowl
- Open Canister after vacuum packaging
- Marinate food with a Marinate Bowl
- Cord storage box
- Cleaning and Maintenance
- Vacuum sealer
- Vacuum bags
- Accessories
- Storing Your Vacuum Sealer
- Nothing happens when I try to vacuum package:
- Air is not removed from the bag completely:
- The machine does not turn to seal after vacuuming:
- Air has re-entered into the bag after being sealed:
- The bag melts:
- The canister will not vacuum:
- Storage guide
- Correct Disposal of this product
- NO
- Vakuumpakking i en beholder og vakuumbolle
- DK
- Vakuumlukning af pose
- Vakuumpakning af en pose med Puls-Vakuum
- Puhdistus & Huolto
- Tyhjiöpakkaaja
Brand : Champion
Model : CHVF410
Category : Vacuum sealer