009-968 - Log splitter Meec Tools - Free user manual and instructions
Find the device manual for free 009-968 Meec Tools in PDF.


| Product Type | Log Splitter |
| Brand | Meec Tools |
| Model | 009-968 |
| Power Source | Electric (230V) |
| Motor Power | 1500 W |
| Splitting Force | 5 tons |
| Max Log Length | 50 cm |
| Max Log Diameter | 25 cm |
| Cycle Time | 12 seconds |
| Dimensions (L x W x H) | 100 x 50 x 80 cm |
| Weight | 30 kg |
| Wheeled | Yes, two wheels |
| Safety Features | Two-hand operation, safety guard |
| Oil Capacity | 3.5 L |
| Operating Position | Horizontal |
| Material | Steel frame, plastic cover |
Frequently Asked Questions - 009-968 Meec Tools
User questions about 009-968 Meec Tools
0 question about this device. Answer the ones you know or ask your own.
Ask a new question about this device
Download the instructions for your Log splitter in PDF format for free! Find your manual 009-968 - Meec Tools and take your electronic device back in hand. On this page are published all the documents necessary for the use of your device. 009-968 by Meec Tools.
USER MANUAL 009-968 Meec Tools
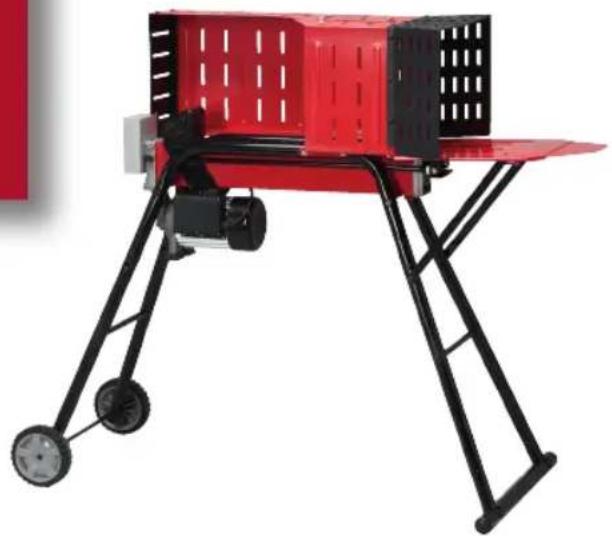
natural_image
Red and black robotic dog-like device with wheels and mechanical components (no visible text or symbols)
OPERATING INSTRUCTIONS
LOG SPLITTER VEDKL∅YVER
▲ Important! Read the user instructions carefully before use. Save them for future reference. (Translation of the original instructions)

BRUKSANVISNING
VEDKLYV
Care for the environment!
Must not be discarded with household waste! This product contains electrical or electronic components that should be recycled. Leave the product for recycling at the designated station e.g. the local authority's recycling station.
Jula reserves the right to make changes. In the event of problems, please contact our customer service. www.jula.com
Tillverkare/Produsent/Producenci/Manufacturer Jula AB, Box 363, 532 24 SKARA
Distributör/Distributör/Dystrybutor/Distributor
Jula Poland Sp. z o.o., ul.
For latest version of operating instructions, see www.jula.com
2019-10-02
© Jula AB
CE
EU DECLARATION OF CONFORMITY
EU FÖRSÄKRAN OM ÖVERENSSTÄMMELSE
EU SAMSVARSERKLÆRING
DEKLARACJA ZGODNOŚCI UE

Jula AB, Box 363, SE-532 24 SKARA, SWEDEN
This declaration of conformity is issued under the sole responsibility of the manufacturer
Machinery Directive 2006/42/EC
EN 609-1:2017, EN 60204-1:2006+A1
Electromagnetic Compatibility Directive 2014/30/EU
EN 55014:2017, EN 55014-2:2015
EN 61000-3-2:2014, EN 61000-3-11:2000
RoHS Directive 2011/65/EU and (EU) 2015/863
EN 50581:2012
This product was CE marked in year -19
Name and address of the person authorised to compile the technical file:
2
natural_image
Close-up of a hand holding a metal rod next to a mechanical device with a circular component (no visible text or symbols)3
4
natural_image
Close-up of a hand using a metal ladder to lift a vehicle, with another hand visible in the background (no text or symbols)6
7
8
natural_image
Technical line drawing of a lander or surveying instrument with wheels and ladder (no text or symbols)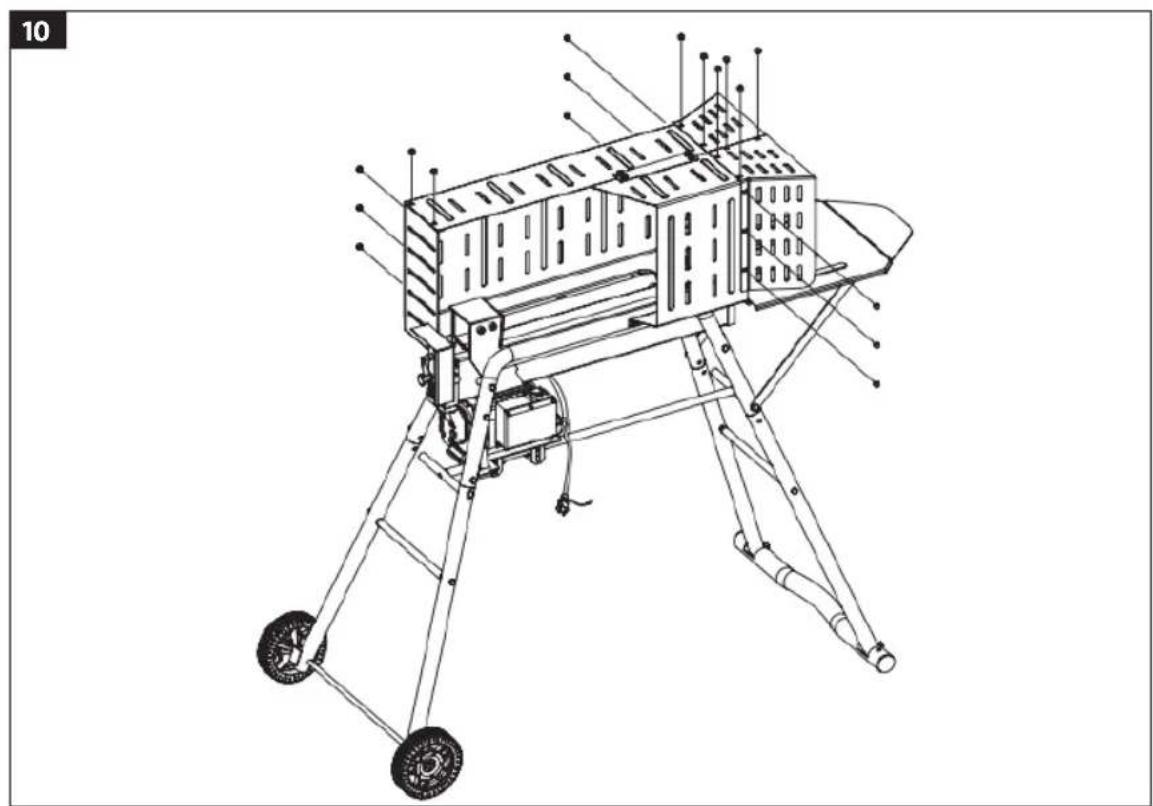
natural_image
Line drawing of a quadruped robot with wheels and structural components (no text or symbols)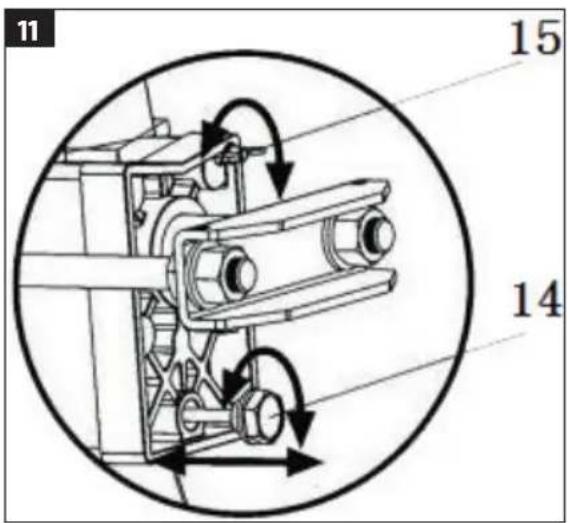
natural_image
Line drawing of a mechanical device with wheels and a cylindrical component (no text or symbols)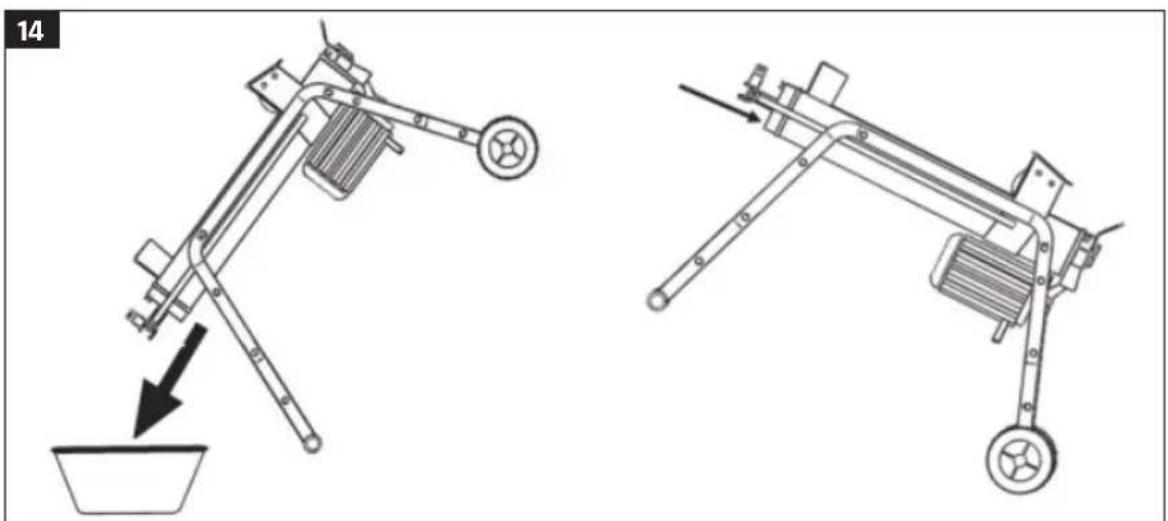
natural_image
Technical line drawing of two mechanical arms with a downward arrow indicating motion, no text or symbols presentSÄKERHETSANVISNINGAR
L∅SNE KUBBE SOM HAR SATT SEG FAST
SKIFTE HYDRAULIKKOLJE
- Read the instructions and stickers on the product. Understand the functions and limitations of the product, including potential risks and dangers during both use and storage.
- Never use the product if you are tired or under the influence of drugs, alcohol or medication.
- Place the product on a level, stable and 85 cm high bench, with plenty of space for the user to handle the logs. Screw the product to the surface if it slides.
- Keep the work area clean and well lit. Cluttered work areas increase the risk of accidents and injuries.
- Do not use the product in damp or wet areas. Do not expose the product to rain.
- Do not use the product in an explosive environment, e.g. near flammable liquids, gas or dust.
- Always carefully check the product before use. The safety devices must be fitted correctly and work properly. Always check that Allan keys/spanners etc. have been removed from the product before starting it. Replace any damaged, missing or broken parts prior to use.
- Do not wear loose-fitting clothing, jewellery or watches that can get caught in moving parts.
- It is recommended to wear safety gloves that are not electrically conductive and non-slip shoes. Wear a hair net if you have long hair.
- The product can eject objects that can cause permanent eye injuries. Wear safety glasses. Normal glasses only have shock-resistant lenses. They are not safety glasses.
- Do not use the product with it placed on the floor or the ground. This will result in an awkward working posture, where the user's face comes close to the product – risk of being hit by splinters etc.
- Unsuitable extension cords can risk causing a fire and/or electric shock. An extension cord must not be longer than 10 metres, with a cross-sectional area of the wires of at least 2.5 ~mm^2 to supply power to the motor. Do not use insufficiently insulated connections. Connections must be appropriate for outdoor use.
- Check that the mains voltage corresponds to the rated voltage on the type plate and that the circuit is correctly fuse protected. Check that the power cord, plug and power point are earthed and that the power point has a residual current device. Avoid body contact with earthed surfaces such as pipes, radiators, cookers and refrigerators.
- Never open the pushbutton box on the motor. The box must only be opened by authorised electricians.
- Do not touch metal parts of the plug when connecting or disconnecting it.
- The product must only be used by one person at once. Keep children and onlookers at a safe distance when using the product. Never allow anyone to help you release logs that have got stuck.
- Check that there are no nails or other foreign objects in the logs. The ends of the logs must be cut at right angles. Branches must be cut off flush with the log.
• The surface must not be slippery.
• Always maintain a firm footing and good balance.
- Never stand on the product. There is a risk of serious personal injury if the product tips over or the user touches sharp parts. Do not store anything above or near the product, where someone could be tempted to stand on it to reach up.
- Pay attention to the movement of the product.
- Do not attempt to add or remove logs until the piston has stopped in its home position.
- Keep your hands away from moving parts.
- Keep your hands at a safe distance from cracks that open up in the wood. Such cracks may close suddenly and crush or amputate your hands.
- Do not attempt to release a log that has got stuck with your hands.
- It does the job better and more safely when used at the rate for which it was designed. Do not attempt to split logs larger than as specified in the technical data. This could result in a risk of serious personal injury and/or material damage.
- Only use the product for its intended purpose.
- Do not leave the product until it has come to a complete standstill.
- Pull out the plug when the product is not in use. Always pull out the plug before adjusting, replacing parts, cleaning or maintenance.
• Used oil must be disposed of in accordance with local regulations. - Keep the product clean for better and safer work.
- Keep the place where the product is stored locked. Switch off main power switch. Store the product out of the reach of children and unauthorised persons.
- The product must be connected to a power point with a residual current device with a tripping current of 0.03 A.
SYMBOLS
The following symbols are used on the product:
| CE | Approved in accordance with the relevant directives. |
 | Read the instructions before use. |
 | Use safety equipment, such as safety glasses, ear protection and a safety helmet. |
 | Wear safety gloves. |
 | Wear safety shoes. |
 | DANGER: Risk of electric shock. |
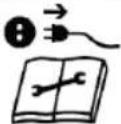 | Unplug the product from the mains before adjusting, replacing parts, cleaning and maintenance. |
 | Keep at a safe distance. |
 | WARNING: Moving parts. |
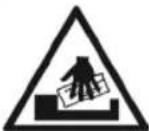 | WARNING: Keep your hands at a safe distance from cracks that open up in the wood. |
EN
 | WARNING: Moving parts. Never allow any part of your body to come between the wood and piston when the piston is moving. |
 | Always recycle used oil. Do not pour oil into drains, the ground or water. |
 | Make sure to carry out the requisite service before using the product. |
 | Check the product before use. |
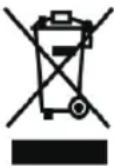 | Recycle discarded product in accordance with local regulations. |
TECHNICAL DATA
| Rated voltage 230 V | ~ 50 Hz |
| Output 2300 W S3 50% | |
| Protection rating IP54 | |
| Splitting force 7 tonnes | |
| Hydraulic pressure 24 MPa | |
| Hydraulic oil volume 2.4 l | |
| Log size Max. length: 52 cm | |
| Diameter*: 3 – 25 cm | |
| Size 110 x 48 x 70.5 cm | |
| Weight 67 kg |
* The specified diameter is only a guide. A thinner log can be more difficult to split, if it has knots or tough grain. On the other hand, thicker logs can be easier to split if they have a smooth grain.
DESCRIPTION
- Blade
- Oil container
- Control lever
- Wheel
- Start inhibitor
- Pusher
- Control lever guard
- Foot
- Upright
- Front leg
- Wheel axle
- Motor cover
- Back leg
FIG. 1
ASSEMBLY
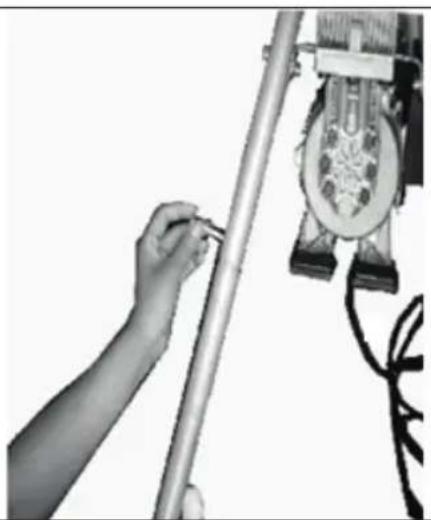
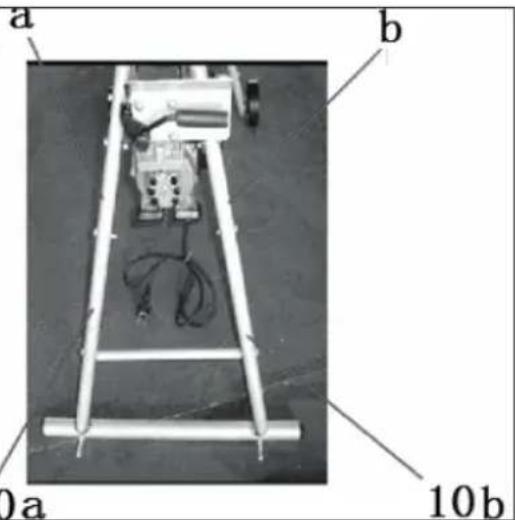
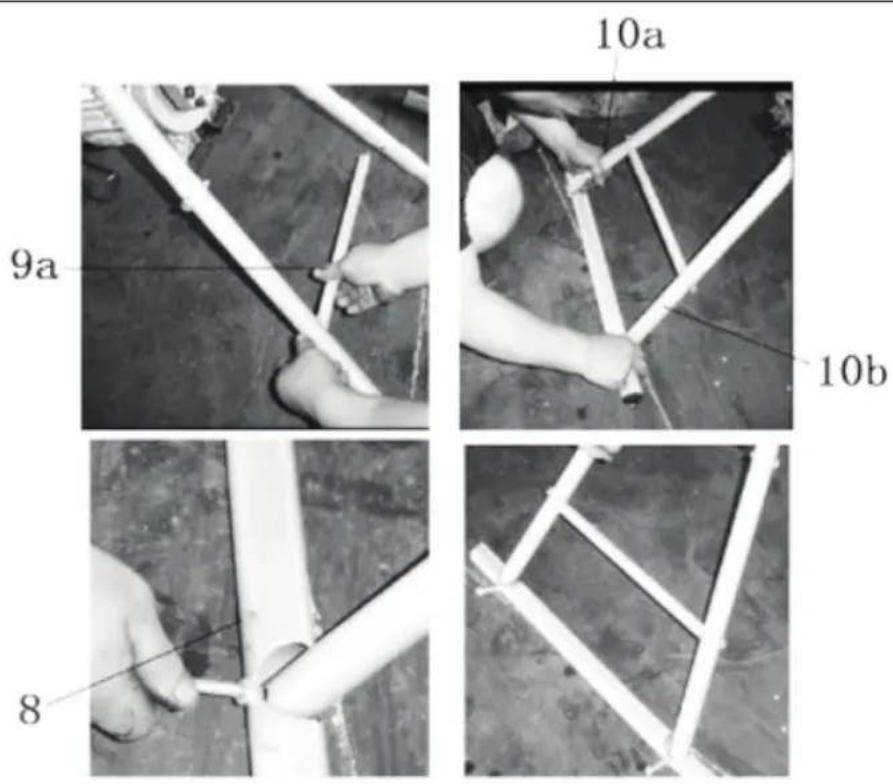
- Fasten the front leg (10a) in the leg fixture (a) and the front leg (10b) in the leg fixture (b) with the nuts and screws.
FIG. 2
FIG. 3
- Align and screw on the upright (9a) between the two front legs (10a and 10b) and then screw the foot (8) on the two front legs (10a and 10b).
FIG. 4
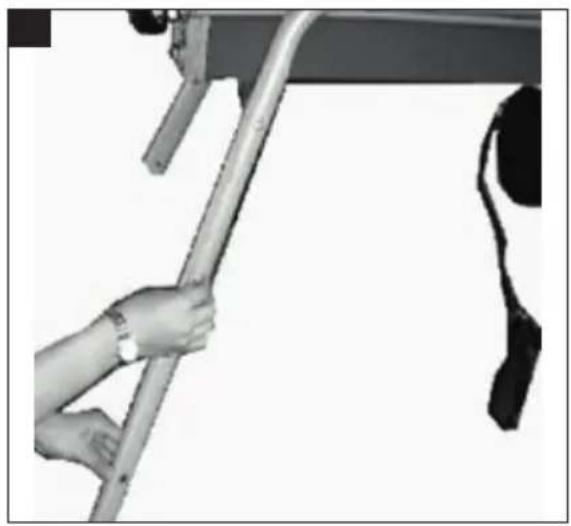
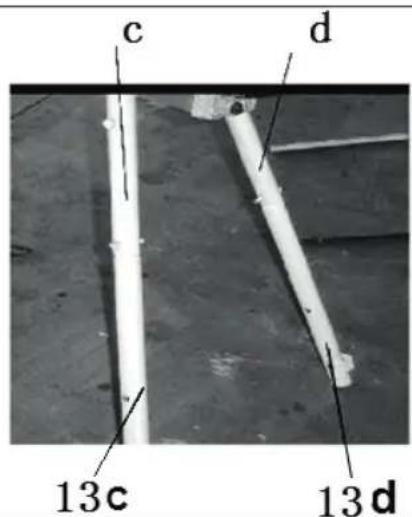
- Fasten the back leg (13c) in the leg fixture (c) and the back leg (13d) in the leg fixture (d) with the nuts and screws.
FIG. 5
FIG. 6
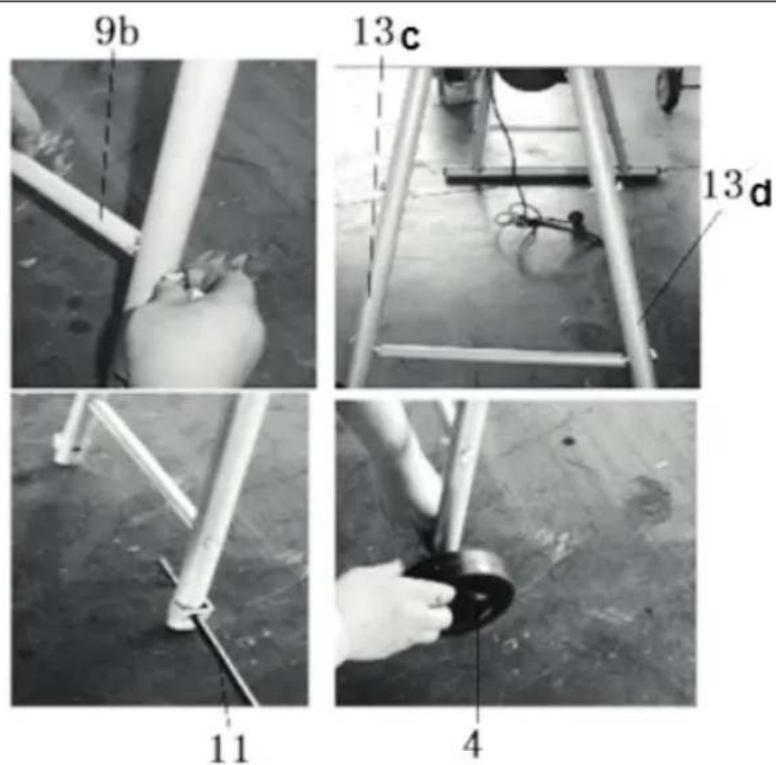
- Align and screw on the upright (9b) between the two back legs (13c and 13d) and then fit the wheel axle (11) in the two back legs, put the wheels on the ends of
EN
the axle with the four spring washers and then fit the wheel caps.
FIG. 7
- Unpack all the accessories shown in the diagram and check that nothing is missing or damaged. Assemble according to the instructions.
FITTING THE GUARD
Component parts
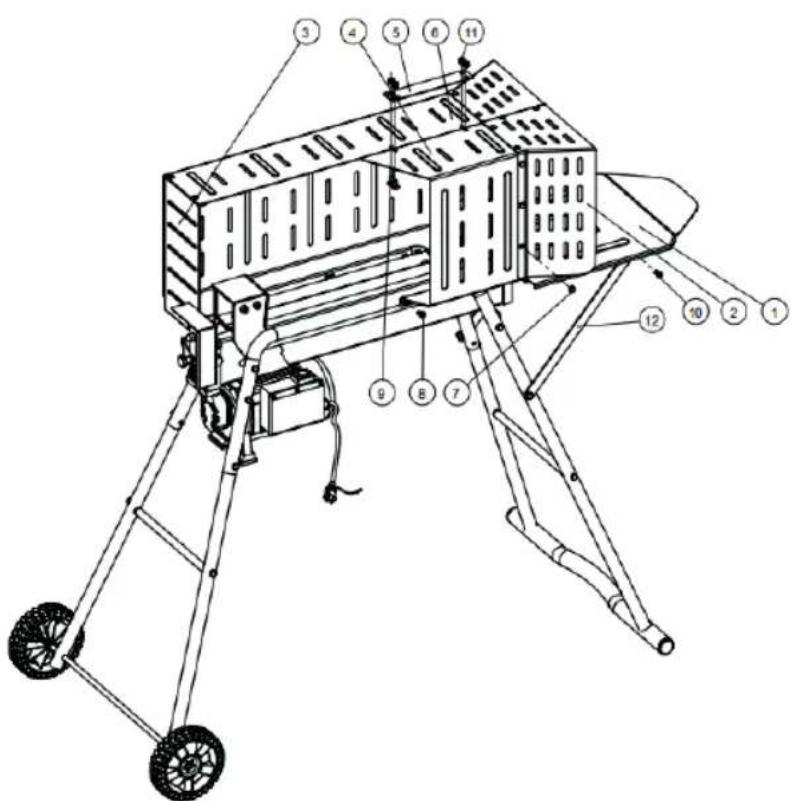
- Log support x1
- Front cover x1
- Back cover x1
- Left cover x1
- Coupling plate x1
- Right cover x1
- Retaining plug x17
- Hex screw M8 x 16 x5
- Carriage screw M8 x 16 x4
- Hex screw M8 x 16 x4
FIG. 8
Assembly
- Fasten the left cover (4) in the screw holes in the left leg with two hex screws M8 x 16 (8) and flat washers, and tighten with a hex key.
- Fasten the right cover (6) in the screw holes in the right leg with three hex screws M8 x 16 (8) and flat washers, and tighten with a hex key.
- Join the left cover (4) and right cover (6) with the coupling plate (5), carriage screw M8 x 16 (9) and the four M8 lock nuts, and tighten with a spanner.
-
Fasten the right cover (4) and left cover (6) in the log support (1) with two hex screws M8 x 16 (10) and nuts, and tighten with a hex key and spanner.
-
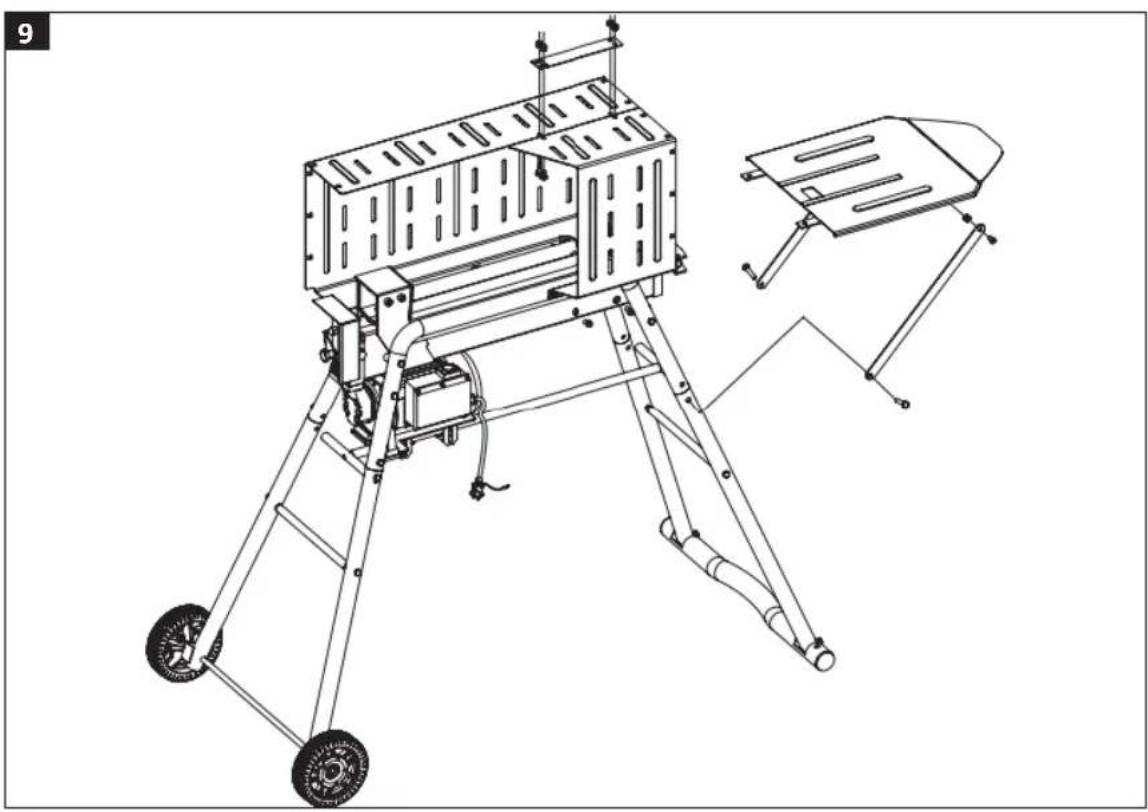
Fasten the outfeed table in the log support (1) with two hex screws M8 x 16 (10) and nuts, and tighten with a hex key and spanner.
- Carefully tap the 17 retaining nylon plugs (7) in place in the holes in front cover (2) and the back cover (3) with a wooden mallet. Carefully tap the retaining plugs (7) in place in the holes in the left and right covers.
FIG. 9
FIG. 10
- This assembly is now complete. If the product does not have extra legs or a stand, put it on a stable workbench with a height of 85 centimetres.
USE
INTENDED USE
The log splitter is only intended for household use. It is intended to be used in ambient temperatures from 5 to 40°C and up to 1000 metres above sea level. The relative humidity should be less than 50% at 40°C. The log splitter can be stored and transported at ambient temperatures from -25 to 55°C.
VENTING
- Before starting the log splitter, undo the vent screw a few turns so that air can flow in and out of the oil tank.
FIG. 11
- The flow of air through the vent hole should be noticeable when the log splitter is in use.
- Before moving the log splitter, check that the vent screw is properly tightened to avoid oil leaking out.
EN
IMPORTANT:
- Compressed air will remain in the hydraulic system if the vent screw is not unscrewed. This will destroy the seals and permanently damage the log splitter.
- Do not adjust the adjusting screw for maximum pressure. The maximum pressure is set at the factory and the adjusting screw is sealed to ensure that the splitting force never exceeds 7 tonnes. If this adjustment is changed there is a risk of serious personal injury and/or material damage, or that the hydraulic pump does not provide sufficient pressure.
HOW TO USE
NOTE:
Check that the screw unions are properly tightened before using the product.
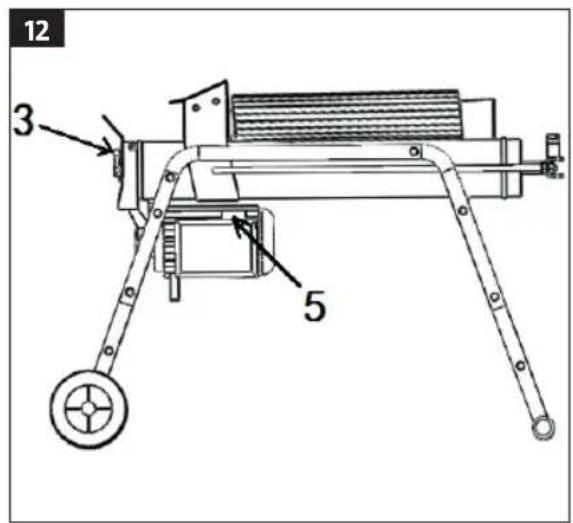
- To ensure the log splitter is safe to use the control system needs both hands to be used at the same time – one hand on the hydraulic control lever and the other on the start inhibitor. The piston stops moving if either the lever or the switch is released. When both the lever and the switch are released the piston starts moving back to the home position. The hydraulic control lever also has a trigger lock, which prevents it from being pressed accidentally. Pull the trigger lock back with your forefinger before pressing the hydraulic control lever forward.
FIG. 12
- Logs should be split along the length of the grain. Never attempt to split a log across the grain: risk of personal injury and/or serious material damage. Never attempt to split two or more logs at the same time. One of them could be thrown out and cause personal injury and/or material damage.
NOTE:
Always place the log firmly on the workbench with the log support. Position the log so that it cannot twist, wobble or slide away during the splitting. Do not put the log on the top part of the blade. This can damage the blade and/or the log splitter.
AVOID OVERHEATING
The hydraulic pump can get very hot after several hours of working with tough logs. This will not damage the product and normal functionality will be restored when the product has cooled. It is, however, very important to avoid overheating the hydraulic oil. Overheating of the oil takes place when attempting to split logs for which the capacity of the product is inadequate – stop the splitting (release the control lever) if the log has not split within 5 seconds.
WARNING!
Do not press the lever down for more than 5 seconds when attempting to split hard logs. Pressing down the lever longer can cause the hydraulic oil to overheat and damage the log splitter. If the log will not split, turn it 90° and try again. If the log still does not split, discard it.
RELEASING LOG THAT HAS JAMMED
- Release both controls.
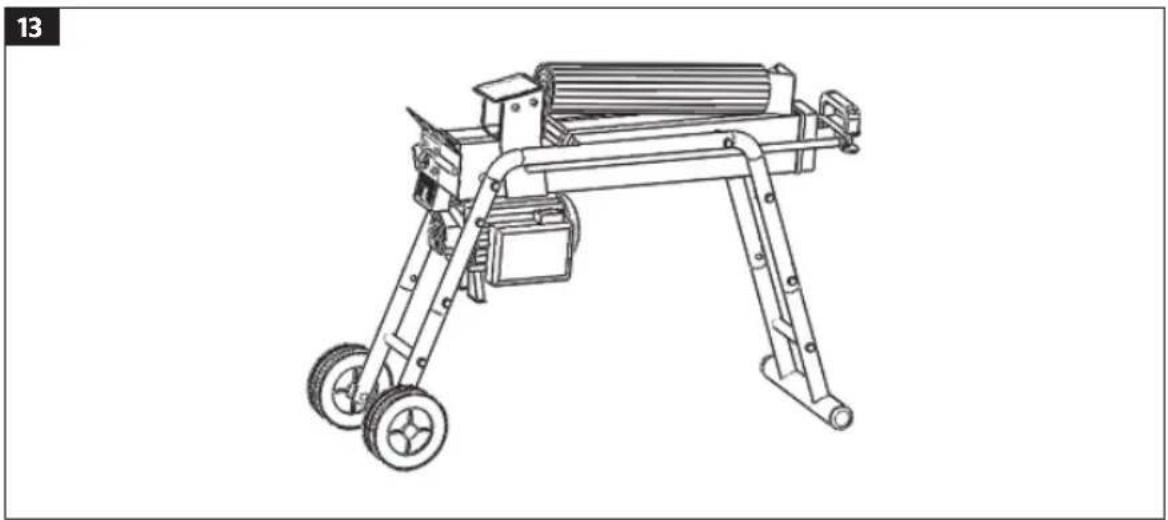
- When the piston has gone back and stopped in the home position, place a wooden wedge under jammed log.
FIG. 13
- Run the piston so that the wedge is pressed in under the jammed log.
- Repeat with thicker wedges until the log comes loose.
NOTE:
Never attempt to knock or tap a jammed log loose. This can damage the log splitter, or cause the log to suddenly come loose and cause personal injury.
MAINTENANCE
CHANGING THE HYDRAULIC OIL
The hydraulic oil in the log splitter should be changed after an interval of 150 working hours. Follow the instructions:
- Switch off the engine and wait until all moving parts have completely stopped.
- Unscrew and remove the oil drain plug.
- Tip up the log splitter on the support legs and let the oil run out into a container that holds at least 2.4 litres.
- Tip up the log splitter on the support legs.
- Fill up with new hydraulic oil.
- Tighten the oil drain plug.
FIG. 14
-
Stand the log splitter up.
-
Check that no oil is leaking out.
IMPORTANT:
Check at regular intervals that the oil level is between the two markings on the dipstick. Top up the hydraulic oil if the level is too low.
The splitting wedge can become blunt in time, and will need to be sharpened. Remove any burrs and damage along the edge with a fine file.
STORAGE
Do as follows before putting the product away after use.
- Unplug the power cord.
- Tighten the oil cap/vent screw.
- Clean the product with a dry cloth.
- Store in a dry and well ventilated place.
TROUBLESHOOTING
| PROBLEM POSSIBLE CAUSE ACTION | ||
| The motor will not start. The over | load protection has tripped. | Allow the motor to cool and then press the reset button for the overload protection. |
| Will not split. Log is not properly in place. Place the log as instructed. | ||
- OPERATING INSTRUCTIONS
- BRUKSANVISNING
- CE
- EU DECLARATION OF CONFORMITY
- EU FÖRSÄKRAN OM ÖVERENSSTÄMMELSE
- EU SAMSVARSERKLÆRING
- DEKLARACJA ZGODNOŚCI UE
- SÄKERHETSANVISNINGAR
- L∅SNE KUBBE SOM HAR SATT SEG FAST
- SKIFTE HYDRAULIKKOLJE
- SYMBOLS
- EN
- DESCRIPTION
- ASSEMBLY
- 7
- FITTING THE GUARD
- Component parts
- 8
- 9
- 10
- USE
- INTENDED USE
- VENTING
- 11
- IMPORTANT:
- HOW TO USE
- NOTE:
- Check that the screw unions are properly tightened before using the product.
- 12
- AVOID OVERHEATING
- WARNING!
- RELEASING LOG THAT HAS JAMMED
- 13
- MAINTENANCE
- CHANGING THE HYDRAULIC OIL
- 14
- STORAGE
Brand : Meec Tools
Model : 009-968
Category : Log splitter