
PNTSA 20-Li A1 - Vacuum Cleaner PARKSIDE - Free user manual and instructions
Find the device manual for free PNTSA 20-Li A1 PARKSIDE in PDF.


| Product type | Cordless wet and dry vacuum |
| Brand | Parkside |
| Model | PNTSA 20-Li A1 |
| Rated voltage | 20 V (compatible with X 20 V Team battery) |
| Protection type | IPX4 |
| Suction power | 9 kPa (90 mbar) |
| Gross tank capacity | 10 L |
| Usable volume for water | 5 L |
| Weight (with accessories) | approx. 4.5 kg |
| Functions | Wet/dry vacuuming, blowing |
| Included accessories | 3-part suction tube, flexible hose, crevice tool, floor nozzle with brush and rubber strips, upholstery nozzle, paper filter bag, pleated filter, wall mount |
| Filters | Paper filter bag and pleated filter (washable) |
| Safety | Automatic shut-off via float (water suction), IPX4 protection |
| Warranty | 3 years (wear parts excluded) |
| Repairability | After-sales service for repairs, spare parts available (ref. see manual) |
| Cleaning and maintenance | Clean tank with damp cloth, replace bag, clean pleated filter |
| Use | Indoor: house, workshop, garage, car |
Frequently Asked Questions - PNTSA 20-Li A1 PARKSIDE
User questions about PNTSA 20-Li A1 PARKSIDE
0 question about this device. Answer the ones you know or ask your own.
Ask a new question about this device
Download the instructions for your Vacuum Cleaner in PDF format for free! Find your manual PNTSA 20-Li A1 - PARKSIDE and take your electronic device back in hand. On this page are published all the documents necessary for the use of your device. PNTSA 20-Li A1 by PARKSIDE.
USER MANUAL PNTSA 20-Li A1 PARKSIDE
natural_image
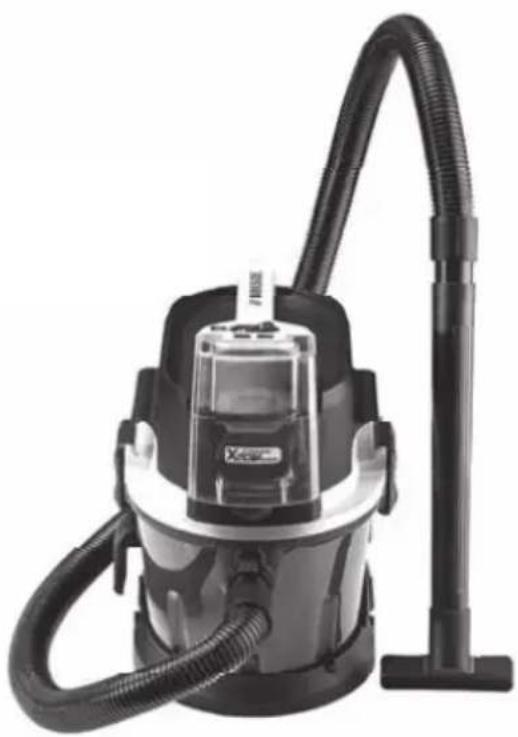
Black and white photo of a vacuum cleaner with coiled hose and handle (no visible text or symbols)
AKKU-NASS-/TROCKENSAUGER/ CORDLESS WET/ DRY VACUUM CLEANER/ ASPIRATEUR EAU/POUSSIERE SANS FIL PNTSA 20-Li A1
DE AT CH
AKKU-NASS-/TROCKENSAUGER
Translation of the original instructions
NL BE
ACCU-NAT-/DROOGZUIGER
Before reading, unfold the page containing the illustrations and familiarise yourself with all functions of the device.
FR BE
natural_image
Close-up of a black plastic component with two screws and a labeled part (13), no text or symbols present.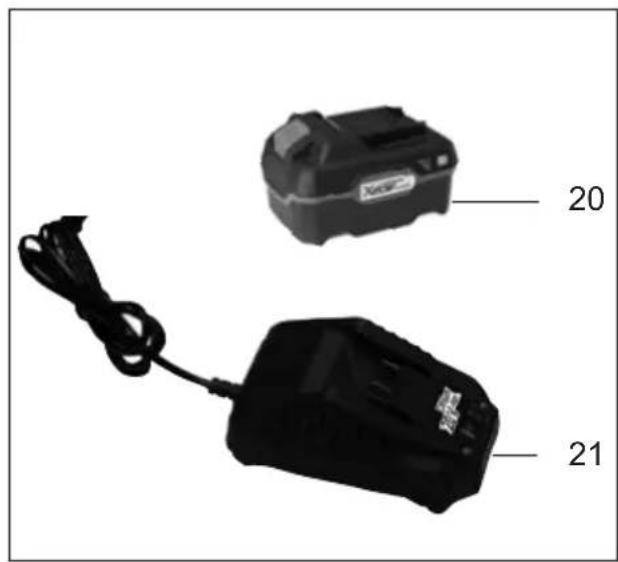
natural_image
Two black electronic devices labeled 20 and 21 connected by a cable, shown against a white background (no text or symbols on the devices themselves)Inhalt
Einleitung......4
Bestimmungsgemäße
Verwendung......4
Service-Center....13
Importeur 13
Application ......14
General description......15
Contents 15
Overview....15
Functional description....15
Technical data....16
Safety information......16
Symbols used in the instructions .....16
Symbols on the device....16
General notes on safety 16
Assembly....17
Operation 17
Switching on/off....17
Nozzle usage....18
Wet vacuuming 18
Dry vacuuming 18
Suction function 18
Blowing 19
Cleaning/Maintenance 19
Cleaning the appliance .....19
Maintenance 19
Storage....19
Disposal/
Environmental protection ......19
Trouble shooting 20
Guarantee 20
Repair Service......21
Service-Center......22
Importer 22
Replacement parts/Accessories ..22
Translation of the original EC declaration of conformity....74
Exploded Drawing 80
Introduction
Congratulations on the purchase of your new device. With it, you have chosen a high quality product.
During production, this equipment has been checked for quality and subjected to a final inspection. The functionality of your equipment is therefore guaranteed. It cannot be ruled out that residual quantities of water or lubricants will remain on or in the equipment/hose lines in isolated cases. This is not a fault or defect and it represents no cause for concern.

The operating instructions constitute part of this product. They contain important information on safety, use and disposal.
Before using the product, familiarise yourself with all of the operating and safety instructions. Use the product only as described and for the applications specified.
Keep this manual safely and in the event that the product is passed on, hand over all documents to the third party.
Application
The appliance is intended for domestic wet and dry vacuuming in, for example, the house, work room, car or garage. The appliance can also be used as a blower or to suction up water. This equipment is not suitable for commercial use.
Vacuuming of flammable or explosive materials or those which endanger health is prohibited. The manufacturer will not be held responsible for injuries resulting from use which does not comply with the directions, or from incorrect use.
General description
The illustration of the principal functioning parts can be found on the front and back foldout pages.
Contents
Unpack the appliance and check that it is complete. The appliance is supplied with the motor head fitted (A 1). To remove the motor head, open ☐ the securing clips (A 8).
- Motor housing
- Waste container
- 3-part vacuum tube
- Suction hose
- Handgrip section
- Paper filter bag
- Housekeeping nozzle
- Floor nozzle with
- turnable insert attachment
with brush and rubber lip, for vacuuming carpets and smooth surfaces (already mounted) - Crevice nozzle
- Wall bracket
- 2 cross-head screws
- Wet and dry vacuum cleaner operating instructions
- Charger and rechargeable battery operating instructions
Dispose of the packaging material properly.
Overview

1 Motor housing
2 Carrying handle
3 On/off switch
4 Battery bay cover
5 Suction connection
6 Waste container
7 Hook for wall bracket
8 2 locking clips
9 Blower connection (not visible)
10 3-part vacuum tube
11 Handgrip section
12 Suction hose
13 Wall bracket
14 Fixing screws for wall bracket
15 Crevice nozzle
16 Housekeeping nozzle
17 Floor nozzle with
18 turnable insert attachment with brush and rubber lip, for vacuuming carpets and smooth surfaces (already mounted)
19 Paper filter bag
20 Rechargeable battery
21 Charger

22 Folded filter closure
23 Folded filter

24 Accessory holders
Functional description
The wet and dry vacuum cleaner is equipped with a robust plastic container for waste collection. The castors make the appliance very easy to manoeuvre. The suction flow is switched off by a float during wet vacuuming once the waste tank is full. The appliance is also equipped with a blower function.
The following describes the function of the operating parts.
Technical data
Cordless Wet & Dry Vacuum Cleaner....PNTSA 20-Li A1
Rated voltage U....20 V== Protection category....IPX4 Suction force....9 kPA (90 mbar) Waste tank capacity (gross)....10 l Usable container volume (water)....5 l Weight (incl. all accessories).....ca. 4.5 kg
Technical and visual modifications may be carried out due to further development without prior notice. All dimensions, information and statements provided in these Operating Instructions are therefore subject to amendment. Legal claims which are based on the Operating Instructions can therefore not be recognised.
Safety information
This appliance can be used by children aged from 8 years and above and persons with reduced physical, sensory or mental capabilities or lack of experience and knowledge if they have been given supervision or instruction concerning use of the appliance in a safe way and understand the hazards involved. Children shall not play with the appliance. Cleaning and user maintenance shall not be made by children without supervision.
Symbols used in the instructions

Hazard symbols with information on prevention of personal injury and property damage.

Precaution symbol (explanation of precaution instead of exclamation mark) with information on prevention of harm/damage.

Notice symbol with information on how to handle the device properly.
Symbols on the device
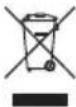
Machines are not to be place with domestic waste.
General notes on safety

Please read the following safety guidelines in order to avoid risk of fire, electric shock, personal injury and damage to objects:
To avoid accidents and injuries:
- Never leave a machine which is ready for operation unattended at the workplace.
• People and animals must not be vacuumed with the machine. - Do not aim the suction hose and nozzle at yourself or others during use, particularly not at the eyes and ears; there is a risk of injury.
- Do not vacuum any hot, incan - descent, flammable, explosive materials, or those which endanger health. This includes hot
ashes, petrol, solvents, acids or caustic solutions. Personal injury could occur.
- Nozzles and suction tubes must not reach head level whilst in use. Personal injury could occur.
To avoid accidents and injuries from electric shocks:
- Turn off the device and remove the battery:
- when you are not using the device,
- transporting it or leaving it un- attended;
- when you are checking the device, cleaning it or removing blockages;
- when you are carrying out cleaning or maintenance work or replacing accessories;
The following states how damage to the appliance and possible injury to people can be avoided:
- Ensure that the machine is correctly assembled and the filters are in the correct position.
- Do not use without the filter. This could damage the machine.
-
Only use original spare parts and accessories delivered and recommended by our Service Centre (see "Spare parts/Accessories"). The use of parts by other manufacturers immediately renders the guarantee void.
-
Only have repairs carried out at our authorised customer service points.
- Observe the instructions for cleaning and maintenance of the machine.
- Store the appliance in a dry place and out of reach of children.

Warning! Observe the safety information in the operating instructions for your Parkside X 20 V Team series rechargeable battery.
Assembly
- Insert the paper filter bag (19) (see C):
- Place the motor head (1) onto the dirt container (6) and lock it into place using the locking clips (8).
- Attach the suction hose (12) and accessories.
Operation

Fully unwind the suction hose (A 12) before commencing work.
Switching on/off
Switching on the vacuum:
On/off switch (A 3) in position "1".
Switching off the vacuum:
On/off switch (A 3) in position "O".
GB IE
Nozzle usage
Crevice nozzle ( A 15):
for vacuuming gaps, corners and radiators.
Housekeeping nozzle (A 16)
For wet and dry vacuuming, for removing stubborn dirt.
Floor nozzle (A 17) with insert attachment (A 18):
for wet and dry vacuuming of smooth surfaces and fitted carpets.
Floor nozzle (A 17) without insert attachment (A 18):
for wet and dry vacuuming of fitted carpets and for removing persistent dirt.
- Press the clips on the right and left side of the floor nozzle (A 17) and remove the insert attachment (A 18).

Mind that sensitive surfaces might get scratched if the insert attachment is not used.
A
Wet vacuuming
-
Remove the paper filter (19) and folded filter (B 23).
-
Suctioning up (draining) water: place the suction hose (A 12) on the handle (A 11) into the water tank and suction up the water.
-
Empty the waste container immediately after vacuuming because it is not designed to store liquids (see "Cleaning/Maintenance").

Never reach into the water to be suctioned up. Danger of electric shock.

If the waste container is full, a float closes the suction opening, and the vacuum operation is interrupted. Switch off the machine and empty the waste tank.

If foam or liquid exits, switch off the machine immediately.

Dry vacuuming
Vacuuming with the paper filter bag:
Insert the material filter
Pull the paper filter bag (19) with the reinforcer upwards over the internal suction fitting (see arrow ). The sealing ring at the filter bag opening must completely surround the lip on the suction pipe.
Vacuuming fine dust:
Specific suction processes (e.g. grinding of paints and lacquers, milling or drilling walls, grinding or drilling hard wood) can pose a risk from hazardous dust.

Suction function
To perform suction, insert the suction hose (12) into the connection (5) on the motor head.
E
Blowing

Operation without the use of a filter is recommended.
To blow, plug the suction hose (12) onto the connection (9) on the motor head.
Cleaning/Maintenance
Cleaning the appliance

Never hose the appliance down with water. Never use aggressive cleaning agents or solvents. This could damage the appliance.
• After use, empty the waste tank ( A 6).
- Clean the waste tank with a damp cloth.
- Replace the paper filter bag ( A 19) when full (see "Replacement parts/Accessories" for reordering).
- Tap the folded filter and clean it with a brush or hand-brush.
Maintenance
• The equipment is maintenance free.
Storage
E
- Insert the separated vacuum tubes (10) into the accessory holder (24).
- Wind the vacuum hose (12) around the device and plug the handle section (11) into a vacuum tube (10).
- Store the appliance in a dry place and out of reach of children.
- You can suspend the device from the wall bracket (A 13) using the wall bracket hook (A 7).

Do not suspend the device from the wall bracket when fully loaded (e.g. full with water).
- To suspend from the wall, attach the wall bracket (A 13) to the wall using the two screws (A 14) and dowels. Ensure that the wall bracket (A 13) is firmly attached right away after mounting and on a regular basis thereafter.

When drilling, be careful not to damage any supply lines. Use suitable search devices to find these or consult an installation plan for guidance. Contact with electrical cables can lead to electric shock and fire. Contact with a gas pipe can result in an explosion. Damage to a water pipe can lead to property damage and electric shock.
Disposal/Environmental protection
Be environmentally friendly. Return the tool, accessories and packaging to a recycling centre when you have finished with them.
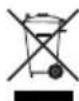
Machines must not be disposed of with household refuse.
Take the machine to a recycling point. The waste plastic and metal parts can be separated, accurately graded and passed on for recycling. Contact our Service Centre for more details.
Defective units returned to us will be disposed of for free.
Trouble shooting
| Problem Possible cause Fault correction | ||
| Device does not start | Defective on/off switch (A 3) | Repair through customer service |
| Worn carbon brushes | ||
| Defective motor | ||
| Low or lack of suction | Hose system (A 12) or jets (A 15/16/17) blocked | Remove obstructions and blockages |
| Suction pipe (A 10) assembled incorrectly | Assemble suction pipe correctly | |
| Container (A 6) open | Close container | |
| Container (A 6) full | Empty container | |
| Filter (A 19/23) full or clogged | Empty, clean or replace filter | |
| Dust or dirt is blow out of the device | Filter (A 19/23) is not or not correctly assembled | Use missing filters or check the correct position of the filter |
Guarantee
Dear Customer,
This equipment is provided with a 3-year guarantee from the date of purchase. In case of defects, you have statutory rights against the seller of the product. These statutory rights are not restricted by our guarantee presented below.
Terms of Guarantee
The term of the guarantee begins on the date of purchase. Please retain the original receipt. This document is required as proof of purchase.
If a material or manufacturing defect occurs within three years of the date of purchase of this product, we will repair or replace – at our choice – the product for you free of charge. This guarantee requires the defective equipment and proof of purchase to be presented within the three-year period with a brief written description of what constitutes the defect and when it occurred.
If the defect is covered by our guarantee, you will receive either the repaired product
or a new product. No new guarantee period begins on repair or replacement of the product.
Guarantee Period and Statutory Claims for Defects
The guarantee period is not extended by the guarantee service. This also applies for replaced or repaired parts. Any damages and defects already present at the time of purchase must be reported immediately after unpacking. Repairs arising after expiry of the guarantee period are chargeable.
Guarantee Cover
The equipment has been carefully produced in accordance with strict quality guidelines and conscientiously checked prior to delivery.
The guarantee applies for all material and manufacturing defects. This guarantee does not extend to cover product parts that are subject to normal wear and may therefore be considered as wearing parts (e.g. filters or attachments) or to cover damage to breakable parts (e.g. switches). This guarantee shall be invalid if the product has been damaged, used incorrectly or not maintained. Precise adherence to all of the instructions specified in the operating manual is required for proper use of the product. Intended uses and actions against which the operating manual advises or warns must be categorically avoided. The product is designed only for private and not commercial use. The guarantee will be invalidated in case of misuse or improper handling, use of force, or interventions not undertaken by our authorised service branch.
Processing in Case of Guarantee
To ensure efficient handling of your query, please follow the directions below:
- Please have the receipt and identification number (IAN 310656) ready as proof of purchase for all enquiries.
- Please find the item number on the rating plate.
- Should functional errors or other defects occur, please initially contact the service department specified below by telephone or by e-mail. You will then receive further information on the processing of your complaint.
- After consultation with our customer service, a product recorded as defective can be sent postage paid to the service address communicated to you, with the proof of purchase (receipt) and specification of what constitutes the defect and when it occurred. In order to avoid acceptance problems and additional costs, please be sure to use only the address communicated to you. Ensure that the consignment is not sent carriage forward or by bulky goods, express or other special freight. Please send the equipment inc. all accessories supplied at the time of purchase and ensure adequate, safe transport packaging.
Repair Service
For a charge, repairs not covered by the guarantee can be carried out by our service branch, which will be happy to issue a cost estimate for you.
We can handle only equipment that has been sent with adequate packaging and postage.
Attention: Please send your equipment to our service branch in clean condition and with an indication of the defect.
Equipment sent carriage forward or by bulky goods, express or other special freight will not be accepted.
We will dispose of your defective devices free of charge when you send them to us.
Service-Center

Service Great Britain
Tel.: 0800 404 7657
(£ 0.10/Min.)
E-Mail: grizzly@lidl.co.uk
IAN 310656

Service Ireland
Tel.: 1890 930 034
(0,08 EUR/Min., (peak))
(0,06 EUR/Min., (off peak))
E-Mail: grizzly@lidl.ie
IAN 310656
Importer
Please note that the following address is not a service address. Please initially contact the service centre specified above.
Replacement parts/Accessories
Spare parts and accessories can be obtained at www.grizzly-service.eu
If you do not have internet access, please contact the Service Centre via telephone (see "Service-Center" Page 22). Please have the order number mentioned below ready.
| Position instruction manual | Position exploded drawing | Description Use Order No. | |
| A 12 | 8 | Vacuum hose | 91105189 |
| A 23 2 | fluted filter | 91105185 | |
| A 19 | 14 | Paper filter bags, pack of 5 | 30250146 |
| A 19 | 14 | Paper filter bags, 1 unit 30250147 |
Sommaire
Introduction ......23
Service Réparations ......33
Service-Center....33
Importeur ......33
Service-Center......43
Importeur ....43
Service-Center....53
Importer 53
Service-Center......62
Dovozce....62
Service-Center....71
Dovozca....71
Translation of the original EC declaration of conformity
* The object of the declaration described above satisfies the provisions of Directive 2011/65/EU of the European Parliament and the Council of 8 June 2011 on limiting the use of certain harmful substances in electrical and electronic appliances.
** The last two digits of the year in which the CE marking was affixed.
  | |
| Nous certifions par la présente que leAspirateur eau/poussiere sans fil série PLG 20 A1Numéro de série201809000001 - 201812074919est conforme aux directives UE actuellement en vigueur : | |
| 2014/30/EU • 2014/35/EU • 2011/65/EU* | |
| En vue de garantir la conformité les normes harmonisées ainsi que les normes et décisions nationales suivantes ont été appliquées : | |
| EN 60335-1:2012/A13:2017 • EN 60335-2-2:2010/A1:2013EN 55014-1:2006/A2:2011 • EN 55014-2:2015EN 62233:2008 | |
| Le fabricant assume seul la responsabilité d’établir la présente déclaration de conformité (18)** : | |
 Grizzly Tools GmbH & Co. KGStockstädter Straße 2063762 Großostheim, Germany08.12.2018 Grizzly Tools GmbH & Co. KGStockstädter Straße 2063762 Großostheim, Germany08.12.2018 |  Christian Frank(Chargé de documentation) Christian Frank(Chargé de documentation) |
 | Vertaling van de originele CE-conformiteitsverklaring |
| Hiermede bevestigen wij dat deAccu-nat-/droogzuigerbouwserie PNTSA 20 Li A1Serienummer201809000001 - 201812074919is overeenkomstig met de hierna volgende, van toepassing zijnde EU-richtlijnen: | |
| 2014/30/EU • 2014/35/EU • 2011/65/EU* | |
| Om de overeenstemming te waarborgen, werden de hierna volgende, in overeenstemming gebrachte normen en nationale normen en bepalingen toegepast: | |
| EN 60335-1:2012/A13:2017 • EN 60335-2-2:2010/A1:2013EN 55014-1:2006/A2:2011 • EN 55014-2:2015EN 62233:2008 | |
| De exclusieve verantwoordelijkheid voor de uitgifte van deze conformiteitsverklaring (18)** wordt gedragen door de fabrikant: | |
 Grizzly Tools GmbH & Co. KGStockstädter Straße 2063762 Großostheim, Germany08.12.2018 Grizzly Tools GmbH & Co. KGStockstädter Straße 2063762 Großostheim, Germany08.12.2018 |  Christian FrankDocumentatiegelastigde Christian FrankDocumentatiegelastigde |
- AKKU-NASS-/TROCKENSAUGER/ CORDLESS WET/ DRY VACUUM CLEANER/ ASPIRATEUR EAU/POUSSIERE SANS FIL PNTSA 20-Li A1
- AKKU-NASS-/TROCKENSAUGER
- ACCU-NAT-/DROOGZUIGER
- FR BE
- Inhalt
- Introduction
- Application
- General description
- Contents
- Overview
- Functional description
- Technical data
- Cordless Wet & Dry Vacuum Cleaner....PNTSA 20-Li A1
- Safety information
- Symbols used in the instructions
- Symbols on the device
- General notes on safety
- To avoid accidents and injuries:
- To avoid accidents and injuries from electric shocks:
- The following states how damage to the appliance and possible injury to people can be avoided:
- Assembly
- Operation
- Switching on/off
- Switching on the vacuum:
- Switching off the vacuum:
- GB IE
- Nozzle usage
- Crevice nozzle ( A 15):
- Housekeeping nozzle (A 16)
- Floor nozzle (A 17) with insert attachment (A 18):
- Floor nozzle (A 17) without insert attachment (A 18):
- A
- Wet vacuuming
- Never reach into the water to be suctioned up. Danger of electric shock.
- Dry vacuuming
- Vacuuming with the paper filter bag:
- Insert the material filter
- Vacuuming fine dust:
- Suction function
- E
- Blowing
- Cleaning/Maintenance
- Cleaning the appliance
- Maintenance
- Storage
- Disposal/Environmental protection
- Trouble shooting
- Guarantee
- Terms of Guarantee
- Guarantee Period and Statutory Claims for Defects
- Guarantee Cover
- Processing in Case of Guarantee
- Repair Service
- Service-Center
- Service Great Britain
- Service Ireland
- Importer
- Replacement parts/Accessories
- Sommaire
- Translation of the original EC declaration of conformity
Brand : PARKSIDE
Model : PNTSA 20-Li A1
Category : Vacuum Cleaner