
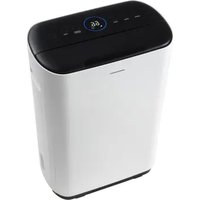
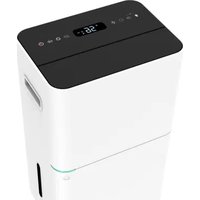
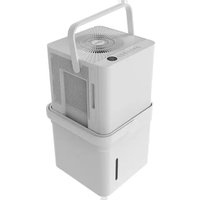
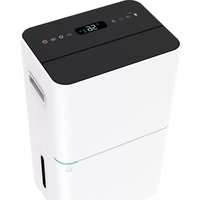
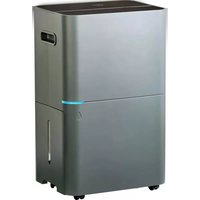
D 625 - Dehumidifier QLIMA - Free user manual and instructions
Find the device manual for free D 625 QLIMA in PDF.


| Type | Dehumidifier |
| Brand | Qlima |
| Model | D 625 |
| Power Consumption (nom/max) | 0.30-0.37 kW |
| Power Supply | 220-240 V / ~50 Hz |
| Current (nom.) | 1.66 A |
| Dehumidifying Capacity (30°C, 80% RH) | 25 L/24h |
| Dehumidifying Capacity (27°C, 60% RH) | 14 L/24h |
| Water Tank Capacity | 4 L |
| Air Flow (nom.) | 173 m³/h |
| Recommended Room Size | 140-165 m³ |
| Operating Temperature Range | 5-35°C |
| Automatic Defrost | Yes |
| Hygrostat | Yes |
| Compressor Type | Reciprocating |
| Refrigerant / Charge | R134a / 184 g |
| Dimensions (W x D x H) | 346 x 253 x 590 mm |
| Net Weight | 14.0 kg |
| Sound Pressure Level | 39 dB(A) |
| Protection Rating | IPX4 |
| Fuse Rating | 250V, 10A |
| Modes | Dry (continuous) and Dehumidification (40%-70% RH) |
| Timer (On/Off) | 1H, 2H, 4H, 8H |
| Fan Speeds | Low, High |
| Filter | 3-layer (Screen, 3M HAF, Activated Carbon) |
| Drainage Options | Manual bucket or continuous drain hose (15 mm included) |
Frequently Asked Questions - D 625 QLIMA
User questions about D 625 QLIMA
0 question about this device. Answer the ones you know or ask your own.
Ask a new question about this device
Download the instructions for your Dehumidifier in PDF format for free! Find your manual D 625 - QLIMA and take your electronic device back in hand. On this page are published all the documents necessary for the use of your device. D 625 by QLIMA.
USER MANUAL D 625 QLIMA
natural_image
White Qlima air conditioner unit with metallic grille and front panel (no visible text or symbols on body)guarantee
YEARS
| DK | BETJENINGSMANUAL | 2 |
| FIN | KÄYTTÖOHJE | 16 |
| GB | OPERATING MANUAL | 30 |
| N | BRUKSANVISNING | 44 |
| PL | INSTRUKCJA OBSŁUGI | 56 |
| S | INSTRUKTIONSBOK | 70 |
1 LÆS VENLIGST BRUGSANVISNINGEN F∅RST.
2 HVIS DU ER I TVIVL OM NOGET, SKAL DU KONTAKTE DIN FORHANDLER.
VIGTIGE KOMPONENTER

BEMÆRK!
METODE 1 - MANUEL T∅MNING
Anmærkninger:

natural_image
Technical line drawing of a mechanical device with no visible text or symbols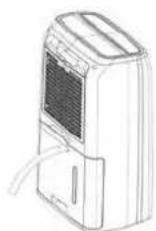
DK
BEMÆRK!

- LUE KÄYTTÖOHJE ENSIN.
- JOS OLET EPÄVARMA JOSTAIN ASIASTA, OTA YHTEYTTÄ JÄLLEENMYYJÄÄN.
TÄRKEÄT KOMPONENTIT

HUOM!
NÄPPÄIMISTÖN TOIMINNOT JA NIMET
VAIHTOEHTO 1: TYHJENNYS MANUAALISESTI
Huomautuksia:
natural_image
Technical line drawing of a mechanical device with no visible text or symbolsVAIHTOEHTO 2: TYHJENNYSLETKU
HUOM!

1 PLEASE READ THE USER'S MANUAL FIRST.
2 IF YOU HAVE ANY DOUBTS, CONSULT YOUR DEALER.
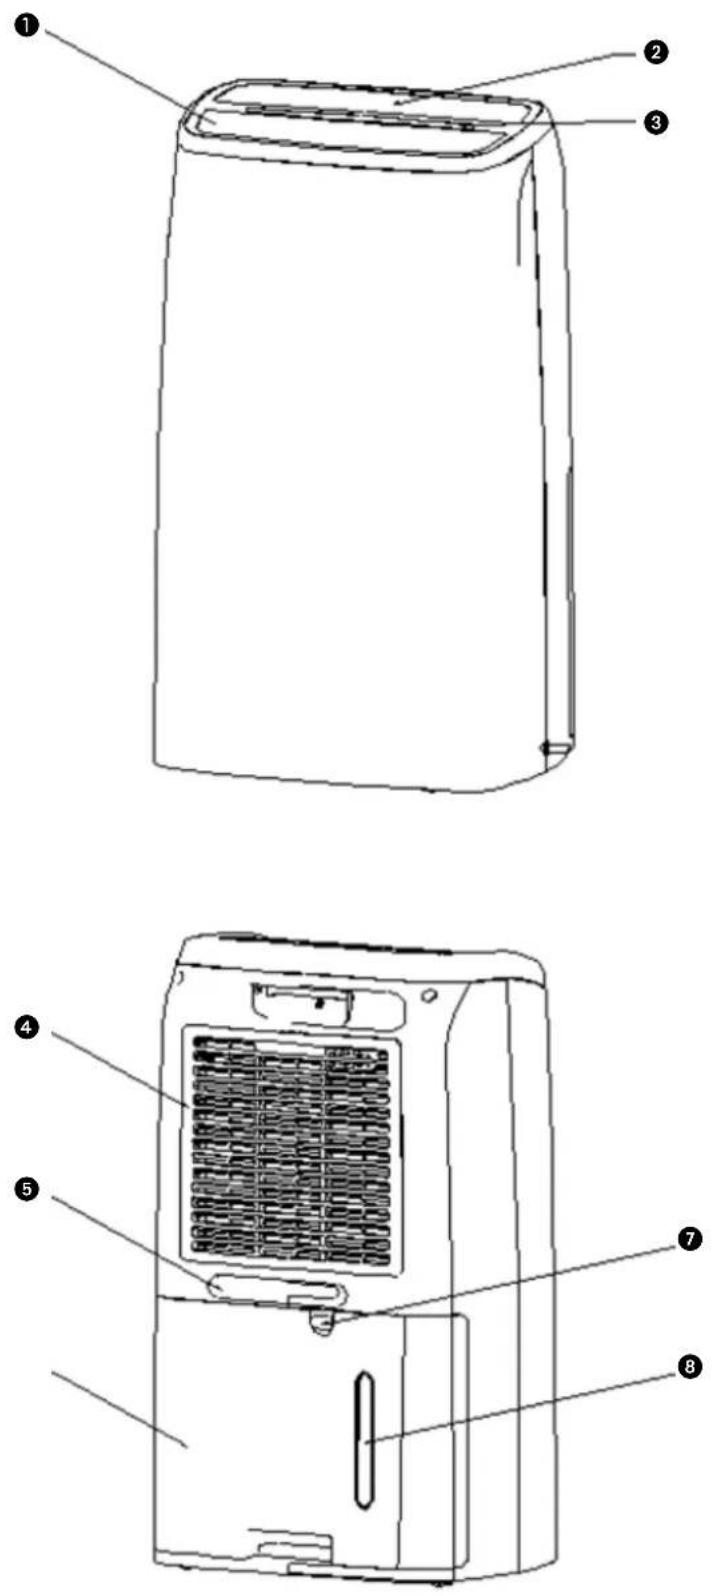
IMPORTANT COMPONENTS
① Louver
② Control panel
③ Indication light bar
④ Air Intake/Filter
⑤ Cord storage
6 Water Tank
⑦ Continuous drain connection
⑧ Water level indicator
Read this user manual carefully before using the appliance and keep it for future reference. Install this device only when it complies with local/national legislation, ordinances and standards. This product is intended to be used as a dehumidifier in residential houses and is only suitable for use in normal household conditions, indoors in living room, kitchen, bathroom and garage. This unit is only suitable for earthed sockets, connection voltage 220-240 V. / \~50 Hz.
GENERAL
- To obtain optimum performance from your dehumidifier, do not place it near a radiator or any other heat source.
- Ensure that all windows are closed in order to achieve maximum efficiency.
- The capacity of the dehumidifier depends on the temperature and the humidity in the room. At lower temperatures, less moisture will be removed.
- Ensure that the screen filter is kept clean. This prevents unnecessary power consumption and guarantees optimum efficiency.
- If the power supply has been interrupted, the dehumidifier will restart after three minutes. The automatic delay protects the compressor.

IMPORTANT
The device MUST always have an earthed connection. If the power supply is not earthed, you may not connect the unit. The plug must always be easily accessible when the unit is connected. Read these instructions carefully and follow the instructions.
Before connecting the unit, check the following:
- The voltage supply must correspond with the mains voltage stated on the rating label.
- The socket and power supply must be suitable for the current stated on the rating label.
- The plug on the cable of the device must fit into the wall socket.
- The device must be placed on a flat and stable surface.
The electricity supply to the device must be checked by a recognised professional if you have any doubts regarding the compatibility.
- This appliance is not intended for use by persons (including children) with reduced physical, sensory or mental capabilities, or lack of experience and knowledge, unless they have been given supervision or instruction concerning use of the appliance by a person responsible for their safety.
- This device is manufactured according to CE safety standards. Nevertheless, you must take care, as with any other electrical device.
- Do not cover the air inlet and/or outlet.
- Empty the water reservoir before moving the unit.
- Never allow the device to come into contact with chemicals.
- Never submerge the unit in water.
- Do not insert objects into the openings of the unit.
- Always remove the plug from the electric power supply before cleaning or replacing the unit or components of the unit.
- Never use an extension cable to connect the device to the electric power supply. If there is no suitable, earthed wall socket available, have one installed by a recognised electrician.
- Children should be supervised to ensure that they do not play with the appliance.
- Have any repairs only carried out by a recognised service engineer or your supplier. Follow the instructions for use and maintenance as indicated in the user manual of this device.
- Always remove the plug of the unit from the wall socket when it is not in use.
- If the power cable is damaged it must be replaced by the manufacturer, its customer service department or persons with comparable qualifications in order to prevent danger.
- This appliance can be used by children aged from 8 years and above and persons with reduced physical, sensory or mental capabilities or lack of experience and knowledge if they have been given supervision or instruction concerning use of the appliance in a safe way and understand the hazards involved.
• Children shall not play with the appliance.
- Cleaning and user maintenance shall not be made by children without supervision.


ATTENTION!
- Never use the device with a damaged power cord, plug, cabinet or control panel. Never trap the power cord or allow it to come into contact with sharp edges.

ATTENTION!
- Failing to follow the instructions may lead to nullification of the guarantee on this device.
THE CONTROL PANEL
- Lowest ambient working condition: 5^ / 40% relative humidity
- Highest ambient working condition: 35^ / 90% relative humidity

NOTE!
- Water bucket must be correctly installed for the dehumidifier to operate.
- Do not remove the bucket while unit is in operation.
- If you want to use drain hose to drain water away, please install the hose according to section "Drainage method".
- Each time pressing the effective button on the control panel will give out a "beep" sound.
- When tuning on the unit, the running indicator is ON. Running indicator is OFF under standby status.
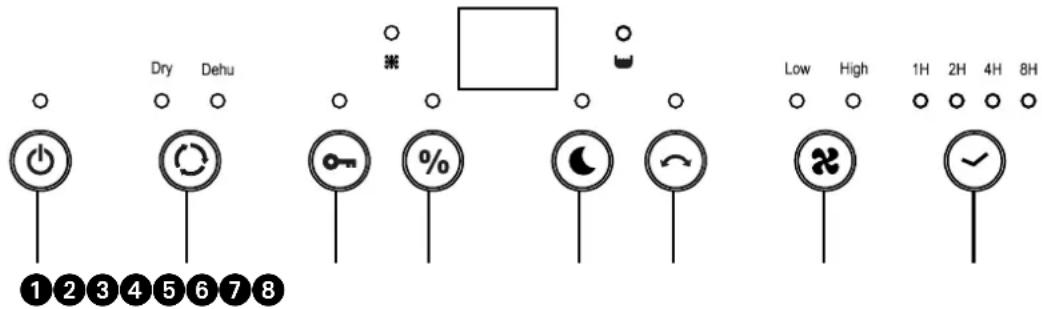
FUNCTIONS & NAME OF KEY PADS
① (On/Off): Switch on/off the power
2 Mode: Press the button to set automatic drying (Dry) or dehumidification (Dehu).
3 Lock: Press to lock the keys
4 % Set: To set CO (continuous operation) or desired humidity level.
5 Press the "Night mode" button to turn indication light off. (Except the CHILD lock light)
6 Swing: Press to control the louver
7 Speed: Press to set fan speed
8 √ Timer: On/Off timer setting
1 When the unit is plugged into a power socket, 2 beep signals can be heard. The display will remain blank until the On/Off power button is pressed.
2 Press "MODE" to set humidistat (Dehu) or dry mode (Dry)
(1) In Dry mode the Dry symbol appears along with CO (continuous) on the display. The fan speed will increase to the highest fourth fan speed (only available in Laundry Mode). Having this higher fan speed is key to drying things faster. We recommend also activating the swing louvre mode to help move the air across the item to be dried.
(2) When selected "Dehu" mode. You can press the SET to select a target relative humidity (40%\~50%\~60%\~70%\~CO). There is also the option of CO which stands for continuous and means that the machine will not stop at a particular relative humidity but will continue to dry regardless of the room relative humidity.
3 CHILD LOCK
Press the button of "LOCK" for 3 second to activate lock function then fall function keys are locked. To release this feature. Press LOCK key again 3 seconds.
4 Press the "SET" to set desired humidity 40%\~50%\~60%\~70%\~CO.
Recommend to set humidity value in 50%. For example, when the appliance detects that the current environment humidity is higher than or equal to 55%RH, the appliance start and fan runs at high speed; when the appliance detects that the current environment humidity is less than or equal to 49%RH, compressor stop and fan runs at low speed, the power indicator light will illuminate.
5 SWING: Press the button to switch on/off swing performance.
Press "SWING" to turn the air outlet louver move or stop.
6 SPEED
Press "SPEED" to select the fan working at "High speed" or "Low speed".
7 TIMER (On or Off)
The appliance must be connected to the mains socket outlet and power provided to the appliance.
With the appliance switched OFF at the control panel (the display and all LEDs will be OFF), press the TIMER button repeatedly to select the number of hours (1H/2H/4H/8H) that will pass before the appliance switches ON.
To switch OFF the appliance:
With the appliance switched ON at a the control panel, press the TIMER button repeatedly to select the number of hours (1H/2H/4H/8H) that will pass before the appliance switches OFF.
8 INDICATION LIGHT BAR
(1) When the machine is running, the blue light is on.
(2) When the water tank is full, the orange light is on and tank "Full" indication light on
9 NIGHT MODE
Pressing the light button when the machine is working makes the buzzer bleep for one time. Digital display, LED light and blue decoration light are off but the power light is on. (Note: the child lock light is on if the machine is at child lock mode.) When pressing the light button again the buzzer bleeps one time. Digital display works normally, corresponding mode or function lights show normally.
WATER FULL
When tank is full, device will automatically shut off and buzzer will alarm 10 times. The indication light of "power" and "tank full" will illuminate.
The dehumidifying process will only restart once the condensate tank has been emptied and re-installed. Once re-installed correctly the LED will turn off. DO NOT attempt to modify or remove the float mechanism; this could result in the tank overflowing.
AUTO RESTART
1 If the unit is turned off unit and is in stand-by, the device will recall the last setting when turned on again.
2 In the event of a power failure, the machine will restart automatically at the settings selected prior to the power interruption.
3 If user sets the "child lock" and "timer" functions, the device will shut off when time is up, but the child lock function will be turned off when the unit restarts.
AUTOMATIC DEFROSTING
When the machine is working in low temperatures the evaporator may frost. In order to protect cooling system, this device is provided with an automatic defrosting function.
COMPRESSOR PROTECTION FUNCTION
This device is equipped with a compressor protection function so the fan will run for 3 minutes before the compressor kicks in.
REFRIGERANT LEAKAGE DETECTION FUNCTION
The refrigerant leakage function will shut off the device automatically if any leak is detected. The digital display will flash and the buttons will be unresponsive until the unit has been restarted.
CONTINUOUS DRAINAGE
Drainage hose 15mm is included. Insert drainage hose to drain outlet and extend the hose to a suitable drainage facility.
AIR FILTER
The dehumidifiers are equipped with a 3-layer filter package to clean the circulated room air. The 3-layer filter package consists of a screen filter and (separately packed) 3M^TM HAF and active carbon filter. These filters must be placed according to the instructions before operating the dehumidifiers.

1 Screen filter; to remove bigger dust particles.
2 3M ^™ HAF filter; to remove unhealthy particles from the air such as pollen, bacteria, animal dander and dust.
3 Active carbon filter sheet; to remove odours.
TO CLEAN, INSPECT OR EXCHANGE THE FILTERS:
TAKING OUT THE FILTERS:
- Take out the water container (see chapter 'DRAINAGE OPTION').
- Take out the screen filter by firmly pressing down the top of the screen filter with 2 or 3 fingers. The screen filter will bend and the two securing hooks at the top side of the screen filter will be releasable from its dedicated holes. The screen filter is now disconnected and can be easily removed.
• Take out the now visible 3M ^TM HAF filter and the active carbon filter
The screen filter has to be cleaned regularly with a vacuum cleaner to avoid blocking of the air flow. It does not need periodically replacement.
New filter

Recommended change of filter
The active carbon sheet can be cleaned with a vacuum cleaner when dusty but has to be changed at the same time as the 3M ^TM HAF filter.

NOTE!
- Never use the dehumidifier without the screen filter!
- To run the unit without active carbon sheet and/or 3M™ HAF filter package does not bring any harm to the dehumidifier. In that case unhealthy dust is not removed.
- Replacement filters are available at your dealer. / www.qlima.com
REPOSITIONING THE FILTERS:
- Reposition the new 3M ^TM filter and new active carbon filter. The active carbon filter at the most inner side of the machine, the 3M ^TM filter at the most outer side of the machine.
- Place the lower end 2 hooks in the dedicated holes, reposition the top end two hooks into the dedicated 2 holes. The screen filter will need to be bend a little, this must be done by pressing on the top of the screen filter with 2 or 3 fingers.
DRAINAGE OPTION
OPTION 1 EMPTYING MANUALLY
Notes:
- Do not remove the bucket when unit is in operation or has just stopped.
Otherwise it may cause some water to drip on the floor. - Do not use the hose if using water bucket to collect water. When the hose is connected, water will be drained out through it instead of into the bucket.
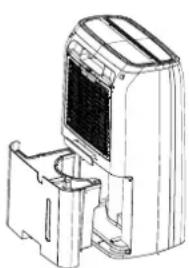
1 Hold the handle at the bottom of the water bucket and pull it out following the arrow direction.
2 Empty the bucket by grasping the handle on the bottom of bucket with one hand and grasping the top of bucket with the other hand.
3 Replace bucket in the dehumidifier according to the arrow direction.
OPTION 2 GRAVITY DRAIN HOSE
1 Use the hose included in the packaging.
2 Remove bucket from the unit as instructed.
3 Thread the drain hose onto the nozzle and make sure it's securely locked.
natural_image
Technical line drawing of a mechanical device with no visible text or symbols
4
Replace the bucket. Make sure the drain hose goes through the buckets drain hole and is placed downward. Lead the hose to the floor drain and then cover the hole with a lid. Note that drain hose should not be pressed, otherwise water can not be drained out.


NOTE!
When you want to take off the drain hose, prepare a receptacle to collect water from the nozzle.
CLEANING AND MAINTENANCE

WARNING:
- Before cleaning, turn off the dehumidifier and disconnect power. Otherwise it may lead to electric shock.
- Do not wash the dehumidifier with water, or it may lead to electric shock.
- Do not use volatile liquid(such as thinner or gasoline) to clean dehumidifier. Otherwise it will damage unit's appearance.
GRILLE AND CASE
To clean the case:
When there is dust on the case, use soft towel to dust it off; When the case is very dirty(greasy), use mild detergent to clean it.
To clean the grille: Use a dust catcher or brush.
CARE AFTER USE-SEASON
- Disconnect power.
- Clean air filter and case.
- Clean dust and obstacle of the dehumidifier.
• Empty the water bucket.
TROUBLESHOOTING
- Check the following before contacting technical support.
| Problem Possible Causes Solution | ||
| The unit does not work. | The power is not connected. Insert | the plug into the wall outlet. |
| The device does not dehumidify. | The water container is full. Remove the water from the container. | |
| The water container has not been replaced correctly. | Place the water container in the correct position. | |
| The air filter is clogged. Clean the air filter. | ||
| The temperature or relative humidity in the room where the device is operating is too low. | It is normal that the device does not dehumidify in these conditions. | |
| The dehumidifier works, but reduces the relative humidity insufficiently. | The room is too large. We recommend using a dehumidifier with a greater capacity. | |
| There are too many sources of humidity. | We recommend using a dehumidifier with a greater capacity. | |
| There is too much ventilation. Reduce ventilation (e.g. close windows and shut doors.) | ||
CONDITIONS OF WARRANTY
There is a two-year warranty on your dehumidifier from the date of purchase. All material or manufacturing defects will be repaired free of charge.
The following applies:
- All claims for compensation, including consequential damage, will not be entertained.
- Any repairs or replacement of components during the warranty period will not result in an extension of the warranty period.
- The warranty will expire if any alterations have been made, not genuine components have been fitted or if the dehumidifier has been repaired by a third party.
- Components subject to normal wear and tear, such as the air filter, are not covered by the warranty.
- The warranty is only valid on presentation of the original, unaltered, and date-stamped purchase receipt.
- The warranty does not cover damage caused by actions that deviate from those as described in the user's manual or by neglect.
- Transportation costs and the risks involved during the transportation of the dehumidifier or components shall always be for the account of the purchaser.
To prevent unnecessary expenses, we recommend that you always carefully read the user's manual first. If this does not provide a solution, take the dehumidifier to your distributor for repair.

not dispose of electrical appliances as unsorted municipal waste, use separate
collection facilities. Contact your local government for information regarding the collection systems available. If electrical appliances are disposed of in landfills or dumps, hazardous substances can leak into the groundwater and get into the food chain, damaging your health and well-being. When replacing old appliances with new once, the retailer is legally obligated to take back your old appliance for disposal at least for free of charge. Do not throw batteries into the fire, where they can explode or release dangerous liquids. If you replace or destroy the remote control, remove the batteries and throw them away in accordance with the applicable regulations because they are harmful to the environment.
Environmental information: This equipment contains fluorinated greenhouse gases covered by the Kyoto Protocol. It should only be serviced or dismantled by professional trained personnel.
This equipment contains R134a refrigerant in the amount as stated in the table above. Do not vent R134a into atmosphere: R134a, is a fluorinated greenhouse gas with a Global Warming Potential (GWP) = 1300
TECHNICAL SPECIFICATIONS
| Model D620 D625 | |||
| Power consumption (nom / max) kW | 0.26-0.32 0.30-0.37 | ||
| Power supply V / Hz / Ph 220-240 / ~ 50 / 1 220-240 / ~ 50 / 1 | |||
| Current (nom.) A 1.56 1.66 | |||
| Dehumidifying capacity (moisture removal) at 30°C, 80%RH | L / 24h 20 25 | ||
| Dehumidifying capacity (moisture removal) at 27°C, 60%RH | L / 24h 12 14 | ||
| Capacity water container | L | 4 | 4 |
| Air flow (nom.)* | m3/h | 160 | 173 |
| For rooms up to* | m3 | 100 - 130 | 140 - 165 |
| Operating range | °C | 5 - 35 | 5 - 35 |
| Automatic defrost | Yes | Yes | |
| Hygrostat | Yes | Yes | |
| Compressor type | Reciprocating | Reciprocating | |
| Refrigerant type / charge | r / gr | R134a / 170 | R134a / 184 |
| Pressure suction / discharge (max.) | MPa | 2.5 / 9.5 (15.3) | 3.3 / 11.7 (15.8) |
| Dimensions (w x d x h ) | mm | 346 × 253 × 590 | 346 × 253 × 590 |
| Net weight | kg | 13.2 | 14.0 |
| Gross weight | kg | 14.4 | 15.2 |
| Sound pressure level * | dB(A) | 39 | 39 |
| Unit Protection | IP | IPX4 | IPX4 |
| Fuse rating | 250V, 10A | 250V, 10A | |
* To be used as indication
Subject to change without prior notice.

1 LES BRUKSANVISNINGEN F∅RST.
2 HVIS DU ER I TVIL, TA KONTAKT MED FORHANDLEREN.
VIKTIGE KOMPONENTER
① Spjeld
② Kontrollpanel
③ Indikasjon lysstripe
④ Luftinntak / filter
⑤ Lagring
6 Vanntank
⑦ Kontinuerlig dreneringsport
8 Indikator for vannivå
BEMERK!
ALTERNATIV 1: MANUELL T∅MMING
Merk:
natural_image
Technical line drawing of a mechanical device with no visible text or symbols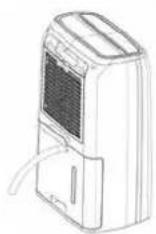
ALTERNATIV 2: TYNGDEKRAFTS-AVL∅PSSLANGE

BEMERK!

UWAGA!
FUNKCJE I NAZWY KLAWISZY
natural_image
Technical line drawing of a mechanical device with no visible text or symbols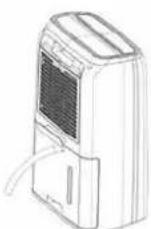

UWAGA!

OBS!
natural_image
Technical line drawing of a mechanical device with no visible text or symbols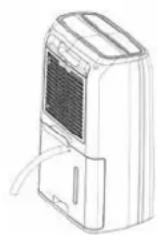


OBSERVERA!
Distributed in Europe by PVG Holding B.V.
Benötigen Sie weitere Informationen oder treten Probleme auf, besuchen Sie bitte unsere Website www.qlima.com, oder setzen Sie sich mit unserem Kundendienst in Verbindung (Telefonnummer auf www.qlima.com).
For alle yderligere oplysninger eller ved eventuelle problemer med apparatet henvises til www.qlima.com eller det lokale Kundecenter (telefonnumre findes i www.qlima.com).
Es Si necesita información o si tiene algún problema, visite nuestra página Web www.qlima.com, o póngase en contacto con el servicio cliente (hallará el número de teléfono en www.qlima.com).
(5) Si vous souhaitez obtenir des informations supplémentaires ou si vous rencontrez un problème, rendez-vous sur notre site Web (www.qlima.com) ou contactez notre service client (vous trouverez l'adresse et numéro de téléphone sur www.qlima.com).
FHN Jos haluat huoltoapua, lisätietoja tai laitteen kanssa tulee ongelmia, tutustu verkkosivustoon osoitteessa www.qlima.com tai kysy neuvoa PVG kuluttajapalvelukeskuksesta (www.qlima.com).
⑥ If you need information or if you have a problem, please visit the our website (www.qlima.com) or contact our sales support (you find its phone number on www.qlima.com)
Per informazioni e in caso di problemi, visitate il sito Web www.qlima.com oppure contattate il Centro Assistenza Clienti (per conoscere il numero di telefono, consultate www.qlima.com).
Hvis du trenger informasjon, eller hvis du har et problem med produktet, kan du gå til nettsidene www.qlima.com. Alternativt kan du kontakte med PVG' forbrukertjeneste (telefonnummeret i www.qlima.com).
Als u informatie nodig hebt of als u een probleem hebt, bezoek dan de onze website (www.qlima.com) of neem contact op met de afdeling sales support (adres en telefoon op www.qlima.com).
Se necessitar de informações ou se tiver problemas, visite o Web site www.qlima.com ou contacte o Centro de Assistência (número de telefone o www.qlima.com)
FL W przypadku problemów i w celu uzyskania szczegółowych informacji odwiedź stronę internetową Qlima dostępną pod adresem www.qlima.com lub skontaktuj się z Centrum kontaktów Qlima (www.qlima.com)
Om du behöver service eller information eller har problem med apparaten kan du besöka www.qlima.com eller kontakta Qlima kundtjänst (du hittar telefonnumret på www.qlima.com).
⑤0 Če želite dodatne informacije, obiščite spletno mesto podjetja na naslovu www.qlima.com ali pokličite na telefonsko (www.qlima.com).
TR Daha fazla bilgiye ihtiyaç duyarsanız veya bir sorunla karşılaşırsanız, www.qlima.com adresindeki Qlima Internet sitesini ziyaret edin veya ülkenizde bulunan Qlima müşteri merkeziyle iletişim kurun (telefon numarasını: www.qlima.com).
- VIGTIGE KOMPONENTER
- BEMÆRK!
- METODE 1 - MANUEL T∅MNING
- Anmærkninger:
- TÄRKEÄT KOMPONENTIT
- HUOM!
- NÄPPÄIMISTÖN TOIMINNOT JA NIMET
- VAIHTOEHTO 1: TYHJENNYS MANUAALISESTI
- Huomautuksia:
- VAIHTOEHTO 2: TYHJENNYSLETKU
- IMPORTANT COMPONENTS
- GENERAL
- IMPORTANT
- ATTENTION!
- THE CONTROL PANEL
- NOTE!
- FUNCTIONS & NAME OF KEY PADS
- INDICATION LIGHT BAR
- NIGHT MODE
- WATER FULL
- AUTO RESTART
- AUTOMATIC DEFROSTING
- COMPRESSOR PROTECTION FUNCTION
- REFRIGERANT LEAKAGE DETECTION FUNCTION
- CONTINUOUS DRAINAGE
- AIR FILTER
- TO CLEAN, INSPECT OR EXCHANGE THE FILTERS:
- TAKING OUT THE FILTERS:
- REPOSITIONING THE FILTERS:
- DRAINAGE OPTION
- OPTION 1 EMPTYING MANUALLY
- Notes:
- OPTION 2 GRAVITY DRAIN HOSE
- CLEANING AND MAINTENANCE
- WARNING:
- GRILLE AND CASE
- CARE AFTER USE-SEASON
- TROUBLESHOOTING
- CONDITIONS OF WARRANTY
- TECHNICAL SPECIFICATIONS
- VIKTIGE KOMPONENTER
- BEMERK!
- ALTERNATIV 1: MANUELL T∅MMING
- Merk:
- ALTERNATIV 2: TYNGDEKRAFTS-AVL∅PSSLANGE
- UWAGA!
- FUNKCJE I NAZWY KLAWISZY
- OBS!
- OBSERVERA!
- Distributed in Europe by PVG Holding B.V.
Brand : QLIMA
Model : D 625
Category : Dehumidifier