721-111 - Slingshot Meec Tools - Free user manual and instructions
Find the device manual for free 721-111 Meec Tools in PDF.


| Brand | Meec Tools |
| Model | 721-111 |
| Product Type | Slingshot |
| Frame Material | ABS plastic |
| Band Material | Natural latex rubber |
| Overall Length | Approx. 180 mm (7 in) |
| Overall Width | Approx. 120 mm (4.7 in) |
| Weight | Approx. 150 g (5.3 oz) |
| Power Source | Manual (elastic tension) |
| Recommended Ammunition | 6-8 mm steel balls or clay pellets |
| Primary Uses | Target practice, small game hunting |
| Band Tension Adjustment | Not adjustable (fixed bands) |
| Includes | Slingshot body, 2 replacement bands, 50 steel balls |
| Maintenance | Wipe clean with dry cloth; store in cool, dry place |
| Safety Precautions | Wear eye protection; never aim at people or animals |
| Spare Parts Availability | Replacement bands and ammunition available separately |
| Repairability | Bands can be replaced easily |
| Age Recommendation | 14 years and older |
Frequently Asked Questions - 721-111 Meec Tools
User questions about 721-111 Meec Tools
0 question about this device. Answer the ones you know or ask your own.
Ask a new question about this device
Download the instructions for your Slingshot in PDF format for free! Find your manual 721-111 - Meec Tools and take your electronic device back in hand. On this page are published all the documents necessary for the use of your device. 721-111 by Meec Tools.
USER MANUAL 721-111 Meec Tools
Operating Instructions for Electric Snow Blower
721-111
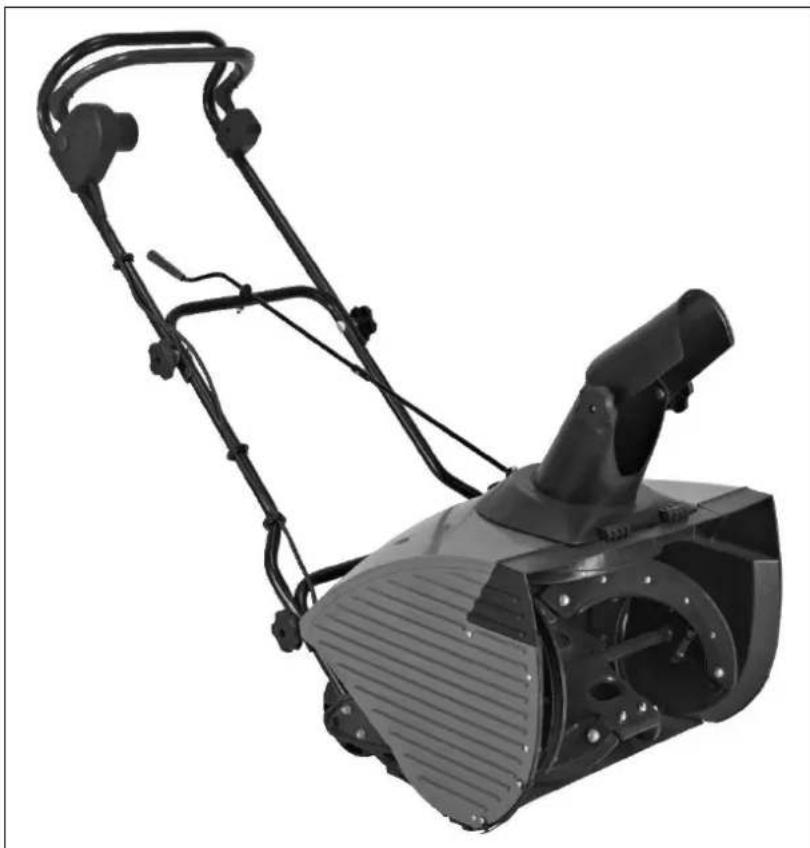
natural_image
Black snowman blade with attached lever and mounting bracket (no visible text or symbols)SV Bruksanvisning i original
NO Bruksanvisning i original
EN Operating instructions in original
SVENSKA 4
SÄKERHETSANVISNINGAR 4
ALLMÄNNA SÄKERHETSANVISNINGAR 4
SAFETY INSTRUCTIONS....29
GENERAL SAFETY INSTRUCTIONS 29
Work area 29
Electrical safety 29
Personal safety 29
Power tool use and care 30
Service 30
Important safety instructions for the snow blower 30
Symbols 31
TECHNICAL DATA....32
DESCRIPTION 32
USE 33
Before starting.... 33
Assembly of upper, middle and lower handles 33
Fitting the ejector unit 33
Fitting the crank for the ejector unit 34
Use 35
Power switch....35
Moving and snow blowing.... 35
Changing the ejector alignment 35
Extension cord 36
MAINTENANCE 36
Replacing the rubber pads.... 36
Storage 36
SÄKERHETSANVISNINGAR
natural_image
Line drawing of a person's leg and arm fastening a car seatbelt (no text or symbols)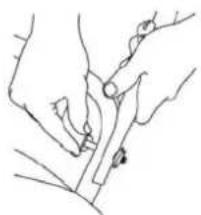
natural_image
Line drawing of hands holding a plant stem with a tool, no text or symbols present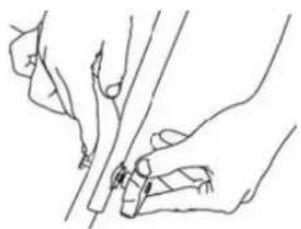
natural_image
Line drawing of two hands holding a tool or object, no text or symbols presentnatural_image
Close-up of a metallic industrial component with a curved top and mounting base (no visible text or symbols)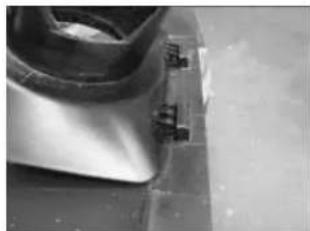
natural_image
Close-up of a metallic mechanical component with metal fasteners attached (no visible text or symbols)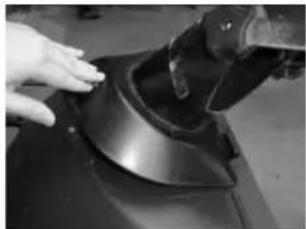
natural_image
Close-up of a hand pressing down on a black mechanical component (no visible text or symbols)natural_image
Close-up of a hand using a tool to adjust or install a mechanical component (no visible text or symbols)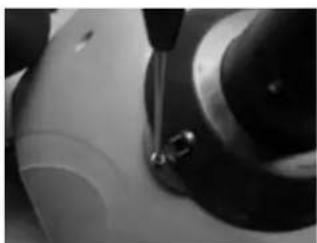
natural_image
Close-up of a sewing machine needle stitching a metal ring (no visible text or symbols)natural_image
Close-up of a black metal rod with two small metallic pins attached (no text or symbols visible)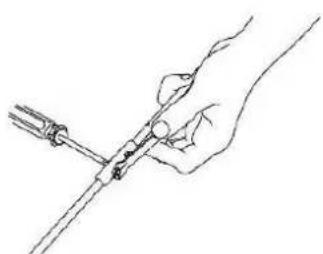
natural_image
Line drawing of a hand holding a tool with a screwdriver inserted (no text or symbols)natural_image
Close-up of a black mechanical tool with a metallic knob and lever handle, resting on a wooden surface (no text or symbols visible)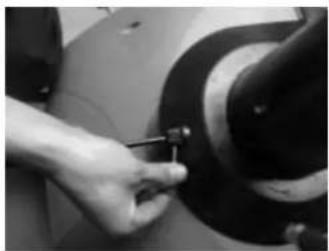
natural_image
Close-up of a hand using a tool to adjust or install a mechanical component (no visible text or symbols)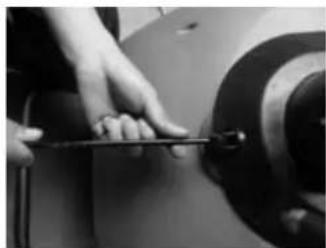
natural_image
Close-up of hands using a tool to adjust or install a mechanical component (no visible text or symbols)natural_image
Line drawing of a hand holding a tool with a circular object, no text or symbols present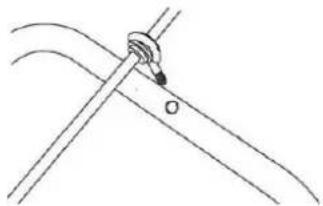
natural_image
Pure technical line drawing of a cable or wire with no text, numbers, or symbols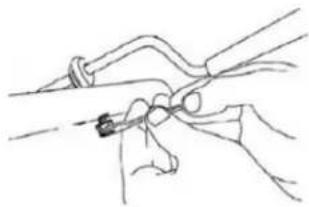
natural_image
Line drawing of a hand holding a tool with a pen, no text or symbols presentAnvändning
natural_image
Line drawing of a hand holding a small object, possibly a tool or device, with no visible text or symbols.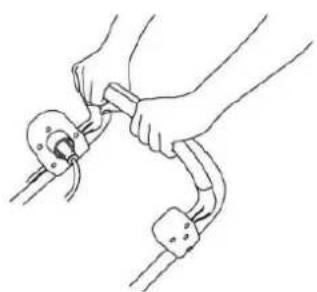
natural_image
Line drawing of hands connecting a cable to a connector (no text or symbols)natural_image
Line drawing of a mechanical device with a rotating blade and base mount (no text or symbols)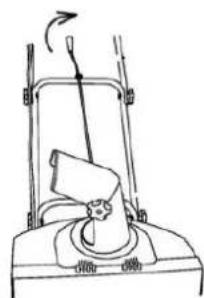
natural_image
Line drawing of a lawn mower with a rotating blade and handle (no text or symbols)Förlängningssladd
natural_image
Technical line drawing of a mechanical component with no visible text or symbols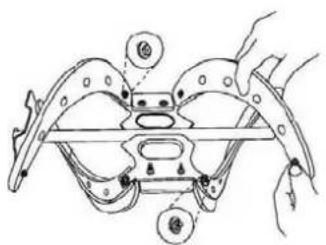
natural_image
Line drawing of a mechanical component with no visible text or symbolsFörvaring
natural_image
Line drawing of a person using a tool on a curved mechanical component (no text or symbols)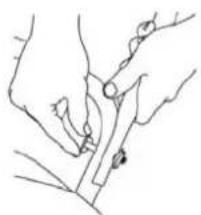
natural_image
Line drawing of hands holding a tool or object with a small inset showing a magnified view (no text or symbols)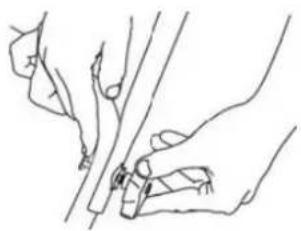
natural_image
Line drawing of hands holding a tool or object against a plain background (no text or symbols)natural_image
Close-up of a mechanical component with a circular top and mounting base (no visible text or symbols)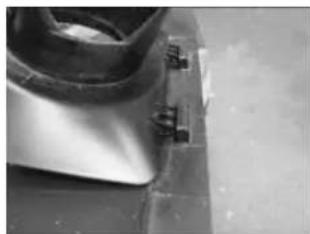
natural_image
Close-up of a metal bracket with bolts attached to a surface (no visible text or symbols)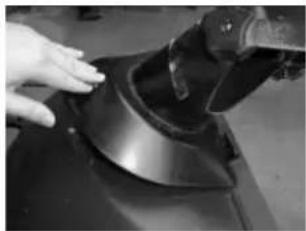
natural_image
Close-up of a hand pressing down on a dark, curved object (no visible text or symbols)- Juster hullene i utkastenheten mot hullet i dekselet. Sett i skruen og skru til med skrutrekker.
natural_image
Close-up of a hand using a tool to adjust or install a mechanical component (no visible text or symbols)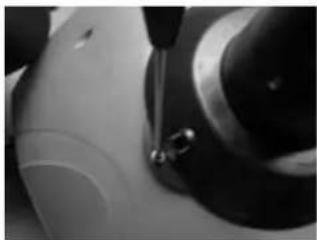
natural_image
Close-up of a sewing machine needle stitching a metal ring (no visible text or symbols)natural_image
Close-up of a black metal rod with two small metallic pins attached (no text or symbols visible)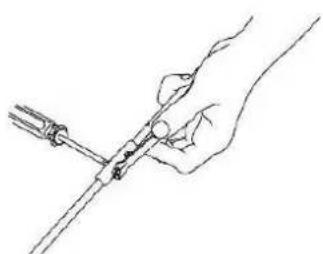
natural_image
Line drawing of a hand holding a tool with a screwdriver inserted (no text or symbols)natural_image
Close-up of a black mechanical tool with a metallic knob and lever handle, resting on a wooden surface (no text or symbols visible)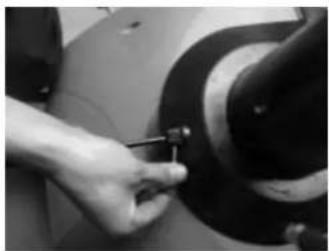
natural_image
Close-up of a hand using a tool to adjust or install a mechanical component (no visible text or symbols)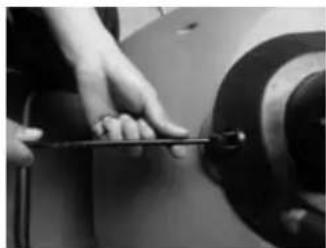
natural_image
Close-up of hands using a tool to adjust or install a mechanical component (no visible text or symbols)natural_image
Line drawing of a hand holding a tool with a circular object, no text or symbols present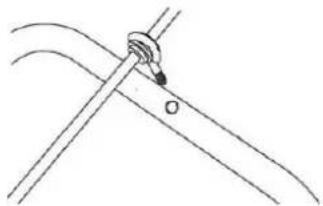
natural_image
Pure technical line drawing of a cable or wire with no text, numbers, or symbols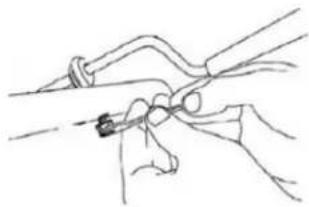
natural_image
Line drawing of two hands manipulating a curved object, possibly a tool or device (no text or symbols present)Bruk
natural_image
Line drawing of a hand holding a small object, possibly a tool or device, with no visible text or symbols.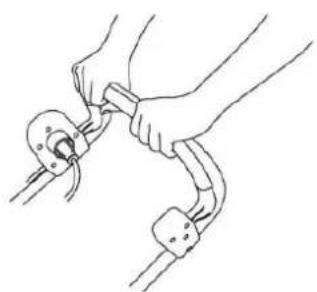
natural_image
Line drawing of hands connecting a cable to a connector (no text or symbols)natural_image
Line drawing of a mechanical device with a rotating blade and base mount (no text or symbols)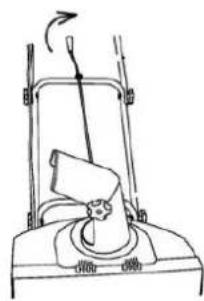
natural_image
Line drawing of a lawn mower with a rotating blade and handle (no text or symbols)Skjøteledning
natural_image
Three technical line drawings showing mechanical assembly steps with no visible text or symbolsOppbevaring
natural_image
Line drawing of a person using a tool on a chair (no text or symbols)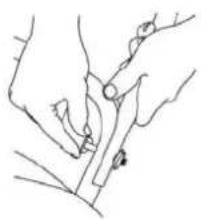
natural_image
Line drawing of hands holding a plant stem with a tool, no text or symbols present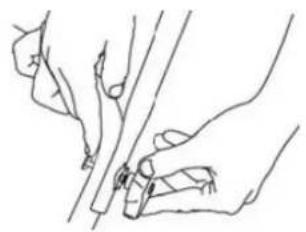
natural_image
Line drawing of two hands holding a tool, no text or symbols presentMontaż wyrzutnika
natural_image
Close-up of a metallic mechanical component with mounting brackets and a curved top (no visible text or symbols)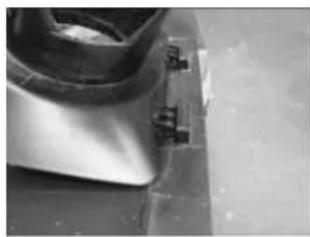
natural_image
Close-up of a metallic mechanical component with bolts attached (no visible text or symbols)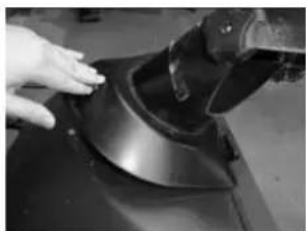
natural_image
Close-up of a hand pressing down on a dark mechanical component (no visible text or symbols)natural_image
Close-up of a hand using a tool to adjust or install a mechanical component (no visible text or symbols)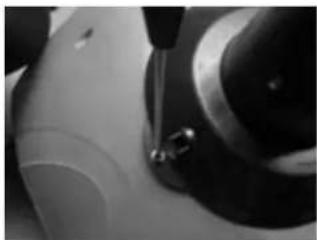
natural_image
Close-up of a sewing machine needle stitching a circular component (no visible text or symbols)natural_image
Close-up of a black metal rod with two small metallic pins attached (no text or symbols visible)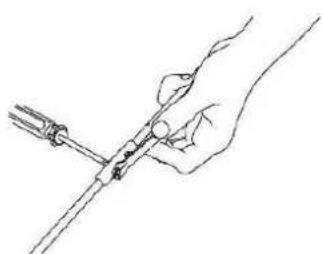
natural_image
Line drawing of a hand holding a tool with a screwdriver inserted (no text or symbols)natural_image
Close-up of a black mechanical tool with a metallic knob and lever handle, resting on a wooden surface (no text or symbols visible)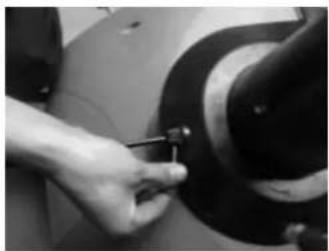
natural_image
Close-up of a hand using a tool to adjust or install a mechanical component (no visible text or symbols)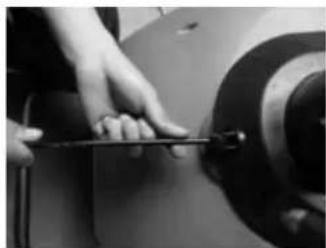
natural_image
Close-up of hands using a tool to adjust or install a mechanical component (no visible text or symbols)natural_image
Line drawing of a hand using a tool to measure a circular object (no text or symbols)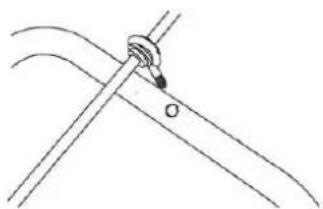
natural_image
Simple line drawing of a cable or wire with a loop and labeled point O (no text or symbols beyond basic geometry)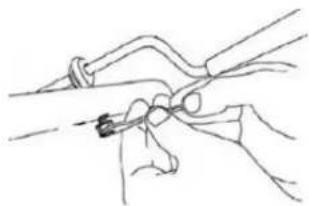
natural_image
Line drawing of a hand holding a tool or device, no text or symbols presentSposób użycia
natural_image
Line drawing of a hand holding a small object, possibly a tool or device, with no visible text or symbols.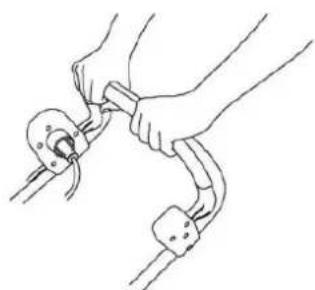
natural_image
Line drawing of hands connecting a cable to a connector (no text or symbols)natural_image
Line drawing of a mechanical device with a rotating knob and base mount (no text or symbols)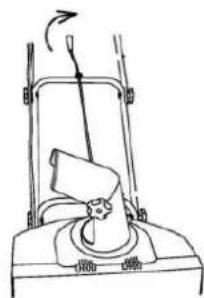
natural_image
Line drawing of a lawn mower with a blade and handle, showing motion direction (no text or symbols)Przedłużacz
natural_image
Technical line drawing of a mechanical component with no visible text or symbols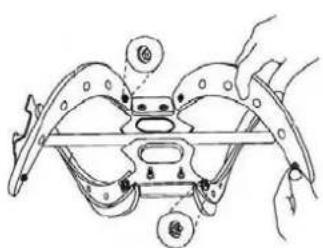
natural_image
Line drawing of a mechanical component with no visible text or symbolsPrzechowywanie
Read the Operating Instructions carefully before use!
IMPORTANT: Read these instructions carefully before assembly and use. Improper use can cause serious personal injury. Save these instructions for future reference.
GENERAL SAFETY INSTRUCTIONS
WARNING: Read all the instructions carefully before use. Failure to follow all the instructions below can result in electric shock, fire and/or serious personal injury. The term "power tool" in all warnings below refers to your mains-powered (corded) or battery-powered (cordless) power tool.
Work area
- Keep the work area clean and well lit. Dark and cluttered work areas increase the risk of accidents and injuries.
- Do not use power tools in explosive environments, such as in the vicinity of flammable liquids, gases or dust. Power tools produce sparks that can ignite dust and fumes.
- Keep children and onlookers at a safe distance when using power tools. You can easily lose control of the equipment if you are distracted.
Electrical safety
- The mains plug on the power tool must match the mains outlet. Never modify the plug in any way. Never use an adapter with earthed power tools. Unmodified plugs and matching outlets reduce the risk of electric shock.
- Avoid body contact with earthed surfaces such as pipes, radiators, cookers and refrigerators. There is an increased risk of electric shock if your body is earthed.
- Do not expose power tools to rain or damp conditions. There is an increased risk of electric shock if water enters a power tool.
- Be careful with the power cord. Never use the cord to carry or pull the power tool, or to pull out the plug from the mains socket. Keep the power cord away from heat, oil, sharp edges and moving parts. Damaged or tangled cords increase the risk of electric shock.
- If using the machine outdoors, only use an extension cord approved for outdoor use. Cords intended for outdoor use reduce the risk of electric shock.
Personal safety
- Pay attention to what you are doing. Remember to use all necessary safety precautions and common sense when working with power tools. Never use power tools if you are tired or under the influence of drugs, alcohol or medication. A moment of inattention when using a power tool can result in serious personal injury.
- Use safety equipment. Always wear safety glasses. Depending on the type of power tool and how it is used, safety equipment such as dust masks, non-slip safety shoes, safety helmets and ear protection reduce the risk of personal injury.
- Avoid accidental starting. Make sure the power switch is in the OFF position before plugging in the power cord. Carrying a power tool with your finger on the switch or connecting a tool to the mains supply when the switch is in the ON position increases the risk of accidents and injuries.
- Remove adjuster keys/spanners and other assembling tools before starting the power tool. Spanners, keys or similar that are left in a rotating part of the power tool can cause personal injury.
- Do not overreach. Always maintain a firm footing and good balance. This will ensure you have better control over the tool in unexpected situations.
- Wear appropriate clothing. Do not wear loose-fitting clothing or jewellery. Keep hair, clothing and gloves away from moving parts. Loose-fitting clothing, jewellery and long hair can get caught in moving parts.
- If dust extraction and dust collection equipment is provided, this should be connected and used correctly. The use of such devices can reduce the risk of dust-related hazards.
Power tool use and care
- Do not force the power tool. Use the correct electric tool for the planned work. The tool does the job better and safer when used at the rate for which it was designed.
- Do not use the tool if it cannot be switched on and off using the power switch. Power tools that cannot be controlled with the power switch are dangerous and must be repaired.
- Always disconnect the power cord from the mains power before making any adjustments, changing accessories or putting the power tool away. These safety precautions reduce the risk of accidentally starting the power tool.
- Store power tools out of the reach of children when not in use. Never allow children, or anyone who is unfamiliar with the power tool and these instructions, to use the tool. Power tools are dangerous if used by inexperienced people.
- Keep the power tool properly maintained. Make sure that moving parts are properly adjusted and do not jam and that no parts are incorrectly fitted or damaged. Check for other factors that could affect the operation of the power tool. If the power tool is damaged, it must be repaired before being used again. Many accidents are caused by poorly maintained power tools.
- Keep cutting tools sharp and clean. Properly maintained cutting tools with sharp cutting edges are less likely to jam and are easier to control.
- Use power tools, accessories, bits, etc., in accordance with these instructions, taking into account actual working conditions and the work that is to be done. It can be dangerous to use power tools for purposes other than those intended.
Service
The power tool may only be serviced by qualified service personnel using identical spare parts. This ensures that the power tool remains safe.
Important safety instructions for the snow blower
- Read all the instructions and safety instructions and familiarise yourself with the controls on the machine and how to use them.
• Never use the machine when you are tired or under the influence of drugs, alcohol or medication. - Never use the machine if the guards or covers are dismantled or damaged.
- Check that all parts are correctly fitted before using.
- Carefully inspect the area where the machine is to be used and remove any objects in the way, such as stones, nails, wire or string, which could fasten in or be blown out by the machine.
- Keep children, onlookers and pets away from the work area.
- Do not use in damp or wet places. Do not expose the machine to rain. Make sure the work area is well lit.
- Keep the work area clean. Cluttered work areas increase the risk of accidents and injuries.
- Protect against the risk of electric shock. Avoid body contact with earthed surfaces such as pipes, radiators, cookers and refrigerators.
- When not in use, store the machine in a dry place out of the reach of children.
- Only use the machine in accordance with these instructions.. All other use involves a risk of serious personal injury and/or material damage.
- Pay attention to the surroundings when using the machine. Ejected objects can cause personal injury and/or material damage.
- Switch off the machine and unplug the power cord when the machine is not in use and before cleaning, maintenance, repairs or inspection. Switch off the machine immediately and unplug the power cord in any risk situations. Disconnect the plug from the mains immediately if the power cord or extension cord becomes damaged.
- Never carry the machine by the power cord. Never pull the power cord to remove the plug from the mains.
- Never attempt to clear the ejector with your hands. Turn off the machine and unplug the power cord before clearing the ejector. Never go in front of the machine when it is running. Never point the ejector at people or animals.
- Keep a firm footing and good balance at all times, and keep a firm grip on the handles.
- Always check the machine before using it. Repair any faults and damage before using the machine.
-
Disconnect the plug from the mains immediately if the power cord or extension cord becomes damaged. A damaged cord must be replaced by an authorised service centre or qualified person to ensure safe use. Follow these instructions when lubricating or replacing parts.
-
Pay special attention to the rubber pads, which can result in an increased load and inferior function if damaged.
- Switch off the machine, unplug the power cord and wait until all moving parts have completely stopped before adjusting, replacing parts, cleaning or carrying out maintenance work.
- Carry out a function check before using the machine for the first time and after repairs, and/or replacement of parts.
- Switch off the machine, unplug the power cord and wait until all moving parts have stopped completely before transporting and/or moving the machine.
- Follow local rules and regulations concerning the use of the machine. Pay attention to the surroundings and avoid causing any interference.
- Keep your hands, feet and other parts of the body away from moving parts and the ejector when the machine is running.
- Check the machine for any cracks or other damage if it has been exposed to any knock and blows.
- Be very careful when going backwards or pulling the machine towards you.
- Switch off the machine, unplug the power cord, and contact your dealer if the machine behaves in an abnormal way or does not sound right.
• Make sure onlookers are fully aware of the machine to minimise the risk of personal injury. - The machine must only be used to clear snow.
- Switch off the machine and unplug the power cord before transport and/or storage.
- Do not expose the power cord or plug to water.
• Only use extension cords approved for outdoor use (does not apply to battery powered machines). - Always keep your hands at a safe distance from rotating parts. Switch off the machine, unplug the power cord and wait until all moving parts have stopped completely before clearing the ejector.
- Wear suitable clothing. Do not wear loose-fitting clothing or jewellery. They can get caught in moving parts. Rubber gloves and non-slip shoes are recommended when working outdoors. Wear a hair net if you have long hair.
- Keep onlookers at a safe distance from the work area. Onlookers should wear safety glasses and be kept at a safe distance from the work area. Do not allow onlookers to touch the machine or the extension cord.
- Use the correct machine. Do not force small machines or accessories to perform jobs that require a powerful machine. Only use the machine for the purpose for which it is intended.
- Do not force the machine. The machine will work better and more safely at the load for which it is intended.
- Wear safety glasses. Normal glasses only have shock-resistant lenses. They are not safety glasses.
- Keep your hands, face and feet away from moving parts. Do not touch or try to stop moving parts. Do not use the machine unless all the safety devices are in place.
Symbols
The symbols below are used on the type plate on the machine. They indicate information on the product, or instructions on how it should be used.
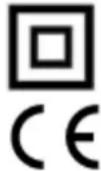

Double insulation for extra protection.
Complies with the relevant safety standards.
Read the Operating Instructions.
The following warning symbols have been put on the machine to draw attention to the necessary safety precautions when in use.
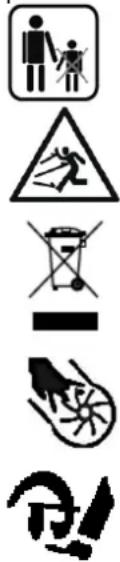
Keep other people, especially children, and pets at a safe distance from the work area.
Stay at a safe distance from the ejector area – risk of personal injury.
The product should be recycled in accordance with local regulations.
Keep your hands and other parts of your body away from the moving parts on the machine – risk of personal injury.
TECHNICAL DATA
| Rated voltage 230 V ~ 50 Hz | ||
| Output | 1600 | W |
| Capacity Max 200 m2/h | ||
| Speed | 2100 | rpm |
| Working depth 23 cm | ||
| Working width 40 cm | ||
| Max ejection length Approx. 5 m | ||
| Sound pressure level, LpA 86 dB(A), K= 3 dB | ||
| Measured Sound power level, LwA 95 dB(A), K= 3 dB | ||
| Guaranteed Sound power level, LwA 98 dB(A), K= 3 dB | ||
| Vibration level 4 m/s2, K= 1,5 m/s2 | ||
Always wear ear protection!
The declared vibration value, which has been measured by a standardised test method, can be used to compare different tools with each other and for a preliminary assessment of exposure.
WARNING! The actual vibration level when using power tools may differ from the specified maximum value, depending on how the tool is used. It is therefore necessary to determine which safety precautions are required to protect the user, based on an estimate of exposure in actual operating conditions (taking into account all stages of the work cycle, e.g. the time when the tool is switched off and when it is idling, in addition to the start-up time).
The figures quoted are emission levels and are not necessarily safe working levels. Whilst there is a correlation between the emission and exposure levels, this cannot be used reliably to determine whether or not further precautions are required. Factors that influence the actual level of exposure of the workforce include the characteristics of the work room and the other sources of noise etc. i.e. the number of machines and other adjacent processes. Also the permissible exposure level can vary from country to country. This information, however, will enable the user of the machine to make a better evaluation of the hazard and risk.
DESCRIPTION
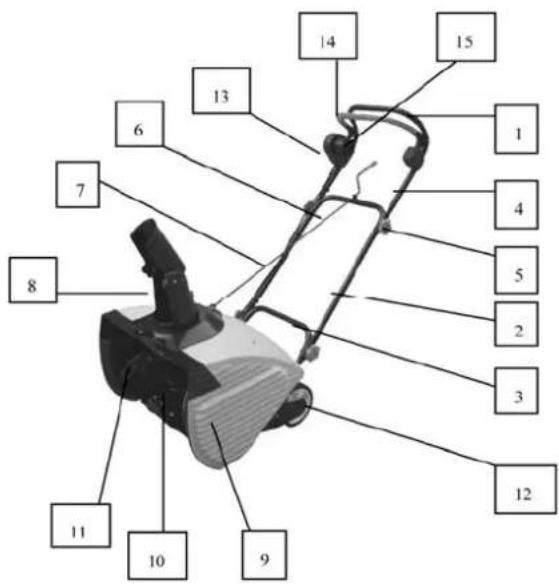
-
Handle
-
Middle handle
-
Lower handle
-
Upper handle
-
Retaining screw
-
Crank for ejector unit, upper part
-
Crank for ejector unit, lower part
-
Ejector unit
-
Cover
-
Rotor
-
Rubber pad
-
Wheel
-
Switch unit
-
Safety handle
-
Switch
USE
Before starting
- Remove the machine and all the parts from the packaging.
- Check all parts for damage. Contact your dealer if any parts are missing or damaged.
The following parts are supplied in a separate bag:
Cable clip x 3
Crank for ejector unit, upper part x 1
Crank for ejector unit, lower part x 1
NOTE: The upper and bottom parts of the crank for the ejector unit are packed together. Assemble the machine according to the instructions before use.
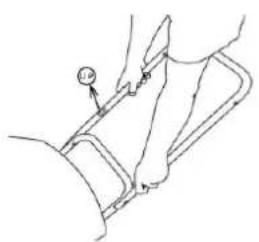
Assembly of upper, middle and lower handles
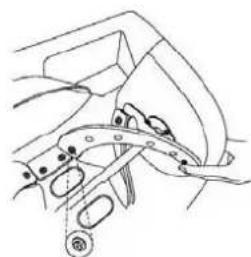
- Undo the 4 screws with washers and nuts holding the upper handle to the lower.
- Align the screw holes in the middle handle to the holes in the lower handle. Insert the screws with washers through the holes on each side, and lock with the nuts. Insert the screws from the inside of the handle, so that the nuts come on the outside. NOTE: Do not overtighten the nuts.
- Fit the upper handle on the middle handle in the same way as step 2, with the screws, washers and nuts.
natural_image
Line drawing of a person using a tool on a chair (no text or symbols)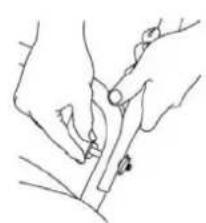
natural_image
Line drawing of hands holding a tool or device with a circular knob (no text or symbols)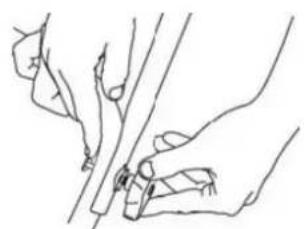
natural_image
Line drawing of two hands holding a tool or object against a diagonal line (no text or symbols)Fitting the ejector unit
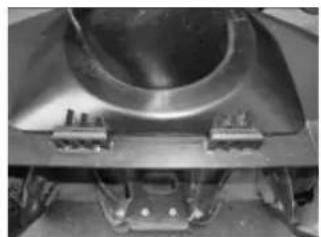
- Insert the flanges on the ejector unit into the corresponding slots in the cover.
- Press down the lower part of the ejector unit.
natural_image
Close-up of a metallic mechanical component with a circular top and mounting base (no visible text or symbols)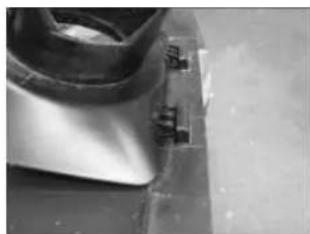
natural_image
Close-up of a metal bracket with two small bolts attached (no visible text or symbols)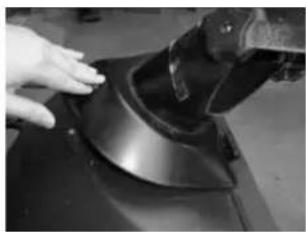
natural_image
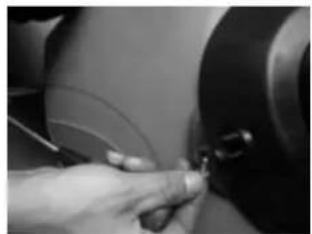
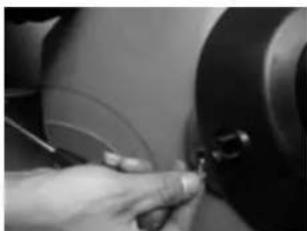
Close-up of a hand pressing down on a black mechanical component (no visible text or symbols)- Align the hole in the ejector unit with the hole in the cover. Insert the screw and tighten with a screwdriver.
natural_image
Close-up of a hand using a tool to adjust or install a mechanical component (no visible text or symbols)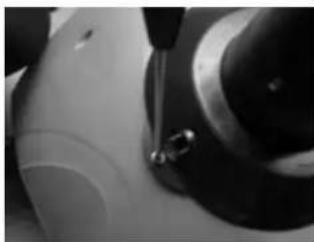
natural_image
Close-up of a sewing machine needle stitching a metal ring (no visible text or symbols)Fitting the crank for the ejector unit
- Take out the upper and lower parts of the crank for the ejector unit from the bag with the parts.
- Undo the screw and nut on the upper part.
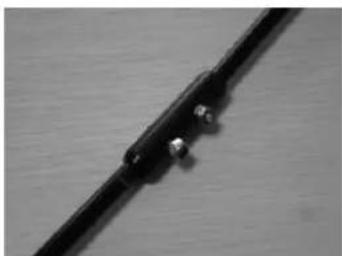
- Align the screw holes to each other and insert the upper part into the lower part. Insert a screw and screw on a nut. Tighten with a screwdriver and spanner.
natural_image
Close-up of a black metal rod with three small circular connectors (no text or symbols visible)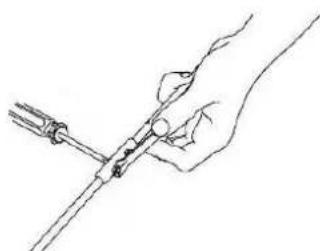
natural_image
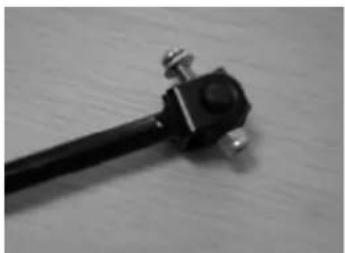
Line drawing of a hand holding a tool with a pen, no text or symbols present- Undo the screw, washer and nut on the coupling. Insert the screw through the hole in the ejector unit. Tighten with a screwdriver and spanner.
natural_image
Close-up of a black mechanical clamp or tool with metal fittings, resting on a wooden surface (no text or symbols visible)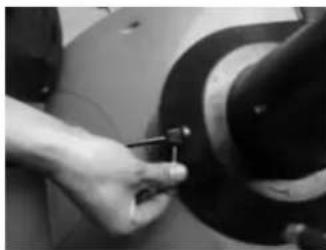
natural_image
Close-up of a hand using a tool to adjust or install a mechanical component (no visible text or symbols)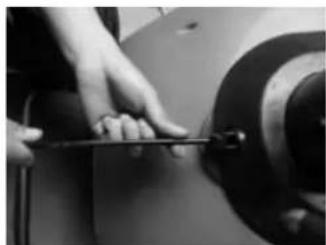
natural_image
Close-up of hands using a tool to adjust or install a mechanical component (no visible text or symbols)- Remove the washer and nut from the eye bolt with the rubber duct on the upper part of the crank for the ejector unit. Place the crank so that the eye bolt comes in the hole on the middle handle. Lock with the washer and nut.

natural_image
Three-step line drawings showing hand positioning and cable termination (no text or symbols)Use
Check that the mains voltage corresponds to the rated voltage on the type plate. Check before plugging in the power cord that all screw connections are correctly fitted and tightened, and that the rubber pads are turned in the right direction.
Power switch
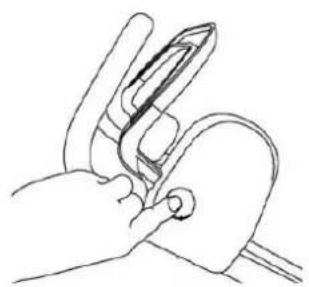
- Press the power switch on the side.
- Press the drive handle towards the handle with both hands to start the machine.
- The machine will not start if this is done in the reverse order.
natural_image
Line drawing of a hand holding a pen or stylus (no text or symbols)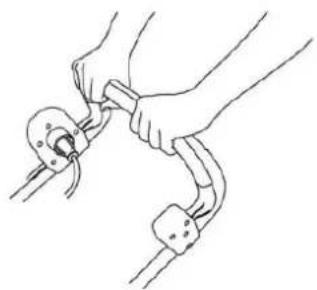
natural_image
Line drawing of hands connecting a cable to a connector (no text or symbols)Moving and snow blowing
• Turn the machine by tilting it slightly, so that the wheel on one side acts as a pivot point.
- Avoid straining the power cord.
- Do not force the machine.
• Work smoothly with an even tempo.
- Never expose the engine to any other load – risk of material damage.
• Always work carefully.
Changing the ejector alignment
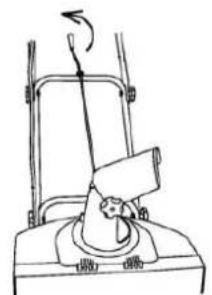
The ejector alignment can be adjusted by 180^ by using the crank for ejector unit.
natural_image
Line drawing of a mechanical device with a rotating arm and base mount (no text or symbols)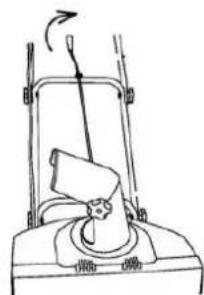
natural_image
Line drawing of a lawn mower with a rotating blade and handle (no text or symbols)Extension cord
If an extension cord is used, the cross-section of the conductors must be sufficient for the machine's power supply. Only use an extension cord approved for outdoor use. An extension cord with a lower rating can prevent the machine from working at full power.
MAINTENANCE
- Maintenance and repairs must only be carried out by qualified personnel who have the correct tools and know-how.
• Check at regular intervals that shear screws and screw connections are intact and properly tightened.
Replacing the rubber pads
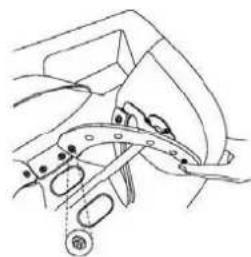
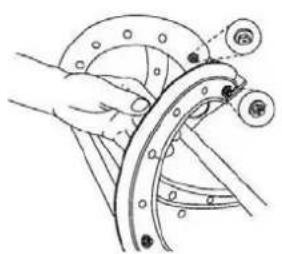
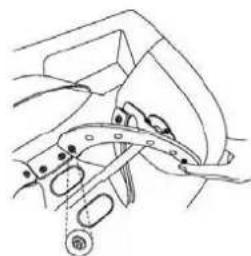
The rubber pads are wearing parts, which are replaced by following the instructions below. The new rubber pads should be positioned with the rough side inwards and the smooth side outwards. Switch off the machine, unplug the power cord and wait until all moving parts have completely stopped before adjusting, replacing parts, cleaning or carrying out maintenance work. Follow the instructions below to replace the rubber pads.
- Unscrew the screws holding the rubber pads.
- Fit a new rubber pad with the rough side inwards and the smooth side outwards.
- Insert and tighten the screws. Fit the other rubber pad in the same way.
natural_image
Technical line drawing of a mechanical component with no visible text or symbols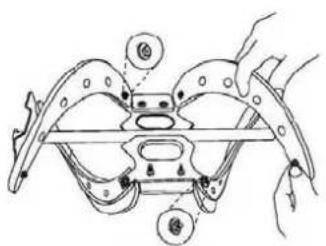
natural_image
Line drawing of a mechanical component with no visible text or symbolsStorage
- Allow the machine to cool, and clean it before transporting it and/or storing it. Secure the machine during transport.
- Unplug the power cord. Carefully check the extension cord for damage and/or wear. Replace if it is worn or damaged.
- Check the machine for damaged, loose, worn or missing parts. Check all connections and unions, and tighten if necessary.
- Store the machine in a dry place out of the reach of children. Cover the machine with a tarpaulin, or the like.
Jula reserves the right to make changes. In the event of problems, please contact our service department.
www.jula.com
Care for the environment!
Must not be discarded with household waste! This product contains electrical or electronic components that should be recycled. Leave the product for recycling at the designated station e.g. the local authority's recycling station.
CE
EC DECLARATION OF CONFORMITY EG FÖRSÄKRAN OM ÖVERENSSTÄMMELSE EF SAMSVARSERKLÆRING DEKLARACJA ZGODNOŚCI WE

Jula AB, Box 363, SE-532 24 SKARA, SWEDEN
Outdoor Noise Directive 2000/14/EC, amended by 2005/88/EC
RoHS Directive 2011/65/EU
This product was CE marked in year -11
Name and address of the person authorised to compile the technical file:
Jonas Backstad Box 363, SE-532 37 Skara, Sweden
Skara 2013-05-10
Stefan Rundberg PRODUCT MANAGER
- Operating Instructions for Electric Snow Blower
- SVENSKA 4
- SÄKERHETSANVISNINGAR 4
- ALLMÄNNA SÄKERHETSANVISNINGAR 4
- SÄKERHETSANVISNINGAR
- Användning
- Förlängningssladd
- Förvaring
- Bruk
- Skjøteledning
- Oppbevaring
- Montaż wyrzutnika
- Sposób użycia
- Przedłużacz
- Przechowywanie
- Read the Operating Instructions carefully before use!
- GENERAL SAFETY INSTRUCTIONS
- Work area
- Electrical safety
- Personal safety
- Power tool use and care
- Service
- Important safety instructions for the snow blower
- Symbols
- Always wear ear protection!
- DESCRIPTION
- USE
- Before starting
- Assembly of upper, middle and lower handles
- Fitting the ejector unit
- Fitting the crank for the ejector unit
- Power switch
- Moving and snow blowing
- Changing the ejector alignment
- Extension cord
- MAINTENANCE
- Replacing the rubber pads
- Storage
- Care for the environment!
- CE
- EC DECLARATION OF CONFORMITY EG FÖRSÄKRAN OM ÖVERENSSTÄMMELSE EF SAMSVARSERKLÆRING DEKLARACJA ZGODNOŚCI WE
Brand : Meec Tools
Model : 721-111
Category : Slingshot