
920-536 - Action Camera Marquant - Free user manual and instructions
Find the device manual for free 920-536 Marquant in PDF.


| Product Type | Action Camera |
| Brand | Marquant |
| Model | 920-536 |
| Lens | 120° wide angle |
| Display | 2.0" TFT LCD |
| Photo Resolution | 5M (2592x1944), 3M (2048x1536), 1M (1280x960), VGA (640x480) |
| Video Resolution | HD (1280x720), VGA (640x480) |
| Storage Media | Micro SD/SDHC up to 32 GB |
| File Formats | Video: AVI, Photo: JPG |
| Battery | Removable 3.7 V lithium-ion, 500 mAh |
| Battery Life | Min. 1.5 hours |
| Underwater Depth | Up to 30 m (with housing) |
| Dimensions | 59 x 41 x 21 mm |
| System Requirements | Windows XP/Vista/7/8, Dual-Core CPU, 1 GB RAM, 2 GB HDD, USB 2.0/3.0 |
| Languages | English, Simple Chinese, Traditional Chinese, Italian, French, Spanish |
| Modes | Stills, Video Recording, Car Mode, Playback |
| Webcam Mode | PC-CAM mode, no drivers needed for Windows XP SP3+ |
| Charging | Via USB cable, indicator red during charging, off when full |
| Accessories Included | Watertight housing, helmet mount, handlebar mount, frame, USB cable |
| Maintenance | Clean lens with optical cloth; store in clean, dry place |
| Safety Notes | Do not modify; protect from knocks, direct sunlight, and moisture |
Frequently Asked Questions - 920-536 Marquant
User questions about 920-536 Marquant
0 question about this device. Answer the ones you know or ask your own.
Ask a new question about this device
Download the instructions for your Action Camera in PDF format for free! Find your manual 920-536 - Marquant and take your electronic device back in hand. On this page are published all the documents necessary for the use of your device. 920-536 by Marquant.
USER MANUAL 920-536 Marquant
natural_image
Black MARQUANT device with circular lens and control buttons (no visible text or symbols on body)SE Bruksanvisning för actionkamera
NO Bruksanvisning for actionkamera
PL Instrukcja obsługi kamery sportowej
EN Operating instructions for action camera
SE - Bruksanvisning i original
EN - Operating instructions (Translation of the original instructions)
Jula reserves the right to make changes. In the event of problems, please contact our service department.
www.jula.com
Tillverkare/ Produsent / Produenci/ Manufacturer
Jula AB, Box 363, 532 24 SKARA
Importör/ Importør/ Importer/ Importer
Care for the environment!
Must not be discarded with household waste! This product contains electrical or electronic components that should be recycled. Leave the product for recycling at the designated station e.g. the local authority's recycling station.
SVENSKA....5
SÄKERHETSANVISNINGAR....5
TEKNISKA DATA 6
BESKRIVNING 7
HANDHAVANDE 9
UNDERHÅLL 13
NORSK 14
SIKKERHETSANVISNINGER 14
TEKNISKE DATA 15
BESKRIVELSE....16
BRUK....18
VEDLIKEHOLD .22
POLSKI 23
ZASADY BEZPIECZEŃSTWA 23
DANE TECHNICZNE 24
OPIS 25
OBSŁUGA 27
KONSERWACJA 31
ENGLISH 32
SAFETY INSTRUCTIONS....32
TECHNICAL DATA 33
DESCRIPTION 34
USE....36
MAINTENANCE 40
SÄKERHETSANVISNINGAR
natural_image
Diagram showing a device panel with USB port and an arrow indicating leftward movement (no text or symbols)START/AVSTÄNGNING
OBS!
Bruke minnekort
natural_image
Diagram showing a device with a card slot and an arrow indicating leftward movement (no text or symbols present)PÅ/AV
OBS!
Meny for stillbildemodus
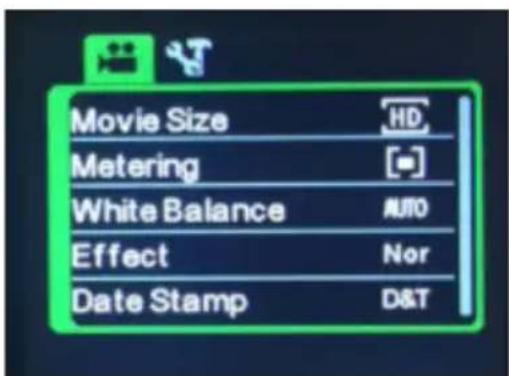
Meny for videoinnspillingsmodus
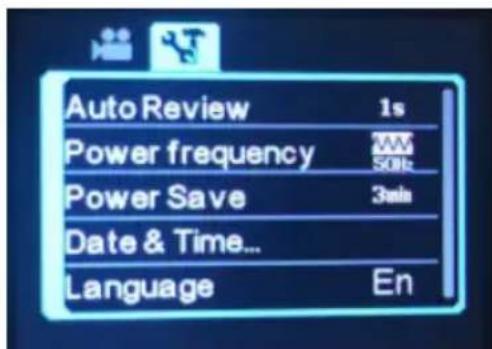
Meny for innstillingsmodus

Meny for avspillingsmodus
KOBLE TIL DATAMASKIN
Overføre filer
- Det vises et ikon for ekstern harddisk på stasjon H: i vinduet Min datamaskin, og du finner bildene og videoene dine i mappen H:\DCIM\RECORDER,100MEDIA.
Webkameramodus
OBS! Du trenger ingen drivere for å bruke webkameramodus (PC-CAM-modus) i Windows XP (SP3) eller nyere.
- I U-disk-modus (MSDC-modus) trykker du på utløseren for å gå til webkameramodus (PC-CAM).
- PCCAM vises på displayet. Webkameraet kan startes fra programvaren.
- Trykk på utløseren for å gå tilbake til U-disk-modus (MSDC-modus).
VEDLIKEHOLD
natural_image
Diagram showing a device with a card slot and an arrow indicating leftward movement (no text or symbols present)WŁĄCZANIE/WYŁĄCZANIE
UWAGA!
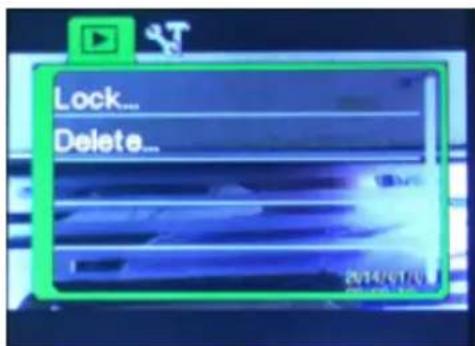
Menu trybu ustawień
Read the operating instructions carefully before use.
Save them for future reference.
- Never modify the product in any way. The manufacturer cannot accept liability for any damage caused by unauthorised modifications.
- Do not expose the memory card to stress in the form of bending, pressure or shock.
- Do not expose the memory card to powerful electromagnetic or magnetic fields, such as near speakers or television receivers.
- Do not expose the memory card to intense heat or cold.
- Keep memory cards clean and do not expose them to water or any other liquid. A memory card that has become wet can be dried with a soft cloth.
- Do not use a memory card from another camera without formatting it first.
- Do not use a memory card that has been formatted in another camera or card reader.
- Data on the memory card can be damaged if the memory card is used incorrectly, or if the power supply is disconnected, or the memory card is removed during recording, deletion, formatting or reading.
- Back up important data on another medium, i.e. hard disk or CD.
- Check before use that the camera is not damaged.
• Repairs must only be carried out by qualified service personnel.
- Protect the lens and display from dust, sand and chemicals..
- Do not touch the lens with your fingers.
- Protect the camera from knocks and blows.
- Protect the camera from direct sunlight.
TECHNICAL DATA
Functions video recording, car camera, stills and playback
Lens 120° wide angle lens
LCD display 2.0" TFT LCD
Size/resolution still
5 M (2592 x 1944)
3 M (2048 x 1536)
1 M (1280 x 960)
VGA (640 x 480)
Resolution video
HD: 1280 x 720
VGA: 640 x 480.
Storage media Memory card Micro SD (SDHC) max 32 GB
File format
Video: AVI
stills: JPG
Battery Removable 3.7 V rechargeable lithium battery 500 mAh.
Language English, simple Chinese, traditional Chinese, Italian, French, Spanish
Dimensions 59 x 41 x 21 mm
Battery life min 1.5 h
Max depth for underwater filming 30 m
System requirements
| Operating system | Windows XP/Vista/7/8 |
| Processor | Intel/AMD Dual-Core CPU or above |
| Internal memory | min 1 GB |
| Hard disk | min 2 GB |
| Other | port for USB 2.0/3.0 |
DESCRIPTION

- Lens
- Display indicator
- Activity indicator
- Power switch/MODE
-
2.0" TFT-LCD
-
Charging indicator
- Microphone
- Shutter button
- Battery cover
- Menu button/Up arrow button
- Down arrow button
- Micro SD card
- Micro USB port
ACCESSORIES

- Watertight camera housing
- Fastener for mounting on helmet
- Strap for mounting on helmet
- Fastener for mounting on handlebars or saddle post
- Frame
- USB cable
USE
BEFORE USING FOR THE FIRST TIME
Charging the battery via USB cable
- Connect the camera to a computer to charge the battery.
- The charge indicator goes red during the charging and goes off when the battery is fully charged. It normally takes 3–5 hours to fully charge the battery.

Using the memory card
NOTE: The camera does not have a built-in memory. Always insert a memory card before use.
- Insert the memory card in the card slot according to the instructions on the camera.
- Remove the memory card by carefully pushing it in so that it springs out.

natural_image
Diagram showing a device with a card slot and an arrow indicating leftward movement (no text or symbols present)SWITCHING ON/OFF
NOTE:
• To save the battery the display switches off automatically when the camera goes into standby mode.
- The camera switches off when the battery is fully charged. When the battery is discharged the icon is shown on the display to indicate that the battery needs to be charged.
Switching on
- Press the power switch for 1 second. The camera switches on and the display lights up.
Switching off
- Press the power switch for 3 seconds when the camera is in standby mode.
FUNCTIONS
NOTE: The camera stops filming/taking pictures when the memory card is full and/or the battery is discharged.
There are 4 different modes on the camera: stills, video recording, car, and playback. Use MODE to switch between modes.
Stills
- Switch on the camera.
- Flick MODE several times to go to stills mode.
- Press the shutter button in preview mode to take a photo.

- Stills mode
- Image size
- Number of photos taken
- Shows that the memory card is inserted
- Battery status
Video recording
- Switch on the camera.
- Flick MODE several times to go to video recording mode.
- Press the shutter button in preview mode to record a video.
- Press the shutter button again to stop recording.

- Video recording mode
- Video format
- Total recording time
- Shows that the memory card is inserted
- Battery status
Car mode
- Switch on the camera.
- Flick MODE several times to go to video car mode.
- Press the shutter button in preview mode to record a video.
– The recording is saved every 3 minutes, after which the next recording sequence starts.
- When the memory card is full the oldest video sequence is deleted to make room for the next.
- Press the shutter button again to stop recording.

- Car mode
- Video format
- Total recording time
- Battery status
- Shows that the memory card is inserted
Playback
- Switch on the camera.
-
Flick MODE several times to go to playback mode.
-
Pause the playback by pressing the shutter button.
- Stop the playback by pressing the power switch.
STATUS LAMPS
- Activity indicator (red): Flashes when the camera is busy filming or photographing, etc.
- Display indicator (red): The indicator goes on when the display is switched off and goes off when the display is activated.
- Charging indicator (red): Goes on when the battery is charging, goes off when battery is fully charged.
SETTINGS
- Press the menu button The menu for the enabled mode is shown in the display.
- Press MODE to move the cursor to the left or right to select the required menu.
- Press the down arrow to move the cursor up or down to select the required menu option.
- Press the shutter button to confirm.
- Press the menu button to exit menu mode.

Menu for stills mode

Menu for video recording mode
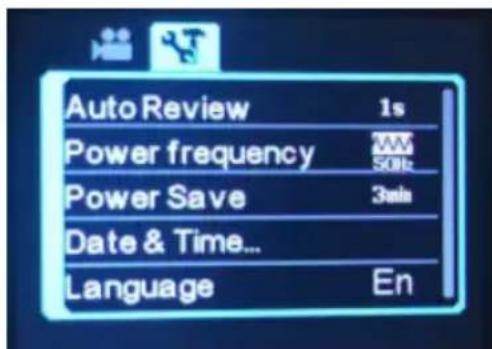
Menu for settings mode
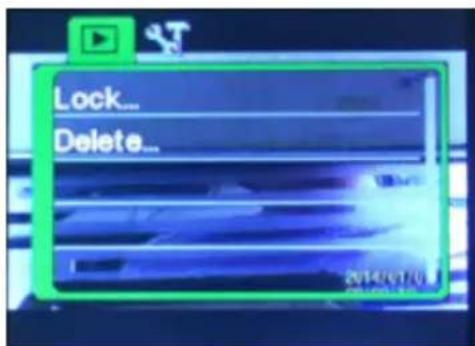
Menu for playback mode
CONNECTING TO A COMPUTER
Transfer files
NOTE: Do not disconnect the USB cable when a transfer is in progress and do not remove the memory card when the USB cable is connected – risk of loss of data.
- The camera has Plug and Play functionality. Start the device and connect it to a computer with the USB cable to use it as a separate hard disk.

- A hard disk icon H: is shown in the window My computer, with your photos and films in the folder H:\DCIM\RECORDER,100MEDIA.
Webcam mode
NOTE: No drive routine is needed for webcam mode (PC-CAM mode) in Windows XP (SP3) and higher.
- In U disk mode (MSDC mode), press the shutter button to switch to webcam mode (PC-CAM).
- The display shows PCCAM. The webcam can be started from the software.
- Press the shutter button to return to U disk mode (MSDC mode).
MAINTENANCE
• Store the product in a clean and dry place.
- Clean the lens by blowing off dust and carefully wiping the lens with a cleaning cloth for optical equipment. Only use detergent intended for cameras. Do not use solvents.
- Care for the environment!
- SVENSKA....5
- SÄKERHETSANVISNINGAR....5
- TEKNISKA DATA 6
- BESKRIVNING 7
- HANDHAVANDE 9
- UNDERHÅLL 13
- NORSK 14
- SIKKERHETSANVISNINGER 14
- TEKNISKE DATA 15
- BESKRIVELSE....16
- BRUK....18
- VEDLIKEHOLD .22
- POLSKI 23
- ZASADY BEZPIECZEŃSTWA 23
- DANE TECHNICZNE 24
- OPIS 25
- OBSŁUGA 27
- KONSERWACJA 31
- ENGLISH 32
- SAFETY INSTRUCTIONS....32
- TECHNICAL DATA 33
- DESCRIPTION 34
- USE....36
- MAINTENANCE 40
- SÄKERHETSANVISNINGAR
- START/AVSTÄNGNING
- OBS!
- Bruke minnekort
- PÅ/AV
- KOBLE TIL DATAMASKIN
- Overføre filer
- Webkameramodus
- VEDLIKEHOLD
- WŁĄCZANIE/WYŁĄCZANIE
- UWAGA!
- Read the operating instructions carefully before use.
- TECHNICAL DATA
- DESCRIPTION
- ACCESSORIES
- USE
- BEFORE USING FOR THE FIRST TIME
- Charging the battery via USB cable
- Using the memory card
- SWITCHING ON/OFF
- NOTE:
- Switching on
- Switching off
- FUNCTIONS
- Stills
- Video recording
- Car mode
- Playback
- STATUS LAMPS
- SETTINGS
- CONNECTING TO A COMPUTER
- Transfer files
- Webcam mode
- MAINTENANCE
Brand : Marquant
Model : 920-536
Category : Action Camera