
PSI-1800 - Iron WILFA - Free user manual and instructions
Find the device manual for free PSI-1800 WILFA in PDF.


| Brand | Wilfa |
| Model | PSI-1800 |
| Product Type | Pressurized Steam Iron |
| Power Supply | 230V~, 50 Hz |
| Power Consumption | 1800 W |
| Soleplate Material | Ceramic |
| Water Tank Capacity | Filling to MAX mark; exact capacity not specified |
| Steam Function | Pressurized steam, variable steam control, vertical steam |
| Spray Function | Yes, fine mist spray |
| Anti-Drip System | Yes, cuts off water when temperature too low |
| Auto Shut-Off | After 5 min upright, 30 sec horizontal |
| LED Display | Temperature and steam settings, green when ready, red when heating |
| Temperature Control | Dial with settings for synthetics, silk/wool, cotton/linen (●, ●●, ●●●) |
| Dry Ironing | Yes, can be used without steam |
| Cord Type | Pivot cord for left or right handed use, with flexible cord protector |
| Weight | Approx. 1.2 kg (estimated) |
| Dimensions | Not specified |
| Water Fill Inlet | Covered to prevent dust and spills |
| Cleaning Instructions | Wipe exterior with damp cloth; clean soleplate from starch buildup occasionally |
| Storage | Store upright; coil cord loosely around iron |
| Waste Disposal | Do not dispose with household waste; recycle per WEEE directive |
Frequently Asked Questions - PSI-1800 WILFA
User questions about PSI-1800 WILFA
0 question about this device. Answer the ones you know or ask your own.
Ask a new question about this device
Download the instructions for your Iron in PDF format for free! Find your manual PSI-1800 - WILFA and take your electronic device back in hand. On this page are published all the documents necessary for the use of your device. PSI-1800 by WILFA.
USER MANUAL PSI-1800 WILFA
natural_image
White and black iron iron iron with a dotted cord, displayed against a plain white background (no text or symbols visible)Wilfa Jämtland
Pressurized steam iron
Bruksanvisning
Bruksanvisning
Brugsanvisning
Käyttöohje
Instruction manual
PSI-1800
Dampstrykejern
Viktige forholdsregler 3
- Spraydyse
- Åpning for påfyll av vann
- Kontrollpanel
- Dampknapp
- Sprayknapp
-
Håndtak
-
Lagring av ledning
- Temperaturkontrollskive
- Vannbeholder
- Forkrommet kant
- Keramisk såleplate
- Fyllebeholder
natural_image
Line drawing of a container pouring liquid into a container with a lid, no text or symbols presentBruksanvisning
Drei temperaturkontrollskiven til ønsket tekstil/temperatur-innstilling. Plasser strykejernet i loddrett stilling (på et solid underlag) mens det varmer opp til ønsket temperatur, ca. i to minutter.
1 DAMP-knappen
natural_image
Line drawing of a steam iron with a circular dial and patterned base (no text or symbols)Autodamp (horisonalt)

natural_image
Line drawing of a microscope (no text or symbols)Ikke
(stående)
natural_image
Pure mechanical diagram showing a spring-loaded component with no text or symbolsnatural_image
Symbol of a trash bin crossed with a diagonal line, representing no waste or discharge (no text or labels)natural_image
Line drawing of a mechanical component with a cup pouring liquid into a handle (no text or symbols)Anvisningar
1 Funktionsknappen för ÅNGA
natural_image
Line drawing of a steam iron with a circular button and patterned base (no text or symbols)
natural_image
Line drawing of a mechanical device with no visible text or symbolsAuto-ånga
(Horisontell)
Ingen
(Lodrät)
natural_image
Pure mechanical diagram showing a clamping mechanism with no text or symbols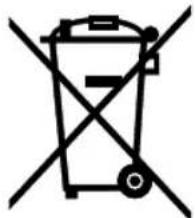
natural_image
Symbol of a trash bin crossed out by two diagonal lines (no text or numbers present)The image contains only background ruled lines. According to Rule 2, these lines must be ignored. There is no actual text content to extract.
Therefore, the corrected OCR output is:
[Empty String]
natural_image
Line drawing of a mechanical component with a cylindrical part inserted, showing no text or symbols1 DAMPKNAP
natural_image
Line drawing of an iron (£) with a cup and spool of coins below (no text or symbols)(vandret)

natural_image
Line drawing of a microscope (no text or symbols)(Iodret)
natural_image
Simple line drawing of a mechanical component or tool with no visible text, numbers, or symbols.natural_image
Symbol of a trash bin crossed out by two diagonal lines, with no text or numbers present.natural_image
Line drawing of a mechanical component with a magnifying glass pouring liquid into a cylindrical part (no text or symbols)Käyttöohjeet
1 HÖYRYPAINIKE
natural_image
Line drawing of a steam iron with a circular dial and patterned base (no text or symbols)
natural_image
Technical line drawing of a mechanical component or bracket (no text or symbols)Automaattinen
höyrytys
(vaakasuorassa)
Ei
(pystyasennossa
natural_image
Pure mechanical component diagram without any text, numbers, or symbols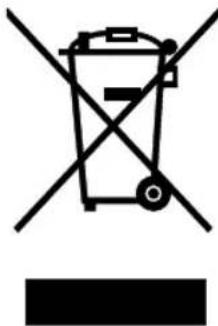
natural_image
Symbol of a trash bin crossed with a diagonal line, no text or numbers presentPressurized steam iron
Important safeguards 3
Save these instructions ....6
Before first use.... 6
Technical Specifications 6
Filling with water.... 7
Operating instruction 7
Dry ironing 9
Ironing chart....9
Auto shut-off.... 10
Emptying the iron 10
Storage.... 10
Important safeguards
When using your iron, basic safety precautions should always be followed:
■ Make sure the power used corresponds with that indicated on the rating label.
■ Use the iron only for needed use as described in the instruction manual.
■ Close supervision is necessary when any appliance is used near children.
Do not leave the iron unattended while connected or on an ironing board. Burns can occur from touching hot metal parts, hot water or steam.
■ Unplug the iron from the mains electrical supply before:
- Cleaning
- Filling with water or emptying the water tank
- Immediately after use
■ Never operate the iron with a damaged power cord or plug, or after it has fallen or been damaged in any way. To avoid the risk of electric shock, do not disassemble the iron; take it to a qualified serviceman for examination and repair.
■ Do not let cord touch hot surfaces.
■ To protect against a risk of electric hazards, do not immerse the iron in water or any other liquid.
■ The iron must be used and rested on a stable surface.
■ When placing the iron on its stand, ensure that the surface on which the stand is placed is stable.
■ The iron is not to be used if it has been dropped, if there are visible signs of damage or if it is leaking.
- Keep the iron and its cord out of reach of children less than 8 years of age when it is energized or cooling down.
■ This appliance can be used by children of 8 years and older and people with reduced physical, sensory or mental capabilities or lack of experience and knowledge if they have been given supervision or instruction concerning use of the appliance in a safe way and understand the hazards involved. Children must not play with the appliance. Cleaning and user
maintenance must not be done by children without supervision.
■ The iron must not be left unattended while is connected to the supply mains.
■ Always turn the iron OFF before plugging or unplugging it from the electrical outlet.
■ The plug must be removed from the socket before the water reservoir is filled (for steam irons and irons incorporating means for spraying water).
■ If the supply cord is damaged, it must be replaced by the manufacturer, its service agent or similarly qualified persons in order to avoid hazard.
■ This appliance is for household use only.
SAVE THESE INSTRUCTIONS
For Household Use Only
GETTING TO KNOW YOUR LIGHTWEIGHT PROFESSIONAL IRON
Before fi rst use
Remove any labels, stickers or tags that may be attached to the body or soleplate of the iron.
It is normal for small amount of smoke and odour to be produced the first time, this will quickly disappear. The smoke and odour are safe and should not recur after initial heating.
When using the steam function for the first time, do not direct the steam towards the garment, as there could be debris from the steam vents.
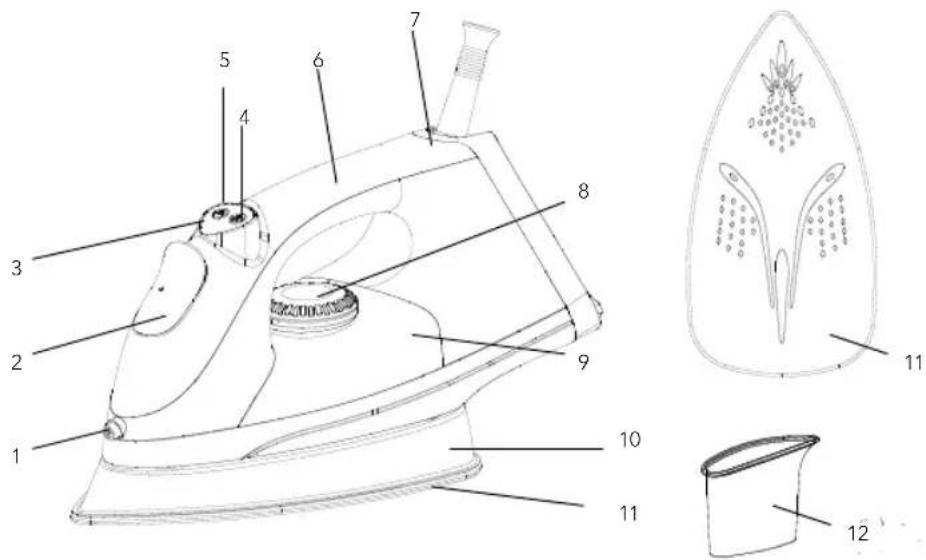
-
Spray Nozzle
-
Cord Storage
-
Water Fill Inlet
-
Temperature Control Dial
-
Control Panel
-
Water Tank
-
Steam Button
-
Chrome-plated Skirt
-
Spray Button
-
Ceramic Soleplate
-
Handle
-
Filling Flask
Technical Specifications
Voltage: 230V\~,50
Hz.
Power: 1800
Watts
Filling with water
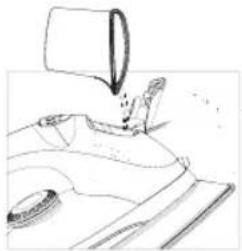
Make sure that both the Steam Control Knob and Temperature Control Dial are in the "OFF" position.
Hold the iron upright so that the water-fi lling inlet is in a horizontal position. Fill with water through Water Filling Inlet until the water reaches the "MAX" mark indicated on the side of the iron, and never fi ll above this mark.
Note: Because of the soleplate design, ordinary tap water may be used with this iron. However, in very hard water areas, we recommend using distilled or demineralized water.
natural_image
Line drawing of a mechanical component with a cylindrical part inserted into a housing (no text or symbols)Operating instruction
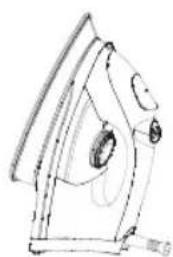
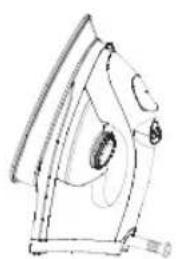
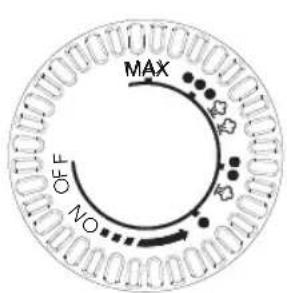
Turn the temperature control dial to the desired fabric/temperature setting. Place the iron on its heel (on a stable, protected surface) while the iron is warming to desired temperature, approximately two minutes.
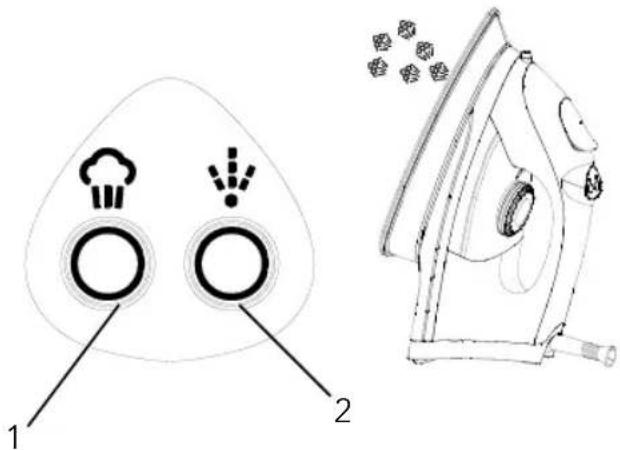
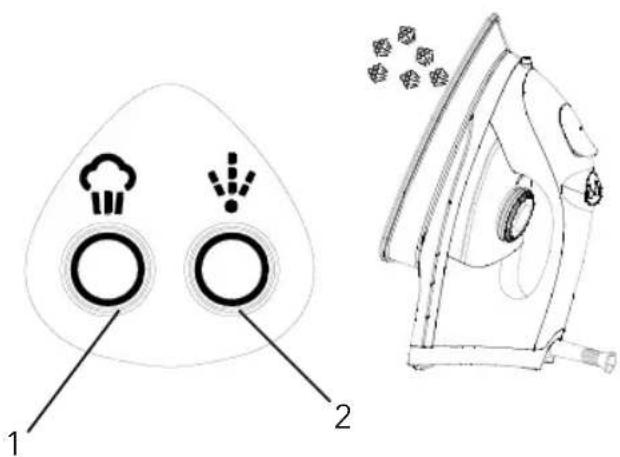
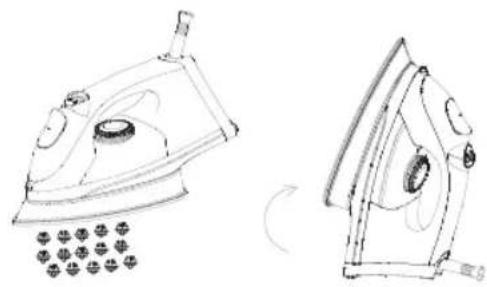
1 STEAM Function button
When the LED lamp turn green, Pressing the steam button and hold at upright provides pressurised steam which aids in removing stubborn wrinkles from fabrics such as denim, cotton or linen.
2 SPRAY BUTTON
Pressing this button and holding provides a defi ned jet of spray which gently moistens fabric. It is useful on fabrics with stubborn wrinkles.
3 VARIABLE STEAM CONTROL
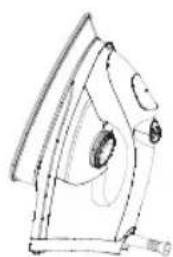
Set the temperature to ●●, ●●● dots or Max. The LED lamp will turn red, heating up until the LED lamp turns green. Pressing the steam button ⏻ one time will cause steam to be emitted from the soleplate.
4 STEAM AUTO-OFF
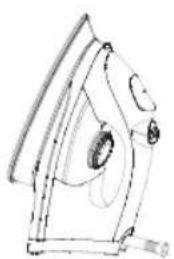
If you lift the iron upright, no steam will be emitted from the soleplate until you have placed the iron in the horizontal position.
This is to preserve water consumption and energy.
Press the steam button again to switch to dry ironing.
5 ANTI-DRIP FUNCTION
Cuts off water when the iron temperature is too low.
6 LED DISPLAY CONTROL
Turn the Temp. Dial to select temperature and amount of steam. Main temperature settings are indicated by the 1, 2 and 3 dots.
7 CERAMIC SOLEPLATE
Provides maximum glide-ability and heat retention.
8 WATER FILLING INLET
The cover prevents dust and foreign matter from entering the water tank. It also stops any water from spilling during ironing.
9 PIVOT CORD
For left- or right-handed use. Pivotsup and down, prevents dragging along the fabric. The fl exible cord protector protects the cord from fraying.
Auto Steam No steam
natural_image
Line drawings of an iron (£) and its side view showing internal components (no text or symbols)(Horizontal)
(Upright)
NOTE: If you press the steam and spray button before the LED display has turned green, the iron will beep.
Dry ironing
For dry ironing, Turn the temperature control dial to the desired fabric/temperature setting. This will cut off the steam flow if there is water in the tank. All marked fabric settings on the temperature control dial can be used for dry ironing.
Wilfa Jämtland allows you to iron all kinds of textiles at full strength when the steam function is switched on. The iron is also fully functional without steam. However, we recommend that you follow the diagram below to avoid damaging textiles.
Ironing chart
| DIRECTIONS ON LABEL | 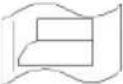 | 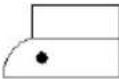 | 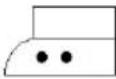 | 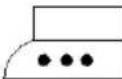 | 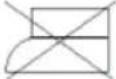 |
| FABRIC | 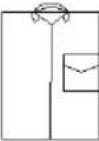 | SYNTHETIC FIBERS, e.g. acrylic, nylon polyester | SILK WOOL | COTTON LINEN | "THIS MATERIAL CANNONT BE IRONED!"Please note that on the label means |
| TEMP. CONTROL DIAL | MIN● | ●● | MAX●●● | ||
| STEAM CONTROL | 0 | ||||
| VERTICAL OF STEAM | 0 | ||||
| SPRAY |
NOTE: Always refer to the garment care tag for ironing instructions. Before starting to iron delicate fabrics, it is best to first test the temperature of the iron on a hem or an inside seam.
Auto shut-off
The iron has an auto shut-off safety function which is designed to engage after approximately 5 minutes of non-use in the upright position.
The auto-shut off will activate if the iron rests in the horizontal position for approximately 30 seconds without use. The auto shut-off indicator light will flash when the auto shut-off has activated. To reset your iron and continue ironing follow these steps:
- Lift the iron.
- Holding the iron horizontally in front of you, gently rock it and forth several times. This motion will reset the safety switch inside the iron.
- If you press the steam button or spray button, the unit will be reset again. Allow time for the iron to re-heat. The LED display will turn green when the iron is ready for use.
Emptying the iron
- Always empty the iron after each use.
- When finished using the iron, turn off the steam button.
- Unplug the iron from the electrical outlet.
- Turn the iron upside down over the sink with the tip pointing downward and allow the water to flow from the inlet.
- Place iron upright and allow it to cool before storing.
Storage
Allow the iron to cool down.
Always store the iron in the upright position to protect the soleplate.
From time to time, clean the exterior of the iron with a damp cloth and wipe dry.
If you use spray starch, wipe the soleplate occasionally with a soft damp cloth to prevent the build-up of deposits.
If the iron has not been used for a few weeks, hold the iron horizontally and allow to steam for 1 minute before ironing.
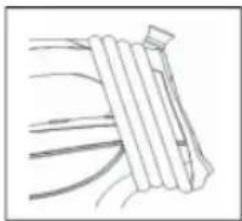
Coil the cord loosely around the iron when storing.
natural_image
Pure line drawing of a mechanical component or assembly without any text, numbers, or symbols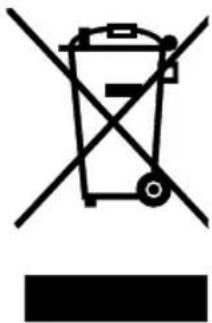
natural_image
Symbol of a trash bin crossed with a diagonal line, no text or numbers presentCorrect Disposal of this product
This marking indicates that this product should not be disposed with other household wastes throughout the EU. To prevent possible harm to the environment or human health from uncontrolled waste disposal, recycle it responsibly to promote the sustainable reuse of material resources. To return your used device, please use the return and collection systems or contact the retailer where the product was purchased. They can take this product for environmental safe recycling.
Under the Waste Electrical and Electronic Equipment Directive (WEEE), such waste must be collected separately and processed. If in future you need to discard this product, please do not throw it out with your normal rubbish. Please send this product to a collection point where one is available.



- Wilfa Jämtland
- Pressurized steam iron
- Dampstrykejern
- Bruksanvisning
- Anvisningar
- DAMPKNAP
- Käyttöohjeet
- Important safeguards
- SAVE THESE INSTRUCTIONS
- For Household Use Only
- GETTING TO KNOW YOUR LIGHTWEIGHT PROFESSIONAL IRON
- Before fi rst use
- Technical Specifications
- Filling with water
- Operating instruction
- STEAM AUTO-OFF
- ANTI-DRIP FUNCTION
- LED DISPLAY CONTROL
- CERAMIC SOLEPLATE
- WATER FILLING INLET
- PIVOT CORD
- Dry ironing
- Auto shut-off
- Emptying the iron
- Storage
- Correct Disposal of this product
Brand : WILFA
Model : PSI-1800
Category : Iron