USER MANUAL SI-24CW WILFA
natural_image
Two black electric iron models, one labeled 'High Power 200KW Canvas' and the other 'High Power 200KW Automotive Canvas', shown against a white background with no visible text or symbols on the devices themselves.
Krøllfritt/ Krøllfritt ION
Steam Iron
Bruksanvisning
Bruksanvisning
Brugsanvisning
Käyttöohje
Instruction manual
Ugit officia porem et
ent, inctorem resent
volorumqui bearum
corestota et ut am
S1-24CW/S1-24TB
Dampstrykejern
natural_image
Two black electric iron machines side by side, one with a white label and control buttons, the other with a logo and Chinese text (no visible text beyond branding)
Kun for husholdningsbruk
1 Vannfyllings-åpning
2 Dreieknapp for dampkontroll
3 Knapp for damputblåsning
4 Spray-knapp
5 Indikatorlampe for Temperatur
6 Temperaturkontrollskive
7 Indikatorlampe for strøm
8 Beskyttelse for strømledning
9 Hælstøtte
10 Knekkavlaster
11 Viser
12 Såleplate
13 Knapp for selvrensing
14 Maksindikator for vannstanden
15 Vanntank
16 Spray-munnstykke
VIKTIGE FORHOLDSREGLER
natural_image
Two black electric iron machines side by side, one with a white label and power cord, the other with a white label and control buttons (no visible text or symbols on the main body).
natural_image
Two black electric iron machines side by side, one with a white label and control buttons, the other with a blue logo (no visible text or symbols on the device itself)
natural_image
Two black electric iron machines side by side, one with a white label and control buttons, the other with a white label and cable (no visible text or symbols on the main body).
Operating Instruction ....3
Instruction Manual 4
Important safeguards ....5
Warning 6
Before first use ....6
Attention 9
Operating Instruction
① Model No: SI-24CW, SI24TB
② 220-240V\~50Hz 2400W
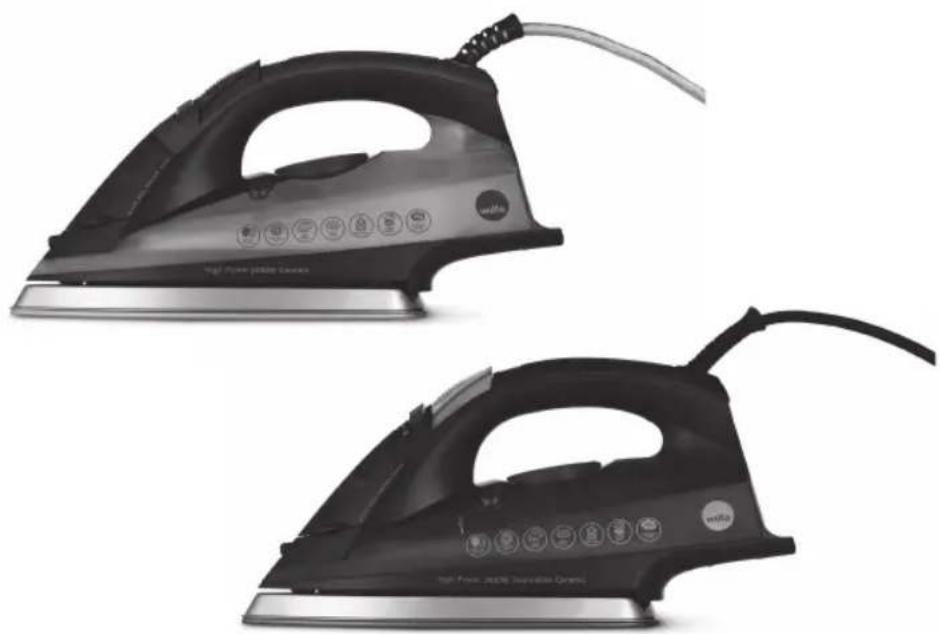
natural_image
Two black electric iron machines side by side, one with a white label and control buttons, the other with a logo and 'Wells' branding (no visible text beyond branding)
For household use only
Before operationg this iron, please read this instruction manual carefully
Instruction Manual
Please read this instruction manual carefully and familiarize yourself. With your new steam iron. Before using the first time, please retain this manual for future reference.
Know your Iron
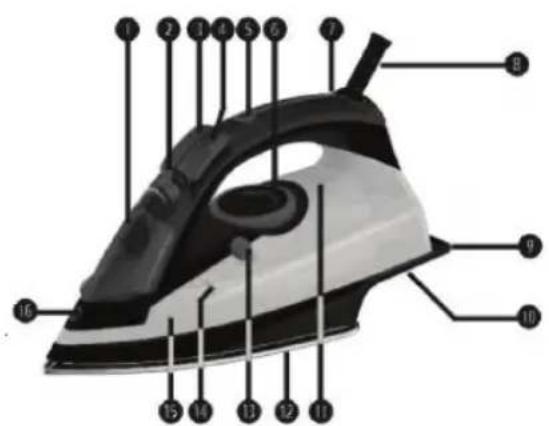
1 Water filling inlet
2 Steam control turning knob
3 Burst of steam button
4 Spray Button
5 Temperature indicator light
6 Temperature control dial
7 Power indicator light
8 Power cord protector
9 Heel rest
10 Cord wrap
11 Pointer
12 Soleplate
13 Self-cleaning button
14 Water tank max indicator
15 Water tank
16 Spray Nozzle
IMPORTANT SAFEGUARDS
When using your iron, basic safety precautions should always be followed:
■ Make sure the power used corresponds with the one indicated on the rating label.
■ Use the iron only for needed use as described in the instruction manual.
■ Close supervision is necessary when any appliance is used near children. Do not leave iron unattended while connected or on an ironing board. Burns can occur from touching hot metal parts, hot water or steam.
- Keep the iron out of reach of children.
■ The iron should never be left unattended while it is connected to the mains supply.
■ Unplug the iron from the mains electrical supply before:
1. Cleaning
2. Filling with water or emptying the water tank
3. Immediately after use
■ Never operate the iron with damaged power cord or plug, or after it has fallen or been damaged in any way. To avoid the risk of electric shock, do not disassemble the iron, take it to a qualified serviceman for examination and repair.
■ Do not let cord touch hot surfaces.
■ To protect against a risk of electric hazards, do not immerse the iron in water or any other liquid.
■ The iron must be used and rested on a stable surface.
■ When placing the iron on its stand, ensure that the surface on which the stand is placed is stable.
■ The iron is not to be used if it has been dropped, if there are visible signs of damage or if it is leaking.
WARNING


1 This appliance is not intended for use by persons (including children) with reduced physical, sensory or mental capabilities, or lack of experience and knowledge, unless they have been given supervision or instruction concerning use of the appliance by a person responsible for their safety.
2 Children should be supervised to ensure that they do not play with the appliance.
3 The iron must not be left unattended while is connected to the supply mains.
4 The plug must be removed from the socket-outlet before the water reservoir is filed with water (for steam ir ons and irons incorporating means for spraying water).
BEFORE FIRST USE
① It is normal for small amount of smoke to be produced the first time, this will quickly disappear.
② When using the steam function for the first time, do not direct the steam towards the laundry, as there could be debris from the steam vents.
FILLING WITH WATER
① Make sure that both the Steam Control turning Knob and Temperature Control Dial are in "OFF" position.
② Hold the iron upright so that the water-filling inlet is in a horizontal position.
③ Fill with water through Water Filling Inlet until the water reach the "MAX" mark indicated on the side of the iron, and never fill above this mark.
SETTING TEMPERATURE
Follow the ironing instructions on the garment label. If there is no instruction but you do know the kind of fabric, please consult the following table.
Note: If the fabric consists of various kinds of fabrics, always select the temperature required by the most delicate fabrics.
| Fabric Temperature control Temperature requirement |
| Synthetic | ● | Low temperature |
| Silk, wool | ●● | Medium temperature |
| Cotton, linen | ●●● MAX | High temperature |
STEAM IRONING
① Place the iron in a vertical position and set the temperature control dial at the minimum/low heat setting.
② Insert the plug into the socket, and then turn the temperature control dial to the "high heat" marking. The power indicator light will turn on, and indicating that the iron start to heat up.
③ When the temperature indicator light turn on, the set temperature has been reached and the iron is ready to use.
④ During ironing, the temperature indicator light on the iron automatically switches on/off as the thermostat maintains the set temperature (you may continue ironing during this process).
⑤ Turn the steam control turning knob to the required position.
⑥ Steam is produced as soon as the iron in held horizontally.
SPRAYING
■ Press the spray button to spray water on clothes, as often as required. Note: When using the water spray function, ensure that there is enough water in the water tank, and you may have to pump the spray button several times at first time you use the iron in order to start the spraying function.
BURST OR VERTICAL STEAM IRONING
■ Press the burst of Steam button to generate a powerful burst of steam that can penetrate the fabrics and smooth the most difficult and tough creases. Wait for a few seconds before pressing again.
■ By pressing the Burst of Steam Button at intervals you can also iron vertically (curtain, hung garments, etc.)
Note: The burst steam function can only be used at high temperature. Stop the emission when the temperature indicator light turns off, then start ironing again only after the temperature indicator light has turned on.
DRY IRONING
For ironing without steam, follow the instruction in section "steam ironing", however, the steam control turning knob should remain in position "O" (no steam).
SELF-CLEANING
The self-cleaning feature cleans inside the soleplate, removing impurities. We recommend using it every 10-15 days.
■ Set the steam control turning knob to position O (no steam)
■ Fill the water tank to the maximum level.
■ Set the temperature control dial to MAX and wait for the pilot light to turn off.
■ Pull the plug out of the socket and press the self-cleaning button until the boiling water, steam, impurities come out.
■ When the soleplate has cooled down, you can clean it with a damp cloth.
ANTI-DRIPPING SYSTEM
This iron is equipped with drip stop function: the iron automatically stops steaming when the temperature is too low to prevent water from dripping out of the soleplate.
With the anti-dripping system, you can perfectly iron even the most delicate fabrics.
ANTI-CALC SYSTEM
A special filter inside the water tank softens the water and prevents scale build-up in the soleplate. The filter is permanent and does not need replacing.
Note: Use tap water only. Distilled and demineralized water makes the anticalc system ineffective by altering its physicochemical characteristics.
AUTO SHUT-OFF
An electronic safety device will automatically switch the heating element off if the iron has not been moved more than 30 seconds in a horizontal position. If in a vertical position, this will happen after 8 minutes. To indicate that the heating element has been switched off, the Power indicator light will start blinking.
■ When picking up the iron again, the Power indicator light stops blinking. This indicates that the iron is heating up again.
■ Wait for the Power indicator light stop blinking. Then is iron is ready for use.
FABRIC & TEMPERATURE INDICATOR
Press on the Electronic Temperature Control to select the desired fabric setting. The lights in the water tank will light up, at the same time lights will start to flash, they will stop flashing when the iron reaches the selected temperature.
HOW TO CLEAN AND STORE
■ After using, lift the iron with the filling hole downwards to empty the remaining water from the Water tank.
- Insert the plug into the socket, and set the Temperature Control Dial to "MAX" for 1-2 minutes to evaporate the remaining water, and then unplug the iron and let it cool down before storing it.
ATTENTION:
When the plug connecting with the power socket, the user is not allowed to leave.
When the power cord is damaged, contact your dealers or an authorized service center for repair.
In case of any repairs, replacement of cord or plug, or adjustment, please consult a qualified technician, or take appliance to an authorized service facility.
P. 10
Under the Waste Electrical and Electronic Equipment Directive (WEEE), such waste must be collected separately and processed. If in future you need to discard this product, please do not throw it out with your normal rubbish. Please send this product to a collection point where one is available.

AS WILFA
Industriveien 25
Postboks 146
1483 Skytta, Norway
Tel: 67 06 33 00
Fax: 67 06 33 91
wilfa.com




