
MCHOBTC13N - Cooker MATSUI - Free user manual and instructions
Find the device manual for free MCHOBTC13N MATSUI in PDF.


| Product Type | Freestanding Electric Cooker |
| Brand | Matsui |
| Model | MCHOBTC13N |
| Colour | White |
| Energy Source | Electric (mains powered) |
| Hob Type | Ceramic glass with 4 zones |
| Oven Type | Electric fan oven |
| Oven Capacity | 65 litres |
| Oven Functions | Conventional, fan, grill, fan grill, defrost |
| Hob Control Type | Rotary knobs |
| Timer Type | Digital with minute minder |
| Child Lock | Yes |
| Oven Cleaning | Standard enamel interior (manual cleaning) |
| Dimensions (H x W x D) | 90 cm x 60 cm x 60 cm |
| Weight | 55 kg |
| Power Rating | 10.0 kW (approx.) |
| Plug Type | Hardwired (requires professional installation) |
| Energy Efficiency Class (Oven) | A |
| Spare Parts Availability | Yes, via authorized service centers |
| Guarantee | 2 years (parts and labour) |
| Safety Features | Automatic oven shut-off, hob residual heat indicators |
Frequently Asked Questions - MCHOBTC13N MATSUI
User questions about MCHOBTC13N MATSUI
0 question about this device. Answer the ones you know or ask your own.
Ask a new question about this device
Download the instructions for your Cooker in PDF format for free! Find your manual MCHOBTC13N - MATSUI and take your electronic device back in hand. On this page are published all the documents necessary for the use of your device. MCHOBTC13N by MATSUI.
USER MANUAL MCHOBTC13N MATSUI
natural_image
Line drawing of a four-tier electric stove with circular vent holes and a control panel, enclosed in a circular frame (no text or symbols)Contents
GB
Safety Warnings....6
Unpacking....16
Product Overview....17
Top View....17
Control Panel....17
Before Using Your New Ceramic Hob 17
Choosing the Right Cookware 18
Using the Touch Controls 18
Using Your Ceramic Hob 19
To Start Cooking 19
When You Have Finished Cooking....20
Locking the Controls....20
To Lock the Controls....20
To Unlock the Controls....20
Over-Temperature Protection 21
Residual Heat Warning 21
Auto Shutdown 21
Using the Timer 21
Timer Overview 21
Using the Timer as a Reminder....21
Setting the Timer to Turn Cooking Zones Off....23
Cooking Guidelines....25
Heat Settings.... 25
Cleaning and Maintenance....26
Hints and Tips....27
Specifications....27
Installation....28
Preparing the Worktop 28
Ensuring Adequate Ventilation 28
Fastening the Fixing Brackets 29
Connecting the Hob to the Mains Power Supply....29
Innhold
NO
IMPORTANT SAFETY INSTRUCTIONS READ CAREFULLY AND KEEP FOR FUTURE REFERENCE
- It is recommended that this appliance is installed by a qualified electrical engineer. The manufacturer is not responsible for any damage caused by incorrect installation.
- Check whether there is any damage to the appliance after you have unpacked it. If any damage is found, do not use the appliance and contact the store where you purchased it.
• This appliance is for Domestic Use only.
- For disconnection from the mains supply you must have a switch with a contact separation of at least 3.0 mm in all poles and rated 32 Amp that provides full disconnection, this must be incorporated in the fixed wiring in accordance with the local wiring rules.
- If your mains cable gets damaged, it should be replaced by an authorized service agent or qualified electrician in order to avoid danger or electric shock.
- Only operate your appliance in a dry atmosphere.
- Keep the electrical cables of your other appliances away from hot areas; do not let them touch the appliance.
- Ensure that the appliance is switched off at the mains supply switch and allowed it to completely cool down before cleaning or performing any maintenance to avoid the possibility of an electric shock.
- Use of your appliance creates moisture in the room in which it is placed, make sure that your kitchen is well ventilated. Maintain the natural ventilation ducts properly.
- This appliance can be used by persons aged from 8 years and above and persons with reduced physical, sensory or mental capabilities, or lack of experience and knowledge if they have been given supervision or instructions concerning the use of the appliance in a safe way and understand the hazards involved. Children should not play with the appliance.
- Cleaning and user maintenance should not be made by children unless they are older than 8 years and are supervised.
- Children should be supervised to ensure that they do not play with the appliance.
- The appliance and its accessible parts become hot during use. Young children should be kept away.
- During use the appliance becomes hot. Care should be taken to avoid touching the cooking zones.
- Unattended cooking on a hob with fat or oil can be dangerous and may result in fire. NEVER try to extinguish a fire with water, but switch off the appliance and then cover the flame e.g. with a lid or a fire blanket.
• Danger of fire: Do not store items on the cooking surfaces. - Do not use harsh abrasives cleaners to clean the glass since they can scratch the surface.
- Glass ceramic hobs should not be used as a worktop. Sharp objects may cause scratches.
- Before starting to use your appliance, keep curtains, tulle, paper or flammable materials away from your appliance. Do not keep combustible or flammable things in or on the appliance.
- This appliance is for cooking purposes only. It must not be used for other purposes, for example room heating.
- Do not use steam cleaners for cleaning the appliance.
- If the hob surface is cracked, switch off the appliance to avoid possibility of electric shock.
• Take care when handling parts with glass, knocks, chips, heavy handling and dropping could cause the glass to shatter. - The appliance is not intended to be operated by means of an external timer or separate remote-control system.
- If the surface is cracked, switch off the appliance to avoid the possibility of electric shock.
- Metallic objects such as knives, folks, spoons and lids should not be placed on the hob surface since they can get hot.
VIKTIGE SIKKERHETSANVISNINGER
LESES N∅YE OG BEHOLDES FOR FREMTIDIG OPPSLAG
- Det anbefales at dette apparatet installeres av en kvalifisert elektriker. Produsenten er ikke ansvarlig for skade som skyldes feil installasjon.
Remove all packaging from the unit. Retain the packaging. If you dispose of it please do so according to local regulations.
The following items are included:
GB

natural_image
Four white circles arranged in a 2x2 grid on a dark background, with no text or symbols present.Main Unit

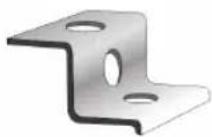
Brackets × 4 GB818 / M4*10-PFH Screw × 4

for securing the bracket.
Top View

- Max. 1200 W Zone
- Max. 1800 W Zone
- Max. 1200 W Zone
- Max. 1800 W Zone
- Glass Plate
- Control Panel
GB
Control Panel
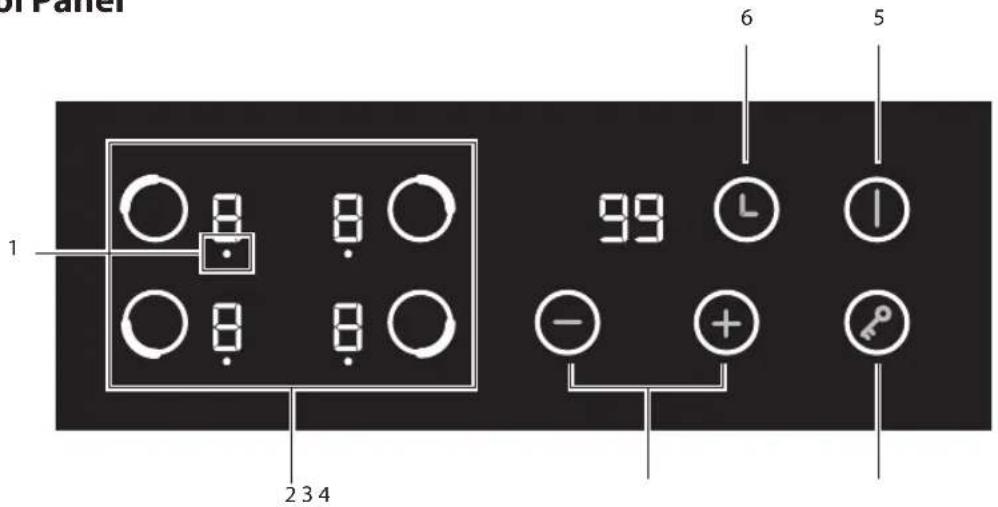
- Timer Indicator
- Cooking Zone Controls
- Power/Time Adjustment Controls
- Keylock Control
- ON/OFF Control
- Timer Control
Before Using Your New Ceramic Hob
- Remove any protective film that may still be on your ceramic hob.
Choosing the Right Cookware
Do not use cookware with jagged edges or a curved base.

natural_image
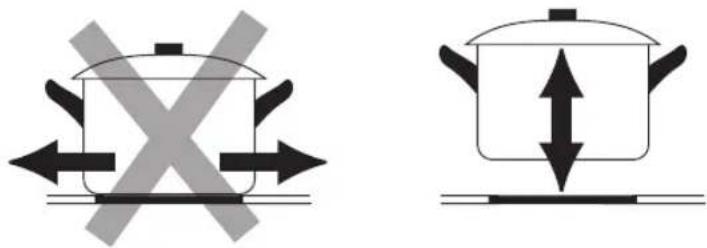
Three identical cooking pots with crossed-out X-shaped marks, shown in different orientations (no text or symbols)Make sure that the base of your pan is smooth, sits flat against the glass, and is the same size as the cooking zone. Always centre your pan on the cooking zone.

natural_image
Four identical cooking pots with crossed-out X marks, shown in sequence (no text or symbols)Always lift pans off the ceramic hob – do not slide, or they may scratch the glass.

- Occasionally the heated areas may be seen switching on and off when higher heat settings are used. This is due to a safety device, which prevents the glass from overheating. Some switching on and off when cooking at high temperatures, e.g. deep fat frying is quite normal, causes no damage to the hob and little delay in cooking times. Excessive switching may however be caused by the use of an unsuitable saucepan or a saucepan which is smaller than the heated area. If excessive switching occurs, discontinue the use of the saucepan.
• To improve performance, and reduce energy, always use pans with close fitting lids.
Using the Touch Controls
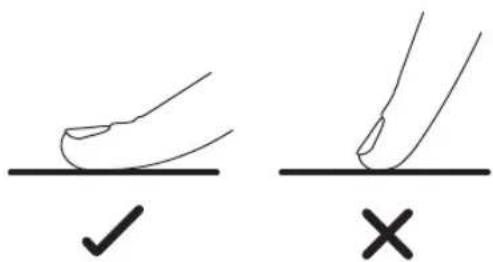
- The controls respond to touch, so you don't need to apply any pressure.
• Use the ball of your finger.
- You will hear an audible tone each time a touch is registered.
• Make sure the controls are always clean and dry, and that there is no object (e.g. a utensil or a cloth) covering them. Even a thin film of water may make the controls difficult to operate.
To Start Cooking
1. Touch the ON/OFF control.
After turning on, you will hear a tone. All the indicators light up for 1 minute then go out, indicating that the ceramic hob has entered standby mode.
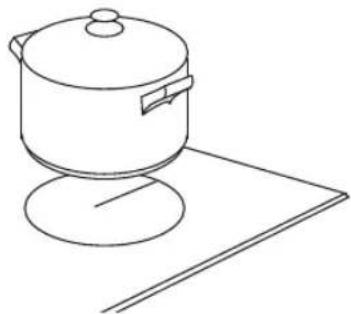
- Place a suitable pan on the cooking zone that you wish to use.
Make sure the bottom of the pan and the surface of the cooking zone are clean and dry.

Do not place hot pans over the control panel as this may cause damage.
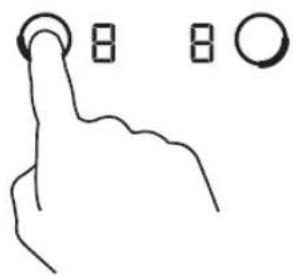
- Select the cooking zone you would like to use.
If you don't choose a heat setting within 1 minute, the ceramic hob will automatically switch back to standby mode. You will need to start again at step 1.
You can modify the heat setting at any time during cooking.

natural_image
Simple line drawing of a hand pointing upward with a circular icon on the index finger (no text or symbols)GB
natural_image
Line drawing of a cooking pot on a stand (no text or symbols)
natural_image
Hand gesture pointing at a circular button with three square buttons above it (no text or symbols)4. Touch the or-controls to
select the power level. The power level will default to level 5.
• Level 5 (Default)
- Level 0 (Off)
• Level 9 (Max power)

When You Have Finished Cooking
- Touch the heating zone that you wish to turn off. Press the button continuously until you see '0' or touch the and controls together. Make sure the display shows '0'.

Or, turn the whole hob off by touching the ON/OFF control.
natural_image
Simple line drawing of a hand pointing upward with a circular symbol on the index finger (no text or labels)6. Beware of hot surfaces
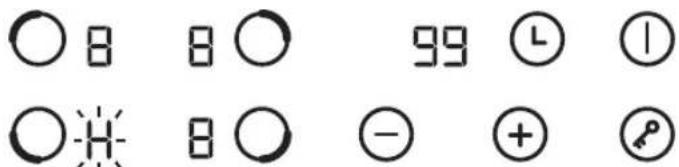
H will flash to show which cooking zone is hot to the touch. It will disappear when the surface has cooled down to a safe temperature. It can also be used as an energy saving function if you want to heat further pans: use the hotplate that is still hot.
Locking the Controls
- You can lock the controls to prevent unintended use (for example children accidentally turning the cooking zones on).
- When the controls are locked, all the controls are disabled.
To Lock the Controls
- Make sure that the ceramic hob is turned on but no cooking zone is in use.
- Touch the Ⓧ keylock control. The timer indicator will show "L"
To Unlock the Controls
- Make sure the ceramic hob is turned on.
- Touch and hold the 🔒 keylock control for 2 seconds.
- You can now start using your ceramic hob.
Over-Temperature Protection
A temperature sensor monitors the temperature inside the ceramic hob.
When an excessive temperature is detected, the ceramic hob will stop operation automatically.
Residual Heat Warning
When the hob has been operating for some time, there will be some residual heat. The letter "H" flashes to warn you to not touch the hot cooking zone.
Auto Shutdown
Another safety feature of the hob is auto shutdown. This occurs whenever you forget to switch off a cooking zone. The default shutdown times are shown in the table below:
| Power Level 123456789 | |||||||||
| Default Working Timer (Hour) 888 | 444222 |
Using the Timer
You can use the timer in two different ways:
- You can use it as a reminder. In this case, the timer will not turn any cooking zone off when the set time is up, it will just count down from the time set.
- You can set it to turn a cooking zone off after the set time is up, e.g. the top right cooking zone can be set to switch off after 25 minutes. The hob will beep once then turn the cooking zone off.
You can set the timer for up to 99 minutes in both modes.
Timer Overview
Minute display
shows the number of minutes set/remaining for:
• the cooking zone whose indicator dot is flashing.
• or the time of the next zone to switch off if multiple timers have been set.
25
L


Using the Timer as a Reminder
As a reminder the timer will simply count down and beep at the end.
- Make sure the ceramic hob is turned ON.
- Touch the Timer control L. The display will show'--'.

GB
- Set the time by touching the or controls of the timer.

- Touch the—or controls of the timer once to increase or decrease by 1 minute.
- Touch and hold the or control of the timer to increase or decrease by 10 minute.
-
If the setting time exceeds 99 minutes, the timer will automatically return to - - .
-
Touching the or-controls together will cancel the timer and -- will show in the minute display.
-
When the timer is set, it will begin to count down immediately. The display will show the remaining time and the timer indicator will flash for 5 seconds.
- When the set time has elapsed, a tone will sound for 30 seconds and -- will show in the display.

Setting the Timer to Turn Cooking Zones Off
You can set a timer for each cooking zone and have them all turn off at different times, e.g. set zone 1 to turn off in 10 mins and zone 2 to turn off in 25 mins. The time will always show the lowest time, in this example 10 mins.
- Touch the Power control ⏻ to switch the hob on.

natural_image
Simple line drawing of a hand pointing upward with a circular symbol on the index finger (no text or labels)GB
- Touch the Cooking Zone control (1,2,3 or 4).

- Touch the ⏻ or ⓣ set the power level.

- Touch the timer control Ⓛ. a red light will flash under the power level of the cooking zone. This shows which zone you are setting the timer on.

- Touch the or—to set the amount of time you want the cooking zone to turn off in.

- Touch the—or controls of the timer once to increase or decrease by 1 minute.
- Touch and hold the - or + controls of the timer to increase or decrease by 10 minutes.
- If the setting time exceeds 99 minutes, the timer will automatically return to --.

- Touch the timer control . The timer will now be set, the red light will now stop flashing.

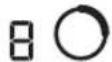
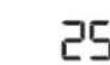


• Other cooking zones will keep operating if they are turned on.
- If you want to change the time after the timer is set, you have to start from step 1.
- To set a timer on another zone repeat steps 1-5.
- If multiple timers have been set the display will show the time of the first zone to switch off. For example:
• Zone 1 set to switch off in 25 mins
• Zone 2 set to switch off in 10 mins
The display will show 10.


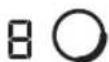


- When the set time has elapsed a beep will sound. The cooking zone will switch off and the red light under the power setting will go out. 'H' will appear to show the cooking zone is still hot.


The time that the next cooking zone will switch off will now be displayed.
Heat Settings
The settings below are guidelines only. The exact setting will depend on several factors, including your cookware and the amount you are cooking. Experiment with the ceramic hob to find the settings that best suit you.
| Heat setting Suitability | |
| 1 - 2 • delicate warming for small amounts of foodmelting chocolate, butter, and foods that burn quicklygentle simmeringslow warming | |
| 3 - 4 • reheatingrapid simmeringcooking rice | |
| 5 - 6 • pancakes | |
| 7 - 8 • sautéingcooking pasta | |
| 9 • stir-fryingsearingbringing soup to the boilboiling water |
| What? How? Important! | ||
| Everyday soiling on glass (fingerprints, marks, stains left by food or non-sugary spillovers on the glass) | 1. Switch the power to the ceramic hob off.2. Apply a ceramic hob cleaner while the glass is still warm (but not hot!)3. Rinse and wipe dry with a clean cloth or paper towel. | ·When the power to the ceramic hob is switched off, there will be no ‘hot surface’ indication but the cooking zone may still be hot!Take extreme care.·Heavy-duty scourers, some nylon scourers and harsh/abrasive cleaning agents may scratch the glass. Always read the label to check if your cleaner or scourer is suitable.·Never leave cleaning residue on the ceramic hob: the glass may become stained. |
| Boilovers, melts, and hot sugary spills on the glass | Remove these immediately with a fish slice, palette knife or razor blade scraper suitable for ceramic glass ceramic hobs, but beware of hot cooking zone surfaces:1. Switch the power to the ceramic hob off.2. Hold the blade or utensil at a 30° angle and scrape the soiling or spill to a cool area of the ceramic hob.3. Clean the soiling or spill up with a dish cloth or paper towel.4. Follow steps 2 to 3 for ‘Everyday soiling on glass’ above. | ·Remove stains left by melts and sugary food or spillovers as soon as possible. If left to cool on the glass, they may be difficult to remove or even permanently damage the glass surface.·Cut hazard: when the safety cover is retracted, the blade in a scraper is razor-sharp. Use with extreme care and always store safely and out of reach of children. |
| Spillovers on the touch controls | 1. Switch the power to the ceramic hob off.2. Soak up the spill3. Wipe the touch control area with a clean damp sponge or cloth.4. Wipe the area completely dry with a paper towel. | ·The ceramic hob may make an available tone or turn itself off, and the touch controls may not function while there is liquid on them. Make sure you wipe the touch control area dry before turning the ceramic hob back on. |
| Problem Possible Causes What To Do | ||
| The cooktop cannot be turned on. | No power. Make sure the ceramic hob is connected to the mains power supply and that it is switched on. Check whether there is a power outage in your home or area. If you've checked everything and the problem persists, call a qualified technician. | |
| The touch controls are unresponsive. | The controls are locked. Unlock the controls. See section ‘Using your ceramic hob’ for instructions. | |
| The touch controls are difficult to operate. | There may be a slight film of water over the controls or you may be using the tip of your finger when touching the controls. | Make sure the touch control area is dry and use the ball of your finger when touching the controls. |
| The glass has been scratched. Rough-edged cookware.Unsuitable, abrasive scourer or cleaning products being used. | Use cookware with flat and smooth bases. See ‘Choosing the right cookware’.See ‘Care and cleaning’. | |
Specifications
| Model MCHOBTC13N | |
| Rated Voltage 220 – 240V~ | |
| Rated Frequency 50 Hz | |
| Overall Dimension (W x D X H) | 590(W) × 520(D) × 67(H) (mm) |
| Power Consumption 5500 – 6600W |
Features and specifications are subject to change without prior notice.
Preparing the Worktop
Cut out the work surface following the dimensions shown in the drawing below.
For the purpose of installation and use, a minimum distance of 5cm space must be left around the cut out.
Be sure the thickness of the work surface is at least 20mm. Use a heat-resistant work surface material to avoid deformation caused by the heat from the hob. The minimum distance between the hob and the cupboard should be at least 65cm.

Ensuring Adequate Ventilation
Always make sure the ceramic cooker hob is well ventilated and that the air inlet and outlet are not blocked. This hob requires an adequate supply of fresh, cool air to fully function. The base of the hob must have direct unrestricted ventilation to the room where the hob is installed. Follow the requirements below.


There are ventilation holes around the outside of the hob. YOU MUST ensure that these holes are not blocked by the worktop, when you put the hob into position.
Fastening the Fixing Brackets
The unit should be placed on a stable, smooth surface (use the packaging).
-
Turn the hob upside down, place it on a soft surface and fasten the brackets to the appropriate holes. DO NOT tighten the screws at this stage.
-
Apply sealing strips around the edge of the hob.

GB

• The hob must be installed by qualified personnel or technicians.
• The hob should not be mounted above cooling equipment, dishwashers and rotary dryers.
• All surfaces around the hob should be able to withstand the heat generated by the hob.
• Never use a steam cleaner to clean the hob.
- Do not use a silicon sealant to seal the appliance against the aperture. This will make it difficult to remove the hob from the aperture, particularly if it needs to be serviced.
Connecting the Hob to the Mains Power Supply
- Remove the screw A.
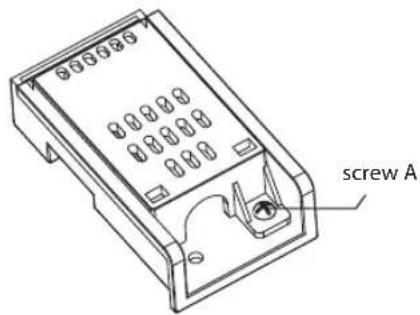
- Push the top plate back and then lift it up.

natural_image
Isometric line drawing of a rectangular electronic component with internal slots and mounting holes (no text or symbols)- Remove the 2 screws B.

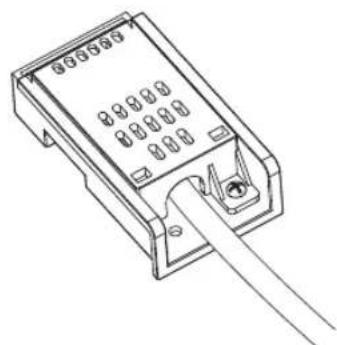
- Remove the 4 screws C in the terminal box and insert the power cord at the connection.

The power supply should be connected in compliance with the relevant standard, or a single-pole circuit breaker the method of connection is shown below.
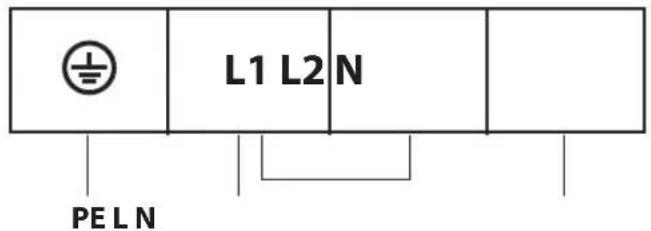
3 × 6 mm^2 / 3 × 2.5 mm^2
• This appliance must be earthed.
• For this connection a power lead of wire type H05VV-F should be used.
GB

- If the mains cable is damaged and needs to be replaced, this should be done by a qualified person using the proper tools, so as to avoid any accidents.
- If the ceramic hob is being connected directly to the mains supply, an omnipolar circuit breaker must be installed with a minimum gap of 3mm between the contacts.
-
The installer must ensure that the correct electrical connection has been made and that it complies with safety regulations.
• The mains cable must not be bent or compressed.
• The mains cable must be checked regularly and only replaced by a qualified person. -
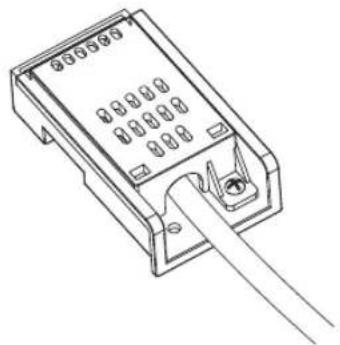
Assemble the cable clamp, be aware that the ellipse hole on cable clamp must match the ellipse hole on. Fix the top plate.
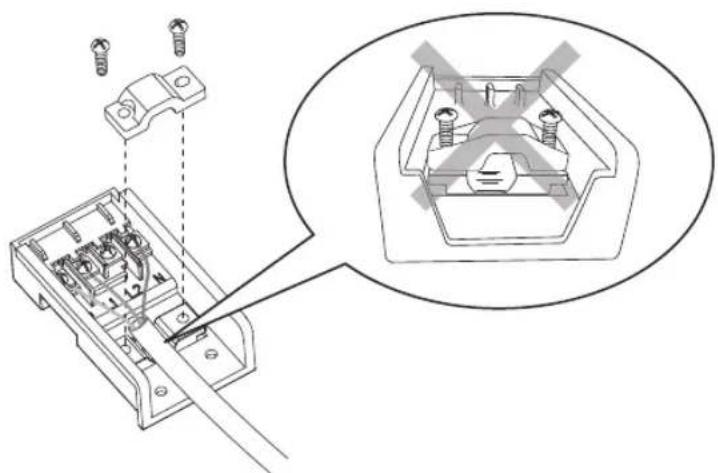
- Fix the top plate.

natural_image
Line drawing of a mechanical component with no visible text or symbolsPakke opp
natural_image
Four white circles arranged in a 2x2 grid on a dark background, with no text or symbols present.Hovedenhet

Braketter × 4 GB818 / M4*10-PFH skrue × 4
natural_image
Two hand-drawn diagrams showing correct and incorrect foot positions (no text or symbols)natural_image
Simple line drawing of a hand pointing upward with a circular symbol on the index finger (no text or labels)
natural_image
Line drawing of a cooking pot on a stand (no text or symbols)

natural_image
Hand pointing at a circular button with three square buttons above it (no text or symbols)natural_image
Simple line drawing of a hand pointing upward with a circular icon on the index finger (no text or symbols)6. Se opp for glovarme overflater
- Still inn tiden ved å berøre - efter -kontrollen til tidsuret.

natural_image
Simple line drawing of a hand pointing upward with a circular symbol on the index finger (no text or labels)
natural_image
Hand gesture pointing at a button with three square buttons above (no text or symbols)NO

natural_image
Isometric line drawing of a rectangular electronic component with internal slots and mounting holes (no text or symbols)- Skru på dekkplaten.
natural_image
Technical line drawing of a mechanical component with no visible text or symbolsUppackning
natural_image
Four white circles arranged in a 2x2 grid on a dark background, with no text or symbols visible.Huvudenhet
Konsoler × 4 GB818 / M4*10-PFH skruv × 4
natural_image
Simple line drawing of a cooking pot with crossed-out X marks (no text or symbols)
natural_image
Simple line drawing of a cooking pot with X-shaped marks and steam lines (no text or symbols)
natural_image
Simple line drawing of a cooking pot with crossed-out X mark (no text or symbols)
natural_image
Simple line drawing of a cooking pot on a stove (no text or symbols)natural_image
Simple line drawing of a cooking pot with crossed arrows indicating pressure or resistance (no text or symbols)
natural_image
Simple line drawing of a pot with an upward arrow indicating pressure or direction, placed on a stove (no text or symbols)

natural_image
Line drawing of a hand pointing at a cooking pot and a cooking pot on a table (no text or symbols)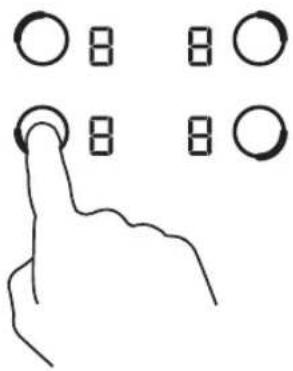
natural_image
Simple line drawing of a hand pointing upward with a circular symbol on the index finger (no text or labels)natural_image
Simple line drawing of a hand pointing upward with a circular icon on the index finger (no text or symbols)natural_image
Hand pointing at a circular button with three square buttons above it (no text or symbols)


natural_image
Isometric line drawing of a rectangular electronic component with internal slots and mounting holes (no text or symbols)- Fäst topplattan.

natural_image
Line drawing of a rectangular electronic device with ports and a cable inserted (no text or symbols)natural_image
Four white circles arranged in a 2x2 grid on a dark background, with no text or symbols present.Päälaite

Pidike x 4 GB818 / M4*10-PFH-ruuvi x 4
natural_image
Simple line drawing of a hand pointing upward with a circular icon on the index finger (no text or symbols)FI

natural_image
Isometric line drawing of a rectangular electronic component with internal slots and mounting holes (no text or symbols)3 × 6 ~mm^2 / 3 × 2.5 ~mm^2
natural_image
Line drawing of a mechanical component with a handle and connector (no text or symbols)natural_image
Four white circles arranged in a 2x2 grid on a dark background, with no text or symbols present.Hovedenhed

Beslag x 4 GB818 / M4*10-PFH skrue x 4
natural_image
Two hand-drawn diagrams showing a shoe being checked and crossed, with checkmark and cross symbols (no text or labels)
natural_image
Simple line drawing of a hand pointing upward with a circular icon on the index finger (no text or symbols)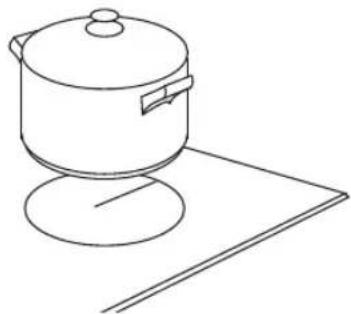
natural_image
Line drawing of a cooking pot on a stand (no text or symbols)DK

natural_image
Simple line drawing of a hand pointing upward with a circular symbol on the index finger (no text or labels)natural_image
Simple line drawing of a hand pointing upward with a circular symbol on the index finger (no text or labels)
- tryk på Kogezoneknappen (1,2,3 eller 4).

natural_image
Hand pointing at a circular button with three square buttons above it (no text or symbols)DK

natural_image
Technical line drawing of a mechanical component with no visible text or symbols3 × 6 mm^2 / 3 × 2.5 mm^2
- Fastspænd topladen.
natural_image
Line drawing of a device with ports and a cable inserted (no text or symbols)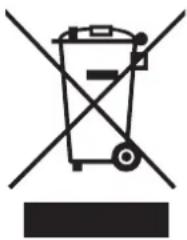
natural_image
Symbol of a trash bin crossed out by a diagonal line, with no text or labels present.GB
This symbol on the product or in the instructions means that your electrical and electronic equipment should be disposed at the end of its life separately from your household waste.
There are separate collection systems for recycling in the EU.
For more information, please contact the local authority or your retailer where you purchased the product.
NO
For general information about this appliance
and handy hints and tips, please visit
www.knowhow.com/knowledgebank or call 0844 5611234.
- Contents
- Innhold
- IMPORTANT SAFETY INSTRUCTIONS READ CAREFULLY AND KEEP FOR FUTURE REFERENCE
- VIKTIGE SIKKERHETSANVISNINGER
- LESES N∅YE OG BEHOLDES FOR FREMTIDIG OPPSLAG
- Before Using Your New Ceramic Hob
- Choosing the Right Cookware
- Using the Touch Controls
- To Start Cooking
- Touch the ON/OFF control.
- Touch the or-controls to
- When You Have Finished Cooking
- Beware of hot surfaces
- Locking the Controls
- To Lock the Controls
- To Unlock the Controls
- Over-Temperature Protection
- Residual Heat Warning
- Auto Shutdown
- Using the Timer
- Timer Overview
- Using the Timer as a Reminder
- GB
- Setting the Timer to Turn Cooking Zones Off
- Heat Settings
- Specifications
- Preparing the Worktop
- Ensuring Adequate Ventilation
- Fastening the Fixing Brackets
- Connecting the Hob to the Mains Power Supply
- Pakke opp
- Se opp for glovarme overflater
- Uppackning
- NO
Brand : MATSUI
Model : MCHOBTC13N
Category : Cooker