Naos - Ventilateur domestique Eta - Free user manual and instructions
Find the device manual for free Naos Eta in PDF.


| Product Type | Domestic Stand Fan |
| Brand | Eta |
| Model | Naos |
| Dimensions (H x W x D) | 1300 x 410 x 410 mm |
| Weight | 5.8 kg |
| Power Supply | 220-240 V ~ 50/60 Hz (see type label for exact voltage) |
| Power Consumption | See type label (standby < 1.0 W) |
| Speed Levels | 4 (F1, F2, F3, F4) |
| Operating Modes | Normal, Natural, Sleep |
| Oscillation | Yes, 45° angle |
| Timer | 1-15 hours |
| Remote Control | Included, requires CR2025 3V battery |
| Control Panel | On-unit buttons with display |
| Noise Level | 63 dB(A) |
| Protection Class | II (double insulated) |
| Grille Material | Metal (front and rear) |
| Blade Material | Plastic |
| Stand Material | Metal with plastic base |
| Height Adjustment | Yes, via extension pole and nut |
| Safety Features | Overheating protection? Not specified; anti-clockwise thread for safety |
| Cleaning | Wipe with damp cloth; do not immerse |
| Usage | Indoor household use only |
| Included Accessories | Remote control (battery included?), assembly parts |
Frequently Asked Questions - Naos Eta
User questions about Naos Eta
0 question about this device. Answer the ones you know or ask your own.
Ask a new question about this device
Download the instructions for your Ventilateur domestique in PDF format for free! Find your manual Naos - Eta and take your electronic device back in hand. On this page are published all the documents necessary for the use of your device. Naos by Eta.
USER MANUAL Naos Eta
natural_image
Black outdoor fan with mesh grille and stand, no visible text or symbols on the fan or background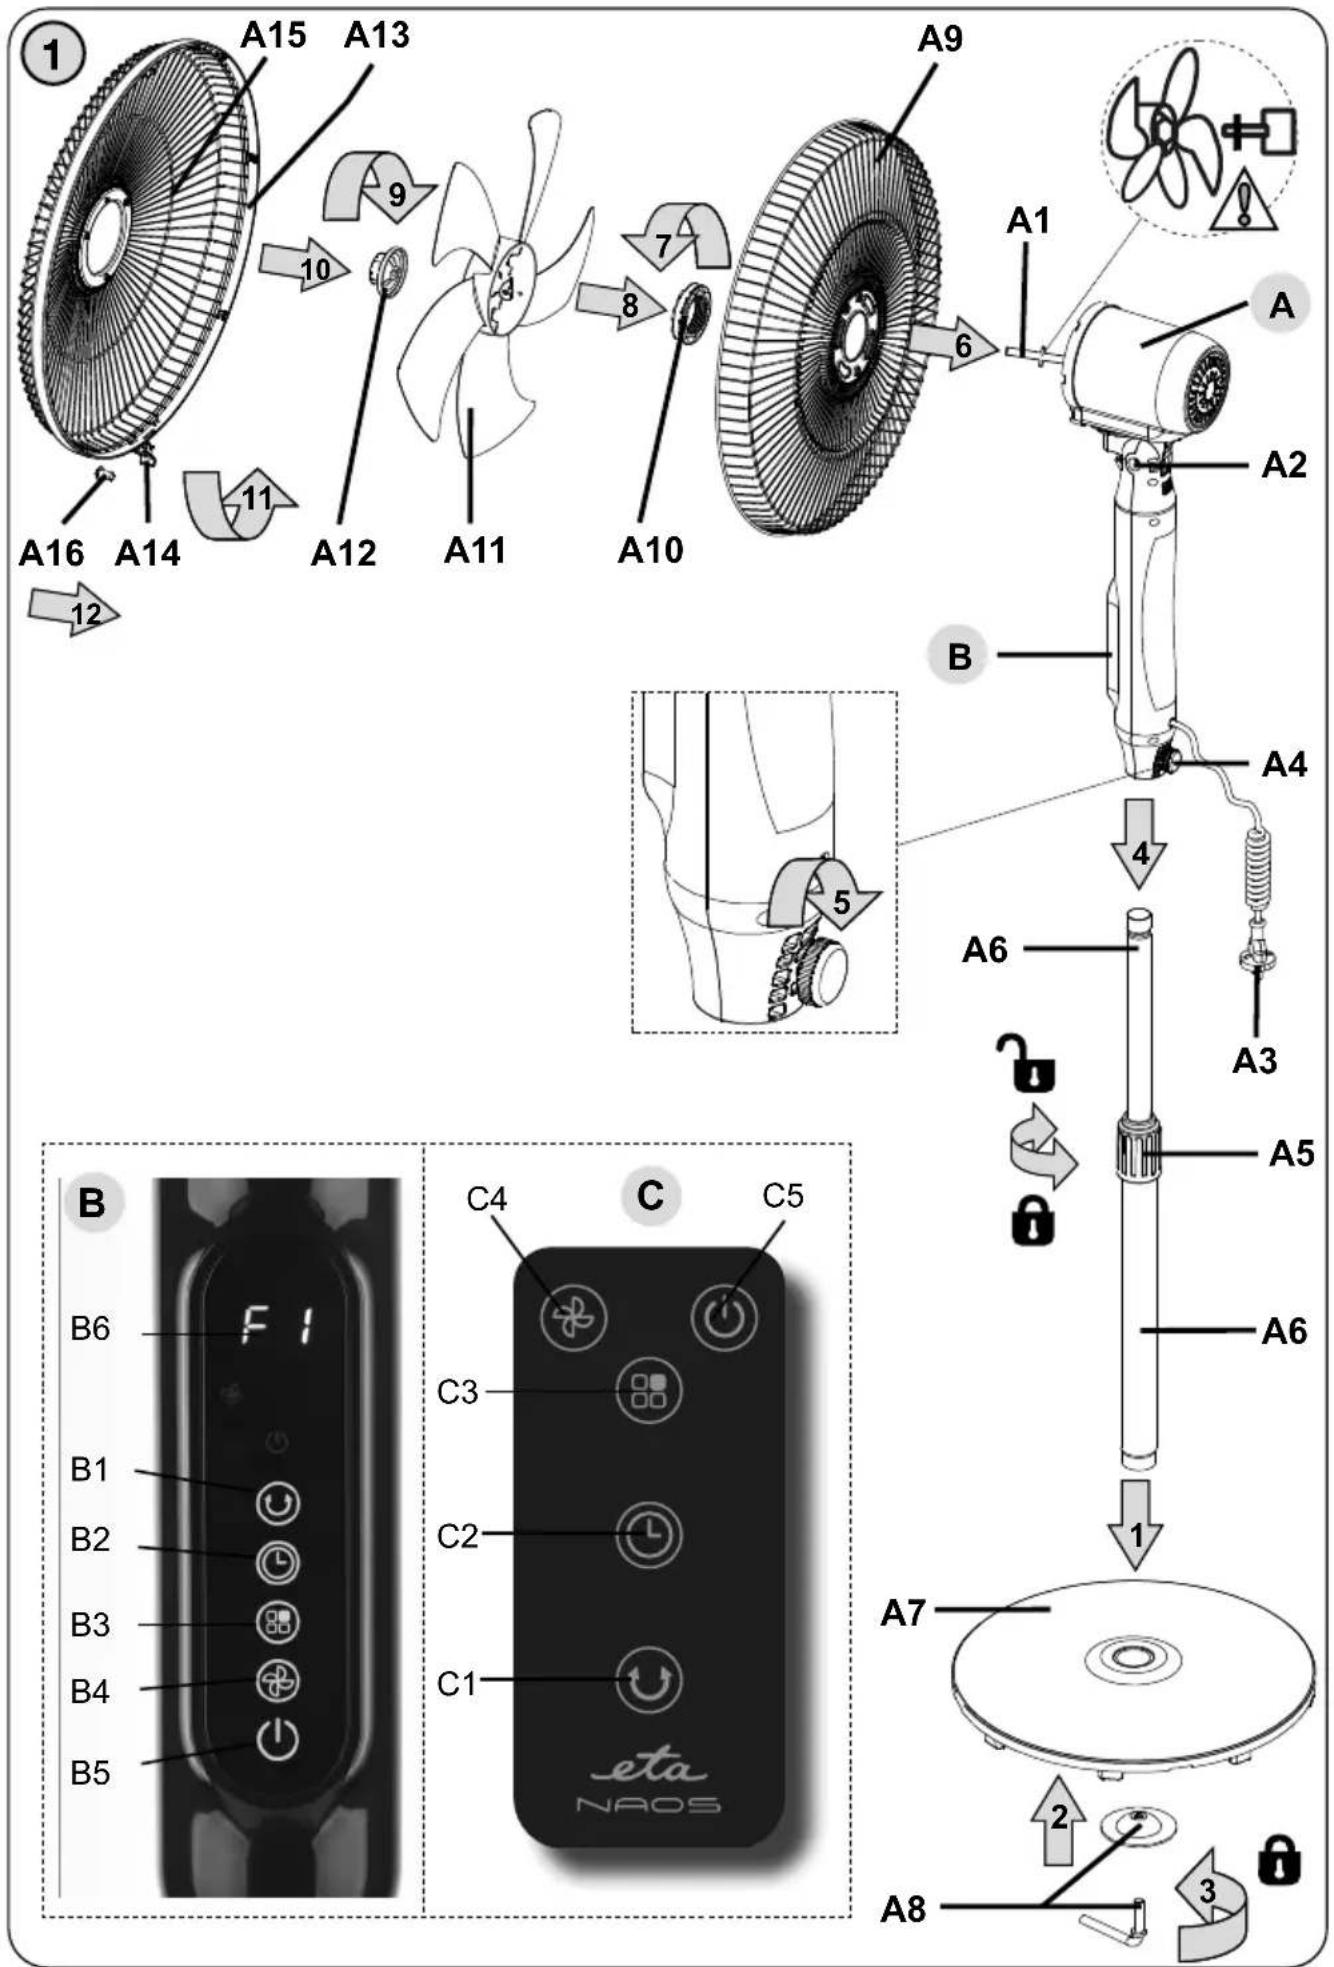
CZ I. BEZPEČNOSTNÍ UPOZORNĚNÍ 4
II. POPIS SPOTŘEBIČE 6
III. POKYNY K OBSLUZE 6
IV. ÚDRŽBA 8
V. EKOLOGIE 8
Dear customer, thank you for purchasing our product. Please read the operating instructions carefully before putting the appliance into operation and keep these instructions including the warranty, the receipt and, if possible, the box with the internal packing.
I. SAFETY WARNING

- Check whether the data on the type label correspond with the voltage in your socket. The power cord plug has to be connected to the properly connected and grounded socket according to the national standard.
- This appliance can be used by children aged from 8 years and above and persons with reduced physical, sensory or mental capabilities or lack of experience and knowledge if they have been given supervision or instruction concerning use of the appliance in a safe way and understand the hazards involved. Children shall not play with the appliance. Cleaning and user maintenance shall not be made by children without supervision. Children younger than 8 years must be kept out of reach of the appliance and its power cord.
- Before replacing accessories or accessible parts, which move during operation, before assembly and disassembly, before cleaning or maintenance, turn off the appliance and disconnect it from the mains by pulling the power cord from the power socket!
- Always unplug the appliance from power supply if you leave it unattended and before assembly, disassembly or cleaning.
- Never use the appliance if the power cord or power plug are damaged, if it is not functioning correctly or if it has fallen on the floor and been damaged or if it has fallen into water. In such cases take the appliance to a professional service centre to verify its safety and correct function.
- If the power cord of the appliance is corrupted, it has to be replaced by the manufacturer, its service technician or a similarly qualified person so as to prevent dangerous situations.
- The appliance is intended for home use and similar (in shops, offices and similar workplaces, in hotels, motels and other residential environments, in facilities providing accommodation with breakfast). It is not intended for commercial use!
- The fan must not be immersed into water or other liquids (even partially) and it must not be used in close proximity of bathtubs, showers, wash basins or other water containers, including a swimming pool. If the ventilator falls into water, do not take it out! First of all unplug the power cord from the socket and only then take out the fan. In this case take the appliance to a special service to check its safety and proper function.
- This appliance is not intended for outdoor use.
-
Do not plug the fork of the supply cord into the power outlet and do not unplug the cord with wet hands or by pulling by the supply cord!
-
The appliance cannot be used in bathrooms in zones 0, 1 and 2 HD 384.3 S1! It must not be used in close proximity of bathtubs, a shower or a swimming pool.
- The appliance must not be used in damp or wet environment and in any environment with the danger of fire or explosion (spaces where chemicals, fuels, oils, gases, paints and other flammable or volatile materials are stored).
- Use the appliance in the working position only at places with no risk of turning over and in a sufficient distance from objects (such as curtains, drapes, etc.), heat sources (e.g. fireplace, heater, stove, cooker, radiators, hot air ovens, grills) and wet surfaces (e.g. sinks, wash basins).
- Make sure that impurities do not enter into the appliance (e.g. clouds of dust, hair etc.).
- Do not put the switched on fan on soft surfaces (e.g. on a bed, towels, wipers, carpets).
- There must not be any device with open flame in the flow of the air coming out from the appliance because of danger of burning process interruption.
- Never let the flow of air blow on you (or animals) for an extended period of time. It may cause health problems.
- Never put the power cord on hot surfaces or do not let it hang over the edge of a table or a work top. Plugging or pulling the power cord e.g. by children can result in tilting over or drawing the appliance down and serious injury!
- The power cord must not be damaged with sharp or hot objects, open fire, it must not be sunk into water or bent over sharp edges.
- Do not wind the power cord around the appliance, this will extend life of the power cord.
- If the battery is leaking, remove it immediately; it can damage the Remote control.
- Dispose of a discharged battery in a suitable way (see par. V. ENVIRONMENTAL PROTECTION).
- Keep battery and Remote control out of reach of children and incapacitated people. A person, who would swallow the battery, must seek medical help immediately.
- Use this appliance only for the purpose for which it was designed as specified in this user's manual. Never use the appliance for any other purpose.
- The producer does not guarantee any loss caused by improper handling of the appliance and its accessories (e. g. electrical accident, fire) and its guarantee for the appliance does not apply in the case of non-compliance with the safety instructions above.
II. DESCRIPTION OF THE APPLIANCE
A - Drive unit
A1 - Shaft
A2 – Adjustable joint angle
A3 - Power cord
A4 - Screw
A5 – Height adjustment nut
A6 - Extension pole (2x)
A7 - Base
A8 - Screw + Gasket
A9 – Rear grill
A10 - Grill nut
A11 - Blade
A12 - Blade nut
A13 – Plastic connecting collar
A14 - Clip
A15 – Front grill
A16 - Screw
B - Control panel
B1 – Oscillation adjustment button
B2 – Timer setting button
B3 – Mode button (NORMAL / NATURAL / SLEEP)
B4 - Speed setting button (F1 / F2 / F3 / F4)
B5 - ON / OFF button
B6 – Displey
C - Remote control
C1 – Oscillation adjustment button
C2 - Timer setting button
C3 – Mode button (NORMAL / NATURAL / SLEEP)
C4 – Speed setting button (F1 / F2 / F3 / F4)
C5 - ON / OFF button
III. INSTRUCTIONS FOR USE
Before first use, remove any packaging and protective material (including any protective film) from the appliance and accessories.
ASSEMBLING:
When assembling the fan, please proceed according to Fig. 1. Prior to mounting the plastic connecting collar A13, loosen the clip A14 and the screw A16 so that you could easily put the collar on the rear and front protecting cover (A9/A15). After that, tighten slightly the clip A14 and screw A16. Adjust the required height and secure in place by tightening the nut A5. When demounting, please proceed in reverse order.
Warning
For safety reasons, the shaft A1 and the propeller nut A12 have an anti-clockwise thread.
CONTROL:
The fan can be operated via control panel B or remote control C. If you want to use the remote control panel C, primarily insert one CR 2025 3 V battery in it and be particular about its correct polarity. The respective information is shown gradually on the display and on the control panel using signs and symbols (fig. 1).
Press the B5/C5 button to turn the fan on. Press B5/C5 again to turn the fan off at any time during operation. Display B6 will display all symbols 0F (stand-by regime).
Adjusting the air blow rate

Press the B4/C4 button to set the air speed in 4 levels. The set stage is indicated by lighting a corresponding indicating light and numbers (F1, F2, F3, F4) of the display.
Oscillation settings

Press the B1/C1 button to turn oscillation on. Press the B1/C1 button again to turn oscillation off. During oscillation, the fan rotates at an angle of about 45^ (back and forth). Switching-on of oscillation is indicated by lighting a indicating light.
Setting the mode

Press the B3/C3 button to switch between NORMAL / NATURAL / SLEEP modes.
| Mode | Light indicator | Description |
| NORMAL |  | Default mode when the fan is turned on; this is a continuous air blow mode. |
| NATURAL |  | Simulation of natural air flow in the nature; the fan alternately turns the blowing on and off, switching the blowing speed between all 4 levels. |
| SLEEP |  | Night mode; the fan alternately turns the air blowing on at the speed. As per belowSpeed F4 = F4 (30 min) ▶ F3 (30 min) ▶ F2 (30 min) ▶ F1 (constant).Speed F3 = F3 (30 min) ▶ F2 (30 min) ▶ F1 (constant).Speed F2 = F2 (30 min) ▶ F1 (constant).Speed F1 = F1 (constant). |
Timer function

After turning the fan on and setting the mode, set the desired operating time using the B2/C2 button. Press button approx. 3 sec. to confirm. The timer can be set in the range of 1-15 hours. The set timer is indicated by lighting a indicating light. After the set time has elapsed, the fan will automatically turn off.
Notes
- The NORMAL / NATURAL / SLEEP operating modes as well as the timer can be arbitrarily set and combined.
IV. MAINTENANCE
The appliance only requires surface maintenance. Clean the surface of the appliance and the power supply with a damp cloth.
V. ENVIRONMENTAL PROTECTION
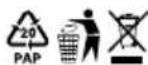
If the dimensions allow, there are labels of materials used for production of packing, components and accessories as well as their recycling on all parts. The symbols specified on the product or in the accompanying documentation mean that the used electric or electronic products must not be disposed of together with municipal waste. For proper disposal of the product, hand it over at special collection places where it will be taken over free of charge. Suitable disposal of the product can help to maintain valuable natural resources and to prevent possible negative impacts on the environment and human health, which could be the possible consequences of improper waste disposal. Ask for more details at the local authorities or in the nearest collection site. Fines can be imposed for improper disposal of this type of waste in agreement with the national regulations. If the appliance is to be put out of operation for good, after disconnecting it from power supply we recommend cutting off the power cord and thus it will not be possible to use the appliance again.
VI. TECHNICAL DATA
Voltage (V) shown on the type label of the appliance
Input (W) shown on the type label of the appliance
Weight (kg) about 5.8
Protection class of the appliance II.
Size of the product (mm) 410 x 410 x 1300
Input in standby mode is < 1.00 W.
Noise level: Acoustic noise level of 63 dB (A) re 1pW
The manufacturer reserves the right to change the technical specifications and accessories for the respective models.
Replacement of parts that require intervention in the electric part of the appliance must be carried out by a specialized service! Failure to comply with the instructions of the manufacturer will lead to expiration of the right to guarantee repair!
WARNINGS AND SYMBOLS USED ON THE APPLIANCE, PACKAGING OR IN THE INSTRUCTIONS MANUAL:
HOUSEHOLD USE ONLY; DO NOT IMMERSE IN WATER OR OTHER LIQUIDS;
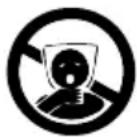

TO AVOID DANGER OF SUFFOCATION, KEEP THIS PLASTIC BAG AWAY FROM BABIES AND CHILDREN. DO NOT USE THIS BAG IN CRIBS, BEDS, CARRIAGES OR PLAYPENS. THIS BAG IS NOT A TOY.
The symbol indicates a WARNING.
eta 2607
NAOS
HASZNÁLATI UTASÍTÁS
- SAFETY WARNING
- DESCRIPTION OF THE APPLIANCE
- A - Drive unit
- B - Control panel
- C - Remote control
- INSTRUCTIONS FOR USE
- ASSEMBLING:
- Warning
- CONTROL:
- Adjusting the air blow rate
- Oscillation settings
- Setting the mode
- Timer function
- Notes
- MAINTENANCE
- ENVIRONMENTAL PROTECTION
- TECHNICAL DATA
- eta 2607
- NAOS
- HASZNÁLATI UTASÍTÁS
Brand : Eta
Model : Naos
Category : Ventilateur domestique