
SW8902N - Home trainer HMS Premium - Free user manual and instructions
Find the device manual for free SW8902N HMS Premium in PDF.


| Product Type | Home Trainer / Spin Bike |
| Brand | HMS Premium |
| Model | SW8902N |
| Dimensions (L x W x H) | 125 x 51 x 117 cm |
| Net Weight | 45 kg |
| Flywheel Weight | 18 kg |
| Maximum User Weight | 120 kg |
| Resistance Type | Magnetic (manual adjustment via knob) |
| Connectivity | Bluetooth (for iBiking+ app) |
| Display / Console | Basic console with Bluetooth indicator and low battery LED; external app required for metrics |
| Power Supply | 4 x AAA alkaline batteries (not included) |
| Safety Class | EN ISO 20957-1 Class H (home use) |
| Intended Use | Home fitness training; not for therapy or rehabilitation |
| Pedals | Right and left pedals with toe cages/cages (included) |
| Saddle Adjustment | Height adjustable (tool-free knob) |
| Handlebar Adjustment | Height adjustable (tool-free knob) |
| Brake | Emergency brake lever with brake pads |
| Maintenance | Regularly check bolts/nuts; clean after use; inspect brake pads |
| Included Accessories | Water bottle, bottle cage, wrenches, assembly hardware |
| Assembly Required | Yes (multi-step assembly with parts list) |
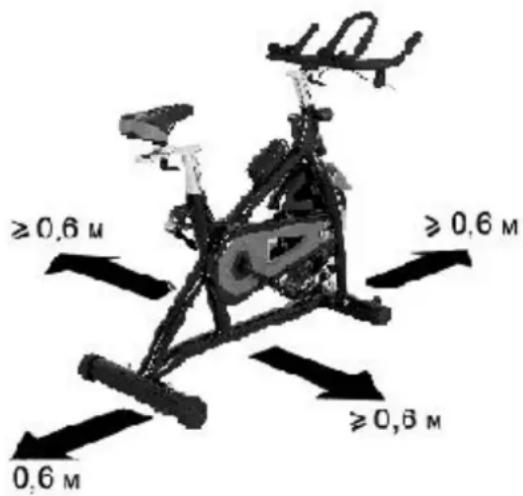
| Free Area Requirement | At least 0.6 m clearance on all sides |
Frequently Asked Questions - SW8902N HMS Premium
User questions about SW8902N HMS Premium
0 question about this device. Answer the ones you know or ask your own.
Ask a new question about this device
Download the instructions for your Home trainer in PDF format for free! Find your manual SW8902N - HMS Premium and take your electronic device back in hand. On this page are published all the documents necessary for the use of your device. SW8902N by HMS Premium.
USER MANUAL SW8902N HMS Premium
natural_image
Black and white photo of a stationary exercise bike with visible mechanical components and side-mounted arms (no text or symbols)INSTRUKCJA UŻYTKOWANIA – MANUAL INSTRUCTION – NÁVOD K OBSLUZE
UWAGI DOTYCZĄCE BEZPIECZEŃSTWA
STEP 4:
Uwaga:
natural_image
Line drawing of a person performing a stationary exercise on a scooter (no text or symbols)3. Trening
Uruchom aplikację
ABISAL
IMPORTANT SAFETY INFORMATION
This product has been designed for home use only and built for optimum safety. Please note the following safety precautions:
- Before starting any exercise program you should consult your doctor to determine if you have any physical or health conditions that could create a risk to your health and safety, or prevent you from using the equipment properly. Your doctor's advice is essential if you are taking medication that affects your heart rate, blood pressure or cholesterol level. This is especially important for persons over the age of 35, pregnant women, or those with pre-existing health problems or balance impairments.
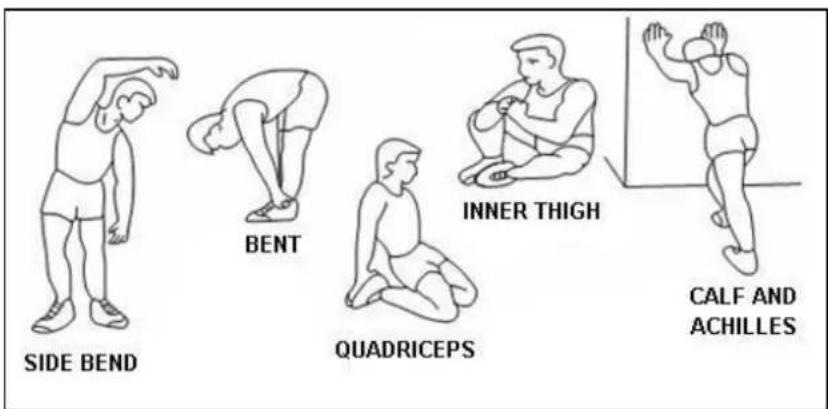
- Before using this equipment to exercise, always do stretching exercises to properly warm up.
- Be aware of your body's signals. Incorrect or excessive exercise can damage your health. Stop exercising if you experience any of the following symptoms: pain, tightness in your chest, irregular heartbeat, extreme shortness of breath, feeling light headed, dizzy or nauseous. If you do experience any of these conditions you should consult your doctor before continuing with exercise e program. Injuries to health may result from incorrect or excessive training.
- During exercises and after keep children and pets away from the equipment.
- Use the equipment on a stable and levelled surface with a protective cover for your floor or carpet. Move all sharp objects.
- Free area shall be not less than 0,6 m greater than the training area in the directions from which the equipment is accessed. Free area must also include the area for emergency dismount. Where equipment is positioned adjacent to each other the value of the free area may be shared.
- Before each use, visually inspect the unit including hardware and resistance bends.
- Before using the equipment, check if the nuts, bolts and other bends are securely tightened.
- Always use the equipment as indicated. If you find any defective components whilst assembling or checking the equipment, or if you hear any unusual noise coming from the equipment while using, stop. Do not use the equipment until the problem has been rectified.
- Do not insert any object into any openings.
- Be aware of all regulation and constructions parts which may disturb during exercises.
- The safety level of the equipment can only be maintained if it is regularly examined for damage and/or wear and tear.
- Wear suitable clothing whilst using the equipment. Avoid wearing loose clothing which may get caught in the equipment or that may restrict or prevent movement.
- The equipment has been tested and certified according to EN ISO 20957-1 under class H. It is not suitable for therapeutic use.
- Care must be taken when lifting or moving the equipment so as not to injure your back. Always use proper lifting techniques and/or use assistance.
- The equipment is designed for adult use only. Keep unsupervised children away from the equipment.
- Assemble this unit as described in this manual. Use only parts from the set. Check all parts with the part list.
WARNING: READ ALL INSTRUCTIONS BEFORE USING ANY FITNESS EQUIPMENT. WE ASSUME NO RESPONSIBILITY FOR PERSONAL INJURY OR PROPERTY DAMAGE CAUSED BY OR THROUGH THE USE OF THIS PRODUCT
SPECIFICATIONS
Weight - 45 kg
Flywheel - 18 kg
Dimensions - 125 x 51 x 117 cm
Maximum weight of user - 120 kg
MAINTENANCE
Your unit has been carefully designed to require minimum maintenance. To ensure this, we recommend that you do the following:
- Keep your unit clean by wiping sweat, dust or other residue off with a soft, clean cloth after each use
• Always make sure that the bands are secure and show no signs of wear - Regularly check the tightness of nuts and bolts
SADDLE ADJUSTMENT
Loosen seat post screw. Set height according to growth. Tighten up screw. Do not take out seat post from the main frame.
TENSION ADJUSTMENT
To reduce tension turn control into sign "-" direction, to increase tension turn control into sign "+" direction.
BREAKING
Stop to pedal and press break when you want stop the item. Magnetic spin bike SW8902 acquire breaking system or emergency break.
PARTS LIST
| NO | NAME | SPECIFICATION | QUANTITY |
| 1 | Main frame | 1 | |
| 2 | Front stabilizer | 1 | |
| 3 | Rear stabilizer | 1 | |
| 4 | End cap | 2 | |
| 5 | End cap | 2 | |
| 6 | Bolt M8*90 | 4 | |
| 7 | Arc washer | ID8.2*OD25 | 4 |
| 8 | Cap nut | 4 | |
| 9 | Bolt | M6*45*16*S10 | 2 |
| 10 | Washer | d6*Φ14*1.5 | 4 |
| 11 | Nylon Nut | M6*H6*S10 | 2 |
| 12 | Crank cap | Φ25*7 | 2 |
| 13 | Pedal (right &left) | 2 | |
| 14 | Crank (L&R) | 2 | |
| 15 | Middle shaft cover | Φ51*59 | 1 |
| 16 | Bearing | 6203RS | 2 |
| 17 | Wheel | Φ70*Φ6*58 | 2 |
| 18 | Inner chain cover | 1 | |
| 19 | Washer | 2 | |
| 20 | Screw | 2 | |
| 21 | Chain | 1 | |
| 22 | Big chain wheel | 1 | |
| 23 | Screw | ST4.2*10*Φ8 | 5 |
| 24 | Washer | d5*Φ10*1 | 5 |
| 25 | Outer chain cover | 1 | |
| 26 | Crank cap | Φ100*Φ40 | 1 |
| 27 | Nut | M12*1*H19.5*S19 | 2 |
| 28 | Nut | M6*H5*S10 | 4 |
| 29 | Screw | M6*50*Φ12*5 | 2 |
| 30 | Space bush | Φ18*Φ12.2*6 | 2 |
| 31 | Nut | M12*1*H6*S19 | 3 |
| 32 | Space bush | Φ18*Φ12.2*14.5 | 1 |
| 33 | Space bush | Φ18*Φ12.2*4 | 2 |
| 34 | Bearing | 6001Z | 2 |
| 35 | Nut | Φ41*4*M33* | 2 |
| 36 | Flywheel | 1 | |
| 37 | Bushing | Φ40*85 | 1 |
| 38 | Small chain wheel | 1 | |
| 39 | Shaft | 1 | |
| 40 | Brake shoe set | 1set | |
| 41 | Flywheel cover | 1 | |
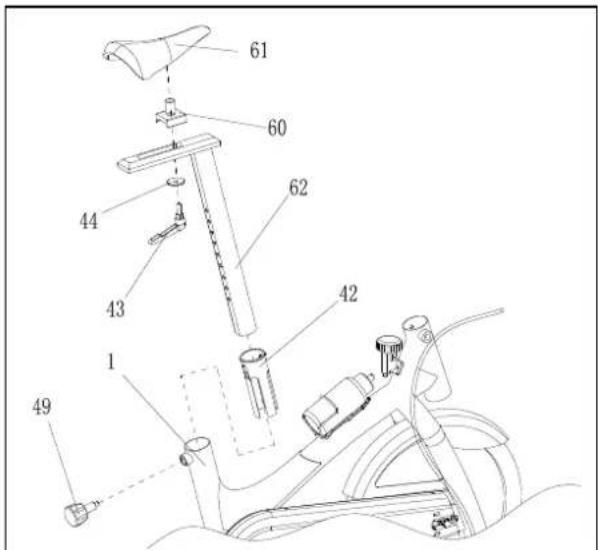
| 42 | D shape bushing | 2 | |
| 43 | Fixing knob | 2 | |
| 44 | Washer | 2 | |
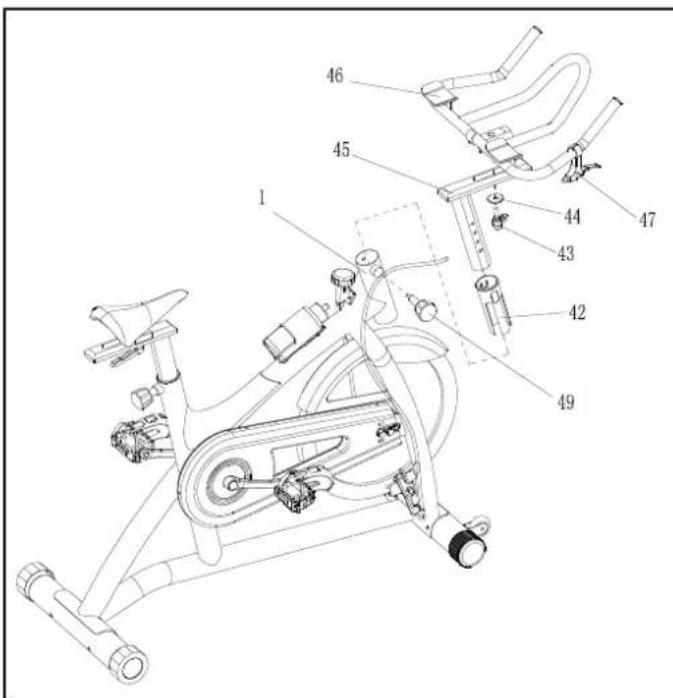
| 45 | Handlebar post | 1 | |
| 46 | Handle | 1 | |
| 47 | Emergency brake clank | 1 | |
| 48 | Tension adjuster | 1 | |
| 49 | Knob | 2 | |
| 50 | Emergency brake cable | 1 | |
| 51 | Brake block | 2 | |
| 52 | Screw | M5*10*Φ8.5 | 2 |
| 53 | Bottle cage | 1 | |
| 54 | Washer | d4*Φ12*1 | 2 |
| 55 | Screw | M4*12*Φ6 | 2 |
| 56 | Bottle | 1 | |
| 57 | Screw | ST3*10*Φ5.6 | 2 |
| 58 | Frame cover | 1 | |
| 59 | Wool plate | 2 | |
| 60 | Saddle | 1 | |
| 61 | Saddle adjusted post | 1 | |
| 62 | Saddle tube post | 1 | |
| 63 | Wristbands liner | 2 | |
| 64 | Sensor | 1 | |
| 65 | Computer | 1 | |
| 66 | Wrench | S13-14-15 | 1 |
ASSEMBLY INSTRUCTION
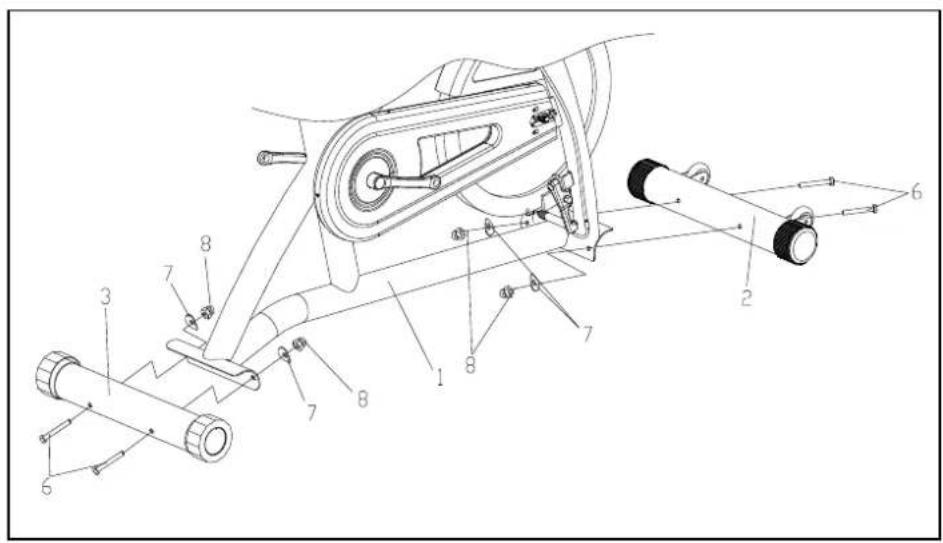
STEP 1: Insert the bottom tube (2&3) into the mainframe (1) with bolt(6), arc-washer (7) and nut (8)
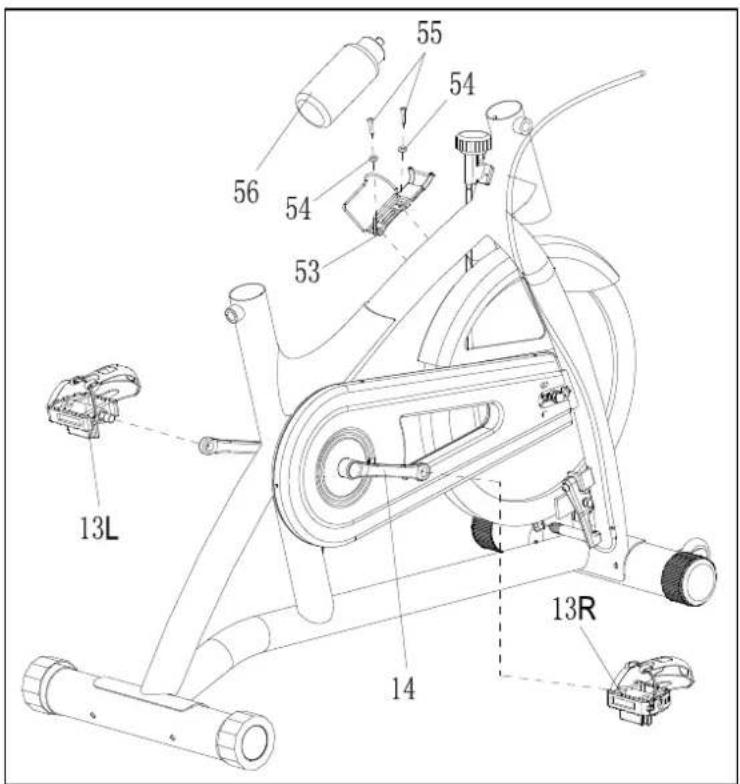
STEP 2: Attach L&R pedal (13L, R) on to the crank handle bar(14) of main frame (1), then lock the water bottle shelf(53) onto the main frame with bolt (55) and washer (54).
STEP 3:
-
Lock the seat (61) onto saddle transom post, then lock the fixed saddle (61) onto saddle post (62) with L-shape locking bar (43) and washer (44)
-
Insert the bush(42) into the vertical tube. Tight the saddle post (62) on the main frame with knob (49)
STEP 4:
-
Fix the handle bar (46) onto the handle bar post (45) with L-shape locking bar (43) and washer (44).
-
Insert the bush (42) into the front vertical tube of main frame, and set the fixed bike onto the main frame with knob (49)
-
Connect the tension wire (50) with break handle bar.
Notes:
- During the assembly of pedals, if you find the bolt tooth are too tight or too loose, do not revolve them heavily. You must check if there are steel dregs and other things between the pedals and crank bar bolt tooth, and clean them off to avoid the bolt tooth are damaged.
- When disassemble, if you find it too tight, it may happen that the bolt tooth are not straight. PIs do not disassemble until you revolve the tooth inside to make it straight, to avoid the tooth damaged.
USAGE
Magnetic spin bike is replacing bicycle exercises. Magnetic spin bike SW8902 is item class H. Unit is not intended for therapy or rehabilitation.
TRAINING INSTRUCTION
1. Warm-Up
To prevent injury and maximize performance we recommend that each workout period starts with a warm-up. We suggest you do the following exercise as the sketch map. Each exercise at least about 30 seconds.
2. Position
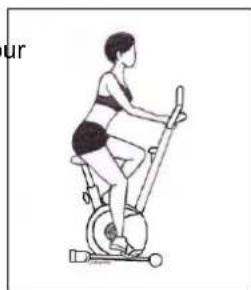
Seat down at the saddle, put feet's in to pedals, hands put on the handlebar. Keep your back straight.
natural_image
Line drawing of a person exercising on an exercise bike (no text or symbols)3. Training Organization
Warm-up:
Before every training you should warm-up for 5-10 minutes. Here you can do some stretching and training with low resistance.
Training session:
During the actual training a rate of 70% -85% of the maximum pulse rate should be chosen. The time-length of your training session can be calculated with the following rule of thumb:
• daily training session: approx. 10 min. per unit
• 2-3 x per week: approx. 30 min. per unit
• 1-2 x per week: approx. 60 min. per unit
Cool down:
To introduce an effective cool-down of the muscles and the metabolism the intensity should be drastically decreased during the last 5 – 10 minutes. Stretching is also helpful for the prevention of muscle aches.
Success
Even after a short period of regular exercises you will notice that you constantly have to increase the resistance to reach your optimum pulse rate. The units will be continuously easier and you will feel a lot fitter during your normal day. For this achievement you should motivate yourself to exercise regularly. Choose fixed hours for your training session and do not start training too aggressively. An old quote amongst sportsmen says: “The most difficult thing about training is to start it.”
Even though we go to great efforts to ensure the quality of each product we produce, occasional errors and /or omissions do occur. In any event should you find this product to has either a defective or a missing part, Please contact us for a replacement.
Instruction Manual of SI0004
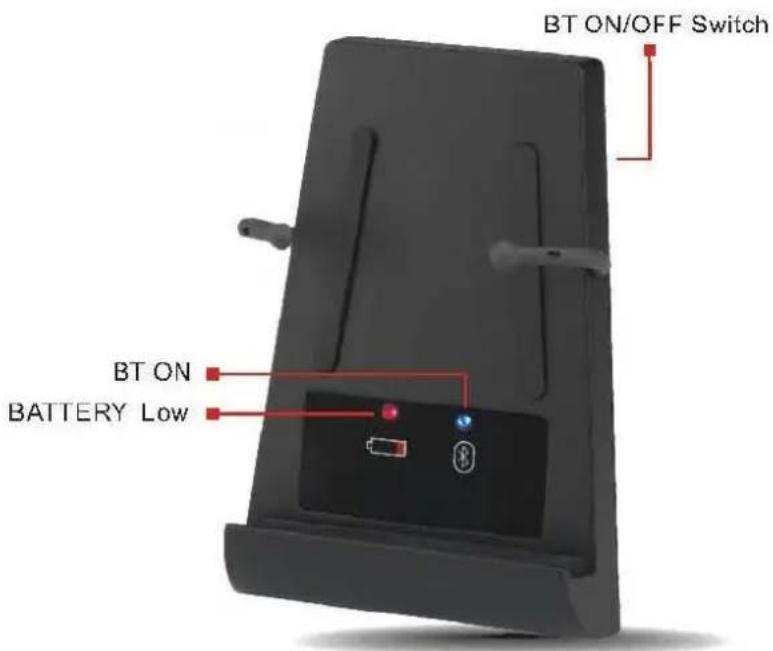
Display
- Low power red LED : The LED will light up while low Power.
- BT blue led: the LED will light up when the console connect with mobile device via Bluetooth.
Operation Procedure
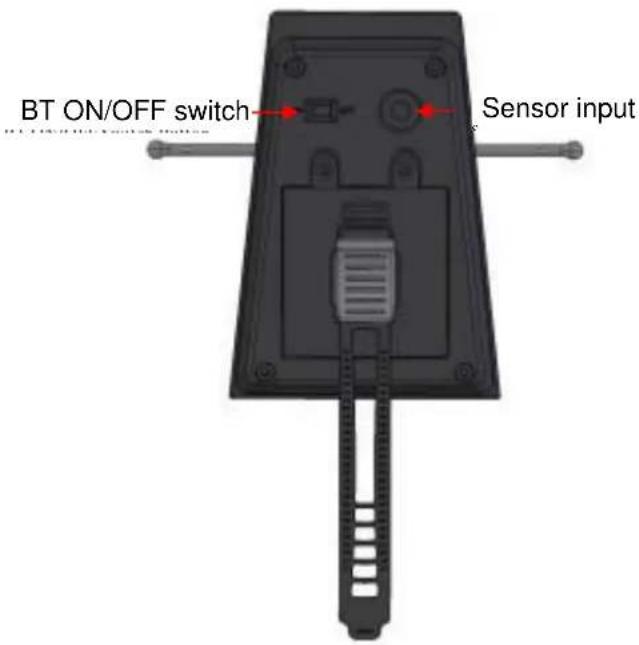
- Sensor input
- Turn on the Power.
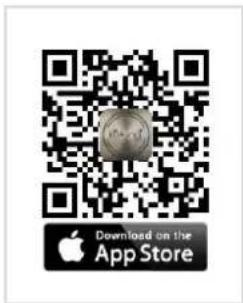
- Connect iBiking+
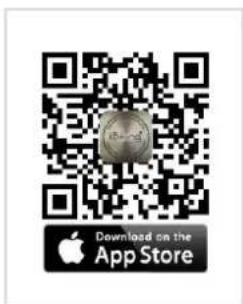
Download iBiking+ to mobile device
- APP Name: iBiking on Android market; iBiking+ on Google play/iTunes store.
- QR code.
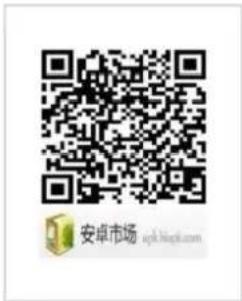
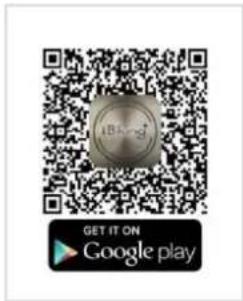
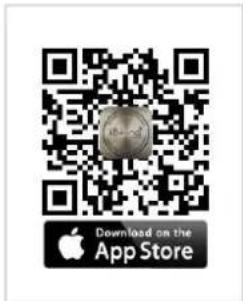
Play APP
- Connect Transmitter with your mobile device.
1.1. iOS system
In SETTING mode, turn on Bluetooth and scan for ID (i.e. iBiking XXX).
Note: you will see the device no. On transmitter), and pair the device.
Initial password is 0000 (4 zeros).
1.2. Android system
Enter iBiking+ Click

->[scan device], select ID (i.e. iBiking XXX).
Note: you will see the device no. on transmitter), then perform [Bluetooth device pairing], preset pairing password: 0000 (4 zeros).
- Programs introduction.
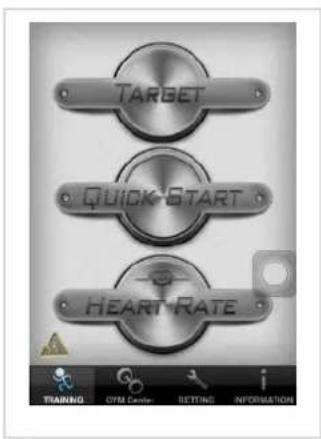
2.1. Information
Review exercise record.
2.2. Setting
Set personal information or create your account (from Facebook or Google).
2.3. Training
2.3.1. Target
Set your Target time, distance, calories, and then start workout. After exercise, you can post your workout information to Facebook or Twitter.
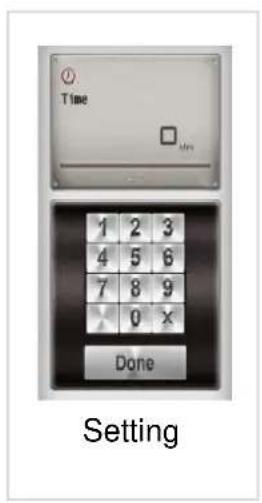
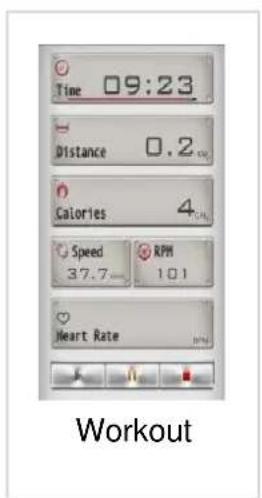
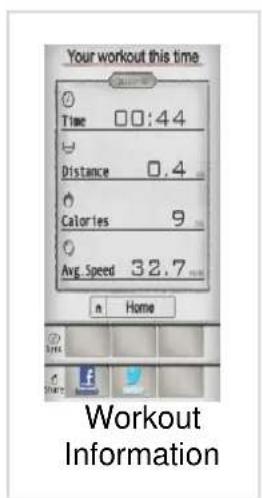
2.3.2. Quick Start
Start workout directly. After exercise, you can post your workout information to Facebook or Twitter.
2.3.3. Heart Rate
This function should be used with iPulse and Polar or Chang Yow Chest Belt. Turn on iPulse transmitter and insert it to mobile device. It can receive pulse signal from 5.3KHZ Polar or Chang Yow Chest Belt.
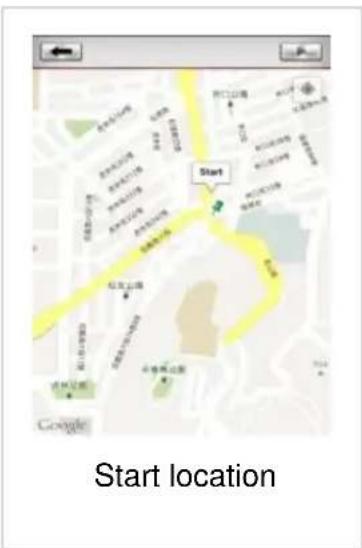
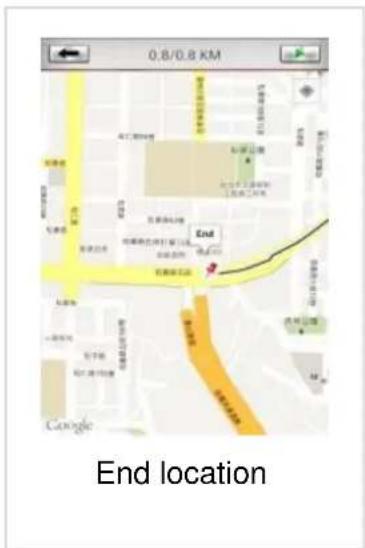
2.4. GYM Center — i-Route (Free now)
Set start location by first press, and set finish location by second press. After set route, start workout.
FAQ
- Couldn't search Bluetooth (BT) transmitter while entering iBiking+.
*Turn off your BT Setting.
*Turn off all the BT device near you, and Turn on the transmitter again.
*Restart your mobile.
- Couldn't connect BT transmitter while entering iBiking+.
*Turn off all the BT device near you, and Turn on the transmitter again.
*Restart your mobile.
- Could not enter BT password.
*Restart your mobile.
- Couldn't use i-Route.
*Make sure the internet connection.
*Confirm you already log in on setting page.
Additional notes
- After 4 minutes without pedaling, console will enter into power saving mode.
- Battery: 4pcs x AAA Alkaline Battery.
- SI0004 support following devices:
Apple Devices: iPhone6, iPhone6+, iPhone 5S, iPhone 5C, iPhone 5, iPhone 4S, iPhone 4.
Android phone OS 2.2 or above.
Resolution: 1920 x 1080, 1280 x 800, 1280 x 760, 800 x 480.
- “Made for iPod”, “Made for iPhone” and “Made for iPad” mean that an electronic accessory has been designed to connect specifically to iPod, iPhone, or iPad, respectively, and has been certified by the developer to meet Apple performance standards. Apple is not responsible for the operation of this device or its compliance with safety and regulatory standards. Please note that the use of this accessory with iPod, iPhone, or iPad may affect wireless performance. iPad, and iPhone are trademarks of Apple Inc., registered in the U.S. and other countries.
iBiking ^+
iBiking+
Download Complete User Guide:
http://manual.abisal.pl/iBiking.pdf
ABISAL
Consumer service department:
ABISAL Sp. z o.o.
ul. Św. Elżbiety 6
41–905 Bytom
abisal@abisal.pl
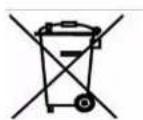
The equipment label depicting a crossed-out wheeled bin symbol informs that it is forbidden to dispose of waste electrical and electronic equipment together with other types of waste. In accordance with the WEE directive on waste electrical and electronic equipment, separate waste management processes should be applied for this type of equipment. The user who intends to dispose of such a product is obliged to return it to an electronic equipment collection point thanks to which they can contribute to its re-use, recycling, and recovery and, in this way, protect the environment. To do this, contact the sales point where the equipment was purchased or a representative of the local authorities. Hazardous substances included in electronic equipment can have negative long-term influence on the natural environment and they can also have negative effect on human health.
NÁVOD K OBSLUZE
RADY TÝKAJÍCÍ SE BEZPEČNOSTI
Pozor:
natural_image
Illustration of a person performing a high kick exercise (no text or symbols)4. Plán tréninku
Rozcvička:
Spust'te aplikaci
ABISAL


- UWAGI DOTYCZĄCE BEZPIECZEŃSTWA
- STEP 4:
- Uwaga:
- Trening
- Uruchom aplikację
- ABISAL
- IMPORTANT SAFETY INFORMATION
- SPECIFICATIONS
- MAINTENANCE
- SADDLE ADJUSTMENT
- TENSION ADJUSTMENT
- BREAKING
- ASSEMBLY INSTRUCTION
- STEP 3:
- Notes:
- USAGE
- TRAINING INSTRUCTION
- Warm-Up
- Position
- Training Organization
- Warm-up:
- Training session:
- Cool down:
- Success
- Instruction Manual of SI0004
- Display
- Operation Procedure
- Download iBiking+ to mobile device
- Play APP
- Information
- Setting
- Training
- Target
- Quick Start
- Heart Rate
- GYM Center — i-Route (Free now)
- FAQ
- Additional notes
- NÁVOD K OBSLUZE
- RADY TÝKAJÍCÍ SE BEZPEČNOSTI
- Pozor:
- Plán tréninku
- Rozcvička:
- Spust'te aplikaci
Brand : HMS Premium
Model : SW8902N
Category : Home trainer