PM-9500 - Heating Ravanson - Free user manual and instructions
Find the device manual for free PM-9500 Ravanson in PDF.


| Product Type | Portable Air Conditioner (Cooling, Dehumidifying, Fan) |
| Brand | Ravanson |
| Model | PM-9500 / PM-9500S |
| Power Supply | 220-240 V ~ 50 Hz |
| Rated Cooling Capacity | 2.6 kW |
| Rated Power Consumption (Cooling) | 1.0 kW |
| Energy Efficiency Class | A |
| EER (Energy Efficiency Ratio) | 2.6 |
| Sound Power Level | 64 dB(A) |
| Refrigerant Type / Weight | R410A / 370 g |
| GWP (Global Warming Potential) | 1975 kg CO₂ eq |
| Mode Selection | Cooling, Dehumidifying, Fan |
| Temperature Setting Range (Cooling) | 16°C to 31°C |
| Fan Speeds | High, Low |
| Timer | 1 - 24 hours (On/Off delay) |
| Sleep Mode | Yes (in Cooling mode) |
| Swing (Airflow Direction) | Yes (via remote or control panel) |
| Control Panel | Touch buttons with LED indicators |
| Remote Control | Yes (requires 2 x AA batteries) |
| Water Tank Capacity / Drainage | Built-in tank with W.F. indicator; manual drain |
| Filter | Washable upper and lower filters |
| Window Installation Kit | Included (for sliding windows/doors) |
| Castors for Mobility | Yes |
| Weight | Approx. 25 kg (estimated) |
| Dimensions (W x D x H) | Approx. 45 x 35 x 70 cm (estimated) |
Frequently Asked Questions - PM-9500 Ravanson
User questions about PM-9500 Ravanson
0 question about this device. Answer the ones you know or ask your own.
Ask a new question about this device
Download the instructions for your Heating in PDF format for free! Find your manual PM-9500 - Ravanson and take your electronic device back in hand. On this page are published all the documents necessary for the use of your device. PM-9500 by Ravanson.
USER MANUAL PM-9500 Ravanson
EN User's manual Air Conditioner
natural_image
White portable air conditioner unit with control panel and ventilation grille (no visible text or symbols)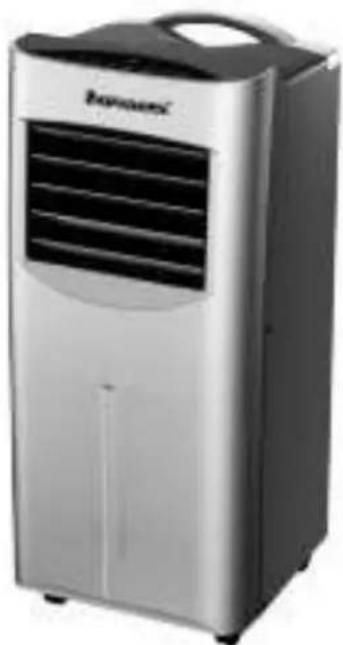
natural_image
Exterior view of a modern air conditioner unit (no visible text or symbols)MODEL:
PM-8500/ PM-8500S/ PM-9500/ PM-9500S
Producent
Ravanson®
RAVANSON LTD Sp. z o.o.
Przód:
natural_image
Simple line drawing of a cylindrical object with a looped end (no text or symbols)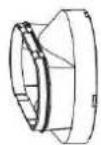
Adapter9okienny99999999999999999999999999999999999999999999999999999999999999999999999
UWAGA!
natural_image
Technical line drawing showing two mechanical components with a central pipe and a cross symbol (no text or labels)IV. INSTALACJA URZĄDZENIA ZA POMOĆĄ ZESTAWU OKIENNEGO9
UWAGA!
Congr3tul3t-ons on the pur6h3se 3nd wel6ome to the f3m-ly of the R3v3nson produ6ts' users.


When you use ele6tr-6 dev-6es, 6omply w-th the 73s-6 pre63ut-ons to redu6e the r-sk of f-re, ele6tr-6 sho6k 3nd/or person3l -njur-es.
Be sure to 63refully rev-ew th-s m3nu3l 7efore us-ng the produ6t for the f-rst t-me 3nd keep -t 3t h3nd for future referen6e.
Before f-rst use, 3lw3ys re3d the s3fety -nstru6t-ons 3nd w3rn-ngs -n6luded -n th-s gu-de.
F3-lure to o7serve the 7elow ment-oned s3fety w3rn-ngs 3nd s3fety gu-del-nes for m3y 63use to ele6tr-6 sho6k, f-re 3nd/or ser-ous -njur-es
Keep s3fety -nstru6t-ons 3nd w3rn-ngs 3t h3nd for future referen6e
I. GENERAL SAFETY GUIDELINESS
This appliance is not intended for use by children under the age of 8 or other persons, without assistance or supervision, if their physical, sensory or mental capabilities prevent them from using it safely or by persons without experience and knowledge on the use thereof. People using this product must understand the risks related to the use of the appliance. Do not allow children to use the appliance as a toy. Cleaning and maintenance by children without supervision is not allowed.
Children are not aware of dangers that may arise during the use of electric devices. Keep the appliance and corresponding cord out of the reach of children under the age of 8.
-
Children should be supervised to ensure that they do not play with the appliance.
-
WARNING! Do not operate the appliance with a damaged cord. Damaged power cord must be replaced by manufacturer, authorized service centre or other qualified persons in order to avoid risk.
-
Do not allow the power cord to touch sharp edges or hot surfaces. Damaged cord poses a risk of electric shock
-
The plug must fit the socket.
-
The plug must not be modified in any way.
-
Installation must comply with the regulations in force in the country where the device is used. If you have any doubts concerning the electrical system, ask a qualified electrician.
-
The device must be placed so as the access to the electrical socket is not obstructed.
-
Do not use any extension cord for the air-conditioner unless it has been inspected and tested by a qualified electrician or electrical part supplier.
-
Do not use outside. Do not expose to rain. Protect against humidity. Do not operate with wet hands.
-
Use only a soft damp (not wet) cloth with mild detergent to clean the appliance. Do not use solvents, petrol or other measures that would damage the device.
-
Transport in an original packaging that protects against mechanical damages.
-
The appliance must be repaired only by a qualified person and with the use of original spare parts.
-
WARNING! Ventilation openings in the device housing or in the adjacent partitions must be perfectly patent and free from any obstacles.
-
WARNING! Do not put any objects through the device openings.
-
WARNING! Do not damage the cooling circuit.
-
WARNING! Do not use electric devices inside chambers designated for food storage, unless they are the type recommended by the manufacturer.
-
Before dismounting, assembly or cleaning the air-conditioner, unplug it.
-
The air-conditioner must always be stored and transported in the upright position as otherwise the compressor can be damaged permanently.
-
Place the air-conditioner in the destination place and wait 24 h before switching it on.
-
Avoid restarting the air-conditioner less than 4 minutes after switching it off as the compressor may be damaged otherwise.
-
Do not use the plug to switch the air-conditioner on and off. Always use the ON/OFF switch on the control panel.
-
Despite operating the unit in accordance with its intended use and in accordance with all safety guidelines, it is impossible to eliminate all residual risk factors.
PLEASE NOTE!
Any service maintenance other than regular filter cleaning or replacements should be carried out by the authorised repair team. The failure to comply with this requirement can render your guarantee void.
WARNING!
The air-conditioner contains eco-friendly natural gas isobutane (R410a).
Before switching the device on, ensure the cooling circuit has not been damaged. A direct contact with evaporating R410a medium can lead to skin frostbiting and eye irritation.
If the circuit has been damaged:
- avoid open fire
- ventilate the room where the cooler/air-conditioner is placed immediately
II. DESIGNATION
The device is not designated to cool server rooms or other rooms where heat is generated constantly.
The device must be used indoors.
If the socket is not available, the installation should be carried out by a qualified electrician.
The device is safe. However, just as any other electric device, it must be used with care.
III. PARTS
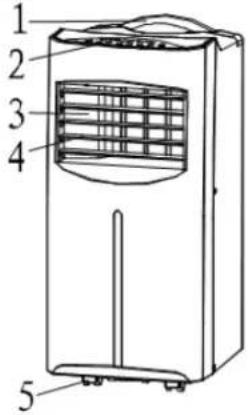
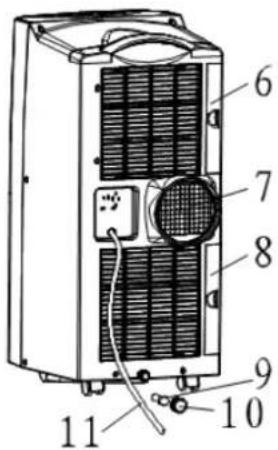
Front:
- Handle
- Control panel
- Air outlet
- Louvre controlling airflow direction
- Castors
Rear:
- Upper filter
- Air discharge
- Lower filter
- Drain hole
- Plug
- Power cord
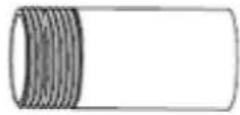
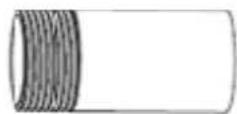
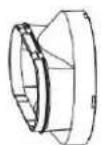
Remote9control9999999999999999999999999999999999999999Draining9hose9
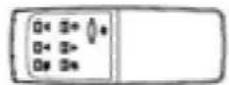
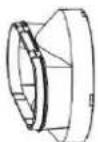
Window9adapter999999999Hose9connector99
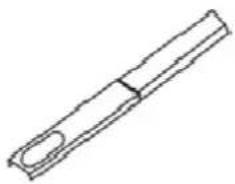
natural_image
Simple line drawing of a mechanical component with a curved end and central slot (no text or symbols)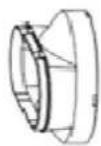
WARNING!
The9device9can9be99moved9easily9from9one9room9to9another.9Bear9in9mind,9however,9that:9
- The9air-conditioner9must9always9be9in9the9upright9position9on9an9even9surface;9
• Do9not9put9near9a9bathtub,9washbasin9or9other9wet9or9damp9surfaces.9
9
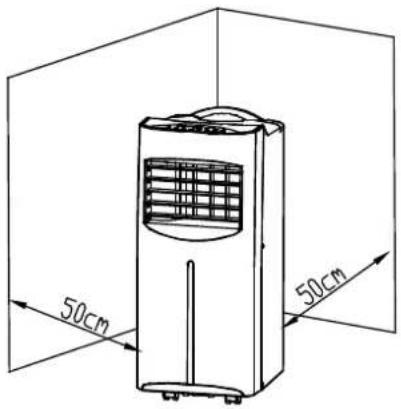
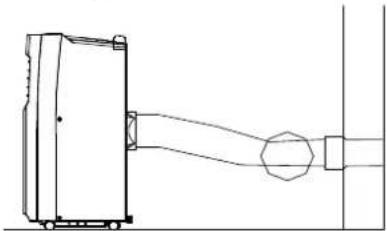
Store9the9device9at9least9509cm9from9the9wall,9curtains,9drapes9and9sources9of9heat9to9ensure9appropriate9heat9 circulation.9
natural_image
Technical line drawing of a mechanical device with no visible text or symbols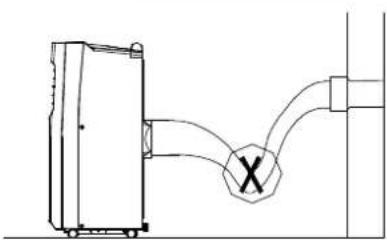
natural_image
Pure technical line drawing of a mechanical or electrical component with no text, numbers, or symbolsIV. INSTALLING THE DEVICE USING THE WINDOW KIT9
PLEASE NOTE!
The9kit9is9designated9solely9for9installing9at9the9sliding9windows9or9doors.9
Do9not9use9the9kit9for9installing9in9basement9windows.9
Step 1
Check9the9exact9dimensions9of9the9window9and99the9kit9of9accessories9for9window99installation.99If9the99slide99for9window9regulation9is9too9long,9cut9it9using9the9appropriate9tools.9If9it9is9too9short,9you9can9buy9a9longer9slide9in9DIY9stores.9
Step 2
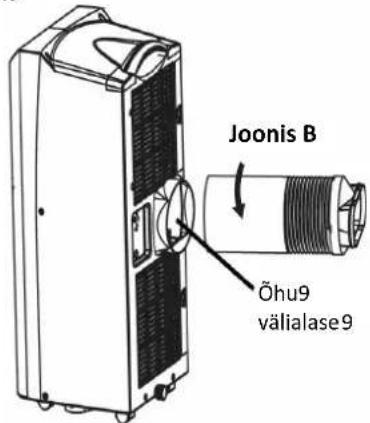
Connect9the9draining9hose9with9the9connector987ig.9A).9Connect9the9hose9to9the9air9discharge9at9the9rear987ig.9B).9 Turn9it9in9by9rotating9counterclockwise.9
9
9
9
9
9
9
9
9
9
9
9
9
9
9
9
9
9
9
9
9
9
9
9
Insert9the9hose9connector9into9the9window9adapter987ig.9C2.9Adjust9the9adapter9to9the9window9width98vertically9or9horizontally29and9then9tighten9the9screw9to9prevent9the9adapter9displacement987ig.9D2.9Ensure9the9adapter9matches9the9window9and9stays9in9place.9Close9the9window9so9as9the9adapter9remains9in9the9slot9between9the9window9and9the9frame9or9the9sill987ig.9E2.9
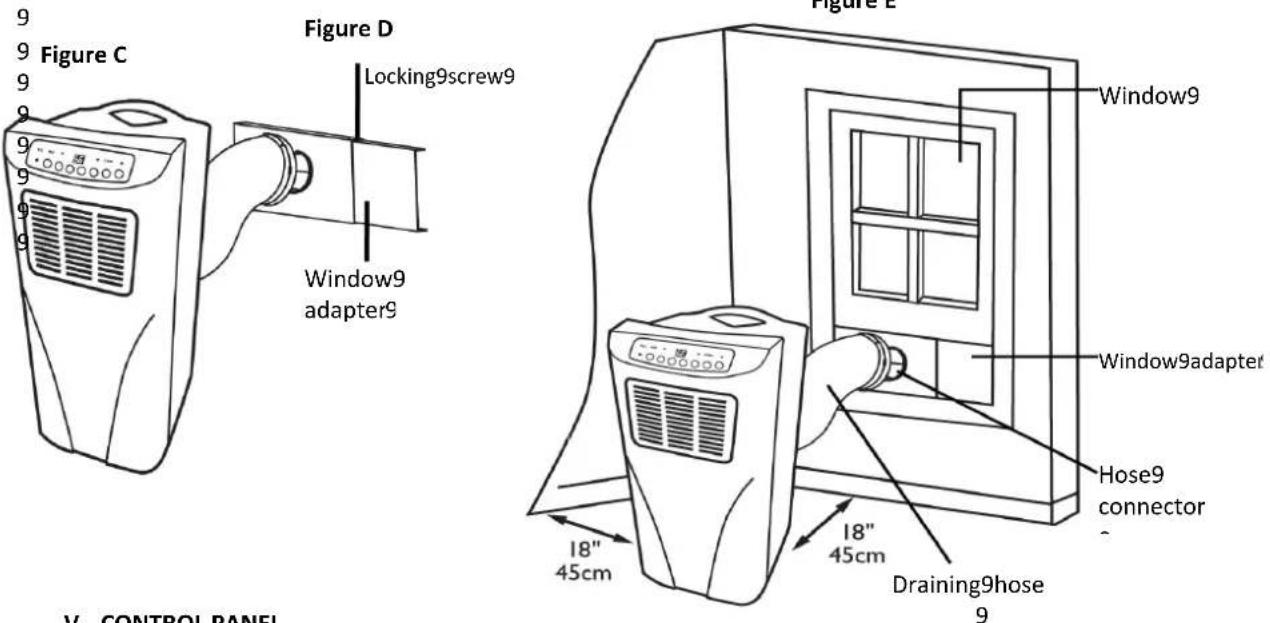
Figure E
V. CONTROL PANEL
PM-8500S PM-9500S
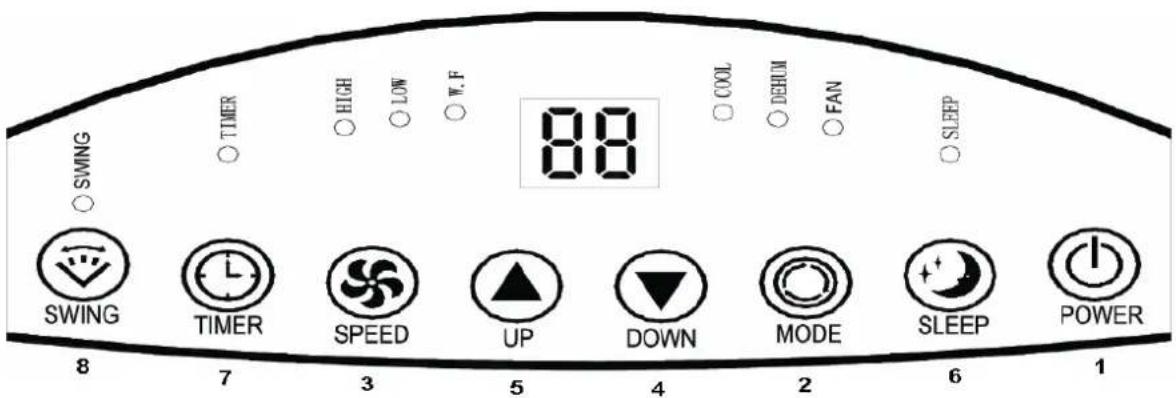
PM-8500 PM-9500
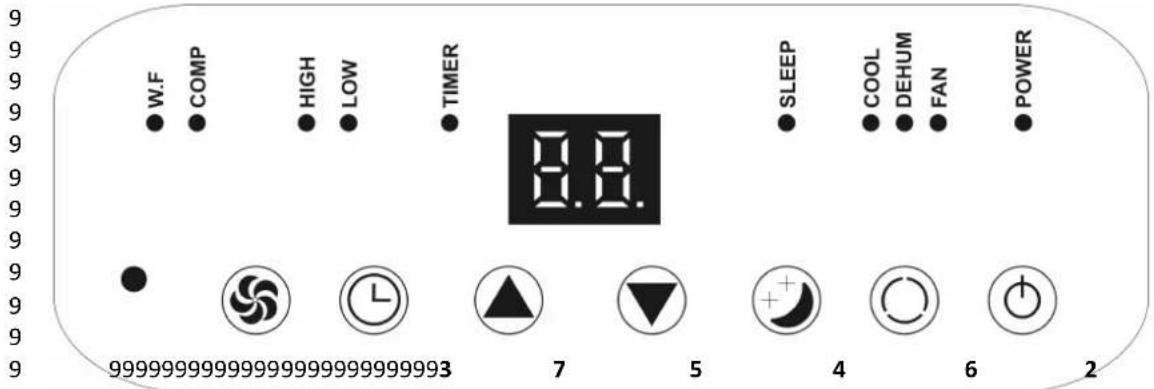
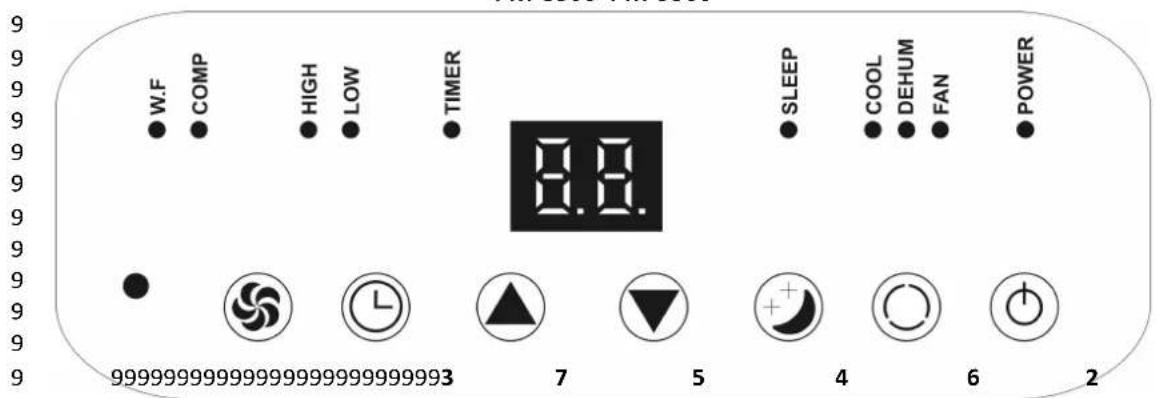
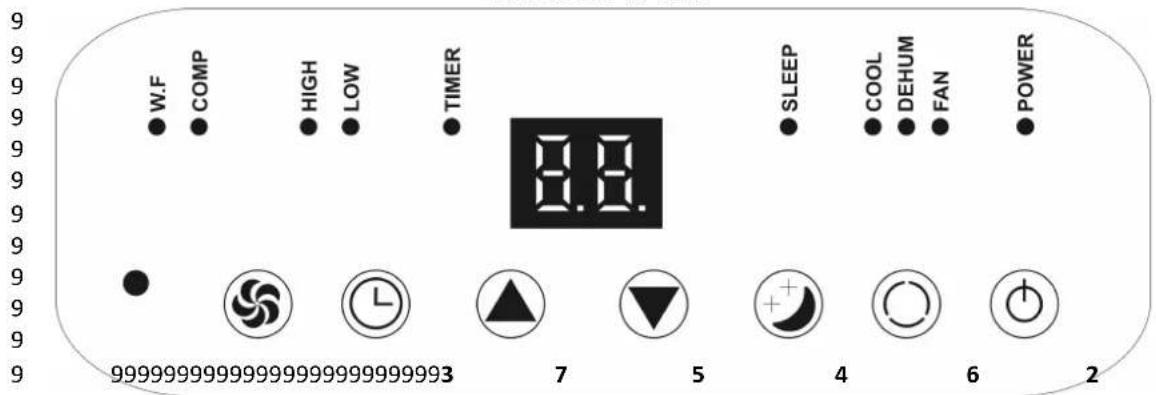
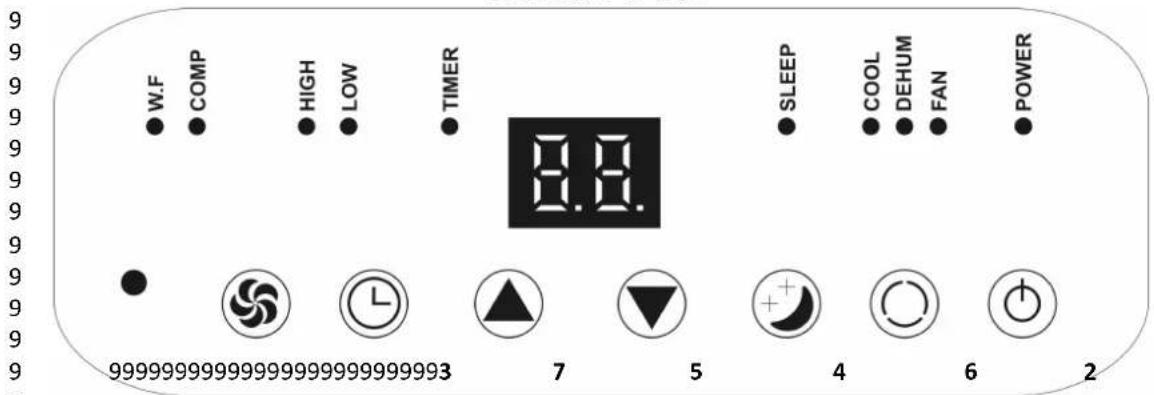
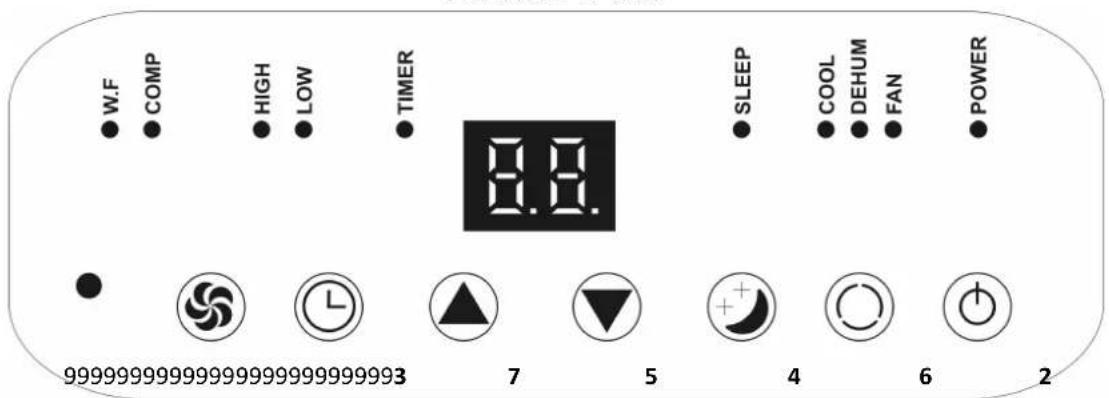
- POWER9-9On/off9switch9
- MODE9-9switch9between9COOLING,9DEHUMIDIFYING9AND9FAN;9The9selected9function9is9signalled9by9a9LED,9 respectively:9COOL9(Cooling),9DEHUM9(Dehumidifying),9FAN9
- SPEED -9setting9fan9speed9(H-highest,9L-9lowest)9
- DOWN9-9in9the9COOLING9mode,9to9reduce9target9temperature99
- UP9-9in9the9COOLING9mode,9to9increase9target9temperature9
- SLEEP -9(work9at9night)9-9in9the9COOLING9mode,9to9switch9the9sleep9mode9on/off99
- SWING9-9 airflow9 control9 by 9 the 9 appropriate 9 positioning 9 of 9 the 9 louvre 9
- TIMER - Setting9the9air-conditioner9unit9operating9time.9lt9is9possible9to9set9the9air-conditioner9unit9operating9time9from919h9to9249h.9
9
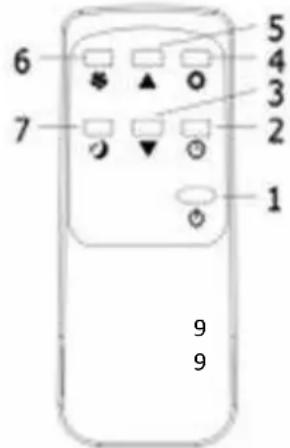
VI. REMOTE CONTROL
- WŁĄCZ9/9WYŁĄCZ9
- TIMER9
- DOWN99
- MODE99
- UP99
- SPEED99
- SLEEP9999999999999999999
- SWING PM-9500S
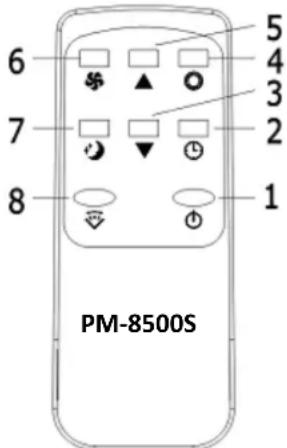
PM 8500
PM 9500
VII. OPERATION
After the device is plugged, the current temperature in the room where the air-conditioner has been placed is displayed.
9
When9the9air-conditioner9is9first9switched9on9by9the9POWER9button,9it9starts9operation9with9low9speed9in9the9cooling9mode,9with9229C9set9by9default.
MODE button
By9pressing9the9MODE9button9you9can9change9the9device9operation9mode:9
- COOL9(cooling)9
Press9UP/DOW9to9set9the9temperature9(from9169C9to9319C)9
Press9SPEED9to9select9high9or9low9speed99
FAN9
Press9SPEED9to9switch9on9quick9or9slow9fan9rotational9speed9
9
PLEASE NOTE!
In9the9FAN9mode:9
a. you9cannot9set9the9SLEEP9mode;9
b. you9cannot9set9the9temperature,9the9device9operates9like9an9ordinary9fan9
- DEHUM9(dehumidifying)9
9
PLEASE NOTE!
In9the9DEHUM9mode:99
- you9cannot9change9fan9speed99
- you9cannot9set9the9SLEEP9mode9
SPEED9and9SLEEP9functions9are9inactive9The9device9operates9with9low9speed.9
9
TIMER button
DelayedHstartH
The9device9can9be9programmed9to9switch9on9after9the9specific9time9has9elapsed9-9delayed9start.9Press9TIMER9in9 the9standby9mode.9The9time9left9before9the9device9is9switched9on9is9displayed.9By9pressing9the9button9once9you9 can9increase9the9time9left9to9start9by919h.9
To9cancel99the9timer9setting,99switch9the99air-conditioner99on99manually9by9pressing9POWER99or99keep99pressing99the TIMER9button9until9its9LED9goes9out9and9"00"9appears9on9the9display.9
Delayed switch-off
The device can be programmed to switch off after the specific time has elapsed - delayed switch-off. Press TIMER in the work mode. The time left before the device is switched off
is displayed. By pressing the button once you can increase the time left to switch-off by 1 h.
To cancel the timer setting, switch the air-conditioner off manually by pressing POWER or keep pressing the TIMER button until its LED goes out and "00" appears on the display.
SLEEP 7utton - sleep mode - only in the COOLING mode
Press SLEEP - the fan is set to slow speed.
When the SLEEP function is on in the cooling mode, the temperature will increase by 1 degree after 1st hour of device operation and by another 1 degree after 2nd hour. After that the temperature will not change.
PLEASE NOTE!
To prote6t the 6ompressor against ex6essive swit6hing on and off, the devi6e was designed so as the 6ompressor swit6hes on after at least 3-minute 7reak if the devi6e has 7een swit6hed off and/or any fun6tion was 6hanged too soon.
VIII. TO EMPTY WATER TANK - "W.F." LED ON THE CONTROL PANEL
If the control lamp ("W.F.") of the water tank overflow is on, empty the tank.
PLEASE NOTE!
Unplug the devi6e 7efore you empty the tank.
Always empty the tank when the air-conditioner is no longer used, regardless of how much water is there.
TO EMPTY THE TANK
- Switch the air-conditioner off. Unplug it.
- Put an appropriate container on the floor under the drain hole (9).
PLEASE NOTE!
Use the container only while emptying the tank. Water should not run into the container when the air-conditioner is on as this can lead to overflowing.
- Twist off the plug (10).
- Remove the rubber stopper and drain water from the device.
- Put the rubber stopper in again. The water tank overflow indicator (W.F.) should go out.
- Tighten the plug.
The air-6conditioner should swit6h off automati6ally when the water tank is full.
Cleaning and maintenant6e
Before you start cleaning, switch the air-conditioner off and unplug it.
Use soft damp (not wet) cloth with mild detergent. Do not use solvents, petrol or other and other measures that would damage the device.
TO CLEAN THE FILTER
The filter should be cleaned every two weeks. Dirty filters reduce the air-conditioner efficiency.
For this purpose, pull out the upper and lower filter from the device.
- Clean the filter with a vacuum cleaner.
- Wash the filter with a running water with a mild detergent.
- Rinse thoroughly.
- Dry the filter before you re-assembly it.
X. TRANSPORT AND STORAGE
Always empty the water tank before you store and transport the device.
Before putting the device away, wait until it cools down. Keep and store in a package protecting from humidity and mechanical damages.
Transport in the original packaging, protecting against mechanical damage and dirt.
XI. POPULAR DEFECTS
| PROBLEM CAUSE SOLUTION | ||
| The air-conditioner does not switch on. | No power supply Plug the air-conditioner. | |
| The water tank overflow indicator is on | Empty the water tank | |
| The air-conditioner restarts Direct sunlight Cover the windows | ||
| Close the doors and windows, remove the heat sources from the room | ||
| Soiled filter Clean or remove the filter | ||
| Air inlet or outlet is obstructed Remove the obstacles | ||
| Noisy operation The air-conditioner is not level Put the air-conditioner on | an even surface to prevent vibrations | |
| The compressor does not operate Active compressor protection This should not last over 3 minutes Restart the air-conditioner | ||
If the above-mentioned advice does not solve the problem, contact the repair service.
Technical parameters
Voltage 220-240 V
Frequency 50 Hz
Refrigerant/weight 410A/370g
The remote control Power supplied 2 x AA (3V d.c.)
| PM-9500 PM-9500S | PM-8500 PM-8500S | |||
| Description | Symbol | Unit | Value | Value |
| Rated cooling efficiency | P rated Cooling | kW | 2,6 | 2,0 |
| Rated heating efficiency P rated | Heating | kW | - | - |
| Nominal power consumption Cooling | P EE, | kW | 1 | 0,9 |
| Nominal power consumption Heating | P COP | kW | - | - |
| Rated energy efficiency ratio | EE,d | - | 2,6 | 2,6 |
| Rated efficiency ratio | COPd | - | - | - |
| Power consumed with the thermostat off | P TO | W | 131,1 | 131,1 |
| Power consumption in standby mode | P 'J | W | 1 | 1 |
| Power consumption of single-/dual-channel air-conditioners - Cooling - Heating | “‘: Q ‘” “‘: Q ‘” | DD: kWh/h SD: kWh/h | 0,9 - | 0,9 - |
| Sound power | L WA | dB (A) | 64 | 64 |
| Global Warming Potential | GWP | kg CO2 equivalents | 1975 | 1975 |
| Further information can be obtained from | RAVANSON LTD. Sp. z o.o.ul. Mazowiecka 6, 09-100 Płońsk |
The manufacturer reserves the right to introduce technical modifications!

The symbol presented below indicates that the used equipment cannot be placed together with other household waste. The user is obliged to bring this item to the waste electrical and electronic equipment collection point where a suitable system is created to allow safe disposal of these items.
Dangerous components present in electrical and electronic equipment have negative
consequences for the environment and human health therefore correct handling of the equipment is very important. Certain substances which may adversely affect the environment over the life of the product and after use have been limited in this device.
Product fiche
| Supplier's name or trade mark | RAVANSON LTD Sp. z o.o. |
| Model identifier | PM-8500; PM-8500S; PM-9500; PM-9500S |
| Sound power level | 64 |
| The name and GWP of the refrigerant used | R410a / 1975 |
| Refrigerant leakage contributes to climate change. Refrigerant with lower global warming potential (GWP) would contribute less to global warming than a refrigerant with higher GWP, if leaked to the atmosphere. This appliance contains a refrigerant fluid with a GWP equal to [xxx]. This means that if 1 kg of this refrigerant fluid would be leaked to the atmosphere, the impact on global warming would be [xxx] times higher than 1 kg of CO9, over a period of 100 years. Never try to interfere with the refrigerant circuit yourself or disassemble the product yourself and always ask a professional. | |
| Energy Efficiency Class | A |
| The indicative hourly electricity consumption Q_DD w kWh/60 min | 0,9 |
| Energy consumption “X,Y” kWh per 60 minutes, based on standard test results. Actual energy consumption will depend on how the appliance is used and where it is located. | |
| The cooling capacity Prated (kW) | 2,6 |
| The heating capacity Prated (kW) | - |
RUS

Передняя панель:
natural_image
Simple line drawing of a cylindrical object with a handle and circular end (no text or symbols)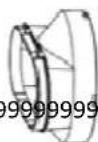
Оконный9адаптер99999999999999999999999999999999999999999999999999999999999999999999
ВНИМАНИЕ!99
natural_image
Technical line drawing of a mechanical assembly with no visible text or symbols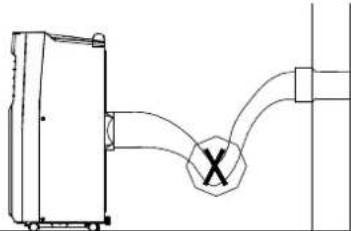
natural_image
Pure electrical circuit lines without any symbolsline
PM-8500S PM-9500S | Feature | Value | |---|---| | SWING | 8 | | TIMER | 7 | | HIGH | 3 | | LOW | 3 | | M.F | 3 | | COOL | 4 | | DEHLM | 2 | | FAN | 2 | | SLEEP | 1 | | POWER | 1 |PM-8500 PM-9500
Přední strana:
natural_image
Simple line drawing of a cylindrical object with a looped end (no text or symbols)Okenní adaptér
Odváděcí hadice
Spojka hadice
POZOR!
9
natural_image
Technical line drawing showing two mechanical assembly steps with no visible text or symbolsIV. NAINSTALOVÁNÍ ZAŘÍZENÍ S POUŽITÍM OKENNÍ SOUPRAVY9
POZOR!
line
| Feature | Value | |---|---| | SWING | 8 | | TIMER | 7 | | SPEED | 3 | | UP | 5 | | DOWN | 4 | | MODE | 2 | | SLEEP | 6 | | POWER | 1 | PM-8500S: 9, PM-9500S: 9 COOL: ○ DEHUM: ○ FAN: ○ SLEEP: ○PM-8500 PM-9500
Predná strana:
natural_image
Simple line drawing of a cylindrical object with a looped end (no text or symbols)Okenný adaptér
Spojka hadice
POZOR!
9
Zariadenie9je9možné9l'ahko9premiestnit'9z9jednej9miestnosti9do9druhej.9Je9však9treba9pri9tom9pamätať,9že:9
natural_image
Technical line drawing showing two views of a device with connected components and a labeled connector (no text or symbols present)IV. NAINŠTALOVANIE ZARIADENIA S POUŽITÍM OKENNEJ SÚPRAVY9
POZOR!
Sprednja9stran:9
- Držaja9za9lažje9prenašanje9
- Krmilna9plošča9
- Izhod9zraka9
- Žaluzija9za9naravnavanje9smeri9izhoda9zraka9
- Kolesca9
Zadnja9stran:9
natural_image
Simple line drawing of a cylindrical object with a looped end (no text or symbols)
Okenski9adapter99999999999999999999999999999999999999999999999999999999999999999999999999 Spojnik9gibke9cevi9
OPOZORILO!9
9
Napravo9je9enostavno9premeščati9iz9enega9v9drug9prostor.9Vendar9ne9pozabite:9
99•99Klimatska9naprava9mora9vedno9stati9pokonci9in9na9ravni9površini;9
99•99Ne9sme9stati9blizu9kopalne9kadi,9umivalnika9ali9drugih9stalno9mokrih9ali9vlažnih9površin.9
9
natural_image
Technical line drawing showing two views of a mechanical or electrical component with no visible text or symbolsIV. INSTALACIJA NAPRAVE Z UPORABO OKENSKEGA KOMPLETA9
POZOR!
Priekinė dalis:
natural_image
Line drawing of a mechanical tool or bracket with a curved handle and oval end (no text or symbols)Nuvedimo žarna
Prijungimo prie lango adapteris
Žarnos jungtis
JSÉJIMAS!
natural_image
Technical line drawing of a mechanical assembly with no visible text or symbols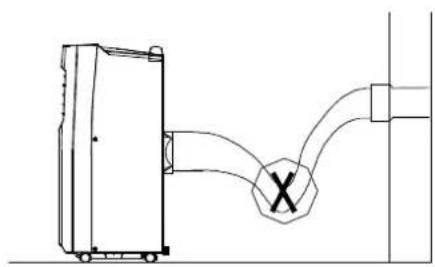
natural_image
Pure technical line drawing of a mechanical component with no text or symbolsIV. MONTAVIMAS SU PRIJUNGIMO PRIE LANGO RINKINIU9
JSPÉJIMAS!
Rinkinys9yra9skirtas9montavimui9tik9su9stumdomomis9durimis9arba9stumdomais9langais.9
line
| Metric | Value | | :--- | :--- | | SWING | 8 | | TIMER | 7 | | SPEED | 3 | | UP | 5 | | DOWN | 4 | | MODE | 2 | | SLEEP | 6 | | POWER | 1 | PM-8500S: 9, PM-9500S: 9.8 COOL: 8.8 DEHUM: 8.8 FAN: 8.8 SLEEP: 8.8PM-8500 PM-9500
Esikülg:
natural_image
Line drawing of a Akna adapter tool (no text or symbols on the diagram itself)Akna adapter
Vooliku liitmik
TÄHELEPANU!
9
line
PM-8500S PM-9500S | Feature | Value | |---|---| | SWING | 8 | | TIMER | 7 | | SPEED | 3 | | UP | 5 | | DOWN | 4 | | MODE | 2 | | SLEEP | 6 | | POWER | 1 |PM-8500 PM-9500
- Ravanson®
- Przód:
- UWAGA!
- INSTALACJA URZĄDZENIA ZA POMOĆĄ ZESTAWU OKIENNEGO9
- GENERAL SAFETY GUIDELINESS
- PLEASE NOTE!
- WARNING!
- DESIGNATION
- Front:
- Rear:
- INSTALLING THE DEVICE USING THE WINDOW KIT9
- Step 1
- Step 2
- REMOTE CONTROL
- OPERATION
- MODE button
- TIMER button
- DelayedHstartH
- Delayed switch-off
- TO EMPTY THE TANK
- Cleaning and maintenant6e
- TO CLEAN THE FILTER
- TRANSPORT AND STORAGE
- Technical parameters
- RUS
- Передняя панель:
- ВНИМАНИЕ!99
- Přední strana:
- POZOR!
- NAINSTALOVÁNÍ ZAŘÍZENÍ S POUŽITÍM OKENNÍ SOUPRAVY9
- Predná strana:
- NAINŠTALOVANIE ZARIADENIA S POUŽITÍM OKENNEJ SÚPRAVY9
- Sprednja9stran:9
- Zadnja9stran:9
- OPOZORILO!9
- INSTALACIJA NAPRAVE Z UPORABO OKENSKEGA KOMPLETA9
- Priekinė dalis:
- JSÉJIMAS!
- MONTAVIMAS SU PRIJUNGIMO PRIE LANGO RINKINIU9
- JSPÉJIMAS!
- Esikülg:
- TÄHELEPANU!
Brand : Ravanson
Model : PM-9500
Category : Heating