
VA-0020 - Vacuum Sealer Concept - Free user manual and instructions
Find the device manual for free VA-0020 Concept in PDF.


| Product Type | Handheld Battery Vacuum Sealer |
| Model | VA-0020 |
| Brand | Concept |
| Voltage | 230 V ~ 50 Hz |
| Input Power | 3 W |
| Battery Type | Nickel-Metal Hydride (NiMH) |
| Charging Time | 9–12 hours (first charge at least 12 hours) |
| Package Contents | Handheld sealer, 4 zipper bags (22×30 cm), 1 clip |
| Functions | Vacuum packaging of zipper bags, canisters, and bottle stoppers |
| Additional Accessories | Bags (VB-2635, VB-2023), canisters (VD-8100, VD-8200), wine stoppers (VD-8300) |
| Cleaning | Wipe with damp cloth; do not immerse; overflow tank washable |
| Safety Features | Automatic shut-off after 45 seconds if unable to complete vacuum |
| Reusability | Bags and canisters reusable; do not reuse bags that held raw meat or were heated |
| Usage | Domestic use only; not for commercial operation |
| Warranty | Repairable by authorized service center |
Frequently Asked Questions - VA-0020 Concept
User questions about VA-0020 Concept
0 question about this device. Answer the ones you know or ask your own.
Ask a new question about this device
Download the instructions for your Vacuum Sealer in PDF format for free! Find your manual VA-0020 - Concept and take your electronic device back in hand. On this page are published all the documents necessary for the use of your device. VA-0020 by Concept.
USER MANUAL VA-0020 Concept
CZ EN DESK PL LV

natural_image
Three empty gray rectangular boxes arranged horizontally (no text or symbols)PODĚKOVÁNÍ
natural_image
Close-up of a black plastic electrical plug with a cable, labeled with number 6 (no text or symbols on the plug itself)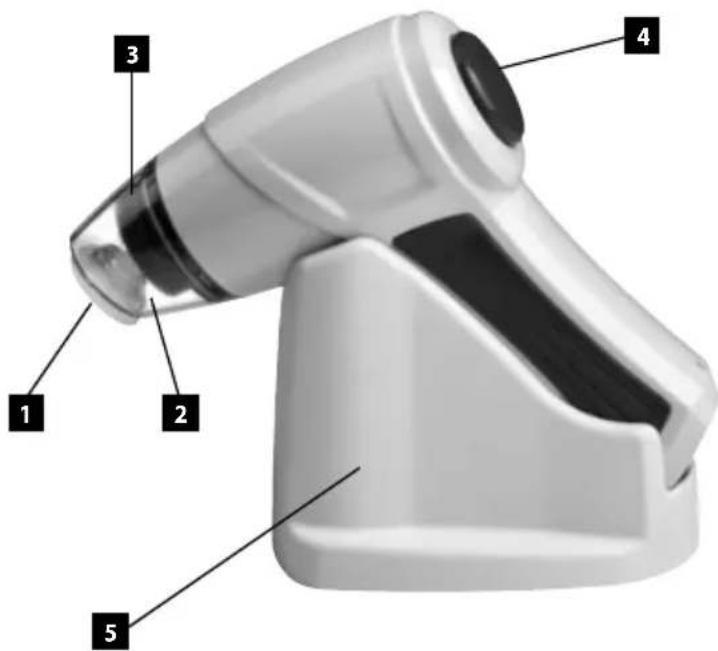
NÁVOD K OBSLUZE
natural_image
Close-up of hands holding a small transparent object with a small circular mark on the surface (no visible text or symbols)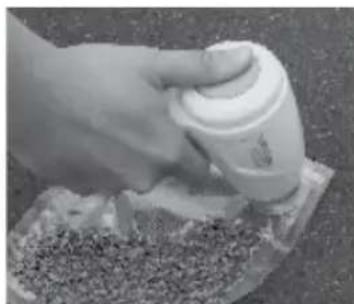
natural_image
Hand using a spray can to apply granular material on a surface (no text or symbols visible)Obr. 1 Obr. 2
natural_image
Hand holding a white tool next to a small electronic device (no visible text or symbols)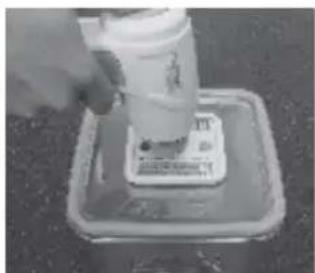
natural_image
Hand pouring liquid into a container on a square base (no visible text or symbols)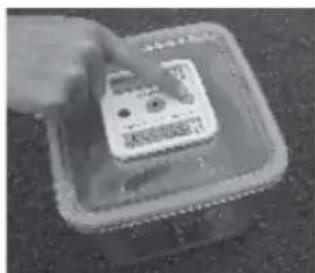
natural_image
Hand placing a small electronic device into a square container (no visible text or symbols)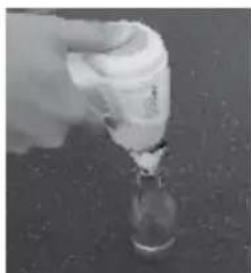
natural_image
Hand pouring liquid into a small vial (no visible text or symbols)Obr. 3 Obr. 4 Obr. 5 Obr. 6
TIPY PRO NEJLEPŠÍ VÝKON PŘÍSTROJE
natural_image
Close-up of a hand holding a transparent cylindrical object against a textured surface (no visible text or symbols)Obr. 7
natural_image
Close-up of a black plastic electrical plug with three pins, attached to a wall (no text or symbols visible)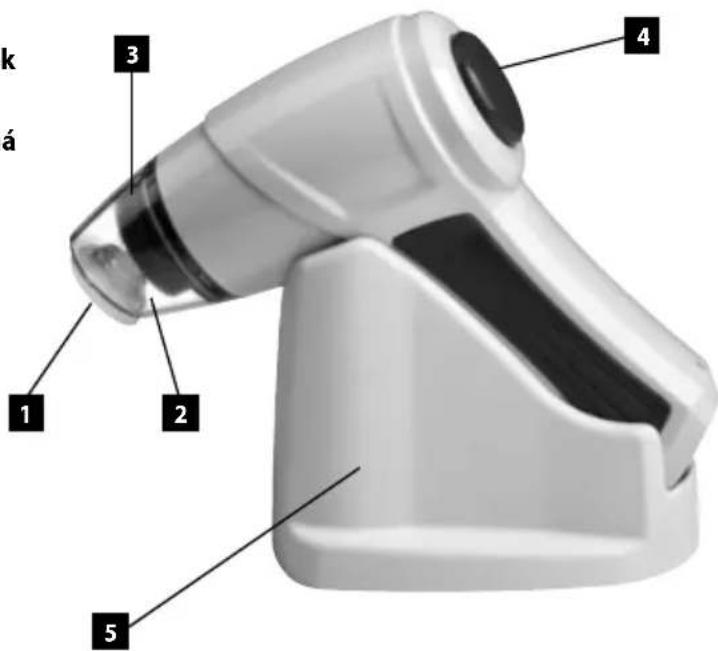
NÁVOD NA OBSLUHU
Postup vákuovania zipsových vreciek Concept Fresh – VB2023, VB2635
natural_image
Close-up of hands holding a small transparent object with a small circular mark on the surface (no visible text or symbols)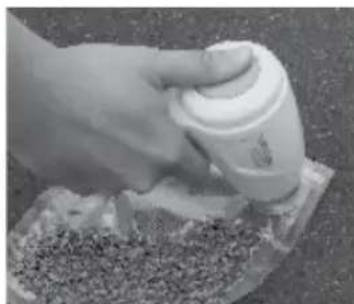
natural_image
Hand using a spray can to apply granular material on a surface (no text or symbols visible)Obr. 1 Obr. 2
natural_image
Hand holding a white tool next to a small electronic device (no visible text or symbols)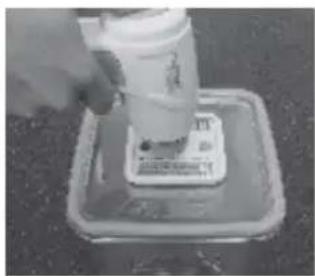
natural_image
Close-up of a hand pouring liquid into a container on a flat surface (no visible text or symbols)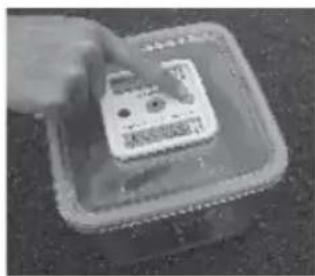
natural_image
Close-up of a hand placing a small electronic device into a square base (no visible text or symbols)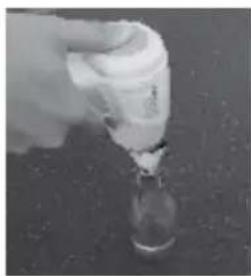
natural_image
Hand pouring liquid into a glass bottle (no visible text or symbols)Obr. 3 Obr. 4 Obr. 5 Obr. 6
TIPY NA NAJLEPŠÍ VÝKON PRÍSTROJA
natural_image
Close-up of a hand holding a transparent cylindrical object against a textured surface (no visible text or symbols)Obr. 7
natural_image
Close-up of a black plastic electrical plug with a cable, labeled with number 6 (no text or symbols on the plug itself)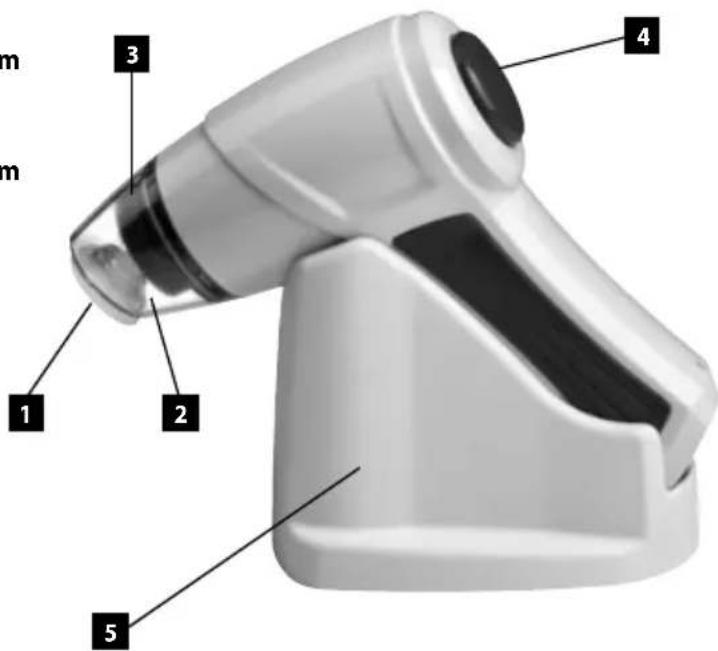
INSTRUKCJA OBSŁUGI
natural_image
Close-up of hands holding a small transparent object with a small circular mark on the surface (no visible text or symbols)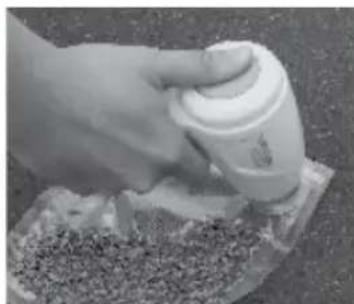
natural_image
Hand using a spray can to apply granular material on a surface (no text or symbols visible)Rys. 1 Rys. 2
Sposób odsysania pojemników Concept VD8100, VD8200 i korków do butelek VD8300
natural_image
Hand holding a handheld device next to a small electronic device (no visible text or symbols)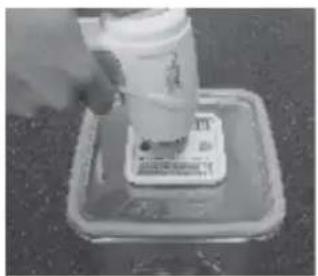
natural_image
Hand pouring liquid into a container on a metal tray (no visible text or symbols)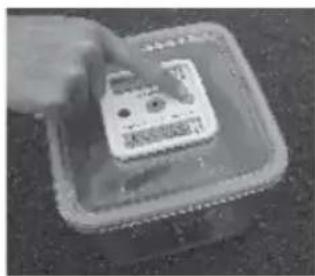
natural_image
Close-up of a hand placing a small electronic device on top of a square base (no visible text or symbols)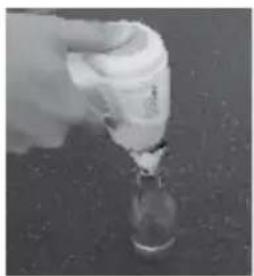
natural_image
Hand pouring liquid into a glass bottle (no visible text or symbols)natural_image
Close-up of a hand holding a transparent cylindrical object against a textured background (no visible text or symbols)Rys. 7
WYPOSAŻENIE DODATKOWE
LIETOŠANAS PAMĀCĪBA
Maisinu ar aizdari Concept Fresh – VB2023, VB2635 gaisa izsūkšanas metode
natural_image
Close-up of hands holding a small transparent object with a label, on a dark surface (no visible text or symbols)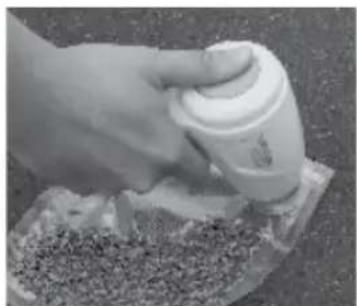
natural_image
Hand using a spray can to apply granular material on a surface (no text or symbols visible)Att. 1 Att. 2
natural_image
Hand holding a white tool next to a small electronic device (no visible text or symbols)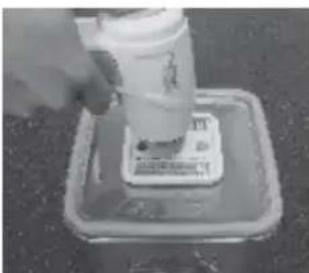
natural_image
Close-up of a hand pouring liquid into a small container on a dark surface (no visible text or symbols)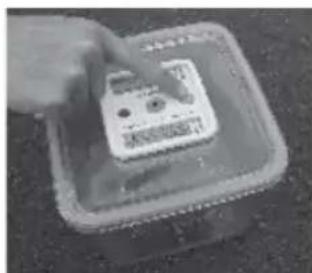
natural_image
Hand placing a small electronic device into a square container (no visible text or symbols)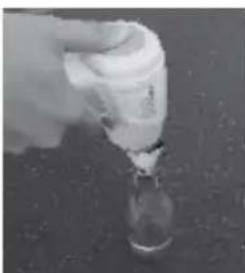
natural_image
Hand pouring liquid into a small glass bottle (no visible text or symbols)natural_image
Close-up of a hand holding a transparent cylindrical object against a textured surface (no visible text or symbols)Att. 7
Thank you for purchasing a Concept product. We hope you will be satisfied with our product throughout its service life.
Please study the entire Operating Manual carefully before you start using the product. Keep the manual in a safe place for future reference. Make sure other people using the product are familiar with these instructions.
| Technical parameters | |
| Voltage 230 V ~ 50 Hz | |
| Input 3 W | |
PACKAGE CONTENTS:
VA0020 – handheld battery vacuum sealer
4 pcs of zipper bags of 22 x 30 cm
1 clip for closing of the bags
IMPORTANT SAFETY INSTRUCTIONS:
- Use the unit only as described in this operating manual.
- Remove all the packaging and marketing materials from the unit before the first use.
- Make sure the mains voltage corresponds to the values on the rating plate. Use grounded wall outlets only.
- Place the appliance on a firm and heat resistant surface, away from heat sources.
- Before use, check the appliance and its parts for any signs of damage.
- Do not use the appliance if not working properly.
- Do not expose the AC adapter cord to excessive bending.
- When disconnecting the device from electrical outlet, grasp and pull the AC adapter only.
- Never attempt to disassemble the device!
- If the device is not used, remove the AC adapter from the electrical outlet.
- Never put the device in a microwave oven and do not wash it in a dishwasher!
- Do not immerse the AC adapter or appliance in water or other liquids.
- Switch off and unplug the appliance from the power outlet before cleaning it and when not in use.
- The unit is suitable for domestic use only. It is not designed for commercial operation.
- Check the appliance and power cord for damage regularly. Do not switch on a damaged unit.
- Do not repair the appliance yourself. Contact an authorized service center.
- The device uses nickel-metal hydride batteries. These batteries must be recycled or disposed of in accordance with the national and local laws and regulations. Do not incinerate or expose to high temperatures. Protect the batteries from contact with liquids.
Failure to follow the manufacturer's instructions may lead to refusal of warranty repair.
DESCRIPTION OF THE DEVICE
- End piece for vacuum packaging of zipper bags
- Overflow tank
- End piece for vacuum packaging of canisters (removable for easy cleaning)
- "START" button to start vacuuming
- Charging dock
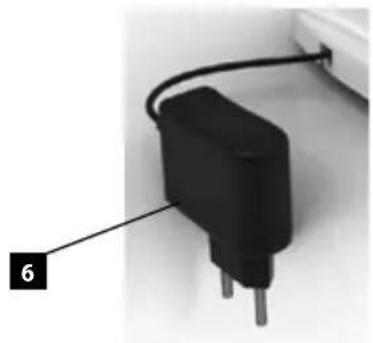
- Charger
natural_image
Close-up of a black plastic electrical plug with a cable, labeled with number 6 (no text or symbols on the plug itself)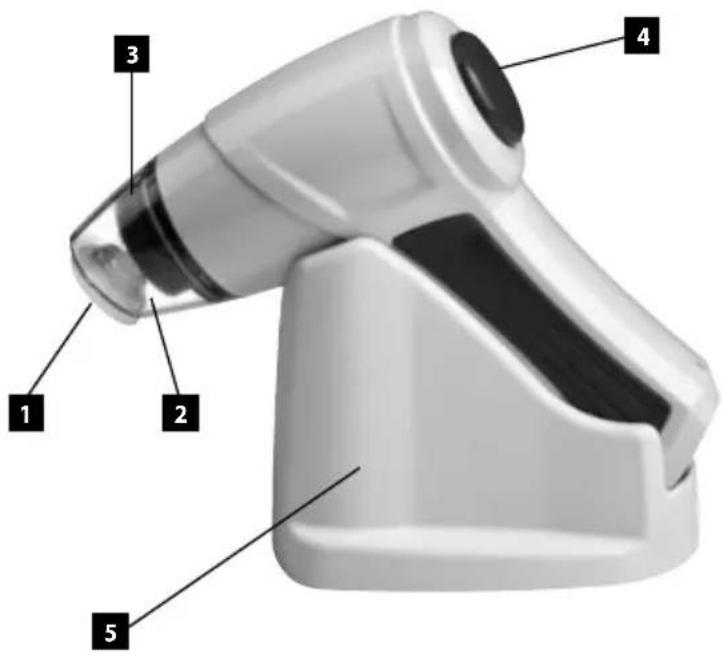
OPERATING INSTRUCTIONS
Steps for vacuum packaging of Concept Fresh zipper bags – VB2023, VB2635
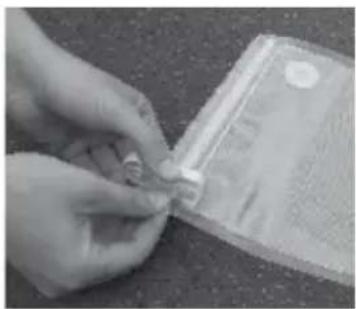
- Place the food into the bag and close it using a special clip supplied with the Concept Fresh VB2023 and VB2635 Fresh bags (Fig. 1).
- Press the nozzle of the vacuum sealer to the zipper bag valve and press "START" (Fig. 2).
- Once the vacuum sealing process is completed, the unit automatically turns off. You can then store the bag and its contents as required.
Important:
The bags are not designed for vacuum packaging of liquids!
natural_image
Close-up of hands holding a small object with a transparent plastic bag attached (no visible text or symbols)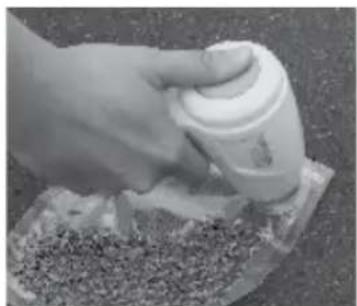
natural_image
Hand pouring a spray bottle onto a tray of granular material (no text or symbols visible)Fig. 1 Fig. 2
Steps for vacuum packaging of Concept VD8100, VD8200 canisters and VD8300 bottle stoppers
- Remove the end piece for vacuum packaging of zipper bags from the unit.
- Fill the canister up to 2.5 cm below the edge. Make sure that the edges of the canisters are free of any food residues. If so, wipe them away.
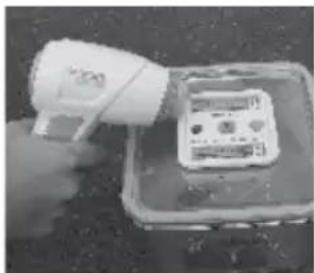
- Put the end piece for vacuum packaging of canisters onto the valve on the lid of the canister and press „START“ (Fig. 3)
- The vacuuming process should take at least 1 minute depending on the size of the canister and its content. The characteristic sound will tell you when the process is finished (for VD8200 canisters check the red button on the lid, which is sucked inside during the vacuuming process). (Fig. 4)
- Fill the canisters again with air:
VD8100 canister set - turn the button on the cover to the „OPEN“ position
VD8200 canister set - press the blue button and hold until the lid cannot be reopened (Fig. 5)
VD8300 wine stopper set - pull the stopper out the neck of the bottle
Note:
When using a stopper from the set of Fresh Concept VD8300 wine stoppers follow the same steps as during canister vacuum packaging. (Fig. 6).
natural_image
Hand holding a handheld device next to an electronic device (no visible text or symbols)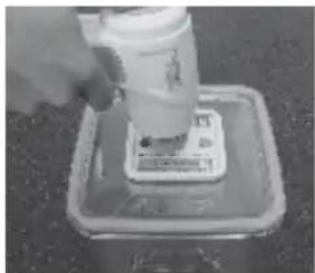
natural_image
Hand pouring liquid into a square container on a dark surface (no visible text or symbols)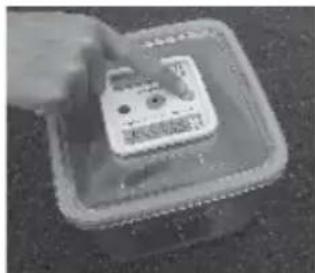
natural_image
Close-up of a hand placing a small electronic device on top of a rectangular tray (no visible text or symbols)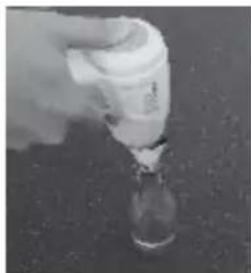
natural_image
Hand pouring liquid into a glass bottle (no visible text or symbols)- Do not overfill the bags or the canisters. Always leave enough space, see the instructions above.
- Use only original bags and canisters of the Fresh Concept series.
- Do not store liquids in zipper bags! Store them in canisters, after they have cooled down.
- Always make sure the zipper bag is free from any impurities that could cause leakage.
- Do not start the vacuum sealer when empty.
- Do not vacuum items with sharp edges that could tear the bag. Use suitable canisters for items with sharp edges.
- Allow about 1 minute for the unit to cool down before reuse.
- If the unit is unable to complete the vacuum packaging process, it switches off automatically after 45 seconds. Check the seal on the bag and the position of the bag in the vacuum chamber.
- Prevent liquids from entering the vacuum chamber or the opening as it would cause subsequent damage to the unit. If you want to package moist food, froze the food first and wipe the bag with a paper towel.
- Liquids can only be vacuum packed in canisters that are available for purchase as additional accessories. Wait until the liquids are cold!
- Any vacuum packed perishable food is to be stored in the refrigerator or freezer. Vacuum packaging only makes the food stay fresh longer, but it does not protect the food from spoiling.
-
The vacuum packing system can be used not only to store food but also to protect valuables (e.g. documents, electronics, medication, etc.)
-
Before each use, make sure that the vacuum chamber and opening are clean and free from any impurities.
- Any damage caused to the unit due to the entry of food residues sucked in from the vacuum chamber is not covered by the warranty!
CLEANING AND MAINTENANCE
- Before cleaning, always unplug the charger.
- Do not immerse in water or any other liquid.
- Avoid using abrasive products, solvents or hot water to clean the unit or any of its parts.
- Wipe the surface of the unit with a damp cloth and a mild detergent.
Wipe out the inside of the unit with a paper towel to remove any food and liquid residues.
- Dry thoroughly before reuse.
- Wash the overflow tank after each use.
Important:
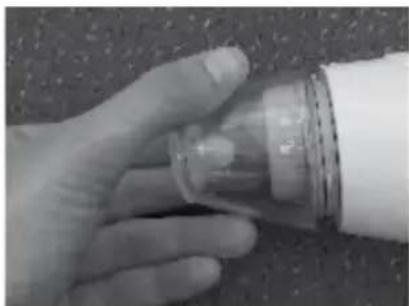
The overflow tank is released by turning the cover to the „unlock" position and removing the cover. (Fig. 7)
natural_image
Close-up of a hand holding a transparent cylindrical object against a textured surface (no visible text or symbols)Fig. 7
Cleaning of bags and canisters for reuse
Before reuse, wash the bags in warm soapy water and rinse thoroughly.
Important:
Do not clean in the dishwasher; high temperature would damage the bags and canisters. Do not immerse the lids in water, clean them with a damp cloth and a mild detergent. canisters are not intended for heating food in the microwave or storing food in the freezer.
Warning:
Do not reuse bags, which were previously used to store raw meat, or heated in boiling water or the microwave.
BATTERY CHARGING
Once you notice that the engine power decreases, the unit has to be recharged.
- Connect the charger to the mains.
- It takes about 9-12 hours to fully charge the batteries.
-
The first charging cycle should take at least 12 hours. The same applies, if the unit has not been used for a longer period of time.
-
During the charging process, the temperature of the battery and the unit increases. This is completely normal.
-
To increase the maximum battery life, fully recharge the unit every 3-6 months.
TROUBLESHOOTING
1. The device does not work
- If the device has not been used for a long time, the battery may be discharged.
- Make sure that all the end pieces and gaskets are correctly fitted.
- If you cannot fix the problem, contact an authorized service centre.
2. The battery charger is not charging
- Check whether the LED indicator on the device is on. If not, try another power outlet.
- If the device is not charging while the LED indicator is on, check the contact between the charger and the device.
- If you cannot fix the problem, contact an authorized service centre.
3. Air has re-entered the bag after being sealed
- Open the zipper and close it again, and repeat the vacuuming process.
- Make sure the bag is not overfilled.
- Extend the vacuuming time.
- Replace the bag with a new one.
4. The air cannot be removed
- Make sure the valve on the lid is in the „SEAL“ position.
- In the beginning of the vacuuming process, press the lid gently onto the canister.
- Make sure that the canister is not damaged (cracked, etc.)
- Make sure that the edges of the canister, the seal and the lid are completely free of impurities.
ADDITIONAL ACCESSORIES
The following additional accessories for the unit are available for purchase:
Code:
VB-2635 set of zipper bags for vacuum packaging - 12 pieces (26 x 35 cm) 8594049740345
VB-2023 set of zipper bags for vacuum packaging - 12 pieces (20 x 23 cm) 8594049740338
VD-8100 set of vacuum storage canisters - 3 pcs 8594049740352
VD-8200 set of rectangular vacuum storage canisters - 2 pcs 8594049740369
VD-8300 set of bottle vacuum packaging wine stoppers - 2 pcs 8594049740376
INSTRUCTIONS AND INFORMATION FOR CORRECT USE OF THE unit
Chemical reactions in food exposed to air, temperature, moisture, and enzyme action, growth of microorganisms or contamination from insects will cause food spoilage. They also cause freezer burn to improperly packed food due to water evaporation. Vacuum packaging can slow down this process. Vacuum packaging is a scientifically tested food storing method of storing, which keeps food fresh up to five times longer than other used methods.
- Vacuum packaging does not replace thermal processes during food preservation. Perishable food should always be stored in the refrigerator or freezer.
- During the suction of the air a small amounts of liquids, crumbs or food particles may be released into the vacuum chamber and cause damage. Therefore, always check that it is free of any food residues.
- Always make sure that the bags are not overfilled or contaminated up to about 7 cm from the seal (both on the outside and the inside).
- Freeze any moist and juicy food such as raw meat before inserting into the bag. You can also place a folded paper towel inside the upper part of the bag (away from the sealed part) before vacuum packaging to catch excess moisture.
- Deep freeze soups, sauces and other liquids first, for example, in a suitable container.
- Do not put powdered and fine grained food in the bag loosely as it could be sucked out. This type of food can be placed in the bag or the canister in a paper towel or another suitable package.
- Do not make your own seals on the side of the bags. The foil is provided with a special side seal which is tight along its entire length.
- In order to prevent creasing or rippling, gently stretch the foil along the length of the vacuum chamber before closing the lid of the unit.
- Make sure that the edge of the bag does not slip out of the vacuum chamber when closing the lid.
- If you store food with sharp edges, protect the bag from tearing by wrapping the food item in a paper napkin or a towel. You can also use a suitable canister.
- Never reuse bags that have been used to store raw meat or that have been used for cooking or placed in the microwave.
- Never defrost or re-heat food in canisters in the microwave!
TIME AND MONEY SAVING TIPS
Easy marinating - vacuum packaging opens up food pores. It will only take a few minutes to marinate your food, instead of long hours of marinating overnight.
Preparing meals in advance - prepare all everyday and special occasion meals in advance.
Seasonal and specialty dishes anytime - perishable food or food that you eat occasionally will stay fresh for a long time.
Helps during diets - you can only pack prepared food portions. Write the calories and nutritional values of the individual portions on each bag.
Outside the kitchen - you can use this system to protect your supplies and equipment from the effects of air, moisture or oxidation during camping, holidays and trips.
FOOD SAFETY
The vacuum packaging process extends the shelf-life of food by removing most of the air from a sealed storage container or a bag, thus reducing food oxidation which affects the nutritional value, taste and overall quality of food. The removal of air also slows down the growth of microorganisms that may, under certain conditions, reduce the quality of food. These microorganisms include mainly:
Mould - mould cannot grow in an environment with low oxygen content and thus the vacuum packaging method is very efficient in reducing its growth.
Yeast - yeast cells need water, sugar and an appropriate temperature to proliferate. They can survive in air as well as without air. Refrigeration is required to slow down the growth of yeast cells. Freezing inhibits their growth completely.
Bacteria - the growth of bacteria can be significantly reduced at temperatures of 4^ or less. Freezing to -17^ does not kill microorganisms, but inhibits their growth and proliferation. In the case of long term storage of perishable food always freeze the food while using the vacuum packaging technology. Once defrosted, keep the food refrigerated at low temperatures.
CAUTION:
Vacuum packaging is not intended as a substitute to canning. Vacuum packaging is able to slow down the processes causing deterioration of food. Perishable food that needs to be frozen or stored in the refrigerator must be kept at the same temperature after vacuum packaging.
TIPS FOR VACUUM PACKAGING AND RE-HEATING OF FOOD
Defrosting and re-heating of vacuum packed food
Always defrost food in the refrigerator or in the microwave. Do not defrost perishable food at room temperature.
Never defrost food in canisters in the microwave.
When re-heating food packed in bags always cut off one corner of the bag before placing the bag in the microwave.
Do not re-heat bones and fatty food in bags in the microwave, as this will prevent the possibility of overheating. It is recommended to heat these types of food by placing the food in water and gently heating through at a temperature of about 75 °C.
Vacuum packaging of meat and fish:
For best results, put the meat or fish in the freezer for 1 or 2 hours before vacuum packaging. Afterwards, use a bag from a foil roll designed for vacuum packaging of food. This will help the food keep its juice and shape.
If you cannot pre-freeze the food, place a folded towel between the meat and the top part of the bag. Keep this paper towel in the bag to absorb excess moisture and juices escaping during the process of vacuum packaging. Make sure the towel does not overlap to the sealing area.
Note: Beef may become dark after vacuum packaging. This occurs due to the removal of oxygen and it does not indicate deterioration of the food.
Vacuum packaging of hard cheeses:
To keep cheese fresh as long as possible, vacuum pack after each opening and use. Prepare a long bag from the foil roll so that you always have 2.5 cm of the bag for each reopening and repacking of the bag. In addition, leave a standard space of 7.5 cm between the contents of the bag and the seal. You can also pack the cheese in a canister.
IMPORTANT: Never use vacuum packaging for soft cheeses.
Vacuum packaging of vegetables:
We recommend cleaning and blanching (i.e. by brief immersion in hot water) the vegetables before vacuum packaging. This process inhibits enzyme activity that could cause the loss of taste, colour and texture.
Note: Blanch the vegetables by cooking briefly in boiling water or placing them in the microwave: 1 to 2 minutes for leafy vegetables, 3 to 4 minutes for peas in pods, sliced zucchini or broccoli, 5 minutes for carrots and 7 to 11 minutes for corncobs. Vegetables should stay crispy. After blanching, immerse immediately in cold water to stop the cooking process. Finally, dry thoroughly and pack.
To freeze the vegetables, it is recommended to pre-freeze them first for 1 to 2 hours until stiff. Before freezing, divide the vegetables into individual portions and spread them on a baking pan so that the pieces do not touch each other. This will prevent the vegetables from sticking together. Immediately after freezing, wrap the vegetables and put them in the freezer.
Note: All kinds of vegetables (including broccoli, Brussels sprouts, cabbage, cauliflower, kale, turnips, etc.) release gases during storage (it is a natural process). Therefore, blanched vegetables must always be stored in the freezer.
IMPORTANT: Never use vacuum packaging to store mushrooms.
More tips for vacuum packaging of leafy vegetables:
For best results, store leafy vegetables in Concept Fresh VD8100 and VD8200 canisters. First, wash the vegetables properly and dry them with a paper towel or in a centrifuge. Place the dried leaves in a canister and remove the air. Store the canister in the refrigerator.
Vacuum packaging of fruit:
Follow the same steps as in the case of vegetables, only without blanching.
You can freeze individual portions for future use or store a small quantity in the refrigerator for quick consumption. We recommend storing fruit in Concept Fresh canisters.
Vacuum packaging of bread:
It is recommended to vacuum pack bread in Concept Fresh canisters, as they are able to retain its original shape. When using bags, pre-freeze the bread for 1 to 2 hours or until completely frozen.
Vacuum packaging of coffee and powdered food:
To prevent the penetration of small particles of food into the vacuum pump, insert a coffee filter or a paper towel into the top part of the bag or canister to prevent the fine material from being sucked up. You can also place food in the bag or canister in its original packaging.
Vacuum packaging of liquids:
For vacuum packaging of liquids in original bottles (wine, oil, etc.) it is recommended to use the original Set of wine stoppers - VD8300. If these stoppers cannot be used, pre-freeze the liquid food in a canister of a suitable shape and size before packing.
Before use, cut off one corner of the bag and defrost in the microwave or in water at 75 °C.
Vacuum packaging of non-food items:
The Concept Fresh vacuum packaging system can also be used to protect non-food materials and items from oxidation, corrosion and moisture. When vacuum packaging these items, follow the steps used for food packaging and use the original Concept Fresh bags or canisters.
When vacuum packaging items with sharp points, wrap the points with a soft material to prevent puncturing of the bag.
Vacuum packaging is an ideal solution for trips to the nature, camping and hiking to pack equipment such as clothing, matches, electronics, maps and food that needs to be kept dry. You can also pack ice, which turns into drinking water after melting.
FOOD STORAGE MANUAL
storage time vacuum pack storage time
Refrigerated food 5-2 °C
Red meat 3-4 days 8-9 days
White meat 2-3 days 6-9 days
Whole fish 1-3 days 4-5 days
Venison 1-3 days 5-7 days
Smoked meat 7-15 days 25-40 days
Sliced smoked meat 4-6 days 20-25 days
Soft cheese 5-7 days 14-20 days
Hard cheese 15-20 days 25-60 days
Vegetable products 1-3 days 7-10 days
Fruit 5-7 days 14-20 days
Cooked, processed food
| Vegetable purees, soups | 2-3 days 6-10 days | |
| Pasta, rice | 2-3 days 6-8 days | |
| Cooked, roasted meat | 3-5 days 10-15 days | |
| Soft bread | 2-3 days 6-8 days | |
| Deep-frying oil | 10-15 days | 25-40 days |
Frozen Food -18-2 °C
| Meat | 4-6 months 15-20 months | |
| Fish | 3-4 months 10-12 months | |
| Vegetables | 8-10 months | 18-24 months |
Food at room temperature 25-2 °C
| Bread | 1-2 days 6-8 days | |
| Packed biscuits | 4-6 months 12 months | |
| Pasta | 5-6 months 12 months | |
| Rice | 5-6 months | 12 months |
| Flour | 4-5 months | 12 months |
| Dried fruit | 3-4 months | 12 months |
| Ground coffee | 2-3 months | 12 months |
| Loose tea 5-6 months | 12 months | |
| Powdered milk | 1-2 months | 12 months |
| Powdered food | 1-2 months 12 months |
REPAIR & MAINTENANCE
Any extensive maintenance or repair that requires access to the inner parts of the product must be performed by an expert service centre.
ENVIRONMENTAL PROTECTION
- Packaging materials and obsolete appliances should be recycled.
- The transport box may be disposed of as sorted waste.
- Polyethylene bags shall be handed over for recycling.
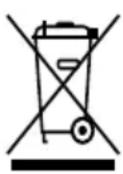
Appliance recycling at the end of its service life:
A symbol on the product or its packaging indicates that this product should not go into household waste. It must be taken to the collection point of an electric and electronic equipment recycling facility. By making sure this product is disposed of properly, you will help prevent the negative effects on the environment and human health that would otherwise result from inappropriate disposal of this product. You can learn more about recycling this product from your local authorities, a household waste disposal service or in the shop where you bought this product.
natural_image
Close-up of a black plastic electrical plug with a cable, labeled with number 6 (no text or symbols on the plug itself)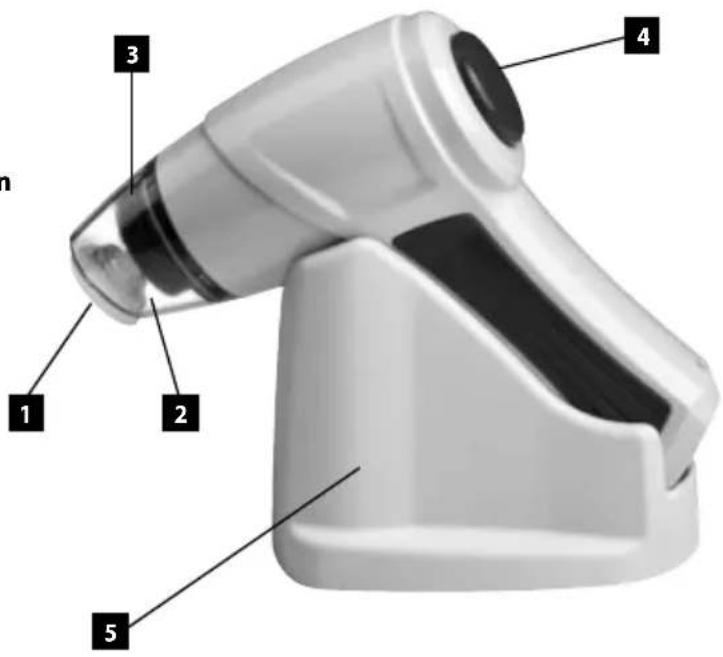
BEDIENUNGSANLEITUNG
natural_image
Close-up of hands holding a small object with visible texture and surface details (no text or symbols)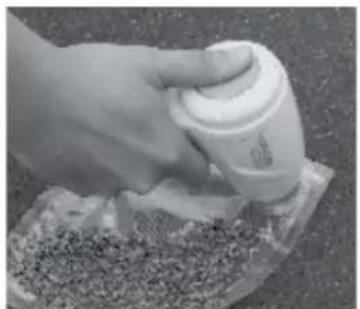
natural_image
Hand pouring a white bottle into a container filled with granular material (no text or symbols visible)Abb. 1 Abb. 2
natural_image
Hand holding a handheld device next to a small electronic device (no visible text or symbols)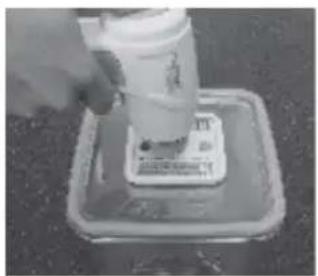
natural_image
Close-up of a hand pouring liquid into a container on a metal tray (no visible text or symbols)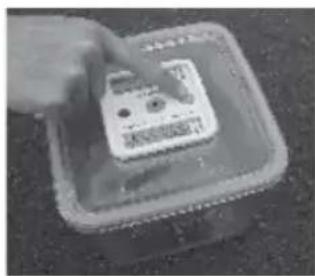
natural_image
Close-up of a hand placing a small electronic device into a square base (no visible text or symbols)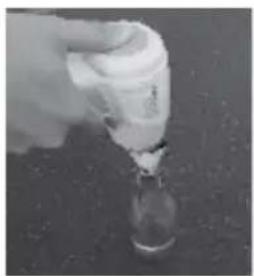
natural_image
Hand pouring liquid into a glass bottle (no visible text or symbols)natural_image
Close-up of a hand holding a transparent cylindrical object against a textured surface (no visible text or symbols)Abb. 7

- PODĚKOVÁNÍ
- NÁVOD K OBSLUZE
- TIPY PRO NEJLEPŠÍ VÝKON PŘÍSTROJE
- NÁVOD NA OBSLUHU
- TIPY NA NAJLEPŠÍ VÝKON PRÍSTROJA
- INSTRUKCJA OBSŁUGI
- Sposób odsysania pojemników Concept VD8100, VD8200 i korków do butelek VD8300
- WYPOSAŻENIE DODATKOWE
- LIETOŠANAS PAMĀCĪBA
- PACKAGE CONTENTS:
- IMPORTANT SAFETY INSTRUCTIONS:
- DESCRIPTION OF THE DEVICE
- OPERATING INSTRUCTIONS
- Important:
- Steps for vacuum packaging of Concept VD8100, VD8200 canisters and VD8300 bottle stoppers
- Note:
- CLEANING AND MAINTENANCE
- Cleaning of bags and canisters for reuse
- Warning:
- BATTERY CHARGING
- Once you notice that the engine power decreases, the unit has to be recharged.
- TROUBLESHOOTING
- The device does not work
- The battery charger is not charging
- Air has re-entered the bag after being sealed
- The air cannot be removed
- ADDITIONAL ACCESSORIES
- INSTRUCTIONS AND INFORMATION FOR CORRECT USE OF THE unit
- TIME AND MONEY SAVING TIPS
- FOOD SAFETY
- CAUTION:
- TIPS FOR VACUUM PACKAGING AND RE-HEATING OF FOOD
- Vacuum packaging of meat and fish:
- Vacuum packaging of hard cheeses:
- Vacuum packaging of vegetables:
- More tips for vacuum packaging of leafy vegetables:
- Vacuum packaging of coffee and powdered food:
- Vacuum packaging of liquids:
- Vacuum packaging of non-food items:
- FOOD STORAGE MANUAL
- Refrigerated food 5-2 °C
- REPAIR & MAINTENANCE
- ENVIRONMENTAL PROTECTION
- Appliance recycling at the end of its service life:
- BEDIENUNGSANLEITUNG
Brand : Concept
Model : VA-0020
Category : Vacuum Sealer