
FZF 4010-E - Vacuum Cleaner Fieldmann - Free user manual and instructions
Find the device manual for free FZF 4010-E Fieldmann in PDF.


| Product Type | Vacuum Cleaner |
| Brand | Fieldmann |
| Model | FZF 4010-E |
| Power Supply | 220-240 V ~ 50 Hz |
| Power Consumption | 1200 W |
| Dust Capacity | 1.5 L |
| Filtration | HEPA filter |
| Noise Level | 78 dB |
| Cord Length | 5 m |
| Weight | 4.5 kg |
| Dimensions (L x W x H) | 400 x 250 x 300 mm |
| Bag Type | Bagless |
| Hose Length | 1.5 m |
| Telescopic Tube | Yes |
| Floor Nozzle | Yes |
| Crevice Tool | Yes |
| Upholstery Tool | Yes |
| Auto Cord Rewind | Yes |
| Filter Washable | Yes |
| Overheat Protection | Yes |
| Warranty | 2 years |
Frequently Asked Questions - FZF 4010-E Fieldmann
User questions about FZF 4010-E Fieldmann
0 question about this device. Answer the ones you know or ask your own.
Ask a new question about this device
Download the instructions for your Vacuum Cleaner in PDF format for free! Find your manual FZF 4010-E - Fieldmann and take your electronic device back in hand. On this page are published all the documents necessary for the use of your device. FZF 4010-E by Fieldmann.
USER MANUAL FZF 4010-E Fieldmann
natural_image
Abstract black-and-white spiral pattern with no text or symbolsFIELDMANN®
Home & Garden Performance
natural_image
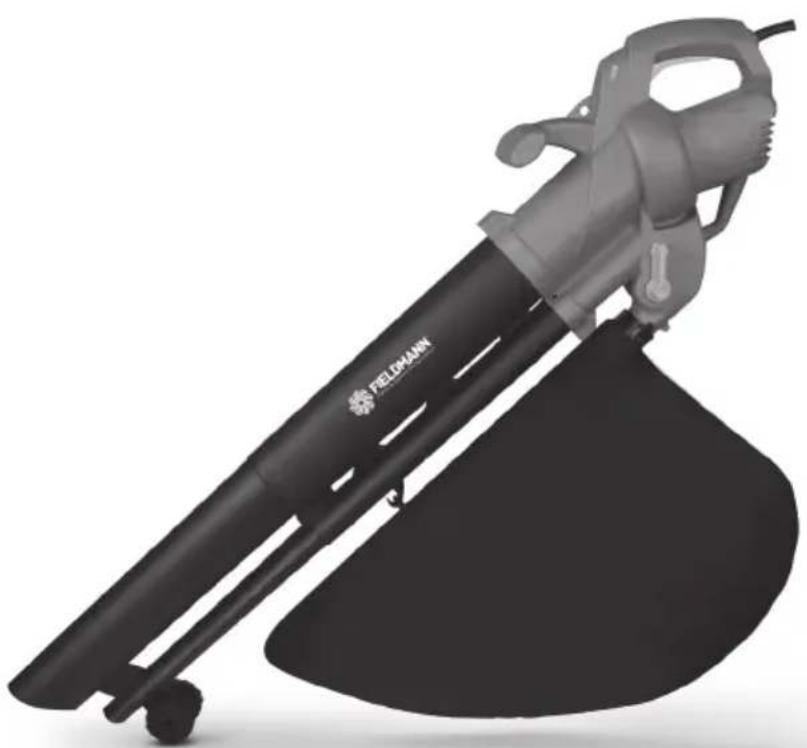
Black electric shaver with a black body and a white handle, no visible text or symbols on the device itself.FZF 4010-E
English 7
Čeština 21
Slovenčina 35
Magyarul 49
Polski 63
1
2
natural_image
Hand holding a cylindrical mechanical component next to a gray industrial device (no visible text or symbols)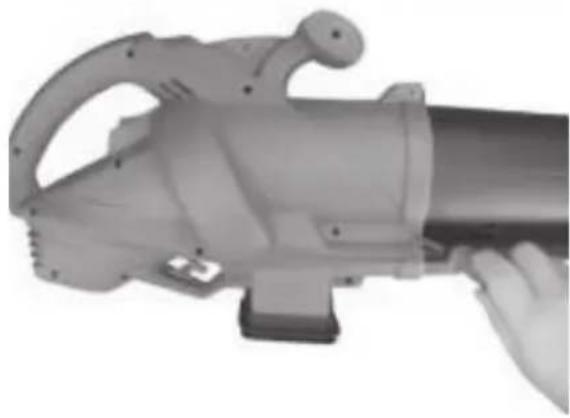
natural_image
Close-up of a handheld industrial tool with handle and lever mechanism (no visible text or symbols)3
natural_image
Close-up of a hand holding a cylindrical object, possibly a device or tool, with no visible text or symbols.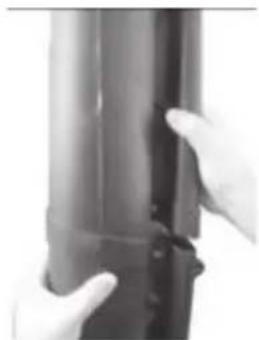
natural_image
Close-up of hands holding a black cylindrical object (no visible text or symbols)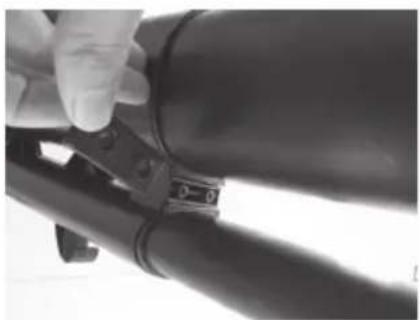
natural_image
Close-up of a hand using a tool to adjust or install a black cylindrical component (no visible text or symbols)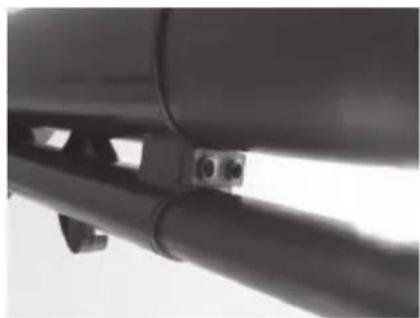
natural_image
Close-up of a black cylindrical mechanical component with mounting brackets (no visible text or symbols)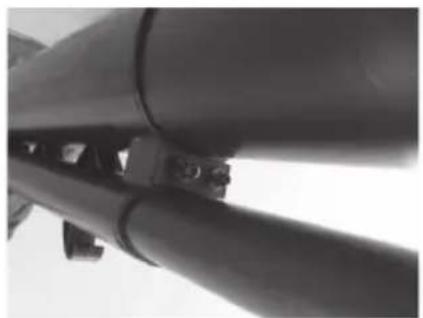
natural_image
Close-up of a mechanical component with cylindrical and rod-like features (no visible text or symbols)4
natural_image
Technical line drawing of a mechanical device with gears and wheels, no text or symbols present5
a
natural_image
Close-up of a white car's front panel with a black control button (no visible text or symbols)b
natural_image
Close-up of a white industrial machine control panel with a circular dial indicator (no visible text or symbols)6
7
Electric Garden Vacuum OPERATING INSTRUCTIONS
Thank you for purchasing this garden vacuum. Before you start using it, please read carefully this operating manual and keep it for future reference.
TABLE OF CONTENTS
PICTURE ANNEX 3
- GENERAL SAFETY REGULATIONS 8
Important safety notices
Packaging
Instructions for use
-
SYMBOLS 9
-
MACHINE DESCRIPTION AND PACKAGE CONTENT 10
-
ASSEMBLY INSTRUCTIONS 10
-
OPERATION 10
-
INSTRUCTIONS FOR USE 13
-
MAINTENANCE AND STORAGE 17
-
TECHNICAL DATA 18
-
DECLARATION OF CONFORMITY 19
-
DISPOSAL 20
WARRANTY CERTIFICATE, WARRANTY TERMS 78 - 79
1. GENERAL SAFETY INSTRUCTIONS
Important safety warnings
* Unpack the product carefully and be sure not to throw away any part of the package before having found all components of the product.
* Keep the product in a dry place out of reach of children.
Read all cautions and instructions. The failure to adhere to warning cautions and instructions may result in an accident, fire and/or a serious injury.
Packaging
The product is placed in a package preventing damage during transport. This package is a raw material therefore it can be handed-over for recycling.
Instructions for use
Before beginning to work with the machine, read the following safety rules and instructions for use. Familiarize with operating elements and the proper use of the device. Keep the manual in a safe place for future reference. We recommend keeping the original package including the inner packaging materials, cash voucher and guarantee card for a period of warranty at minimum. For a case of transportation, pack the machine into the original box from the manufacturer, thus ensuring a maximum protection of the product during a possible transport (e.g. moving or sending into a service station).

Note: If you hand the machine over to next persons, hand it over together with the manual. Adherence to the attached instructions for use is a precondition for the proper use of the machine. The operation manual includes also instructions for operation, maintenance and repairs.
The manufacturer does not take any responsibility for accidents or damages resulting from the failure to adhere to this manual.
2. SYMBOLY

General hazard safety alert.
Read carefully operating instructions before putting the machine into operation.

Do not work in the rain or leave the garden vacuum outdoors whilst raining.
Use protective equipment while working.
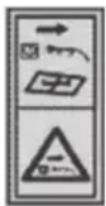
Switch off and remove plug from the mains before performing any maintenance (cleaning, inspection or repair) tasks or if the machine is damaged or defective.
Switch off and remove plug from the mains if the cable is damaged or cut.
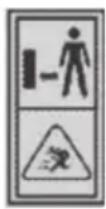
Keep bystanders a safe distance away from the machine.
Beware of foreign objects thrown from the machine.
3. MACHINE DESCRIPTION AND PACKAGE CONTENT
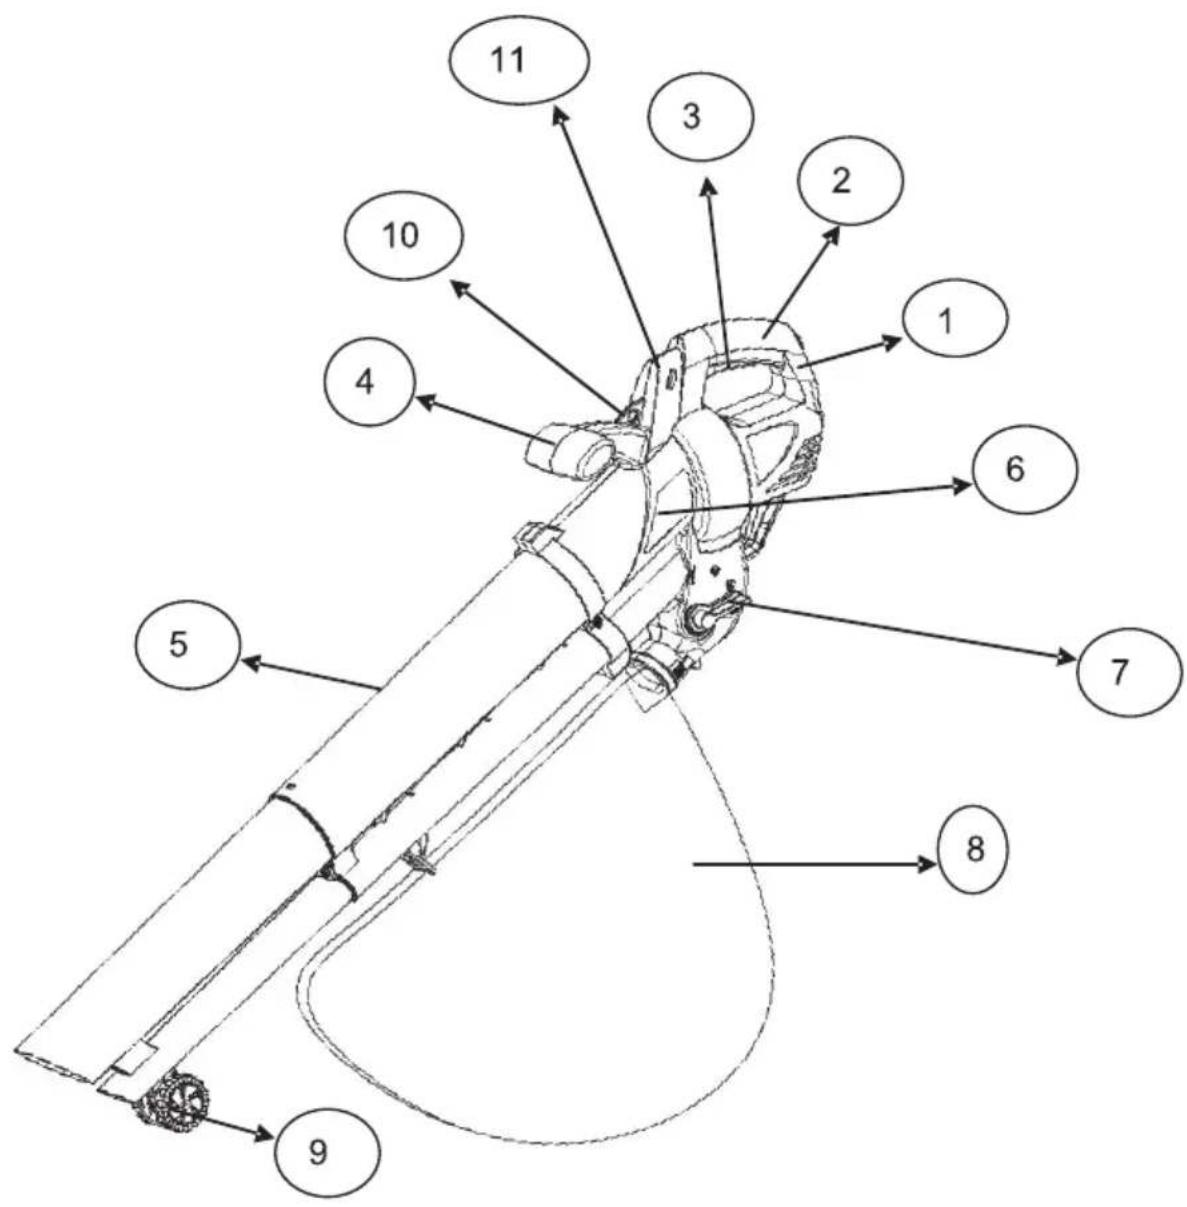
Machine Description (see Fig. 1)
- Cord guard
- Main handle
- On/off switch
- Additional handle
- Blower tube
-
Engine cover
-
Function switch
- Collection bag
- Wheel
- Shoulder harness
- Speed control governor
Package Content
Remove the machine carefully from the packaging and check the completeness of the following parts:
* Suction/blower tube with wheels
Middle suction/blower tube
Garden vacuum/blower body
Collection bag
* Suction tube fixing screws (4 screws)
Operating instructions
4. ASSEMBLY INSTRUCTIONS
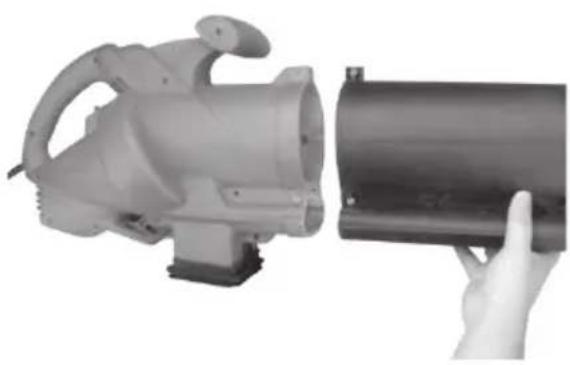
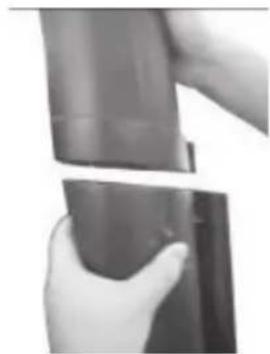
* Slide the upper tube into the motor housing, then tighten the screws and make sure the tube is firmly fixed with motor housing. (Fig. 2)
* Insert the lower tube into the upper tube and push them until they are connected firmly together and then tighten the screws. (Fig. 3)
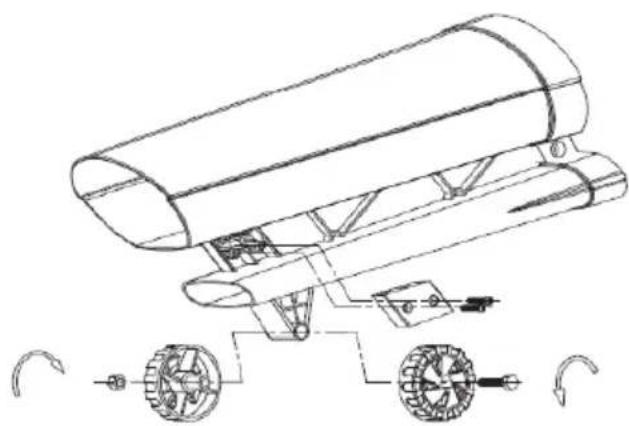
Assemble the wheels to the lower tube. (Fig. 4)
* Attach the collection bag to the hook on the upper tube and the outlet on the bottom of the motor housing.
⚠️ ATTENTION! In the interest of safety the tubes should not be dismantled after they have been assembled.
5. OPERATION
ATTENTION! Before stating the machine, make sure that collection bag is fitted and the shoulder harness is adjusted in a suitable working position.
Switching on and off
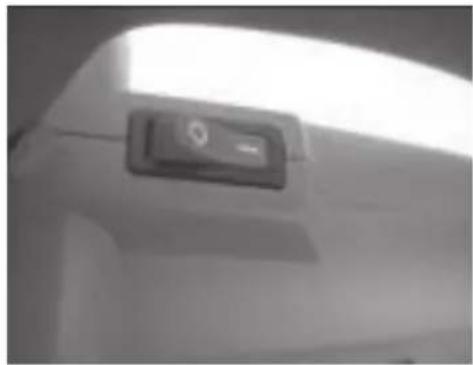
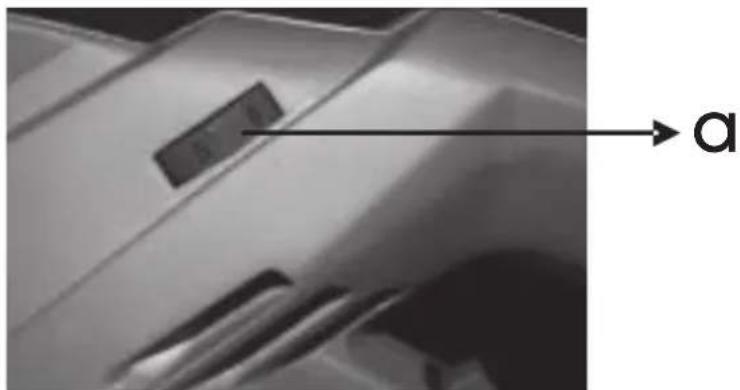
* To switch the machine on, move the switch (3) to position "1". (Fig. 5a).
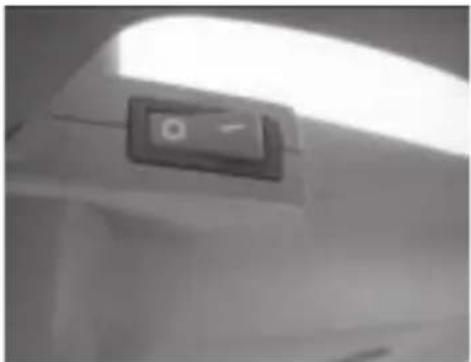
* To switch the machine off, move the switch (3) to position "0". (Fig. 5b).
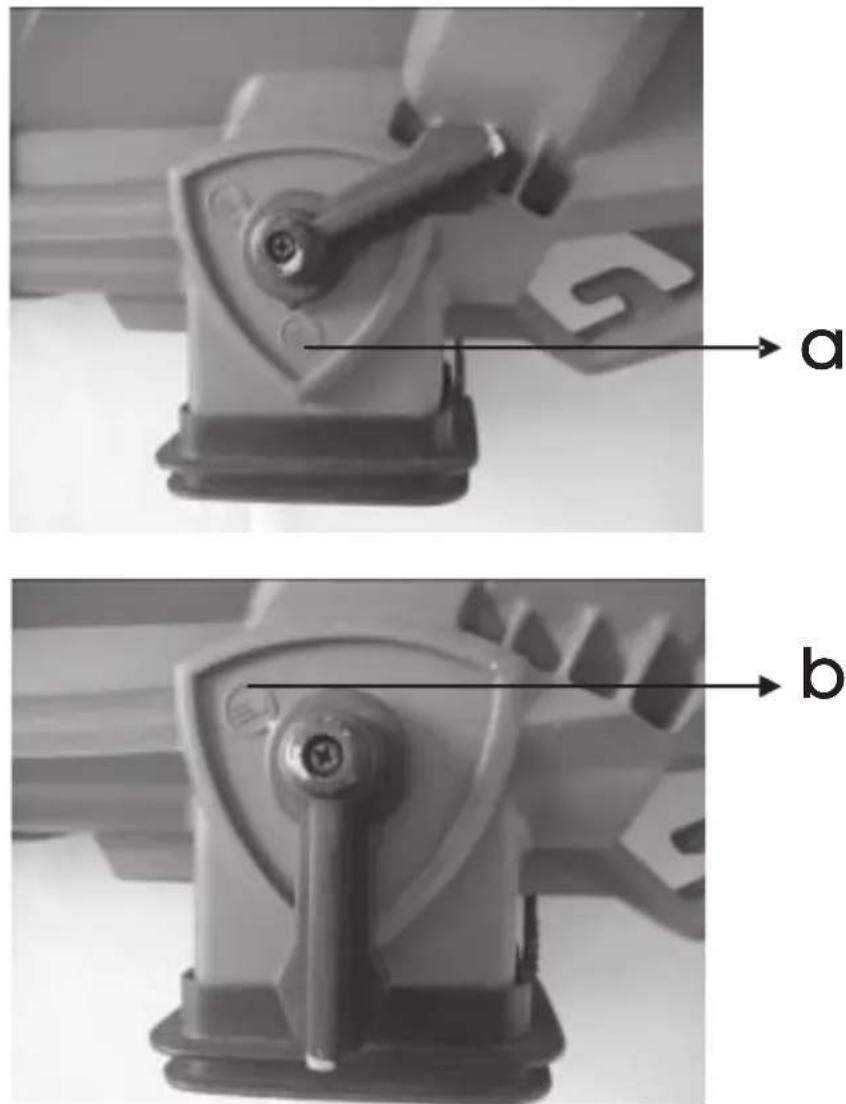
Speed control governor (Fig. 6)
Push the knob of the adjuster (a) from position "1" to position "6"; the speed will be adjusted from 10,000 min-1 to 15,000 min-1; bigger figure means higher speed.
Blowing mode (Fig. 7a)

Note: Blowing mode can be also used to clean corners, fences, walls, wooden areas or beneath cars. Be careful where you point the jet of air as it could move heavy material or cause injury or damage.
Turn the Function switch counterclockwise to the blow mode position.
Move the switch to ON position, point the jet of air in front of you and move slowly forward to gather the leaves together or to move the leaves from inaccessible areas as shown in Fig.7a.
Vacuum mode (Fig. 7b)
Set the Function switch clockwise to the vacuum mode position.
Make sure the collection bag is fitted properly.
Hold the blower/vacuum several centimetres over the leaves you are going to suck up. Now switch the machine ON.
Hold the machine as shown in Fig. 7b, tilting the blower/suction tube slightly, and perform a sweeping action to collect light debris with approximately 50 mm distance between the blower/suction tube opening and the floor or ground to be clean up.
The leaves will be sucked up into the tube, chopped up and thrown into the collection bag.
When the collection bag is full, the vacuum power will be greatly reduced. When this happens, turn the switch to position "0" (OFF) and disconnect the plug from the electricity supply. Wait until the suction fan has stopped completely before operation. Open the zip fastener inside the bag, spread out the opening and empty the bag completely. If you have collected only leaves or vegetable matter, they will already have been shredded and will be ready for composting. Zip up the bag and resume work.

Note: Before re-fitting the bag, clean the inside of the exhaust opening and remove any shredded deposits. Pay special attention to the cleaning of the supporting edges of the air flow deviator on the inside of the tube.
Electronic speed control setting (Fig. 6)
Your machine is completed with a speed control governor which allows you adjust the air speed for various working conditions.
Turn the speed control governor forward to increase the motor speed and blowing/suction air speed.
Working Procedure
Do not try to suck up wet debris; also let wet leaves, etc. dry out before using the vacuum. The garden vacuum/blower can be used to blow away debris from courtyards, pathways, roads, lawns, shrubs and fences. It can also be used to collect leaves, paper, small branches and wood dust. If you use the garden vacuum/blower in the vacuum mode, it will suck up the garden waste through the suction tube into the collection bag and when passing through the suction fan the garden waste is shredded. Shredded organic parts are quite suitable for mulching around plants.
Blower Mode
Before commencing work, familiarize yourself with the working area. Remove all objects which could be thrown away by the blower or which could jam or clog the blower. Using the switch lever on the side of the machine, select the blower mode and turn the machine on. Place the blower on the guiding wheels in the front of the tube and move it forward while directing the tube to the garden waste you wish to blow away. In addition, you can hold the tube above ground and move forward while swinging the machine from side to side. Blow the garden waste to create a reasonable pile which can then be comfortably removed using the vacuum function. Never blow the garden waste in the direction of bystanders or animals.
Vacuum Mode
Before commencing work, familiarize yourself with the working area. Remove all objects or debris which could be thrown away by the vacuum or which could jam or clog the vacuum. Using the switch lever on the side of the machine, select the vacuum mode and turn the machine on. Place the vacuum on the guiding wheels and move it forward while directing the suction tube to the garden waste you wish to collect. You can also hold the suction tube above ground and move forward while swinging the machine from side to side and directing the tube to the garden waste to collect it.
ATTENTION! Never insert the suction tube into the removed garden waste as it may clog the suction tube and reduce the efficiency of the machine.
Organic material e.g. leaves contains large amount of water which may cause the material to stick on the inside of the suction tube. To reduce stickiness of the material, let it dry out for several days before collection.
* Always use the Vacuum function of the garden vacuum with the collection bag attached.
ATTENTION! Any hard objects such as stones, cans, glass, etc. could damage the suction fan.
6. INSTRUCTIONS FOR USE
Operation
This product is not intended for use by persons (including children) with reduced physical, sensory or mental capabilities, or lack of experience and knowledge, unless they have been given professional supervision or instruction concerning the use of this product by a person responsible for their safety.
Never use the garden vacuum/blower if there are other persons, children or domestic animals in close vicinity. Also make sure that there are no persons or domestic animals in the blowing direction.
Exercise extreme caution when using the garden vacuum near children. Always keep the product out of reach of children. Children should be supervised to ensure that they will not play with the product.
* Never use the appliance if you are tired or under the influence of alcohol or narcotic drugs.
* Never allow operation of the machine by children or persons not familiarized with this instruction manual. Local regulation may stipulate minimum age of the user.
The user is responsible for damage caused to third persons within the working area of the garden machine as a result of its use.
* Never use the appliance if your hands are wet or without proper footwear.
Secure loose clothing, long hair or jewellery so that they do not get caught by the moving parts of the machine.
The main requirement is the use of safety goggles (dioptric glasses are not an adequate eye protection).
During the periods of more frequent use of the appliance, we recommend using hearing protection.
Where there is the risk of falling objects or hitting protruding or prominent objects and low ceilings with head, a hard hat should be worn.
Do not lean and keep your balance at all times. Always keep proper footing on slopes. Walk, never run when operating the machine.
* Keep the cooling suction openings free of debris.
* Never blow debris in the direction of bystanders.
Purpose of Use
The garden vacuum/blower is suitable for use in private gardens.
As appliances for use in private gardens are regarded those appliances the annual use of which usually not exceed 50 operating hours and which are mostly used for lawn maintenance but not in public facilities, parks, sports grounds or in agriculture or forestry.
Do not use the product for other than intended purposes.
For safety reasons the machine may not be used as a propulsion unit for any other working instruments and sets of tools, unless expressly permitted by the manufacturer.
Instructions for Use
Turn the machine on and operate it as specified in the instruction manual and strictly observe all instructions.
Remove the cord from the mains before any inspection, maintenance or repair.
* Always work under good visibility or ensure adequate artificial lighting.
* Never operate the machine in closed, poorly ventilated rooms or near flammable or explosive liquids, fumes or gases.
* Never use the appliance where it could get into contact with water level (e.g. in close vicinity of garden ponds, sunken pools, etc.).
Before removing or emptying the collection bag, turn off the engine and wait until the fan has completely stopped.
Do not use the appliance for sucking water or very damp debris.
* Never start the vacuum without the collection bag attached.
This electric appliance conforms to national and international standards and safety regulations. Repair should only be carried out by a qualified person using original spare parts. Failure to do so could seriously endanger the user.
Do not attempt to repair the electric machine in any way. Use of any attachments or accessories not recommended in this manual could cause damage to the machine and injury to the user.
Use and store the appliance out of flammable and volatile substances.
Do not expose the appliance to extreme temperatures, direct sunlight, and excessive humidity and do not place it in an excessively dusty environment.
Do not place the appliance near heating elements, open fire and other heat generating appliances or devices.
Do not spray the appliance with water or other liquid. Do not pour water or other liquids into the product.
Do not immerse the appliance in water or other liquid.
* Never leave running appliance unattended.
Do not touch parts of the machine until they have completely stopped. After switching off, the rotating parts of the machine may keep rotating and cause injury.
Before storing the machine in a closed room, let the engine cool down.
In no circumstances repair the appliance yourself and do not make any modifications.
ATTENTION! Danger of injury by electric shock!
All repairs and adjustments of this product should be made by an authorized repair shop. Any alterations of the product during the warranty period could render the warranty null and void.
The manufacturer is not liable for damage resulting from incorrect use of the appliance and its accessories (injury, burns, scalding, fire, deterioration of food, etc.).
Connection to Electrical Network
Before connecting the product to the mains socket outlet, make sure the voltage on the product's label matches the power supply voltage in the mains socket outlet.
It is recommended to connect this machine only to socket outlets protected by a residual current device with release current of 30 mA.
* Never touch the mains socket outlet with wet hands.
The connecting sockets on the connecting elements must be made of, or coated by, rubber, soft PVC or some other thermoplastic material having the same strength.
The applied connecting cables may not be lighter than rubber hose lines H07RN-F pursuant to DIN 57 282/VDE 0282 and their diameter must be at least 1.5 mm2. Plug-ins must have protective contacts and connections resistant to spraying water. Run the connecting cables through a pressure release on the guiding handle and plug them into the plug - socket combination. Before use check the cables for damage or indications of ageing of material. Never operate the machine unless the electrical wiring is in perfect condition (the same applies to cables to the engine). If the cable is damage during work, immediately remove the plug from the mains and only then check the damage.
The cross-section of the extension cable must be as specified in the operating manual and must be protected against spraying water.
Plug-in contact may not lie in water.
If the power cord of the product is damaged, have it replaced by a professional repair shop or similarly qualified person to avoid hazardous situations. It is prohibited to use the product with damaged power cord or power cord plug.
Do not remove the plug from the electric socket by pulling the power cord.
* Avoid switching on and off the machine too frequently during a short period of time, particularly do not play with the switch.
Before assembling, cleaning the machine or performing any inspection, maintenance or repair tasks switch off the machine and disconnect it from the electric power supply by removing the power cord from the socket.
Repairs of electrical parts may only be carried out by an authorized repair shop.
When hitting a foreign object, turn off the engine, remove the cable from the mains, locate the damage and perform the necessary repairs. Only then restart the machine and resume work.
If the machine starts to vibrate unusually, immediately remove the plug from the socket and check the machine.
When working, do not restrict free movement of the extension cable.
Do not lay the power cord near hot surfaces or over sharp objects. Do not place heavy objects on top of the power cord and place the cable so as to prevent stepping on it or stumbling over it. Make sure the power cord is not in contact with hot surfaces.
* Keep the power supply and extension cables in sufficient distance from the cutting blades. Electrical shock hazard.
Voltage fluctuations caused by this appliance when starting the engine may result in interference with other devices connected to the same circuit during unfavourable network conditions. In such case take adequate measures (e.g. connect the machine to a different circuit or operate it on a circuit with lower impedance.
Beware of the necessary extension cables.
If you are not using or will not use the appliance, switch it off and remove the plug from the mains socket.
Proceed accordingly before cleaning the machine.
* Always remove the plug from the mains if:
- you are leaving the machine,
- the machine starts to vibrate unusually (check immediately).
Electrical Safety
The garden vacuum/blower can be connected to any lighting connector (with alternating current 230 V). However, only "socket" protected by a 16 A protective switch and by a residual current device with max. 30 mA.
Use only undamaged connecting cables. The cables may not be arbitrarily long (max. 50 m) otherwise the capacity of the electric motor would be reduced. Instrument connecting cables must have cross-section of 3 * 1.5 mm2. The cables of electric garden appliances are often susceptible to insulation damage. It is caused by:
- damage resulting from running over the cable
- compression of the cable when conducted under doors, windows, etc.
- cracks caused by ageing of the insulation
- broken spots as a result of unprofessional cable attachment or conduit.
Such damaged cables are often used even though they are life-threatening. Cables, plugs and connecting sockets must comply with the below specified conditions. Electrical cables for connecting garden appliances must have rubber insulation.
The machine should be powered using an automatic residual current device protected supply with tripping current of no more than 30mA.
For extension cables shorter than 15 metres use wire cross-section of 1.5 mm2.
For extension cables longer than 15 metres but shorter than 40 metres use wire cross-section of 2.5 mm ^2 .
Such damaged cables are often used even though they are life-threatening. Cables, plugs and connecting sockets must comply with the below specified conditions. Electrical cables for connecting garden appliances must have rubber insulation.
Electrical cables must be at least H05RN-F type, with 3 conductors. Printed cable label is required.
Therefore, buy only labelled cables. Plugs and connecting sockets on electrical supply cables must be made of rubber and resistant to spraying water. Connecting cables may not be arbitrarily long. Longer cables require larger diameter. Regularly check the connecting cables for damage. During check, the cable must be disconnected. Unwind the connecting cable completely. Also check broken spots of the connecting cable on plugs and connecting sockets.
The connecting sockets on the connecting elements must be made of, or coated by, rubber, soft PVC or some other thermoplastic material having the same strength.
7. MAINTENANCE AND STORAGE
* Check whether the appliance shows signs of wear and tear.
Carry out maintenance and cleaning of the machine only when the engine is stopped and the machine is disconnected from electricity network.
* Regular care of the machine ensures long life and efficiency.
* Keep all nuts, bolts and screws tightened to ensure conditions for safe use of the appliance.
* Regularly check if the collection bag shows any signs of wear and tear or loss of functionality.
* Replace any damaged or worn-out parts.
* Damaged parts may only be replaced by a professional using original spare parts.
* Never use accessories that have not been supplied with or are not intended for this product.
* Always disconnect this product from power supply before cleaning.
When cleaning external parts of the product use soft cloth and tepid water. Do not use rough cleaning agents, thinners or solvents otherwise the surface of the product could be damaged.
Do not clean the vacuum/blower under running water (particularly not under high pressure).
Use brush to clean any free soil particles around the fan and inside the suction and blowing tubes.
* Only store in a dry place.
Do not place any objects on top of the appliance.
If repair is required, contact an authorized customer service.
* Never use accessories that have not been supplied with or are not intended for this product.
8. TECHNICAL DATA
| Rated voltage (V) 230 – 240 V~ 50 Hz | |
| Rated capacity (W) 2600 | |
| Unloaded speed (min-1) 10 000 – 15 000 | |
| Wind speed (km/h) up to 250 | |
| Mulching ratio 10:1 | |
| Collection bag capacity (l) 40 | |
| Air pressure level at the attendant's place 87,4 dB (A) k = 3 dB (A) | |
| Acoustic power level 98,07 dB (A) k = 3 dB (A) | |
| Guaranteed acoustic power level 99 dB (A) | |
| Vibrations (m/s2) 6,004 m/s | ^2k = 1,66 m/s^2 |
| Machine weight (in kg) 2,70 |
The User's Manual is in a specific language version.
9. DECLARATION OF CONFORMITY
Product / brand: ELECTRIC GARDEN VACUUM CLEANER / FIELDMANN
Type / model: FZF 4010-E 230V AC/ 2600W
The product is inline with regulations listed below:
* EEC directive for low voltage electrical equipment No.2006/95/EC
EC directive for Electromagnetic Compatibility (EMC) No.2004/108/EC
EC directive for RoHS 2006/95/EC
EC directive relating to machinery 2006/42/EC
and norms:
EN 60335-1:2012
EN 60335-1/A14:2010
IEC 6033-2-100:2002
EN 15503:2009
EN 62233:2008
EN 55014-1:2006+A1+A2
EN 55014-2:1997+A1+A2
EN 61000-3-3:2013
EN 61000-3-2:2006/A1:2009/A2:2009
CE label:....14
Company FAST ČR, a.s. is authorized to act on behalf of manufacturer.
Manufacturer:
FAST ČR, a.s.
Černokostelecká 2111, 100 00 Praha 10, Czech Republic
VAT no: CZ26726548
Place of issuance: Prague
Date of issuance: 7.4.2014
Name: Ing. Zdeněk Pech
Chairman of the Board
Signature:
10. DISPOSAL
INSTRUCTIONS AND INFORMATION ON DISPOSAL OF USED PACKAGING.
Put any used package material to the place determined by the municipality for waste disposal.
DISPOSAL OF USED ELECTRIC AND ELECTRONIC EQUIPMENT
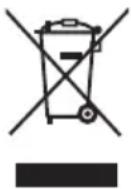
This symbol on products or accompanying documents means that used electric or electronic products must not be put to ordinary municipal waste. Hand over such products to determined collection points for proper disposal, restoration and recycling. Alternatively, in some countries of the European Union or other European countries you can return your products to your local dealer when you buy an equivalent new product. By dutiful disposal of this product you can preserve precious natural resources and you help prevent any potential adverse effects on the environment and human health which could be the results of wrong waste disposal. Ask your local authority or the nearest collection point for additional details. In case of improper disposal of this waste kind penalties can be imposed in accordance with national regulations.
For companies in the European Union countries
Should you want to dispose of electric and electronic devices, ask your dealer or vendor for necessary information.
Disposal in other countries outside the European Union
Should you want to dispose of this product, ask your local authorities or your dealer for necessary information about disposal method.

This product fulfils all basic requirements of the EU directives that apply to it.
Text, design and technical specifications can change without prior notice and we reserve the right for their change.
Mexico: Mexico Mexico: Mexico. Ho.
Rck: 1 Year: 20
Razitko prodajce: Pečiatka predajcu | Seller's stamp: Piecznoć spredawcy | Keraskedő belyegzője:
Zašob opravy: Spšob opravy Mode of repair Sposob naprawy: Jav'tas modja:
servis.brno@fastcr.cz
www.fastcr.cz
Fast Plus, spol. s r. o.
Na Pánloch 18
SK 831 06 Bratislava
Slovenská republika
Tel.: +421/2/49 105 854
Fax: +421/2/49 105 859
servis@fastplus.sk
www.fastplus.sk
Home & Garden Performance
revision 02/2011
Záruční podmínky
Conditions of guarantee
This product is warranted for the period of 24 months from the date of purchase to the end-user. Warranty is limited to the following conditions. Warranty is referred only to the customer goods using for common domestic use. The claim for service can be applied either at dealer's shop where the product was bought, or at below mentioned authorized-service shops. The end-user is obligated to set up a claim immediately when the defects appeared but only till the end of warranty period. The end user is obligated to cooperate to certify the claiming defects. Only completed and clean (according to hygienic standards) product will be accepted. In case of eligible warranty claim the warranty period will be prolonged by the period from the date of claim application till the date of taking over the product by end-user, or the date the end-user is obligated to take it over. To obtain the service under this warranty, end-user is obligated to certify his claim with duly completed following do c u resipti certificate of warranty certificate of installation...
This warranty is void especially if apply as follows: ■ Defects which were put on sale.
■ Wear-out or damage caused by common use.
The product was damaged by unprofessional or wrong installation, used in contrary to the applicable instruction manual, used in contrary to legal enactment and common process of use or used for another purpose which has been designed for. The product was damaged by uncarred-for or insufficient maintenance. The product was damaged by dirt, accident of force, majeure (natural disaster, fire, flood,...). Defects on functionality caused by low duality of signal, electromagnetic fi old interference etc. The product was mechanically damaged (e.g. broken button, fall...). Damage caused by use of unsuitable media, fittings, expendable supplies (batteries) or by unsuitable working conditions (e.g. high temperatures, high humidity, quakes,...). Repair, modification or other failure action to the product by unauthorized person. End-user did not prove enough his right to claim time and place of purchase. Data on presented documents differs from data on products. Cases when the claiming product can not be identified according to the presented documents (e.g. the serial number or the warranty seal has been damaged).
natural_image
Black handheld electric shaver with a black cover, no visible text or symbols on the device itself.
- FIELDMANN®
- Home & Garden Performance
- Electric Garden Vacuum OPERATING INSTRUCTIONS
- TABLE OF CONTENTS
- GENERAL SAFETY INSTRUCTIONS
- Important safety warnings
- Packaging
- Instructions for use
- SYMBOLY
- MACHINE DESCRIPTION AND PACKAGE CONTENT
- Machine Description (see Fig. 1)
- Package Content
- ASSEMBLY INSTRUCTIONS
- OPERATION
- Switching on and off
- Speed control governor (Fig. 6)
- Blowing mode (Fig. 7a)
- Vacuum mode (Fig. 7b)
- Electronic speed control setting (Fig. 6)
- Working Procedure
- Blower Mode
- Vacuum Mode
- INSTRUCTIONS FOR USE
- Operation
- Purpose of Use
- ATTENTION! Danger of injury by electric shock!
- Connection to Electrical Network
- Electrical Safety
- MAINTENANCE AND STORAGE
- TECHNICAL DATA
- DECLARATION OF CONFORMITY
- The product is inline with regulations listed below:
- and norms:
- Manufacturer:
- DISPOSAL
- INSTRUCTIONS AND INFORMATION ON DISPOSAL OF USED PACKAGING.
- DISPOSAL OF USED ELECTRIC AND ELECTRONIC EQUIPMENT
- For companies in the European Union countries
- Disposal in other countries outside the European Union
- Fast Plus, spol. s r. o.
- Záruční podmínky
- Conditions of guarantee
- This warranty is void especially if apply as follows: ■ Defects which were put on sale.
Brand : Fieldmann
Model : FZF 4010-E
Category : Vacuum Cleaner