
F4151CW - Freezer GORENJE - Free user manual and instructions
Find the device manual for free F4151CW GORENJE in PDF.

| Product Type | Upright Freezer |
| Brand | Gorenje |
| Model | F4151CW |
| Width | 660 mm |
| Height | 1080 mm |
| Depth | Approximately 600 mm (standard) |
| Weight | Approximately 50 kg |
| Power Supply | 220-240 V, 50 Hz |
| Climate Class | SN, N, ST, T (10°C to 43°C) |
| Energy Consumption | Standard usage (refer to rating plate) |
| Freezer Capacity | Approximately 200-250 L (typical) |
| Freezing Capacity | As stated on rating plate (typical 10-15 kg/24h) |
| Control Type | Electronic front panel with LED display |
| Functions | Super freezing, ECO mode, Lock, Temperature setting (-16°C to -22°C) |
| Alarms | Door open (after 5 min), High temperature (> -8°C) |
| Defrosting | Manual, when frost layer is 3-5 mm thick |
| Door Reversibility | Yes, instructions provided |
| Adjustable Feet | Yes, two front feet |
| Handle Installation | Provided with screw covers |
| Refrigerant | R600a (isobutane) typical, check rating plate |
| Noise Level | Normal operating sounds (compressor and refrigerant flow) |
| Safety Features | Ventilation slots must be unobstructed; no electrical devices inside; lock safety for child entrapment |
| Maintenance | Clean with lukewarm water and vinegar; avoid abrasive cleaners; keep condenser dust-free |
Frequently Asked Questions - F4151CW GORENJE
User questions about F4151CW GORENJE
0 question about this device. Answer the ones you know or ask your own.
Ask a new question about this device
Download the instructions for your Freezer in PDF format for free! Find your manual F4151CW - GORENJE and take your electronic device back in hand. On this page are published all the documents necessary for the use of your device. F4151CW by GORENJE.
USER MANUAL F4151CW GORENJE
natural_image
Abstract geometric line drawing of a 3D cube with cutouts and a small curved element (no text or symbols)Skříňová mraznička Zamražarka szufladowa Vol'ne stojaca mraznička Álló fagyasztó Arka ngrirëse Вертикален фризер Zamrzivač Upright Freezer Congelator vertical Zamrzovalna omara Vertikalni zamrzivač
Wichtige Hinweise D
Before fi rst operation GB
- The appliance is manufactured in compliance with all relevant safety standards; however, it is recommended that persons with impaired physical, motional, or mental abilities, or persons with inadequate experience and knowledge, do not use the appliance without due supervision. The same recommendation applies to minors using the appliance.
- Warning: Ventilation slots on the appliance or built-in element should always be kept clean and unobstructed.
- Warning: Do not use any mechanical accessories when thawing the refrigerator, except for those explicitly recommended by the manufacturer.
- Warning: To prevent any pollution be careful not to damage the insulation or refrigeration tubes at the rear wall during the installation, cleaning and disposal of the appliance.
- Warning: Do not use any electrical devices inside the appliance, except for those explicitly recommended by the manufacturer.
• After the installation, the appliance mains plug should be accessible!
natural_image
Simple line drawing of a mechanical component with a spring attached to a base (no text or symbols)natural_image
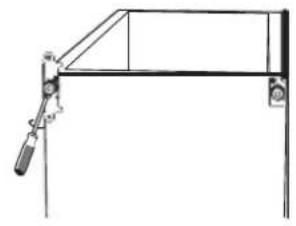
Line drawing of a simple architectural or mechanical structure with grid lines and a shaded vertical section (no text or symbols)| D | E | F | G | H | I |
| 660 mm | 1 080 mm | 80 mm | 50 mm | 135°-145° | 900 mm |
Montáž madla
natural_image
Simple line drawing of a mechanical device with a screwdriver and lever (no text or symbols)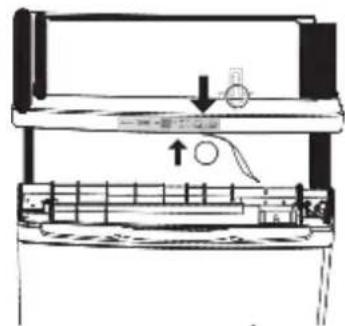
natural_image
Technical line drawing of a mechanical assembly with no visible text or symbols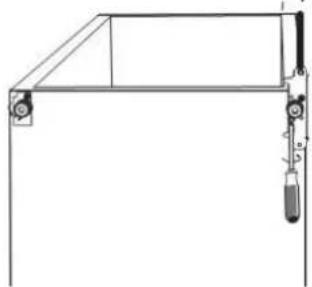
natural_image
Pure technical line drawing of a mechanical assembly without any text, numbers, or symbols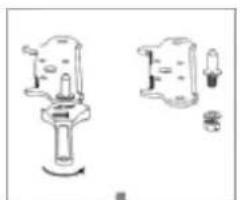
natural_image
Technical line drawing of mechanical components (no text or symbols)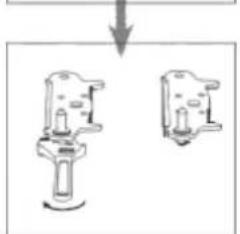
natural_image
Diagram showing two mechanical components with a downward arrow indicating motion or assembly (no text or symbols)natural_image
Simple line drawing of a mechanical support structure with no text or symbols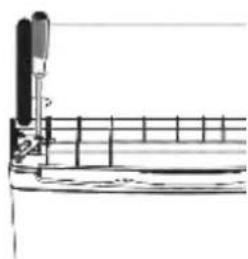
natural_image
Pure technical line drawing of a mechanical assembly without any text, numbers, or symbols
natural_image
Simple line drawing of a mechanical device with a screwdriver and directional arrow (no text or symbols)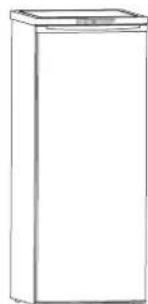
natural_image
Line drawing of a simple rectangular cabinet or refrigerator with no text or symbolsÚdržba a čištění
natural_image
Line drawing of a hand cleaning a clean material inside a transparent enclosure (no text or symbols)natural_image
Simple line drawing of a mechanical component with a base and top (no text or symbols)natural_image
Simple line drawing of a cabinet with a grid-patterned wall behind it (no text or symbols)flowchart
graph TD
    A["Front Panel"] --> B["Top Panel"]
    B --> C["Left Panel"]
    C --> D["Right Panel"]
    D --> E["Bottom Panel"]
    E --> F["Back panel with valve parts"]
    F --> G["Final Panel with valve parts"]
natural_image
Simple line drawing of a mechanical support structure with no text or symbols
natural_image
Pure technical line drawing of a mechanical assembly without any text, numbers, or symbols
natural_image
Simple line drawing of a mechanical device with a screwdriver and lever (no text or symbols)
natural_image
Line drawing of a simple rectangular cabinet or enclosure with no text or symbolsnatural_image
Line drawing of a hand cleaning a clean material inside a transparent enclosure (no text or symbols)natural_image
Simple line drawing of a mechanical component with a spring attached to a base (no text or symbols)natural_image
Architectural line drawing of a window frame structure with grid lines (no text or symbols)| D | E | F | G | H | I |
| 660mm | 1080mm | 80mm | 50mm | 135°-145° | 900mm |
Inštalácia rukoväte
natural_image
Pure technical line drawing of a mechanical component without any text, numbers, or symbolsPopis spotrebiča
natural_image
Simple line drawing of a mechanical support structure with no text or symbols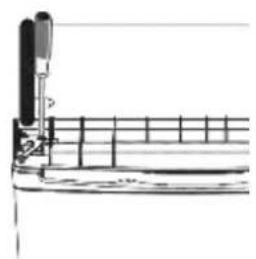
natural_image
Pure technical line drawing of a mechanical assembly without any text, numbers, or symbols
natural_image
Simple line drawing of a mechanical device with a screwdriver and lever (no text or symbols)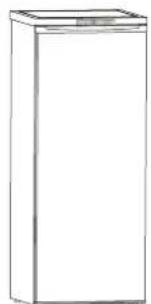
natural_image
Line drawing of a simple rectangular cabinet or storage unit (no text or symbols)Údržba a čistenie
Rozmrazovanie mrazničky
natural_image
Line drawing of a hand cleaning a window with a cloth, no text or symbols presentnatural_image
Simple line drawing of a mechanical component with a spring attached to a base (no text or symbols)natural_image
Simple line drawing of a cabinet or storage unit with grid lines and a shaded base (no text or symbols)| D | E | F | G | H | I |
| 660mm | 1080mm | 80mm | 50mm | 135°-145° | 900mm |
natural_image
Pure mechanical diagram showing a lever and support structure without any text, numbers, or symbols
natural_image
Pure technical line drawing of a mechanical assembly without any text, numbers, or symbols
natural_image
Simple line drawing of a mechanical device with a screwdriver and lever (no text or symbols)
natural_image
Simple line drawing of a rectangular cabinet or enclosure (no text or symbols)natural_image
Line drawing of a hand cleaning a window with a cloth, no text or symbols presentnatural_image
Simple line drawing of a mechanical component with a spring attached to a base (no text or symbols)natural_image
Simple line drawing of a rectangular structure with vertical supports and a shaded vertical section (no text or symbols)| D | E | F | G | H | I |
| 660 mm | 1080 mm | 80 mm | 50 mm | 135^ -145^ | 900 mm |
Instalimi i dorezë
- Evitoni tapotē e vidhave nga dera.
natural_image
Pure mechanical diagram showing a lever and support structure without any text, numbers, or symbols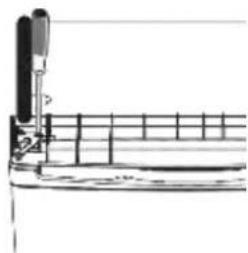
natural_image
Pure technical line drawing of a mechanical assembly without any text, numbers, or symbols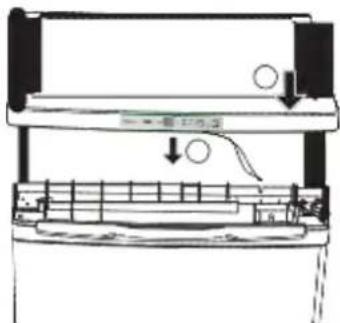

natural_image
Simple line drawing of a mechanical device with a screwdriver and lever (no text or symbols)
natural_image
Simple line drawing of a rectangular cabinet or enclosure (no text or symbols)natural_image
Line drawing of a hand cleaning a window frame with a cloth (no text or symbols)natural_image
Simple line drawing of a mechanical component with a spring and base (no text or symbols)natural_image
Simple line drawing of a cabinet or support structure with grid lines and a shaded vertical section (no text or symbols)| D | E | F | G | H | I |
| 660mm | 1080mm | 80mm | 50mm | 135° -145° | 900mm |
Монтаж на дръжката
Описание на уреда

natural_image
Technical line drawings of a mechanical device with exploded and assembled views (no text or symbols)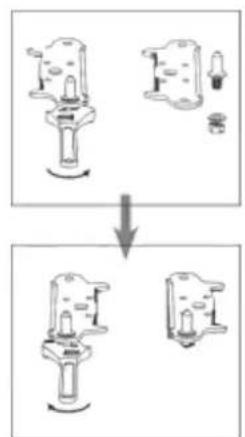
flowchart
graph TD
    A["Initial Component"] --> B["Assembly Step"]
    B --> C["Final Assembly"]
natural_image
Technical line drawing of a mechanical support structure (no text or symbols)
natural_image
Pure technical line drawing of a mechanical assembly without any text, numbers, or symbols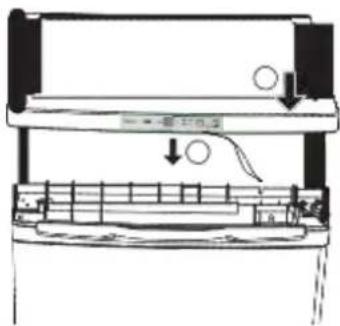
natural_image
Simple line drawing of a mechanical device with a screwdriver and lever (no text or symbols)
natural_image
Simple line drawing of a rectangular cabinet or enclosure with no text or symbolsnatural_image
Line drawing of a hand cleaning a clean material inside a 3D printer (no text or symbols)natural_image
Simple line drawing of a mechanical spring attached to a base plate (no text or symbols)- Uređaj opremljen ventilacijskom mrežom, možete postaviti bliže zidu. Mreža osigurava pravilnu cirkulaciju zraka, potrebnu za nesmetan i pravilan rad kondenzatora.
natural_image
Architectural line drawing of a building facade with vertical supports and a shaded wall section (no text or symbols)
Montaža drške
-
Skinite poklopce vijaka sa vrata
-
Pomoću dv a vijka pričvrstite dršku
-
Vratite z aštitne poklopce vijaka
natural_image
Pure technical line drawing of a mechanical component or bracket (no text or symbols)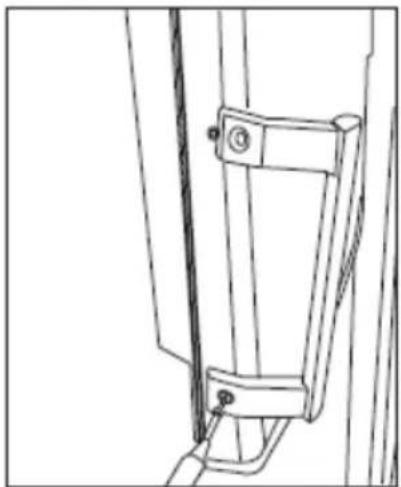
natural_image
Technical line drawing of a mechanical bracket or bracket assembly (no text or symbols)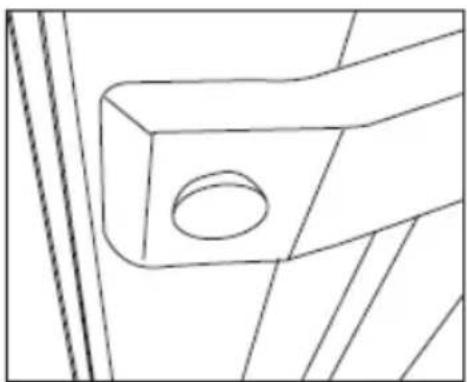
natural_image
Technical line drawing of a mechanical bracket or bracket with a circular hole and diagonal hatching (no text or symbols)Opis uređaja
natural_image
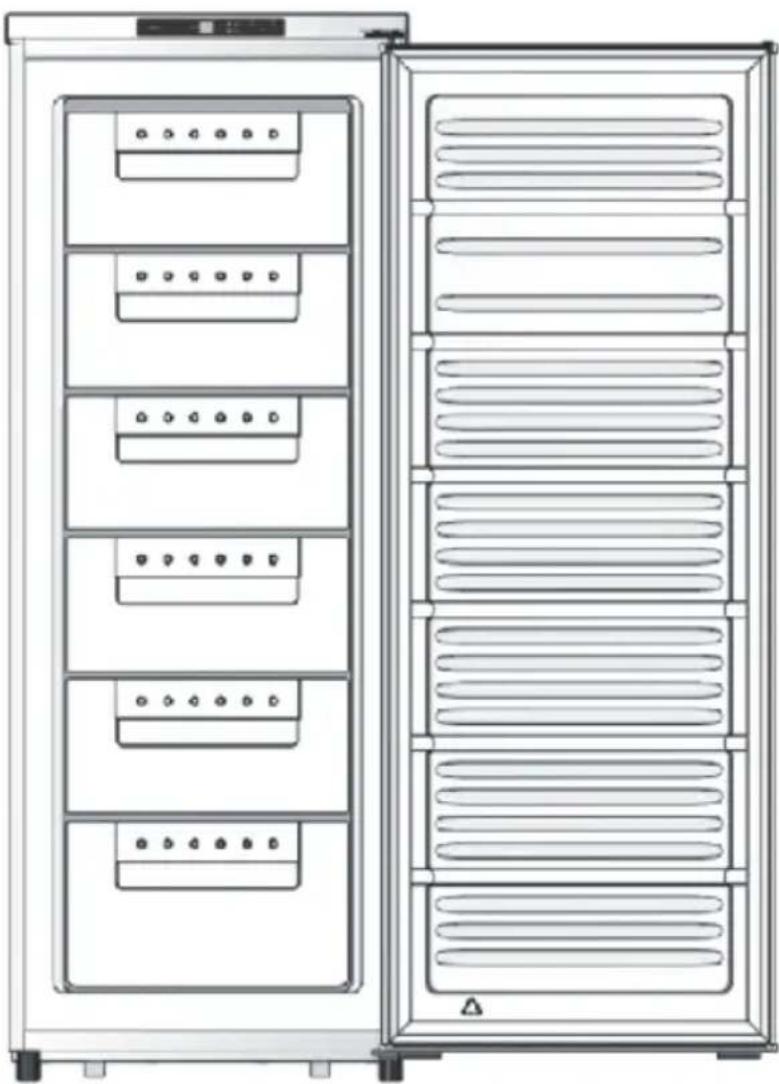
Front and back view diagram of a server rack cabinet with multiple compartments and ventilation slots (no text or labels)- Kućište
- Ladice za zamrzavanje
- Kompresor (na stražnjoj strani uređaja)
- Podesive nožice
- Radna površina
- Elektronska ploča za upravljanje
- Brtva vrata
- Sklop vrata
Rukovanje uređajem
natural_image
Simple line drawing of a mechanical setup with a lever and support frame (no text or symbols)natural_image
Diagram of a mechanical device with a lever and adjustment mechanism (no text or symbols)- Pažljivo podignite gornji pokrov za 5 cm, izvadite vodiče elektronskih spojeva, i zatim odstranite pokrov.
natural_image
Technical line drawing of a mechanical assembly or tool (no visible text or symbols)- Odvijte tri vijka, zatim izvadite gornju šarku koja vrata drži u svom položaju. Podignite vrata i položite ih na meku površinu, pazeći da se ne ogrebu.
natural_image
Pure technical line drawing of a mechanical assembly without any text, numbers, or symbols- Odvijte vijke donje šarke i odstranite šarku i podesive nožice.
natural_image
Pure electrical circuit lines without any symbols- Odvijte i odstranite klin donje šarke, okrenite položaj konzole i vratite je nazad.
natural_image
Two mechanical component diagrams showing a top and side views (no text or symbols)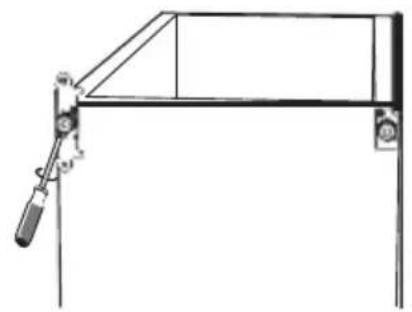
natural_image
Technical line drawing of a mechanical support structure with no visible text or symbols- Pričvrstite konzolu na klin donje šarke, zatim ponovno montirajte obje podesive nožice.

natural_image
Pure technical line drawing of a mechanical assembly without any text, numbers, or symbolsnatural_image
Simple line drawing of a mechanical setup with a screwdriver and lever (no text or symbols)natural_image
Line drawing of a simple rectangular refrigerator with lid and front panel (no text or symbols)natural_image
Line drawing of a hand cleaning a window with a circular object on the floor (no text or symbols)- Unutrašnjost zamrzivača obrišite spužvom i čistom krpom.
Čišćenje uređaja
Prije čišćenja prekinite dovod električne energije u uređaj.
Za čišćenje nemojte koristiti gruba i agresivna sredstva za čišćenje, jer možete oštetiti površinu. Nakon čišćenja pazite da odstranite sve ostatke sredstva za čišćenje.
- Vanjski dio uređaja čistite vodom i tekućim deterdžentom.
- Unutarnjost uređaja operite mlačnom vodom, kojoj ste dodali malo vinskog octa.
Thank you for your trust and for buying this appliance. We hope it will successfully serve the purpose for many years.
The upright freezer for domestic use is intended for freezing fresh food and for long-
term storing of frozen food (up to one year, depending on the kind of food).
Before Putting Into Use 2
Instructions for Use
We Care for the Environment
Tips for Energy Saving
Important 3
Placing and Installation 4
Placing the Appliance
Connection to Power Supply
Description of the Appliance 6
Using the freezer....6
Electronic front control panel.... 7
Use....8
Freezing Fresh Foods
Changing the Direction of Opening the Door10
Maintenance and Cleaning....12
Cleaning the Appliance
Switch Off the Appliance When Not in Use
Trouble Shooting Guide 13
Before Putting Into Use
- Before connecting the appliance to the mains supply, leave it stand for about 2 hours which will reduce the possibility of malfunctions in the cooling system that might have occurred due to transport handling.
- Clean the appliance thoroughly, especially the interior (see Cleaning and Maintenance).
Instructions for Use
These instructions for use were prepared for the user. They describe the appliance and its correct and safe use. They were prepared for various types/models of appliances therefore you might find in it description of some functions and accessories that do not apply to your appliance.
We Care for the Environment
- Our products use environmentally friendly packaging, which can be either recycled or disposed of in an environmentally friendly manner. To this end, individual packaging materials are clearly marked.
- These instructions are printed either on recycled paper or chlorine free bleached paper.
- When your appliance finally wears out, please try not to burden the environment with it; call your nearest authorised service agent. (See Disposing of the Worn Out Appliance)
Tips for Energy Saving
- Try not to open the door too often, especially when the weather is wet and hot. Once you open the door, mind to close it as soon as possible. This is especially important if you have an upright model.
- Every now and then check if the appliance is sufficiently ventilated (adequate air circulation behind the appliance).
- Turn the thermostat knob from higher to lower setting as soon as possible (depends on how loaded the appliance is, ambient temperature...)
- Never use continuous operation unless unnecessarily required; switch the operation mode selection switch to the setting for automatic operation as soon as possible.
- Before freezing packages of fresh foods, make sure they are cooled to ambient temperature.
-
Ice and frost layer increase energy consumption, so do clean the appliance as soon as the layer is 3-5 mm thick.
-
If the gasket is damaged or if it turns out that the sealing is poor, the energy consumption is substantially higher. To restore efficiency, replace the gasket.
- The condenser on the rear wall should be always clean, free of dust or any impurities.
- Always consider instructions stated in sections Positioning and Energy Saving Tips, otherwise the energy consumption is substantially higher.

Important
- If you've bought this appliance to replace an old one equipped with a lock that cannot be opened from inside (lock, bolt), make sure that the lock is broken. This will make it impossible for the children to lock themselves in the appliance and suffocate.
- Mind to connect the appliance correctly to the mains supply (see Connection to the Mains Supply).
- Do not touch the cooled surfaces while the appliance operates, especially not with wet hands, because the skin might stick to the cold surfaces.
- Do not freeze bottled drinks, especially not fizzy ones such as mineral water, sparkling wine, beer, cola etc., because liquid expands during freezing and the glass bottle is very likely to blow up.
- Never try to eat frozen food (bread, fruit, vegetables), because you may get frostbites.
- Carefully check the foods for color and smell and if you are in doubt about their quality, throw them away because they may be spoiled and therefore dangerous to eat.
- Disconnect the appliance from the mains before repairing (only a qualified technician should repair it) and before cleaning.
- Do not defrost the appliance with other electric devices (hair dryer etc.) and never scrape the ice or frost layer with sharp tools. Use only enclosed tools or tools recommended by the manufacturer.
- For the sake of environment protection - be careful not to damage the rear wall of the appliance (the condenser unit or the tubes - for example when moving the appliance) or any part of the refrigerating system inside the appliance.
- The refrigerating system of the appliance is filled with refrigerant and oil, so when the appliance is damaged, handle it with care and dispose it of in compliance with environmental protecting precautions. (See We Care for the Environment).
- Heating element incorporated in the appliance, all around the rim, is controlled
by the operation of the compressor and it prevents the door gasket to freeze on to the freezer compartment.
- When activating the "Super" function, the red light may turn on. This is normal condition and there is no need for warning.
- If the supply cord is damaged, it must be replaced by the manufacturer or his service agent or a qualified person in order to avoid hazard.
- The rating plate is in the interior or on the rear wall of the appliance.

The symbol on the product or on its packaging indicates that this product may not be treated as household waste. Instead it shall be handed over to the applicable collection point for the recycling of electrical and electronic equipment. By ensuring this product is disposed of correctly, you will help prevent potential negative consequences for the environment and human health, which could otherwise be caused by inappropriate waste handling of this product. For more detailed information about recycling of this product, please contact your local city office, your household waste disposal service or the shop where you purchased the product.
Storing Time During Power Supply Interruption
Avoid opening the freezer in case of failure or power supply interruption! In case the interruption is extended over longer period of time, take food out of the freezer and use it, or make sure it remains well cooled (perhaps you have an extra appliance).
Disposing of the Worn Out Appliance
- When your appliance finally wears out, dispose it of. If the appliance has a lock, break it, in order to prevent eventual accidents (danger of children get locked inside the appliance).
- The refrigerating system of the appliance is filled with refrigerant and insulating substances which should be separately treated and processed. Call your nearest authorised service agent or specialised servicing centre. If you don't find one, contact your local authorities or your distributor. Be careful not to damage the tubes on the rear wall of the appliance (danger of pollution).
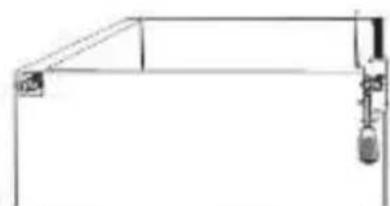
Placing and Installation
Choosing the Right Place
Place the appliance in a dry and regularly ventilated room. Allowed ambient temperature depends on the model (class) of the appliance and is stated on the rating plate of the appliance.
Never place the appliance near heat emitting devices (e.g. cooker, radiator, water heater and similar devices) and do not expose it to direct sunlight.
The appliance should be positioned at least 3 cm away from the electric or gas cooker and at least 30 cm away from the oil or coal stove. If this is not possible, use an appropriate insulation.
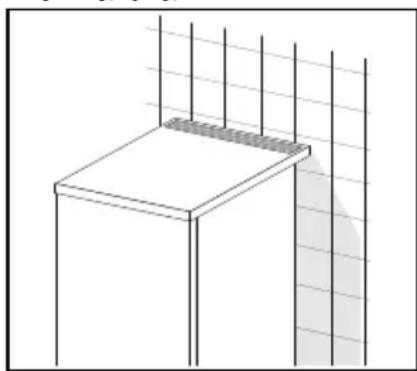
Behind the appliance there should be free space at least 200 cm ^2 wide and above the appliance the high kitchen units should be at least 5 cm away from the appliance in order to assure adequate ventilation of the condenser unit.
| Class | Ambient temperature |
| SN (sub-normal) | from + 10°C to + 32°C |
| N (normal) | from + 16°C to + 32°C |
| ST (sub-tropical) | from + 16°C to + 38°C |
| T (tropical) | from + 16°C to + 43°C |
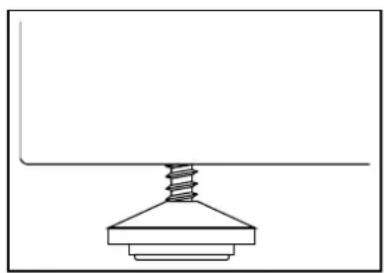
Placing the Appliance
- Place the appliance firmly on a solid base. Level it with the two adjustable feet, located on the front.
natural_image
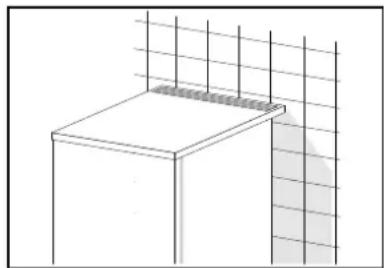
Simple line drawing of a mechanical component with a spring attached to a base (no text or symbols)- The appliance with ventilation grid may be placed close to the wall. The grid enables sufficient air circulation, required for adequate ventilation of the rear wall.
natural_image
Simple line drawing of a cabinet with a grid wall and a shaded section on the right side (no text or symbols)Connection to Power Supply
Connect the appliance with the cable and plug to the power supply socket outlet with a ground terminal (safety socket).
Required nominal voltage and frequency are indicated in the rating plate. The connection to the mains supply and earthing have to be made according to current standards and regulations. The appliance resists temporary voltage tolerance up to -6 to +6 %.
Installing the appliance
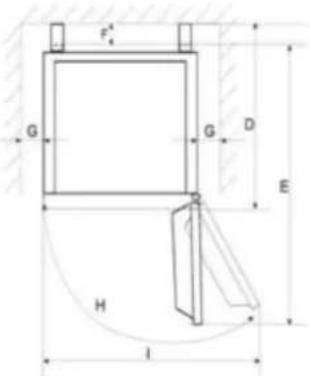
| D | E | F | G | H | I |
| 660mm | 1080mm | 80mm | 50mm | 135°-145° | 900mm |
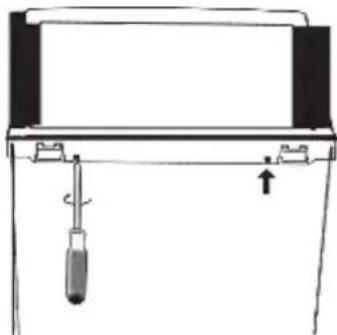
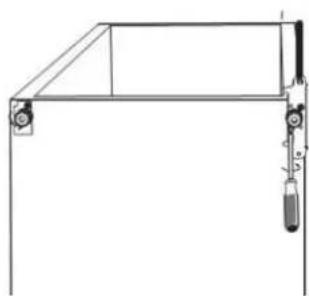
Handle installation
- Take off screw covers from the door

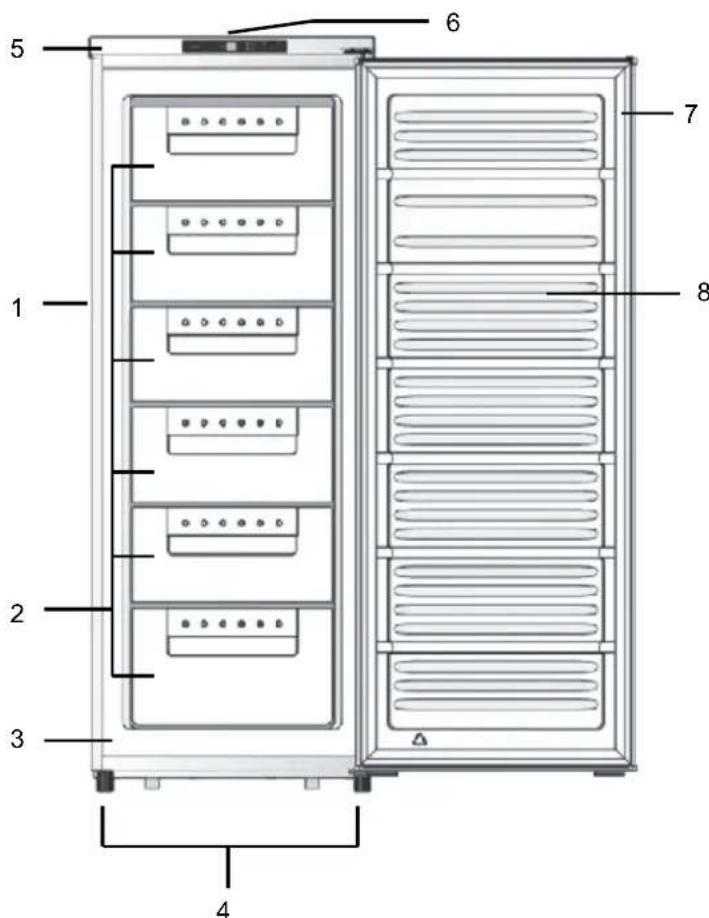
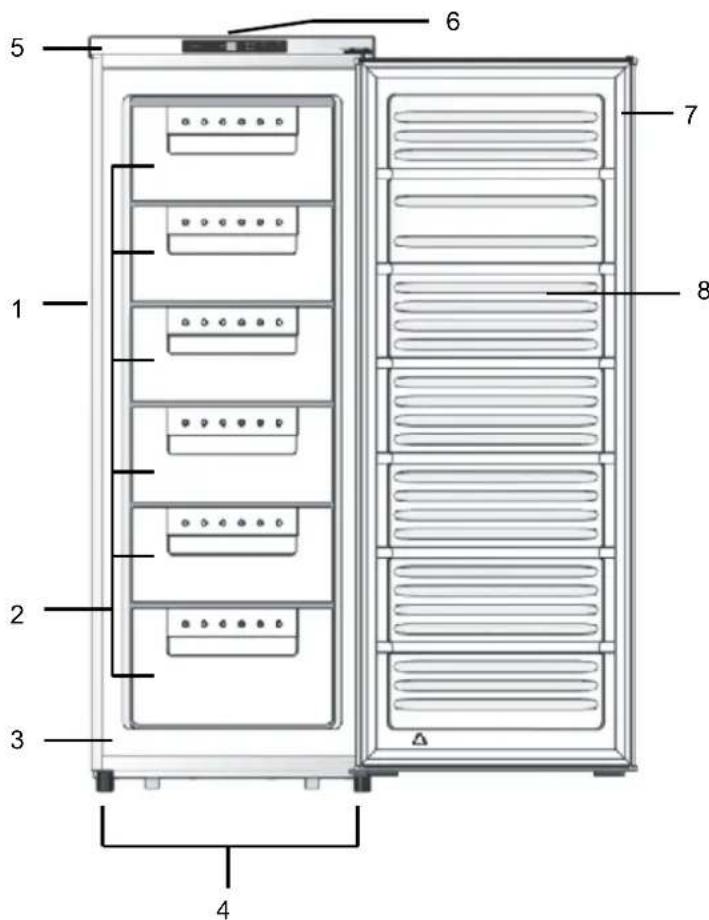
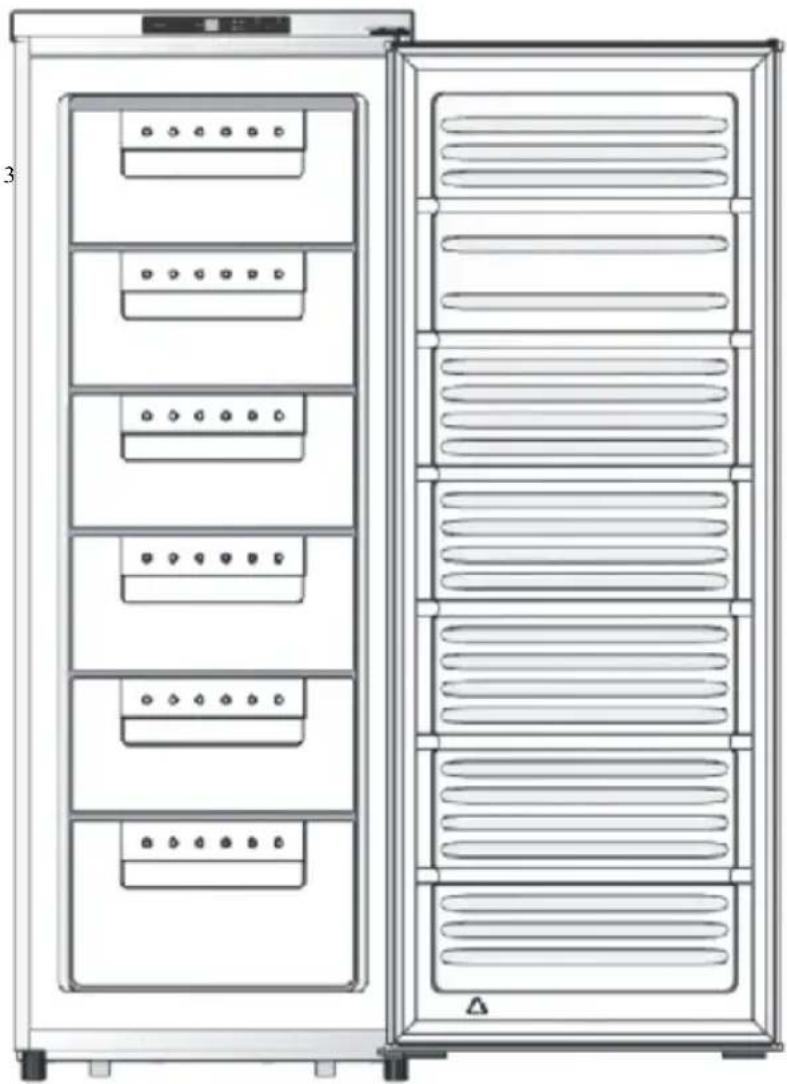
Description of the Appliance
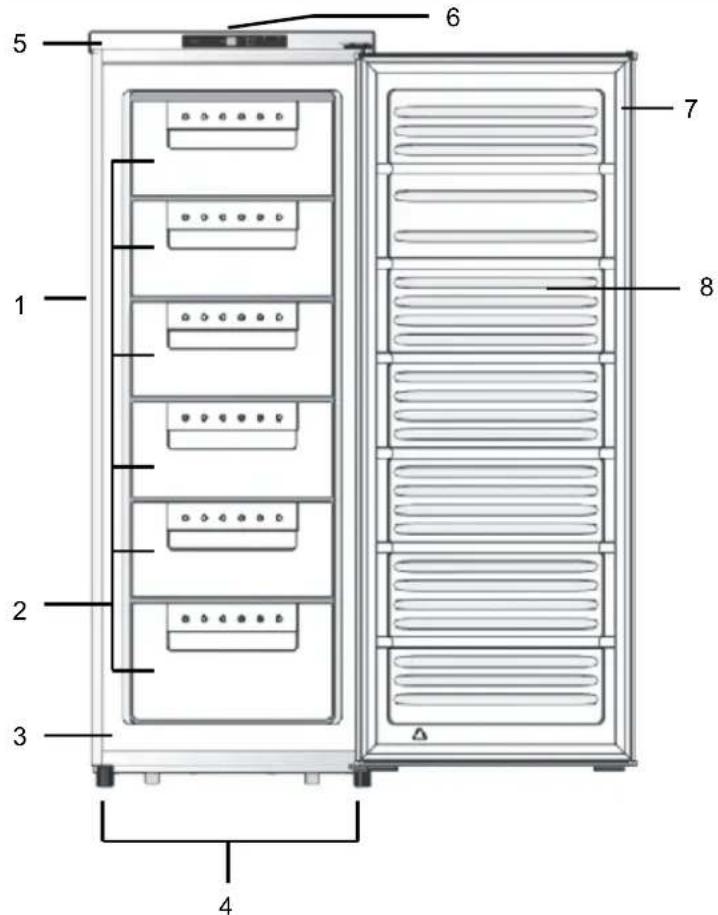
- Cabinet
- Drawers
- Compressor(at the back of cabinet)
- Adjustable Feet
- Worktop
- Electronic front control panel
- Door Gasket
- Door assembly
Using the freezer
This appliance is designed to conserve frozen foods, to freeze fresh food and to make ice-cubes.
Do not freeze a large quantity of food at any one time, as the faster an item is frozen, the more it will keep its qualities. Similarly, make sure that you wrap your foodstuffs before freezing, so that they retain their full flavour and do not spoil the other products.
The conservation time for frozen foods depends on the type of food. Refer to the instructions on the packaging.
Never place hot foods in your freezer. Never place bottles or drinks cans in it either, as they can burst when their contents freeze.
Highly carbonated drinks can even explode! NEVER keep lemonade, fruit juice, beer, wine, champagne, etc. in the freezer compartment.
Electronic front control panel
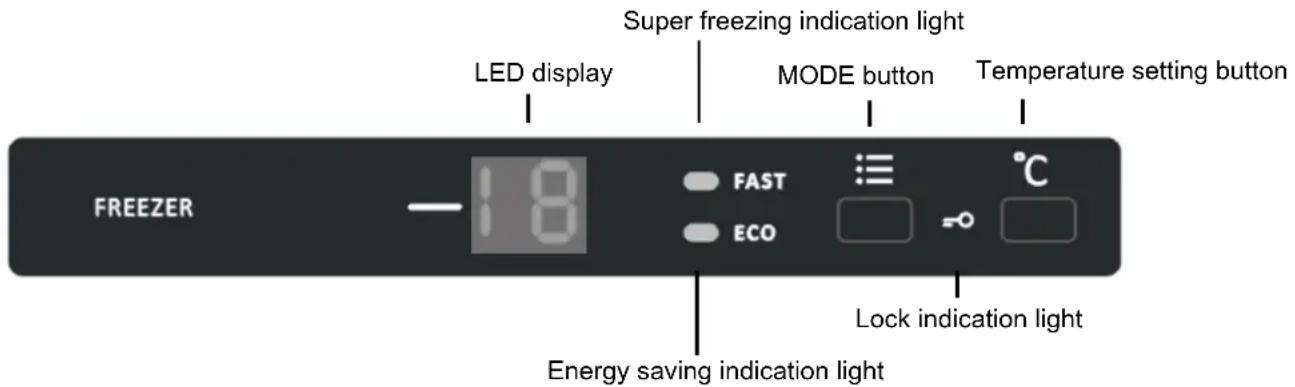
MODE function:
- When firstly push "MODE" button, the lamp of "FAST" is lighted on, appliance would be fast freezing and the LED displays "SF".
- When secondly push "MODE" button, the lamp of "FAST" is blacked down and the lamp "ECO" is lighted on, appliance would go into "ECO" mode. It will run at -16^ and the LED will display "SE".
- Third push makes "ECO" mode black out and the appliance will go back to user setting mode.
TEMPERATURE setting:
- Push "°C" button, the LED number would light so you could adjust the temperature level by pressing "°C" button. The setting cycle runs like following -16 °C, -17 °C, -18 °C, -19 °C, -20 °C, -21 °C, -22 °C. Each temperature level is confirmed after keeping it for 5 seconds.
LOCK option of the buttons:
- Pushing “MODE” button and °C “TEMPERATURE SETTING BUTTON at the same time for 3 seconds makes buttons go into LOCK mode and symbol lights. In order to unlock the buttons, push
"MODE" button and °C "TEMPERATURE SETTING BUTTON at the same time for 3 seconds.
DOOR OPEN alarm:
- If the freezer door is opened for more than 5 minutes, the should alarm will be on and will end as the door is closed.
HIGH TEMPERATURE alarm:
- If the inside freezer temperature is higher than -8 °C then the "LED" display shows "ht" and give out alarm sound until any button is pressed or the temperature drops back below -8 °C.
IMPORTANT! The display always shows the setting temperature and not the actual one.
Note that; the ambient temperature, temperature of the freshly stored food and how often the door is opened, affects the temperature in the freezer compartment. If required, change the temperature setting.
Use
Freezing Fresh Foods
Proper use of the appliance, adequately packed food, correct temperature and taking into account hygienic precautions will substantially influence the quality of freezing the food or storing of the frozen foodstuffs.
- Carefully select food to be frozen: it should be of adequate quality and suitable for freezing.
- Choose correct packaging for each kind of food and pack it correctly.
- The packaging should be air tight and well sealed without leaking since this could cause substantial vitamin loss and dehydration.
- Foils and bags should be soft enough to tightly wrap around the food.
- Mark packages with following data: kind and amount of foods and the date of loading.
- It is most important that the food is frozen as quickly as possible. We therefore recommend the size of the package not to be too large and to be cooled before loading into the freezer.
- The amount of the fresh foods that can be loaded in the freezer within 24 hours is stated on the rating plate. If the loaded amount is too large, the quality of freezing is reduced which affects the quality of frozen foods.
Freezing Procedure
Freezing compartment is used for freezing foodstuffs (see chapter "Description of the Appliance").
- If you want to freeze larger amount of fresh food, choose Super freezing MODE.
- Don't let the fresh packages touch the frozen ones.
- Some 24 hours after the last load, set the thermostat knob to the position for normal operation.
- There is no need to choose “Super freezing MODE” if you intend to freeze smaller amount of fresh foods.
Storing Frozen Foods
Packages of frozen foods are stored in baskets. If you remove the baskets, you can store frozen packages directly on the cooling shelves.
Storing Commercially Frozen Foods
The storage time and recommended temperature for storing commercially frozen foods is indicated on the packaging. For storing and use consider manufacturer's instruction. When shopping, be careful and choose only packages of foods which are adequately packed and provided with complete data and stored in freezers where the temperature is not higher than -18°C.
Do not buy packages of food wrapped with frost. This indicates that the package was thawed before at least once.
Take care that packages don't start to thaw. Temperature rise shortens the storage time of commercially frozen foods.
Approximate Storage Time of Frozen Foods
| Food | Storage time (in months) | |||||||||||
| 1 | 2 | 3 | 4 | 5 | 6 | 7 | 8 | 9 | 10 | 11 | 12 | |
| Vegetable | + | + | + | |||||||||
| Fruit | + | + | + | |||||||||
| Bread, pastries | + | |||||||||||
| Milk | + | |||||||||||
| Ready-made meals | + | |||||||||||
| Meat: Beef | + | + | + | |||||||||
| Veal | + | + | + | |||||||||
| Pork | + | + | + | |||||||||
| Poultry | + | + | + | |||||||||
| Game | + | + | + | |||||||||
| Minced meat | + | |||||||||||
| Smoked sausages | + | |||||||||||
| Fish: lean fat | + | |||||||||||
| + | ||||||||||||
| Offal | + | |||||||||||
Defrosting of Frozen Food
Partially thawed or defrosted foods should be used as soon as possible. Cold air preserves the food but it does not destroy microorganisms which rapidly activate themselves after defrosting and make foods perishable.
Partial defrosting reduces the nutritional value of foods, especially of fruits, vegetables and ready-made meals.
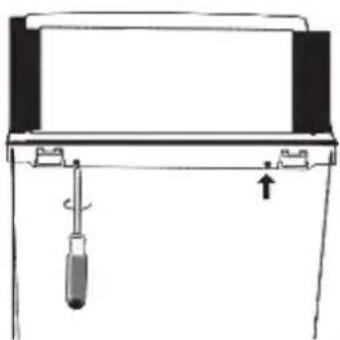
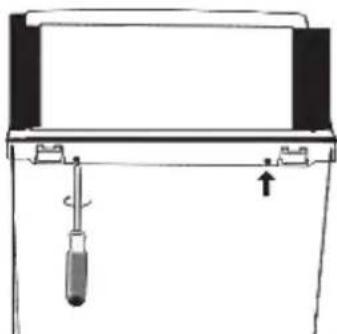
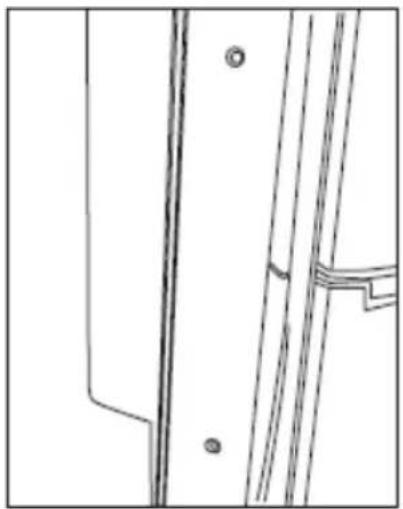
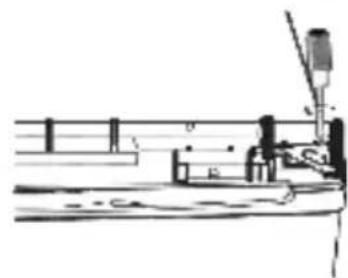
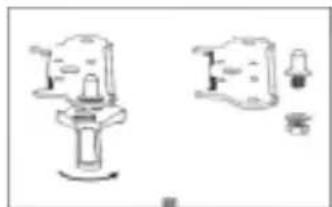
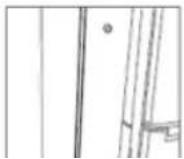
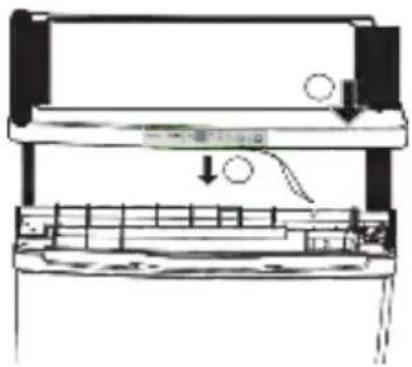
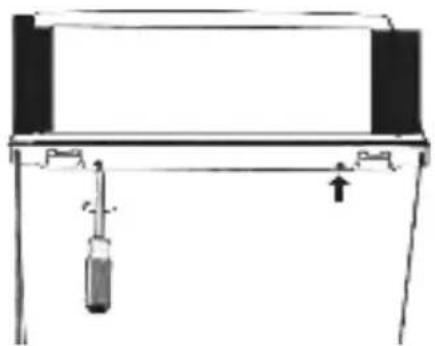
Changing the Direction of Opening the Door
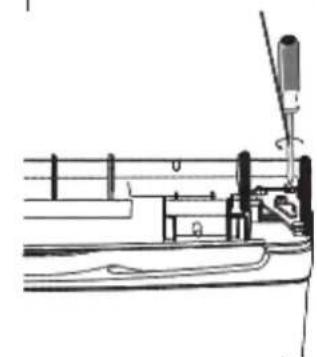
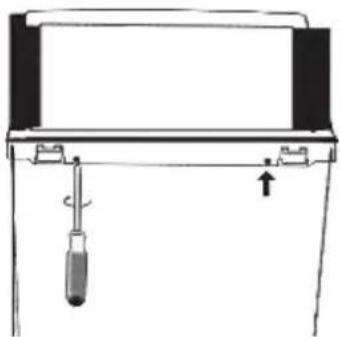
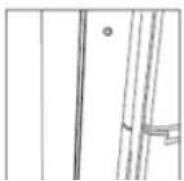
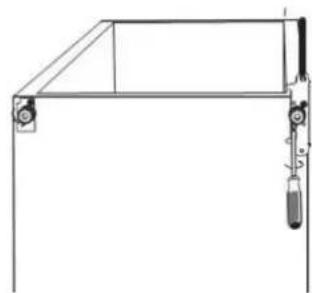
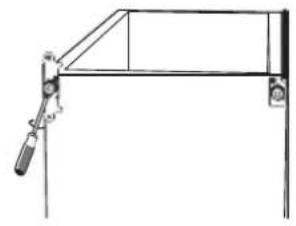
- Remove the 2 screws on the back.
- Carefully lift the top cover 5CM away from the freezer, pull out the wire connector, then remove the top cover away.
- Remove the three screws, then remove the upper hinge that holds the door in place. Lift the door and place it on a padded surface to prevent it from scratching.
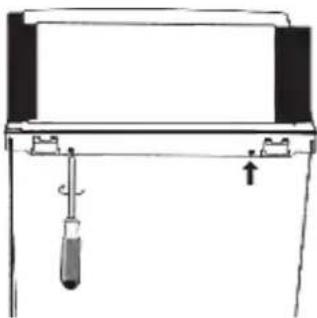
- Remove the screws and bottom hinge, then remove adjustable feet.
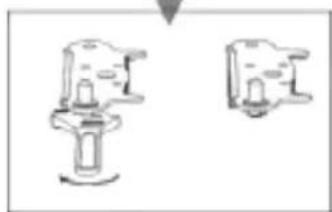
- Unscrew and remove the bottom hinge pin, turn the bracket over and replace it.

flowchart
graph TD
    A["Top Panel"] --> B["Shake Window"]
    B --> C["Shake Bracket"]
    C --> D["Shake Door"]
    D --> E["Shake Panel"]
    E --> F["Shake Window"]
    F --> G["Shake Window"]
    G --> H["Shake Window"]
    H --> I["Shake Window"]
    I --> J["Shake Window"]
    J --> K["Shake Window"]
    K --> L["Shake Window"]
    L --> M["Shake Window"]
    M --> N["Shake Window"]
    N --> O["Shake Window"]
    O --> P["Shake Window"]
    P --> Q["Shake Window"]
    Q --> R["Shake Window"]
    R --> S["Shake Window"]
    S --> T["Shake Window"]
    T --> U["Shake Window"]
    U --> V["Shake Window"]
    V --> W["Shake Window"]
    W --> X["Shake Window"]
    X --> Y["Shake Window"]
    Y --> Z["Shake Window"]
natural_image
Pure technical line drawing of a mechanical frame structure without any text, numbers, or symbols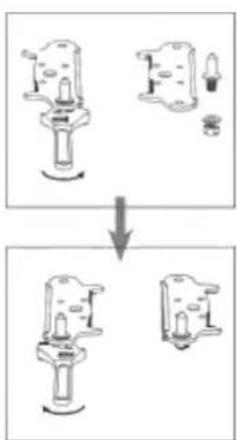
flowchart
graph TD
    A["Top-Down Top-Left"] --> B["Top-Down Top-Right"]
    B --> C["Bottom-Down Bottom-Left"]
-
Reinsert the bracket to the bottom hinge pin. then reinsert both adjustable feet.
-
Place the door back on. Ensure the door is aligned horizontally and vertically so that the seals are closed on all sides before finally screw tightening the top hinge.
-
Connect the wire connector to the display board, then put back the top cover.
-
Screw the 2 screws on the back
-
With the door closed, check that the door is aligned horizontally and vertically, the seals are closed on all sides before finally tightening the bottom hinge. Re-adjust the leveling of the feet as needed.
natural_image
Simple line drawing of a mechanical support structure with no text or symbols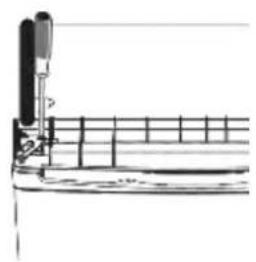
natural_image
Pure technical line drawing of a mechanical assembly without any text, numbers, or symbols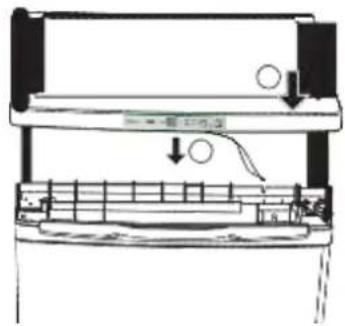

natural_image
Simple line drawing of a mechanical device with a screwdriver and lever (no text or symbols)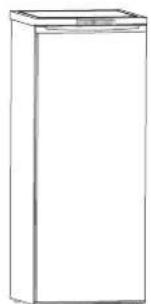
natural_image
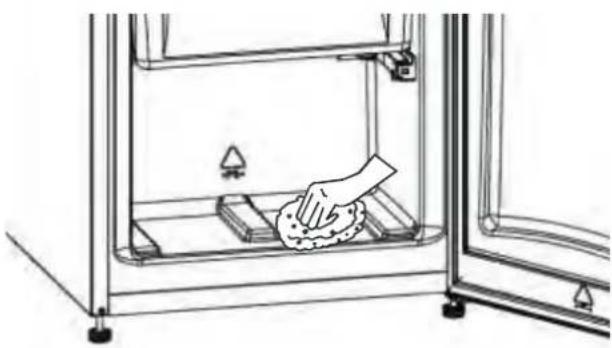
Line drawing of a rectangular industrial cabinet or storage unit (no text or symbols)Maintenance and Cleaning
Freezer Defrosting
Frost and ice layer, depositing on the inner walls of the freezer should be defrosted when 3-5 mm thick.
- 24 hours before defrosting choose "Super freezing MODE" so that the food packages are well cooled. After that empty the freezer and take care that the packages don't start to thaw.
- Disconnect the appliance from the mains supply.
- Defrosting is accelerated if the door is left open.
- Avoid using defrosting sprays, as they may cause damage to the plastic parts and may be hazardous to health.
natural_image
Line drawing of a hand cleaning a clean material inside a transparent enclosure (no text or symbols)- Dry the inside of the compartment with a sponge or a clean cloth
Switch Off the Appliance When Not in Use
If you do not intend to use the appliance for a longer period of time, disconnect the power supply, empty the appliance, defrost it and clean it. Leave the door slightly open.
Cleaning the Appliance
Before cleaning the appliance disconnect the cable from the mains supply. Do not use abrasive cleaning agents. Be careful to remove any cleanser agent remaining after cleaning.
- Clean the exterior of the appliances with water and liquid detergent.
- Wash the interior with lukewarm water and some vinegar.
After you have cleaned the appliance, reconnect it to the mains supply and put the food packages back to their place.

Trouble Shooting Guide
During the service, you can come across some troubles that in most cases result from
improper handling of the appliance and can easy be eliminated.
| Symptom | Solution |
| No power to the appliance | Check there is power at the socket. |
| Check there is not a power cut by checking the household lights. | |
| Check the fuse has not blown. | |
| The temperature in the freezer section is too high | Check the ambient temperature is within appliances operating limits of 16 C to 32 C. Relocate the appliance if necessary. |
| Check the thermostat is turned to the correct Setting relative to ambient conditions. | |
| The freezer door will not open | - Has door just been opened? If so leave for a few minutes to allow the air pressure to equalise. |
| The compressor runs continuously | Adjust the thermostat to give correct temperature control. |
| Check that the door is closed. | |
| Large quantities of food have recently been placed in the cabinet / and or door is frequently opened. | |
| Check that air ventilation is not obstructed. | |
| Excessive frost and ice has built up | Ensure the door is not left open. |
| Check that nothing is preventing the door from closing. | |
| Is the door gasket intact and clean. | |
| Has advised periodic defrosting been carried out. | |
| Noise | Refer to normal operating sounds. |
when you open the door, warm air gets into the appliance and when it is cooling, the underpressure seals the door. After few minutes (1-3), the door can easily be opened.
Normal operating sounds
Cooling in refrigerating-freezing appliances is enabled by the cooling system with compressor, which produces noise. How noisy the appliance is depends on where it is placed, how it is used and how old the appliance is.
- During the operation of the compressor the noise of liquid is heard and when the compressor is not operating, the refrigerant flow is heard. This is a normal condition and it has no influence whatsoever on the lifetime of the appliance.
- After starting the appliance, the operation of the compressor and the refrigerant flow may be louder, which does not mean that something is wrong with the appliance and it has no influence on the lifetime of the appliance. Gradually the noise is reduced.
- Sometimes unusual and stronger noise is heard, which is rather unusual for the appliance. This noise is often a consequence of inadequate placing. (The appliance shall be placed and leveled firmly on solid base and it should not touch the wall or kitchen units standing next to it.
WE RESERVE THE RIGHT TO ALTER THE SPECIFICATIONS WITH NO INFLUENCE ON THE OPERATION OF THE APPLIANCE.
Congelator vertical RO
natural_image
Simple line drawing of a mechanical component with a spring attached to a base (no text or symbols)natural_image
Simple line drawing of a cabinet with a grid wall and a shaded section on the right side (no text or symbols)Conectarea la priză
| D | E | F | G | H | I |
| 660mm | 1080mm | 80mm | 50mm | 135°-145° | 900mm |
Montarea mânerului
natural_image
Simple line drawing of a mechanical support structure with no text or symbols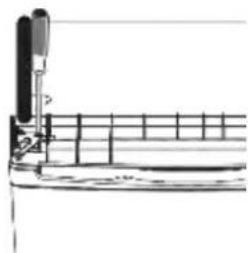
natural_image
Pure technical line drawing of a mechanical assembly without any text, numbers, or symbols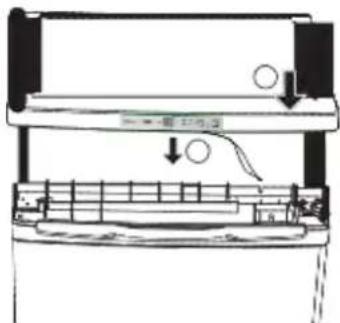

natural_image
Simple line drawing of a mechanical device with a screwdriver and lever (no text or symbols)
natural_image
Simple line drawing of a rectangular cabinet or enclosure (no text or symbols)natural_image
Line drawing of a hand cleaning a textured surface inside a transparent enclosure (no text or symbols)natural_image
Simple line drawing of a mechanical component with a spring attached to a base (no text or symbols)natural_image
Simple line drawing of a rectangular structure with vertical supports and a shaded vertical section (no text or symbols)Priklop na električno omrežje
| D | E | F | G | H | I |
| 660 mm | 1080 mm | 80 mm | 50 mm | 135^ - 145^ | 900 mm |
Namestitev ročaja
- Snemite pokrove vijakov z vrat.
Opis Aparata
flowchart
graph TD
    A["Front Panel"] --> B["Top Panel"]
    B --> C["Left Panel"]
    C --> D["Top Panel"]
    D --> E["Left Panel"]
    E --> F["Bottom Panel"]
    F --> G["Left Panel"]
    G --> H["Bottom Panel"]
    H --> I["Bottom Panel with Component 1"]
    I --> J["Bottom Panel with Component 2"]
natural_image
Pure technical line drawing of a mechanical frame structure without any text, numbers, or symbols
flowchart
graph TD
    A["Top View"] --> B["Downward Arrow"]
    B --> C["Bottom View"]
    style A fill:#f9f,stroke:#333
    style B fill:#ccf,stroke:#333
    style C fill:#cfc,stroke:#333
-
Ponovno vstavite nosilec na zatič spodnjega tečaja, nato pa ponovno vstavite še obe nožici.
-
Ponovno namestite vrata. Preden dokončno privijete zgornji tečaj, preverite, će so vrata poravnana v vodoravni in navpični smeri ter će se vsa tesnila tesno prilegajo na vseh stranicah.
-
Priključite konektor na prikazovalnik in ponovno namestite zgornji pokrov.
-
Privijte dva vijaka na hrbtni strani.
-
Ko so vrata zaprta, preverite, će so poravnana v vodoravni in navpični smeri ter će se vsa tesnila tesno prilegajo na vseh stranicah. Nato privijte spodnji tečaj. Po potrebi nastavite višino nožic.
natural_image
Simple line drawing of a mechanical support structure with no text or symbols
natural_image
Pure technical line drawing of a mechanical assembly without any text, numbers, or symbols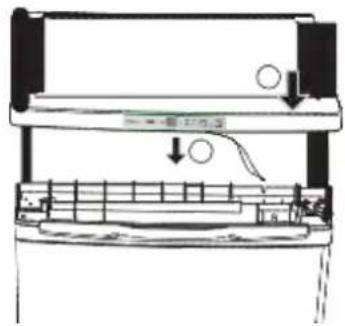

natural_image
Simple line drawing of a mechanical device with a screwdriver and lever (no text or symbols)
natural_image
Line drawing of a simple rectangular cabinet or storage unit (no text or symbols)natural_image
Line drawing of a hand cleaning a window frame with a cloth (no text or symbols)- Posušite notranjost zamrzovalnega dela z gobo in čisto krpo.
Izklopite aparat, ko ga ne uporabljate.
natural_image
Simple line drawing of a mechanical component with a spring and base (no text or symbols)natural_image
Diagram of a window structure with grid pattern and shaded structural detail (no text or symbols)natural_image
Pure technical line drawing of a mechanical component without any text, numbers, or symbols
natural_image
Technical line drawing of a mechanical bracket or bracket assembly (no text or symbols)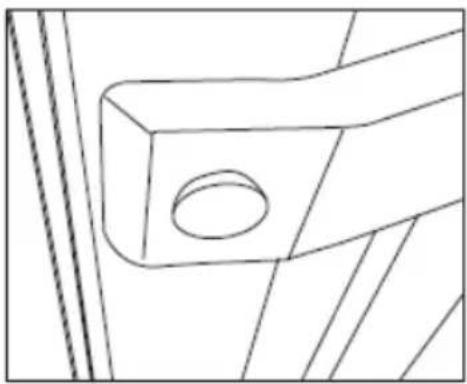
natural_image
Technical line drawing of a mechanical bracket or bracket with a circular hole and diagonal lines (no text or symbols)Opis aparata
natural_image
Front and back line drawing of a multi-level industrial storage cabinet with rows of compartments and control panels (no text or symbols)- Kućište aparata
- Fijoke za zamrzavanje
- Kompresor (pozadi kućišta)
- Regulacione nožice
- Radni pult
- Elektronska kontrolna tabla
- Zaptivač vrata
- Komplet vrata
Rukovanje aparatom
natural_image
Technical line drawing of a mechanical support structure with no visible text or symbols- Pričvrstite konzolu na klin donjeg šarnira, zatim ponovno montirajte obe regulacione nožice.

natural_image
Pure technical line drawing of a mechanical assembly without any text, numbers, or symbols- Vratite vrata nazad. Proverite dali su vrata pravilno poravnana u horizontalnom i vertikalnom smislu, tako da zaptivači prianjaju duž celog okvira. Nakon toga prišrafite i pričvrstite gornji šarnir.
- Vodiče elektronskih spojeva spojite nazad na kontrolnu tablu i vratite gornji poklopac.
natural_image
Simple line drawing of a mechanical setup with a screwdriver and lever (no text or symbols)- Prišrafite dva šrafa pozadi aparata.

natural_image
Line drawing of a simple rectangular cabinet or refrigerator with no text or symbols- Sa vratima u zatvorenom položaju proverite horizontalan i vertikalan položaj vrata, proverite dali zaptivači pravilno zatvaraju otvore na svim stranama, i konačno prišrafite donji šarnir. Podesite položaj i balans regulacionih nožica po potrebi.
natural_image
Line drawing of a hand cleaning a window with a cloth, no text or symbols present- Unutrašnjost aparata obrišite sunderom ili čistom krpom.
Čišćenje aparata
Pre čišćenja prekinite dovod električne energije u aparat.
Za čišćenje ne smete koristiti gruba i agresivna sredstva za čišćenje, jer možete oštetiti površinu. Nakon čišćenja pazite da odstranite sve ostatke sredstva za čišćenje.
- Spoljašnji deo aparata čistite vodom i deterdžentom.
- Unutrašnjost aparata operite mlakom vodom, kojoj ste dodali nešto vinskog sirćeta.
Nakon čišćenja ponovo priključite aparat na električnu mrežu i vratite hranu nazad.
Isključenje aparata kada ga ne koristite
Ukoliko aparat ne nameravate koristiti duže vreme, isključite ga iz električne mreže, izvadite iz njega hranu i očistite ga. Vrata ostavite pritvorena.
⑦ Uputstva za otklanjanje smetnji
U toku upotrebe aparata može doći do smetnji u radu koje su u većini slučajeva posledica nepravilne upotrebe, te ih možete pokušati otkloniti sami.
| Pojava | Rješenje |
| Aparat ne radi nakon priključenja na električnu instalaciju. | Proverite dovod napona u utičnicu.Proverite dali je došlo do nestanka struje (upalite neku sijalicu).Proverite dali je pregoreo osigurač. |
| Temperatura u zamrzivaču je previsoka. | Proverite sobnu temperaturu u prostoriji, u kojoj je smešten aparat – raspon mora biti između + 16°C i + 32°C.Po potrebi premestite aparat.Proverite dali je termostat pravilno regulisan obzirom na temperaturne uslove okoline. |
| Vrata zamrzivača ne mogu da se otvore. | Dali ste tik pre toga otvarali vrata? U tom slučaju pričekajte nekoliko momenata da se izjednači vazdušni tlak. |
| Kompresor radi neprekidno. | Dugme termostata pomerite na pravilnu vrednost.Proverite dali su vrata zatvorena.Nedavno ste u unutrašnjost složili veću količinu hrane, ili ste često otvarali vrata.Pobrinite se za neometano kruženje vazduha. |
| Izrazito akumulisanje inja i leda. | Proverite dali su vrata ostala otvorena.Pobrinite se da zatvaranje vrata bude nesmetano.Proverite dali je zaptivač na vratima posve čist i neoštećen.Preporučujemo da aparat povremeno odmrznete. |
| Šumovi | Više o tome u poglavlju o uobičajenim zvukovima i šumovima tokom rada aparata. |
Vrata zamrzivača se teško otvaraju

- Wichtige Hinweise D
- Before fi rst operation GB
- Montáž madla
- Údržba a čištění
- Inštalácia rukoväte
- Popis spotrebiča
- Údržba a čistenie
- Rozmrazovanie mrazničky
- Instalimi i dorezë
- Описание на уреда
- Montaža drške
- Opis uređaja
- Rukovanje uređajem
- Čišćenje uređaja
- Before Putting Into Use 2
- Important 3
- Placing and Installation 4
- Description of the Appliance 6
- Using the freezer....6
- Electronic front control panel.... 7
- Use....8
- Changing the Direction of Opening the Door10
- Maintenance and Cleaning....12
- Trouble Shooting Guide 13
- Before Putting Into Use
- Instructions for Use
- We Care for the Environment
- Tips for Energy Saving
- Important
- Storing Time During Power Supply Interruption
- Disposing of the Worn Out Appliance
- Placing and Installation
- Choosing the Right Place
- Placing the Appliance
- Connection to Power Supply
- Installing the appliance
- Handle installation
- Description of the Appliance
- Using the freezer
- Electronic front control panel
- MODE function:
- TEMPERATURE setting:
- LOCK option of the buttons:
- DOOR OPEN alarm:
- HIGH TEMPERATURE alarm:
- IMPORTANT! The display always shows the setting temperature and not the actual one.
- Use
- Freezing Fresh Foods
- Freezing Procedure
- Storing Frozen Foods
- Storing Commercially Frozen Foods
- Defrosting of Frozen Food
- Changing the Direction of Opening the Door
- Maintenance and Cleaning
- Freezer Defrosting
- Switch Off the Appliance When Not in Use
- Cleaning the Appliance
- Trouble Shooting Guide
- Normal operating sounds
- Congelator vertical RO
- Conectarea la priză
- Montarea mânerului
- Priklop na električno omrežje
- Namestitev ročaja
- Opis Aparata
- Izklopite aparat, ko ga ne uporabljate.
- Rukovanje aparatom
- Čišćenje aparata
- Isključenje aparata kada ga ne koristite
- ⑦ Uputstva za otklanjanje smetnji
- Vrata zamrzivača se teško otvaraju
Brand : GORENJE
Model : F4151CW
Category : Freezer