
LEGEND 970 - SSD ADATA - Free user manual and instructions
Find the device manual for free LEGEND 970 ADATA in PDF.


| Product Type | SSD (Solid State Drive) |
| Brand | ADATA |
| Model | LEGEND 970 |
| Form Factor | M.2 2280 |
| Interface | PCIe Gen4 x4, NVMe 1.4 |
| Capacity | 1TB / 2TB / 4TB |
| Sequential Read Speed | Up to 7,400 MB/s |
| Sequential Write Speed | Up to 6,800 MB/s |
| Random Read (IOPS) | Up to 1,000K IOPS |
| Random Write (IOPS) | Up to 1,000K IOPS |
| NAND Flash Type | 3D TLC NAND |
| Controller | Innogrit IG5236 |
| DRAM Cache | Yes, DDR4 DRAM |
| Dimensions (L x W x H) | 22 x 80 x 8.6 mm |
| Weight | Approx. 20 g |
| Power Consumption (Active) | Up to 8.5W |
| Power Consumption (Idle) | Less than 50 mW |
| Operating Temperature | 0°C to 70°C |
| Storage Temperature | -40°C to 85°C |
| Endurance (TBW) | Up to 740 TBW (1TB model) |
| Mean Time Between Failures (MTBF) | 2,000,000 hours |
| Warranty | 5-year limited warranty |
| Main Functions | High-speed data storage, OS boot drive, gaming, content creation |
| Cleaning & Maintenance | No cleaning required; keep in a dry, dust-free environment |
| Safety | RoHS compliant |
| Spare Parts & Repairability | Non-repairable; replace entire unit if defective |
Frequently Asked Questions - LEGEND 970 ADATA
User questions about LEGEND 970 ADATA
0 question about this device. Answer the ones you know or ask your own.
Ask a new question about this device
Download the instructions for your SSD in PDF format for free! Find your manual LEGEND 970 - ADATA and take your electronic device back in hand. On this page are published all the documents necessary for the use of your device. LEGEND 970 by ADATA.
USER MANUAL LEGEND 970 ADATA
natural_image
Colorful hummingbird logo with wings spread against blue background (no text or symbols)ADATA®
INDEX
INSTALLING AN M.2 SSD ON A DESKTOP PC
Chinese traditional 03
Chinese simple 07
English 11
German 15
Japanese 19
Korean 23
Portuguese 27
Russian 31
Romanian 35
Spanish 39
INSTALLING THE LEGEND 970 SSD ON A DESKTOP PC
Chinese traditional 43
English 46
INSTALLING AN M.2 SSD ON A LAPTOP PC
Chinese traditional 49
Chinese simple 53 53
English 57
German 61
Japanese 65
Korean 69
Portuguese 73
Russian 77
Romanian 81
Spanish 85
如何在桌機安裝 M.2固態硬碟

natural_image
Exterior view of a computer monitor displaying a colorful circular lens, next to a black ADATA RAM module (no text or symbols on the main subject)更換前準備步驟
natural_image
Interior view of a computer tower case showing internal components like CPU, memory, and hardware (no visible text or labels)1. 準備工具
2. 備份資料
3. 請確實關機
natural_image
Hand inserting a socket into a server rack unit (no visible text or labels)natural_image
Hand placing a hard drive into a black server tower case with visible internal components (no text or symbols)1. 將主機機殼卸下
natural_image
Interior view of a computer motherboard with CPU socket and monitor (no visible text or symbols)natural_image
Close-up of a hand inserting a CPU into a motherboard with visible hardware and slots (no text or symbols)3. 對準M.2插槽、插上固態硬碟
natural_image
Close-up of hands operating a computer motherboard with a mouse and monitor (no visible text or symbols)4. 拴上螺絲固態硬碟
再以螺絲起子固定M.2固態硬碟。
natural_image
Interior view of a black desktop computer tower with visible internal components and a hand adjusting the base panel (no text or symbols)5. 重新裝上機殼
natural_image
Hand pressing a button into a server rack with multiple drive bays (no visible text or labels)natural_image
Exterior view of a computer monitor displaying a colorful circular lens, next to a black ADATA RAM module (no text or symbols on the main subject)更换前准备步骤
natural_image
Interior view of a computer tower case showing internal components like CPU, memory, and hardware (no visible text or labels)1. 准备工具
natural_image
Hand inserting a socket into a server rack unit (no visible text or labels)natural_image
Hand placing a hard drive into a black server tower case with visible internal components and a screwdriver nearby (no text or symbols)1. 将机箱侧板卸下
natural_image
Interior view of a computer motherboard with CPU socket and monitor (no visible text or symbols)natural_image
Close-up of a hand inserting a CPU into a motherboard with visible hardware and slots (no text or symbols)3. 对准M.2插槽、插上固态硬盘
natural_image
Close-up of hands operating a computer motherboard with a mouse and monitor (no visible text or symbols)4.拧上螺丝以固定固态硬盘
再以螺丝起子固定M.2固态硬盘。
natural_image
Interior view of a black desktop computer tower with visible internal components and a hand adjusting the base panel (no text or symbols)5. 重新装上机箱侧板
natural_image
Hand pressing a button into a server rack with multiple drive bays (no visible text or labels)natural_image
Exterior view of a computer monitor displaying a colorful circular lens, next to a black ADATA RAM module (no text or symbols on the main subject)BEFORE INSTALLATION

natural_image
Interior view of a computer tower case showing internal components like CPU, memory, and hardware (no visible text or labels)1. GATHER THE THINGS YOU'LL NEED
PC, Phillips screwdrivers, and ADATA M.2 SSD *Please use a standard Phillips screwdriver (3.5mm) for disassembling the case; and a smaller Phillips screwdriver for installing the M.2 solid state drive as it uses screws with a diameter of 1.85-1.98mm

Make sure to backup the important data on your PC to an external device, such as an external HDD, before starting installation.

After backing up your data, power off your PC to avoid data loss or damage to other components during installation.

natural_image
Hand inserting a socket into a server rack unit (no visible text or labels)4. SWITCH OFF THE POWER SWITCH AND UNPLUG POWER CORD
This action is necessary to discharge residual power that can damage your PC and its components.
*The location of the power switch may vary by PC, please check your user manual.
INSTALLATION

natural_image
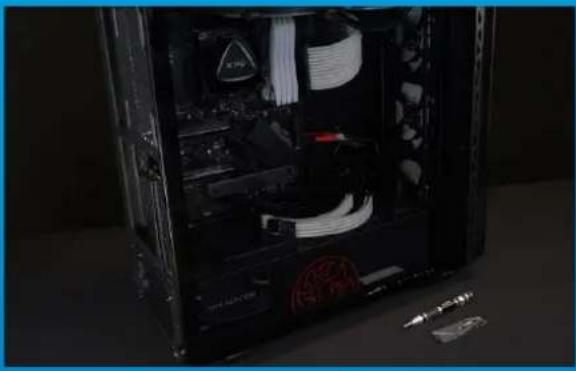
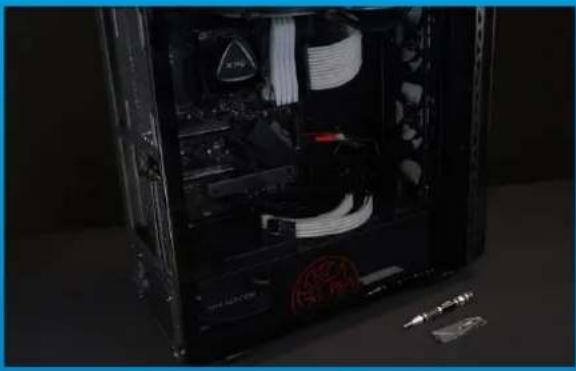
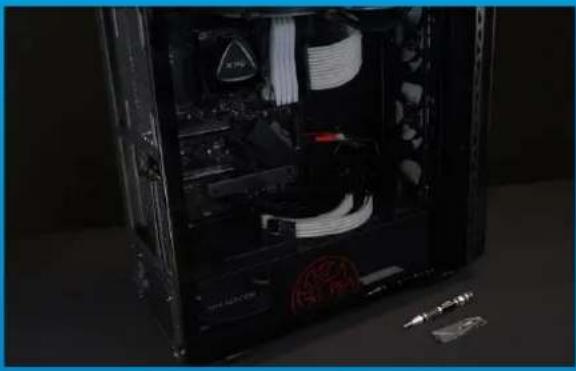
Hand placing a hard drive into a black server tower case with visible internal components and a screwdriver nearby (no text or symbols)1. REMOVE THE PC CASE
Use the standard Philips screwdriver to remove the screws and then remove the PC case

natural_image
Interior view of a computer motherboard with CPU socket and monitor (no visible text or symbols)2. LOCATE THE M.2 PCIE SLOT AND CONFIRM THERE ARE SCREWS
Locate the M.2 PCIe slot, ensure the SSD will fit, and confirm there are screws present.
*The location of slots may vary by PC. Please check your PC's user manual for more information.
**Generally speaking, the screws that secure the SSD in place will be installed on the motherboard when the PC is shipped from the factory.

natural_image
Close-up of a hand inserting a CPU into a motherboard with visible hardware and slots (no text or symbols)3. ALIGN THE M.2 SLOT AND INSERT THE SOLID STATE DRIVE
Use your small Phillips screwdriver to remove the screws on the motherboard. Align the notches in the SSD with the ridges in the PCIe slot, then insert at a an angle. Give it a final push to ensure it is securely in place.
* The slot has a foolproof design. Please insert the SSD in the direction corresponding to the pins on the solid state drive and the slot. Do not insert it forcibly to avoid damage to the product.

natural_image
Close-up of hands operating a computer motherboard with a tool, no visible text or symbols4. FASTEN THE SCREWS TO SECURE THE SSD
Use your small Phillips screwdriver to secure the SSD into place.

natural_image
Interior view of a black desktop computer tower with visible internal components and a hand adjusting the base panel (no text or symbols)5. RESEMBLE THE CASE
*Do not overtighten the screws as it may damage the screws ad back plate

natural_image
Hand pressing a button into a server rack with multiple drive bays (no visible text or labels)6. PLUG IN THE POWER CORD AND POWER ON THE PC TO COMPLETE INSTALLATION
EINE M.2-SSD AN EINEM DESKTOP-PC INSTALLIEREN
natural_image
Exterior view of a computer monitor displaying a colorful circular lens, next to a black ADATA RAM module (no text or symbols on the main subject)VOR DER INSTALLATION
natural_image
Interior view of a computer tower case showing internal components like CPU, memory, and hardware (no visible text or labels)1. ALLES NÖTIGE ZUSAMMENTRAGEN
2. IHRE DATEN SICHERN
natural_image
Hand inserting a socket into a server rack (no visible text or labels)natural_image
Hand placing a hard drive into a black server tower case with visible internal components and a screwdriver nearby (no text or symbols)1. PC-GEHÄUSE ENTFERNEN
natural_image
Interior view of a computer motherboard with CPU socket and monitor (no visible text or symbols)2. M.2-PCIE-STECKPLATZ AUSFINDIG MACHEN UND SICHERSTELLEN, DASS SCHRAUBEN VORHANDEN SIND
natural_image
Close-up of a hand inserting a CPU into a motherboard with visible hardware and slots (no text or symbols)natural_image
Close-up of hands operating a computer motherboard with a mouse and monitor (no visible text or symbols)natural_image
Interior view of a black desktop computer tower with visible internal components and a hand adjusting the base panel (no text or symbols)natural_image
Hand pressing a button into a server rack with multiple drive bays (no visible text or labels)natural_image
Exterior view of a computer monitor displaying a colorful circular lens, next to a black ADATA RAM module (no text or symbols on the main subject)交換前の準備

natural_image
Interior view of a computer tower case showing internal components like CPU, memory, and hardware (no visible text or labels)1. 準 備するもの
natural_image
Hand inserting a socket into a server rack (no visible text or labels)natural_image
Hand placing a hard drive into a black server tower case with visible internal components (no text or symbols)1. パソコン本体のケースを取り外す
natural_image
Interior view of a computer motherboard with CPU socket and monitor, showing internal circuitry and wiring (no readable text or symbols)natural_image
Close-up of a hand inserting a CPU into a motherboard with visible hardware and slots (no text or symbols)3. M.2スロットにSSDを差し込む
natural_image
Close-up of hands operating a computer motherboard with a mouse and monitor (no visible text or symbols)4. SSDをねじで固定する
natural_image
Interior view of a black desktop computer tower with visible internal components and a hand adjusting the base panel (no text or symbols)5. ケースを元の位置に取り付ける
natural_image
Hand pressing a button into a server rack with multiple drive bays (no visible text or labels)natural_image
Exterior view of a computer monitor displaying a colorful circular lens, next to a black ADATA RAM module (no text or symbols on the main subject)설치하기 전에

natural_image
Interior view of a computer tower case showing internal components and wiring (no visible text or symbols)1. 필요한 도구 준비
natural_image
Hand inserting a socket into a server rack (no visible text or labels)natural_image
Hand placing a hard drive into a black server tower case with visible internal components and a screwdriver nearby (no text or symbols)1. PC 케이스 제거
natural_image
Interior view of a computer motherboard with CPU socket and monitor (no visible text or symbols)natural_image
Close-up of a hand inserting a CPU into a motherboard with visible hardware and slots (no text or symbols)natural_image
Close-up of a hand inserting a component into a device (no visible text or symbols)4. 나사를 조여서 SSD 고정
natural_image
Interior view of a black desktop computer tower with visible internal components and a hand adjusting the base panel (no text or symbols)5. 케이스 재조립
natural_image
Hand pressing a button into a server rack with multiple drive bays (no visible text or labels)natural_image
Exterior view of a computer monitor displaying a colorful circular lens, next to a black ADATA RAM module (no text or symbols on the main subject)ANTES DA INSTALAÇÃO

natural_image
Interior view of a computer tower case showing internal components like CPU, memory, and hardware (no visible text or labels)1. REÚNA AS COISAS QUE VOCÊ PRECISA
2. FAÇA BACKUP DE SEUS DADOS
natural_image
Hand inserting a socket into a server rack (no visible text or labels)natural_image
Hand placing a hard drive into a black server tower case with visible internal components and wiring (no text or symbols)1. REMOVA O GABINETE DO PC
natural_image
Interior view of a computer motherboard with CPU socket and monitor (no visible text or symbols)2. LOCALIZE O SLOT M.2 PCIE E CONFIRME SE HÁ PARAFUSOS
natural_image
Close-up of a hand inserting a CPU into a motherboard with visible hardware and slots (no text or symbols)3. ALINHE O SLOT M.2 E INSIRA A UNIDADE DE ESTADO SÓLIDO
natural_image
Close-up of hands operating a computer motherboard with a mouse and monitor (no visible text or symbols)4. APERTE OS PARAFUSOS PARA PRENDER O SSD
natural_image
Interior view of a black desktop computer tower with visible internal components and a hand adjusting the base panel (no text or symbols)natural_image
Hand pressing a button into a server rack with multiple drive bays (no visible text or labels)natural_image
Interior view of a computer tower case showing internal components like CPU, memory, and hardware (no visible text or labels)2. ЗАРЕЗЕРВИРУЙТЕ ДАННЫЕ
natural_image
Hand inserting a socket into a server rack (no visible text or labels)natural_image
Hand placing a hard drive into a black server tower case with visible internal components and wiring (no text or symbols)1. СНИМИТЕ ЗАДНЮЮ ПЛАСТИНУ ПК
natural_image
Interior view of a computer motherboard with CPU socket and monitor (no visible text or symbols)natural_image
Close-up of a hand inserting a CPU into a motherboard with visible hardware and slots (no text or symbols)natural_image
Close-up of hands operating a computer motherboard with a mouse and monitor (no visible text or symbols)natural_image
Interior view of a black desktop computer tower with visible internal components and a hand adjusting the base panel (no text or symbols)5. ЗАКРЕПИТЕ ЗАДНЮЮ ПЛАСТИНУ НА МЕСТЕ
natural_image
Hand pressing a button into a server rack with multiple drive bays (no visible text or labels)natural_image
Exterior view of a computer RAM module next to a colorful circular display screen (no text or symbols on the main subject)ÎNAINTE DE INSTALARE

natural_image
Interior view of a black server chassis with visible internal components and wiring (no text or symbols)1. ADUNATI LUCRURILE DE CARE VETI AVEA NEVOIE
3. OPRITI PC-UL
natural_image
Hand inserting a socket into a server rack (no visible text or labels)4. DECONECTATI ALIMENTAREA CU ENERGIE ȘI CABLUL DE ALIMENTARE
natural_image
Hand placing a hard drive into a black server tower case with visible internal components and a screwdriver nearby (no text or symbols)1. SCOATETI CARCASA PC-ULUI
natural_image
Interior view of a computer motherboard with CPU socket and monitor, showing no visible text or symbols2. LOCALIZATI FANTA M.2 PCIE ŞI CONFIRMAȚI CĂ EXISTĂ ȘURUBURI
natural_image
Close-up of a hand holding a computer motherboard with CPU socket and monitor (no visible text or symbols)3. ALINIATI FANTA M.2 ŞI INTRODUCEȚI UNITATEA SOLID STATE
natural_image
Close-up of hands assembling a computer motherboard with a screwdriver (no visible text or symbols)4. STRÂNGETI ŞURUBURILE PENTRU A FIXA SSD
natural_image
Close-up of a hand inserting a CPU into a black internal space, with visible hardware and components (no text or symbols)5. REASAMBLATI CARCASA
natural_image
Close-up of a hand pressing a button on a black server rack with multiple drive bays (no visible text or labels)6. CONECTATI CABLUL DE ALIMENTARE ȘI PORNITI PC-UL PENTRU A FINALIZA INSTALAREA
INSTALAR UNA UNIDAD DE
ESTADO SÓLIDO M.2 EN
UN EQUIPO DE
SOBREMESA

natural_image
Interior view of a computer tower case showing internal components like CPU, memory, and hardware (no visible text or labels)1. REUNIR LOS ELEMENTOS QUE NECESITARÁ
natural_image
Hand inserting a socket into a server rack (no visible text or labels)natural_image
Hand placing a hard drive into a black server tower case with visible internal components and wiring (no text or symbols)1. QUITAR LA CARCASA DEL EQUIPO
natural_image
Interior view of a computer motherboard with CPU socket and monitor (no visible text or symbols)2. LOCALIZAR LA RANURA PCIE M.2 Y CONFIRMAR QUE TIENE TORNILLOS
natural_image
Close-up of a hand inserting a CPU into a motherboard with visible hardware and slots (no text or symbols)3. ALINEAR LA RANURA M.2 E INSERTAR LA UNIDAD DE ESTADO SÓLIDO
natural_image
Close-up of a hand inserting a component into a device (no visible text or symbols)natural_image
Interior view of a black desktop computer tower with visible internal components and a hand adjusting the base panel (no text or symbols)5. VOLVER A MONTAR LA CARCASA
natural_image
Hand pressing a button into a server rack with multiple drive bays (no visible text or labels)natural_image
Exterior view of a computer RAM module with a colorful circular light source and a visible ADATA LEGEND 970 chip (no text beyond branding)安裝步驟
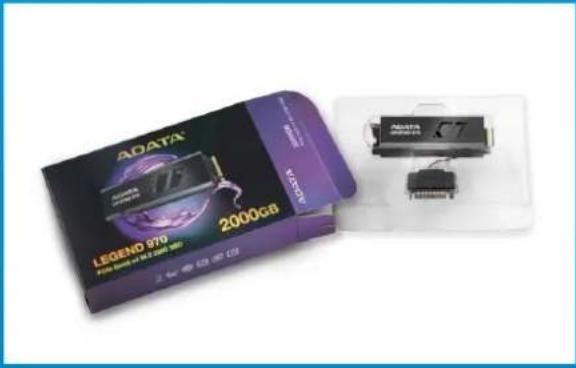
- 將產品連同泡殼從彩盒取出

natural_image
Hand holding a black electronic device labeled 'A DATA' with wires, placed on a white surface (no readable text beyond label)natural_image
Close-up of hands installing a component on a computer motherboard with visible RAM slots and a D4012 memory card (no text or symbols on the main subject)- 將產品插入主機板上的M.2插槽中
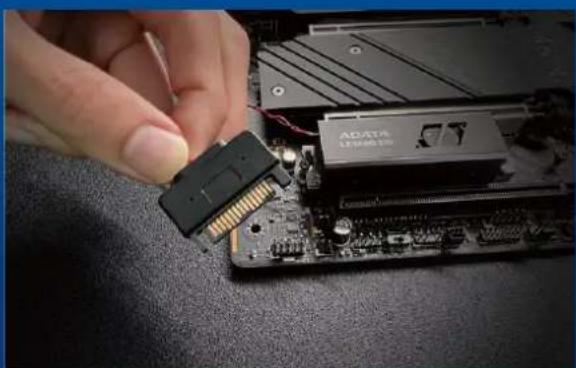
natural_image
Close-up of a hand inserting a 24-pin BOS card into a computer motherboard, with visible CPU socket and memory drive (no text or symbols)- 拿起產品左端的SATA電源線(公頭)
安裝步驟

natural_image
Close-up of a hand holding a small metallic component next to a black CPU fan (no visible text or symbols)natural_image
Close-up of hands holding a small electronic component with a red wire, placed on a dark surface (no visible text or symbols)- 將兩條 SATA線連接在一起
natural_image
Close-up of a computer motherboard with visible CPU socket and connected components (no text or symbols)- 安装完成
INSTALLING THE LEGEND 970 SSD ON A DESKTOP PC
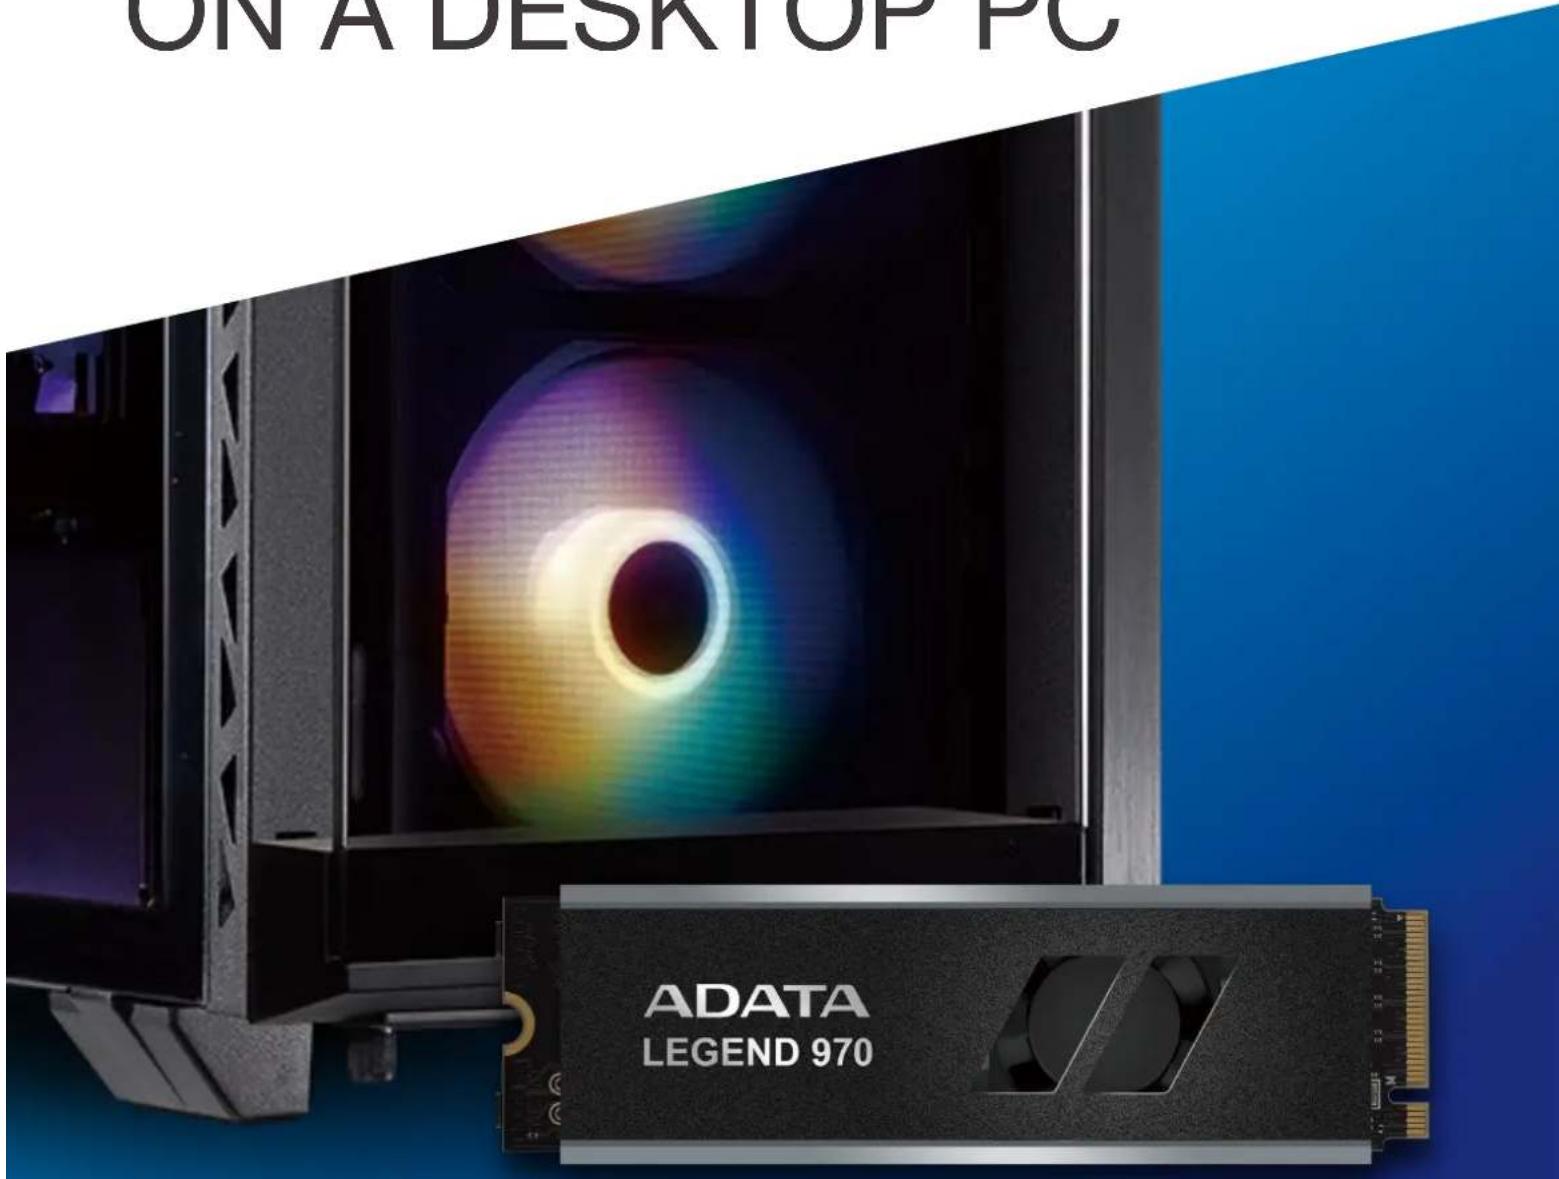
INSTALLATION STEPS
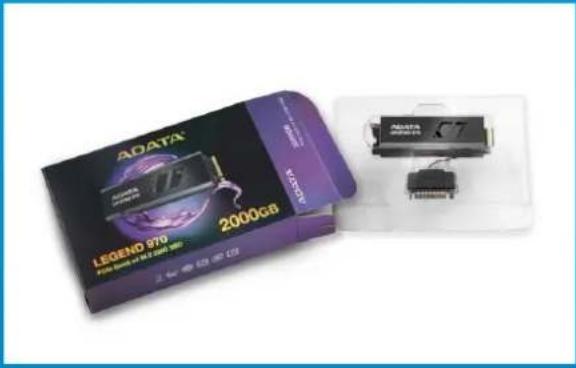
- Remove blister pack along with the product from the outer box.

natural_image
Hand holding a black electronic device labeled 'A DATA' with wires, placed on a white surface (no readable text beyond label)- Insert fingers into the cutouts, grip the product firmly, and pull firmly. Slide left side of product out of the blister pack first (to prevent damage to the power cable), then remove the entire product.

natural_image
Close-up of hands installing a component on a computer motherboard with visible RAM slots and a D4012 memory card (no text or symbols on the main subject)- Insert the product into the M.2 slot on the motherboard.

natural_image
Close-up of a hand inserting a 24-pin BOS card into a computer motherboard, with visible CPU socket and memory drive (no text or symbols)- Locate the SATA power cable(SATA pin) on the left side of the product.
INSTALLATION STEPS

natural_image
Hand holding a small metallic component next to a black CPU fan (no visible text or symbols)- Locate a SATA cable(SATA socket) from PC power supply unit.
Note: This cable can be found in the cable bundle of the power supply unit.
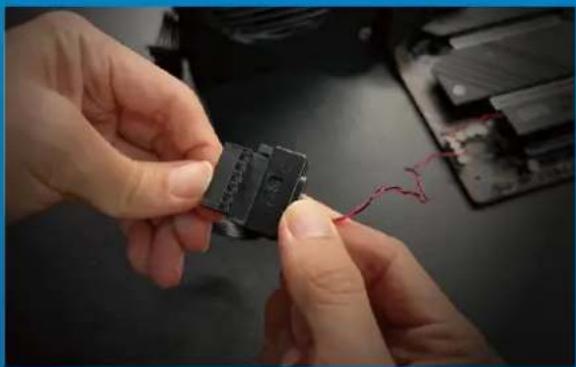
natural_image
Close-up of hands holding a small electronic component with a red wire, placed on a dark surface (no visible text or symbols)- Connect the two SATA cables.
Note: The direction of power cable connectors to ensure a smooth connection.
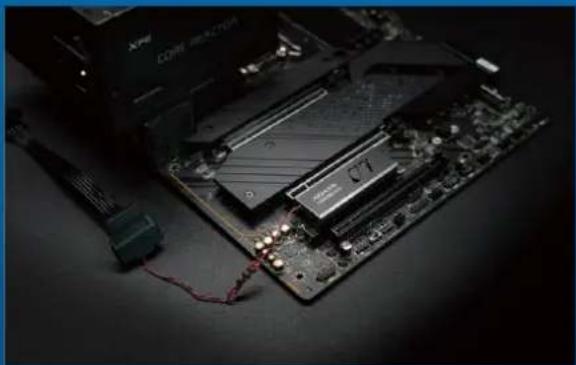
natural_image
Close-up of a computer motherboard with visible CPU socket and connected components (no text or symbols)- Installation is now complete.
如何在筆電安裝 M.2固態硬碟

natural_image
Laptop with a black CPU socket and a white RAM module, no visible text or symbols on the main components.更換前準備步驟

1. 準備工具
2. 備份資料
natural_image
Close-up of two hands resting on a dark surface, with a small triangular object labeled 'XPS' visible in the background (no other text or symbols)4. 將電源線及電池拔除
natural_image
Close-up of hands holding a flashlight next to a laptop case (no visible text or symbols)1. 將主機背板卸下
natural_image
Top-down view of a laptop's internal circuit board and drive casing (no visible text or symbols)natural_image
Close-up of a hand inserting a XPG into a computer motherboard (no visible text or symbols)3. 對準M.2插槽、插上固態硬碟
natural_image
Close-up of hands using a tool to adjust or install electronic components on a circuit board (no visible text or symbols)4. 拴上螺絲以固定固態硬碟
再以螺絲起子固定M.2固態硬碟。
5. 重新盖上背板
natural_image
Close-up of human legs and hands on a dark surface, no visible text or symbolsnatural_image
Laptop with visible keyboard and ADATA chip, no text or symbols on the main components更换前准备步骤

1. 准备工具
2. 备份数据
natural_image
Close-up of two hands resting on a dark surface, with a small triangular object labeled 'XPS' visible in the background (no other text or symbols)4. 将电源线及电池拔除
natural_image
Close-up of hands holding a flashlight next to a laptop case (no visible text or symbols)1. 将电脑背板卸下
natural_image
Top-down view of a laptop's internal circuit board and drive casing (no visible text or symbols)natural_image
Close-up of a hand inserting a XPG into a computer motherboard (no visible text or symbols)3. 对准M.2插槽、插上固态硬盘
natural_image
Close-up of hands using a tool to adjust or install electronic components on a circuit board (no visible text or symbols)4. 拴上螺丝以固定固态硬盘
再以螺丝起子固定M.2固态硬盘。
5. 重新盖上背板
natural_image
Close-up of human legs and hands on a dark surface, no visible text or symbolsnatural_image
Laptop keyboard with ADATA chip resting on a blue surface, no visible text or symbols on the main components.BEFORE INSTALLATION

1. GATHER THE THINGS YOU'LL NEED
PC, Phillips screwdrivers, and ADATA M.2 SSD
*Please use a standard Phillips screwdriver (3.5mm) for disassembling the case; and a smaller Phillips screwdriver for installing the M.2 solid state drive as it uses screws with a diameter of 1.85-1.98mm.
Make sure to backup the important data on your PC to an external device, such as an external HDD, before starting installation.

After backing up your data, power off your PC to avoid data loss or damage to other components during installation.
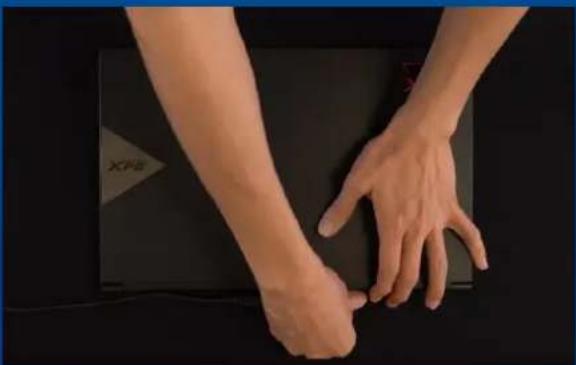
natural_image
Close-up of two hands resting on a dark surface, no visible text or symbols4. UNPLUG POWER CORD AND BATTERY
This action is necessary to discharge residual power that can damage your PC and its components.
*The battery removal step applies only to laptops when it's possible to remove the battery. To see how to remove the battery, refer to your user manual.
INSTALLATION

natural_image
Close-up of hands holding a flashlight next to a laptop case (no visible text or symbols)1. REMOVE YOUR PC'S BACK PLATE
Use your standard Phillips screwdriver to remove the screws from the back plate.
*If you are unsure how to do this, refer to your user manual
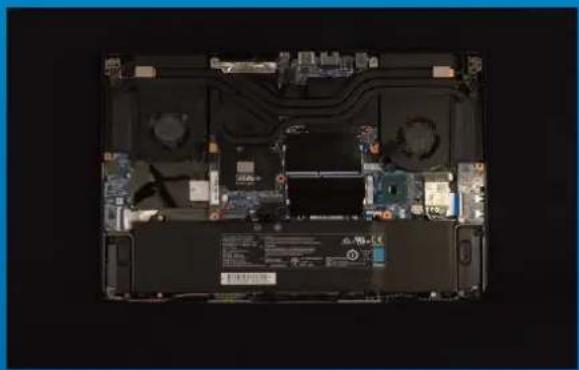
natural_image
Top-down view of a laptop's internal circuit board and drive casing (no visible text or symbols)2. LOCATE THE M.2 PCIE SLOT AND CONFIRM THERE ARE SCREWS
Locate the M.2 PCIe slot, ensure the SSD will fit and confirm there are screws present.
*The location of slots may vary by PC. Please check your PC's user manual for more information.
**Generally speaking, the screws that secure the SSD in place will be installed on the motherboard when the laptop is shipped from the factory.

natural_image
Close-up of a hand inserting a XPG into a computer motherboard (no visible text or symbols)3. ALIGN THE M.2 SLOT AND INSERT THE SOLID STATE DRIVE
Use your small Phillips screwdriver to remove the screws on the motherboard. Align the notches in the SSD with the ridges in the PCIe slot, then insert at a an angle. Give it a final push to ensure it is securely in place.
*The slot has a foolproof design. Please insert the SSD in the direction corresponding to the pins on the solid state drive and the slot. Do not insert it forcibly to avoid damage to the product.
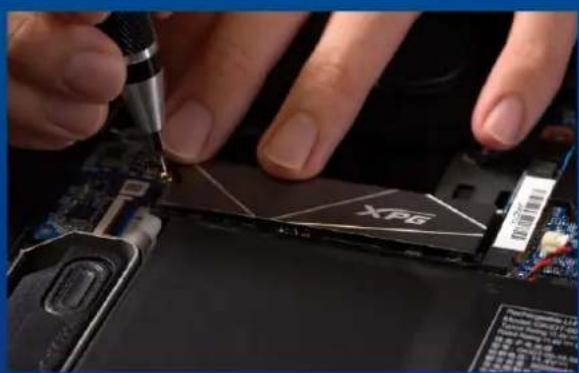
natural_image
Close-up of hands using a tool to repair a device on a circuit board (no visible text or symbols)4. FASTEN THE SCREWS TO SECURE THE SSD
Use your small Phillips screwdriver to secure the SSD into place.
*Do not overtighten the screws
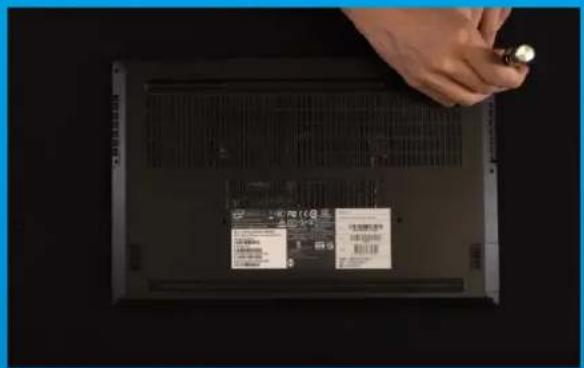
5. SECURE THE BACK PLATE INTO PLACE
*Do not overtighten the screws as it may cause damage

natural_image
Close-up of human legs and hands resting on a dark surface, with no visible text or symbols6. PLUG IN THE POWER CORD AND POWER ON THE PC TO COMPLETE INSTALLATION
EINE M.2-SSD AN EINEM LAPTOP-PC INSTALLIEREN

natural_image
Laptop keyboard with ADATA chip resting on a blue surface, no visible text or symbols on the main components.VOR DER INSTALLATION
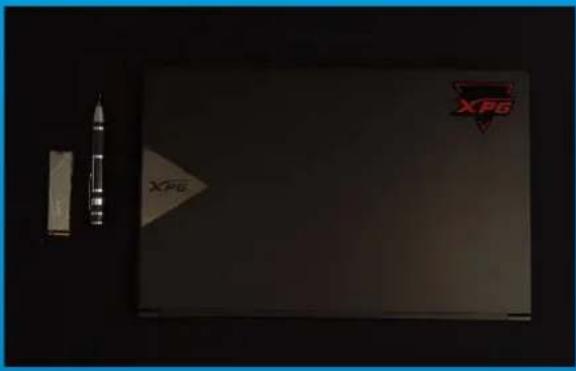
1. ALLES NÖTIGE ZUSAMMENTRAGEN
2. IHRE DATEN SICHERN
natural_image
Close-up of two hands resting on a dark surface, no visible text or symbols4. NETZKABEL UND AKKU TRENNEN
natural_image
Close-up of hands holding a flashlight next to a laptop case (no visible text or symbols)1. RÜCKPLATTE IHRES PCS ENTFERNEN
natural_image
Top-down view of a laptop's internal circuit board and drive casing (no visible text or symbols)2. M.2-PCIE-STECKPLATZ AUSFINDIG MACHEN UND SICHERSTELLEN, DASS SCHRAUBEN VORHANDEN SIND
natural_image
Close-up of a hand inserting a XPG into a computer motherboard (no visible text or symbols)natural_image
Close-up of hands using a tool to repair a device on a circuit board (no visible text or symbols)5. RÜCKPLATTE WIEDER EINSETZEN
natural_image
Close-up of human legs and hands resting on a dark surface, with no visible text or symbolsnatural_image
Laptop with visible keyboard and ADATA chip, no text or symbols on the main components交換前の準備

1. 準 備するもの
2. データの バックアップ
natural_image
Close-up of two hands resting on a dark surface, with a small triangular object labeled 'XPS' visible in the background (no other text or symbols)natural_image
Close-up of hands holding a flashlight next to a laptop case (no visible text or symbols)1. パソコンのバックパネルを取り外す
natural_image
Top-down view of a laptop's internal circuit board and drive bay (no visible text or symbols)natural_image
Close-up of a hand inserting a XPG into a computer motherboard (no visible text or symbols)3. M.2スロットにSSDを差し込む
natural_image
Close-up of hands using a tool to repair a device on a circuit board (no visible text or symbols)4. SSDをねじで固定する
natural_image
Close-up of human legs and hands resting on a dark surface, with no visible text or symbolsnatural_image
Laptop keyboard with ADATA chip placed on a blue surface, no visible text or symbols on the main components설치하기 전에

1. 필요한 도구 준비
2. 데이터 백업
natural_image
Close-up of human hands resting on a dark surface, no visible text or symbols4. 전원 코드와 배터리 분리
natural_image
Close-up of hands holding a flashlight next to a laptop case (no visible text or symbols)1. PC 뒤판 제거
natural_image
Laptop keyboard with visible circuit board and drive bays (no text or symbols)natural_image
Close-up of a hand inserting a XPG into a computer motherboard (no visible text or symbols)natural_image
Close-up of hands using a tool to adjust or install electronic components on a circuit board (no visible text or symbols)4. 나사를 조여서 SSD 고정
5. 뒤판 제자리에 고정
natural_image
Close-up of human legs and hands on a dark surface, no visible text or symbolsnatural_image
Laptop keyboard with ADATA chip resting on a blue surface, no visible text or symbols on the main components.ANTES DA INSTALAÇÃO

1. REÚNA AS COISAS QUE VOCÊ PRECISA
2. FAÇA BACKUP DE SEUS DADOS
natural_image
Close-up of two hands resting on a dark surface, with a small triangular object labeled 'XPS' visible in the background (no other text or symbols)natural_image
Close-up of hands holding a flashlight next to a laptop case (no visible text or symbols)1. REMOVA A PLACA TRASEIRA DO SEU PC
natural_image
Laptop keyboard with visible circuit board and drive bays (no text or symbols)2. LOCALIZE O SLOT M.2 PCIE E CONFIRME SE HÁ PARAFUSOS
natural_image
Close-up of a hand inserting a XPG into a computer motherboard (no visible text or symbols)3. ALINHE O SLOT M.2 E INSIRA A UNIDADE DE ESTADO SÓLIDO
natural_image
Close-up of hands using a tool to repair a device on a circuit board (no visible text or symbols)4. APERTE OS PARAFUSOS PARA PRENDER O SSD
5. PRENDA A PLACA TRASEIRA NO LUGAR
natural_image
Close-up of human legs and hands resting on a dark surface, with no visible text or symbols2. ЗАРЕЗЕРВИРУЙТЕ ДАННЫЕ
natural_image
Close-up of two hands resting on a dark surface, with a small triangular object labeled 'XPS' visible in the background (no other text or symbols)natural_image
Close-up of hands holding a flashlight next to a laptop case (no visible text or symbols)1. СНИМИТЕ ЗАДНЮЮ ПЛАСТИНУ ПК
natural_image
Laptop keyboard with visible circuit board and drive bays (no text or symbols)natural_image
Close-up of a hand inserting a XPG into a computer motherboard (no visible text or symbols)natural_image
Close-up of hands using a tool to repair a device on a circuit board (no visible text or symbols)5. ЗАКРЕПИТЕ ЗАДНЮЮ ПЛАСТИНУ НА МЕСТЕ
natural_image
Close-up of human legs and hands resting on a dark surface, with no visible text or symbolsnatural_image
Laptop keyboard with ADATA chip and a glowing GPU readout, no visible text or symbols on the hardware surface.ÎNAINTE DE INSTALARE

1. ADUNATI LUCRURILE DE CARE VETI AVEA NEVOIE
2. FACETI O COPIE DE REZERVĂ A DATELOR
natural_image
Close-up of hands resting on a dark surface, possibly a laptop or tablet device (no visible text or symbols)4. DECONECTATI CABLUL DE ALIMENTARE ȘI BATERIA
natural_image
Close-up of hands installing a device on a laptop back panel (no visible text or symbols)1. SCOATEȚI PLACA DIN SPATE A PC-ULUI
natural_image
Laptop interior view showing exposed circuit board and internal components (no visible text or symbols)2. LOCALIZATI FANTA M.2 PCIE ŞI CONFIRMAȚI CĂ EXISTĂ ȘURUBURI
natural_image
Close-up of a hand inserting a device into a computer motherboard with an XPG chip (no visible text or symbols)3. ALINIATI FANTA M.2 ŞI INTRODUCEȚI UNITATEA SOLID STATE
natural_image
Close-up of hands using a tool to adjust or install electronic components on a circuit board (no visible text or symbols)4. STRÂNGETI ŞURUBURILE PENTRU A FIXA SSD
5. FIXAREA PLĂCII DIN SPATE ÎN POZITIE
natural_image
Close-up of hands resting on a dark surface, possibly a laptop or tablet device (no visible text or symbols)6. CONECTATI CABLUL DE ALIMENTARE ȘI PORNITI PC-UL PENTRU A FINALIZA INSTALAREA
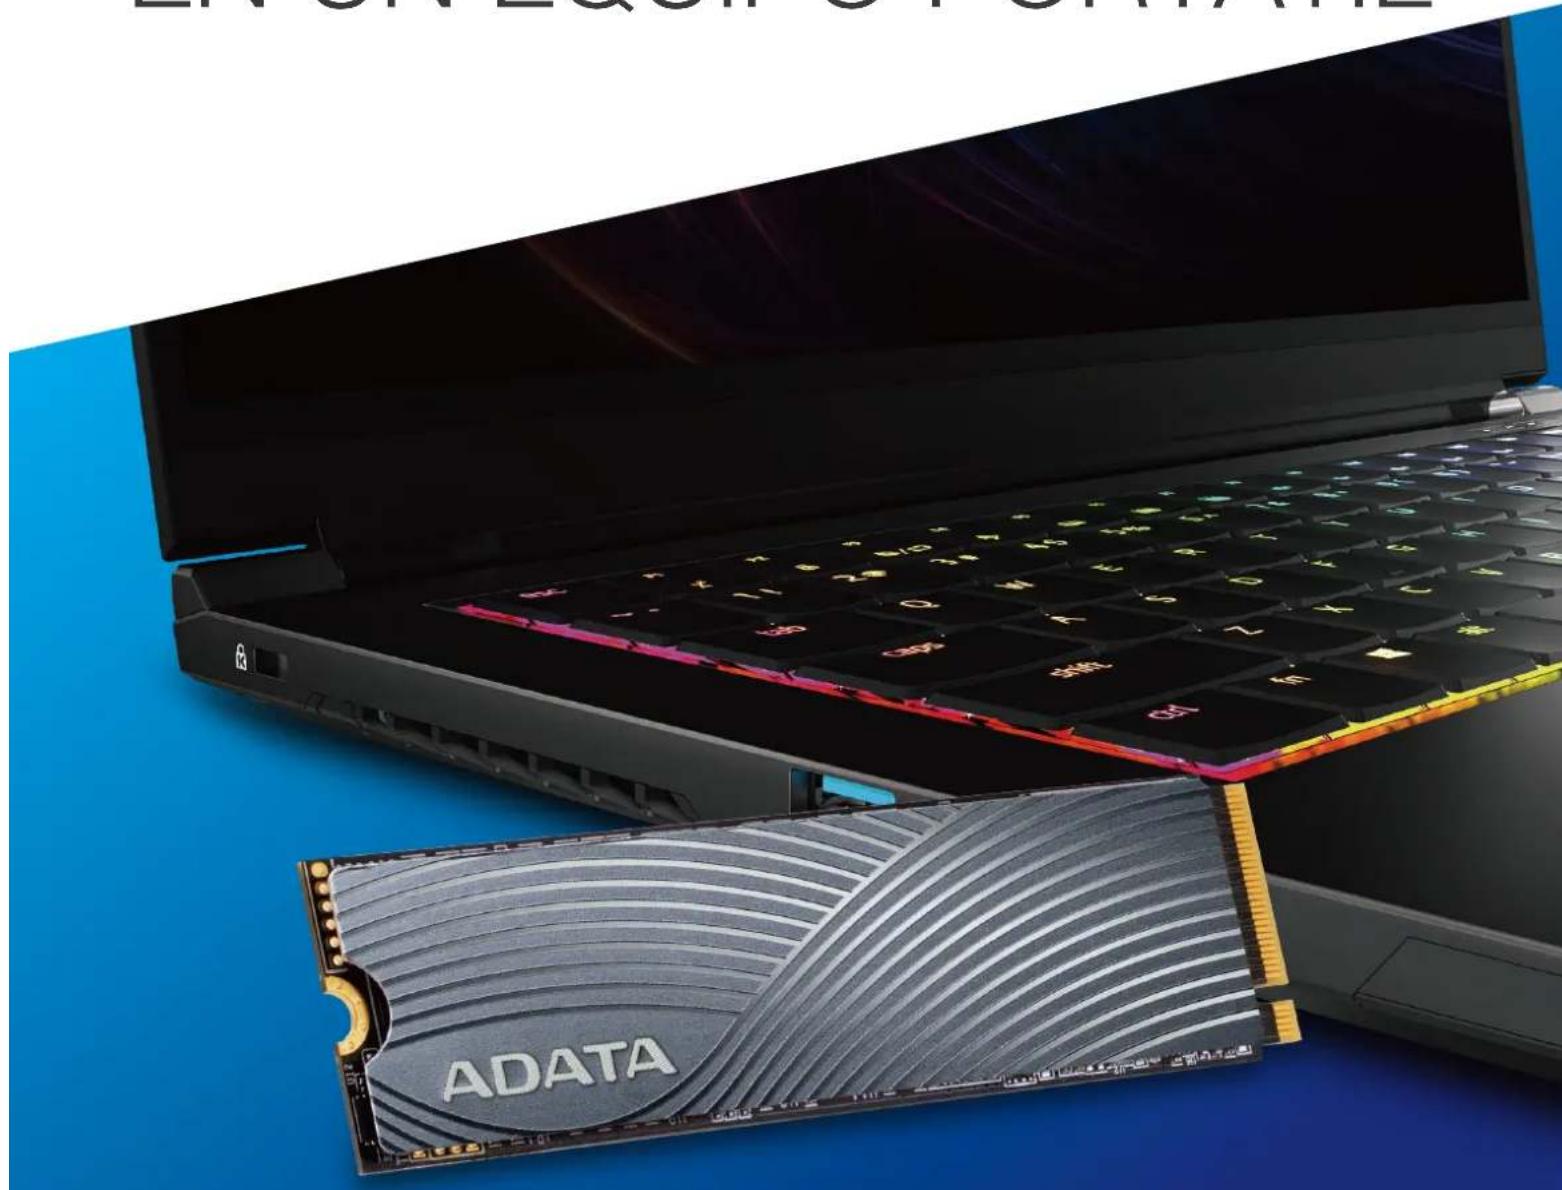
INSTALAR UNA UNIDAD DE ESTADO SÓLIDO M.2 EN UN EQUIPO PORTÁTIL
natural_image
Laptop keyboard with ADATA chip and a RAM module, no visible text or symbols on the main componentsnatural_image
Close-up of human hands resting on a dark surface, no visible text or symbolsnatural_image
Close-up of hands holding a flashlight next to a laptop case (no visible text or symbols)1. RETIRAR LA PLACA POSTERIOR DE SU PC
natural_image
Laptop keyboard with visible circuit board and drive bays (no text or symbols)2. LOCALIZAR LA RANURA PCIE M.2 Y CONFIRMAR QUE TIENE TORNILLOS
natural_image
Close-up of a hand inserting a XPG into a computer motherboard (no visible text or symbols)3. ALINEAR LA RANURA M.2 E INSERTAR LA UNIDAD DE ESTADO SÓLIDO
natural_image
Close-up of hands using a tool to repair a device on a circuit board (no visible text or symbols)5. ASEGURAR LA PLACA POSTERIOR EN SU LUGAR
natural_image
Close-up of human legs and hands resting on a dark surface, with no visible text or symbols



- ADATA®
- INDEX
- INSTALLING AN M.2 SSD ON A DESKTOP PC
- INSTALLING THE LEGEND 970 SSD ON A DESKTOP PC
- INSTALLING AN M.2 SSD ON A LAPTOP PC
- 如何在桌機安裝 M.2固態硬碟
- 更換前準備步驟
- 準備工具
- 備份資料
- 請確實關機
- 將主機機殼卸下
- 對準M.2插槽、插上固態硬碟
- 拴上螺絲固態硬碟
- 重新裝上機殼
- 更换前准备步骤
- 准备工具
- 将机箱侧板卸下
- 对准M.2插槽、插上固态硬盘
- 4.拧上螺丝以固定固态硬盘
- 重新装上机箱侧板
- BEFORE INSTALLATION
- GATHER THE THINGS YOU'LL NEED
- SWITCH OFF THE POWER SWITCH AND UNPLUG POWER CORD
- INSTALLATION
- REMOVE THE PC CASE
- LOCATE THE M.2 PCIE SLOT AND CONFIRM THERE ARE SCREWS
- ALIGN THE M.2 SLOT AND INSERT THE SOLID STATE DRIVE
- FASTEN THE SCREWS TO SECURE THE SSD
- RESEMBLE THE CASE
- PLUG IN THE POWER CORD AND POWER ON THE PC TO COMPLETE INSTALLATION
- EINE M.2-SSD AN EINEM DESKTOP-PC INSTALLIEREN
- VOR DER INSTALLATION
- ALLES NÖTIGE ZUSAMMENTRAGEN
- IHRE DATEN SICHERN
- PC-GEHÄUSE ENTFERNEN
- M.2-PCIE-STECKPLATZ AUSFINDIG MACHEN UND SICHERSTELLEN, DASS SCHRAUBEN VORHANDEN SIND
- 交換前の準備
- 準 備するもの
- パソコン本体のケースを取り外す
- M.2スロットにSSDを差し込む
- SSDをねじで固定する
- ケースを元の位置に取り付ける
- 설치하기 전에
- 필요한 도구 준비
- PC 케이스 제거
- 나사를 조여서 SSD 고정
- 케이스 재조립
- ANTES DA INSTALAÇÃO
- REÚNA AS COISAS QUE VOCÊ PRECISA
- FAÇA BACKUP DE SEUS DADOS
- REMOVA O GABINETE DO PC
- LOCALIZE O SLOT M.2 PCIE E CONFIRME SE HÁ PARAFUSOS
- ALINHE O SLOT M.2 E INSIRA A UNIDADE DE ESTADO SÓLIDO
- APERTE OS PARAFUSOS PARA PRENDER O SSD
- ЗАРЕЗЕРВИРУЙТЕ ДАННЫЕ
- СНИМИТЕ ЗАДНЮЮ ПЛАСТИНУ ПК
- ЗАКРЕПИТЕ ЗАДНЮЮ ПЛАСТИНУ НА МЕСТЕ
- ÎNAINTE DE INSTALARE
- ADUNATI LUCRURILE DE CARE VETI AVEA NEVOIE
- OPRITI PC-UL
- DECONECTATI ALIMENTAREA CU ENERGIE ȘI CABLUL DE ALIMENTARE
- SCOATETI CARCASA PC-ULUI
- LOCALIZATI FANTA M.2 PCIE ŞI CONFIRMAȚI CĂ EXISTĂ ȘURUBURI
- ALINIATI FANTA M.2 ŞI INTRODUCEȚI UNITATEA SOLID STATE
- STRÂNGETI ŞURUBURILE PENTRU A FIXA SSD
- REASAMBLATI CARCASA
- CONECTATI CABLUL DE ALIMENTARE ȘI PORNITI PC-UL PENTRU A FINALIZA INSTALAREA
- INSTALAR UNA UNIDAD DE
- ESTADO SÓLIDO M.2 EN
- UN EQUIPO DE
- SOBREMESA
- REUNIR LOS ELEMENTOS QUE NECESITARÁ
- QUITAR LA CARCASA DEL EQUIPO
- LOCALIZAR LA RANURA PCIE M.2 Y CONFIRMAR QUE TIENE TORNILLOS
- ALINEAR LA RANURA M.2 E INSERTAR LA UNIDAD DE ESTADO SÓLIDO
- VOLVER A MONTAR LA CARCASA
- 安裝步驟
- INSTALLATION STEPS
- 如何在筆電安裝 M.2固態硬碟
- 將電源線及電池拔除
- 將主機背板卸下
- 拴上螺絲以固定固態硬碟
- 重新盖上背板
- 备份数据
- 将电源线及电池拔除
- 将电脑背板卸下
- 拴上螺丝以固定固态硬盘
- UNPLUG POWER CORD AND BATTERY
- REMOVE YOUR PC'S BACK PLATE
- SECURE THE BACK PLATE INTO PLACE
- EINE M.2-SSD AN EINEM LAPTOP-PC INSTALLIEREN
- NETZKABEL UND AKKU TRENNEN
- RÜCKPLATTE IHRES PCS ENTFERNEN
- RÜCKPLATTE WIEDER EINSETZEN
- データの バックアップ
- パソコンのバックパネルを取り外す
- 데이터 백업
- 전원 코드와 배터리 분리
- PC 뒤판 제거
- 뒤판 제자리에 고정
- REMOVA A PLACA TRASEIRA DO SEU PC
- PRENDA A PLACA TRASEIRA NO LUGAR
- FACETI O COPIE DE REZERVĂ A DATELOR
- DECONECTATI CABLUL DE ALIMENTARE ȘI BATERIA
- SCOATEȚI PLACA DIN SPATE A PC-ULUI
- FIXAREA PLĂCII DIN SPATE ÎN POZITIE
- INSTALAR UNA UNIDAD DE ESTADO SÓLIDO M.2 EN UN EQUIPO PORTÁTIL
- RETIRAR LA PLACA POSTERIOR DE SU PC
- ASEGURAR LA PLACA POSTERIOR EN SU LUGAR
Brand : ADATA
Model : LEGEND 970
Category : SSD