
32E625BHS - TV TESLA - Free user manual and instructions
Find the device manual for free 32E625BHS TESLA in PDF.


| Product Type | LED Television |
| Screen Size | 32 inches (32") |
| Display Resolution | 1366 x 768 (HD Ready) |
| Power Supply | AC 100-240V, 50/60Hz |
| Power Consumption (Typical) | Approx. 50W |
| Weight (Approx.) | 4 kg (with stand) |
| Dimensions (W x H x D) without stand | 730 x 430 x 80 mm |
| Smart TV Platform | Android TV with Google Assistant |
| Built-in Chromecast | Yes |
| Connectivity | 1 x HDMI, 1 x USB, 1 x AV (RCA), 1 x Antenna (75 ohm), 1 x Earphone, 1 x Optical SPDIF, 1 x RJ45 Ethernet |
| CI Slot | Yes (for pay TV CAM module) |
| Sound | Dolby Audio |
| Remote Control | Bluetooth remote with voice, Netflix, YouTube, Spotify keys |
| PVR Recording | Yes via USB |
| Parental Controls | Yes (PIN protected) |
| VESA Mount | M6 screws (28-70 inch models) |
| Energy Efficiency Class | A+ (estimated) |
| Operating Temperature | 0°C to 35°C |
| Max Altitude | 2000 m |
Frequently Asked Questions - 32E625BHS TESLA
User questions about 32E625BHS TESLA
0 question about this device. Answer the ones you know or ask your own.
Ask a new question about this device
Download the instructions for your TV in PDF format for free! Find your manual 32E625BHS - TESLA and take your electronic device back in hand. On this page are published all the documents necessary for the use of your device. 32E625BHS by TESLA.
USER MANUAL 32E625BHS TESLA
Please read these instructions before operating your set and retain them for future reference.
BIH/MNE
UPUTSTVO ZA UPOTREBU
Prije upotrebe uredaja pročitati ova uputstva i zadržati ih radi kasnijih referenci.
BGR
 | The exclamation point within an equilateral triangle is intended to alert the user to the presence of important operating in the literature accompanying the appliance. |
 | WarningThe lightning flash with arrowhead symbol within an equilateral triangle,is intended to alert the user to the presence of uninsulated dangerous voltage within the products enclosure that may be of sufficient magnitude to constitute a risk of electric shock to persons. |
CAUTION
RISK OF ELECTRIC SHOCK DO NOT OPEN
High voltages are used in the operation of this product. to reduce the risk of electric shock, do not remove cover of the cabinet, refer servicing to qualified service personal
If the TV any changes or coarse adjustment, electric shocks to be hurt, do not attempt to open a machine-maintenance, customer contact centres needed overhaul.
IMPORTANT SAFETY PRECAUTIONS
- Read these instructions. Keep these instructions. Heed all warnings. Follow all instructions.
- Do not use this apparatus near water. Clean only with dry cloth.
- Do not block any ventilation openings. Install in accordance with the manufacturer's instructions.
- Do not install near any heat sources such as radiators, heat registers, stoves, or other apparatus (including amplifiers) that produce heat.
- Do not defeat the safety purpose of the polarized or grounding-type plug. A polarized plug has two blades with one wider than the other. A grounding type plug has two blades and a third grounding prong. The wide blade or the third prong are provided for your safety, If the provided plug does not fit into your outlet, consult an electrician for replacement of the obsolete outlet.
- Protect the power cord from being walked on or pinched particularly at Plugs, convenience receptacles, and the point where they exit from the apparatus.
- Only use attachments /accessories specified by the manufacturer.
- Use only with the cart, stand, tripod, bracket, or table specified by the manufacturer, or sold with the apparatus. When a cart is used caution when moving the cart/apparatus combination to avoid injury tip-over.
- Unplug this apparatus during lightning storms or when unused for long periods of time.

Caution:
- To reduce the risk of fire or electric shock, do not expose this apparatus to rain or moisture.
- The mains plug is used as disconnect device, the disconnect device shall remain readily operable.
- The socket-out shall be installed near the equipment and shall be easily accessible.
- This product should never be placed in a built-in installation such as a bookcase or rack unless proper ventilation is provided or the manufacture's instructions have been adhered to.
- The apparatus shall not be exposed to dripping or splashing and that no objects filled with liquid, such as vases, shall be placed on the apparatus.
- Do not place any sources of danger on the apparatus (e.g. liquid filled objects, lighted candles).
- Wall or Ceiling Mounting -The appliance should be mounted to a wall or ceiling only as recommended by the manufacturer.
- Never place the TV, remote control or batteries near naked flames or other heat sources, including direct sunlight. To prevent the spread of fire, keep candles or other flames away from the TV, remote control and batteries at all limes.
- The USB terminal should be loaded with 0.5A under normal operation. These servicing instructions are for use by qualified service personnel only. To reduce the risk of electric shock do not perform any servicing other than that contained in the operating instructions, unless you are qualified to do so.
- The battery shall not be exposed to excessive heat such as sunshine, fire or the like.
- This equipment is a Class II or double insulated electrical appliance. II has been designed in such a way that ii does not require a safety connection to electrical earth
- The maximum using environment temperature is 35 degrees. The Maximum using altitude is 2000 meters
TV BUTTONS AND TERMINAL INTERFACE
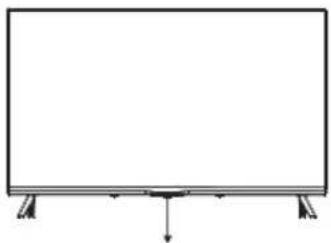
TV Buttons
Note: The following is only functional schematic, And the actual position and arrangement of different models may be different.
One key: Seven keys:
natural_image
Simple line drawing of a flat-screen monitor with stand supports at both ends (no text or symbols)Press this button in standby mode to turn on / off the TV.
| ⊕ | Turn ON/OFF Power |
| SOURCE/ — | External Signal Input Selection |
| MENU/OK | Display Main MENU And Confirm MENU Item Selection |
| CH+/- | Selecting Channel |
| VOL+/- | Adjusting Volume |
Terminal Interface
Note: The following is only functional schematic, And the actual position and arrangement of different models may be different.
 | AV inputExternal AV Signal Input |
 | CI SLOTThe card reader input Cl(common interface)this requires CAM (conditionalaccess module) used for pay tv. |
 | HDMI inputDigital signal input from HDMI video connector. |
 | ANT 75Connect the antennal/cadle tv input (75/VHF/UHF) |
 | EARPHONE outputWhen earphones are plugged in, speakers are disabled |
 | USB inputConnect a USB device here to play its media files or to recordprograms via the PVR function. |
 | OPTICAL outputConnect the SPDIF receiver. |
 | RJ45Connect the Internet. |
TV INSTALL AND CONNECT
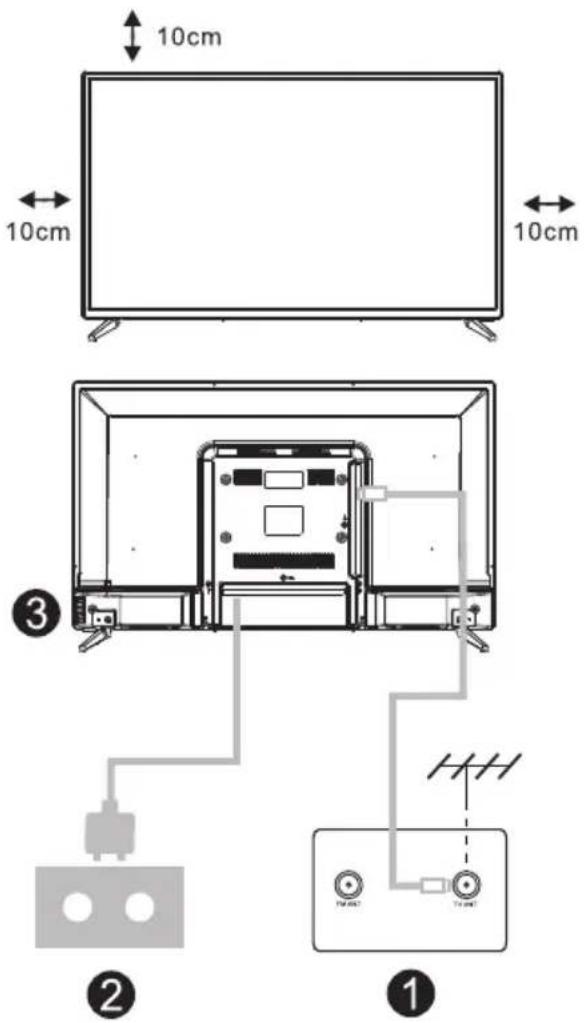
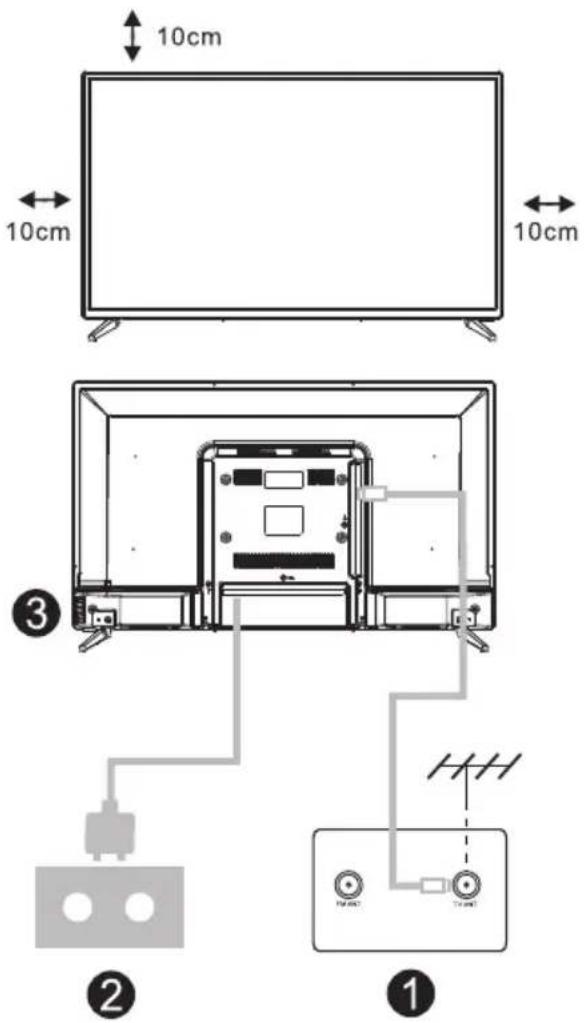
Set your TV
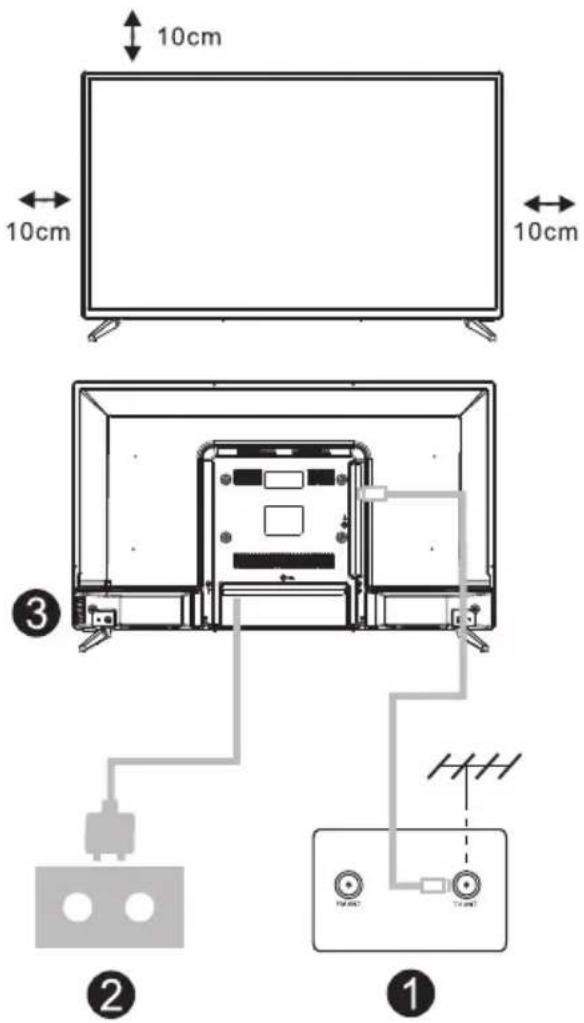
To put your TV on a firm place which can bear the weight of the TV.
To avoid danger, please don't positions the TV near water or heating place (such as light, candle, heating machine), do not block the ventilation at the back of TV.
Connect antenna and power
- Connect the antenna cable to the antenna socket on the back of the TV.
- To plug the power cord of TV (AC 100-240V-50/60Hz).
Turn on TV
- Connect the power supply, enter the standby mode (red light), press the power button of the TV or the power button on the remote control to turn on the TV
Note:
Picture for reference purposes only.
TV STAND INSTALLATION INSTRUCTIONS
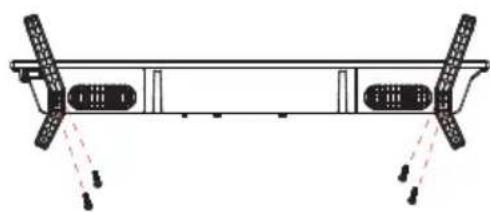
- Open the carton and remove the TV and scattered accessories and base (some models without base).
- In order to avoid damaging the TV, please cover it with soft mattress, put it on the table, face down on the soft material and screw the neck of the base to the TV.
- Screw the base and connected to the TV.
- The installation is complete.
Note:
Picture for reference purposes only.
natural_image
Technical line drawing of a mechanical support structure with no visible text or symbols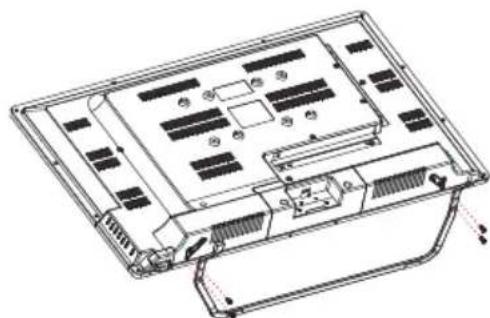
natural_image
Technical line drawing of an electronic device chassis with internal components (no text or symbols)REMOTE CONTROL
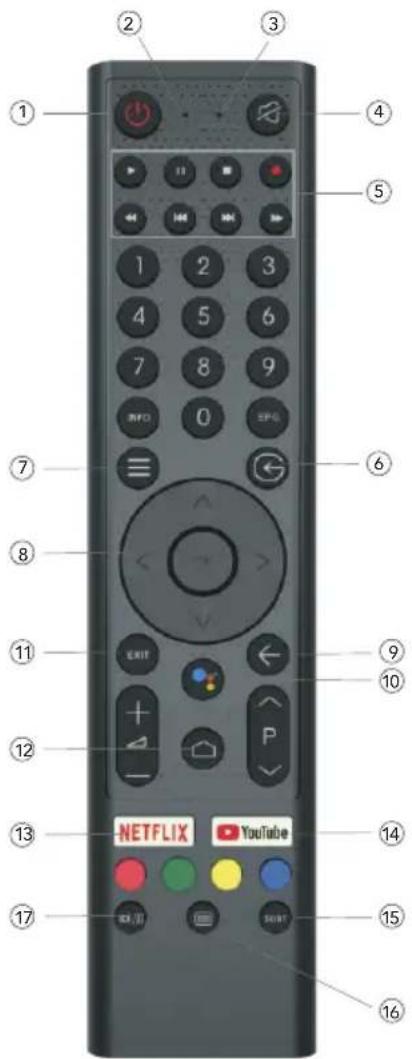
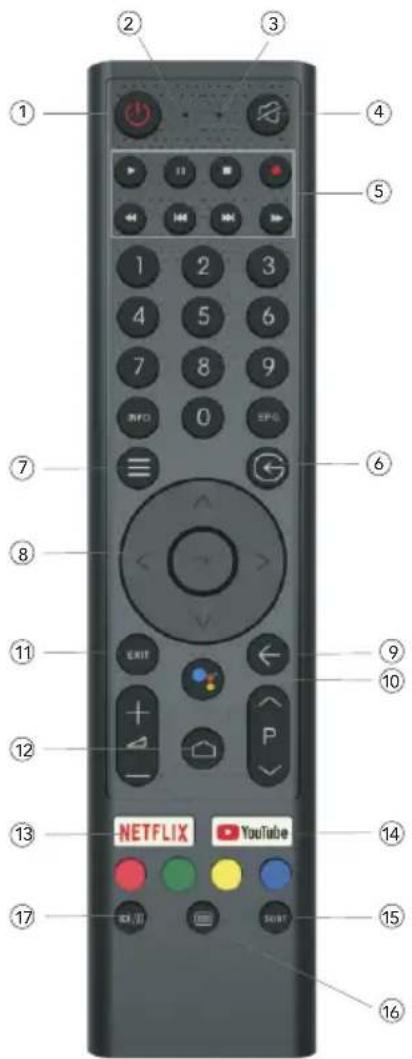
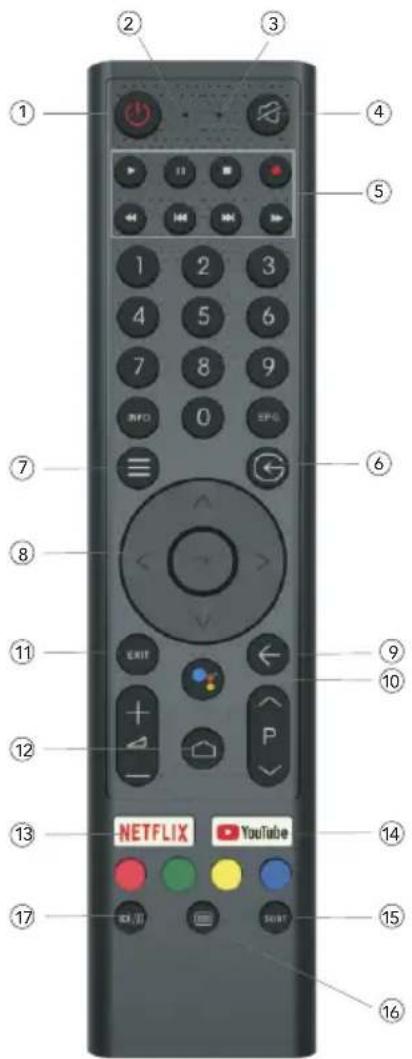
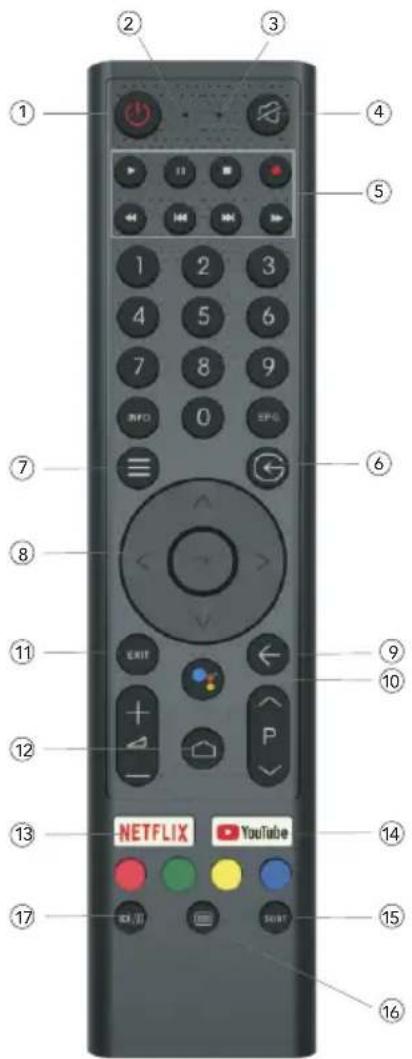
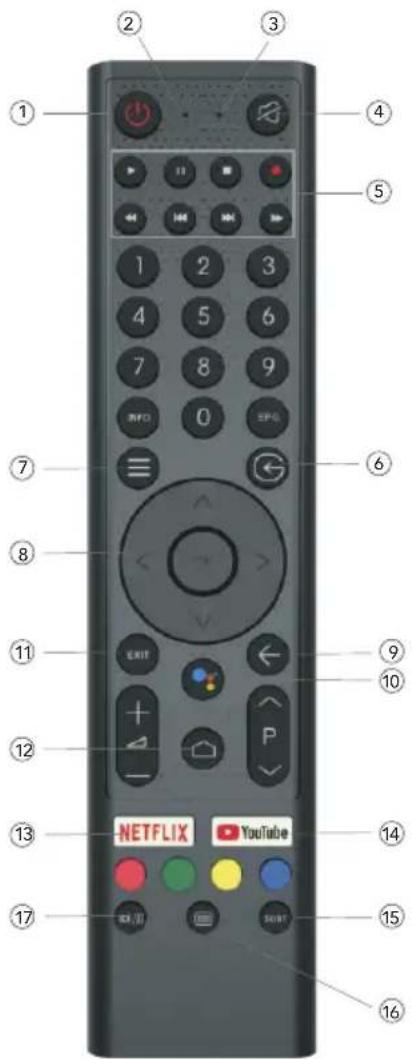
-
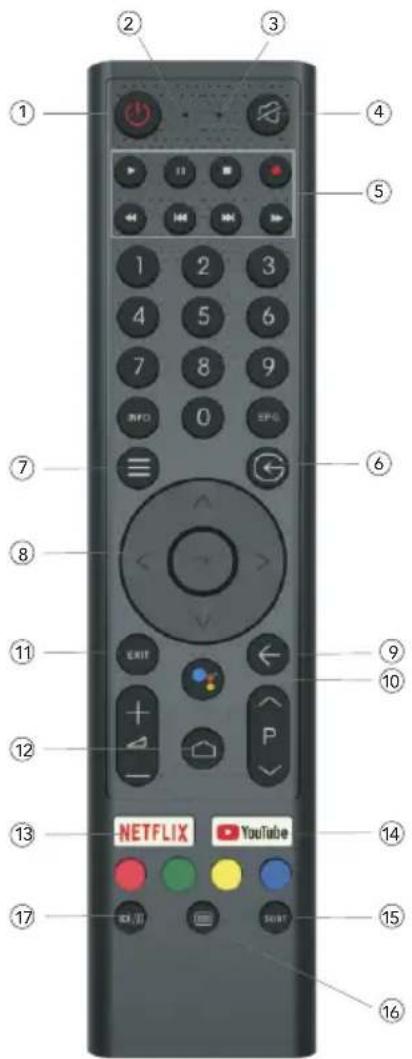
Switches the TV between on and standby mode
-
Indicator light
-
Microphone hole
-
Mute or restore TV sound
-
Media control Fast forward/back Play the last/next program Play/Pause/Stop/Record program
-
Inputs Display/Select signal source options
-
Menu Displays the OSD (On Screen Display) menu
-
Navigation buttons Cursor UP/LEFT/RIGHT/DOWN
-
Back Press to move back through menus
-
Google Assistant
-
Exit Exit the OSD menu
-
HOME Displays the home screen.
-
NETFLIX Connects to NETFLIX for viewing on line TV shows and films (internet connection required).
-
YouTube Connects to YouTube (internet connection required).
-
SUBT
-
Teletext Turn on and off the teletext function. (DTV mode)
-
Audio Displays the Audio Language list and select an audio language or audio format if available (only applicable when the TV programme has this feature)
Disclaimer: Google Assistant is not available in certain languages and countries
INITIAL INSTALLATION
The first time you switch the TV on, the initial step screen appears which guides you through the initial process. Please according to the Text Tips to finish initial installation.
1.1 Language select
->Press ∧ / ∨ on remote control to select the language option, then click to confinn.
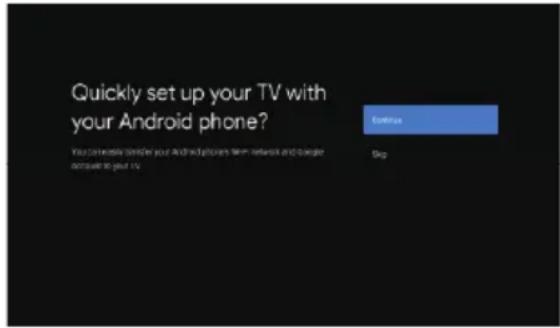
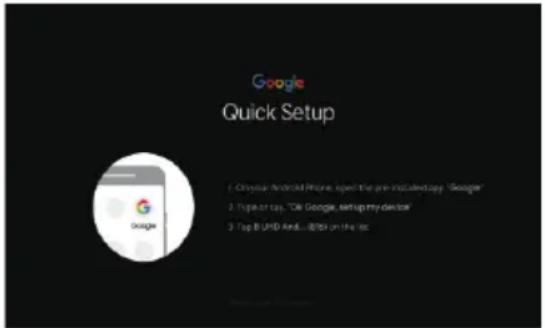
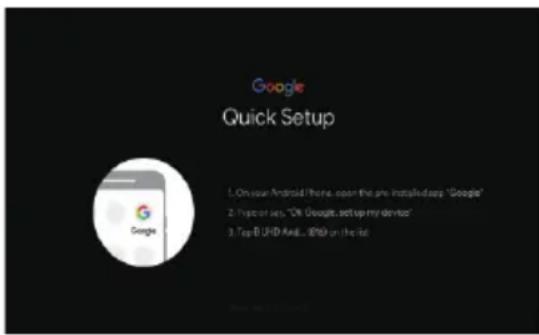
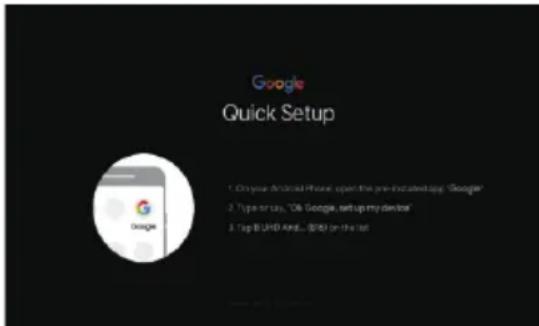
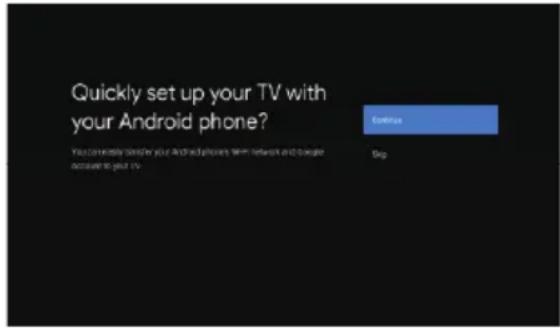
1.2 Quickly set up your TV with your Android phone? (Continue/skip)
Steps:
- On your Android Phone, open the Pre-installed app "Google".
- Type or say, "Ok Google, set up my device".
- Tap the model name on the list.
1.3 Configure the network
->Select wired or wireless to connect to internet.
->If you select skip, it could be performed in homepage or settings menu.
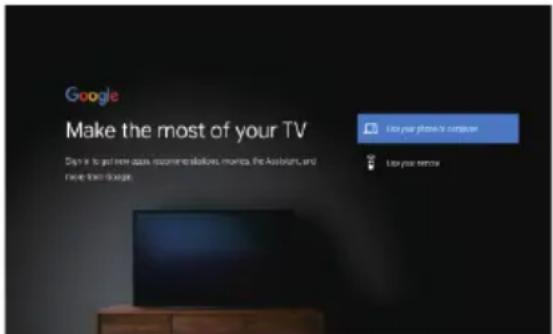
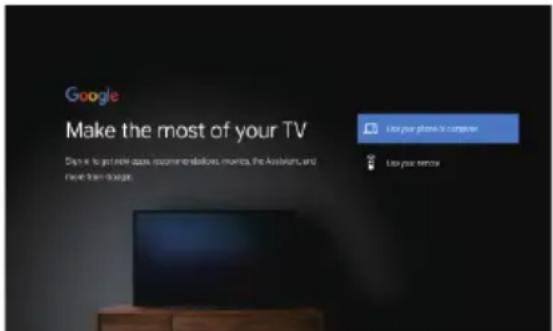
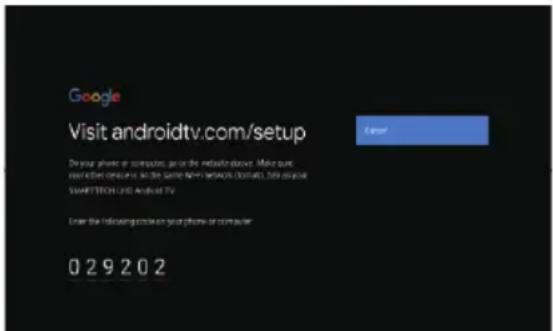
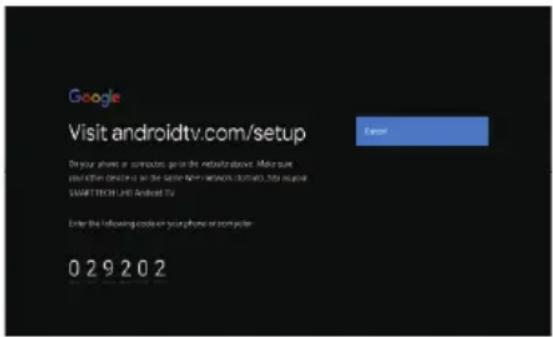
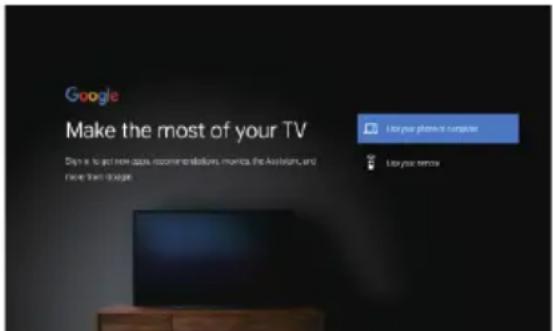
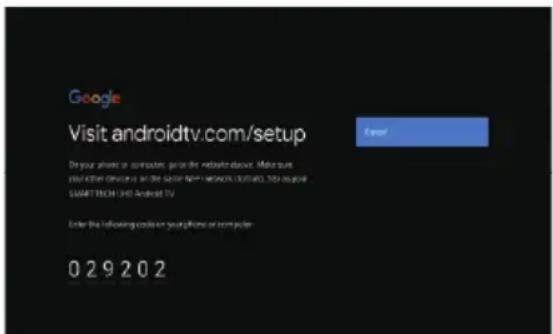
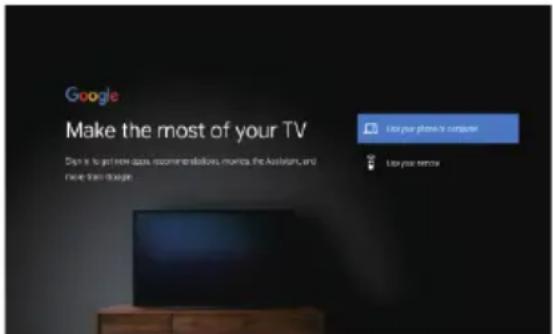
1.4 Google Account Sign in
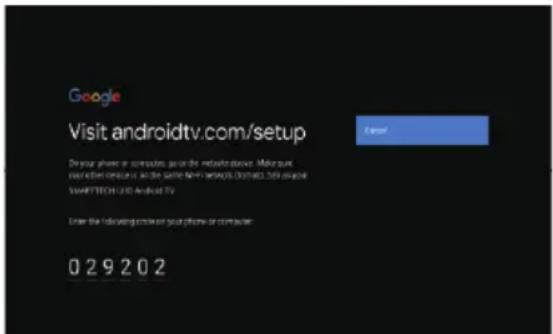
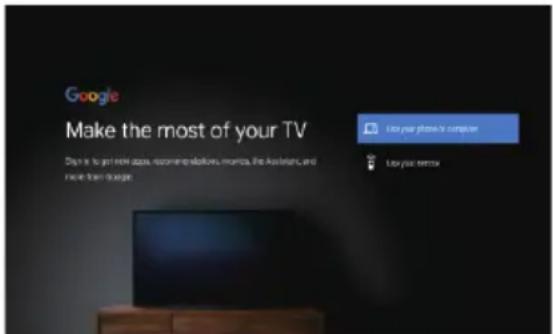
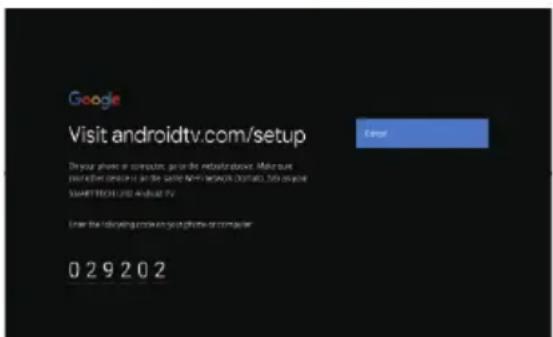
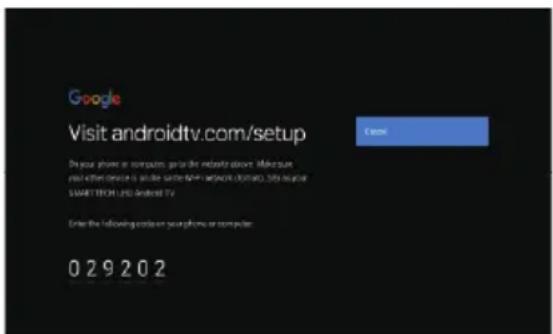
Sign in to get new apps, recommendations, movies, the Assistant, and more from Google. Two ways to login Google account:
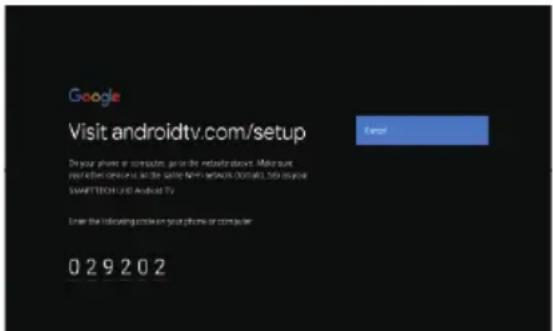
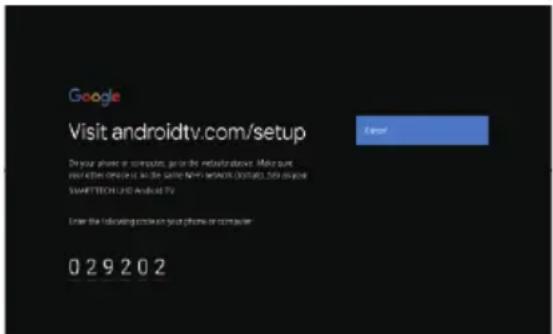
->Use your phone or computer:
-
Visit androidtv.com/setup on your phone or computer, Make sure your other device is on the same Wi-Fi network as your Android TV ^™ .
-
Enter the display code on your phone or computer.
->Use your remote:
Use the remote to enter your Google account and password to sign in to Google account.
1.5 Google setting
In these steps you will setup the Terms of Service, Location, Help improve Android, Google Assistant and additional Google functions.
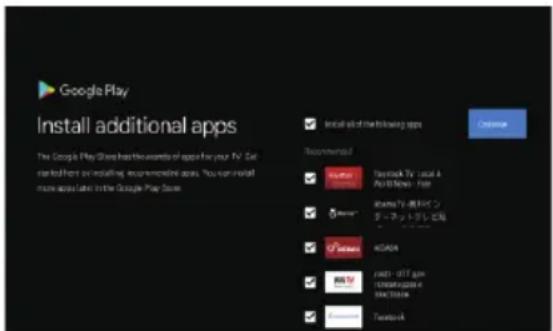
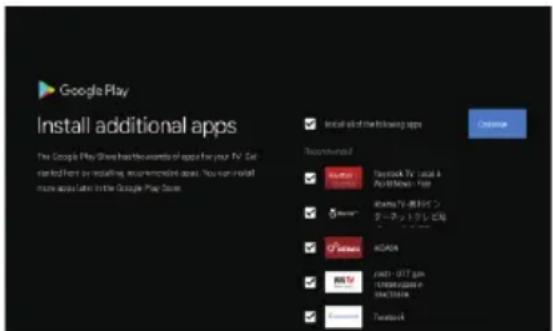
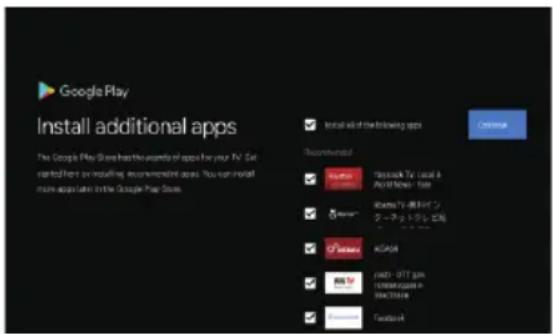
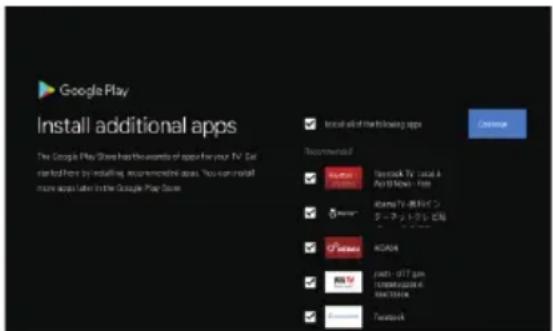
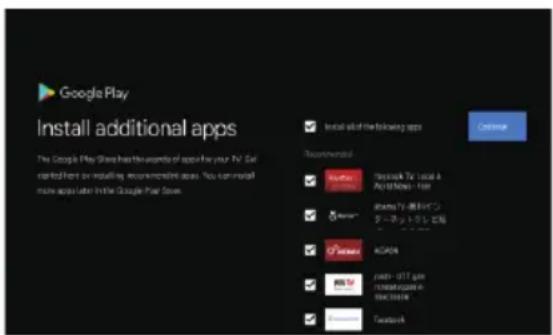
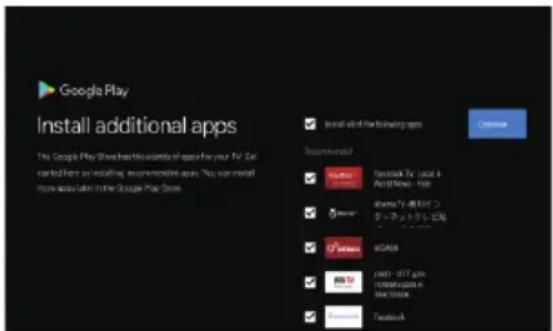
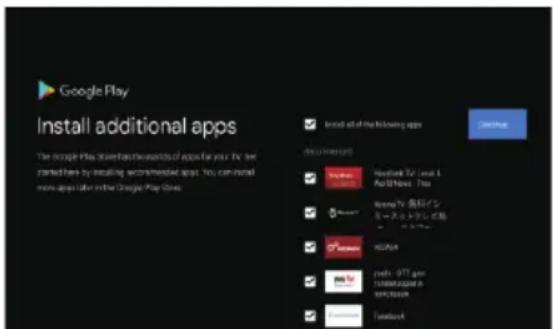
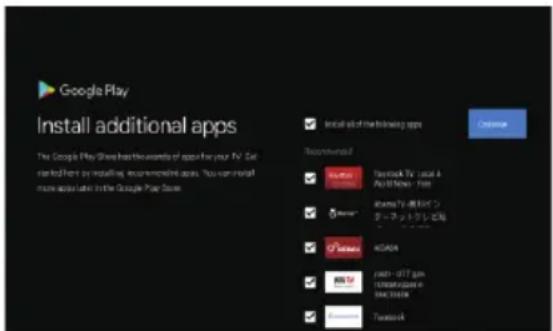
1.6 Play Auto Installs
Select install or un-install the recommended apps and Google apps by using this process.
->Press "Continue" to the next setting page.
1.7 Pairing Bluetooth Remote
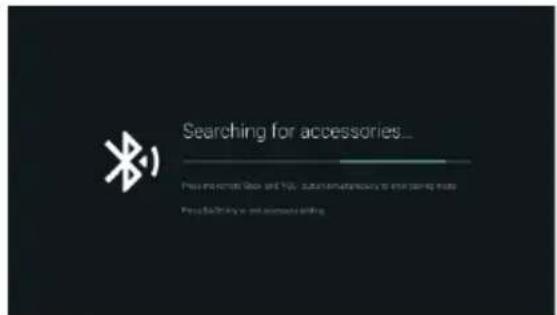
-> Press 'BACK' and 'VOL- -imultaneously on remote control to enter the Bluetooth pairing mode. The Indicator light on remote control will flash when enter the pairing mode.
-> Press【to】begin pairing.
-> Press ← on remote control to skip the pairing mode.
1.8 Country select
->Press ∧/ von remote control to select the country option, then click to confirm.
1.9 Set the TV password for Parental Controls, "0000" is invalid.
1.10 Select TV mode(Home/Retail)
Home mode is optimized for efficient energy usage for home use.
Retail mode is optimized to store demo with fixed settings.
1.11 Chromecast built-in™
Select On/Off to make Chromecast built-in available.
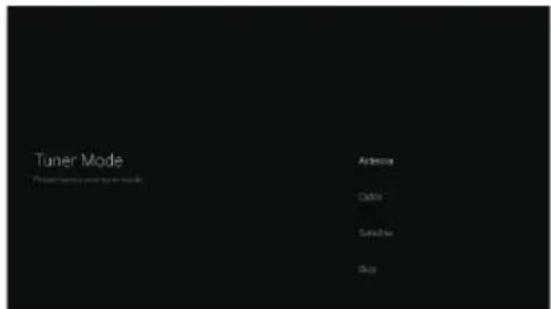
1.12 TV Channel Setting
->Select Antenna/Cable/Satellite to scan TV channel.
->If you select skip, the channel scan could be performed in menu.
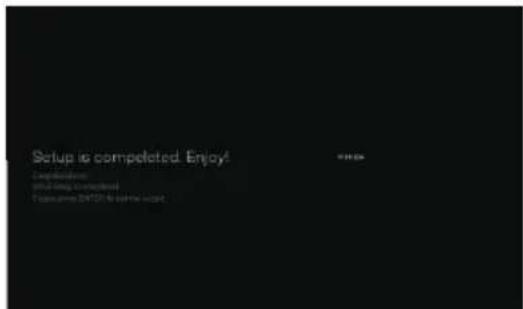
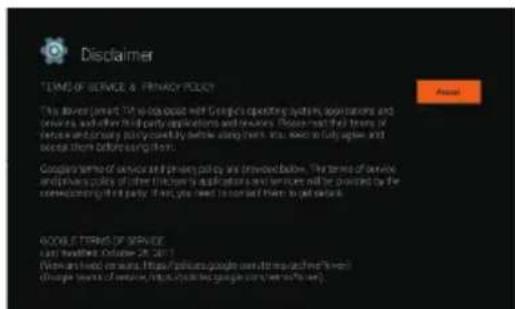
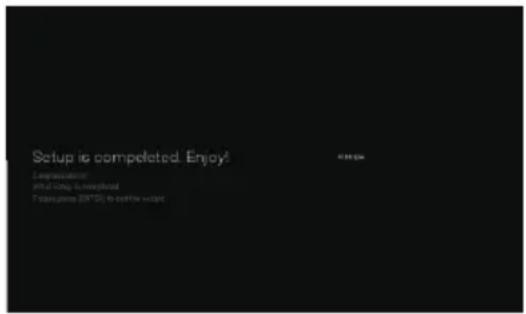
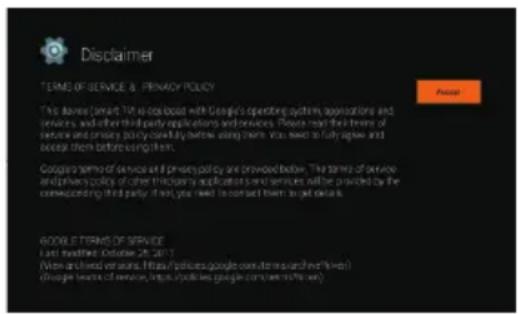
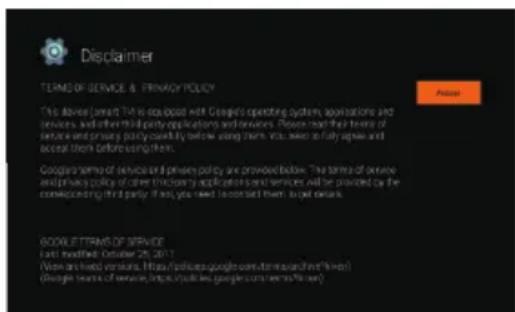
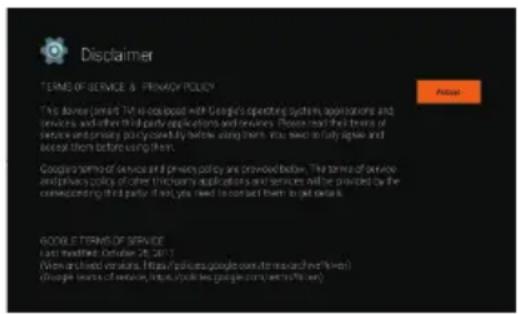
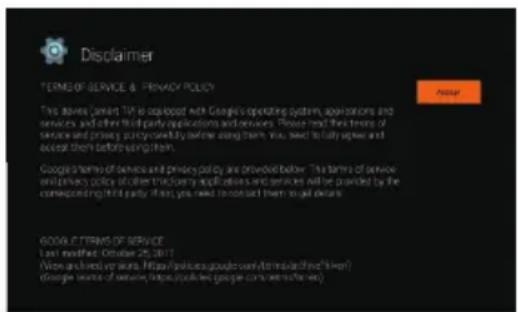
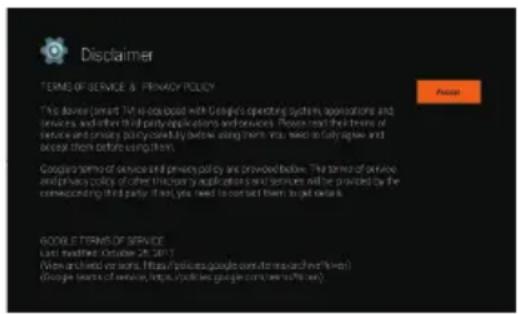
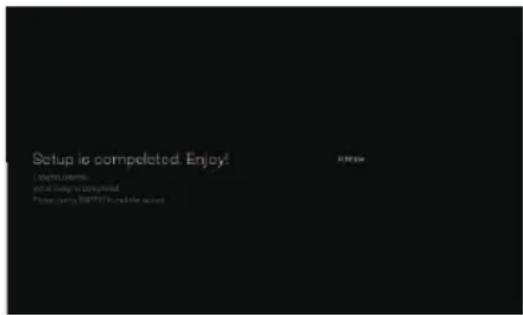
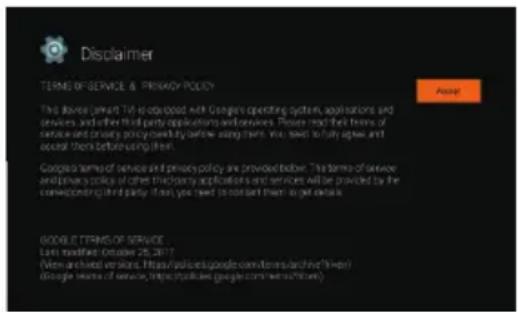
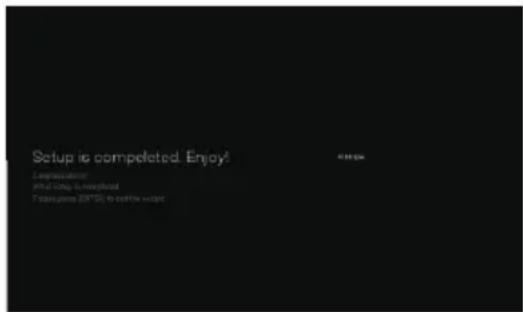
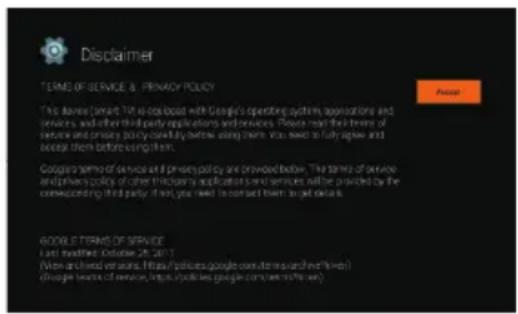
1.13 Setup completed and Disclaimer Terms
HOME
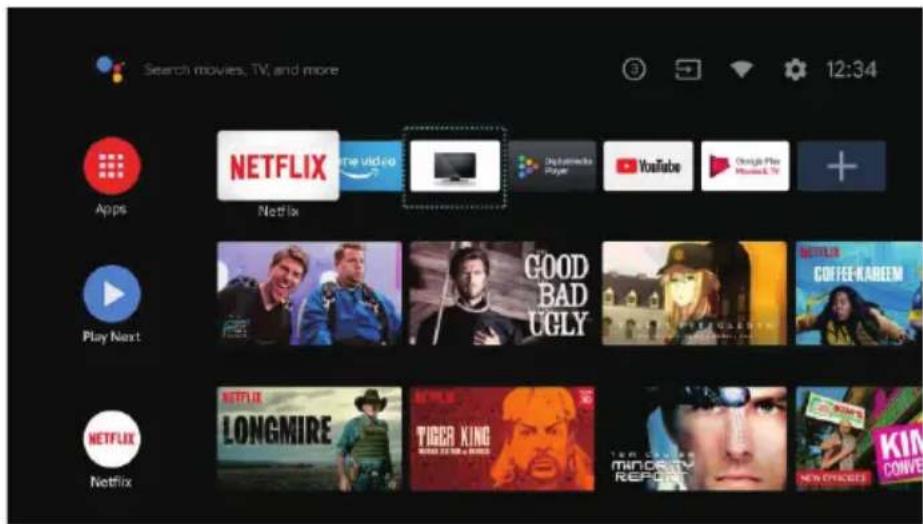
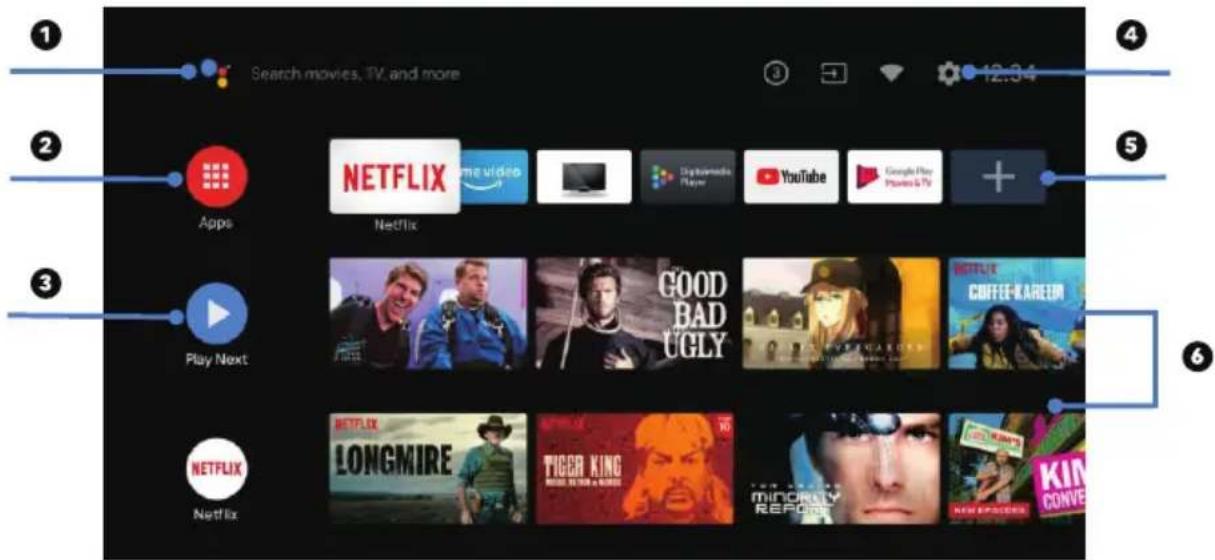
When initial setup is complete, the TV will enter the homepage by default, or press in remote control to display the homepage.
->Press ^/∨/<</> on remote control to switch between Google Assistant, Apps, Play Next, Netflix, YouTube, and more on the Homepage.
-> Press【to】enter.
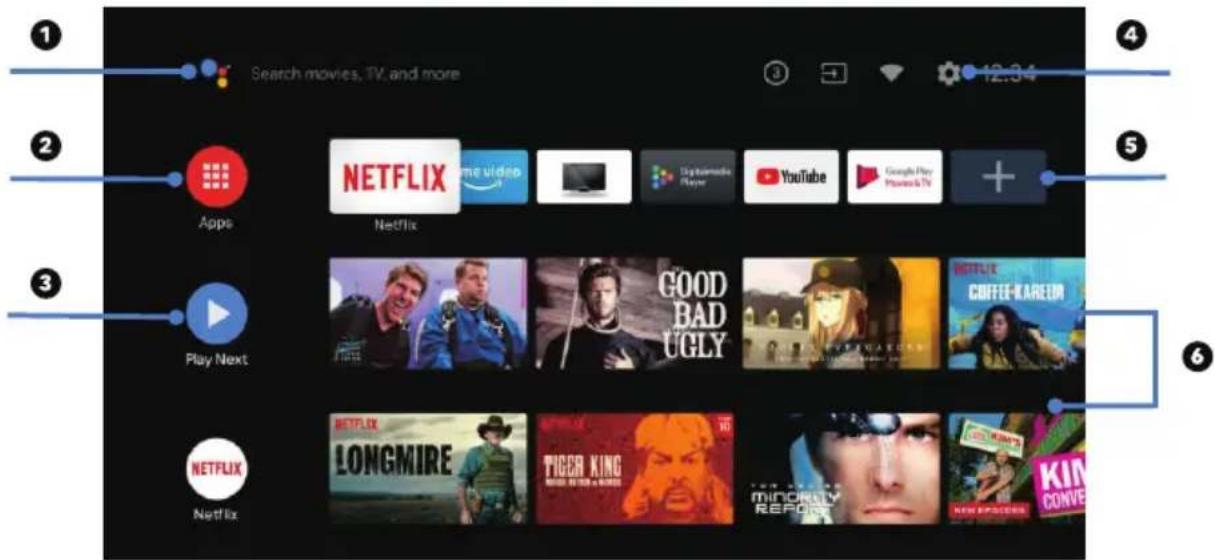
- Google Assistant
Use your voice to jump to shows, control devices, and more-with Google Assistant
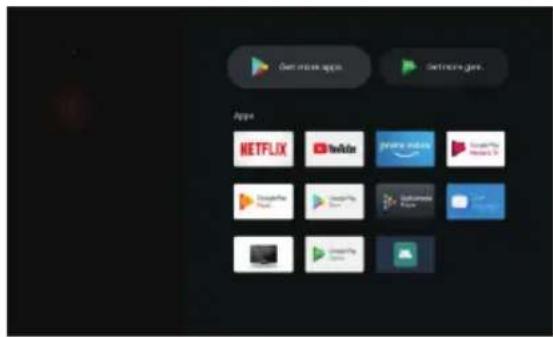
- Apps
List of downloaded and pre-loaded apps on your device
- Play Next
Based on your watch history and includes next episode in a series or unfinished movies
- Settings
Manage apps and TV controls, change preferences, sounds, and account
- Favorite apps
Quick access to frequently used apps
- Channels
For easy content discovery
SETTINGS
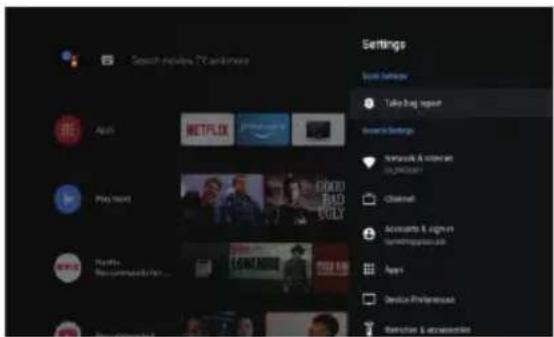
Allows to set various performance of your TV.
-> Press < / > on remote control to select
"Settings" which is in the upper right corner of the screen.
-> Press ✗ on remote control to select the option which you want to adjust in the Settings menu.
-> Press [to]enter.
3.1 Network&internet
Adjust all network setting and check connection if you have connection problems.
-> Press ∧/ ∨ on remote control to select
"Network&internet" in the settings menu.
-> Press ∧ on remote control to select:Wi-Fi/
Add new network/Scanning always available/Proxy settings/IP settings.
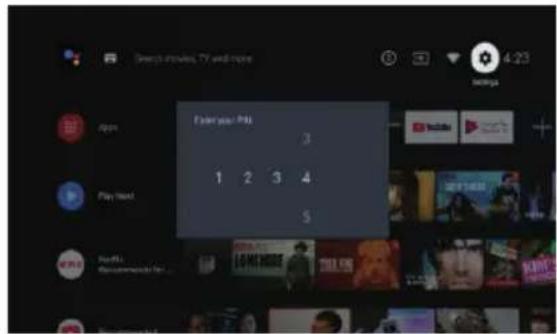
3.2 Channel
->Press ∧ / ∨ on remote control to select "Channel" menu.
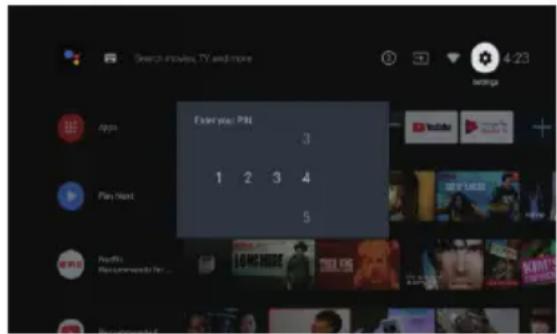
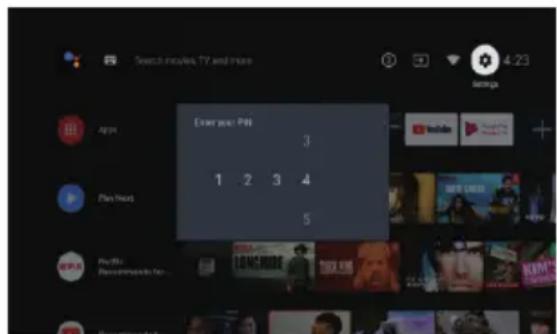
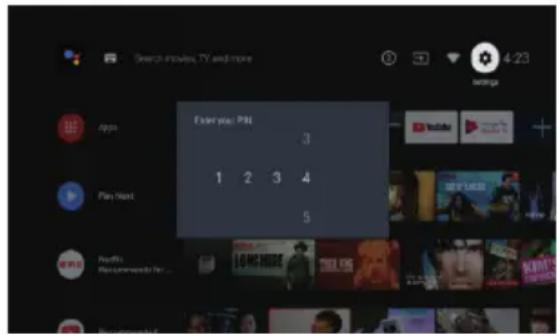
->Press【OK】to enter "Parental Controls", then click √ or use the number buttons on remote control to enter your PIN (Password for Parental Controls).
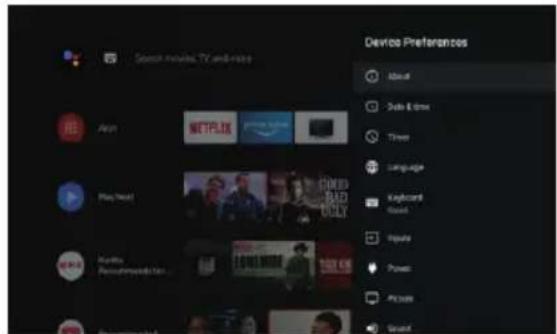
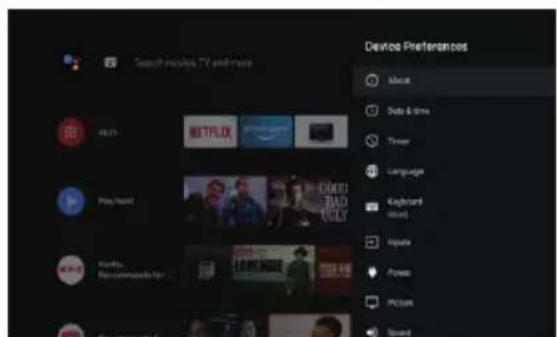
3.3 Device Preferences
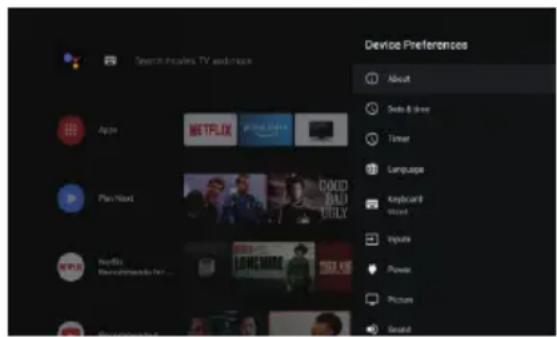
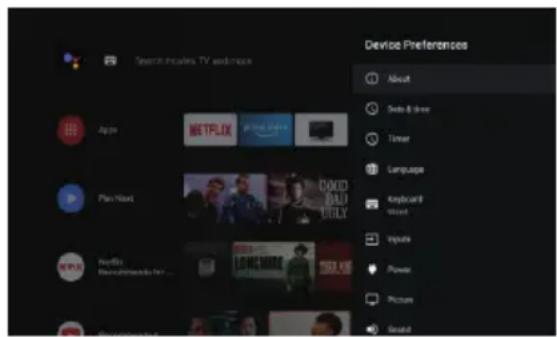
-> Press ∧/ ∨ on remote control to select "Device Preferences".
->Press ∧ on remote control to select the options of About, Date&time, Timer, Language, Inputs, Picture, Sound, Google Assistant, Reset,etc.
->Press【OK】to jump to the corresponding suboption.
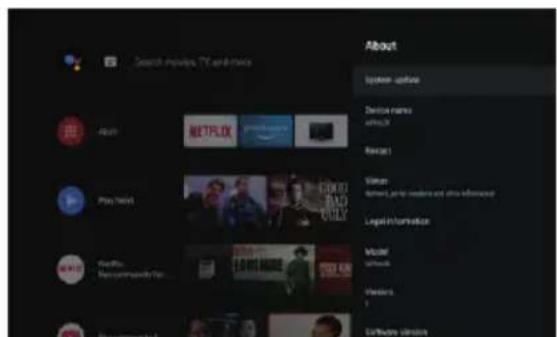
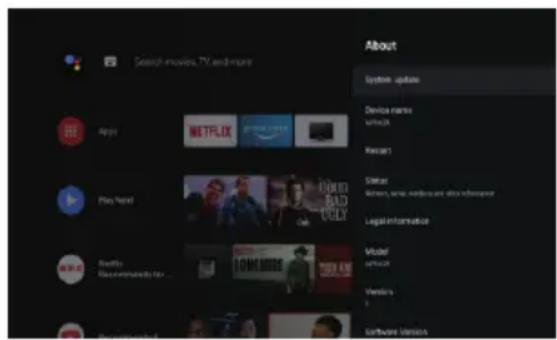
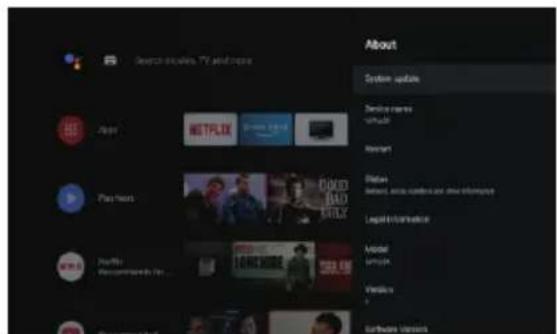
3.3.1 About
-> Press ∧/ ∨on remote control to select "About".
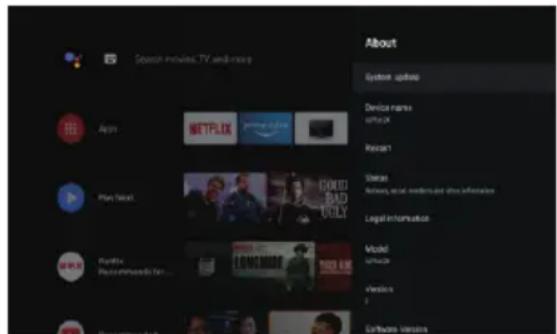
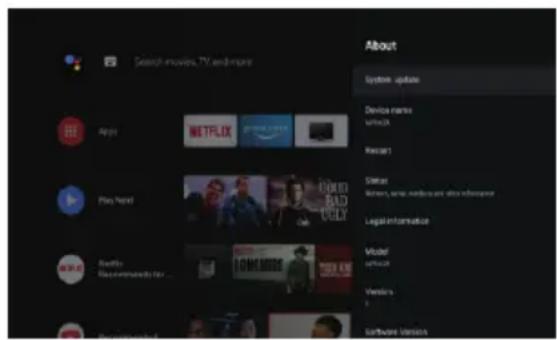
->Press ✗ on remote control to check additional information such as System update, Device name, Restart, Status, and more.
-> Press on remote control to return to the previous menu. Press on remote control to exit the menu.
3.3.2 Reset
If select reset, it will erase all data from your device's internal storage, including:your Google account, System and app data and settings, and downloaded apps.
-> Press ∧ / ∨ on remote control to select "Reset".
-> Press ∧ ∨n remote control to select "Cancel" or "Erase everything".
APP INSTALL/MOVE/UNINSTALL
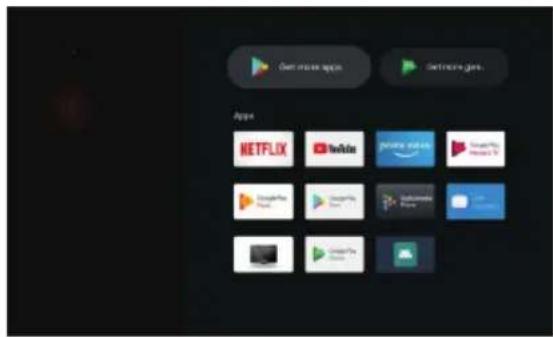
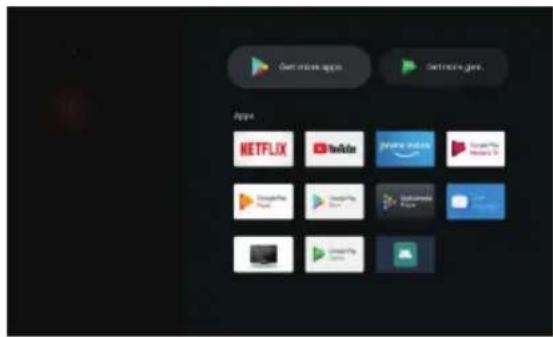
-> Press ∧ on remote control to select "Apps" on Homepage, then click【ok】enter.
-> Select "Get more apps" and input app name.
->Select "search" which is in the upper right corner of the page.
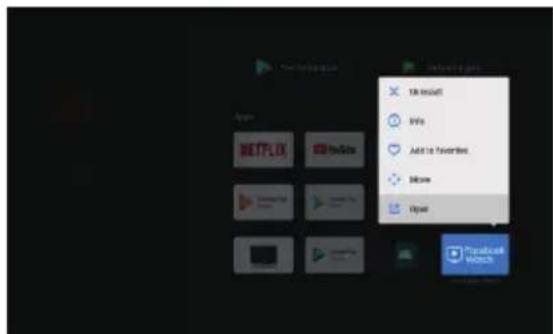
Example for "Facebook"
4.1 Install
-> Input "Facebook", find "Facebook" App will show in the list, then click 【OK】 to select it.
->Select "Install", when completed select to open or Uninstall.
4.2 Move
-> Select "Facebook", press and hold【OK】 remote control, then click ✗ on remote control to select "Move".
-> Press ∧/∨ K on remote control to move, then click to confirm.
4.3 Uninstall
-> Select "Facebook", press and hold [OK] remote control, then click / on remote control to select "Uninstall".
-> press [ok] to uninstall.
TV SOURCE SETTING
The way to enter TV source in Homepage:
-> Press © on remote control or Select "Live TV" on Homepage.
->Press ⊖ on remote control.
-> Press^on remote control to select "Channels" and select "New Channels Available" to enter.
TROUBLESHOOTING
| Problem Solution | |
| No power • Check if the AC cord | of TV is plugged in or not. If there's still no power, please disconnect the plug, and reconnect to the socket after 60 seconds. Turn the power back on. |
| Signal not received properly | • Double or phantom images may appear on your TV if there are high buildings or mountains close to where you are. You can adjust the image thru manual operation: consult instruction of vernier regulation, or adjust the direction of the external antenna.• If you use an indoor antenna, signal reception may be more difficult under certain circumstances. Adjust the direction of the antenna for optimum reception. If this does not improve reception, you may have to switch to an external antenna. |
| No picture • Check if the antenna | at the back of the TV is connected properly.• View other channels to see if the problem still occurs. |
| Video appears with no audio • Try | increasing the volume.• Check if the TV sound is on mute or not. |
| Audio is present, but video does not appear or is discolored | • Try adjusting the contrast and brightness. |
| Static noise affects video and audio quality | • Check if the antenna at the back of the TV is connected properly. |
| Broken lines on screen • Electrical | appliances such as hair dryers or vacuums etc. may be interfering with your TV set. Switch these appliances off. |
| Remote doesn't work • Make sure | the plastic bag which came with the remote control is removed. Try using the remote in a shorter distance from the TV. Check if the placement of the batteries is correct, or try using new batteries with the remote control.• The TV will go into Standby mode if it receives no response in a few minutes. |
| No video (PC mode) | • Please check if the cable is connected to the VGA port correctly, or if the cable is bent in some places. |
| Vertical line blinking (PC Mode) | • Enter the main menu, and adjust the vertical placement to eliminate the verticalline. |
| Horizontal tearing (PC Mode) | • Adjust the horizontal placement of the screen to clear any horizontal lines. |
| Screen is too bright or dark (PC Mode) | • Adjust the brightness or contrast in the main menu. |
| No response from the PC | • Check if the PC'S display resolution is set to a compatible resolution for the TV. |
| Lines appearing when a device is connected to the RCA port | • Make sure you are using a cable in good quality. |
| Problems are unresolved | • Unplug the power cable and wail for 30 seconds, then reconnect to the socket. If problems still persist, do not attempt to repair the TV by yourself. Kindly contact the service center. |
Do not leave your 1V displaying a static image, whether ii is from a paused video, menu screen, etc. for an extended period of lime, doing so will damage the display and may cause image burn-in.
LICENCES

The terms HDMI and HDMI High-Oefinition Multimedia Interface, and the HDMI logo are trademarks or registered trademarks of HDMI Licensing LLC in the United States and other countries.

Manufactured under license from Dolby Laboratories. Dolby, Dolby Audio, and the double-D symbol are trademarks of Dolby Laboratories Licensing Corporation.
Google, YouTube, Android TV and Chromecast built-in are trademarks of Google LLC.
SUGGESTION
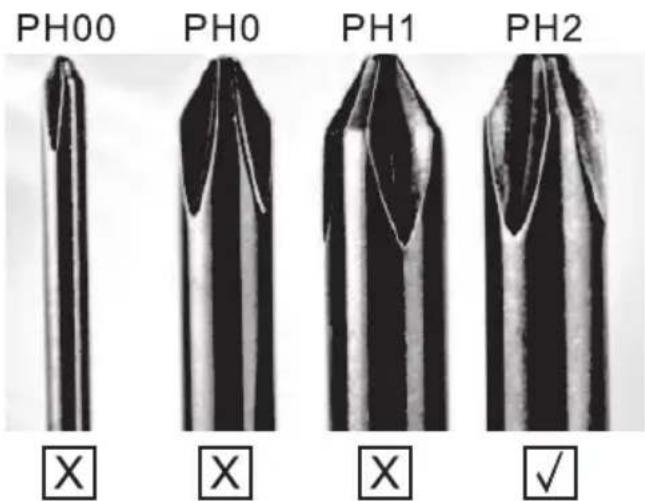
To make it more convenient for base installation and to avoid any risk of scratches and damage, we advise you using the type of PH2 screwdriver.
WARNING
Never place a television set in an unstable location. A television set may fall, causing serious personal injury or death. Many injuries, particularly to children, can be avoided by taking simple precautions such as:
-
Using cabinets or stands recommended by the manufacturer of the television set.
-
Only using furniture that can safely support the television set.
-
Ensuring the television set is not overhanging the edge of the supporting furniture.
-
Not placing the television set on tall furniture (for example, cupboards or bookcases). without anchoring both the furniture and the television set to a suitable support.
-
Not placing the television set on cloth or other materials that may be located between the television set and supporting furniture,
-
Educating children about the dangers of climbing on furniture to reach the television set or its controls. If your existing television set is being retained and relocated, the same considerations as above should be applied.
Wall-mounted screw:22-24inch M4, 28-70inch M6, 75inch M8
Note: don't hang at an angle to avoid the risk of falling off.
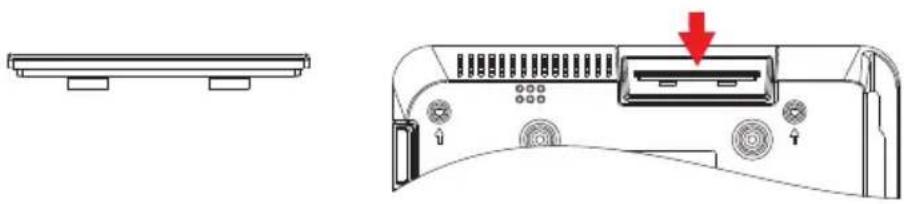
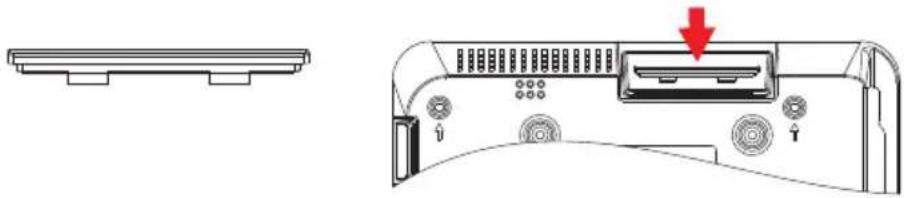
Note: If the model has a CI card slot on its top, a silicone plug for the CI card slot can be found in the accessory bag (for models without CI card slot, there is no such silicone plug), please insert the silicone plug into the slot when the CI card is not in use.
natural_image
Technical line drawing of a computer rear panel with a red arrow indicating a component (no text or symbols present)Note: Picture for reference purposes only.
BEZBJEDNOSNE INFORMACIJE
| Simbol uzvičnika u jednakostraničnom trouglu upozorava korisnika na prisustvo važnih uputstava za rad uređaja, koja se nalaze u dokumentaciji isporučenoj sa tim uredajem. | |
| UpozorenjeSimbol munje u jednakostraničnom trouglu upozorava korisnika o prisustvu neizolovanog opasnog napona unutar samog proizvoda koji može biti dovoljno visok da predstavlja rizik od strujnog udara za one koji rukuju uređajem. |
| CAUTION |
| RISK OF ELECTRIC SHOCKDO NOT OPEN |
natural_image
Simple line drawing of a blank rectangular panel with support legs and a downward arrow at the bottom (no text or symbols)Pritisnite ovo dugme u aktivnom/pasivnom režimu pripravnosti (standby) da biste uključili/isključili TV.
| ∅ | UKLJUČITE/ ISKLJUČITE napajanje (Power) |
| SOURCE/— | Izbor eksternog ulaznog signala |
| MENU/OK | Izbor prikaza glavnog menija i potvrda izabranog sadržaja |
| CH+/- | Izbor kanala |
| VOL+/- | Podešavanje zvuka |
Priključak interfejsa
Napomena: U nastavku je dat samo prikaz rada uređaja, dok stvarni položaj i raspored različitih modela može biti različit.
 | AV ulazEksterni ulaz AV signala |
 | CI SLOTUlaz za čitač kartice CI (zajednički interfejs) zahtjeva opciju CAM (modul za uslovni pristup) koja se koristi za TV programe koji se plaćaju. |
 | HDMI ulazUlaz za digitalni signal sa HDMI video priključka. |
 | ANT 75Povežite antenu/ kabal sa ulazom za TV (75/VHF/UHF) |
 | Izlaz za SLUŠALICEKada su slušalice priključene, zvučnici ne rade. |
 | USB ulazPovežite ovdje USB uređaj da biste mogli da reprodukujete medijske sadržaje ili da snimate programe pomoću funkcije PVR. |
 | Optički izlazPovežite prijemnik SPDIF. |
 | RJ45Povežite uređaj sa internetom. |
INSTALACIJA TV UREĐAJA I POVEZIVANJE
Postavite TV uređaj
- Uključivanje TV-a ili prelazak na režim pripravnosti (standby).
- Indikatorska lampica
- Otvor za mikrofon
- Isključivanje ili vraćanje zvuka na TV-u
- Kontrola medija Brzo premotavanje unaprijed/unazad Puštanje prethodnog/narednog programa Pokretanje/prekid/zaustavljanje/snimanje programa
- Ulazi Prikaz/Odabir opcija izvora signala
- Meni Prikaz menija na ekranu (OSD)
- Tasteri za navigaciju Strelica za gore/lijevo/desno/dole
- Nazad Povratak u prethodni meni
- Google Assistant
- Izlaz Izlaz iz OSD menija
- POČETNA STRANICA (HOME) Prikaz početne stranice ekrana.
- NETFLIX Povezivanje sa NETFLIX-om za online gledanje serija i filmova (obavezna je veza sa internetom).
- YouTube Povezivanje sa YouTube kanalom (obavezna je veza sa internetom).
- SUBT (Podešavanje titla)
- Teletekst Uključivanje i isključivanje funkcije teleteksta. (DTV režim)
- Audio Prikaz liste audio jezika i izbor audio jezika ili audio formata, ako je dostupan (primjenjuje se samo kada TV program ima tu opciju)
Odricanje od odgovornosti: Google Assistant nije dostupan kod nekih jezika i zemalja
POČETNA POSTAVKA
1.8 Izbor zemlje
->Pritisnite ∧ / ∨ na daljinskom upravljaču da odaberete zemlju, a potom pritisnite [dak] potvrdite.
1.9 Postavite lozinku za TV za Roditeljski nadzor, lozinka "0000" ne važi.
1.13 Završena postavka i Odredbe o odricanju odgovornosti
POČETNA STRANICA (HOME)
Kada se završi početna postavka, na TV uređaju će se po pravilu prikazivati početna stranica ili možete da pritisnete 🚫a daljinskom upravljaču da prikažete početnu stranicu.
3.1 Mreža i internet
Izvršite sva podešavanja koja se odnose na mrežu i proverite vezu ukoliko imate problema sa povezivanjem.
-> Pritisnite ∧ / √na daljinskom upravljaču da izaberete opciju "Mreža i internet" u meniju Podešavanja.
-> Pritisnite ✘ Na daljinskom upravljaču da izaberete sljedeće opcije: bežična mreža (Wi-Fi)/ Dodajte novu mrežu/ Uvek dostupan pregled/ Podešavanja proksija/ Podešavanja IP podataka.
3.2 Kanal
->Pritisnite ∧ / ∨a daljinskom upravljaču da izaberete meni "Kanal" (Channel).
->Pritisnite 【OK】za ulazak u sadržaj "Roditeljski nadzor", potom pritisnite ∧/∨ ili upotrebite tastere sa brojevima na daljinskom upravljaču da unesete vaš PIN (lozinku za roditeljski nadzor).
3.3 Željene postavke
-> Pritisnite ∧ / ∨na daljinskom upravljaču da izaberete opciju "Željene postavke".
-> Pritisnite ✘ ✘a daljinskom upravljaču da izaberete opcije: O uređaju, Datum i vrijeme, Tajmer, Jezik, Ulazi, Slika, Zvuk, Google Assistant, Resetovanje, itd.
->Pritisnite 【OK】da biste izabrali odgovarajuću podopciju.
3.3.1 O uređaju
-> Pritisnite ∧ / √na daljinskom upravljaču da izaberete opciju "O uređaju".
-> Pritisnite ✘ ná daljinskom upravljaču da izaberete dodatne informacije, kao što su: Ažuriranje sistema, Naziv uređaja, Ponovno pokretanje, Status, i dr.
-> Pritisnite 🚫na daljinskom upravljaču da se vratite u prethodni meni. Pritisnite 🚫na daljinskom upravljaču da izadete iz Menija.
3.3.2 Resetovanje
Ako izaberete opciju "Resetovanje", svi podaci iz interne memorije vašeg uređaja biće obrisani, uključujući i vaš Google nalog, Podešavanja i podatke o sistemu i aplikacijama, kao i preuzete aplikacije.
-> Pritisnite ∧ / ∨na daljinskom upravljaču da izaberete opciju "Resetovanje".
-> Pritisnite ✘ Na daljinskom upravljaču da izaberete opciju "Otkaži" ili "Obriši sve".
INSTALIRAJ/POKRENI/ DEINSTALIRAJ APLIKACIJU
-> Pritisnite ∧ na daljinskom upravljaču da izaberete opciju "Aplikacije" na Početnoj stranici, a potom pritisnite【OK】
-> Izaberite opciju "Preuzmite još aplikacija" i dodajte naziv aplikacije.
-> Izaberite opciju "Traži" koja se nalazi u gornjem desnom uglu stranice.
-> Pritisnite ∧/∨ K na daljinskom upravljaču za pomjeranje, a zatim pritisnite da potvrdite.
4.3 Deinstaliranje
-> Pritisnite ☐ na daljinskom upravljaču.
-> Pritisnite ∧na daljinskom upravljaču da izaberete opciju "Kanali" i izaberete opciju "Dostupni novi kanali" da biste ušli na sadržaj.
RJEŠAVANJE PROBLEMA
| Problem Rješenje | |
| Nema napajanja | Provjerite da li je AC kabal televizora priključen ili ne. Ako i dalje nema napajanja, molimo da isključite kabal iz utičnice i ponovo ga uključite nakon 60 sekundiPonovo uključite napajanje. |
| Prijem signala nije dobar | Duple ili prozirne slike mogu se pojaviti na vašem TV uređaju ako postoje visoke zgrade ili planine u vašem neposrednom okruženju. Možete podešavati sliku manuelno: Provjerite uputstva ili prilagodite pravac spoljne antene.Ako koristite sobnu antenu, prijem signala može biti još teži u određenim okolnostima. Podesite pravac antene za najbolji mogući prijem. Ukoliko se tako ne popravi prijem, možda ćete morati da predete na spoljnu antenu. |
| Nema slike • Provjerite da li je antena na zadnjoj strani TV uređaja pravilno priključena.Provjerite da li se problem još uvek javlja i na drugim kanalima. | |
| Video se prikazuje bez zvuka • Pokušajte da pojačate ton.Provjerite da li je zvuk na TV uređaju isključen ili ne. | |
| Zvuk je prisutan, ali video se ne pojavljuje ili je bez boje | Pokušajte da podesite kontrast i osvetljenje. |
| Statička buka utiče na kvalitet video i audio sadržaja | Provjerite da li je antena na zadnjoj strani TV uređaja pravilno priključena. |
| Isprekidane linije na ekranu | Električni aparati, kao što je fen za kosu ili usisivač, itd. mogu ometati rad vašeg TV uređaja. Isključite te aparate. |
| Daljinski upravljač ne radi | Uvjerite se da je plastična kesa u kojoj je bio daljinski upravljač uklonjena. Pokušajte da koristite daljinski upravljač na kraćoj udaljenosti od TV uređaja. Provjerite da li su baterije pravilno postavljene ili pokušajte sa novim baterijama za daljinski upravljač.TV uređaj će preći u režim pripravnosti (Standby) ako ne dobija odgovor u roku od nekoliko minuta. |
| Nema videa (PC režim) • Molimo | provjerite da li je kabal pravilno povezan sa VGA ulazom, odnosno da li je kabal na nekim mjestima savijen. |
| Treperenje vertikalnih linja (PC režim) | Udite u glavni meni i podesite vertikalnu poziciju kako biste uklonili vertikalnu liniju. |
| Horizontalne naprsline(PC režim) | Podesite horizontalnu poziciju ekrana kako biste ga očistili od svih horizontalnih linija. |
| Ekran je isuviše svijetao ili taman (PC režim) | Podesite osvjetljenje ili kontrast u glavnom meniju. |
| Nema PC signala • Provjerite da li je postavljena rezolucija PC uređaja kompatibilna sa rezolucijom TV uređaja. | |
| Linije se pojavljuju kada je uređaj povezan sa RCA ulazom. | Uvjerite se da je kabal koji koristite dobrog kvaliteta. |
| Problemi se ne mogu riješiti | Isključite kabal za napajanje i sačekajte 30 sekundi, potom ga ponovo uključite u utičnicu. Ako se problemi i dalje javljaju, ne pokušavajte samoinicijativno da popravljate TV uređaj. Molimo vas da kontaktirate servisni centar. |
Ne ostavljajte TV da dugo pokazuje statičnu sliku, bilo da je to zbog prekinutog video, ekrana sa menijem, itd. jer to može dovesti do oštećenja ekrana i može prouzrokovati sagorijevanje ekrana (burn-in).
LICENCE

Termini HDMI i HDMI Visoka definicija multimedijalnog interfejsa, kao i HDMI logotip su zaštitni znakovi ili registrovani zaštitni znakovi kompanije HDMI Licensing DOO u Sjedinjenim Državama i drugim zemljama.

Proizvedeni su po licenci Dolby Laboratories. Dolby, Dolby Audio i Double-D simbol su zaštitni znakovi Dolby Laboratories Licensing Corporation.
Google, YouTube, Android TV i Chromecast built-in su zaštitni znakovi kompanije Google DOO.
PRIJEDLOG
UPOZORENJE
Nikada ne postavljajte TV uređaj na nestabilno mjesto. TV uređaj može pasti i dovesti do teških tjelesnih povreda ili smrti. Mnoge povrede, naročito djece, mogu se izbjeći preduzimanjem jednostavnih mjera predostrožnosti, kao što su:
- Korištenje vitrina ili postolja preporučenih od strane proizvođača TV uređaja.
- Korištenje samo onog namještaja na kome će TV uređaj biti bezbijedan.
- TV uredaj ne prelazi ivicu pomoćnog namještaja na kojem se nalazi.
- TV uređaj se ne postavlja na namještaj velike visine (na primjer, ormari ili police za knjige) bez pričvršćivanja namještaja i TV uređaja za odgovarajuću podlogu.
- TV uređaj se ne postavlja na tkaninu ili druge materijale koji se mogu nalaziti između TV uređaja i pomoćnog namještaja.
- Djecu treba edukovati o opasnostima uslijed penjanja na namještaj kako bi dohvatila TV ili njegove funkcije.
- Ako zadržavate i premještate svoj postojeći TV, treba primjenjivati iste preporuke kao one gore navedene.
Šarafciger za montažu na zid: M4 od 22-24 inča, M6 od 28-70 inča, M8 od 75 inča.
Napomena: ne postavljajte uređaj pod uglom kako ne bi došlo do njegovog pada.
Napomena: Ako model ima otvor za CI karticu na gornjem delu ekrana, silikonski zaštitni poklopac za CI karticu možete pronaći u kesi sa dodatnom opremom (za modele bez otvora za CI karticu, ne postoji zaštitni poklopac). Molimo vas da zaštitni poklopac ubacite u otvor kada se CI kartica ne koristi.
natural_image
Technical line drawing of a device rear panel with mounting bracket and control buttons (no text or symbols)Napomena: Slika je ilustrativnog karaktera.
natural_image
Simple line drawing of a flat-screen monitor with stand legs and a downward arrow at the bottom (no text or symbols)natural_image
Technical line drawing of a mechanical support structure with two vertical supports and dashed lines indicating motion or alignment (no text or symbols)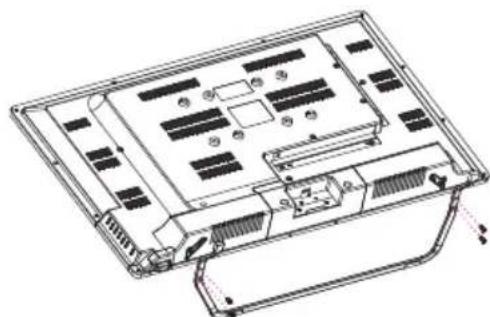
natural_image
Technical line drawing of an electronic device chassis with internal components (no text or symbols)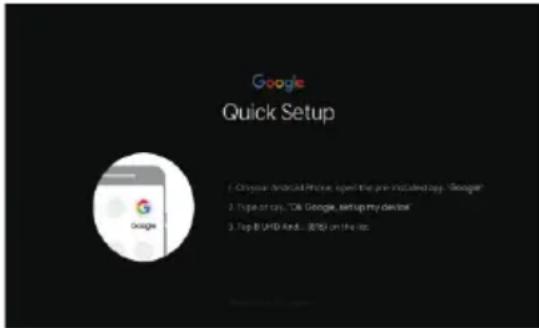
HOME
- GoogleAcистент
3.1 Мрежа и интернет
3.2 данни
3.3.2 Reset (нулиране)
ИНСТАЛИРАНЕ/ПРЕМЕСТВАНЕ/ ДЕИНСТАЛИРАНЕ НА ПРИЛОЖЕНИЕ
natural_image
Diagram of a computer monitor rear panel with ports and a red arrow indicating a location (no text or symbols present)natural_image
Simple line drawing of a flat-screen monitor with three legs and a central screen (no text or symbols)natural_image
Technical line drawing of a mechanical support structure with no visible text or symbols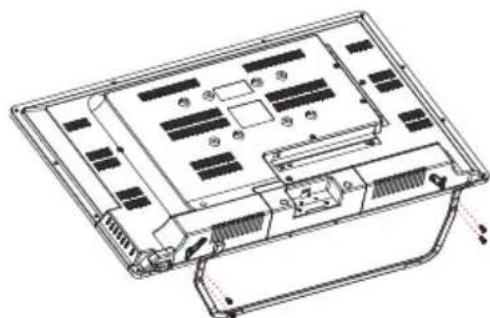
natural_image
Technical line drawing of an electronic device chassis with internal components (no text or symbols)THΛΕΧΕΙΡΙΣΤΗΡΙΟ
1.8 Επιλογή χώρας
1.11 Chromecast built-in™
APXIKH OΘONH
1. Google Assistant
ΠΡΟΕΙΔΟΠΟΙΗΣΗ
natural_image
Technical line drawing of a computer monitor rear panel with a red arrow indicating the portion of the device (no text or symbols present)natural_image
Simple line drawing of a blank rectangular frame with three legs and a downward arrow at the bottom (no text or symbols)natural_image
Technical line drawing of a mechanical support structure with two vertical supports and dashed lines indicating motion or alignment (no text or symbols)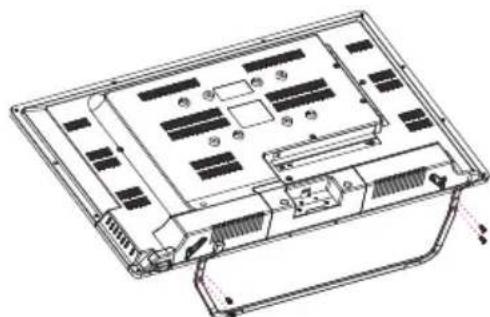
natural_image
Technical line drawing of an electronic device chassis with internal components (no text or symbols)ДАЛЕЧИНСКИ УПРАВУВАЧ
1.8 Избор на држава
- Google Assistant
ПРЕДУПРЕДУВАЊЕ
natural_image
Technical diagram showing a device rear panel with a red arrow pointing to a component, alongside a separate schematic view of its front panel (no text or symbols present)natural_image
Simple line drawing of a blank rectangular monitor with legs and a downward arrow at the bottom (no text or symbols)Setare televizor
natural_image
Technical line drawing of a mechanical support frame with two vertical supports and dashed lines indicating force or movement (no text or symbols)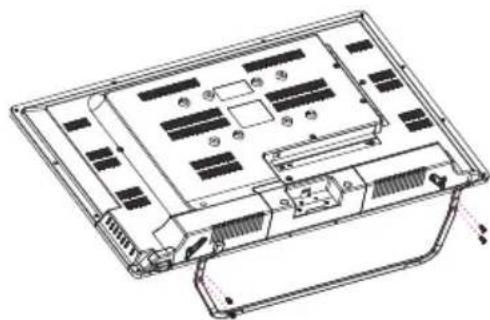
natural_image
Technical line drawing of an electronic device chassis with internal components (no text or symbols)TELECOMANDĂ
1.7 Conectarea telecomenzii Bluetooth
1.11 Chromecast built-in™
HOME
1. Google Assistant
ATENTIE
natural_image
Technical line drawing of a device rear panel with a red arrow pointing to a component (no text or symbols present)natural_image
Simple line drawing of a flat-screen monitor with stand supports at both ends (no text or symbols)natural_image
Technical line drawing of a mechanical support structure with two vertical supports and a horizontal beam (no text or symbols)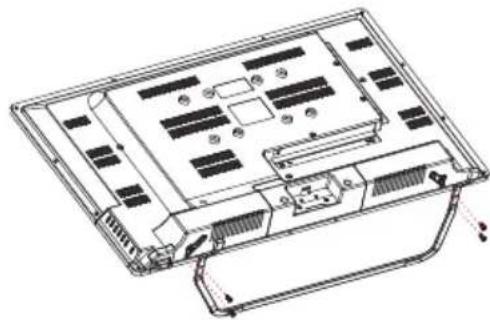
natural_image
Technical line drawing of an electronic device chassis with internal components (no text or symbols)DALJINSKI UPRAVLJALNIK
1.3 Configure the network (Konfigurirajte omrežje)
1.8 Country select (Izbira države)
1.11 Chromecast built-in™
Izberite On/Off (Vklop/izklop), da bo možnost Chromecast built-in na voljo.
1.12 TV Channel Setting (Nastavitev kanalov televizorja)
1.13 Setup completed and Disclaimer Terms (Dokončana nastavitev in pogoji izjave o zavrnitvi odgovornosti)
ZAČETEK
NAMESTITEV/PREMIK/ODSTRANITEV APLIKACIJE
OPOZORILO
natural_image
Technical line drawing of a computer monitor rear panel with a red arrow indicating the portion of the device (no text or symbols present)natural_image
Simple line drawing of a blank rectangular panel with three legs and a downward arrow at the bottom (no text or symbols)Pritisnite ovo dugme u aktivnom/pasivnom režimu pripravnosti (standby) da biste uključili/isključili TV.
| ∅ | UKLJUČITE/ ISKLJUČITE napajanje (Power) |
| SOURCE/— | Izbor eksternog ulaznog signala |
| MENU/OK | Izbor prikaza glavnog menija i potvrda izabranog sadržaja |
| CH+/- | Izbor kanala |
| VOL+/- | Podešavanje zvuka |
Priključak interfejsa
Napomena: U nastavku je dat samo prikaz rada uređaja, dok stvarni položaj i raspored različitih modela može biti različit.
| AV ulazEksterni ulaz AV signala |
| CI SLOTUlaz za čitač kartice CI (zajednički interfejs) zahteva opciju CAM (modul za uslovni pristup) koja se koristi za TV programe koji se plaćaju. |
| HDMI ulazUlaz za digitalni signal sa HDMI video priključka. |
 | ANT 75Povežite antenu/ kabl sa ulazom za TV (75/VHF/UHF) |
 | Izlaz za SLUŠALICEKada su slušalice priključene, zvučnici ne rade. |
 | USB ulazPovežite ovde USB uređaj da biste mogli da reprodukujete medijske sadržaje ili da snimate programe pomoću funkcije PVR. |
 | Optički izlazPovežite prijemnik SPDIF. |
 | RJ45Povežite uređaj sa internetom. |
INSTALACIJA TV UREĐAJA I POVEZIVANJE
Postavite TV uređaj
natural_image
Technical line drawing of a mechanical assembly with two vertical supports and a horizontal beam (no text or symbols)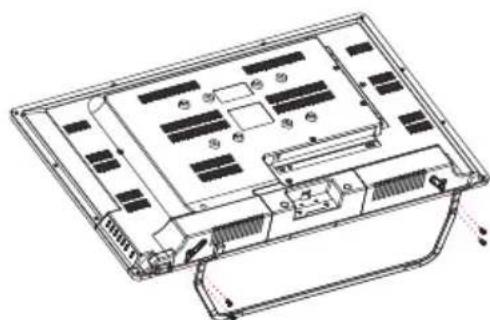
natural_image
Technical line drawing of an electronic device chassis with internal components (no text or symbols)DALJINSKI UPRAVLJAČ
- Uključivanje TV-a ili prelazak na režim pripravnosti (standby).
- Indikatorska lampica
- Otvor za mikrofon
- Isključivanje ili vraćanje zvuka na TV-u
- Kontrola medija Brzo premotavanje unapred/unazad Puštanje prethodnog/narednog programa Pokretanje/prekid/zaustavljanje/snimanje programa
- Ulazi Prikaz/Odabir opcija izvora signala
- Meni Prikaz menija na ekranu (OSD)
- Tasteri za navigaciju Strelica za gore/levo/desno/dole
- Nazad Povratak u prethodni meni
- Google Assistant
- Izlaz Izlaz iz OSD menija
- POČETNA STRANICA (HOME) Prikaz početne stranice ekrana.
- NETFLIX Povezivanje sa NETFLIX-om za online gledanje serija i filmova (obavezna je veza sa internetom).
- YouTube Povezivanje sa YouTube kanalom (obavezna je veza sa internetom).
- SUBT (Podešavanje titla)
- Teletekst Uključivanje i isključivanje funkcije teleteksta. (DTV režim)
- Audio Prikaz liste audio jezika i izbor audio jezika ili audio formata, ako je dostupan (primenjuje se samo kada TV program ima tu opciju)
Odricanje od odgovornosti: Google Assistant nije dostupan kod nekih jezika i zemalja
POČETNA POSTAVKA
Kada prvi put uključite TV, pojavljuje se ekran sa inicijalnim koracima koji vas vodi kroz ovaj početni proces. Molimo da sledite tekst sa uputstvima kako biste završili postavku.
1.1 Izbor jezika
->Pritisnite ∧/√na daljinskom upravljaču da biste izabrali jezik, potom pritisnite [dako] potvrdite.
1.2 Želite brzo da povežete vaš TV sa vašim Android telefonom? (Nastavite/ Preskočite)
Koraci:
- Na vašem Android telefonu otvorite prethodno instaliranu aplikaciju "Google".
- Oktucajte ili recite, "U redu, Google, poveži moj uređaj".
- Izaberite naziv modela sa spiska.
1.8 Izbor zemlje
->Pritisnite ∧ / ∨ na daljinskom upravljaču da odaberete zemlju, a potom pritisnite [dav] potvrdite.
1.9 Postavite lozinku za TV za Roditeljski nadzor, lozinka "0000" ne važi.
1.13 Završena postavka i Odredbe o odricanju odgovornosti
POČETNA STRANICA (HOME)
Kada se završi početna postavka, na TV uređaju će se po pravilu prikazivati početna stranica ili možete da pritisnete 🚫a daljinskom upravljaču da prikažete početnu stranicu.
->Pritisnite ∧/∨/<</> na daljinskom upravljaču za promenu sadržaja između Google Assistant-a, Aplikacija, Prikaži naredni sadržaj, Netflix, YouTube i još mnogih sadržaja na Početnoj stranici.
-> Pritisnite【zak】lazak u sadržaj.
1. Google Assistant
Upotrebite glas da biste pokrenuli emisije, kontrolne uređaje i još toga uz pomoć Google Assistant-a.
2. Aplikacije
3.1 Mreža i internet
Izvršite sva podešavanja koja se odnose na mrežu i proverite vezu ukoliko imate problema sa povezivanjem.
-> Pritisnite ∧ / √na daljinskom upravljaču da izaberete opciju "Mreža i internet" u meniju Podešavanja.
-> Pritisnite ✘ na daljinskom upravljaču da izaberete sledeće opcije: bežična mreža (Wi-Fi)/ Dodajte novu mrežu/ Uvek dostupan pregled/ Podešavanja proksija/ Podešavanja IP podataka.
3.2 Kanal
->Pritisnite ∧ / ∨a daljinskom upravljaču da izaberete meni "Kanal" (Channel).
->Pritisnite 【OK】za ulazak u sadržaj "Roditeljski nadzor", potom pritisnite ∧/∨ ili upotrebite tastere sa brojevima na daljinskom upravljaču da unesete vaš PIN (lozinku za roditeljski nadzor).
3.3 Željene postavke
-> Pritisnite ∧ / ∨na daljinskom upravljaču da izaberete opciju "Željene postavke".
-> Pritisnite ✘ da lajinskom upravljaču da izaberete opcije: O uređaju, Datum i vreme, Tajmer, Jezik, Ulazi, Slika, Zvuk, Google Assistant, Resetovanje, itd.
->Pritisnite 【OK】da biste izabrali odgovarajuću podopciju.
3.3.1 O uređaju
-> Pritisnite ∧ / √na daljinskom upravljaču da izaberete opciju "O uređaju".
-> Pritisnite ✘ ná daljinskom upravljaču da izaberete dodatne informacije, kao što su: Ažuriranje sistema, Naziv uređaja, Ponovno pokretanje, Status, i dr.
-> Pritisnite 🚫na daljinskom upravljaču da se vratite u prethodni meni. Pritisnite 🚫na daljinskom upravljaču da izadete iz Menija.
3.3.2 Resetovanje
Ako izaberete opciju "Resetovanje", svi podaci iz interne memorije vašeg uređaja biće obrisani, uključujući i vaš Google nalog, Podešavanja i podatke o sistemu i aplikacijama, kao i preuzete aplikacije.
-> Pritisnite ∧ / ∨na daljinskom upravljaču da izaberete opciju "Resetovanje".
-> Pritisnite ✘ Na daljinskom upravljaču da izaberete opciju "Otkaži" ili "Obriši sve".
INSTALIRAJ/POKRENI/ DEINSTALIRAJ APLIKACIJU
-> Pritisnite ∧ na daljinskom upravljaču da izaberete opciju "Aplikacije" na Početnoj stranici, a potom pritisnite【OK】
-> Izaberite opciju "Preuzmite još aplikacija" i dodajte naziv aplikacije.
-> Izaberite opciju "Traži" koja se nalazi u gornjem desnom uglu stranice.
Primer upotrebe "Facebook"-a
4.1 Instaliranje
-> Unesite "Facebook", "Facebook", aplikacija će se pojaviti, a potom pritisnite 【OK】da biste je izabrali.
-> Izaberite opciju "Instaliranje", kada se završi, izaberite opciju Otvori ili Deinstaliraj.
4.2 Pomeranje
-> Pritisnite ∧/∨ K na daljinskom upravljaču za pomeranje, a zatim pritisnite da potvrdite.
4.3 Deinstaliranje
UPOZORENJE
natural_image
Technical line drawing of a device rear panel with labeled ports and a red arrow indicating a component (no text or symbols present)Napomena: Slika je ilustrativnog karaktera.

- UPUTSTVO ZA UPOTREBU
- CAUTION
- IMPORTANT SAFETY PRECAUTIONS
- Caution:
- TV BUTTONS AND TERMINAL INTERFACE
- TV Buttons
- Terminal Interface
- TV INSTALL AND CONNECT
- Set your TV
- Connect antenna and power
- Turn on TV
- Note:
- TV STAND INSTALLATION INSTRUCTIONS
- REMOTE CONTROL
- INITIAL INSTALLATION
- Language select
- Quickly set up your TV with your Android phone? (Continue/skip)
- Steps:
- Configure the network
- Google Account Sign in
- Google setting
- Play Auto Installs
- Pairing Bluetooth Remote
- Country select
- Set the TV password for Parental Controls, "0000" is invalid.
- Select TV mode(Home/Retail)
- Chromecast built-in™
- TV Channel Setting
- Setup completed and Disclaimer Terms
- HOME
- SETTINGS
- Network&internet
- Channel
- Device Preferences
- About
- Reset
- APP INSTALL/MOVE/UNINSTALL
- Example for "Facebook"
- Install
- Move
- Uninstall
- TV SOURCE SETTING
- TROUBLESHOOTING
- LICENCES
- SUGGESTION
- WARNING
- BEZBJEDNOSNE INFORMACIJE
- Priključak interfejsa
- INSTALACIJA TV UREĐAJA I POVEZIVANJE
- Postavite TV uređaj
- POČETNA POSTAVKA
- Izbor zemlje
- Postavite lozinku za TV za Roditeljski nadzor, lozinka "0000" ne važi.
- Završena postavka i Odredbe o odricanju odgovornosti
- POČETNA STRANICA (HOME)
- Mreža i internet
- Kanal
- Željene postavke
- O uređaju
- Resetovanje
- INSTALIRAJ/POKRENI/ DEINSTALIRAJ APLIKACIJU
- Deinstaliranje
- RJEŠAVANJE PROBLEMA
- LICENCE
- PRIJEDLOG
- UPOZORENJE
- Мрежа и интернет
- данни
- Reset (нулиране)
- ИНСТАЛИРАНЕ/ПРЕМЕСТВАНЕ/ ДЕИНСТАЛИРАНЕ НА ПРИЛОЖЕНИЕ
- THΛΕΧΕΙΡΙΣΤΗΡΙΟ
- Επιλογή χώρας
- APXIKH OΘONH
- Google Assistant
- ΠΡΟΕΙΔΟΠΟΙΗΣΗ
- ДАЛЕЧИНСКИ УПРАВУВАЧ
- Избор на држава
- ПРЕДУПРЕДУВАЊЕ
- Setare televizor
- TELECOMANDĂ
- Conectarea telecomenzii Bluetooth
- ATENTIE
- DALJINSKI UPRAVLJALNIK
- Configure the network (Konfigurirajte omrežje)
- Country select (Izbira države)
- TV Channel Setting (Nastavitev kanalov televizorja)
- Setup completed and Disclaimer Terms (Dokončana nastavitev in pogoji izjave o zavrnitvi odgovornosti)
- ZAČETEK
- NAMESTITEV/PREMIK/ODSTRANITEV APLIKACIJE
- OPOZORILO
- DALJINSKI UPRAVLJAČ
- Izbor jezika
- Želite brzo da povežete vaš TV sa vašim Android telefonom? (Nastavite/ Preskočite)
- Koraci:
- Aplikacije
- Primer upotrebe "Facebook"-a
- Instaliranje
- Pomeranje
Brand : TESLA
Model : 32E625BHS
Category : TV