
NV68R2340RM - Oven SAMSUNG - Free user manual and instructions
Find the device manual for free NV68R2340RM SAMSUNG in PDF.


| Product Type | Built-in Electric Oven |
| Model | NV68R2340RM |
| Brand | Samsung |
| Overall Dimensions (W x H x D) | 595 x 595 x 570 mm |
| Oven Volume | 68 L |
| Net Weight | 34.2 kg |
| Power Supply | 230-240 V, 50 Hz |
| Maximum Connected Load | 3400-3600 W |
| Energy Class | A |
| Energy Consumption (Conventional) | 0.99 kWh/cycle |
| Energy Consumption (Fan-forced) | 0.80 kWh/cycle |
| Cooking Modes | Convection, Eco Convection, Top Heat + Convection, Bottom Heat + Convection, Pro-Roasting, Large Grill, Small Grill, Dual Cook, etc. |
| Auto Cook Programmes | 20 programmes |
| Steam Cleaning | Yes, 26-minute steam cycle |
| Child Lock | Yes |
| Oven Light | Yes, automatic on/off |
| Display | Digital with clock and settings |
| Number of Glass Sheets in Door | 3 (removable for cleaning) |
| Accessories Included | Wire rack, Wire rack insert, Baking tray, Universal tray, Extra-deep tray (depending on model) |
| Installation Type | Built-in, requires ventilation gap of min. 5 mm |
| Safety Features | Automatic shut-off, child lock, cool-touch door, temperature monitoring |
| Temperature Range | 30 °C to 250 °C (depending on mode) |
| Timer | Yes, up to 23h 59min with delay end option |
Frequently Asked Questions - NV68R2340RM SAMSUNG
User questions about NV68R2340RM SAMSUNG
0 question about this device. Answer the ones you know or ask your own.
Ask a new question about this device
Download the instructions for your Oven in PDF format for free! Find your manual NV68R2340RM - SAMSUNG and take your electronic device back in hand. On this page are published all the documents necessary for the use of your device. NV68R2340RM by SAMSUNG.
USER MANUAL NV68R2340RM SAMSUNG
Фурна (мм)
| A 560 G Maks. 506 | |||
| B 175 H Maks. 494 | |||
| C 370 I 21 | |||
| D Maks. 50 J 549 | |||
| E | 595 K | 572 | |
| F | 595 | L | 550 |
natural_image
Pure geometric diagram showing a circle intersected by two diagonal lines, with a labeled point A inside (no text or symbols beyond the label)natural_image
Technical line drawing of a structural frame with an inset magnified detail showing internal components (no text or symbols)010902050406070803
natural_image
Three-panel diagram showing a circular button with a plus sign, no text or symbols presentnatural_image
Simple line drawing of a hand pouring liquid into a container (no text or symbols)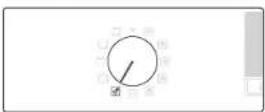
natural_image
Hand cleaning a tiled room with a cloth (no text or symbols visible)ПРЕДУПРЕЖДЕНИЕ
natural_image
Diagram showing a mechanical device with a rotating arm and surrounding components (no text or symbols)natural_image
Diagram of a kitchen appliance with a 70-degree angle indicator (no text or symbols present)natural_image
Diagram of a mechanical component with a downward arrow indicating motion or force (no text or symbols)natural_image
Technical line drawing of a door frame with a gray slanted base and label '01' (no text or symbols beyond the label)01 Колекто за вода
natural_image
Simple line drawing of a stylized eye with stripes inside a circular frame (no text or symbols)natural_image
Diagram of a door frame with an inset showing a close-up of the interior (no text or symbols)natural_image
Diagram of a room interior with a staircase and directional arrows indicating motion (no text or symbols)natural_image
Diagram showing a directional arrow pointing right through a rectangular frame with internal striped pattern (no text or symbols)natural_image
Mechanical component diagram showing a knob with an arrow indicating rotation (no text or symbols)Pečnica (mm)
| A 560 G maks. 506 | ||
| B 175 H maks. 494 | ||
| C 370 I 21 | ||
| D maks. 50 J 549 | ||
| E 595 K 572 | ||
| F 585 L 550 |
natural_image
Pure technical diagram showing a circular component with a labeled point A, no text or symbols presentPazite da ostavite razmak (A) od minimalno 5 mm izmeću pećnice i strana ormarića.
natural_image
Technical line drawing of a structural frame with an inset showing a mechanical component (no text or symbols)Postavite pečnicu u ormarić i pričvrstite je s obje strane pomoću 2 vijka.
Nakon montaže uklonite zaštitnu foliju, traku i ostalu ambalažu te izvadite isporučeni pribor iz pečnice. Kako bisle pećnicu izvadili iz ormariča, najprije isključite napajanje pečnice i uklonite 2 vijka s obje strane pečnice.
UPOZORENJE
Pecnica treba ventilaciju kako bi norma no funkcionirala. Ni u kojem slučaju nemojte blokrati ventilacijske otvore.
B NAPOMENA
natural_image
Simple line drawing of a container with liquid being poured into it (no text or symbols)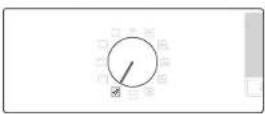
natural_image
Hand cleaning a tiled room with a cloth (no text or symbols visible)-
Izlijte 400 ml vode na dno pećnice i zatvorite vrata pećnice.
-
Okrenite birač načina rada kako biste odabrali funkciju
-
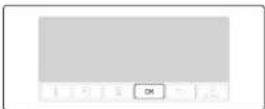
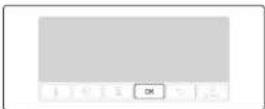
Pritisrite OK (U redu) kako biste započeli s čišćenjem. Čišćenje parom traje 26 minuta.
-
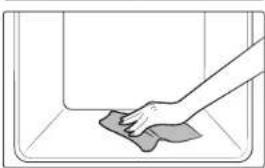
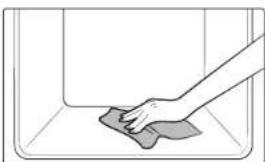
Koristite suhu krpu u pečnici.
NAPOMENA
natural_image
Diagram showing a mechanical device inside a frame with an arrow indicating rotation (no text or symbols)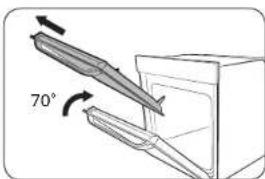
natural_image
Diagram of a kitchen appliance with a 70-degree angle indicator (no text or symbols present)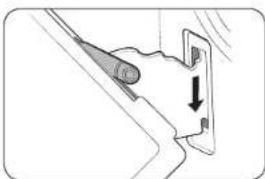
natural_image
Diagram of a mechanical component with a downward arrow indicating motion or force (no text or symbols)-
Otvorite vrata i prebacite spojnice na obje šarke.
-
Zatvorite vrata na otprilike 70°. Objema rukama uhvatite stranice vrata na sredini i povucite dok šarke ne izadu.
-
Kako biste nakon čišćenja vratili vrata na njihovo mjesto, ponovite korake 1 i 2 obrnutim recoslijedom. Spojnica šarke treba biti zatvorena s obja strane.
Hrvatski 25
Održavanje
Skidanje stakla na vratima
Vrata pečnice opremljena su s tri ploče stakla, jedne na drugoj.
natural_image
Technical line drawing of a door frame with a labeled component (01), no text or symbols present.01 Kolektor za vodu
Kolektor za vodu ne prikuplja samo višak vlage od kuhanja već i ostatke hrane. Redovito praznite i čistite kolektor za vodu.
UPOZORENJE
Ako dode do curenja vode iz kolektora za vodu, obratite se lokalnom servisnom centru tvrtke Samsung.
natural_image
Simple line drawing of a star-shaped object with a smiling face, enclosed in a rectangular frame (no text or symbols)26 Hrvatski

natural_image
Diagram of a microwave oven with a magnified inset showing internal components (no text or symbols)natural_image
Diagram of a door with a staircase and directional arrows indicating motion (no text or symbols)natural_image
Diagram of a mechanical component with an arrow indicating direction, no text or symbols presentnatural_image
Mechanical component diagram showing a circular knob with an arrow indicating rotation (no text or symbols)Sutō (mm)
| A 560 G Max. 506 | ||
| B 175 H Max. 494 | ||
| C 370 I 21 | ||
| D Max. 50 J 549 | ||
| E 595 K 572 | ||
| F 595 L 550 |
natural_image
Pure technical diagram showing a circular component with a labeled point A, no text or symbols presentnatural_image
Technical line drawing of a structural frame with an inset showing a magnified detail (no text or symbols)natural_image
Simple line drawing of a container with liquid being poured into it (no text or symbols)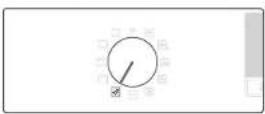
natural_image
Hand cleaning a tiled room with a cloth (no text or symbols visible)natural_image
Three-panel diagram showing a blank control panel, a circular dial indicator with arrows, and a blank action button labeled 'OK' (no text or symbols on panels)natural_image
Diagram showing a mechanical device inside a frame with an arrow indicating rotation (no text or symbols)natural_image
Diagram of a mechanical component with a downward arrow indicating motion or force (no text or symbols)natural_image
Diagram of a mechanical assembly with layered components and a labeled component '01' (no text or symbols beyond label)natural_image
Technical diagram of a door frame with a labeled component '01' (no text or symbols beyond label)01 Vízgyújtó
natural_image
Simple line drawing of a smiling face with striped eyes and wings, enclosed in a circular frame (no text or symbols)natural_image
Diagram of a microwave oven with a magnified inset showing internal components (no text or symbols)natural_image
Diagram of a door with a staircase and directional arrows indicating motion (no text or symbols)natural_image
Diagram of a mechanical component with an arrow indicating direction, no text or symbols presentnatural_image
Mechanical component diagram showing a circular knob with an arrow indicating rotation (no text or symbols)Cuptor (mm)
| A 560 G Max. 506 | |||
| B 175 H Max. 494 | |||
| C 370 I 21 | |||
| D | Max. 50 | J 549 | |
| E 595 K 572 | |||
| F 585 L 550 | |||
Dulap Incastrat (mm)
| A Min. 550 |
| B Min. 560 |
| C Min. 50 |
| D Min. 590 - Max. 600 |
| E Min. 460 x Min. 50 |
NOTA
natural_image
Diagram showing a circular object with a labeled point A and diagonal lines, no readable text or symbols present.natural_image
Technical line drawing of a structural frame with an inset showing a mechanical component (no text or symbols)natural_image
Simple line drawing of a container with liquid being poured into it (no text or symbols)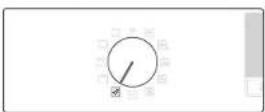
natural_image
Simple line drawing of a hand cleaning a tiled surface (no text or symbols)AVERTISMENT
natural_image
Diagram showing a mechanical device with a rotating arm and surrounding structural elements (no text or symbols)natural_image
Diagram of a kitchen appliance with a 70-degree angle indicator (no text or symbols present)natural_image
Simple line drawing of a mechanical component with a downward arrow indicating motion or force (no text or symbols)natural_image
Technical line drawing of a door frame with a labeled component (01), no text or symbols present.01 Colector de apă
natural_image
Simple line drawing of a star-shaped object with a smiling face, enclosed in a rectangular frame (no text or symbols)26 Română

natural_image
Diagram of a microwave oven with a magnified inset showing internal components (no text or symbols)natural_image
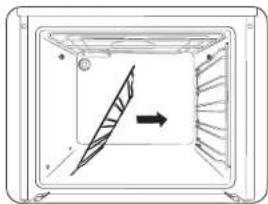
Diagram of a door with a staircase and directional arrows indicating motion (no text or symbols)- Rotiti grilajul lateral aproximativ 45°.
natural_image
Diagram of a mechanical component with an arrow indicating direction, no text or symbols presentnatural_image
Mechanical component diagram showing a circular knob with an arrow indicating rotation (no text or symbols)Fura (mm)
| A 360 G Maks. 306 | ||
| B 175 H Maks. 494 | ||
| C 370 I 21 | ||
| D Maks. 50 J 549 | ||
| E 595 K 572 | ||
| F 595 L 550 |
Mobilie inkaso (mm)
| A Min. 550 |
| B Min. 560 |
| C Min. 50 |
| D Min. 590 Maks. 600 |
| E Min. 460 x Min. 50 |
SHËNIM
natural_image
Pure geometric diagram showing a circle intersected by two diagonal lines, with a labeled point A inside (no text or symbols beyond the label)natural_image
Technical line drawing of a structural frame with an inset magnified detail showing internal components (no text or symbols)natural_image
Simple line drawing of a hand pouring liquid into a container (no text or symbols)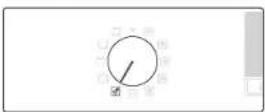
natural_image
Hand cleaning a tiled room with a cloth (no text or symbols visible)natural_image
Diagram showing a mechanical device with a rotating arm and surrounding components (no text or symbols)natural_image
Diagram of a kitchen appliance with a 70-degree angle indicator (no text or symbols present)natural_image
Diagram of a mechanical component with a downward arrow indicating motion or force (no text or symbols)natural_image
3D diagram of a layered structure with labeled component '01' and a central feature (no text or symbols beyond labels)natural_image
Technical line drawing of a door frame with a labeled component (01), no text or symbols present.01 Ujembedhës
Ujæmbledhesi mbledh jo vetem lagsnt rën e repërt por adhe mbetjet e ushcimit. Zobrazni che pastroni regullisht ujæmbledhesin.
PARALAJMËRIM
natural_image
Simple line drawing of a stylized object with horizontal stripes and a circular outline (no text or symbols)natural_image
Diagram of a door frame with an inset showing a hand holding a tool, no text or symbols present.natural_image
Diagram of a door with a staircase and directional arrows indicating motion (no text or symbols)natural_image
Diagram of a container with internal fan-like structure and directional arrow (no text or symbols)natural_image
Mechanical component with a circular knob and directional arrow (no text or symbols)Pećnica (mm)
| A 560 G Maks. 506 | ||
| B 175 H Maks. 494 | ||
| C 370 I 21 | ||
| D Maks. 50 J 549 | ||
| E 585 K 572 | ||
| F 585 L 550 |
Ugradni element (mm)
| A Min. 550 |
| B Min. 560 |
| C Min. 50 |
| D Min. 590 - Maks. 600 |
| E Min. 460 x Min. 50 |
NAPOMENA
natural_image
Diagram showing a circular object with a labeled point A and diagonal lines, no readable text or symbols present.Obavezno ostavite razmak (A) od barem 5 mm između pećnice i svih susednih delova kuhinjskog elementa.
natural_image
Technical line drawing of a structural frame with an inset showing a cross-section detail (no text or symbols)natural_image
Simple line drawing of a container with liquid being poured into it (no text or symbols)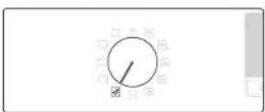
natural_image
Line drawing of a hand cleaning a tiled surface (no text or symbols)UPOZORENJE
natural_image
Diagram showing a mechanical device with a rotating arm and surrounding structural elements (no text or symbols)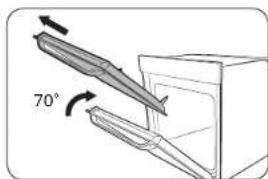
natural_image
Diagram of a kitchen appliance with a 70-degree angle indicator (no text or symbols present)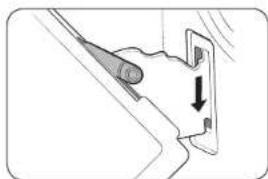
natural_image
Simple line drawing of a mechanical component with a downward arrow indicating motion (no text or symbols)- Otvorite vrata i potpuno otvorite držače na obe šarke.
- Zatvorite vrata na približno 70°. Obema rukama uhvatite vrata pećnice sa strane na sredini, a zatim ih izdignite i vucito dok ih ne izvadite iz šarki.
- Da biste ponovo pričvrstili vrata nakon čišćenja, ponovite korake 1 i 2 obrnutim redosledom. Držač na šarkama treba da bude zatvoren sa obe strane.
Održavanje
Skidanje stakla na vratima
Na vratima pećnice se nalaze tri sloja stakla postavljena jedno na drugo. Ovi slojevi se mogu skinuti i očistiti.
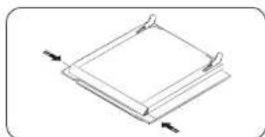
- Pritisnite oba dugmeta sa leve i desne strane vrata.
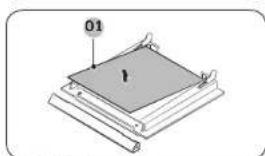
- Skinite poklopac i uklonite 1. i 2. staklo sa vrata,
01 Staklo 1
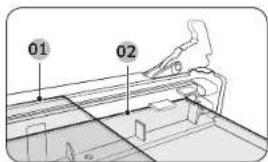
- Nakon čišćenja stakla, ponovite korake 1 i 2 obrnutim redosledom da biste vratili staklo na mesto. Pravilan položaj 1. i 2. stakla prikazan je na slici.
01 Staklo 1
02 Staklo 2
NAPOMENA
natural_image
Technical line drawing of a door frame with a labeled component (01), no text or symbols present.01 Sakupljač vode
Sakupljač vode sakuplja ne samo višak pare od pripreme hrane, već i ostatke hrane. Redovno praznite i čistite sakupljač vode.
UPOZORENJE
Ako primetite da voda curi iz sakupljača vode, obratite se lokalnom servisnom centru kompanije Samsung.
Čišćenje svoda pećnice (u zavisnosti od modela)
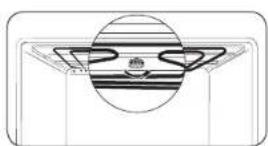
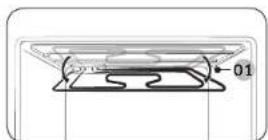
01 Oko 12°
-
Možete da spustite grejač roštilja da biste lakše očistili svod počnice. Uklonite okrugli zavrtanj tako što čete ga okretati u smeru suprotnom od kazaljke na satu, dok držite grejač roštilja.
-
Prednji deo grejača roštilja će se spustiti, ali grejač roštilja neće moći da se izvadi iz pećnice. Ne gurajte grejač roštilja nadole da ga ne biste iskrivili.
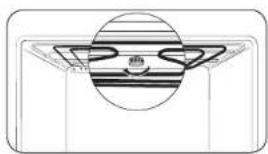
natural_image
Simple line drawing of a smiling face with striped pattern inside a circular frame (no text or symbols)natural_image
Diagram of a microwave oven with a magnified inset showing internal components (no text or symbols)- Pritisnite centrali deo gornjeg dela bočne vodice.
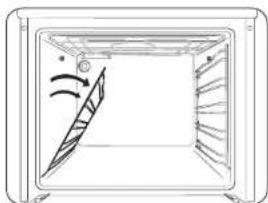
natural_image
Diagram of a door with a staircase and directional arrows indicating motion (no text or symbols)natural_image
Diagram of a container with internal structure and directional arrow, no text or symbols present- Povucite bočnu vodicu i izvadite je iz dva donja otvora.
Zamena
Sijalice
natural_image
Mechanical component diagram showing a circular knob with an arrow indicating rotation (no text or symbols)- Skinite stakleni poklopac okretanjem suprotno od kazaljki na satu.
- Zamenite sijalicu u pećnici.
- Očistite stakleni poklopac
- Kada završite, ponovite navedeni 1. korak obrnutim redosledom da biste vratili stakleni poklopac.
UPOZORENJE
Pečica (mm)
| A | 560 G Najv. 506 | ||
| B | 175 H Najv. 494 | ||
| C | 370 I 21 | ||
| D | Najv. 50 J 549 | ||
| E | 585 K 572 | ||
| F | 595 L 550 |
Vgradna omara (mm)
natural_image
Diagram showing a circular object with a labeled point A and diagonal lines, no readable text or symbols present.Med pečico in vsako stranjo omarice mora biti najmanj 5 mm velika reža (A).
natural_image
Technical line drawing of a structural frame with an inset showing a mechanical component (no text or symbols)Pečico namestite v omarico in jo na obeh straneh trdno pritrdite z 2 vijakoma.
natural_image
Simple line drawing of a container with liquid being poured into it (no text or symbols)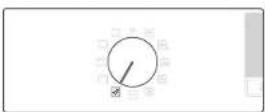
natural_image
Line drawing of a hand cleaning a tiled wall (no text or symbols)OPOZORILO
natural_image
Diagram showing a mechanical device inside a circular frame, with no visible text or symbols.natural_image
Diagram of a kitchen appliance with an open drawer and a 70-degree angle indicator (no text or symbols present)natural_image
Diagram of a mechanical component with a downward arrow indicating motion or force (no text or symbols)natural_image
Technical line drawing of a door frame with a labeled component (01), no text or symbols present.01 Zbiralnik vode
V zbiralniku vode se zbirajo odvečna vlaga od peke in ostanki hrane. Zbiralnik vode redno praznite in čistite.
OPOZORILO
natural_image
Simple line drawing of a star-shaped object with a smiling face, enclosed in a rectangular frame (no text or symbols)- Ko zaključite čiščenje stropa pečice. dvignite grelnik za žar spet v začetni položaj in zavrtite okroglo matico v smeri urinega kazalca, da jo zatisnete.
26 Slovenščina

natural_image
Diagram of a door frame with an inset showing a tool inserted into the door (no text or symbols present)natural_image
Diagram of a door with a ladder and directional arrows indicating motion (no text or symbols)natural_image
Diagram of a mechanical or structural component with internal diagonal section and directional arrow (no text or symbols)natural_image
Mechanical component diagram showing a circular knob with an arrow indicating rotation (no text or symbols)User & installation manual
NV68R2340RS / NV68R2340RM
NV801240K5_0L_DC68=32572-100KG+HII+HU+UU+3U+SK+SL+EN.mib 17/24/2019 1504019
SAMSUNG
ContentsContents
Using this manual 3
The following symbols are used in this User Manual: 3
Safety instructions 3
Important safety precautions 3
Correct Disposal of This Product (Waste Electrical & Electronic Equipment) 6
Auto energy saving function 6
Installation 6
what's included 6
Power connection 7
Cabinet mount 8
Before you start 9
Initial settings 9
New oven smell 9
Accessories 10
Operations 11
Control panel 11
Common settings 11
Cooking mode 15
Auto cook 16
Steam cleaning 17
Timer 17
Sound On/Off 17
Cooking smart 18
Manual cooking 18
Auto cook programmes 22
Test Dishes 24
Maintenance 25
Cleaning 25
Replacement 27
Troubleshooting 28
Checkpoints 28
Information codes 30
Technical specifications 30
Appendix 31
Product data sheet 31
2 English

Using this manual
Thank you for choosing SAMSUNG Built-In Oven.
This User Manual contains important information on safety and instructions
intended to assist you in the operation and maintenance of your appliance.
Please take the time to read this User Manual before using your oven and keep
this book for future reference.
The following symbols are used in this User Manual:
WARNING
Hazards or unsafe practices that may result in severe personal injury, death and/or property damage.
CAUTION
Hazards or unsafe practices that may result in personal injury and/or property damage.
NOTE
Useful tips, recommendations, or information that helps users manipulate the product.
Safety instructions
Installation of this oven must be performed only by a licensed electrician. The installer is responsible for connecting the appliance to the mains power supply in observance of the relevant safety recommendations.
Important safety precautions
WARNING
This appliance is not intended for use by persons (including children) with reduced physical, sensory or mental capabilities, or lack of experience and knowledge, unless they have been given supervision or instruction concerning use of the appliance by a person responsible for their safety.
Children should be supervised to ensure that they do not play with the appliance.
The means for disconnection must be incorporated in the fixed wiring in accordance with the wiring rules.
This Appliance should be allowed to disconnection from the supply after installation. The disconnection may be achieved by having the plug accessible or by incorporating a switch in the fixed wiring in accordance with the wiring rules.
If the supply cord is damaged, it must be replaced by the manufacturer, its service agent or similarly qualified persons in order to avoid a hazard.
Safety instructions
The method of fixing stated is not to depend on the use of adhesives since they are not considered to be a reliable fixing means.
This appliance can be used by children aged from 8 years and above and persons with reduced physical, sensory or mental capabilities or lack of experience and knowledge if they have been given supervision or instruction concerning use of the appliance in a safe way and understand the hazards involved. Children shall not play with the appliance. Cleaning and user maintenance shall not be made by children without supervision. Keep the appliance and its cord out of reach of children less than 8 years.
During use the appliance becomes hot. Care should be taken to avoid touching heating elements inside the oven.
WARNING: Accessible parts may become hot during use. Young children should be kept away.
Do not use harsh abrasive cleaners or sharp metal scrapers to clean the oven door glass since they can scratch the surface, which may result in shattering of the glass.
If this appliance has cleaning function, excess spillage must be removed before cleaning and all utensils should not be left in the oven during steam cleaning or self cleaning. The cleaning function depends on the model.
If this appliance has cleaning function, during cleaning conditions the surfaces may get hotter than usual and children should be kept away. The cleaning function depends on the model.
Only use the temperature probe recommended for this oven. (Meat probe model only)
A steam cleaner is not to be used.
WARNING: Ensure that the appliance is switched off before replacing the lamp to avoid the possibility of electric shock.
The appliance must not be installed behind a decorative door in order to avoid overheating.
WARNING: The appliance and its accessible parts become hot during use. Care should be taken to avoid touching heating elements. Children less than 8 years of age shall be kept away unless continuously supervised.
CAUTION: The cooking process has to be supervised. A short term cooking process has to be supervised continuously.
The door or the outer surface may get hot when the appliance is operating.
The temperature of accessible surfaces may be high when the appliance is operating. The surfaces are liable to get hot during use.
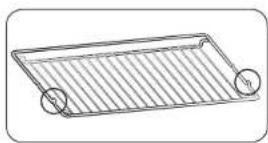
Insert the wire rack into position with the protruding parts (stoppers on both sides) towards the front so that the wire rack supports the rest position for large loads.
CAUTION
If the oven has been damaged in transport, do not connect it.
This appliance must be connected to the mains power supply only by a specially licensed electrician.
In the event of a fault or damage to the appliance, do not attempt to operate it.
Repairs should be performed by a licensed technician only. Improper repair may result in considerable danger to you and others. If your oven needs repair, contact a SAMSUNG Service center or your dealer.
Electrical leads and cables should not be allowed to touch the oven.
The oven should be connected to the mains power supply by means of an approved circuit breaker or fuse. Never use multiple plug adapters or extension loads.
The power supply of the appliance should be turned off when it is being repaired or cleaned.
Take care when connecting electrical appliances to sockets near the oven.
If this appliance has a vapour or steam cooking function, do not operate this appliance when the water supply cartridge is damaged. (Vapour or steam function model only)
When the cartridge is cracked or broken, do not use it and contact your nearest service center. (Vapour or steam function model only)
This oven has been designed only for the cooking of household foods.
During use, the oven interior surfaces become hot enough to cause burns. Do not touch heating elements or interior surfaces of the oven until they have had time to cool.
Never store flammable materials in the oven.
The oven surfaces become hot when the appliance is operated at a high temperature for an extended period of time.
When cooking, take care when opening the oven door as hot air and steam can escape rapidly.
When cooking dishes that contain alcohol, the alcohol may evaporate due to the high temperatures and the vapour can catch fire if it comes into contact with a hot part of the oven.
For your safety, do not use high-pressure water cleaners or steam jet cleaners.
Children should be kept at a safe distance when the oven is in use.
Frozen foods such as pizzas should be cooked on the big grid. If the baking tray is used, it may become deformed due to the great variation in temperatures.
Do not pour water into the bottom of the oven when it is hot. This could cause damage to the enamel surface.
The oven door must be closed during cooking.
Do not line the bottom of the oven with aluminum foil and do not place any baking trays or tins on it. The aluminum foil blocks the heat, which may result in damage to the enamel surfaces and cause poor cooking results.
Fruit juices will leave stains, which can become permanent on the enamel surfaces of the oven.
When cooking very moist cakes, use the deep pan.
Do not rest bakeware on the open oven door.
Keep children away from the door when opening or closing it as they may bump themselves on the door or catch their fingers in the door.
Do not step, lean, sit or place heavy items on the door.
Do not open the door with unnecessarily strong force.
WARNING: Do not disconnect the appliance from the main power supply even after the cooking process is completed.
WARNING: Do not leave the door open while oven is cooking.
InstallationSafety instructions
Correct Disposal of This Product (Waste Electrical & Electronic Equipment)
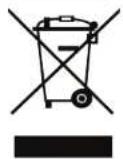
(Applicable in countries with separate collection systems) This marking on the product, accessories or literature indicates that the product and its electronic accessories (e.g. charger, headset, USB cable) should not be disposed of with other household waste at the end of their working life. To prevent possible harm to the environment or human health from uncontrolled waste disposal, please separate these items from other types of waste and recycle them responsibly to promote the sustainable reuse of material resources.
Household users should contact either the retailer where they purchased this product, or their local government office, for details of where and how they can take these items for environmentally safe recycling. Business users should contact their supplier and check the terms and conditions of the purchase contract. This product and its electronic accessories should not be mixed with other commercial wastes for disposal.
For information on Samsung's environmental commitments and product-specific regulatory obligations, e.g. REACH, WEEE, Batteries, visit : samsung.com/uk/aboutsamsung/samsungelectronics/corporate citizenship/data corner.html
Auto energy saving function
- If no user input is made for a certain time while the appliance is operating, the appliance stops operation and goes to Standby state.
• Light : During cooking process, you can switch off Oven lamp by pressing 'Oven light' button. For energy saving, the oven lighting is switched off a few minutes after cooking program has started.
Installation
WARNING
This oven must be installed by a qualified technician. The installer is responsible for connecting the oven to the main power, while observing the relevant safety regulations of your area.
What's included
Make sure all parts and accessories are included in the product package. If you have a problem with the oven or accessories, contact a local Samsung customer center or the retailer.
Oven at a glance
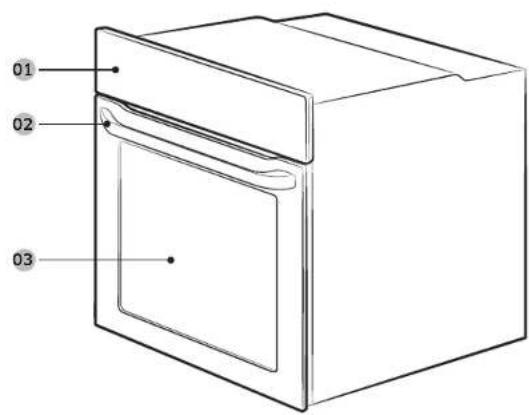
01 Control panel
02 Door handle
03 Door
Accessories
The oven comes with different accessories that help you prepare different types of food.
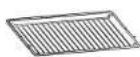
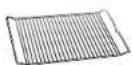
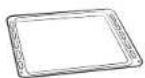
Wire rack Wire rack insert ^ Baking tray
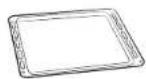
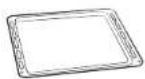
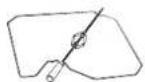
Universal tray * Extra-deep tray * Rotisserie spit *
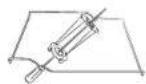
Rotisserie spit and Shashlik *
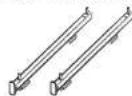
Telescopic rail

NOTE
Availability of accessories with an asterisk (*) depends on the oven model.
Power connection
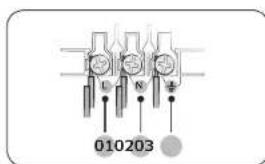
01 BROWN or BLACK
02 BLUE or WHITE
03 YELLOW and GREEN
Plug the oven into an electrical socket. If a plug-type socket is not available due to allowable current limitations, use a multi-pole isolator switch (with at least 3 mm spacing in-between) in order to meet safety regulations. Use a power cord of sufficient length that supports the specification H05 RR F or H05 VV F, min. 1.5\~2.5 mm ^3 .
| Rated current(A) Minimum cross-sectional area | |
| 10 < A ≤ 16 1.5 mm | 2 |
| 16 < A ≤ 25 2.5 mm | 2 |
Check the output specifications on the label attached to the oven.
Open the rear cover of the oven using a screwdriver, and remove the screws on the cord clamp. Then, connect the power lines to the relevant connection terminals.
The terminal is designed for earthgrounding. First connect the yellow and green lines (earthgrounding), which must be longer than the others. If you use a plug-type socket, the plug must remain accessible after the oven is installed. Samsung is not responsible for accidents caused by missing or faulty earthgrounding.

WARNING
Do not step on or twist the wires during installation, and keep them away from heat emitting parts of the oven.

Installation
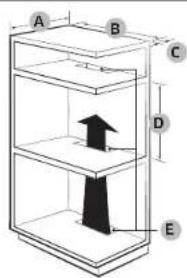
Cabinet mount
If installing the oven in a built-in cabinet, the cabinet must have its plastic surfaces and adhesive parts resistant up to 90 °C. Samsung is not responsible for damage to furniture from the oven's heat emission.
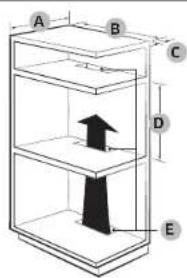
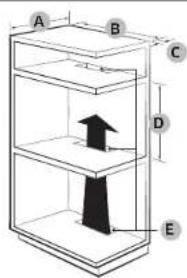
The oven must be properly ventilated. For ventilation, leave a gap of about 50 mm between the lower shelf of the cabinet and the supporting wall. If you install the oven under a cooktop, follow the cooktop's installation instructions.
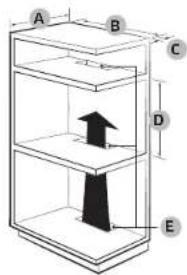
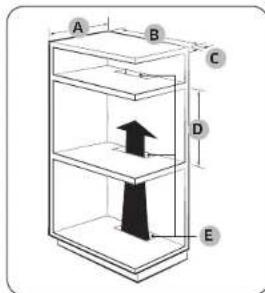
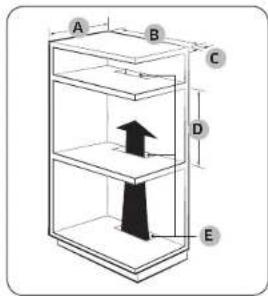
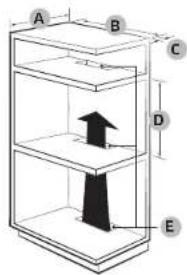
Required Dimensions for Installation
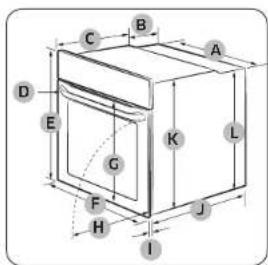
Oven (mm)
| A | 560 G Max. 506 | ||
| B | 175 H Max. 494 | ||
| C | 370 I 21 | ||
| D | Max. 50 J | 549 | |
| E | 595 K 572 | ||
| F | 595 | L | 550 |
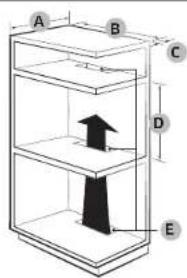
Built-in cabinet (mm)
| A Min. 550 |
| B Min. 560 |
| C Min. 50 |
| D Min. 590 - Max. 600 |
| E Min. 460 x Min. 50 |
NOTE
The built-in cabinet must have vents (E) to ventilate heat and circulate the air.
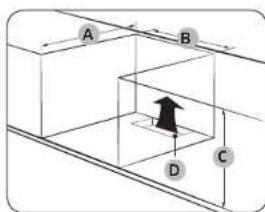
Under-sink cabinet (mm)
| A Min. 550 |
| B Min. 560 |
| C Min. 600 |
| D Min. 460 x Min. 50 |
NOTE
The built-in cabinet must have vents (D) to ventilate heat and circulate the air.
Mounting the oven
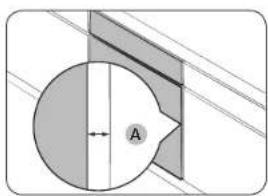
natural_image
Diagram showing a circular object with a labeled point A and diagonal lines, no readable text or symbols present.Make sure to leave a gap (A) of at least 5 mm between the oven and each side of the cabinet.
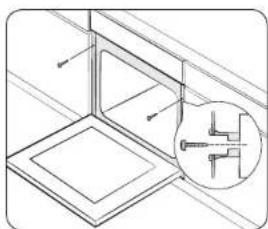
natural_image
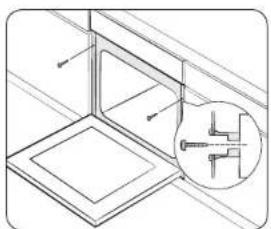
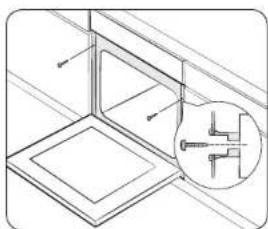
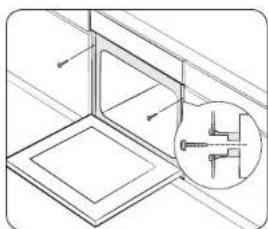
Technical line drawing of a structural frame with an inset showing a mechanical component (no text or symbols)Fit the oven into the cabinet and fix the oven firmly on both sides using 2 screws.
After installation is complete, remove the protective film, tape, and other packing material, and take out the provided accessories from inside the oven. To remove the oven from the cabinet, first disconnect power to the oven and remove 2 screws on both sides of the oven.
WARNING
The oven requires ventilation for normal operation. Do not block the vents under any circumstance.
NOTE
The actual appearance of the oven may differ with the model.
Before you start
Initial settings
When you power on the oven for the first time, the default time of "12:00" appears on the display where the hour element ("12") blinks. Follow the steps below to set the current time.
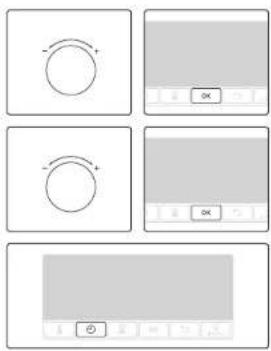
- With the hour element blinking, turn the value dial (right-sided dial) to set the hour, and then press OK to move to the minute element.
- With the minute element blinking, turn the value dial to set the minute, and then press OK.
To change the current time after this initial setting, hold down the Ⓐ button for 3 seconds and follow the above steps.
New oven smell
Before using the oven for the first time, clean inside the oven to remove the new oven smell.
- Remove all accessories from inside the oven.
- Run the oven with Convection 200 °C or Conventional 200 °C for an hour. This will burn any remaining production substances in the oven.
- When complete, turn off the oven.
Before you start
Accessories
For first time use, clean the accessories thoroughly with warm water, detergent and a soft clean cloth.
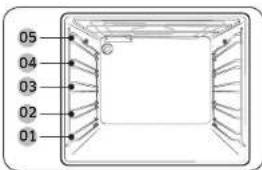
01 Level 1 02 Level 2
03 Level 3 04 Level 4
05 Level 5
- Insert the accessory to the correct position inside of the oven.
- Allow at least a 1 cm space from the accessory and the bottom of the oven, and from any other accessory.
• Take caution in removing cookware and/or accessories out of the oven. Hot meals or accessories can cause burns.
• The accessories may be deformed while they are gaining heat. Once they have cooled down, they will recover their original appearance and performance.
Basic use
For better cooking experience, familiarise yourself with how to use each accessory.
| Wire rack The wire | rack is designed for grilling and roasting. Insert the wire rack into position with the protruding parts (stoppers on both sides) towards the front |
| Wire rack insert *The | wire rack insert is used with the tray, and prevents liquid from dropping onto the bottom of the oven. |
| Baking tray *The | baking tray (depth: 20 mm) is used to bake cakes, cookies, and other pastries. Put the slanted side to the front. |
| Universal tray *The | universal tray (depth : 30 mm) is used for cooking and roasting. Use the wire-tray insert to prevent liquid from dropping onto the bottom of the oven. Put the slanted side to the front. |
| Extra-deep tray *The | extra deep tray (depth: 50 mm) is used for roasting with or without the wire-tray insert. Put the slanted side to the front. |
| Rotisserie spit * The rotisserie spit is used for grilling food such as chicken. Use the rotisserie spit only in single mode at level 3 where the spit adapter is available. Unscrew the spit handle to remove while grilling. | |
| Rotisserie spit and Shashlik * | Put the tray at rack position 1 to collect cooking juices, or on the bottom of the oven for a large serving of meat. It is recommended to use the spit accessories for meat under 1.5 kg.1. Insert the spit into the meat. To help insert the spit, screw the spit handle toward the blunt end.2. Put parboiled potatoes and vegetables around the meat.3. Put the cradle at the middle tray position with the "V" shape to the front. Rest the spit onto the cradle with the pointed end backward and gently push until the tip of the spit enters the turning mechanism at the back of the oven. The blunt end of the spit must rest on the "V" shape. (The spit has two lugs which should be nearest to the oven door so to stop the spit going forward, the lugs also act as a grip for the handle.)4. Unscrew the handle before cooking.5. After cooking, screw the handle back to help remove the spit from the cradle.⚠ WARNINGMake sure that the rotisserie handle is seated properly. Be careful when using the rotisserie. The forks and pins are pointed and sharp, which can cause physical injury! To prevent burns, use gloves to remove the rotisserie because it is very hot. |
| Telescopic rails * Use | Use the telescopic rail plate to insert the tray as follows:1. Stretch the rail plate out from the oven.2. Put the tray on the rail plate and slide the rail plate into the oven.3. Close the oven door. |
NOTE
Availability of accessories with an asterisk (*) depends on the oven model.
10 English

Operations
Control panel
The front panel comes in a wide range of materials and colours. For improved quality, the actual appearance of the oven is subject to change without notice.
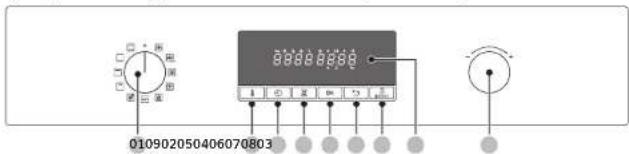
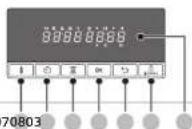
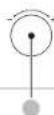
| 01 Mode selector | Turn to select a cooking mode or function. |
| 02 Temperature Use to set the temperature. | |
| 03 Cooking time Press to set the cooking time. | |
| 04 Timer | Timer helps you check the time or operating duration while cooking. |
| 05 OK Press to confirm your settings. | |
| 06 Back Cancel current settings, and return to the main screen. | |
| 07 Oven light( Child lock) | Press to turn the internal light on or off.The oven light turns on automatically when the oven operation starts. And it turns off automatically after a certain period of inactivity in order to save power.Child lock: To prevent accidents. Child lock disables all controls. But you can switch off by turning the mode selector to off. Hold down for 3 seconds to activate, or hold down for 3 seconds again to deactivate the lock on the control panel. |
| 08 Display | Shows necessary information of selected modes or settings |
| 09 Value dial | Use the value dial to:Set the cooking time or temperature.Choose a sub item of top-level menus: Cleaning, Auto cook, Special function, or Grill.Choose a serving size for Auto Cook programmes. |
Common settings
It is common to change the default temperature and/or cooking time across all cooking modes. Follow the steps below to adjust the temperature and/or cooking time for the selected cooking mode.
Temperature
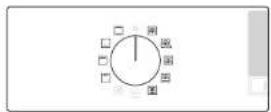
- Turn the mode selector to choose a mode or function. The default temperature of each selection appears.
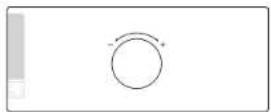
- Turn the value dial to set a desired temperature.
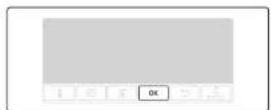
- Press OK to confirm your changes.
NOTE
If you do not make any further settings within a few seconds, the oven starts cooking automatically with the default settings.
To change the set temperature, press ↓ button and follow the above steps.
English 11

Operations
Cooking time
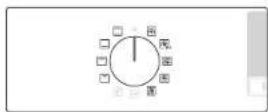
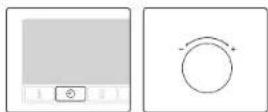
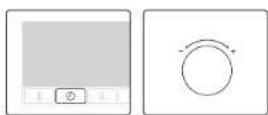
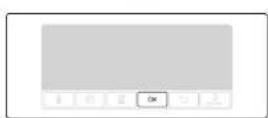
- Turn the mode selector to choose a mode or function.
- Press the Ⓑ button, and then turn the value dial to set a desired time. You can set the time to a max of 23 hours and 59 minutes.
- Optionally, you can delay the end time of your cooking to a desired point. Press the Ⓑ button, and use the value dial to set an end point. See Delay End for more information.
- Press OK to confirm your changes.
End time
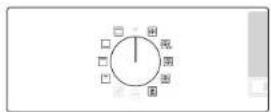
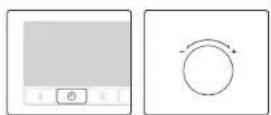
- Turn the mode selector to choose a mode or function.
- Press ☑ twice, and turn the value dial to set a desired end time.
- Press OK to confirm your changes.
NOTE
- You can cook without setting the end time if you want to. In this case, the oven starts cooking at set temperatures without time information, and you must stop the oven manually when cooking is complete.
• To change the end time, press ④wice, and follow the above steps.
NOTE
- You can cook without setting the cooking time if you want to. In this case, the oven starts cooking at set temperatures without time information, and you must stop the oven manually when cooking is complete.
- To change the set cooking time, press 📋 button and follow the above steps.
12 English
Delay End
Delay End is designed to make cooking more convenient.
Case 1
Suppose you select a one-hour recipe at 2:00 PM and you want the oven to finish cooking at 6:00 PM. To set the end time, change the Ready At time to 6:00 PM. The oven will start cooking at 5:00 PM and end at 6:00 PM as you set.
Current time: 2 pm Set cooking time: 1 hour
Set Delay End time: 6 pm

Case 2
Current time: 2 pm Set cooking time: 2 hour
Set Delay End time: 5 pm


CAUTION
- Delay End is not available in Dual cook mode.
- Do not keep cooked food in the oven too long. The food may spoil.
To clear the cooking time
You can clear the cooking time. This is useful if you want to stop the oven manually at any time during the process.
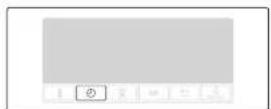
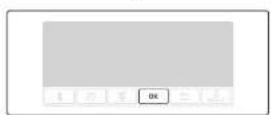
- While the oven is cooking, press ④o display the remaining cooking time.
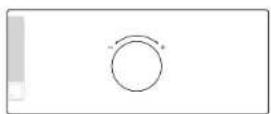
- Turn the value dial to set the cooking time to "00:00". Alternatively, simply press
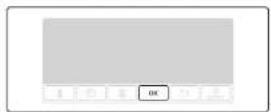
- Press OK The oven continues to cook at set temperatures without time information.

NOTE
If you have cancelled the cooking time, you must stop the oven manually when cooking is complete.
Operations
To clear the end time
You can clear the end time. This is useful if you want to stop the oven manually at any time during the process.
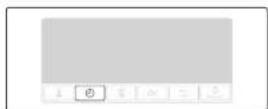
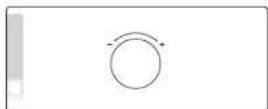
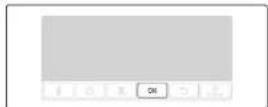
-
While the oven is cooking, press ☎ twice.
-
Turn the value dial to set the end time to the current time. Alternatively, simply press ↩
-
Press OK. The oven continues to cook at set temperatures without time information.
To stop cooking
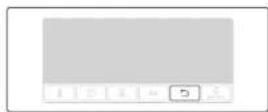
-
While cooking is in process, press
-
Press OK to cancel cooking.
- Alternatively, simply turn the mode selector to "○"

NOTE
If you have cancelled the end time, you must stop the oven manually when cooking is complete.
14 English

Cooking mode
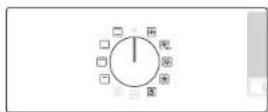
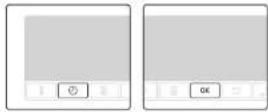
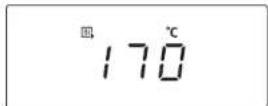
- Turn the mode selector to choose a mode or function.
- Set the cooking time and/or temperature if necessary. For more information, see Common Settings.
The oven starts preheating with ☐con until the internal temperature reaches the target temperature.
Pre-heating is recommended for all cooking modes unless otherwise specified in the cooking guide.
NOTE
You can change the cooking time and/or temperature during cooking.
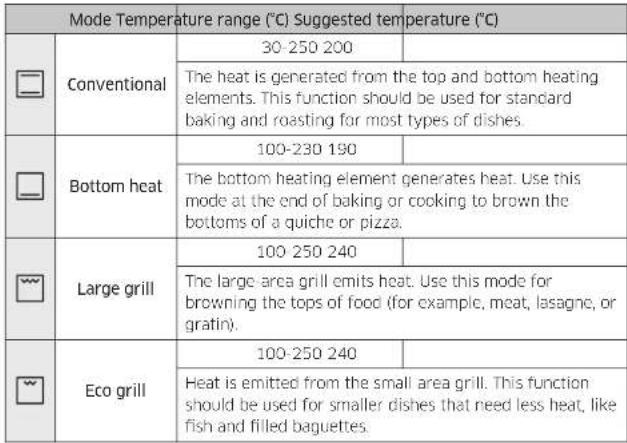
Cooking modes
| Mode Temperature range (°C) Suggested temperature (°C) | |||
| Convection | 30-250 170 | ||
| The rear heating element generates heat, which is evenly distributed by the convection fan. Use this mode for baking and roasting on different levels at the same time. | |||
| Eco convection | 30-250 170 | ||
| Eco Convection uses the optimized heating system to save energy while cooking. The cooking times slightly increases, but the cooking results remain the same. Note that this mode does not require preheating.NOTEECO Convection mode of heating used to determine the energy efficiency class is in accordance with EN60350-1 | |||
| Top heat + convection | 40-250 190 | ||
| The top heating element generates heat, which is evenly distributed by the convection fan. Use this mode for roasting that requires a crispy top (for example, meat or lasagne). | |||
| Bottom heat + convection | 40-250 190 | ||
| The bottom heating element generates heat, which is evenly distributed by the convection fan. Use this mode for pizza, bread, or cake. | |||
| Pro-Roasting | 80-200 160 | ||
| Pro-Roasting runs an automatic pre-heating cycle until the oven temperature reaches 220 °C. Then, the top heating element and the convection fan start operating to sear food such as meat. After searing, the meat will be cooked at low temperatures. Use this mode for beef, poultry, or fish. | |||
Operations
 |
Auto cook
For inexperienced cooks, the oven offers a total of 20 auto cooking recipes. Take advantage of this feature to save you time or shorten your learning curve. The cooking time and temperature will be adjusted according to the selected programme and serving size.
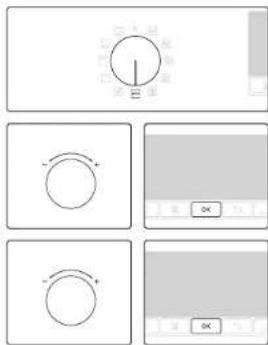
- Turn the mode selector to select 📄
- Turn the value dial to select a programme, and then press OK. The available weight range (serving size) is presented for you.
- Turn the value dial to set the serving size, and then press OK to start cooking.
NOTE
- Some of the items in the Auto cook programmes include preheating. For those items the preheating progress is displayed. Please put the food in the oven after preheating beep. Then, press Cooking time to start Auto Cook.
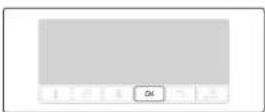
- For more information, see the Auto cook programmes section in this manual.
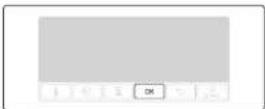
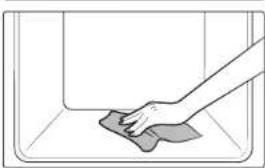
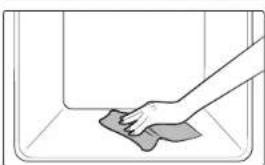
Steam cleaning
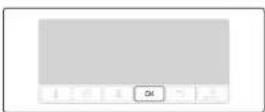
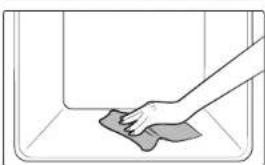
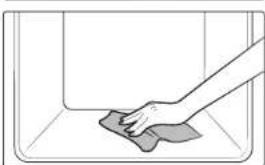
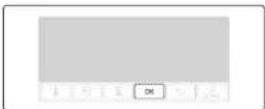
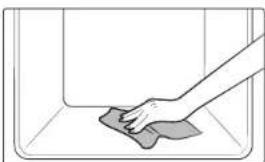
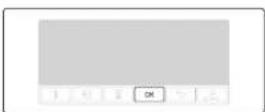
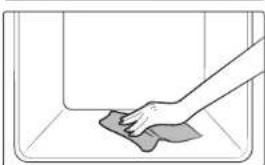
This is useful for cleaning light soiling with steaming. This function saves you time by removing the need for regular manual cleaning. The remaining time appears on the display during this process.
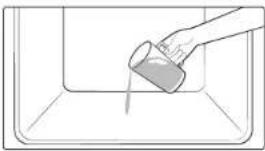
natural_image
Simple line drawing of a container with liquid being poured into it (no text or symbols)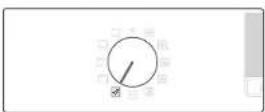
natural_image
Simple line drawing of a hand cleaning a tiled surface (no text or symbols)
WARNING
Do not open the door before the cycle is complete. The water inside the oven is very hot, and it can cause a burn.
NOTE
- If the oven is heavily soiled with grease, for example, after roasting or grilling, it is recommended to remove stubborn soils manually using a cleaning agent before activating Steam cleaning.
- Leave the oven door ajar when the cycle is complete. This is to allow the interior enamel surface to dry thoroughly.
- While the oven is hot inside, auto cleaning is not activated. Wait until the oven cools down, and try again.
- Do not pour water onto the bottom by force. Do it gently. Otherwise, the water overflows to the front.
Timer
Timer helps you check the time or operating duration while cooking.
1. Press ☒
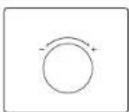
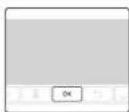
- Turn the value dial to set the desired duration, and then press OK. You can set the time to a max of 23 hours and 59 minutes.
Sound On/Off
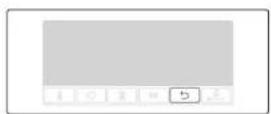

Cooking smart
Manual cooking
WARNING on acrylamide
Acrylamide produced while baking starch contained food such as potato chips, French fries, and bread may cause health problems. It is recommended to cook these foods at low temperatures and avoid overcooking, heavy crisping, or burning.

NOTE
- Pre-heating is recommended for all cooking modes unless otherwise specified in the cooking guide.
- When using Eco Grill, put food in the centre of the accessory tray.
Accessory tips
Your oven comes with a different number or kind of accessories. You may find that some accessories are missing from the table below. However, even if you are not provided with the exact accessories specified in this cooking guide, you can follow along with what you already have, and achieve the same results.
• The Baking tray and the Universal tray are interchangeable.
- When cooking oily foods, it is recommended to put a tray under the Wire rack to collect oil residue. If you are provided with the Wire rack insert, you can use it together with the tray.
- If you are provided with the Universal tray or Extra deep tray, or both, it is better to use whichever is deeper for cooking oily foods.
Baking
We recommend to preheat the oven for best results.
| Food Accessory Level | Type of heating | Temp. (°C) | Time (min.) | ||
| Sponge cake | Wire rack,ø 25-26 cm tin | 2 160-170-85 | 40 | ||
| Marble cake | Wire rack,Gugelhopf tin | 3 175-185-60 | 60 | ||
| Tart | Wire rack,ø 20 cm tart tin | 3 190-200-60 | 60 | ||
| Yeast cake on tray with fruits and crumbles | Universal tray 2 | 160-180 40-50 | |||
| Fruit crumble | Wire rack, 22-24 cm oven dish | 3 170-180-25-30 | |||
| Scones Universal tray 3 180-190 30-35 | |||||
| Lasagne | Wire rack, 22-24 cm oven dish | 3 190-200-25-30 | |||
| Meringues Universal tray 3 80-100 100-150 | |||||
| Soufflé | Wire rack,souffle cups | 3 170-180-20 | 25 | ||
| Apple yeast tray cake | Universal tray 3 | 150-170 60 | |||
| Homemade pizza,1-1.2 kg | Universal tray 2 | 190-210 10 | |||
| Frozen puff pastry, filled | Universal tray 2 | 180-200 20 | |||
| Quiche | Wire rack, 22-24 cm oven dish | 2 180-180-25-35 | |||
18 English

| Food Accessory Level | Type of heating | Temp. (°C) | Time (min.) | |
| Apple pie | Wire rack,∅ 20 cm tin | 2 160-155-75 | ||
| Chilled pizza Universal tray 3 180-200 5-10 | ||||
Roasting
| Food Accessory Level | Type of heating | Temp. (°C) | Time (min.) | ||
| Meat(Beef/Pork/Lamb) | |||||
| Sirloin of beef, 1 kg | Wire rack + Universal tray | 31 | 160-180 50-70 | ||
| Boned loin of veal, 1.5 kg | Wire rack + Universal tray | 31 | 160-180 90-120 | ||
| Pork roast, 1 kg | Wire rack + Universal tray | 31 | 200-210 50-60 | ||
| Joint of pork, 1 kg | Wire rack + Universal tray | 31 | 160-180 100 120 | ||
| Leg of lamb on the bone, 1 kg | Wire rack + Universal tray | 31 | 170-180 100 120 | ||
| Poultry(Chicken/Duck/Turkey) | |||||
| Chicken, Whole, 1.2 kg* | Wire rack + Universal tray | 31 | 205 80-100 | ||
| Chicken pieces | Wire rack + Universal tray | 31 | 200-220 25-35 | ||
| Duck breast | Wire rack + Universal tray | 31 | 180-200 20-30 | ||
| Small turkey, Whole, 5 kg | Wire rack + Universal tray | 31 | 180-200 120 150 | ||
| Food Accessory Level | Type of heating | Temp. (°C) | Time (min.) | ||
| Vegetables | |||||
| Vegetables, 0.5 kg | Wire rack + Universal tray | 31 | 220-230 | 15-20 | |
| Baked potato halves, 0.5 kg | Wire rack + Universal tray | 31 | 200 | 45-50 | |
| Fish | |||||
| Fish fillet, baked | Wire rack + Universal tray | 31 | 200-230 | 10-15 | |
| Roast fish | Wire rack+ Universal tray | 31 | 180-200 | 30-40 | |
* Turnover after half of time.
Cooking smart
Grilling
We recommend preheat the oven using large grill mode. Turn over after half of time.
| Food Accessory Level | Type of heating | Temp. (°C) | Time (min.) | ||
| Bread | |||||
| Toast Wire rack 5 240-250 2-4 | |||||
| Cheese toast Universal tray 4 200 4-8 | |||||
| Beef | |||||
| Steak* | Wire rack + Universal tray | 41 | 230-250 15-20 | ||
| Burgers* | Wire rack + Universal tray | 41 | 230-250 15-20 | ||
| Pork | |||||
| Pork chops | Wire rack + Universal tray | 41 | 230-250 20-25 | ||
| Sausages | Wire rack + Universal tray | 41 | 230-250 10-15 | ||
| Poultry | |||||
| Chicken, breast | Wire rack + Universal tray | 41 | 230-240 30-35 | ||
| Chicken, drumstick | Wire rack + Universal tray | 41 | 230-240 25-30 | ||
* Turnover after 2/3 of the cooking time.
Frozen ready-meal
| Food Accessory Level | Type of heating | Temp. (°C) | Time (min.) | |
| Frozen pizza Wire rack 3 200-220 15 | 25 | |||
| Frozen lasagne wire rack 3 180-200 | 45-50 | |||
| Frozen oven chips Universal tray 3 | 220-225 | 20 | ||
| Frozen croquettes Universal tray 3 | 220-230 | 25 | ||
| Frozen oven camembert Wire rack 3 190-200 | 10-15 | |||
| Frozen baguettes with topping Wire rack + Universal tray | 31 | 190-200 | 10-15 | |
| Frozen fish fingers Wire rack + Universal tray | 31 | 190-200 | 15-25 | |
| Frozen fish burger Wire rack 3 180 | 20 | 35 |
20 English
Pro-Roasting
This mode includes an automatic heating-up cycle up to 220 °C. The top heater and the convection fan are operating during the process of searing the meat. After this stage the food is cooked gently by the low temperature of pre-selection. This process is done while the top and the bottom heaters are operating. This mode is suitable for meat roasts and poultry.
| Food Accessory Level Temp. (°C) Time (hrs.) | ||||
| Roast beef wire rack + Universal tray | 31 | 80-100 3-4 | ||
| Pork roast wire rack + Universal tray | 31 | 80-100 4-5 | ||
| Lamb roast Wire rack + Universal tray | 31 | 80-100 3-4 | ||
| Duck breast Wire rack + Universal tray | 31 | 70-90 2-3 | ||
ECO convection
This mode uses the optimized heating system so that you save the energy during cooking your dishes. The times of this category are suggested to not be preheated before cooking for saving more energy.
You can increase or decrease the cooking time and/or temperature to your preference.
| Food Accessory Level Temp. (°C) Time (min.) | ||||
| Fruit crumble, 0.8-1.2 kg | Wire rack 2 16 | 0-180 40-60 | ||
| Jacket potatoes, 0.4-0.8 kg | Universal tray 2 | 190-200 50-70 | ||
| Sausages, 0.3-0.5 kg | Wire rack + Universal tray | 3 1 | 160-180 15-25 | |
| Frozen oven chips, 0.3-0.5 kg | Universal tray | 3 | 180-200 20-30 | |
| Food Accessory Level Temp. (°C) Time (min.) | ||||
| Frozen potato wedges, 0.3-0.5 kg | Universal tray | 3 | 190-210-20 | 30 |
| Fish fillets, baked, 0.4-0.8 kg | Wire rack + universal tray | 31 | 200-220-20 | 30 |
| Crispy fish fillets, breaded, 0.4-0.8 kg | Wire rack + universal tray | 31 | 200-220-20 | 30 |
| Roast sirloin of beef, 0.8-1.2 kg | Wire rack + universal tray | 21 | 180-200-50 | 70 |
| Roast vegetables, 0.4-0.6 kg | Universal tray | 3 | 200-220-20 | 30 |
English 21
Cooking smart
Auto cook programmes
The following table presents 20 auto programmes for cooking, roasting and baking.
It contains its quantities, weight ranges and appropriate recommendations. Cooking modes and times have been pre-programmed for your convenience. You will find some recipes for the auto programmes in your instruction book. Auto cook programmes 1 to 8, 18 and 19 include preheating and display the preheating progress. Please put the food in the oven after preheating beep. Then, press Cooking time to start Auto Cook.
WARNING
Always use oven gloves while taking out food.
| No. | Food | Weight (kg) | Accessory | Level |
| A 1 Potato gratin | 1.0-1.5 Wire rack 3 | |||
| Prepare fresh potato gratin using an ovenproof dish, 22-24 cm. Start programme, after preheating beep sounds, put dish in the centre of rack. | ||||
| A 2 | Vegetable gratin | 0.8-1.2 Wire rack 3 | ||
| Prepare fresh vegetable gratin using an ovenproof dish, 22-24 cm. Start programme, after preheating beep sounds, put dish in the centre of rack. | ||||
| A 3 Lasagne | 1.0-1.5 Wire rack 3 | |||
| Prepare homemade lasagne using a 22-24 cm ovenproof dish. Start programme, after preheating beep sounds, put dish in the centre of rack. | ||||
| A 4 Apple pie | 1.2-1.4 Wire rack 2 | |||
| Prepare apple pie using a 24-26 cm round metal baking tin. Start programme, after preheating beep sounds, put tin in the centre of rack. | ||||
| No. | Food | Weight (kg) | Accessory | Level |
| A 5 | Quiche Lorraine | 1.2-1.5 Wire rack 2 | ||
| Prepare quiche dough, put in a round quiche dish with 25 cm diameter. Start programme, after preheating beep sounds add filling and put dish in the centre of rack. | ||||
| A 6 | Sponge cake | 0.5-0.6 Wire rack 3 | ||
| Prepare dough and put into a black metal round baking tin with 26 cm diameter. Start programme, after preheating beep sounds, put tin in the centre of rack. | ||||
| A 7 | Marble cake | 0.7-0.8 Wire rack 2 | ||
| Prepare dough and put into a metal round gugelhopf or bundt tin. Start programme, after preheating beep sounds, put tin in the centre of rack. | ||||
| A 8 | Dutch loaf cake | 0.7-0.8 Wire rack 2 | ||
| Prepare dough and put into a black metal rectangular baking dish (length 25 cm). Start programme, after preheating beep sounds, put tin in the centre of rack. | ||||
| A 9 | Roast sirloin of beef | 0.9-1.1 | Wire rack + Universal tray | 2 |
| 11-1.3 | 1 | |||
| Season the beef and leave in refrigerator for 1 hour. Put on the wire rack with fat side up. | ||||
| A 10 | Herb roasted lamb chops | 0.4-0.6 | Wire rack + Universal tray | 4 |
| 0.6-0.8 | 1 | |||
| Marinate the lamb chops with herbs and spices and put them on wire rack. | ||||
22 English
| No. | Food | Weight (kg) | Accessory | Level |
| A 11 | Chicken, whole | 0.9-1.1 | Wire rack +Universal tray | 21 |
| 1.1-1.3 | ||||
| Rinse and clean chicken. Brush chicken with oil and spices. Put it breast side down on the wire rack and turn over, as soon as the oven beeps. | ||||
| A 12 | Chicken, breast | 0.4-0.6 | Wire rack +Universal tray | 41 |
| 0.6-0.8 | ||||
| Marinate breasts and put on the wire rack. | ||||
| A 13 | Trout | 0.3-0.5 | Wire rack +Universal tray | 41 |
| 0.5-0.7 | ||||
| Rinse and clean the fish and put head to tail on the wire rack. Add lemon juice, salt and herbs inside fish.Cut skin surface with knife. Brush oil and salt. | ||||
| A 14 | Salmon fillet | 0.4-0.6 | Wire rack +Universal tray | 41 |
| 0.6-0.8 | ||||
| Rinse and clean fillets of steaks. Put fillets skin side up on wire rack. | ||||
| A 15 | Roasted vegetables | 0.4-0.6 | Universal tray 4 | |
| 0.6-0.8 | ||||
| Rinse and prepare slices of courgette, eggplant, pepper, onion and cherry tomatoes. Brush with olive oil, herbs and spices. Distribute evenly on tray. | ||||
| A 16 | Baked potato halves | 0.6-0.8 | Universal tray 3 | |
| 0.8-1.0 | ||||
| Cut large potatoes (each 200 g) into halves lengthways. Put with cut side up on tray and brush with olive oil, herbs and spices. | ||||
| No. | Food | Weight (kg) | Accessory | Level |
| A 17 | Frozen oven chips | 0.3-0.5 | Universal tray 3 | |
| 0.5-0.7 | ||||
| Distribute frozen oven chips evenly on tray. | ||||
| A 18 | Frozen pizza | 0.3-0.6 | Wire rack 3 | |
| 0.6-0.9 | ||||
| Put the frozen pizza in the middle of the wire rack.Start programme, after preheating beep sounds, insert rack. The first setting is for thin Italian pizza, the sound setting for thick pan pizza. | ||||
| A 19 | Homemade pizza | 0.8-1.0 | Universal tray 2 | |
| 1.0-1.2 | ||||
| Prepare homemade pizza with the yeast dough and put it on the tray. The weight include dough and topping such as sauce, vegetables, ham and cheese. Start programme, after preheating beep sounds, insert tray. | ||||
| A 20 | Fermentation yeast dough | 0.5-0.6 | Wire rack 2 | |
| 0.7-0.8 | ||||
| Prepare dough in bowl, cover with cling film. Put in centre of rack. The first setting is for pizza and cake dough, the second setting for bread dough. | ||||

English 23

Cooking smart
Test Dishes
According to standard EN 60350-1
1. Baking
The recommendations for baking refer to a preheated oven. Always put trays the slanted side to the door front.
| Type of food | Accessory Level | Type of heating | Temp. (°C) | Time (min.) | |
| Small cakes | Universal tray | 3 165 25-30 | |||
| 2 160 30-30 | |||||
| 1+4 155 33 | |||||
| Shortbread | Universal tray 1+4 140 33-38 | ||||
| Fatless sponge cake | Wire rack + Spring form cake tin (Dark coated,ø 26 cm) | 2 160 35-40 | |||
| 2 160 35-40 | |||||
| 1+4 155 45 | |||||
| Apple pie | Wire rack + 2 Spring form cake tins * (Dark coated,ø 20 cm) | 1 placed diagonally | 160 70-80 | ||
| Universal tray + Wire rack + 2 Spring form cake tins ** (Dark coated,ø 20 cm) | 1+3 160 80 |
* Two cakes are arranged on the grid at the back left and at the front right.
** Two cakes are arranged in the centre on top of each other.
2. Grilling
Preheat the empty oven for 5 minutes using Large Grill function.
| Type of food | Accessory Level | Type of heating | Temp. (°C) | Time (min.) | |
| White bread toast | Wire rack 5 | 250 (max) | 1 2 | ||
| Beef burgers* (12 ea) | Wire rack + Universal tray (to catch drippings) | 41 | 250 (max) | 1^st 18-22 2^nd 7-10 |
* Turn over after ^2/_3 of the cooking time.
- Roasting
| Type of food | Accessory Level | Type of heating | Temp. (°C) | Time (min.) | |
| Whole chicken* | Wire rack + Universal tray (to catch drippings) | 31 | 205 80 | 100 |
* Turnover after half of time.
Maintenance
Cleaning
WARNING
Make sure the oven and accessories are cool before cleaning. Do not use abrasive cleaning agents, hard brushes, scouring pads or cloths, steel wool, knives or any other abrasive materials.
Oven interior
- For cleaning the interior of the oven, use a clean cloth and a mild cleaning agent or warm soapy water.
- Do not hand-clean the door seal.
- To avoid damaging the enamelled oven surfaces, only use standard oven cleaners.
• To remove stubborn soils, use a special oven cleaner.
Oven exterior
For cleaning the exterior of the oven such as the oven door, handle, and display, use a clean cloth and a mild cleaning detergent or warm soapy water, and dry with a kitchen roll or dry towel. Grease and dirt can remain, especially around the handle because of the hot air coming from inside. It is recommended to clean the handle after each use.
Accessories
Wash the accessories after every use, and dry it with a tea towel. To remove stubborn impurities, soak the used accessories in warm soapy water for about 30 minutes before washing.
Catalytic enamel surface (applicable models only)
The removable parts are coated with dark grey catalytic enamel. They can be soiled with oil and fat spattered by the circulating air during convection heating. However, these impurities burn off at oven temperatures of 200 °C or above.
- Remove all accessories from the oven.
- Clean the interior of the oven.
- Select Convection mode with max temperature, and run the cycle for an hour.
NOTE
The catalytic parts are coated on either a single side or 3 sides, depending on the model.
Door removal
For normal use, the oven door must not be removed but if removal is necessary, for example, for cleaning purposes, follow these instructions.
CAUTION
The oven door is heavy.
natural_image
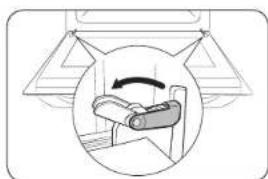
Diagram showing a mechanical device inside a circular frame, with no visible text or symbols.- Open the door and flip open the clips at both hinges completely.
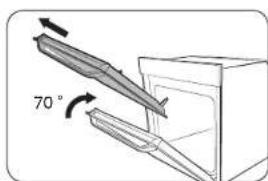
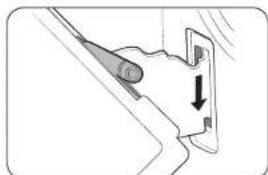
- Close the door by approximately 70°. With both hands, grasp the sides of the oven door at its middle and pull-lift until the hinges can be taken out.
natural_image
Diagram of a mechanical component with a downward arrow indicating motion or force (no text or symbols)- After cleaning, for attaching the door repeat the 1 and 2 steps in revers order. The clip on the hinge should be closed on both side.
Maintenance
Door Glass Removal
The oven door is equipped with three sheets of glass placed against each other. These sheets can be removed for cleaning.
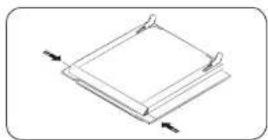
- Press the both buttons on the left and right sides of the door.
natural_image
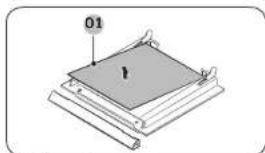
3D diagram of a layered mechanical or electronic component with labeled part '01' and a central feature (no text or symbols beyond labels)- Detach the covering and remove glass 1 and 2 from the door.
01 Glass 1
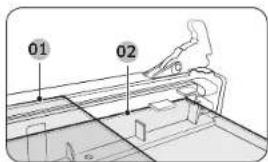
- After cleaning the door glasses, for assembly repeat 1, 2 steps in revers order. Check the right locations of glass 1 and 2 with picture.
01 Glass 1
02 Glass 2
NOTE
When assembly the inner glass 1, put printing to direction below.
Water collector
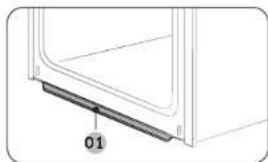
natural_image
Technical line drawing of a door frame with a labeled component (01), no text or symbols present.01 Water collector
The water collector collects not only excess moisture from cooking but also food residue. Regularly empty and clean the water collector.
WARNING
If you encounter a water leak from the water collector, contact us at a local Samsung service center.
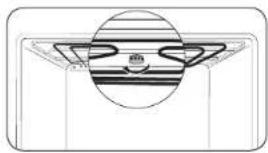
Cleaning the ceiling (depending on model)
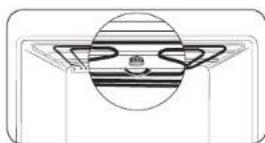
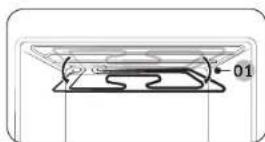
01 Approx. 12°
-
You can let down the grill heater and it is helpful for cleaning the ceiling of the oven. Remove the nut circular by turning it anticlockwise while holding the grill heater.
-
The front of the grill heater inclines downwards and the grill heater can not be removed out of the oven. Do not press the grill heater down, the grill heater can be deformed.
-
When cleaning has been done, lift the grill heater back to its original level and turn the nut circular clockwise
natural_image
Simple line drawing of a smiling face with glasses inside a circular frame (no text or symbols)26 English

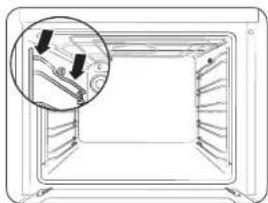
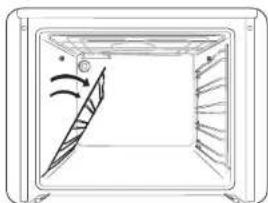
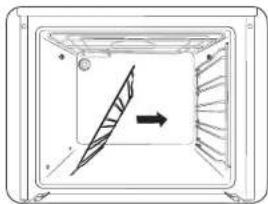
Detaching the side runners (depending on model)
natural_image
Diagram of a microwave oven with a magnified inset showing internal components (no text or symbols)- Press central part of the side runner top portion.
natural_image
Diagram of a door with a staircase and directional arrows indicating motion (no text or symbols)- Rotate the side runner by approximately 45^ .
natural_image
Diagram of a container with internal structure and directional arrow, no text or symbols present- Pull and remove the side runner from bottom two holes.
Replacement
Bulbs
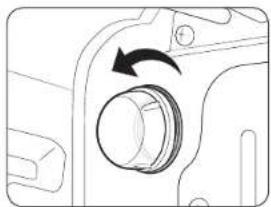
natural_image
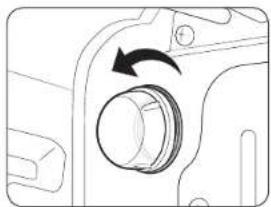
Mechanical component diagram showing a circular knob with an arrow indicating rotation (no text or symbols)- Remove the glass cap by turning anti-clockwise.
- Replace the oven light.
- Clean the glass cap.
- When done, follow step 1 above in the reverse order to reinsert the glass cap.
WARNING
- Before replacing a bulb, turn off the oven and unplug the power cord.
- Use only 25-40 W/220-240 V, 300 °C heat-resistant bulbs. You can purchase approved bulbs at a local Samsung service center.
- Always use a dry cloth when handling a halogen bulb. This is to prevent the bulb from being tampered with fingerprints or sweat, resulting in a shortened lifecycle.
TroubleshootingTroubleshooting
Checkpoints
If you encounter a problem with the oven, first check the table below and try the suggestions. If the problem continues, contact a local Samsung service centre.
| Problem Cause | Action | |
| The buttons cannot be pressed properly. | · If there is foreign matter caught between the buttons | · Remove the foreign matter and try again. |
| · Touch model: if there is moisture on the exterior | · Remove the moisture and try again. | |
| · If the lock function is set | · Check whether the lock function is set. | |
| The time is not displayed. | · If there is no power supplied | · Check whether there is power supplied. |
| The oven does not work. | · If there is no power supplied | · Check whether there is power supplied. |
| The oven stops while in operation. | · If it is unplugged from the power socket | · Reconnect the power. |
| The power turns off during operation. | · If continuous cooking takes a long time | · After cooking for a long time, let the oven cool. |
| · If the cooling fan does not work | · Listen for the sound of the cooling fan. | |
| · If the oven is installed in a place without good ventilation | · Keep the gaps specified in the product installation guide. | |
| · When using several power plugs in the same socket | · Use a single plug. | |
| There is no power to the oven. | · If there is no power supplied | · Check whether there is power supplied. |
| Problem Cause Action | ||
| The oven exterior is too hot during operation. | · If the oven is installed in a place without good ventilation | · Keep the gaps specified in the product installation guide. |
| The door cannot be opened properly. | · If there is food residue stuck between the door and product interior | · Clean the oven well and then open the door again. |
| The interior light is dim or does not turn on. | · If the lamp turns on and then off | · The lamp automatically turns off after a certain amount of time to save power. You can turn it on again by pressing the oven light button. |
| · If the lamp is covered by foreign matter during cooking | · Clean the inside of the oven and then check. | |
| Electric shock occurs on the oven. | · If the power is not properly grounded | · Check whether the power supply is properly grounded. |
| · If you are using a socket without grounding | ||
| There is water dripping. | · There may be water or steam in some cases depending on the food. This is not a product malfunction. | · Let the oven cool and then wipe with a dry dish towel. |
| There is steam through a crack in the door. | ||
| There is water remaining in the oven. | ||
| The brightness inside the oven varies. | · The brightness changes depending on power output changes. | · Power output changes during cooking are not malfunctions, so there is no need to worry. |
| Cooking is finished, but the cooling fan is still running. | The fan automatically runs for a certain amount of time to ventilate inside the oven. | This is not a product malfunction, so there is no need to worry. |
| The oven does not heat. | If the door is openClose the door and restart. | |
| If oven controls are not correctly set | Refer to the chapter on oven operation and reset the oven. | |
| If the household fuse has been blown or the circuit breaker has operated | Replace the fuse or reset the circuit. If it happens repeatedly, call an electrician. | |
| Smoke comes out during operation. | During initial operationSmoke may come from the heater when you first use the oven. This is not a malfunction, and if you run the oven 2-3 times, it should stop happening. | |
| If there is food on the heater | Let the oven cool sufficiently and remove the food from the heater. | |
| There is a burning or plastic smell when using the oven. | If using plastic or other containers that are not heat-resistant | Use glass containers suitable for hot temperatures. |
| Problem Cause Action | ||
| The oven does not cook properly. | • If the door is often opened during cooking | • Do not frequently open the door unless you are cooking things that need to be turned. If you frequently open the door, the interior temperature will be lower and this may affect the results of your cooking. |
| Steam cleaning does not work. | • This is because the temperature is too high. | • Cool the oven and then use |
Technical specifications Troubleshooting Technical specifications
Information codes
If the oven fails to operate, you may see an information code on the display. Check the table below and try the suggestions.
| Code | Meaning Action | |
| C-d1 | Door lock malfunctions | Turn off the oven and then restart.If the problem continues, turn off all power for 30 seconds or more and then reconnect. If the problem is not fixed, please contact a service centre. |
| C-20 | Sensor malfunctions | |
| C-21 | ||
| C-22 | ||
| C-F1 | Only occurs during EEPROM Read/Write | |
| C-F0 | If there is no communication between the main PCB and sub PCB | |
| C-F2 | Occurs when a communication problem is maintained between the Touch IC <-> Main or Sub micom | Turn off the oven and then restart.If the problem continues, turn off all power for 30 seconds or more and then reconnect. If the problem is not fixed, please contact a service centre. |
| C-d0 | Button problemOccurs when a button is pressed and held for a period of time. | Clean the buttons and make sure there is no water on/around them.Turn off the oven and try again. If the problem continues, contact a local Samsung service centre. |
| S-01 | Safety shutoffOven has continued operating at a set temperature for an extended time.Under 105 °C - 16 hoursFrom 105 °C to 240 °C - 8 hoursFrom 245 °C to Max - 4 hours | This is not system failure. Turn off the oven and remove food. Thenm try again normally. |
SAMSUNG strives to improve its products at all times. Both the design specifications and these user instructions are thus subject to change without notice.
| Dimensions (W x H x D) | Outside | 595 x 595 x 570 mm |
| Volume | 68 liter | |
| Weight Net | 34.2 kg | |
| Connection voltage | 230-240 V - 50 Hz | |
| Maximum connected load power | 3400-3600 W | |
30 English
Appendix
Product data sheet
| SAMSUNG SAMSUNG | |
| Model identification NV68R2340RS | NV68R2340RM |
| Energy Efficiency Index per cavity (EEI cavity) | 95.2 |
| Energy Efficiency Class per cavity A | |
| Energy consumption (electricity) required to heat a standardised load in a cavity of an electric heated oven during a cycle in conventional mode per cavity (electric final energy) (EC electric cavity) | 0.99 kwh/cycle |
| Energy consumption required to heat a standardised load in a cavity of an electric heated oven during a cycle in fan-forced mode per cavity (electric final energy) (EC electric cavity) | 0.80 kwh/cycle |
| Number of cavities 1 | |
| Heat source per cavity (electricity or gas) electricity | |
| Volume per cavity (V) 68 L | |
| Type of oven Built-in | |
| Mass of the appliance (M) 34.2 kg |
Data determined according to standard EN 60350-1 and Commission Regulations (EU) No 65/2014 and (EU) No 66/2014.
Energy saving tips
- During cooking, the oven door should remain closed except for turning food over. Do not open the door frequently during cooking to maintain the oven temperature and to save energy.
- Plan oven use to avoid turning the oven off between cooking one item and the next to save energy and reduce the time for re-heating the oven.
- If cooking time is more than 30 minutes, the oven may be switched off 5-10 minutes before the end of the cooking time to save energy. The residual heat will complete the cooking process.
- Wherever possible cook more than one item at a time.
English 31
SAMSUNG
QUESTIONS OR COMMENTS?
| COUNTRY CALL OR VISIT US ONLINE AT | ||
| ALBANIA 045 620 202 www.samsung.com/al/support | ||
| BOSNIA 055 233 999 www.samsung.com/support | ||
| North Macedonia 023 207 777 www.samsung.com/mk/support | ||
| BULGARIA | *3000 Цена на един градски разговор0800 111 31^{-}^{-}^{-}^{-}^{-}^{-}^{-}^{-}^{-}^{-}^{-}^{-}^{-}^{-}^{-}^{-}^{-}^{-}^{-}^{-}^{-}^{-}^{-}^{-}^{-}^{-}^{-}^{-}^{-}^{-}^{-}^{-}^{-}^{-}^{-}^{-}^{-}^{-}^{-}^{-}^{-}^{-}^{-}^{-}^{-}^{-}^{-}^{-}^{-}^{-}^{-}-^{-}^{-}^{-}^{-}^{-}^{-}^{-}^{-}^{-}^{-}^{-}^{-}^{-}^{-}^{-}^{-}^{-}^{-}^{-}^{-}^{-}^{-}^{-}^{-}^{-}^{-}^{-}^{-}^{-}^{-}^{-}^{-}^{-}^{-}^{-}^{-}^{-}^{-}^{-}^{-}^{-}^{-}^{-}^{-}^{-}^{-}^{-}^{-}^{-}^{--}^{-}^{-}^{-}^{-}^{-}^{-}^{-}^{-}^{-}^{-}^{-}^{-}^{-}^{-}^{-}^{-}^{-}^{-}^{-}^{-}^{-}^{-}^{-}^{-}^{-}^{-}^{-}^{-}^{-}^{-}^{-}^{-}^{-}^{-}^{-}^{-}^{-}^{-}^{-}^{-}^{-}^{-}^{-}^{-}^{-}^{-}^{-}^{-}^{-}^{+}^{-}^{-}^{-}^{-}^{-}^{-}^{-}^{-}^{-}^{-}^{-}^{-}^{-}^{-}^{-}^{-}^{-}^{-}^{-}^{-}^{-}^{-}^{-}^{-}^{-}^{-}^{-}^{-}^{-}^{-}^{-}^{-}^{-}^{-}^{-}^{-}^{-}^{-}^{-}^{-}^{-}^{-}^{-}^{-}^{-}^{-}^{-}^{-}^{-} ^{-}^{-}^{-}^{-}^{-}^{-}^{-}^{-}^{-}^{-}^{-}^{-}^{-}^{-}^{-}^{-}^{-}^{-}^{-}^{-}^{-}^{-}^{-}^{-}^{-}^{-}^{-}^{-}^{-}^{-}^{-}^{-}^{-}^{-}^{-}^{-}^{-}^{-}^{-}^{-}^{-}^{-}^{-}^{-}^{-}^{-}^{-}^{-}^{-}^{-} -\text{)}^{+}^{-}^{-}^{-}^{-}^{-}^{-}^{-}^{-}^{-}^{-}^{-}^{-}^{-}^{-}^{-}^{-}^{-}^{-}^{-}^{-}^{-}^{-}^{-}^{-}^{-}^{-}^{-}^{-}^{-}^{-}^{-}^{-}^{-}^{-}^{-}^{-}^{-}^{-}^{-}^{-}^{-}^{-}^{-}^{-}^{-}^{-}^{-}^{-}^{+}\text{)}^{+}^{-}^{-}^{-}^{-}^{-}^{-}^{-}^{-}^{-}^{-}^{-}^{-}^{-}^{-}^{-}^{-}^{-}^{-}^{-}^{-}^{-}^{-}^{-}^{-}^{-}^{-}^{-}^{-}^{-}^{-}^{-}^{-}^{-}^{-}^{-}^{-}^{-}^{-}^{-}^{-}^{-}^{-}^{-}^{-}^{-}^{-}^{-}\text{)}^{+}^{-}^{-}^{-}^{-}^{-}^{-}^{-}^{-}^{-}^{-}^{-}^{-}^{-}^{-}^{-}^{-}^{-}^{-}^{-}^{-}^{-}^{-}^{-}^{-}^{-}^{-}^{-}^{-}^{-}^{-}^{-}^{-}^{-}^{-}^{-}^{-}^{-}^{-}^{-}^{-}^{-}^{-}^{-}^{-}^{-}^{-}^{+}\text{)}^+ -\text{)}^{+}^{-}^{-}^{-}^{-}^{-}^{-}^{-}^{-}^{-}^{-}^{-}^{-}^{-}^{-}^{-}^{-}^{-}^{-}^{-}^{-}^{-}^{-}^{-}^{-}^{-}^{-}^{-}^{-}^{-}^{-}^{-}^{-}^{-}^{-}^{-}^{-}^{-}^{-}^{-}^{-}^{-}^{-}^{-}^{-}^{-}^{-}\text{)}^{+} -\text{)}^{+}^{-}^{-}^{-}^{-}^{-}^{-}^{-}^{-}^{-}^{-}^{-}^{-}^{-}^{-}^{-}^{-}^{-}^{-}^{-}^{-}^{-}^{-}^{-}^{-}^{-}^{-}^{-}^{-}^{-}^{-}^{-}^{-}^{-}^{-}^{-}^{-}^{-}^{-}^{-}^{-}^{-}^{-}^{-}^{-}^{-}^{+}\text{)}^{+}-\text{)}^{+}-\text{)}^{+}-\text{)}^{+}-\text{)}^{+}-\text{)}^{+}-\text{)}^{+}-\text{)}^{+}-\text{)}^{+}-\text{)}^{+}-\text{)}^{+}-\text{)}^{+}-\text{)}^{+}-\text{)}^{+}-\text{)}^{+}-\text{}\] | |

DG68-00757E-00
- ПРЕДУПРЕЖДЕНИЕ
- UPOZORENJE
- B NAPOMENA
- NAPOMENA
- Održavanje
- Skidanje stakla na vratima
- NOTA
- AVERTISMENT
- SHËNIM
- PARALAJMËRIM
- Čišćenje svoda pećnice (u zavisnosti od modela)
- Zamena
- Sijalice
- OPOZORILO
- ContentsContents
- Using this manual 3
- Safety instructions 3
- Installation 6
- Before you start 9
- Operations 11
- Cooking smart 18
- Maintenance 25
- Troubleshooting 28
- Technical specifications 30
- Appendix 31
- English
- Using this manual
- The following symbols are used in this User Manual:
- WARNING
- CAUTION
- NOTE
- Safety instructions
- Important safety precautions
- InstallationSafety instructions
- Correct Disposal of This Product (Waste Electrical & Electronic Equipment)
- Auto energy saving function
- Installation
- What's included
- Accessories
- Power connection
- Cabinet mount
- Before you start
- Initial settings
- New oven smell
- Basic use
- Operations
- Control panel
- Common settings
- Temperature
- Cooking time
- End time
- English
- Delay End
- Case 1
- Case 2
- To clear the cooking time
- To clear the end time
- To stop cooking
- Cooking mode
- Auto cook
- Steam cleaning
- Timer
- Sound On/Off
- Cooking smart
- Manual cooking
- WARNING on acrylamide
- Accessory tips
- Baking
- Grilling
- Pro-Roasting
- ECO convection
- Auto cook programmes
- Test Dishes
- Baking
- Grilling
- Maintenance
- Cleaning
- Oven interior
- Oven exterior
- Catalytic enamel surface (applicable models only)
- Door removal
- Door Glass Removal
- Water collector
- Cleaning the ceiling (depending on model)
- Detaching the side runners (depending on model)
- Replacement
- Bulbs
- TroubleshootingTroubleshooting
- Checkpoints
- Technical specifications Troubleshooting Technical specifications
- Information codes
- Appendix
- Energy saving tips
- SAMSUNG
Brand : SAMSUNG
Model : NV68R2340RM
Category : Oven