Slypod - Uncategorized Moza - Free user manual and instructions
Find the device manual for free Slypod Moza in PDF.


User questions about Slypod Moza
0 question about this device. Answer the ones you know or ask your own.
Ask a new question about this device
Download the instructions for your Uncategorized in PDF format for free! Find your manual Slypod - Moza and take your electronic device back in hand. On this page are published all the documents necessary for the use of your device. Slypod by Moza.
USER MANUAL Slypod Moza
natural_image
Technical line drawing of a cylindrical device labeled 'SLYPODE' with no additional text or symbolsSLYPOD E
User Manual
Disclaimer and Warning
Thank you for purchasing the MOZA Slypod E!
- This document is related to the safety use and legal rights of your equipment. Please read it carefully before the first use.
- By using this product, you are deemed to have read, understood, endorsed and accepted all the terms and content of this statement. You are solely responsible for the use of this product and the consequences thereof. You undertake to use this product for legitimate purposes and agree to the terms and any relevant regulations, policies and guidelines formulated by Shenzhen Gudsen Technology Co., Ltd. (hereinafter referred to as Gudsen). Gudsen is not responsible for damage, injury or any legal problems caused by the direct or indirect use of this product. Users should follow all safety guidelines including but not limited to this document.
- MOZA Slypod E is professional videography equipment. Users need to have professional videography and safety knowledge, and need to be careful. Please read the user manual carefully before the first use.
- This product is not a toy and not suitable for use by minors. Do not allow children to operate this product.
- Do not use MOZA Slypod E with products or accessories that are not provided or recommended by Gudsen, and please strictly follow the safety guidelines in the product manual.
- The final interpretation of this document belongs to Shenzhen Gudsen Technology Co., Ltd. Updates are subject to change without notice. Please visit the official website www.gudsen.com for the latest product information.
Safety Guidelines
1. Safety Instructions for Charging
Do not use an unofficial charging cable for external DC power to prevent the gimbal from working properly and causing unnecessary damage.
- Do not put the equipment into the water or get it wet!
- Do not charge the equipment under fire or extremely hot conditions! Do not use or store the equipment near heat sources such as fire or heaters! If the battery leaks or gives off an odor, remove the equipment from the open fire immediately!
- Do not use the unqualified adapter to charge the equipment!
- Do not disassemble and install the equipment to prevent the gimbal from working properly!
- Do not use the equipment in extremely harsh environments to prevent the gimbal from working properly!
- Do not pierce the equipment with nails or other sharp objects. Do not hammer or pedal the equipment!
- Do not hit, throw or shake the equipment!
- Do not solder the equipment terminal directly!
- Do not disassemble the equipment in any way!
- Do not put the equipment into microwave or pressure vessel!
- Do not use if the battery emits odor, heat, deformation, discoloration, or any other abnormality; If the equipment is in use or charging, unplug the power adapter from the device and stop using it immediately!
Battery Charging
The Slypod E is equipped with a Type-C interface, supporting 5V2A low-speed charging. The fast charge protocol is not supported. Users can select the matched charger according to actual needs.
Please use the TYPE-C interface to charge the battery and do not use external power sources such as wall outlet or car cigarette lighter to charge the battery.
Battery Charging Instructions
The MOZA Slypod E has a built-in lithium battery. Fully charge the battery before the first use to active the battery. The solid red light indicate that the equipment is charging, and the solid blue light indicate that the charging is complete. With universal Type-C port, the MOZA Slypod E can be charged by phone charger or power bank.
The charging stops automatically when the battery gets full.
- Please use the original charging cable provided in the package! (5V 2A low-speed charging input is supported, the fast charge protocol is not supported)
- Please do not overcharge or over-discharge the battery. Otherwise the battery will be damaged;
- Recharge and discharge the battery every 3 months to keep it activated if it is left unused for a long time
Battery Protection
The Slypod E has under-voltage, overcurrent protection function. Battery protection state will be triggered by abnormal conditions such as overuse or short circuit. When the battery enters the protection state, it stops output with a warning red color light.
MOZA Slypod E Overview
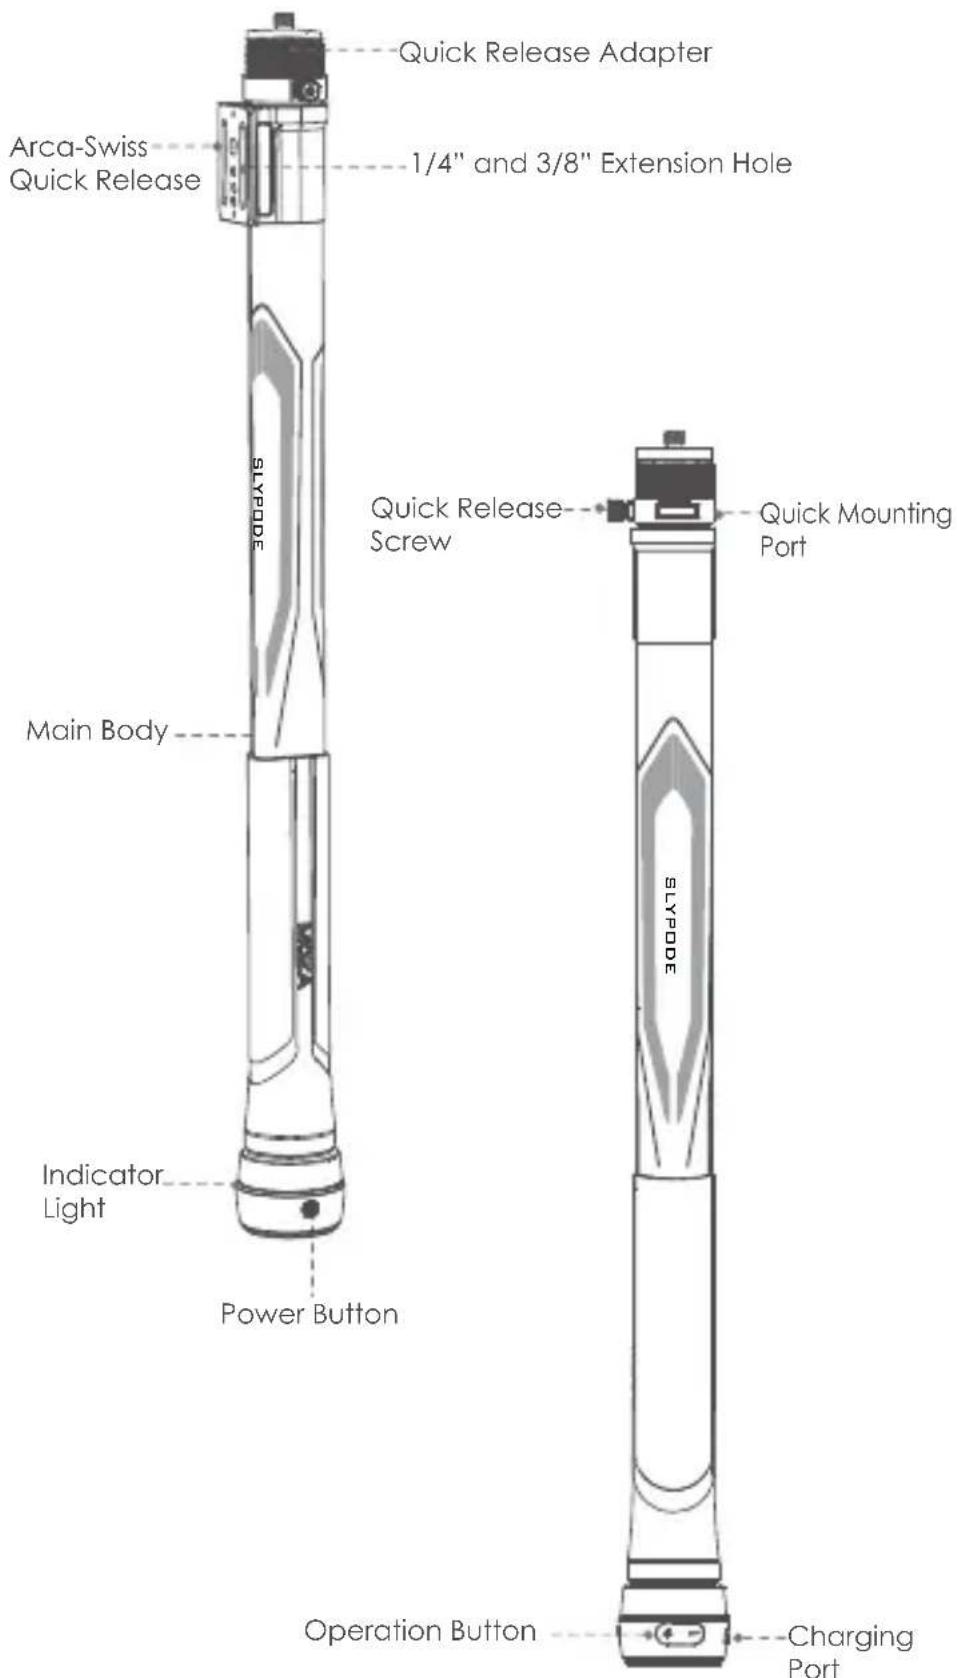
text_image
Quick Release Adapter Arca-Swiss Quick Release 1/4" and 3/8" Extension Hole STXPODE Main Body Indicator Light Power Button Operation Button Charging Port Quick Release Screw Quick Mounting Port SLYPODEAdapter (accessory)
natural_image
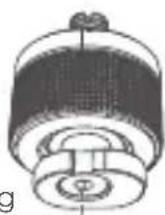
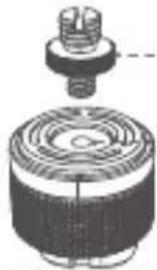
Technical illustration of a mechanical component with threaded end and concentric circular features (no text or symbols)-1/4" to 3/8" Adapter Screw
-1/4" Extension Hole
Quick Mounting Port
There is a 1/4" extension screw hole on the top of the adapter, and it comes with a 1/4" to 3/8" adapter screw to meet different shooting devices.
Arca-Swiss Quick Release
1/4" Screw Hole
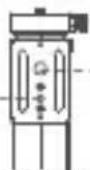
3/8" Screw Hole
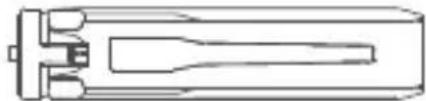
There is a 1/4" screw hole and a 3/8" screw hole on the body of Arca-Swiss quick release which can meet various extension needs. (When connecting the body with monopod or tripod via the Arca-Swiss quick release, the Slypod E can be used as a motorized slider)
Tripod
natural_image
Technical line drawing of a mechanical component (no text or symbols)There is a 1/4" extension screw on top of the tripod, which can be used for support and extension, the tripod can be used as a handle when the legs are not open. (The main body must be connected to the stand adapter to connect the tripod)
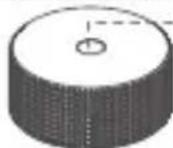
Stand Adapter
1/4" Screw Hole
There are 1/4" extension screw holes on the stand adapter which enable the body to connect with tripod or other accessories to mount different shooting devices.
Mounting
Mounting the adapter
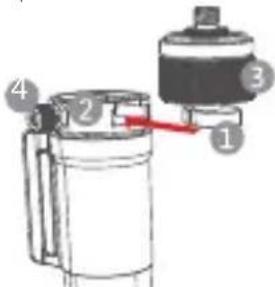
Push the quick mounting port 1 from the bottom of the adapter into the groove at the top of the pole 2 until fully fit. After connected, tighten the knob 3 clockwise to secure the adapter onto the pole; Turn counter-clockwise to loosen the knob 3 , then turn the knob 4 counter-clockwise to detach the adapter from the pole. Reset the quick release knob after the adapter is detached.
text_image
Diagram of a mechanical device with numbered components and a red arrow indicating directionGetting Started
Long press for 3 seconds: Power on/off
Button Operations
Power Button | Device status | Extend+ | Retract- | |
| Click once | Photo taking control via the shutter cable | Static | Start to extend | Start to retract |
| — | Extend | Accelerate by one gear | Decelerate by one gear | |
| — | Retract | Decelerate by one gear | Accelerate by one gear | |
| Click all three buttons at the same time: reset (blinking white) | ||||
| Long press | Power on | Static | Start to extend and continue to accelerate | Retract and continue to accelerate |
| — | Extend | Keep extending and continue to accelerate | Extending decelerates first, then start to retract | |
| — | Retract | Retracting accelerates first, then start to extend | Keep retracting and continue to accelerate | |
| — | — | Long press +/- buttons at the same time: automatic reciprocating mode (The blue light lasts for 1s indicate a mode switch.) | ||
| Double click | Stop | — | — | — |
| Triple click | Reset + Turn Off (Blinking red) | — | — | — |
App Download
Scan the QR code below or search in the App Store to download the MOZA Master App.
IOS Android
Device Connection (Wireless)
Download the "MOZA Master" App.
a. Turn on the Slypod E and mobile phone Bluetooth.
b. Launch the "MOZA Master", select the device to connect.
c. Enter the operation interface after connection is completed.
App Operation

It is required to activate the device according to the instructions before the first operation. Please refer to the latest App version. There is no further notice for App updates, please check on our official website and the App store. When the Slypod E is controlled by the App, other buttons will be disabled except for the power button.
- Regular Mode
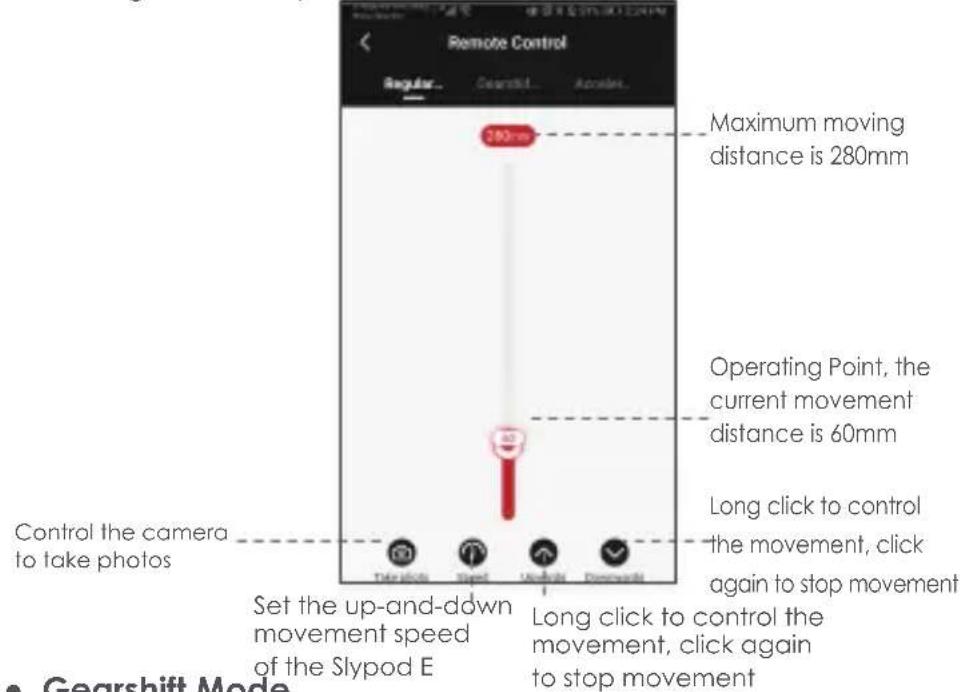
Slide the red operating point from the starting point to any position, the Slypod E will move accordingly. Release the operating point, the Slypod E will stop moving. Long click Downwards or Upwards icon, the Slypod E will automatically move up or down. Click Downwards or Upwards icon again to stop the movement. Click the 'Take photo' icon, and Slypod E will control the camera to take a photo. (Please make sure your Slypod E is connected with the camera control cable, the camera control cable needs to be purchased separately). Speed Setting: Click Speed icon to set the speed, and the Slypod E will move according to the set speed.
text_image
Remote Control Regular... Ceramic... Acceler... 280mm Maximum moving distance is 280mm Operating Point, the current movement distance is 60mm Long click to control the movement, click again to stop movement Control the camera to take photos Set the up-and-down movement speed of the Slypod E Long click to control the movement, click again to stop movement Take photo Spect Unstable Downstairs- Gearshift Mode
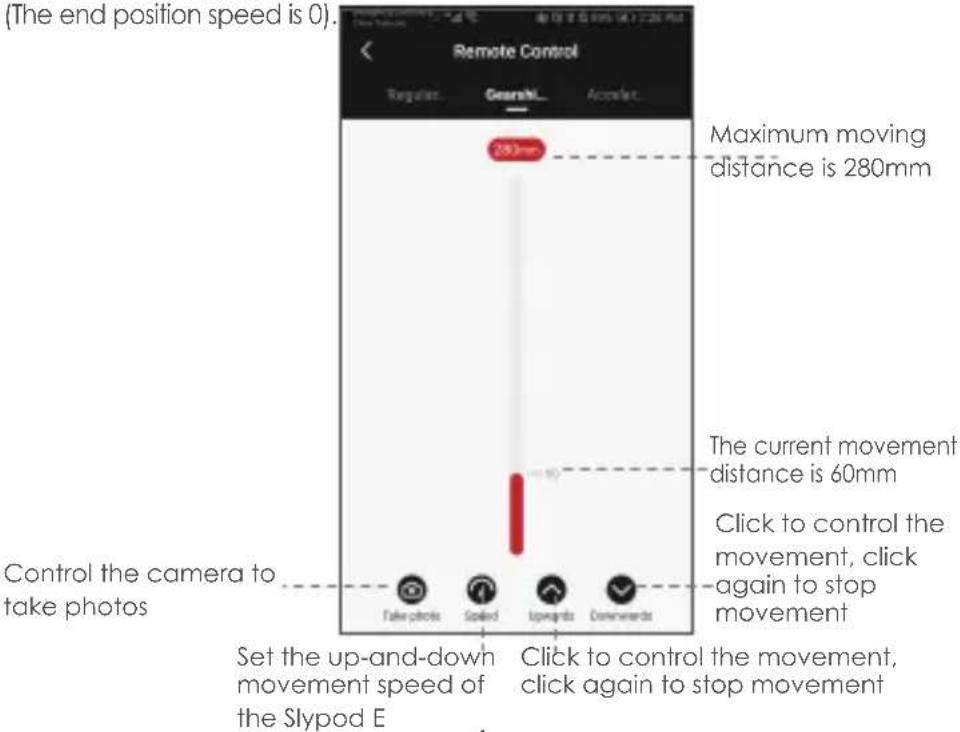
Click Upwards or Downwards icon to control the movement of Slypod E. Click again to stop the movement. Click Take photo icon to control the camera to take a photo. (Please make sure your Slypod E is connected with the camera control cable, the camera control cable needs to be purchased separately). Speed Setting: Click speed icon to set the speed, the Slypod E will move from the current speed to the set speed and then decelerates to the end position. (The end position speed is 0).
(The end position speed is 0)
text_image
(The end position speed is 0). Remote Control Regular... Search... Acceler... 280mm Maximum moving distance is 280mm The current movement distance is 60mm Click to control the movement, click again to stop movement Control the camera to take photos Take photo Spiled Upwards Comments Set the up-and-down movement speed of the Slypod E Click to control the movement, click again to stop movement- Acceleration Mode
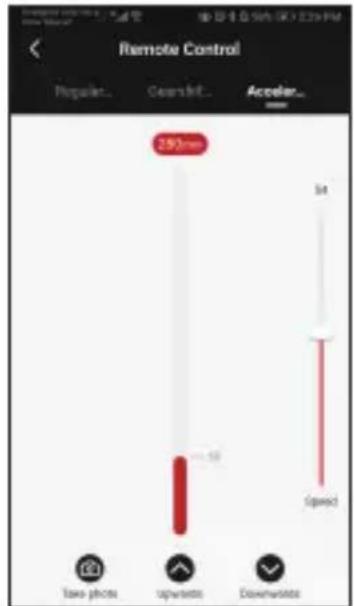
Click Upwards and the device will move up automatically; click again and the device stops moving. Click Downwards and the device will move down automatically; click again and the device stops moving. Click 'Take photo', the Slypod E controls the camera to take a photo. (Slypod E needs to be connected to the camera with the camera control cable, the camera control cable needs to be purchased separately) Speed setting: Drag the white mark to set the device acceleration speed, and the device will continue to accelerate to the end position according to the set speed (When the Slypod E extends to 280mm or retracts to 0mm, it will reach the setting speed)
text_image
Remote Control Regular... Capacit... Acceler... 250mm upsets downsets Speed Take photo upsets downsets• Segmentation Mode
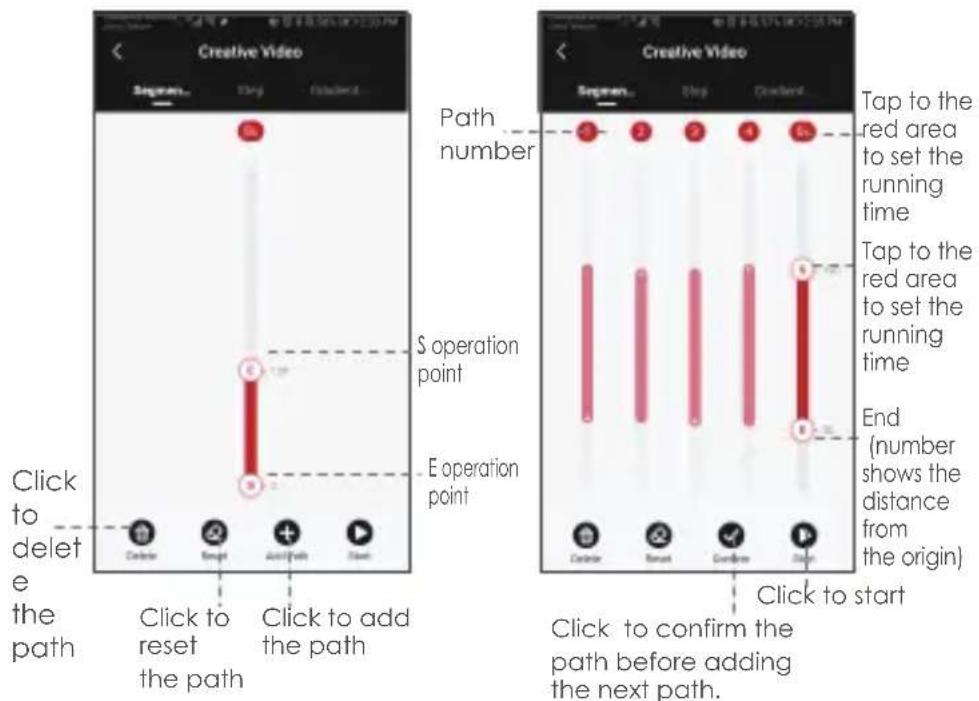
Select the segmentation mode, add a path (Click + to add the path. 5 paths is the most that can be added, click confirm before adding the next path). Slide the S operating point and the E operating point to any position to set the starting position and end position of the first path. Slide the E operating point to set the end position of the second, third, fourth or fifth path. Then, the starting point of the next path will be the end position of the previous one.
text_image
Creative Video Signen. Buy Printed... Click to delete the path Click to reset the path Click to add the path S operation point E operation point Path number Creative Video Signen. Buy Printed... Tap to the red area to set the running time Tap to the red area to set the running time End (number shows the distance from the origin) Click to start Click to confirm the path before adding the next path.Click √ to confirm the path and set the running time. The next path can be added after confirming the path. Click Confirm and the Slypod E will run according to the setting after the countdown is over. At this point, enter the Segmentation time-lapse interface, click on the red circular area, the Slypod E can control the camera to take pictures. (Slypod E needs to be connected to the camera with the camera control cable)

text_image
Creative Video Segner... Time Session 1 2 3 4 5 6 Segmentation 05 Time Setting(s): Cancel Confirm Set path running time Segmentation time-lapse... Start lag time (take 00:08:02) Cancel Reset Add Time SessionClick on the red circular area, the Slypod can control the camera to take pictures
- Step Time-Lapse
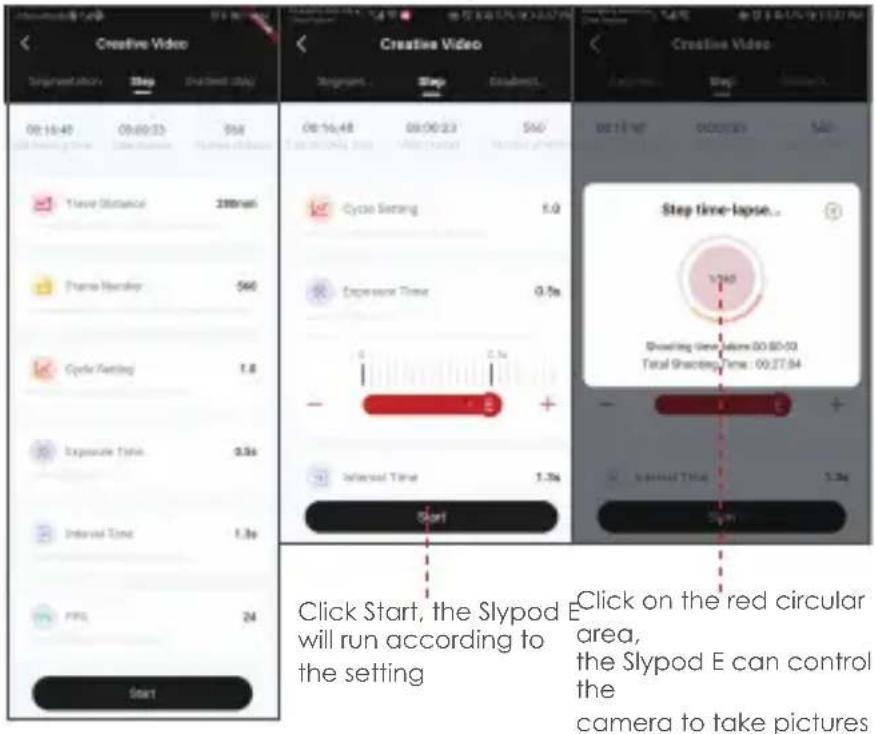
Select Step mode to set Travel Distance, Frame Number, Cycle Setting, Exposure Time, Interval Time and FPS. Click "+" -" to adjust the parameter, click to start, the Slypod E will run according to the set parameters, the interface will display Shooting Time Taken, Total Shooting Time, Total number of photos. Enter the Step time-lapse interface, click on the red circular area, the Slypod E can control the camera to take pictures. (Slypod E needs to be connected to the camera with the camera control cable)
text_image
Creative Video Start Step End (end) 08:16:40 09:00:23 566 Take Distance 280mm Frame Masking 566 Cycle Setting 1.8 Exposure Time 0.5s Interval Time 1.3s FPG 24 Start Creative Video Start Step End 08:16:40 09:00:23 566 Cycle Setting 5.0 Expressive Time 0.5s Inversed Time 1.3s Start Step time-lapse... 1745 Shooting Time 00:00:03 Total Shooting Time 00:27:54 Inversed Time 5.3s Start Click Start, the Slypod E will run according to the setting. Click on the red circular area, the Slypod E can control the camera to take pictures- Gradient Step Time-Lapse
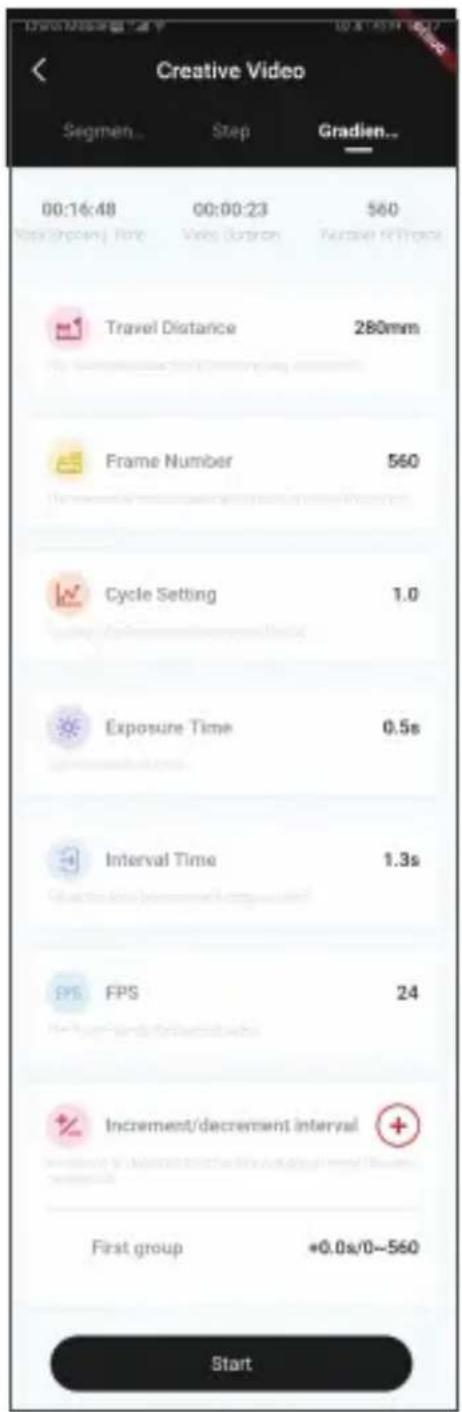
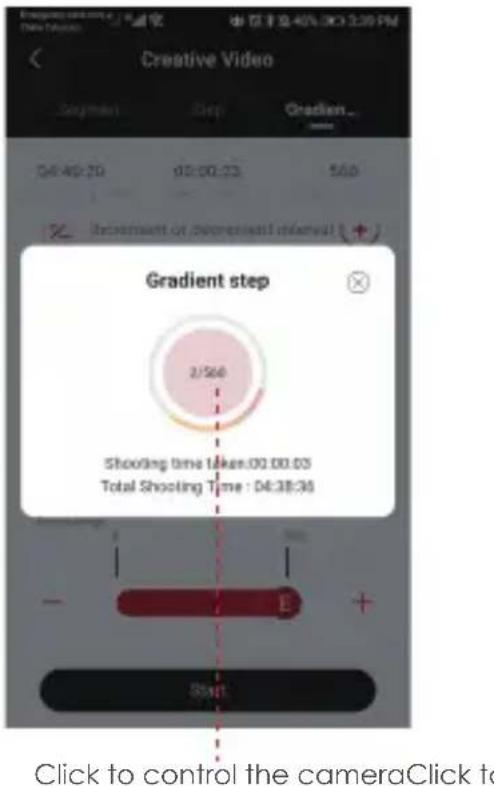
Select the gradient Step Time-Lapse and set the travel distance, frame number, cycle setting, exposure time, interval time, FPS, increment and decrement of interval. For the first time, click + to add the first group of increment or decrement of time and frame number, and click again the + to add a second group(5 groups can be added at most). Click Start, the device will move according to the settled parameters. The interface will show the total shooting time, video duration, and the number of photos. During the shot, click the center red area, the Slypod E will control the camera to take photos.(Slypod E and camera need to be connected with camera shutter control cable)
text_image
Creative Video Segmen... Step Gradien... 00:16:48 00:00:23 560 View Shopping Time View Options Purchase History Travel Distance 280mm Frame Number 560 Cycle Setting 1.0 Exposure Time 0.5s Interval Time 1.3s FPS FPS 24 Increment/decrement interval + First group +0.0s/0-560 Start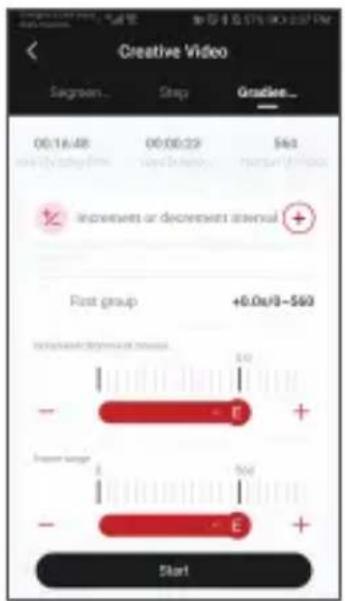
text_image
Creative Video Sagreen... Stop Gracie... 00:16:48 00:00:29 $63 increase or decrease removal + First group +0.0x/0-560 Increase or Decrease removal - E + Increase Range E 560 - E + Start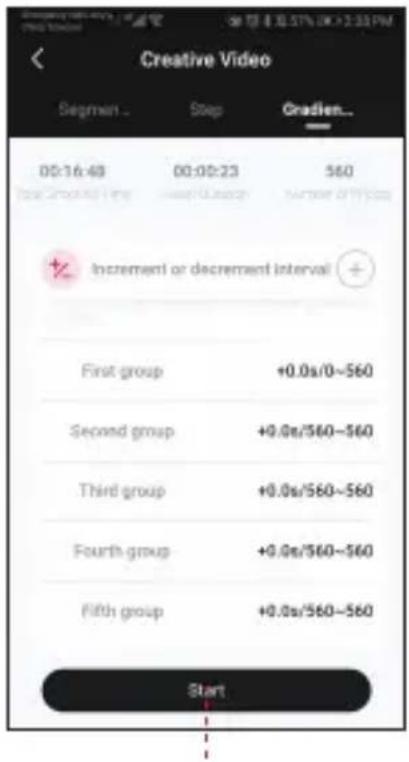
text_image
Creative Video Segment Step Cradien... 00:16:48 00:00:23 560 Increment or decrement interval First group +0.0s/0~560 Second group +0.0s/560~560 Third group +0.0s/560~560 Fourth group +0.0s/560~560 Fifth group +0.0s/560~560 StartStep Time-lapse
text_image
Creative Video Segment Step Gradient... 04:40:20 02:00:23 560 Increment or Palestine interval Gradient step 2/560 Shooting time taken:00:00:03 Total Shooting Time : 04:38:36 Start Click to control the cameraClick to- Setting-Indicator Light
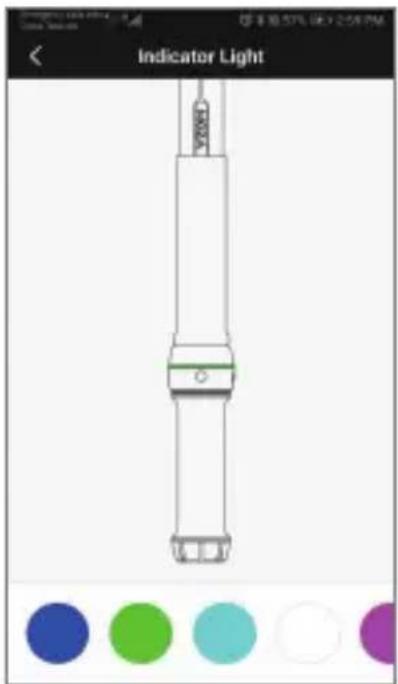
Enter the operation interface, select Setting-Indicator Light, up to 5 kinds of indicator light colors can be set based on personal preference.
text_image
Indicator Light 0 10 57L 62V 2.58 PMFirmware Upgrade
Updating the firmware of Slypod E should be done in the charging state. When in charging state, turn on the device, connect it to the App, enter the operation interface and start the firmware upgrade. The device must be restarted after the firmware upgrade succeeds. If the upgrade fails, the process needs to be repeated until the upgrade succeeds.
Color Definition
| Charging | Solid red |
| Charging completed | Solid blue |
| Power on Solid green | |
| Under-voltage alarm Solid | orange |
| Low voltage alarm | Blinking red + automatic reset &shutdown(unable to power on when pressing the power button) |
| Blinking green for 1sStart/stop running switch | |
| Calibration status | Blinking white |
| Testing/operating modes switch | Blinking blue for 1s |
Charging
Uncover the rubber sleeve over the charging port, the Type-C interface is inside. The Slypod E can be charged by mobile phone charger, mobile power bank, etc. It will automatically stop charging when the battery is full, please disconnect the charger then (It is recommended to use the original charging cable provided in the package)
Calibration
Calibration is needed when there is abnormality with the device. There are two ways to calibrate the Slypod E: Click all three buttons (power, +, -) at the same time.Enter the operation interface to start calibration in the App. Please subscribe Gudsen MOZA official YouTube channel for the latest tutorials.
Specifications
| Slypod E | |
| Size | Storage Length: 585mm (grip excluded) |
| Expanded Length: 996mm | |
| Max Diameter: 54mm | |
| Weight | Main Body: 918g |
| Adapter: 73g | |
| Tripod: 195g | |
| Stand Adapter:54g | |
| Payload | Vertical: 9kg |
| Horizontal: 4Kg | |
| Operating speed | Highest:28mm/s |
| Lowest: 0.15mm/s | |
| Operating Voltage | 8.5v-12.6v |
| Battery Life | 120min |
| Working Temperature | -10 °C - 50 °C |
| Communication Interface | Bluetooth |
| 2.4G | |
| Type-C | |
| Battery Model | Lithium-ion Battery |
| Battery Capacity | 600mAh |
| Battery Voltage | 11.1V |
| Charging Port | Type-C USB |
| Charging Voltage | 5V |
| Charging Time | 90min |
Contacts

text_image
QR code with central logo containing 'MOZA' text and a small heart symbol in the center.
text_image
QR code image with central logo and text '中国银行' (Bank of China) in the pattern
text_image
QR code image with central logo and text 'TAI' and 'WANZHA'Official Website Sina Weibo WeChat

text_image
QR code with central logo and text 'MOZA' visible in red at center
text_image
QR code with central logo and text 'MOZZA' visible in red at center
text_image
QR code with central logo and text 'MOZA' in red at centerFacebook YouTube

text_image
QR code with central logo and text 'MOZA' visible in red at centerTutorial

text_image
QR code with central logo and text 'MOZA' in red at centerFirmware Upgrade and Calibration YouTube QR
text_image
QR code image with embedded text '中国银行' in the centerFirmware Upgrade and Calibration WeChat QR