
Moin - Action Camera Moza - Free user manual and instructions
Find the device manual for free Moin Moza in PDF.


| Product Type | Action Camera with 3-axis gimbal |
| Dimensions | 129 × 37.8 × 32 mm |
| Weight | 176 g |
| Battery | Lithium-ion, 950 mAh, 7.68 V |
| Charging Time | Approx. 90 min (5V/2A charger) |
| Operating Time | Up to 145 min (1080p/30fps) |
| Display | 2.45-inch IPS LCD touchscreen (480×272), reversible |
| Video Resolution | 4K up to 60fps, 1080p up to 200fps |
| Photo Resolution | 12MP (4000×3000) |
| Lens | FOV 120°, F2.2, equivalent focal length 14mm |
| ISO Range | 100 – 3200 (photo and video) |
| Shutter Speed | 60s – 1/8000s |
| Gimbal Stabilization | 3-axis (tilt, pan, roll); max controllable speed 120°/s |
| Wireless | Wi-Fi 802.11a/b/g/n/ac (2.4/5GHz), Bluetooth BLE 4.2 |
| Memory Card | microSD (exFAT), 16 – 256GB, V30 or higher recommended |
| Photo Formats | JPEG, JPEG+DNG (RAW) |
| Video Formats | MP4 (H.264), max bitrate 100 Mbps |
| Operating Temperature | 0 °C to 40 °C |
| Safety Precautions | Keep away from liquids; do not disassemble; use within 0–40 °C |
| Maintenance | Avoid dust and sand; clean with dry cloth |
Frequently Asked Questions - Moin Moza
Swipe down and tap the follow mode icon to switch.
User questions about Moin Moza
0 question about this device. Answer the ones you know or ask your own.
Ask a new question about this device
Download the instructions for your Action Camera in PDF format for free! Find your manual Moin - Moza and take your electronic device back in hand. On this page are published all the documents necessary for the use of your device. Moin by Moza.
USER MANUAL Moin Moza
- Buttons and Operations....5
- Buttons Function....5
- Indicator Light Instruction......6
- Touch Screen Operations....6
- Adjust the Screen Angle....6
- Start Using....7
- Recording/Photographing....7
- Switch recording and photographing mode ....7
- Playback....7
• Gimbal Follow Mode Switch.....8 - Selfie Mode....9
• Screen Lock and Unlock....9
- Shooting Guidance....9
- Switch Automatic / Manual Mode for Shooting......9
Take Static Images....10
• Take Dynamic Images....12
- Device Custom Setting....13
• Screen Brightness Setting....13
- Spot (partial) Metering Setting....13
- Grid Setting....13
• Language Setting....13
• Screen Auto Sleep and Auto Power Off....13
- Wireless Connection....14
Factory Reset....14
- Other System Settings....14
- App Connection....15
- Troubleshooting Common Issues......16
- Specifications....17
Tips for Reading

Search by Key Words
Key words can be found in the user manual by using the searching function. For example in Adobe Reader to search for key words, Windows Users can press Ctrl+F, and for Mac User press Command+F.

Navigate to a Topic
Click on a topic to navigate to the corresponding page.

Print Document
This document can be printed.
Icon Explanation

Important notice

Tips

Prohibited Operations
Video Tutorial
You can search the official account in WeChat: Gudsen in the menu bar>college course>video school, click the "Tutorial" to see the tutorial of MOIN Camera.
You can also scan the QR code to view the video tutorial to use the product correctly.
Download MOZA Artist App
Please download the MOZA Artist App on the App Store to get better experience. For quicker access you can scan the QR Code.


- System Requirements: iOS 11.0 or above, Android 6.0 or above.
Disclaimer
Thank you for purchasing MOIN Camera. The information referred to in this document affects your safety and legal rights and responsibilities. Please read this document carefully to ensure proper configuration before using. Failure to read and follow instructions and warnings from this document may lead to serious injury to yourself or others, damage to your product or to other objects around.
This document and all the relevant documents about MOIN Camera are reserved by Shenzhen Gudsen Technology Co., LTD. For the most update information, please visit www.gudsen.com to get latest information.
By using this product, you hereby agreed that you have read this disclaimer and warning carefully and understand, agreed to obey the terms and conditions herein. You agreed with the fact that you are responsible for your own conduct while using this product and for many consequences thereof. You promise to use this product only for legitimate purposes, and agree to this article and any relevant regulations, policies and guidelines formulated by Gudsen. In addition to the current laws and regulations in China and those of your residing country, Gudsen will not be responsible for the loss, injury and any legal liability caused by the direct or indirect use of the product and this information. Users should follow all safety guidelines including but not limited to those mentioned in this article.
Safety Guidelines
Warning:
-
Do not allow the product to come in contact with any kind of liquid. Do not leave product out in the rain or near a source of moisture. If the inside gets wet with water, chemical decomposition may occur, which may cause the lens corrosion, battery to spontaneous combust, or even explosion.
-
In case of fire, please use water, water mist, sand, fire blanket, and dry powder carbon dioxide fire extinguisher immediately. Please select according to the above recommended order according to the actual situation to choose the best way to put out the fire.
-
Please use the product in the temperature range of 0 degrees to 40 degrees Celsius.
-
It is forbidden to disassemble the product in any way. If the battery is punctured during disassembly, it will lead to leakage of electrolyte in the battery, even fire, and explosion.
-
Mechanical impact, rolling or throwing of products is prohibited. Do not place heavy objects on the product.
-
Do not heat the product. Do not place the product in the microwave oven or pressure cooker.
-
It is forbidden to place the product close to the heat source (stove or heater, etc.) and place the product in the hot weather of car. Do not store the product above 60 °C. The ideal storage temperature is 22 °C to 28 °C.
-
MOIN Camera is a high precision device. Fall, impact, and
extrusion may lead to damage or abnormal operation to MOIN Camera.
-
Please do not cover or touch the heat dissipation area with your body during use to avoid scalding. When the temperature of MOIN Camera is too high, filming may be interrupted automatically.
-
Please pay attention to dust and sand prevention when using MOIN Camera.
Copyright notice:
The images you take with MOIN Camera are not only for personal enjoyment, but also according to the copyright law, it is not allowed to use without the permission of the copyright owner. In addition, during the demonstration, performance and display items, even for the purpose of personal appreciation, shooting is prohibited. Please pay attention to this.
Notes on discarding / transferring this camera
When discarding or transferring this camera, please do the following to protect your personal information.
Slide down to the settings menu - click system settings - restore to default settings.
Notes on discarding/transferring memory card
Performing [format] or [delete] on the camera or computer may not completely delete the data on the memory card. When transferring the memory card, it is recommended to use the special data deletion software of the computer to delete the data completely. In addition, when discarding a memory card, it is recommended that the memory card be actually destroyed.
Notes on 5GHz band of WLAN
WLAN 5GHz cannot be used outdoors.
Memory card requirements
MOIN Camera uses micro SD card for media storage. Before using, please set the memory card in exFAT format. MOIN Camera supports 16-256gb memory cards. It is recommended to use micro SD card with speed higher than V30. Memory card not included.
Recommended memory card
| Brand Capacity Spec Picture | |||
| SanDisk | 64GB | U3 A2 V30 UHS-I 4K Extreme |  |
| SanDisk | 128GB | U3 A2 V30 UHS-I 4K Extreme |  |
| SanDisk | 256GB | U3 A2 V30 UHS-I 4K Extreme |  |
| SanDisk | 64GB | U3 A2 V30 UHS-I 4K Extreme |  |
| SanDisk | 128GB | U3 A2 V30 UHS-I 4K Extreme |  |
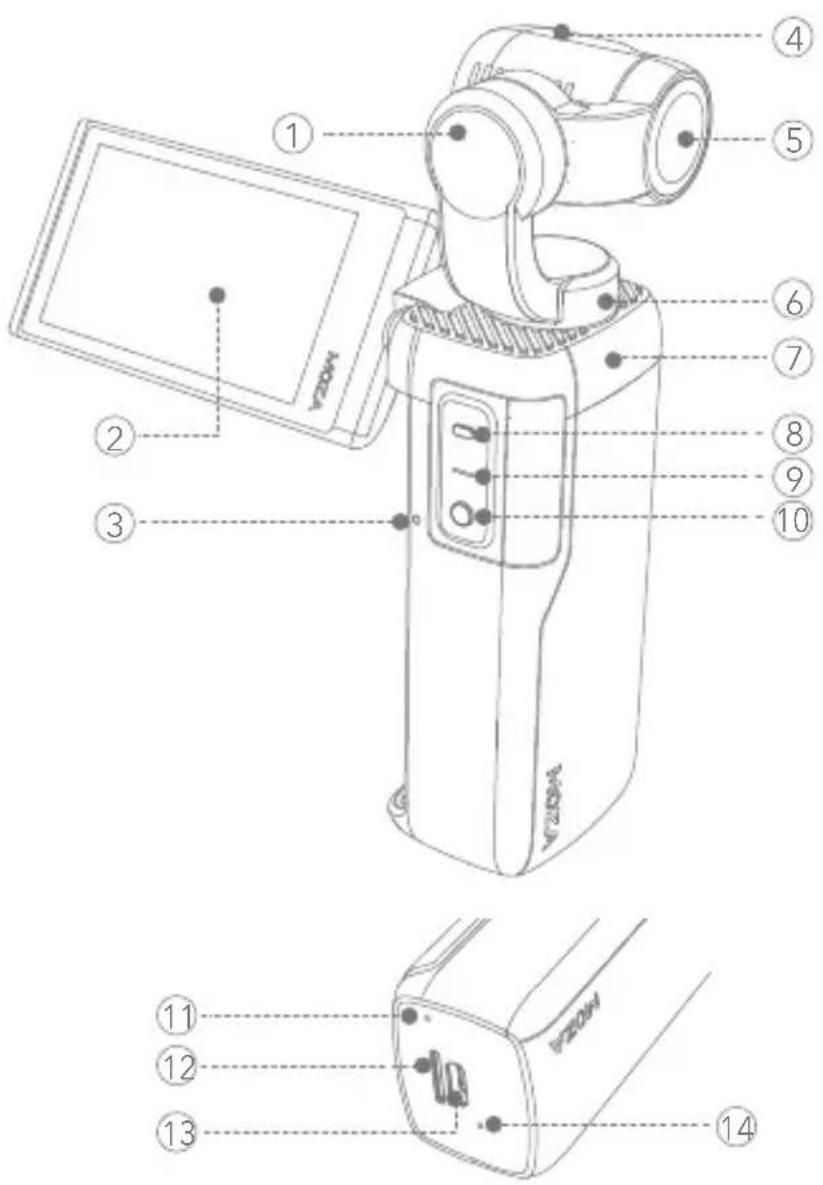
① Roll Axis Motor
⑧ Power
② Foldable and Tiltable Screen
⑨ Indicate Light
③ Pickup
⑩ Record
④ Lens
⑪ Pickup
⑤ Pitch Axis Motor
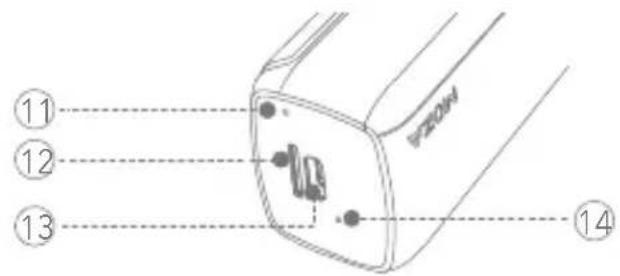
⑫ Micro SD Card Slot
⑥ Heading Axis Motor
⑬ Type-C Interface
⑦ Heat Elimination Area
⑭ Reset
Attention:
-
Do not block the pickup hole during recording, to avoid affecting the audio recording.
-
Do not rotate the screen too much, otherwise the device may get damaged.
Preparations
Charging
Before using for the first time, please use the standard charging cable to connect the TYPE-C interface at the bottom of the body with a USB charger (USB Charger Not Included) to charge the MOIN Camera.
When charging, the red indicator light of the handle will stay on, and when fully charged the indicator light will turn off.
After power on, the touch screen displays the power level.
Charging time: about 90 minutes (with 5V / 2A USB charger, tested at Gudsen laboratory)

Attention:
- Please use the 5V / 2A charger to get better charging experience.
- Please charge at 0-40 °C
- Charging time is for reference only, your charging time may differ.
Memory Card Installment
Insert the micro SD card into the micro SD card slot, and the terminal face should be facing the side with the MOZA logo. Please insert the memory card until it clicks. It is recommended to use a memory card with a transmission speed of V30 or higher. Memory card not included.
Switch On/Off

Press the gray power button for 2 seconds to switch on / off.
Recording/Photograph

After power on, click the red record button to start recording or taking pictures.
Button and Operation
Function of Button
natural_image
Simple icon of a device with a red dot and green horizontal line, no text or symbols present.
Power Button
Long press for 2 seconds: Power on/off
Short press: Switch between recording/photo taking
Double click: Return to center
Click third: Selfie mode

Recording Button
Short press: Take photo(when in photo mode) Record (when in recording mode)
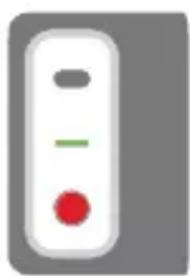
Indicator Light Instruction
| Color | Statement | Instruction |
| Green Light | Always on | Power on, power quantity is above 20% |
| Flicker quickly | Recording Video | |
| Flicker slowly | Taking a photograph | |
| Red Light | Flicker | MOIN Camera's status is abnormal; The status can be viewed on the screen.Low powerNo memory card, or card errorMemory card is full |
| The red light is always on when charging and goes out after being fully charged. | ||
Touch Screen Operations
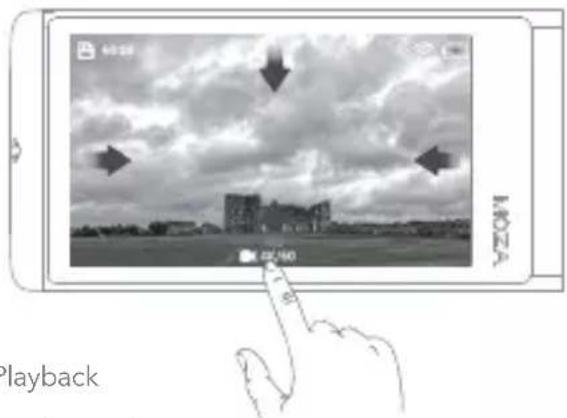

Playback
Mode switching
Menu settings
Shooting parameter adjustment
Mode parameter setting
Adjust the Screen Angle
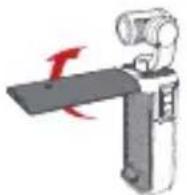
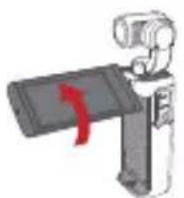
The screen angle and orientation can be adjusted to suit the scene and shooting mode.
Tilt the screen down: the screen can be rotated down about 90°.
Rotate the screen: the screen can be rotated about 30°.

Attention:
- Please close the screen when you are not using MOIN Camera.
- Do not rotate the screen too much to avoid damaging the device.
Start Using
Recording/Photographing
After powering on, click ● the record button to start recording or photographing. When MOIN Camera is in recording mode, click the record button to start recording. When in photographing mode, MOIN Camera starts taking photos. MOIN Camera will be in record mode by default.
Switch recording and photographing mode
1. Quick switching
You can short press the power button to switch between photographing and recording modes.
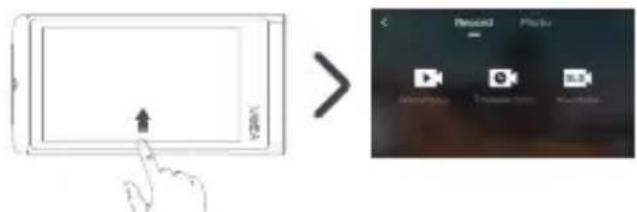
2.Switch Menu
swipe up from the bottom edge of the screen to enter Switch Menu to switch the mode.
Playback
Swipe up and down in the album to view thumbnails of photos and videos in the album.
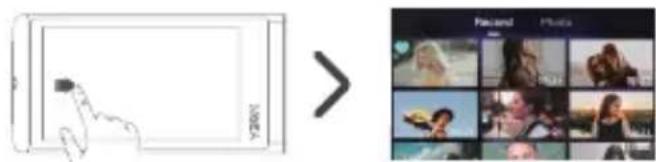
- Select image: Click the image thumbnail in the thumbnail interface to select the corresponding image file.
- Play image: Double-click the thumbnail in the album to play the corresponding photo or video. On the playback interface, you can click to
- Collect image files: in the selected image status or playback interface, click white heart ♥ to collect image files. When the icon becomes blue heart ♥, the image file has been collected and cannot be deleted.
- Cancel collection: in the selected image status or playback interface, click Cancel collection of image file. When the icon becomes white heart ♥, the image file is locked for collection and can be deleted.
- Delete image: in the selected image status or playback interface, click 📋 to delete image file.
Attention:
Once an image is deleted, it cannot be restored. Please confirm whether you want to delete before deleting!
Switch Gimbal to Follow Mode
Swipe down ↓ from the top edge of the screen to open the settings menu. Click the following mode icon ↑ to switch the pan/tilt follow mode or lock mode.
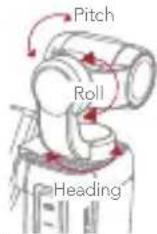
• PTZ following mode and corresponding icon:
Following mode (default mode): This mode is suitable for most shooting scenes. The camera lens roll is kept horizontal, and pitch/pan will follow the handle rotation.


Pitch lock mode: Roll and pitch axes of the camera lens remain locked, only pan will follow the rotation of the handle.


The above two following modes support face tracking.
MOIN Camera will automatically track the user after recognizing the face in selfie mode.
- When the camera is facing forward, you need to click the confirm to start following.

FPV mode: the camera lens completely follows all directions of the gimbal, pitch, roll, and pan will follow the rotation of the handle. Return to the center: after returning to the center, the lens will face straight ahead horizontally.


To return the camera to center. You can double-click the power button or slide down from the top edge of the screen and click the icon to the enter the settings menu.

Attention:
When the movement of the gimbal is blocked, it will enter the protection mode. After entering the protection mode, please ensure that the movement of the gimbal is not blocked, and click the screen to unlock (UI image) to wake up the gimbal.
• PTZ follow sensitivity setting
Swipe down from the top edge of the screen, click the setting menu to enter the system setting menu, and click "PTZ sensitivity". The pan/tilt sensitivity can be set to: sensitive or soft.

Set to sensitive, the gimbal will respond quicker; set to soft, the gimbal will respond slower and smoother.
Selfie Mode

When shooting, you can quickly switch the gimbal between the front to back or selfie mode by the following operations
Three-click the power button: Selfie mode
Or swipe down from the top edge of the screen ↓ and click the selfie switch icon 📋 in the settings menu
Screen Lock and Unlock

- Screen Lock
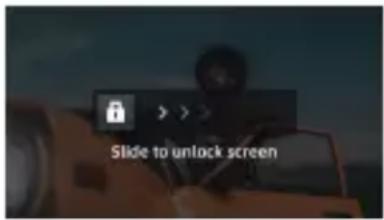
Swipe down from the top edge of the screen ↓ and tap the screen lock icon in the settings menu to lock the MOIN Camera screen. After the screen is locked, the screen will turn black automatically.
- Screen Unlock
When the screen is locked, click the power button or double-tap the screen and slide the unlock icon on the screen to unlock.
Shooting Guidance
Switch automatic / Manual Mode for Shooting
- Manual and automatic mode switching
The default mode of MOIN Camera is automatic.
Swipe left from the right edge of the screen to open the shooting parameter adjustment menu. Click "manual" in the menu to switch to manual mode. In manual mode in auto mode, click "auto" to switch to auto mode.
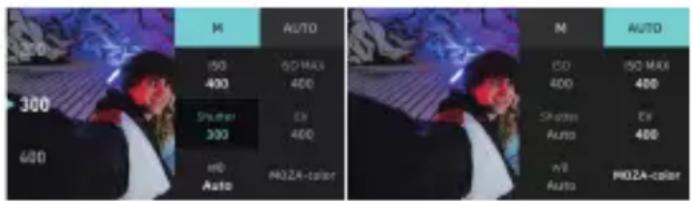
- Adjust shooting parameters
Parameters that can be adjusted in automatic mode:
Auto MAX ISO: the camera will be at the set Max ISO within a large range of sensitivity, the sensitivity is set according to the brightness.

MAX ISO can be set between ISO100-3200, the set step distance is 1EV.
(EV): usually, the exposure is set automatically by the camera. Based on the automatically set exposure value, the whole image becomes bright when compensating in + direction and dark when compensating in - direction.
-
The value can be set in the range of -2.0eV to +2.0eV.
-
The set step distance of Exposure Bias Value is 1/3 EV.
Parameters that can be adjusted in manual mode:
Shutter: Set the preferred shutter speed for static or dynamic image shooting. The smaller the shutter speed number, the faster the shutter speed.
WB: Set the preferred white balance mode.
Auto / daylight / cloudy / incandescent / fluorescent / water auto / D4000/D5000/D9000/D10000
ISO: Manually set the preferred sensitivity. The higher the value, the higher the sensitivity. The setting range is iso100-3200, and the setting step is 1EV.

The higher the ISO, the more noise.
Take Static Images

Regular mode

The default mode of taking photos is regular mode. Press the recording key ● in a short time to take a static images.
Adjust static image quality
In the preview interface, slide from the right edge of the screen to the left ↩ to open the shooting parameter adjustment menu.
Click JPEG + DNG to take raw photos.
※You can use this menu to take photos in JPEG, or JPEG + DNG.
JPEG: Take photos at the form of JPEG
DNG: When recording JPEG image and recording raw file before image processing, DNG is selected as the recording format when it is suitable for computer post-processing according to professional purpose.

Attention:
The RAW file shot in this MOIN Camera is DNG.
In the preview interface, click adjustment menu.

below to enter the mode
Adjust the picture scale.
In the mode adjustment menu and the "scale" submenu, you can set the screen scale to 4:3 or 16:9.
Set the countdown for taking photos
You can set the countdown to make it easier for you to take a self or co shoot. The setting value of countdown can be 0 / 1 / 2 / 3 / 4 / 5 / 10 seconds.
- Surround Exposure

Automatically change the exposure according to the standard dark bright sequence (surround exposure). You can choose your favorite image after shooting.
In the preview interface, click the icon which below
AEB to enter the mode adjustment menu.
Adjust exposure step length:
The exposure step and the number of shots can be adjusted according to the needs. The exposure step can be set to three pictures were taken with 1 / 3 EV, five pictures with 1 / 3 EV and three pictures with 2 / 3 EV.
Adjust the picture scale:
You can adjust the scale of the screen in the mode adjustment menu. It can be adjusted to 16:9 or 4:3.
• Continuous photograph

After setting up continuous shooting, click the recording button ●, camera will automatically take a certain number of pictures in succession.
In the preview interface, click the icon which below the icon to enter the mode adjustment menu.
Set the number of continuous shots
Set the number of automatic continuous photos in the "speed" submenu after pressing the record key. The number of photos can be set to 3 / 5 / 7 / 9.
Adjust the picture scale
You can adjust the scale of the screen in the mode adjustment menu. It can be adjusted to 16:9 or 4:3.
- Time-lapse

In this mode, after short pressing the record key, the camera will automatically record at the preset shooting interval to repeat the static image shooting. Press the record key again to stop shooting.

MOIN Camera takes static images in this mode, and cannot create dynamic images directly in this mode. To create dynamic images, please use computer software (e.g. Photoshop, Irtimelapse) for post synthesis or use delayed recording mode.
In the preview interface, click the icon 📋 below 📋 to enter the mode adjustment menu and set the delay photographing interval.
The photographing interval delay can be set. The time that can be set to 5 / 1 / 2 / 3 / 5 / 10 seconds.
Adjust the picture scale
In the mode adjustment menu and the "scale" sub menu, you can set the screen scale to 4:3 or 16:9.
- Panoramic mode

In the preview interface, click the icon 📋 at the bottom 📋 to enter the mode adjustment menu to adjust the number of shots in panoramic mode.
You can adjust the number of shots to 1x3 or 3x3 according to your needs.

In this mode, MOIN Camera takes static images, and compositing function is not provided.
Take dynamic images
- General video

The default recording mode is normal recording. Press the recording key ● in a short time to capture the dynamic images.
MOZA Color:
In the preview interface, slide from the right edge of the screen to the left to open the shooting parameter adjustment menu. MOZA color is a video color filter, which can only be enabled in normal video mode. When opened, a unique color filter will be provided.
In the preview interface, click 📋 below ▶ to enter the mode adjustment menu.
Adjust resolution
In the mode adjustment menu 'resolution', you can set the resolution to 720P/1080P/2.7K(4:3)/2.7K/3.2K/4K/4K(4:3).
Adjust frame rate:
You can set the frame rate when recording. The frame rate can be set at different resolutions
Record on a loop
This function can only be used in normal video recording mode, and the duration can be set to off /1 / 2 / 3 / 5 minutes.

Attention:
Normal video supports recording on a loop. After the function of circular video recording is turned on, if the card is full, the previous first video clip will be deleted to allow continued loop recording.
- Time-lapse

In this mode, after short pressing the record key ●, the delay video is shot and synthesized according to the preset shooting interval, shooting duration and film resolution.
Short press the record key during recording to stop shooting in advance.

In this mode, MOIN Camera will automatically synthesize time-lapse video with a frame rate of 30fps.
In the preview interface, click the icon below to enter the mode adjustment menu.
Duration: The duration of recording. Please note that the duration is not equal to the duration of delayed video.
Interval: The interval between two still photos when delayed shooting.
Resolution: The resolution of the delay video synthesized by Moin Camera. 12
- Slow Motion SLO
In this mode, the slow motion video will be taken after pressing the recording key briefly.
In the preview interface, click the icon SLO below to enter the mode adjustment menu.
Resolution: the video resolution generated by MOIN Camera.
Multiple: the slowing rate of the slow motion video shot by MOIN Camera.
Device Custom Setting
Swipe down on the touch screen to enter the setting page.
Screen Brightness Setting
In the setting page, tap the icon ⚙ to adjust the brightness levels.
Spot (partial) Metering Setting

to adjust the brightness levels.
In the setting page, tap the icon Ⓐ to enter the Spot(Partial) Metering Setting. In the preview page to move the icon spot to the needed position, tap the icon √ to confirm.

Attention: Tap the exit directly won't save any changes.
Grid Setting

In the setting page, tap "Enter the System Setting", tap "Grid Setting" to enable the grid.
- Rule of thirds: show the rule of thirds grid line
- Asterisk: show the asterisk grid line
- Close: the preview interface does not display auxiliary lines
Language Setting
In the setting page, tap "Enter the System Setting", tap "Language Setting" to choose the system language.
Screen Auto Sleep and Auto Power Off
Moin camera can be set to automatically stop the screen or shut down after a period of no operation.
- Auto Sleep
In the setting page, tap the icon ☐ to enter the setting system, tap "Auto Sleep" to set the time before device enters sleep mode or turn off the mode. After device enters Auto Sleep, double tab the screen or click any button to wake up the screen.

Attention: Auto Sleep mode won't work when playback.
- Auto Power Off
In the setting page, tap the icon ⚙ to enter the setting system, click "Auto Power Off" to set the time before device powers off automatically or turn off the mode.

Attention:
The Auto Power Off won't work while the device in this mode:
- Time-lapse
Video - Playback
Wireless Connection
In the setting page, tap the icon tap 'Wireless Connection'.

to enter the setting system,
Wireless info.: Check the device name and password Wi-Fi Frequency: Select the frequency 2.4G/Auto Reset
Connection: Reset the device name and password into factory setting

Attention: Wireless 5GHz frequency can be used outdoors.
Factory Reset
In the setting page, tap the icon to enter the setting system, tap "Factory Reset", the device will reset default setting.
Other System Settings:
Format Micro-SD Card: Tap to format the Micro-SD Card.
Watermark Setting: The watermark shows on the bottom right corner of the videos or the photos. The watermark can set up date/time/turn off.

Attention: When the video set up in 4K 60FPS cannot enable the watermark
Mute Video: Enable to record video without sound
Sounds: Turn on/off the device sounds
Looping Interval: Set your device to record 1, 2, 3, 5 minutes loops or turn off. It will record until your SD card is full before looping back to record over the start of the video.
Firmware Version: Tap to view the device firmware version info.
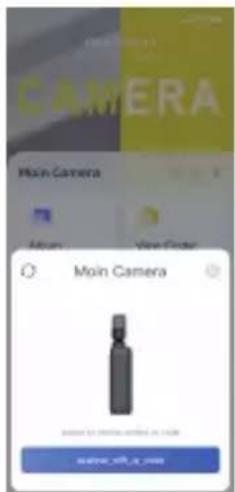
App Connection
- Tap device connection 2. Tap "Scan the Wi-Fi Code"
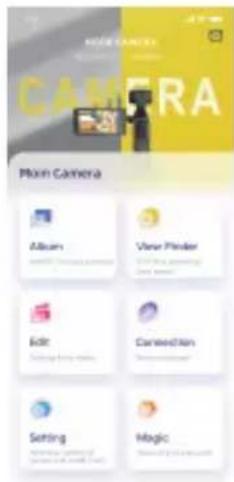
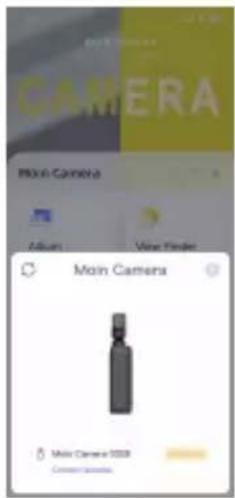
- Connect successfully3. Scan the cod
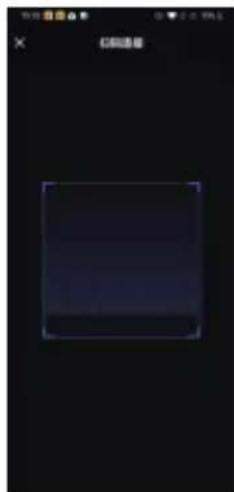
Troubleshooting Common Issues
Gimbal enters protection mode
When the gimbal cannot move smoothly due to external factors, it will enter the protection mode. When in protection mode, to reactivate the gimbal, simply click the screen to unlock (UI icon)
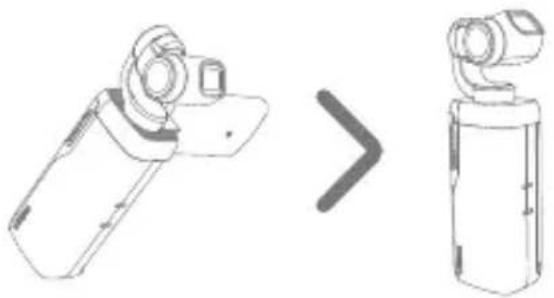
The gimbal is not level
When MOIN Camera is turned on in a non-horizontal position (pitch and tilt angle), it will maintain the inclination angle after turn on. To restore it to the horizontal position,
Please double-click the recording button to return to the center.
natural_image
Diagram showing a device transitioning from a flat case to a cylindrical device with a right-pointing arrow (no text or symbols)The gimbal cannot be charged when the temperature is high
In this case, the battery is in the protection mode, please wait for the battery temperature to drop below 40°C to resume charging.
The gimbal crashes, the buttons do not work and cannot be shut down
Above abnormal could be caused by the firmware issue, use a paperclip to press the reset button at the bottom of the machine.
After inserting the card, the camera shows a low-speed card and cannot record/take photos
Using low-speed cards below Class10 or Micro SD cards with a capacity of less than 16G will report an error. Please use the U3/V30 Micro SD card that listed in the recommendation List.
Specifications
| Dimensions | 129×37.8×32mm | |
| Weight | 176g | |
| Gimbal | Rotation Range Tilt: | Pan: From -250°~+70° |
| From-120°~98° | ||
| Roll: ±90° | ||
| Controllable Rotation Range Tilt: | Pan: from -230°to +50° | |
| from -95° to +50° | ||
| Roll: ±45° | ||
| Max Controllable Speed | 120°/S | |
| Angular Vibration Range | ±0.005° | |
| Lens FOV:120° F2.2 | ||
| Equivalent Focal Length: 14mm | ||
| ISO Range Photo: 100~ | 3200 | |
| Video: 100~3200 | ||
| Shutter Speed 60S~1/8000S | ||
| Max Photographic Resolution | 4000X3000, 12MP | |
| Time-lapse Recording | Time-lapse Recording/Track time-lapse resolution4K(4:3)/4K/3.2K/2.7K/2.7K (4:3)/1080PIntervala10.5S/1S/2S/3S/4S/5S Duration:1min/2min/3min/4min/5min/∞ | |
| Normal Recording | 4K:3840X2160 @ 60/50/48/30/25/24P4K(4:3):3840X2880 @ /48/30/25/243.2K: 3200x2400 @ 30/25/24PFHD:1920X1080 @200/120/100/60/50/48/30/24PHD:1280X720 240/200/120/100P2.7K:2704X1520 60/50/48/30/25/24P2.7K (4:3) :2704X152060/50/48/30/25/24P | |
| Slow Motion 720: 4X;8X | ||
| 1080P:4X; 8X | ||
| Photograph Mode | Single Shot, Panorama, Staticlapse,Motionlapse, Hyperlapse | |
| Record Mode | Record; Slow Motion; MOZA-colo | |
| Max Video Bitrate 100Mbps | ||
| Supported File Formats | exFAT (FAT64) | |
| Photo Format JPEG/JPEG+DNG | ||
| Video Forma mp4 (MPEG-4AVC/H.264) | ||
| Recommended Memory Card | MicroSD, V30 | |
| Capacity 16~256G | ||
| Audio Format 48KHZ, AAC | ||
| Screen | 2.45 Inches 480X272 Reversible Screen | |
| IPS LCD | Reversible Angle:Revise up and down-90°~+60°90° for opening and closing | |
| Connection | Wi-Fi Operating Frequency | FCC/CE/SRRC: 2.400-2.4835 GHz, MIC:2.400-2.4835 GHz |
| Wi-Fi Protocol | 802.11a/b/g/n/ac | |
| Bluetooth Operating Frequency | 2.400-2.4835 GHz | |
| Bluetooth Protocol | BLE 4.2 | |
| Type Lithium battery | ||
| Battery | Capacity 950mAh | |
| Energy 7.14Wh | ||
| Voltage 7.68V | ||
| Operating Temperature | From 0°to 40° | |
| Operating Time | 145min | |
| (Tested by Single Shot with 1080/30fps) | ||
| Charging Time | 90min (5V/2A Charging Rate, tested in MOZA laboratory) | |
Notice: Working time and charging time for Laboratory environmental testing, for reference only.
Contact MOZA Support Team
Customer Service: Support-Product Support
Service Hotline: 0016467400973
目录
下载MOZA Artist App


natural_image
Simple vertical button with a red dot at the bottom and a green line inside, no text or symbols present.
电源键
长按2秒:开机/关机
短按:切换录制/拍照模式
双击:云台归中
三击:自拍模式

录制键
短按:拍照(拍照模式时)
录制(录制模式时)
指示灯指示说明
natural_image
Dark background image with a faint central dark rectangle and no visible text or symbols.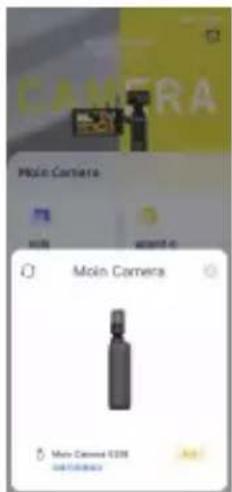
常见问题排错
云台进入保护模式
natural_image
Diagram showing a device transitioning from a rectangular to a cylindrical device, with no visible text or symbols.云台在机身仍发热时无法充电
- Tips for Reading
- Icon Explanation
- Download MOZA Artist App
- Disclaimer
- Safety Guidelines
- Warning:
- Copyright notice:
- Notes on discarding / transferring this camera
- Notes on discarding/transferring memory card
- Notes on 5GHz band of WLAN
- Memory card requirements
- Attention:
- Preparations
- Charging
- Memory Card Installment
- Switch On/Off
- Recording/Photograph
- Button and Operation
- Function of Button
- Power Button
- Recording Button
- Indicator Light Instruction
- Touch Screen Operations
- Adjust the Screen Angle
- Start Using
- Recording/Photographing
- Switch recording and photographing mode
- Quick switching
- 2.Switch Menu
- Playback
- Switch Gimbal to Follow Mode
- • PTZ following mode and corresponding icon:
- • PTZ follow sensitivity setting
- Selfie Mode
- Screen Lock and Unlock
- - Screen Lock
- - Screen Unlock
- Shooting Guidance
- Switch automatic / Manual Mode for Shooting
- - Manual and automatic mode switching
- - Adjust shooting parameters
- Parameters that can be adjusted in manual mode:
- Take Static Images
- Regular mode
- Adjust static image quality
- In the preview interface, click adjustment menu.
- Set the countdown for taking photos
- - Surround Exposure
- Adjust exposure step length:
- Adjust the picture scale:
- • Continuous photograph
- Set the number of continuous shots
- Adjust the picture scale
- - Time-lapse
- Take dynamic images
- MOZA Color:
- Adjust frame rate:
- Record on a loop
- - Slow Motion SLO
- Device Custom Setting
- Screen Brightness Setting
- Spot (partial) Metering Setting
- Grid Setting
- Language Setting
- Screen Auto Sleep and Auto Power Off
- - Auto Sleep
- - Auto Power Off
- Wireless Connection
- Factory Reset
- Other System Settings:
- App Connection
- Troubleshooting Common Issues
- Gimbal enters protection mode
- The gimbal is not level
- Contact MOZA Support Team
- 目录
- 下载MOZA Artist App
- 电源键
- 录制键
- 常见问题排错
- 云台进入保护模式
- 云台在机身仍发热时无法充电
Brand : Moza
Model : Moin
Category : Action Camera