AirCross 2 - Tripod Moza - Free user manual and instructions
Find the device manual for free AirCross 2 Moza in PDF.


User questions about AirCross 2 Moza
0 question about this device. Answer the ones you know or ask your own.
Ask a new question about this device
Download the instructions for your Tripod in PDF format for free! Find your manual AirCross 2 - Moza and take your electronic device back in hand. On this page are published all the documents necessary for the use of your device. AirCross 2 by Moza.
USER MANUAL AirCross 2 Moza
• Installing the Battery 7
- Attaching the Tripod 7
- Unlocking Motors 7
- Mounting the Camera 8
• Balancing 8
■ Buttons and OLED Display 9
- Button Functions 9
• LED Indicators 10 - Main Interface 10
- Menu Description 11
■ Features Description 13
- Camera Control 13
- Motor Output 14
FPV,Sport Gear Mode 15 - Manual Positioning 16
- Button Customization 16
- Inception Mode 16
• Balance Check 17 - Sensor Calibration 18
- Language Switch 19
- User Configuration Management 19
■ Extension 19
- Extensible electronic accessories 19
- Two Camera Mounting Directions 20
- Smartphone and PC Connection 21
- Phone Holder 21
- Firmware Upgrade 21
■ SPECS 22
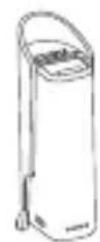
Packing List
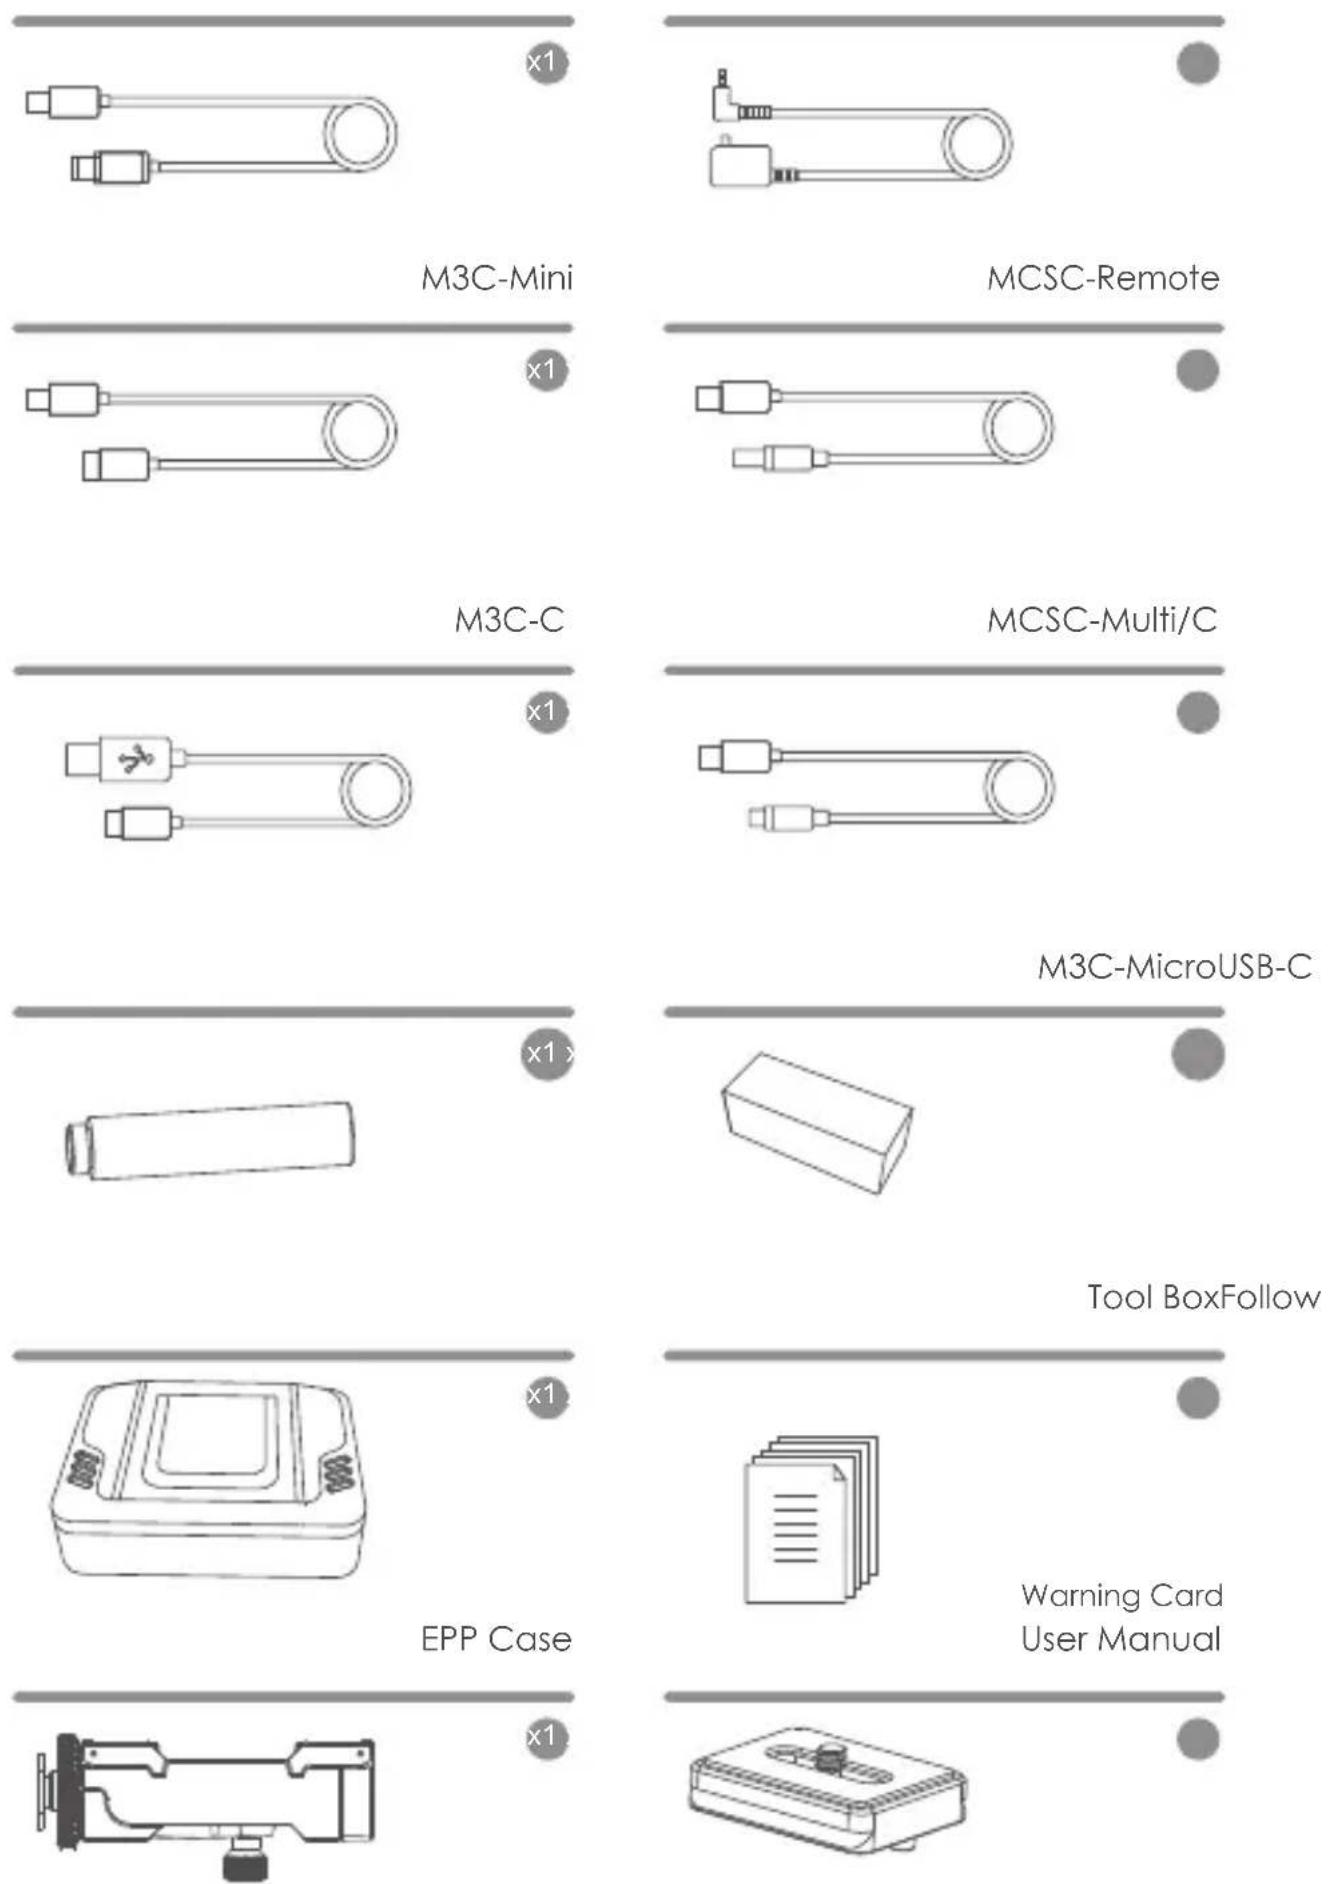
Check that all of the following items are in your package. If any item is missing, please contact MOZA or your local dealer.
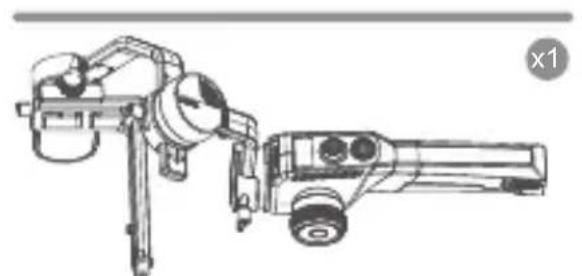
natural_image
Technical line drawing of a mechanical device with a flatbed truck and cylindrical component (no text or symbols)Gimbal
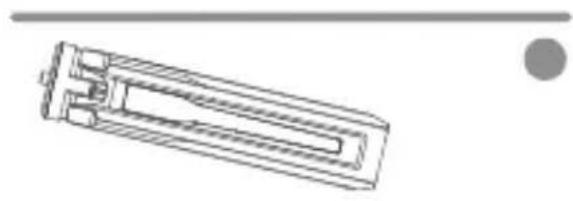
natural_image
Technical line drawing of a mechanical component with no visible text or symbolsTripod
x1
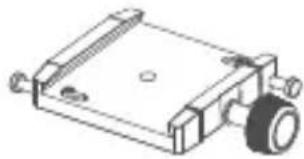
natural_image
Technical line drawing of a mechanical component with mounting holes and a wheel (no text or symbols)●
Battery Quick Release Baseplate
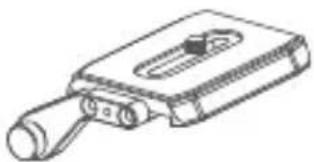
natural_image
Line drawing of a handheld electronic device with a handle and internal components (no text or symbols)x1
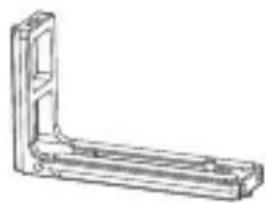
natural_image
Technical line drawing of a L-shaped metal bracket (no text or symbols)●
L-BracketQuick
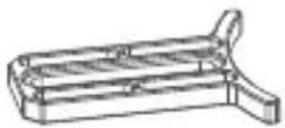
x1
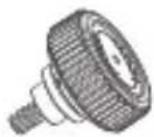
●
Lens Support Lens Support Screw
x1
●
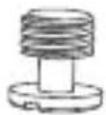
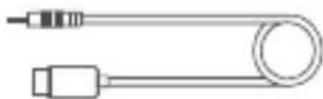
3/8"Camera Mount Screw MCSC-C1
Phone holder (Optional) Arca quick release plate (Optional)
Disclaimer and Warning
Thank you for purchasing the MOZA AirCross 2!
- This document is related to the safety use and legal rights of your equipment. Please read it carefully before the first use.
- By using this product, you are deemed to have read, understood, endorsed and accepted all the terms and content of this statement. You are solely responsible for the use of this product and the consequences thereof. You undertake to use this product for legitimate purposes and agree to the terms and any relevant regulations, policies and guidelines formulated by Shenzhen Gudsen Technology Co., Ltd. (hereinafter referred to as Gudsen). Gudsen is not responsible for damage, injury or any legal problems caused by the direct or indirect use of this product. Users should follow all safety guidelines including but not limited to this document.
- MOZA AirCross 2 is professional videography equipment. Users need to have professional videography and safety knowledge, and need to be careful. Please read the user manual carefully before the first use.
- This product is not a toy and not suitable for use by minors. Do not allow children to operate this product.
- Do not use MOZA AirCross 2 with products or accessories that are not provided or recommended by Gudsen, and please strictly follow the safety guidelines in the product manual.
- The final interpretation of this document belongs to Shenzhen Gudsen Technology Co., Ltd. Updates are subject to change without notice. Please visit the official website www.gudsen.com for the latest product information.
Safety Guidelines
1. Battery Safety Instructions
The AirCross 2 is equipped with an M2S30QB smart battery. Do not use an unofficial battery to prevent the gimbal from working properly and causing unnecessary damage. When a backup battery is needed, please purchase the official battery. Please fully charge the new battery to activate it before the first use.
- Do not put the batteries into the water or get it wet!
- Do not charge the batteries under fire or extremely hot conditions!
- Do not use or store the batteries near heat sources such as fire or heaters! If the batteries leak or give off an odor, remove the batteries from the open fire immediately!
- Do not use the unqualified adapter to charge the batteries!
- Do not reverse the positive and negative poles!
-
Do not put the batteries into fire or heat the batteries!
-
Do not short the positive or negative pole with wires or other metal objects. Do not transport or store batteries with necklaces, hair clips or other metal objects!
- Do not pierce the battery case with nails or other sharp objects. Do not hammer or pedal the batteries!
- Do not hit, throw or shake the batteries!
- Do not solder the battery poles directly!
- Do not disassemble the batteries in any way!
- Do not put the batteries into microwave or pressure vessel!
- Do not use in combination with primary batteries(such as dry batteries) or batteries of different capacities, models or varieties!
- Do not use if the batteries emit odor, heat, deformation, discoloration, or any other abnormality; If the batteries are in use or charging, unplug the power adapter from the device and stop using it immediately!
- The batteries are only available for MOZA AirCross 2. Do not attempt to connect it to other products to avoid damage to the batteries or other equipment.
Battery Charging
M2S30QB smart battery is equipped with a Type-C interface, supporting 5V2A low-speed charging and 9V2A high-speed charging, users can select the matched charger according to actual needs.
Please use the TYPE-C interface to charge the batteries and do not use external power sources such as wall outlet or car cigarette lighter to charge the batteries.
Battery Indicator
The M2S30QB smart battery has 4 LED indicators. When it is in charging, 4 indicators will light up in turn; when it is removed and not charged, users can slightly shake it to check the battery level. Indicators will light up for 5 seconds and then automatically go off.
| Indicator Status | Battery Level |
| ● ● ● ● | 75%-100% |
| ○ ● ● ● | 50%-75% |
| ○ ○ ● ● | 25%-50% |
| ○ ○ ○ ● | 0%-25% |
| ○ ○ ○ ○ | Out of power |
Battery Protection
The M2S30QB smart battery has under-voltage, overcurrent and overheat protection state. Battery protection state will be triggered by abnormal conditions such as overuse and short circuit. When the battery enters the protection state, it stops output and cannot be shaken to view the battery level. The battery can be unprotected by charging. Insert the charging cable, when indicators light up in sequence, users can use it again.
Battery Storage
- IThe storage temperature for battery must be in the range of -20^ 45^ .
- For long-term storage(more than 3 months), batteries must be placed in an environment with a temperature of -20 25^ C and a humidity of 65 ± 20 % RH.
- For long-term storage, batteries should be fully charged and should be recharged once a month.
2. Motor Lock Use Instructions
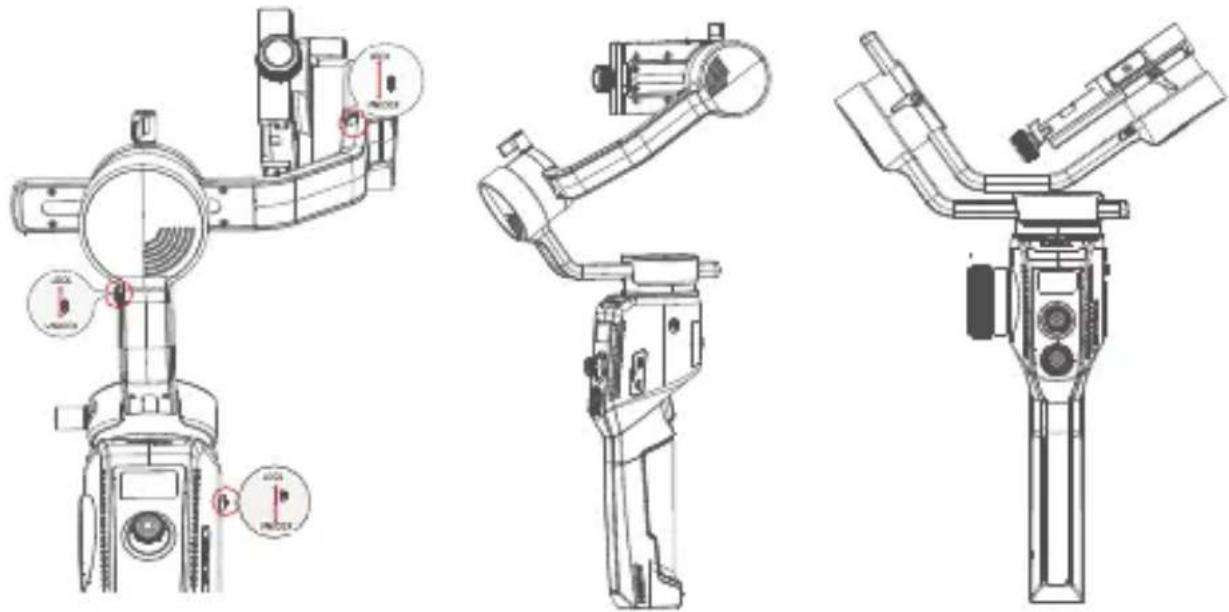
The AirCross 2 is equipped with 3 motor locks that are used to secure the gimbal axes. After receiving the product, please check if the motor locks are in the locked position. Please unlock the gimbal axes first before using it. Motor locks are used for:
a. Locking all three axes for easy carry.
b. Securing certain axes when mounting the camera and adjusting the balance.
c. Fixing the body to prevent collision and friction.
d. Keeping good posture when placed statically.

Note:
Violent rotation of each arm in the locked state may cause motor locks to malfunction; It is strictly forbidden to turn on the AirCross 2 in the locked state, otherwise it will cause motors to heat up and enter the protection state.
3. Notes for Abnormal Situation
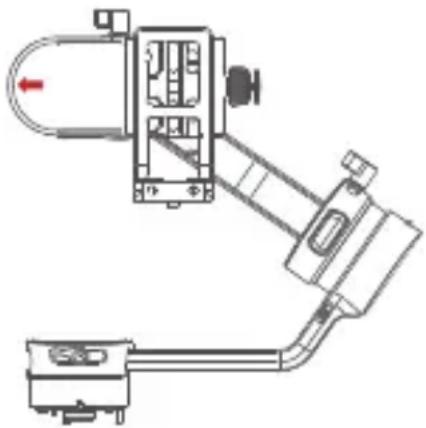
Wrong Camera Mounting Direction
The tilt axis of the MOZA AirCross 2 can be rotated 360°. When mounting the camera, please follow the red arrow indication to keep the elliptical end of the tilt axis aligned with the lens direction.
natural_image
Technical line drawing of a mechanical device with no visible text or symbolsTransportation Safety
The AirCross 2 contains sensitive accelerometers and gyro sensors that may experience sensor drift after severe vibrations. After receiving the product, please follow instructions in the manual to mount the camera. If the camera cannot keep level after turning it on, please calibrate the gyroscope and accelerometer to ensure normal use.
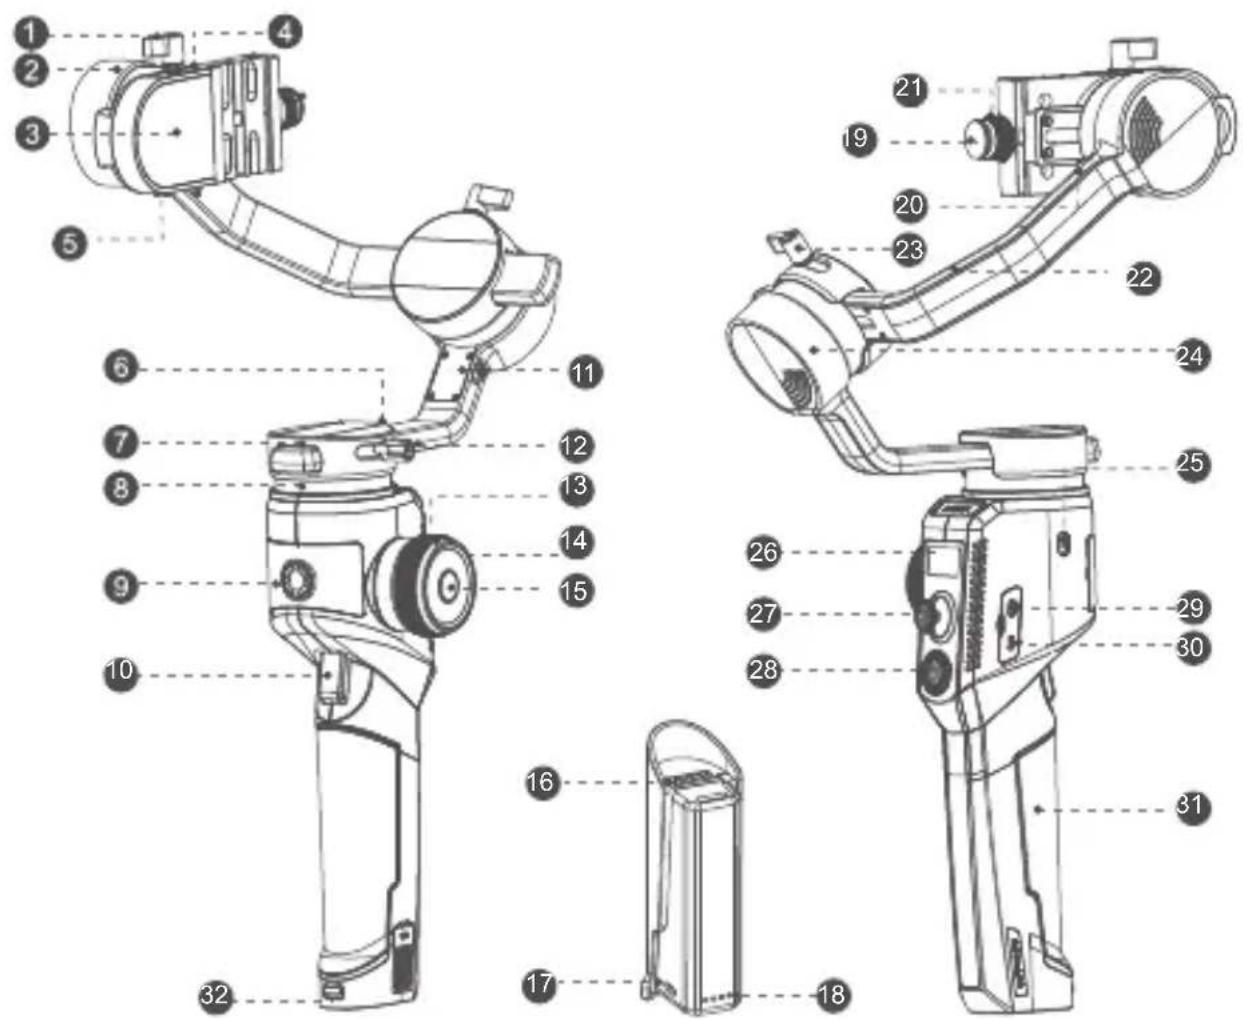
AirCross 2 overview
text_image
Technical diagram of a robotic device with numbered parts for identification and assembly reference.① Tilt Knob
9 3/8"Screw
17 USB Type-C Charging Port
25 Pan Motor Lock
② Tilt Motor
10 Smart Trigger
18 Battery Level Indicator
26 OLED Screen
3 Tilt Arm
11 Roll Motor Lock
19 Safety Lock
27 Joystick
4 Camera Control Port
12 Pan Knob
20 Roll Motor Lock
28 Dial Wheel
5 Baseplate Knob
13 Smart Wheel
41 Multi-CAN Port
29 USB Port
6 Pan Arm
14 Indicator Light Ring
22 Roll Arm
30 Multi-CAN Port
7 Crash Pad
15 Power Button
23 Roll Knob
31 Battery
8 Pan Motor
24 Roll Motor
32 Battery Lock
16 Power Supply Electrode
Installation and Balance Adjustment
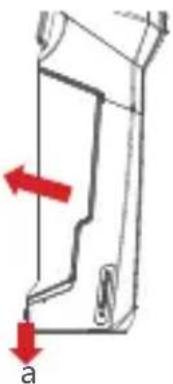
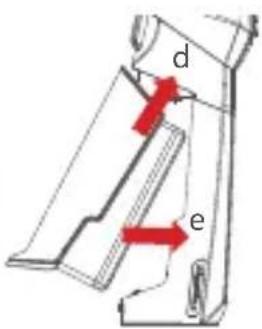
Installing the Battery
a. Press the battery lock downwards;
b. Take out the battery;
c. Remove the insulating film at the electrode;
d. Attach the battery electrode to the gimbal.
e. Press the battery into the hatch
b
natural_image
Technical line drawing of a mechanical bracket with red arrows indicating direction (no text or symbols)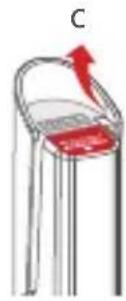
text_image
d eAttaching the Tripod
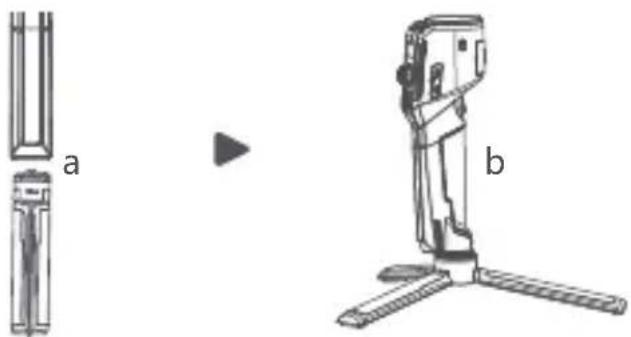
Attach the tripod to stand the gimbal.
a. Screw the tripod tightly into the 1/4" hole at the bottom of the gimbal.
b. Expand mini tripod, place the gimbal on a flat surface
natural_image
Technical illustration of a mechanical device with labeled parts (a and b), showing a side view and a right-side view of the device (no text or symbols present)Unlocking Motors
The AirCross 2 gimbal has 3 locks which are used to lock motors to prevent rotation.
natural_image
Technical line drawings of three mechanical device components with no visible text or symbols3 Motor Locks Unfolding Storage

Notes: Please unlock all motor locks before starting on the gimbal, otherwise motors will get overheated or enter the protection mode.
Mounting the Camera
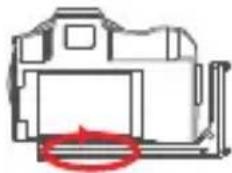
Horizontal Mounting
a. Place the longer side of the L-Bracket under the camera, and lock the camera with a 1/4"screw.
natural_image
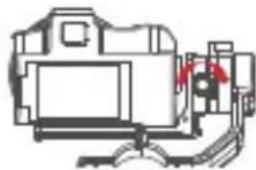
Technical line drawing of a camera frame with no visible text or symbolsVertical Mounting
a. Place the longer side of the L-Bracket under the camera, and lock the camera with a 1/4"screw.
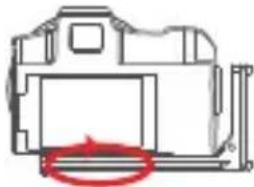
b. Loosen the quick release knob screw, Pull out the safety lock at the end of the quick-release knob, insert the shorter end of the L-Bracket into the quick release baseplate, and then lock the knob.
natural_image
Line drawing of a camera with no visible text, numbers, or symbolsb. Loosen the quick release knob screw, pull out the safety lock, insert the longer end of the L-Bracket into the quick release baseplate, and then lock the knob.
natural_image
Technical line drawing of a camera frame with no visible text or symbols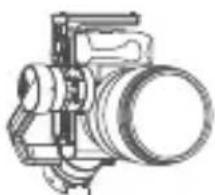
natural_image
Line drawing of a vintage camera with lens and frame (no text or symbols)Use the Arca-Swiss quick release plate for vertical shot:
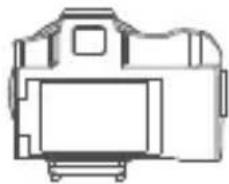
a. Place the Arca-Swiss quick release plate horizontally under the camera and use a 1/4" screw to lock the camera;
b. Loosen the quick-release knob and pull out the safety lock at the end of the quick-release knob. Install the Arca-Swiss quick-release plate into the quick-release base. Then lock the knob.
natural_image
Line drawing of a DSLR camera with no text or symbols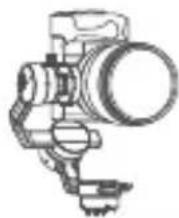

Note: The camera can only be installed vertically using the Arca-Swiss quick release plate. It does not block the camera's battery port and memory card slot.
Balancing
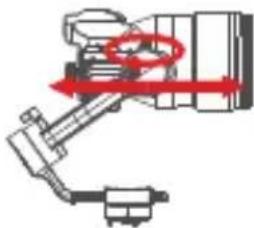
a. Loosen the knob of the tilt arm, adjust the tilt arm back and forth until the lens moves horizontally forward, and then lock the knob.
b. Rotate the camera to make its lens face upward, loosen knob on the release plate, adjust the release plate back and forth until the lens faces straight upward, and then lock the knob.
natural_image
Mechanical assembly diagram showing a lever and shaft assembly with no visible text or symbols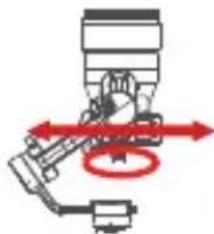
natural_image
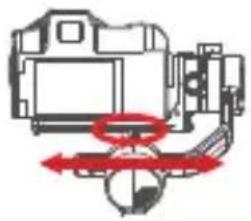
Mechanical assembly diagram showing piston and crankshaft components with red directional arrows indicating motion (no text or labels)c. Loosen the knob of the roll arm, adjust roll arm leftwards and rightwards until it remains horizontal, and then lock the knob.
d. Hold the gimbal horizontally to make the pan arm level with the ground, then loosen the knob on the pan arm, adjust the pan arm leftwards and rightwards until it remains level, and then lock the knob.
natural_image
Diagram of a camera with red directional arrows indicating motion or force (no text or symbols)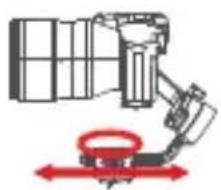
natural_image
Diagram of a mechanical device with red directional arrows indicating movement or force (no text or symbols)
Note: Please release the motor lock of the axes before balance adjustment, otherwise it can't be adjusted accurately. Please ensure that the MOZA AirCross 2 is balanced well before use.
Buttons and OLED Display
Button Functions
| Button Operation Function Customizable Function Menu | |||||||||
| Trigger | 1X click —— | —— | Focus Photo —— — — The same | ||||||
| 2X click Re-center —— Re-center Selfie —— The same | |||||||||
| 3X click Selfie —— Re-center Selfie —— The same | |||||||||
| Hold | Pan-tilt follow | —— | Pan-tilt follow | All lock | Sport gear mode | FPV | ——The same | same | |
| Click and hold | All lock | —— | —— | —— | —— | The same | |||
| Power Button | 1X click | Switch wheel modes | —— | —— | —— | —— | The same | ||
| 2X click | Sleep/wake up | —— | —— | —— | —— | The same | |||
| 3X click | Switch Grouping of Wheel Modes | —— | —— | —— | —— | The same | |||
| Long press | ON/OFF | —— | —— | —— | —— | The same | |||
| Smart Wheel | Turn | Focus motor 1 | Focus motor 1 | Focus motor 2 | E-focus | Tilt axis | Roll axis | Pan axis | The same |
| Joystick | Push up/down | Move the tilt axis | Tilt axis | Roll axis | Pan axis | —— | —— | The same | |
| Push left/right | Move the pan axis | Tilt axis | Roll axis | Pan axis | —— | —— | The same | ||
| Top Button | 1X click | Tilt follow | —— | —— | —— | —— | Option-up | ||
| Long press | Lock/Unlock the dial | —— | —— | —— | —— | —— | |||
| Down Button | 1X click Pan | follow | —— | —— | —— | —— | Option-down | ||
| Left Button | 1X click Roll | follow | —— | —— | —— | —— | Return | ||
| 3X click FPV | mode | —— | —— | —— | —— | —— | |||
| Right Button | 1X click | Sport gear mode | —— | —— | —— | —— | Confirm/Next menu | ||
| 3X click | Inception mode | —— | —— | —— | —— | —— | |||
| Center Button | 1X click | Video recording | —— | —— | —— | —— | Video recording | ||
| 2X click | Take photo | —— | —— | —— | —— | Take photo | |||
| Long press Enter menu | —— | —— | —— | Exit menu | |||||
| Dial Wheel | Turn | Adjust the follow speed | —— | —— | —— | Adjust relevant parameter | |||
| Combo | Center button +Power | Firmware upgrade | —— | —— | —— | —— | —— | ||
OLED Display
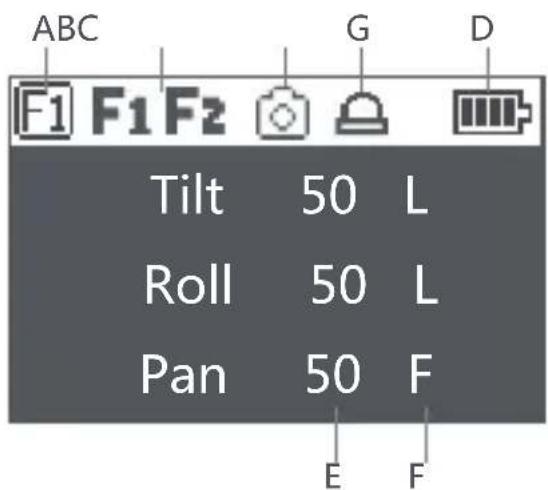
text_image
ABC F1 F1 F2 G D Tilt 50 L Roll 50 L Pan 50 F E FA: Smart wheel working modes
Controlling external follow focus motor 1
Controlling external follow focus motor 2
Electronic follow focus
Controlling the tilt axis
Controlling the roll axis
Controlling the pan axis
B: Focus motor connection status. Icon will be displayed after connection, otherwise it won't be displayed. Up to two focus motors can be connected at the same time.
C: Camera connection status. Icon will be displayed after USB connection, otherwise it won't be displayed.
D: Battery level. Each grid represents 25% battery level. When the battery is empty, please charge the battery in time.
E: Follow speed value: 0-100. Turn the dial to adjust the value
F: Follow status
L: Lock. The axis locks and doesn't follow.
F: Follow. The axis follows.
Q: Sport Gear Mode
G: the dial is locked, please long press 'TF' button to unlock
LED Indicators
Power on: automatic color changing
Sport gear mode: solid blue
Inception mode: solid blue
Sleep mode: slowly flashing green
Warning alarm: quickly flashing red
Firmware upgraded: breathing yellow

Note: The button functions and light colors above are the factory default settings. You can customize some button functions and light effects in the menu.
Menu Description
| L1 L2 L3 L4 L5 Value Function | |||||
| camera | select | Shutter Cable | * set the connection type to universal shutter cable | ||
| MCSC-Multi | * set the connection type to Sony-Multi port | ||||
| MCSC-Multi/C | * | set the connection type to Sony-Multi port and power supply | |||
| MCSC-Remote | * set the connection type to Panasonic-Remote port | ||||
| M3C-USB | * set the connection type to USB port | ||||
| parameter | SO | 32--106400 Set the camera ISO | |||
| TV | 30--1/8000 Set the camera shutter | ||||
| AV | F1--F22 Set the camera aperture | ||||
| gimbal | motor | switch | ? /ok turn on/off motor | ||
| power | autolune | ? /ok tuning/tuned | |||
| level | ultra light * set motor level to the minimum | ||||
| light * set motor level to light | |||||
| medium * set motor level to medium | |||||
| heavy * set motor level to heavy | |||||
| ultra heavy * set motor level to ultra heavy | |||||
| custom | tilt 0-100 set tilt motor power | ||||
| roll 0-100 set roll motor power | |||||
| pan 0-100 set pan motor power | |||||
| filter | tilt | 0-100 set tilt motor filter | |||
| roll | 0-100 set roll motor filter | ||||
| pan | 0-100 set pan motor filter | ||||
| follow | switch | tilt | on/off enter/exit tilt follow mode | ||
| roll | on/off enter/exit roll follow mode | ||||
| pan | on/off enter/exit pan follow mode | ||||
| speed | tilt | 0-100 set the following speed of tilt motor | |||
| roll | 0-100 set the following speed of roll motor | ||||
| pan | 0-100 set the following speed of roll motor | ||||
| deadband | tilt | 0-100 set the following initiation angle of tilt motor | |||
| roll | 0-100 set the following initiation angle of roll motor | ||||
| pan | 0-100 set the following initiation angle of pan motor | ||||
| operation | joystick | function | eft-right tilt/rol/pan | move the joystick left/right to control the tilt/roll/pan rotation | |
| up-down tilt/rol/pan | move the joystick up/down to control the tilt/roll/pan rotation | ||||
| sensitivity | eft-right 0-100 set sensitivity level of left-right movement | ||||
| up-down 0-100 set sensitivity level of up-down movement | |||||
| habits | eft-right +/- set the control habit of joystick left/right movement | ||||
| up-down +/- set the control habit of joystick up/down movement | |||||
| wheel | function | focus-1 | control the external focus motor 1 | ||
| focus-2 | control the external focus motor 2 | ||||
| focus-e | control the electronic focus | ||||
| tilt * control the pan axis | |||||
| roll * | control the tilt axis | ||||
| pan * | control the roll axis | ||||
| sensitivity | 0-100 wheel sensitivity | ||||
| habits | +/- set the control direction of wheel rotation | ||||
| trigger | hold | none | none | ||
| allow | enter pan-tilt follow mode | ||||
| ock * | enter all lock mode | ||||
| quick | enter sport gear mode | ||||
| FPV * | enter FPV mode | ||||
| click | none | none | |||
| shutter | take photo | ||||
| focus | auto focus | ||||
| double-click | none | none | |||
| re-center | re-center | ||||
| selfie | rotate the gimbal 180° for selfie | ||||
| triple-click | none | none | |||
| re-center | re-center | ||||
| selfie | rotate the gimbal 180° for selfie | ||||
| L1 L2 L3 L4 L5 Value Function | ||||||
| gimbal | operation | dial +/- rotated dial clockwise to increase/decrease value | ||||
| LED | switch | on/off turn on/off LED light on the wheel | ||||
| brightness | 0-100 adjust the brightness | |||||
| advanced | autotune | ? /ok auto tune | ||||
| balance chk check the balance state of camera | ||||||
| Focus | F1 | switch ? /ok/err turn on/off the focus motor 1 | ||||
| set A ? /ok/err set the point A of focus motor 1 | ||||||
| set B ? /ok/err set the point B of focus motor 1 | ||||||
| Clear AB ? /ok/err Clear the calibration information | ||||||
| Guidance | > | Enter the guidance mode | ||||
| F2 | switch ? /ok/err turn on/off the focus motor 1 | |||||
| set A ? /ok/err set the point A of focus motor 1 | ||||||
| set B ? /ok/err set the point B of focus motor 1 | ||||||
| Clear AB ? /ok/err Clear the calibration information | ||||||
| Guidance | > | Enter the guidance mode | ||||
| dolly zoom | > | Enter the dolly zoom mode | ||||
| inception | speed | 0-100 | set the rotation speed of inception mode | |||
| motion sensing | switch | filt | ? /on/off | turn on/off the motion control of tilt axis | ||
| roll | ? /on/off | turn on/off the motion control of roll axis | ||||
| pan | ? /on/off | turn on/off the motion control of pan axis | ||||
| speed | 0-100 set the rotation speed of motion control | |||||
| tracking | speed | 0-100 set the max speed of tracking | ||||
| manual pos | filt | on/off turn on/off the manual positioning of tilt axis | ||||
| roll | on/off turn on/off the manual positioning of roll axis | |||||
| pan | on/off turn on/off the manual positioning of pan axis | |||||
| calibration | gyro | ? /ok calibrating/calibrated the gyroscope | ||||
| acc | ? /ok calibrating/calibrated the accelerometer | |||||
| angle offset | filt | 0-100 set the offset value of tilt axis | ||||
| roll | 0-100 set the offset value of roll axis | |||||
| pan | 0-100 set the offset value of pan axis | |||||
| general | language | English | * switch display language to English | |||
| 中文 | * switch display language to Chinese | |||||
| config | config1 | save | ? /ok save to configuration 1 | |||
| load | ? /ok load configuration 1 | |||||
| config2 | save | ? /ok save to configuration 2 | ||||
| load | ? /ok load configuration 2 | |||||
| config3 | save | ? /ok save to configuration 3 | ||||
| load | ? /ok load configuration 3 | |||||
| reset | ? /ok restore default parameter settings | |||||
| about | device name and firmware information | |||||
Menu type introduction:
If there is a “>” mark at the right side of the selected item, press the dial right button for the next menu.
If the selected item has a “[ ]” and contains a number, rotate the dial to adjust its value.
If the selected item has a “()” and contains an option, press the right button to switch among options

Notes:
- If there is a “*” at the right side of one item, the current list is the final option, press the dial right button to launch it.
- If the selected item and other items in the menu list don't have any marks, press the dial right button to launch the option once. ">" is displayed during the process. "ok" is displayed after the process is completed, and "err" is displayed if the option fails.

- Filtering parameters: When the motor vibrates with highfrequency, the value should be turned down. When the motor vibrates with low-frequency, the value should be increased.
- The manual positioning function has lower priority than the following function. When using manual positioning function normally, following function of the axis should be turned off.
Features Description
Camera Control
The AirCross 2 can support camera video recording, photo taking and electronic focus control. Please refer to the compatibility list for more details (* Please set the lens to "MF"mode)
| Camera Brand | Camera Model | Connection Type | Cable | Control Protocol | shutter | ecording | ISO | TV | AV | Auto Focus | Electronic Focus | Power Supply |
| EOS R | M3C-USBCANON | M3C-C | USB | √ | √ | √ | √ | √ | — | |||
| EOS RP | √ | √ | √ | √ | √ | — | ||||||
| EOS 6D Mark II | M3C-Mini | * | √ | √ | √ | √ | — | |||||
| EOS 6D | * | √ | √ | √ | √ | — | ||||||
| EOS 60D | * | √ | √ | √ | √ | — | ||||||
| EOS 77D | * | √ | √ | √ | √ | — | ||||||
| EOS 80D | * | √ | √ | √ | √ | — | ||||||
| EOS 5D2 | * | √ | √ | √ | √ | — | ||||||
| EOS 5D3 | * | √ | √ | √ | √ | — | ||||||
| EOS 800D | * | √ | √ | √ | √ | — | ||||||
| EOS 5D Mark IV | M3C-Micro | * | √ | √ | √ | √ | — | |||||
| EOS 200D II | * | √ | √ | √ | √ | — | ||||||
| EOS M50 | √ | √ | √ | √ | √ | — | ||||||
| EOS M5 | MCSC-C1 | MCSC-C1 shutter Protocol | √ | — | — | — | — | |||||
| EOS 750D | √ | — | — | — | — | |||||||
| SONY | Alpha 7S | M3C-USB | M3C-Micro | USB | — | √ | √ | √ | √ | — | ||
| Alpha 7R | — | √ | √ | √ | √ | — | ||||||
| Alpha 6300 | — | √ | √ | √ | √ | — | ||||||
| Alpha 6400 | — | √ | √ | √ | √ | |||||||
| Alpha 6500 | — | √ | √ | √ | √ | — | ||||||
| Alpha 7S II | — | √ | √ | √ | √ | — | ||||||
| Alpha 7R II | — | √ | √ | √ | √ | — | ||||||
| Alpha 7 L | — | √ | √ | √ | √ | — | ||||||
| Alpha 7 III | — | √ | √ | √ | √ | |||||||
| Alpha 7R III | — | √ | √ | √ | √ | |||||||
| DSC-RX100M3 | — | √ | √ | √ | √ | — | ||||||
| DSC-RX100M4 | — | √ | √ | √ | √ | — | ||||||
| DSC-RX100M5 | — | √ | √ | √ | √ | — | ||||||
| SONY | Alpha 7S | MCSC-Multi | MCSC-Multi | Multi | √ | √ | — | — | — | |||
| Alpha 7R | √ | √ | — | — | — | |||||||
| Alpha 6300 | MCSC-Multi/C | MCSC-Multi/C | √ | √ | — | — | — | |||||
| Alpha 6400 | √ | √ | — | — | — | |||||||
| Alpha 6500 | √ | √ | — | — | — | |||||||
| Alpha 7S II | √ | √ | — | — | — | |||||||
| Alpha 7R II | √ | √ | — | — | — | |||||||
| Alpha 7 I | √ | √ | — | — | — | |||||||
| Alpha 7 III | √ | √ | — | — | — | |||||||
| Alpha 7R III | √ | √ | — | — | — | |||||||
| DSC-RX100M3 | √ | √ | — | — | — | |||||||
| DSC-RX100M4 | √ | √ | — | — | — | |||||||
| DSC-RX100M5 | √ | √ | — | — | — | |||||||
| Panasonic | DMC-G7KGK | MCSC-Remote | MCSC-Remote | MCSC-Remote | √ | √ | — | — | — | |||
| DMC-G85GK | √ | √ | — | — | — | |||||||
| DMC-GH3 | √ | √ | — | — | — | |||||||
| Lumix GH4 | √ | √ | — | — | — | |||||||
| DC-S1GK-K | √ | √ | — | — | — | — | ||||||
| M3C-USB | M3C-C | USB | √ | √ | √ | √ | √ | |||||
| Lumix GH5 | √ | √ | √ | √ | √ | — | ||||||
| Lumix GH5s | √ | √ | √ | √ | √ | — | ||||||
| Nikon | Z6 | M3C-USB | M3C-C | USB | √ | √ | √ | √ | √ | — | ||
| Z7 | √ | √ | √ | √ | √ | — | ||||||
| D850 | M3C-Micro | √ | √ | √ | √ | √ | — | |||||
| FUJFILM | X-12 | MCSC-C1 | MCSC-C1 | Fuji shutter | √ | √ | — | — | — | — | ||
| X-13 | √ | √ | — | — | — | — | ||||||
| X-120 | √ | √ | — | — | — | — | ||||||
| X-130 | √ | √ | — | — | — | |||||||
| BMD | BMPCC 4K M3C-USB M3C-CP | 1 | USB | — | √ | — | — | — | — | — | — | |
| ZCAM | E2 M3C-LANC | M3C-LANC 1 | LANC | — | √ | — | — | — | √ | — | — | |
Note: please refer to the official website for the latest camera control list.
The M3C-DP and M3C-LANC control cables are optional, you can purchase those cables from www.gudsen.com
Operation Steps:
a. Long press the center button to enter the menu, refer to the compatibility list to select the correct camera type.
13
b. Refer to the list to choose and connect the camera control cable. Connect the Mini-USB end of the control cable to the control port of AirCross 2. Connect the other end to the corresponding control port of the camera.
c. You can achieve recording by clicking the menu button one time and taking photos by clicking menu button twice after selecting the camera type and connecting the camera control cable.

Note:
- Cameras equipped with Micro USB 3.0 interface, such as the Nikon D850, can be normally controlled by half plugging the M3C-Micro cable.

natural_image
Simple diagram with a grid of white squares and a red rectangular shape, no text or symbols present.- After plugging the camera control cable, please operate the camera according to the prompts on the camera screen, otherwise the camera control function may not work properly.
Motor Output
The payload of AirCross 2 is from 300g to 3200g. Different payload requires different motor power to achieve the best stability. There are three methods for adjusting the output of the motor:
Auto-tuning operation method:
a. Install the camera and adjust the balance
b. Unlock all motor locks
c. Turn on the stabilizer, long press the center button to enter the menu, select 'Gimbal' > 'Motor' > 'Power' > 'Auto-tune'
d. During the auto-tuning, the stabilizer will vibrate automatically to match the most suitable output value. Wait for about 5 seconds, the stabilizer stops shaking, and the auto-tuning completes.
| camera | > |
| gimbal | > |
| advanced | > |
| general | > |
| motor | > |
| follow | > |
| operation | > |
| switch | |
| power | > |
| filter | > |
| autotune | |
| level | > |
| custom | > |
Set the output gear:
Factory default presets 5 groups of motor output values, which are suitable for cameras of different weight levels.
Customize the output value of each motor:
The users can customize the output value of each motor to reach more precise control of the motor output. The adjustment range is 0 to 100.

Note:
- Under the camera lens combination of the limit, the auto-tuning function may not accurately calculate the appropriate output value. Please manually adjust the motor output according to the situation.
- If the motor output is too low, the video is not stable enough; if the motor output is too high, it will cause high-frequency vibration of the stabilizer.
- When the motor output is at the critical value, the stabilizer will not vibrate in the upright state, but it will vibrate in the forward or inverted state. Please reduce the motor output moderately.
FPV, Sport Gear Mode
When the follow function is enabled, the camera will follow the movement of the gimbal.
Users can enable the follow mode of each axis through dial buttons and turn the dial to adjust the following speed, which can be also enabled in the menu.
| Follow Mode Switch | Example 1 Example 2 | |
| Enter the tilt follow | 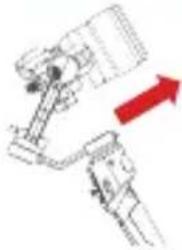 | 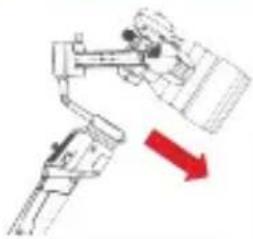 |
| Exit the tilt follow | 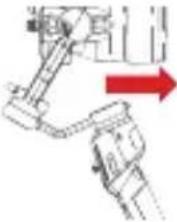 | 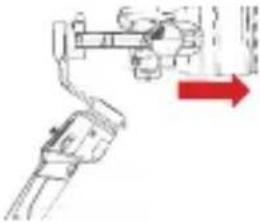 |
| Enter the roll follow | 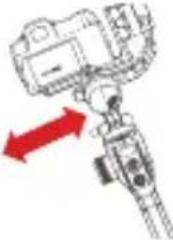 | 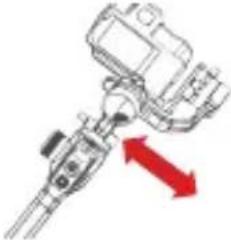 |
| Exit the roll follow | 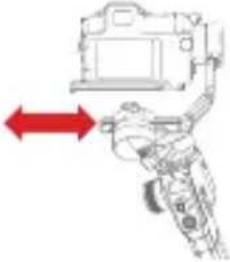 | 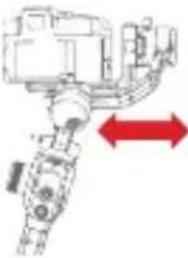 |

Note:
- The AirCross 2 is in pan follow mode by default.
- In addition to controlling the follow mode by the switches of each axis independently, follow modes can be also enabled by the trigger, please refer to Page9 'Button Functions' for more details.
- The angle of the roll follow is 60^ . For a larger following angle, please triple click the left button to enter the FPV mode to achieve 360^ follow of three axes.
- If faster following speed is required, please click the right button to enter the sport gear mode. (Currently only supports the pan axis)
Manual Positioning
Manual positioning is used to quickly adjust the direction of the camera. When the function of manual positioning is enabled, the camera orientation can be adjusted by hand which will not automatically return to the initial position. The adjustment speed is faster than using the joystick or the following mode. The manual positioning of the tilt and pan axis are enabled by default on the AirCross 2. Manual positioning of the roll axes can be enabled in the menu.
| camera | > |
| g imbal >motion sensin | |
| advanced | > |
| general | > |
| inception | > |
| > | |
| tracking | > |
| manual pos | > |
| tilt | [off] |
| roll | [off] |
| pan | [ on] |
| tilt | [on] |
| roll | [off] |
| pan | [ on] |

Note: The follow function has higher priority than manual positioning. When the follow function of any axis is on, the manual positioning function cannot be used. Only after the follow function is off, the manual positioning can be used normally.
Button Customization
Button Customization is used to specify the function, sensitivity and operation direction of each button according to the user's habits. For Example:
By default, moving the joystick up and down controls the tilt axis rotation. It can be changed to control the roll or pan axis rotation by customizing;
By default, moving the joystick left and right controls the pan axis rotation. It can be changed to control the tilt or roll axis rotation by customizing.
| camera | > |
| g imbal | > |
| a dvanced | > |
| g general | > |
| motor | > |
| follow | > |
| operation | > |
| joystick | > |
| wheel | > |
| trigger | > |
| dial | > |
| function | > |
| sensitivity | > |
| habits | > |
| left-right | [p] |
| up-down | [t] |
The higher the sensitivity of the button, the more sensitive and faster the control is. If you change the 'custom' to -, the direction of operation will be opposite. For more button customization, please refer to Page11 Menu Description.
Inception Mode
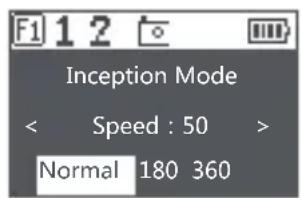
The Inception Mode is used to control the camera to rotate in the roll direction for shooting upside down and rotating footages. In the main interface, triple click the right button to enter the Inception Mode. After entering the Inception Mode, the camera lens is vertically up and each axis automatically follows.
Button Definition for Inception Mode:
- Turn the joystick left or right: the gimbal turns to left or right, when
release or turn to a specified angle, the gimbal stops.
- Turn the dial: adjust the rotation speed
- Press the left button on the dial once: the gimbal rotates to the left automatically. If the gimbal is rotating, press once to stop.
- Press right button on the dial once: the gimbal rotates to the right automatically. If the gimbal is rotating, press once to stop.
- Press up/down button on the dial: select rotationangle
- Normal: gimbal rotates and does not stop automatically
- 180: the gimbal rotates 180^ and stops automatically.
- 360: the gimbal rotates 360^ and stops automatically.
text_image
F1 1 2 Inception Mode < Speed : 50 > Normal 180 360
text_image
F1 1 2 Inception Mode < Speed : 50 >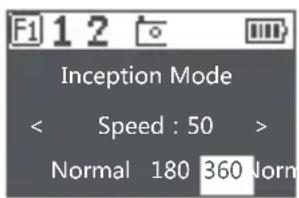
text_image
F1 1 2 Inception Mode < Speed : 50 > Normal 180 360 Norm180
Triple click the right button again to exit the Inception Mode.
Balance Check
The gimbal can check the balance status of the tilt and roll axis automatically and instruct users to make the correct adjustment.
a. Attach a tripod to the gimbal, turn on the gimbal and place it on a horizontal tabletop.
b. Enter the menu, select advanced>balance chk, the gimbal begins to check the balance adjustment.
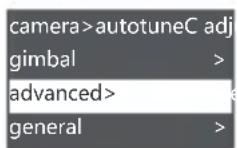
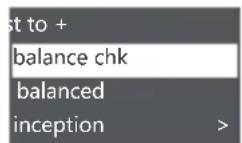

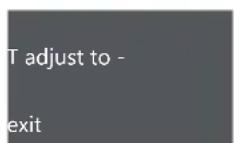
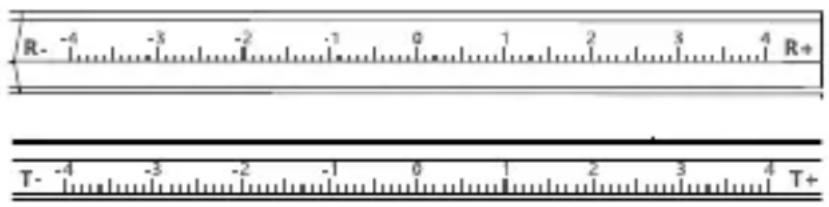
c. When balance check is completed, the balance status of each axis will be displayed on the screen, direction guide will be also displayed if the adjustment is needed.
d. C means quick release plate, T means tilt axis, R means roll axis, the direction can be viewed at the corresponding position of the gimbal, then start the adjustment according to the screen prompts.
e. When adjustment is completed, press the right button and check it again until the gimbal is well balanced.
text_image
R- -4 -3 -2 -1 0 1 2 3 4 R+ T- -4 -3 -2 -1 0 1 2 3 4 T+
Note: Balance check can be only used with the tilt and roll axis, the pan axis balance can't be checked. When exit balance check, a notice that user need to check and balance pan axis manually will appear on the screen. Be sure that the motor lock has been released when using balance check.
Sensor Calibration
Gyroscope Calibration
Turn on the gimbal and leave it quietly for about 5 minutes, the gyroscope calibration is required when the gimbal drifts obviously. The steps are as follows:
a. Turn on the gimbal (long press the power button)
b. Turn off the motors (double press the power button/enter the menu, select gimbal>motor>switch, set 'off')
c. Leave the AirCross 2 on the table and don't shake it or the desktop.
d. Enter the menu, select advanced>calibrate>Gyro cali and press the dial right button, wait about 5 seconds, when the '?' changes to 'OK', the calibration is completed.
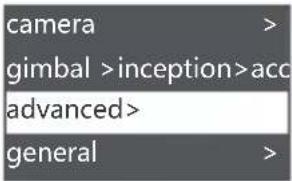
text_image
camera gimbal >inception>acc advanced> general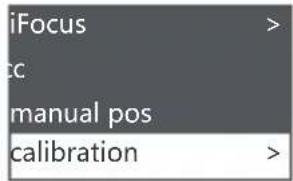
text_image
iFocus cc manual pos calibration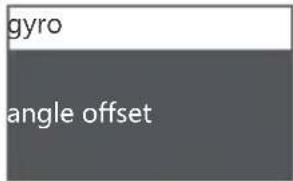
text_image
gyro angle offset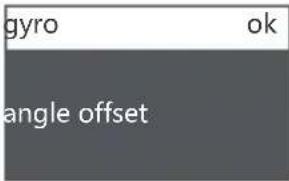
text_image
gyro ok angle offsetAccelerometer Calibration
Turn on the gimbal and there is no obvious drift, the accelerometer calibration is required when the camera doesn't keep level. The steps are as follows:
a. Turn on the gimbal (long press the power button)
b. Turn off the motors (double press the power button/enter the menu, select gimbal>motor>switch, set 'off')
c. Leave the L-shaped quick release plate on the horizontal table. Avoid the bottom screw and keep the AirCross 2 at static position. Do not shake the it or tilt it. (or mount the camera to refer to its level)
d. Enter the menu, select advanced>calibrate>Acc cali, and press the dial right button to enter calibration. Wait about 5 seconds, when the '?' changes to 'OK', the calibration is completed.
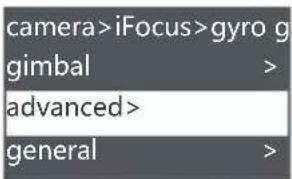
text_image
camera>iFocus>gyro g gimbal > advanced > general >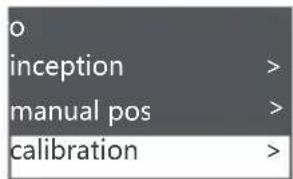
text_image
o inception > manual pos > calibration >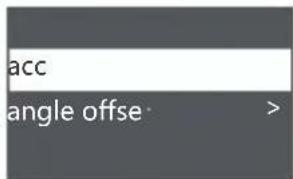
text_image
acc angle offse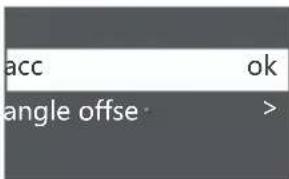
text_image
acc ok angle offse >
Note:
- Please keep the gimbal stationary during the calibration, any shaking will cause the calibration to deviate. 2. Any drastic shaking might cause 'err' shown on the screen, please calibrate again. 3. Do not arbitrarily perform calibration operations while it is not necessary.
Offset
In case of emergency shooting, the camera cannot be leveled and there is no time for sensor calibration, the camera can be adjusted to a horizontal state by offset.
a. Turn on the gimbal and the camera level, check the offset of the tilt and yaw axis.
b. Enter the menu, select advanced>calibrate>offset, select an axis that is not horizontal, and then turn the dial to adjust the fine adjustment value of the axis until the camera completely keeps level.
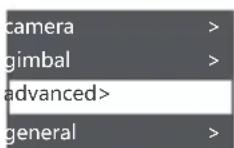
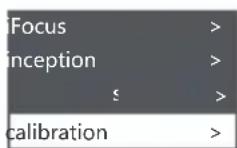
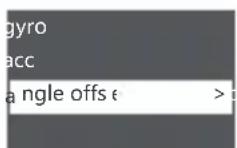
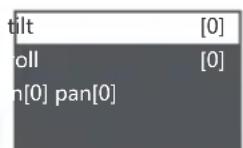
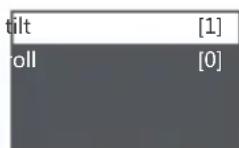

Notes:
- The offset can only adjust the angle of each axis within the range of about ±5^ , if there is too much offset, the camera cannot be completely leveled. 2. Offset is only a temporary solution, after shooting, accelerometer calibration is still needed. 3. The parameters of the offset will not be saved and will become invalid after restart.
Language Switch
The AirCross 2 supports both Chinese and English. After turning on the gimbal, users can switch language in the menu.
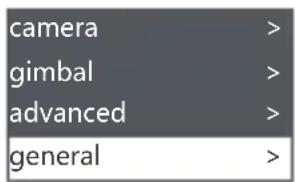
text_image
camera gimbal advanced general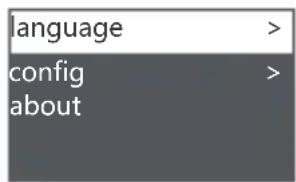
text_image
language > config about >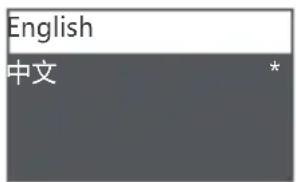
text_image
English 中文 *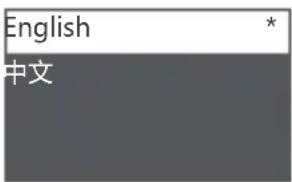
text_image
English * 中文User Configuration Management
The AirCross 2 can save 3 groups of user data like camera type, motor output, button operations and other parameters, so users can retrieve relevant parameters previously used and avoid trouble of setting parameters each time when changing the camera.
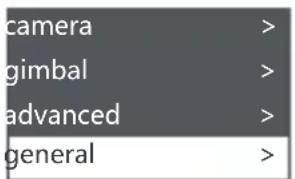
text_image
camera gimbal advanced general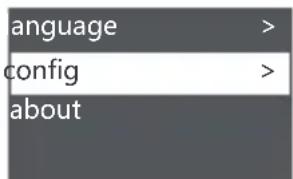
text_image
language > config > about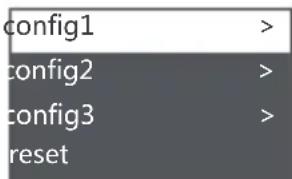
text_image
config1 config2 config3 reset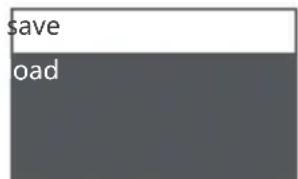
text_image
save oadWhen configuration data is confusing, users can select "restore configuration" to clear all previous configuration data.
Extension
Extensible electronic accessories
AirCross 2 can assemble 2 iFocus M motors to control focus ring and zoom ring of the lens, please connect the CAN port of AirCross 2 and iFocus M via Multi-CAN cable, and set the smart wheel to 'F1' or 'F2' mode, then you can control iFocus M motor with the smart wheel AirCross 2 and slypod can be assembled together to form a 4-axis linkage photography system.
Manfrotto Quick Release System
The AirCross 2 is equipped with a Manfrotto quick release baseplate and a plate which make it facile for users to change shooting equipment. When using the Manfrotto quick release system, please install the baseplate onto the longer end of the L-Bracket, so that the knob screw onto the baseplate is exposed. Then fix the camera onto the release plate.

natural_image
Three-step diagram showing a camera assembly process: before, after, and after (no text or symbols)Two Camera Mounting Directions
By default, the camera handle side is located near the tilt motor to allow an unobstructed access to the camera control ports; however under some special circumstances, the camera control ports side should be located near the tilt motor.
Rightward installation is required under the following situations:
a. The camera size is too wide like BMPCC.
b. A specialized camera cage is used.
c. The camera lens is too heavy to adjust the balance

natural_image
Technical line drawing of a mechanical device with no visible text or symbolsRegular installation
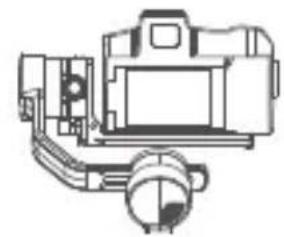
natural_image
Technical line drawing of a camera assembly (no text or symbols)Rightward installation
Rightward Installation steps:
a. Mount the L-Bracket at the bottom of the camera with the short end near the side of the lens:
b. Rotate the roll arm 180° until the tilt motor is located at the left side of the roll motor;
c. Mount the shorter end of the L-Bracket on the release baseplate.

Notes:
- Some camera cages are equipped with ARCA standard release plate. These special cages can be mounted directly on the AirCross 2. gimbal without using the L-Bracket. 2. Some special cages have no Arca-Swiss standard quick release plate on the side, The Arca-Swiss quick release plate can be mounted on the side of the camera rabbit cage with a 1/4" screw and then mounted to AirCross 2. 3. When camera is mounted in this way, the camera control port or HDMI port will be blocked.
Smartphone and PC Connection
The AirCross 2 is equipped with BLUETOOTH 4.0 and can be connected with smartphones. Users can set parameters, shot time-lapse video, upgrade firmware and make other operations via the MOZA Master App. With a Type-C USB interface, the AirCross 2 is able to be connected to a computer. Users can set parameter, upgrade firmware and make other operations via the MOZA Master software.
Download Link: https://www.gudsen.com/moza-aircross-2

Note:
- The MOZA Master supports iOS, Android, Windows and MacOS
- Before using the MOZA Master on computer, please install the driver first, otherwise the computer cannot recognize the AirCross 2
- Smart phones cannot directly pair with the AirCross 2 via Bluetooth, MOZA Master App must be used to connect your phone with the AirCross 2
Install the Phone Holder
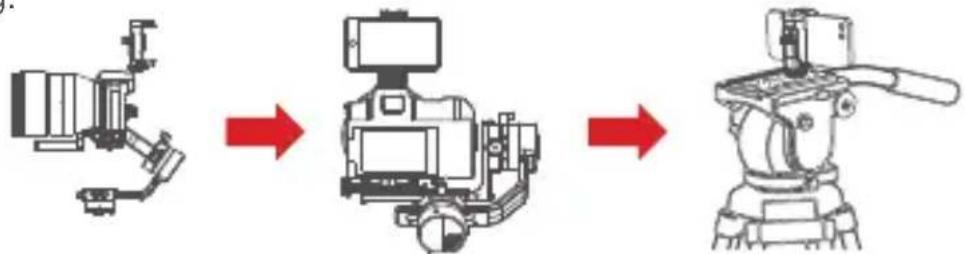
Install the phone on top of the camera. Operate object tracking through App.
a. Fix the phone holder to the hot shoe connector on the top of the camera b. Place the phone horizontally in the phone holder c. Open the App.Enter the object tracking feature. Adjust the phone angle. Make the phone framing as consistent as possible with the camera framing.
flowchart
graph LR
    A["Fixed Body"] --> B["Cam/Monitor"]
    B --> C[" mounted Camera"]
In addition to being mounted on the top of the camera for object tracking, the phone holder can also be used to fasten the phone to tripod head for mimic motion control.
Firmware Upgrade
Upgrade via computer:
a.Turn off the gimbal.
b.Long press the center button, then press the power button with the other hand until the prompt 'BOOT MODE' appears on the screen.
c.Connect the gimbal to the computer with a USB Type-C cable.
d.The software will automatically identify the device and load the firmware. Press the 'Upgrade' button and wait for about 30s.
e.Restart the gimbal after the upgrade.
Upgrade via App:
a.Turn off the gimbal.
b. Long press the center button, then press the power button with the other hand until the prompt 'BOOT MODE' appears on the screen.
c.Start App, press Bluetooth to search for AirCross 2 device and connect.
d. The App will automatically enter the firmware upgrade interface, please wait for the firmware download to complete, press the 'upgrade' button and wait for about 5 minutes.
e.Restart the gimbal after the upgrade.

Note:
Make sure the gimbal is fully charged and the computer or mobile phone network connection is normal during the upgrade.
Do not disconnect the gimbal from power, USB cable or Bluetooth during the upgrade, otherwise the upgrade will fail.
Please re-install the batteries and try to upgrade again until the upgrade is completed.
Specs
| Specs | ||
| Body weight (g) Battery excluded 950 | ||
| Payload (g) | Minimum 300 | |
| Maximum 3200 | ||
| Dimension (mm) Storage dimension 335*225*90 | ||
| Camera Tray Dimension (mm) | Release center to roll axis 105 | |
| Release center to tilt axis | 120 | |
| Release center to the peak of tilt | 80 | |
| Mechanical Endpoint Range (°) | Pan | 360°continuous |
| Roll | 360°continuous | |
| Tilt | 360°continuous | |
| Operation Temperature (°C) | Lowest | 0 |
| Highest | 50 | |
| Operation Voltage | Standard | 7.2 |
| Operation Current | Dynamic (mA) | 200 |
| Battery | Model | M2S30QB |
| Type | Li-ion | |
| Standard capacity (mAh) | 3000 | |
| Standard voltage (V) | 7.2 | |
| Charging time (H) | 1.5 | |
| Battery life (H) | 12 | |
| Connections | Bluetooth | 4.0 BLE |
| 2.4G | 50m | |
| USB in | USB -C | |
| Camera control port | Mini USB 10PIN | |
| Accessory extension ports | Multi-CAN*3 | |

text_image
MOZAFollow us
text_image
QR code with central logo containing 'MD20' text and Chinese charactersMOZA WeChat