
Mini-P - Tripod Moza - Free user manual and instructions
Find the device manual for free Mini-P Moza in PDF.


| Product Type | 3-Axis Gimbal Stabilizer |
| Brand | Moza |
| Model | Mini-P |
| Weight | 710 g (1.57 lbs) |
| Dimensions (Unfolded) | 305 × 51 × 166 mm |
| Dimensions (Folded) | 198 × 166 × 102 mm |
| Maximum Payload | 130 – 900 g (0.29 – 1.98 lbs) |
| Battery Type | Built-in Lithium-ion |
| Battery Capacity | 2000 mAh |
| Battery Voltage | 7.4 V |
| Charging Time | 1.5 hours |
| Battery Life | Up to 20 hours |
| Charging Port | USB-C |
| Supported Phone Width | 58 – 88 mm |
| Mechanical Pan Range | 360° |
| Mechanical Roll Range | 330° |
| Mechanical Tilt Range | 330° |
| App Compatibility | MOZA Master (camera) & MOZA Genie (phone), iOS & Android |
| Key Modes | Object Tracking, Inception Mode, FPV, Timelapse, Mimic Motion Control |
| Motor Locks | Tilt, Roll, and Pan storage locks for secure transport |
| Included Accessories | Tripod, Phone Holder, L-Bracket, USB-C Cable |
| Maintenance | Recharge every 3 months if not used; avoid overcharging/discharging |
Frequently Asked Questions - Mini-P Moza
User questions about Mini-P Moza
0 question about this device. Answer the ones you know or ask your own.
Ask a new question about this device
Download the instructions for your Tripod in PDF format for free! Find your manual Mini-P - Moza and take your electronic device back in hand. On this page are published all the documents necessary for the use of your device. Mini-P by Moza.
USER MANUAL Mini-P Moza
natural_image
Technical line drawing of a camera mounted on a tripod-mounted device (no text or symbols)Mini-P User manual
CONTENTS
EN....1
FRA....11
KOR....21
DE....31
RUS....41
PTG....51
ESP....61
JAP....71
繁體....81
Battery and Charging
The MOZA Mini-P has a built-in lithium battery. Fully charge the battery before first use. The LED power indicator blinks when the battery level is less than 20%. Charge it with an universal USB-C cable, Mini-P can be charged through a phone charger and mobile power supplier. The charging stops automatically when the battery is fully charged.
Notes:
- Please do not over-charge or over-discharge the battery. Otherwise the battery will be damaged.
- Recharge and discharge the battery every 3 months to keep it intact if it is left unused for a long time.
Contacts
Official Website Sina Weibo WeChat


Twitter Facebook YouTube



Instagram
MOZA Genie Download
IOS Android

Tutorial

Firmware Upgrade and Calibration YouTube QR

Firmware Upgrade and Calibration WeChat QR
GUDSEN
INVENTED FOR VIDEO
Shenzhen Gudsen Technology Co., Ltd Web: www.gudsen.com
Mini-P Overview
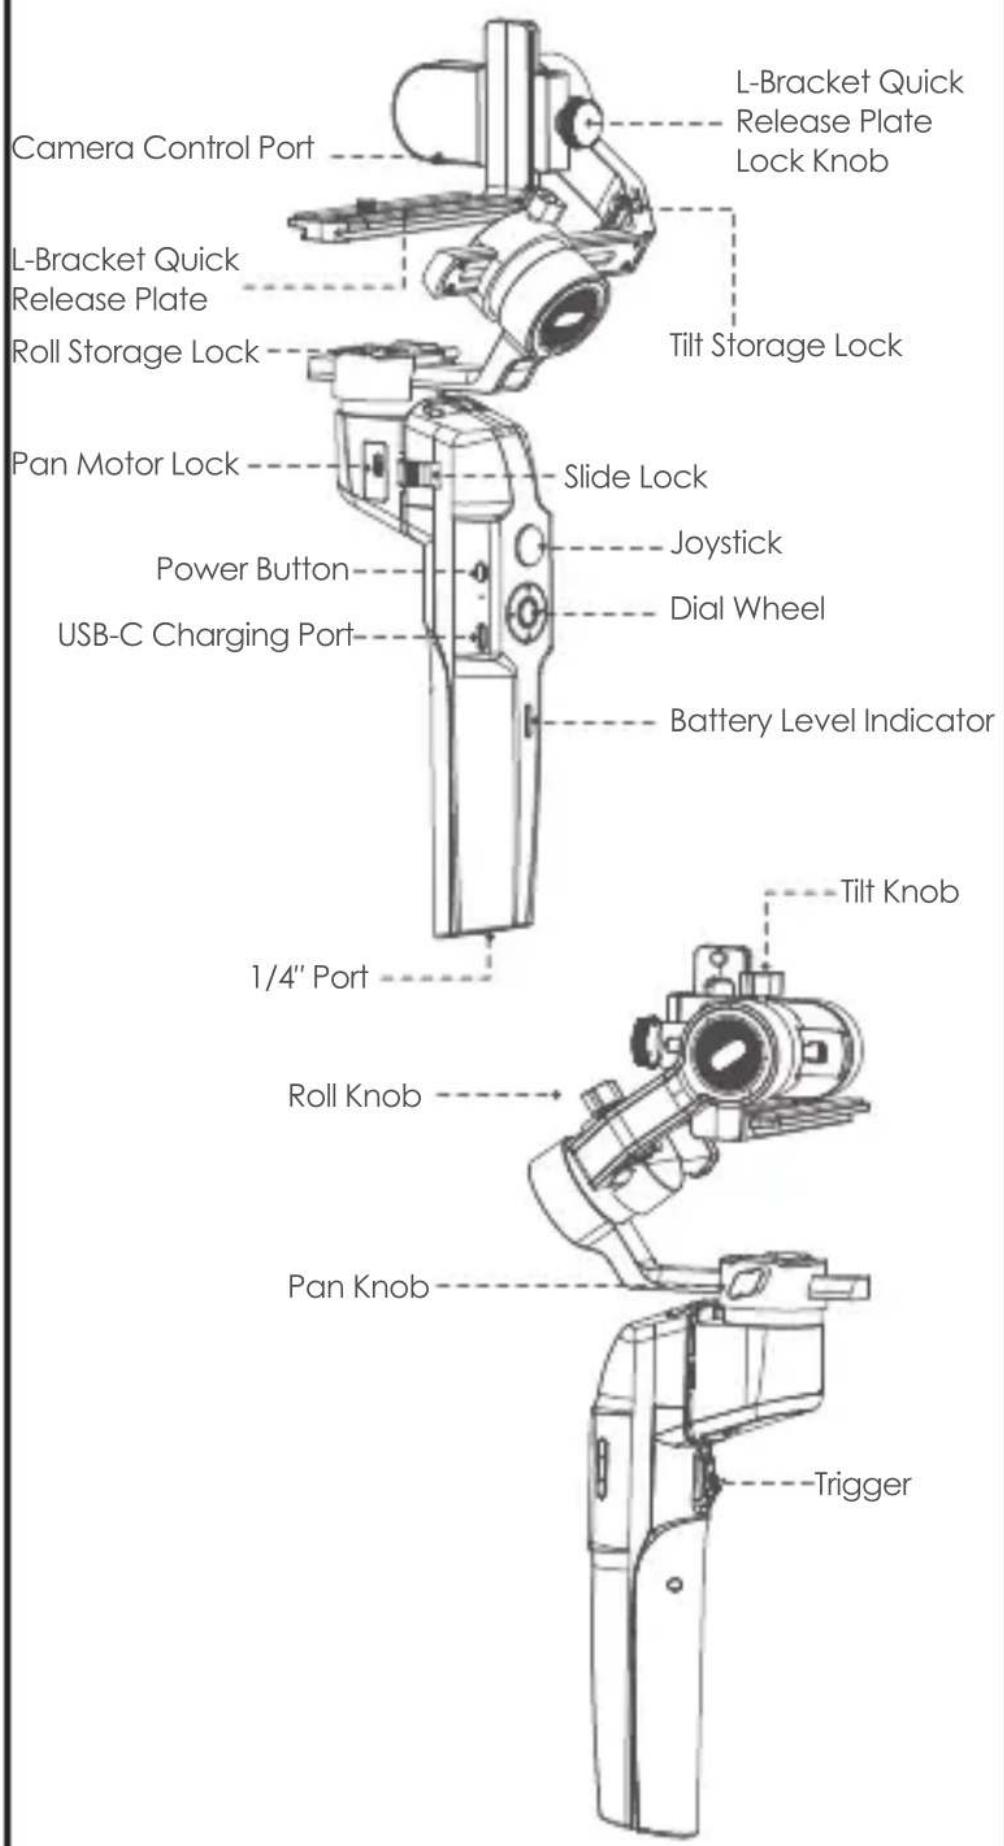
Mini-P Installation
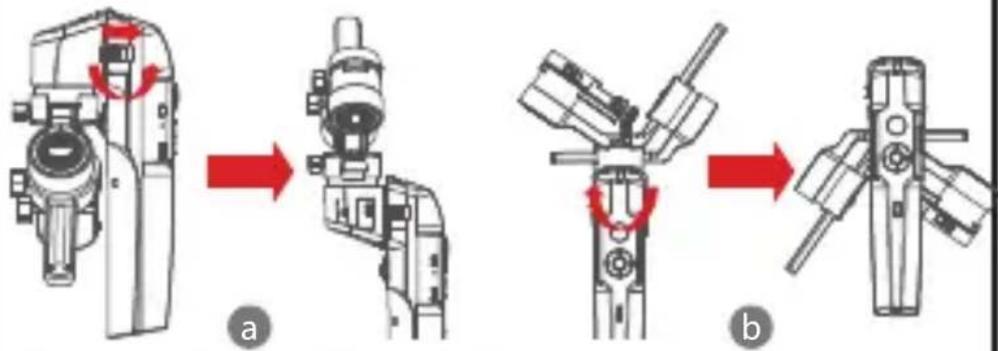
- Expanding and Folding the Mini-P main body
a. Folded Status
Slide the slide lock and rotate the gimbal 180° anticlockwise. Then it locks automatically.
b. Expanded Status
Slide the slide lock and rotate the gimbal 180° clockwise. Then it locks automatically.
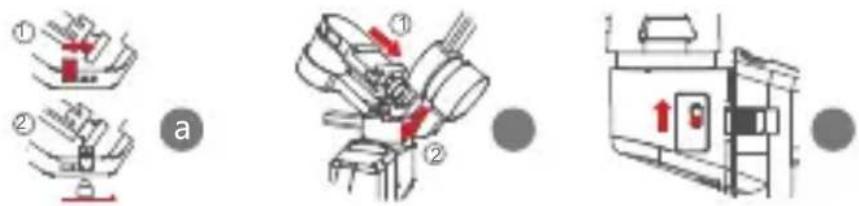
Storage and Expand the Mini-P
Mini-P is equipped with three axes storage lock for gimbal storage, to protect from constant movement.
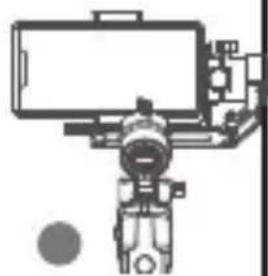
a. Slide the tilt storage lock on the roll arm(Picture a), slide the tilt arm downwards(Picture b), place the L-Bracket lock knob into the tilt storage lock groove, then the tilt motor storage is complete.
b. Slide the roll arm downwards, place the roll arm between the 2 bosses on the silicone sleeve of the pan motor (Picture b), then the roll motor storage is complete.
c. Slide the pan motor lock upwards(Picture c) then the pan motor storage is complete.
Reverse the above steps to expand the gimbal
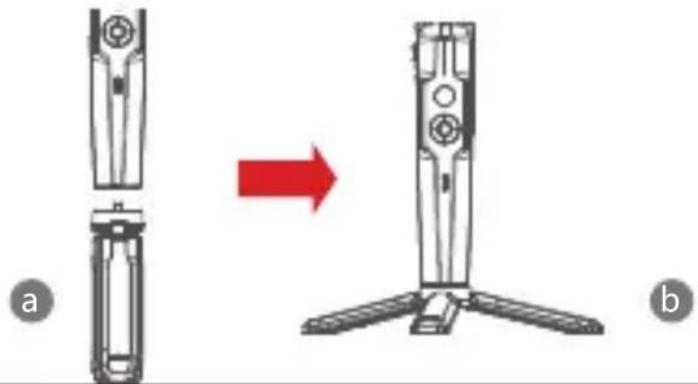
- Attaching the Tripod
a. Screw the tripod tightly into the 1/4" hole at the bottom of the gimbal.
b. Extend the three support feet, place the gimbal on a flat surface
natural_image
Diagram showing a device being processed from a left-side component to a right-side assembly, with no visible text or symbols.Mounting the Camera
Horizontal Mounting
a. Place the longer side of the L-Bracket under the camera, and secure the camera with a 1/4"screw.
b. Loosen the L-Bracket quick release plate lock knob, slider the shorter side of the L-Bracket quick release plate into center of the quick-release base, then lock the knob.
natural_image
Technical line drawing of a device front panel with control buttons and indicator lights (no text or symbols)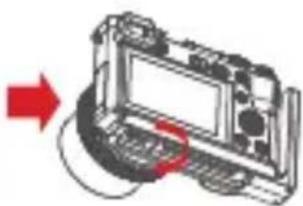
natural_image
Diagram of a device with a red arrow pointing to a screen and cable (no text or symbols present)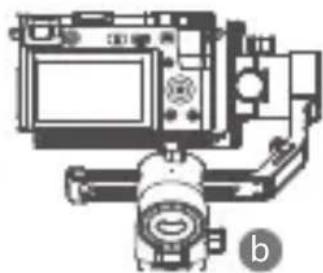
natural_image
Technical line drawing of a mechanical device with no visible text or symbolsa
Vertical Mounting
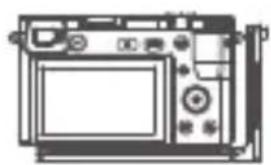
a. Place the longer side of the L-Bracket under the camera to secure it, and lock the camera with a 1/4"screw.
b. Loosen the L-Bracket quick release plate lock knob, slider the longer side of the L-Bracket quick release plate into center of the quick-release base, then lock the knob.
natural_image
Line drawing of a device front panel with control buttons and display screen (no text or symbols)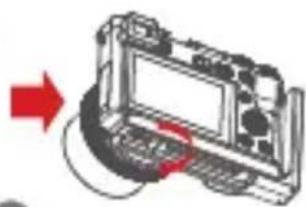
natural_image
Diagram of a device with a red arrow pointing to a screen and cable (no text or symbols present)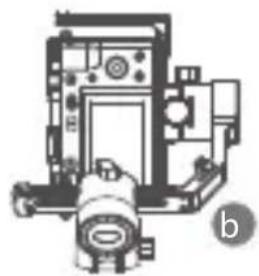
natural_image
Technical line drawing of a vintage mechanical device with no visible text or symbolsa
Mounting the Mobile Phone
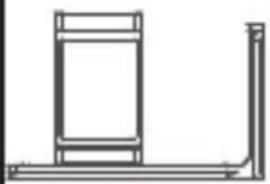
a. Fix the phone holder on the longer side of the L-Bracket quick release plate with 1/4"screw, Make sure the side with clips is backward
b. Put the phone in the phone holder, ensure that the clips do not touch the power key or volume key;
c. Loosen the L-Bracket quick release plate lock knob, slider the shorter side of the L-Bracket quick release plate into center of the quick-release base, then lock the knob.
natural_image
Pure technical line drawing of a mechanical bracket or frame structure without any text, numbers, or symbolsa

natural_image
Simple line drawing of a rectangular monitor or screen with no text, numbers, or symbols●
natural_image
Technical line drawing of a mechanical device with no visible text or symbolsNote: Please hold your phone or camera tightly when loosening the L-Bracket quick release plate lock knob and removing the L-Bracket quick release plate. Preventing the mobile phone or camera from falling to the ground.
Balancing
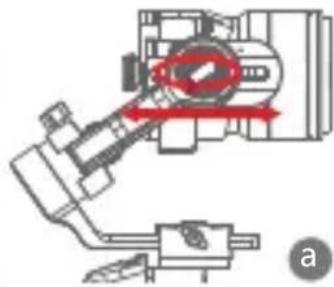
a. Loosen the tilt knob, and adjust the tilt arm back and forth until the lens is horizontally forward, then lock the knob.
b. Rotate the camera until the lens is facing up, loosen the L-Bracket quick release plate lock knob, and adjust the L-Bracket quick release plate back and forth until the lens is straight up (leveled), then lock the knob.
natural_image
Technical diagram of a mechanical assembly with no visible text or symbols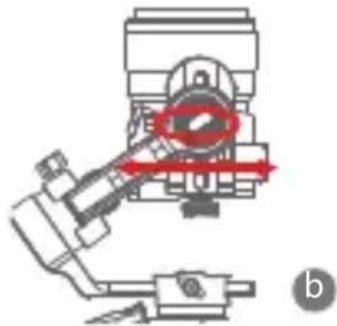
natural_image
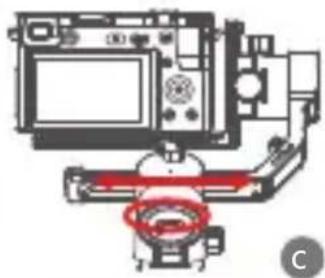
Mechanical assembly diagram showing a valve mechanism with red annotation arrows (no text or symbols)c. Loosen the roll knob, adjust the roll arm left and right until the roll arm remains horizontal, then lock the knob; The camera or phone should be leveled and can be positioned in any direction (up or down) and it stays there.
d. Hold the stabilizer horizontally and make the pan arm parallel to the ground, then loosen the pan knob, adjust the pan arm left and right until the pan arm remains horizontal, and then lock the knob. Your camera or phone should be leveled and can be move to any direction (tilt, pan, roll) and stays on that position without hands holding it.
natural_image
Technical diagram of a camera assembly with no visible text or symbols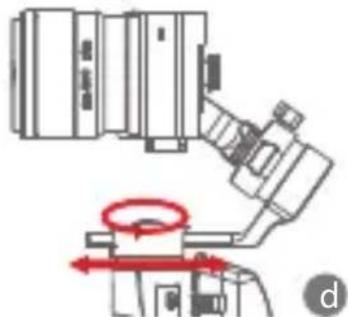
natural_image
Technical diagram of a mechanical assembly with directional arrows and a highlighted circular component (no text or symbols)Note: When adjusting the balance of an axis, please unlock the motor lock of the axis first, otherwise it cannot be adjusted accurately; if the balance is not adjusted accurately, it will cause the abnormal motor work, motor overheat, unstable video, unavailable of certain functions, and also shorten battery life, please make sure it is completely balanced before turning on the gimbal.
Connecting camera or mobile phone
a. After installing the camera to the gimbal, you need to use the camera control cable to connect camera with gimbal, and then you can control the gimbal through the MOZA Master App
b. After installing the mobile phone to the gimbal, please open the MOZA Genie App to connect the gimbal, then you can control the phone to take photos or videos through te gimbal.
Note: For camera functions and features, please use Moza Master App. For Phone controls, please use Moza Genie App.
Button Features
Simplified Operation
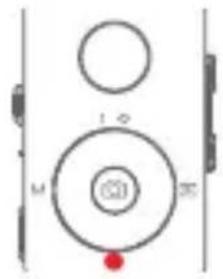
Down Button
- Double press: Sports gear mode, double press again to exit sports gear mode
- Triple press: Inception mode, Triple press again to exit inception mode
Joystick
- Move upwards: phone camera turns up
- Move downwards: phone camera turns down
- Move leftwards: phone camera turns left
- Move rightwards: phone camera turns right The speed of camera moving increases with the larger moving range of joystick
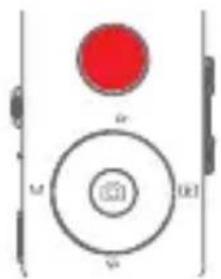
Follow Function
- Left Button Press twice the left button: FPV mode. Press twice again to stop
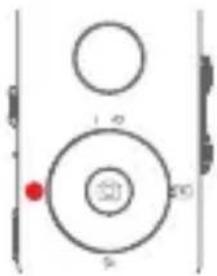
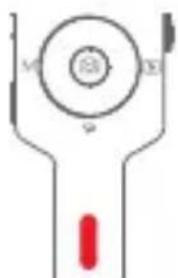
Check the Battery Level
Status Indicator
- Blue light is always on: 60%-100% battery level
- Blue light flashes slowly: 20%-60% battery level
- Blue light flashes quickly: 0%-20% battery level
- Orange light flashes slowly: Gimbal motor enters to sleep mode
- Blue and orange lights flash quickly: FPV mode
- Blue and orange lights flash slowly in turn: Firmware upgrade mode
- The red light is always on: Charging
- The red light is off: Charging Completed
natural_image
Pure electrical circuit lines without any symbolsTrigger
• Double press: Re-center
- Single press: Auto focus (some cameras are not supported)
- Triple press: Switch to selfie mode
- Hold: Switch to tilt follow mode
- Double press and hold: Switch to All-locked mode
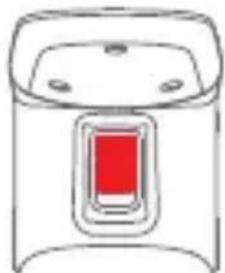
natural_image
Simple line drawing of a device with a red rectangular button on the side (no text or symbols)W-T Button
Triple press W button: Auto tune
Power Button
Long press: Turn on / off
MOZA Genie App Control

 | Press the center button on the camera interface:Video mode: start/stop recording; photo mode: take a photo |
| Double press the center button in video mode: take a photo during recording | |
| Long press the center button: confirm the timelapse points (in advanced timelapse mode) | |
 | Press the top button once: open the menuPress twice the top button: switch to video mode/photo modeLong press the top button for 3s: switch to front camera/rear camera |
 | Press the right button once: photo playback in album. Press once again to return to the camera |
| After the completion of timelapse points setting, long press the right button: start/stop advanced timelapse shooting (in advanced timelapse mode) | |
 | Press and hold the T button: zoom in (Zoom +)Double-press the T button: zoom in automatically at constant speed |
| Press and hold the W button: zoom out (Zoom-)Double press on the W button: zoom out automatically at a constant speed |
Functions Description of the Gimball
• Control the camera or phone to record a video or take a photo
a. Install the camera on the gimbal, then you can use the shutter control cable to connect the gimbal and camera. Press the center button once to take a photo in photo mode. Press the center button once to start/stop recording in video mode.
b. Install the phone on the gimbal, then turn on the MOZA Genie App and connect the gimbal to the MOZA Genie App. Press the center button once to take a photo in photo mode. Press the center button once to start/stop recording in video mode.
c. Double press the top button to switch the video mode/photo mode
• Mimic Motion Control
(requires 2 smartphones: one on gimbal and one to control the mimic. If planning to use the camera on gimbal, only one smartphone is required)
a. Place the smartphone on the Gimbal through the phone holder; b. Use a 2nd smartphone and open the "MOZA Master" App, connect it to the gimbal and enter Mimic Motion Control Mode; c. Rotate the 2nd phone and it will control the movement of the gimbal.
- Timelapse
Use the MOZA Master App or MOZA Genie App to connect the gimbal, select "Creative video" button and there will be multiple timelapse modes for shooting.
• Bidirectional Start
By default, we mount the camera handle near the tilt motor so that the camera control port can be exposed. But in some special cases, we need to mount the camera control port near the tilt motor for normal use.
The following situations will require reverse mounting:
a. The camera is too wide for forward mounting.
b. The lens used is too heavy to be balanced when forward mounting.
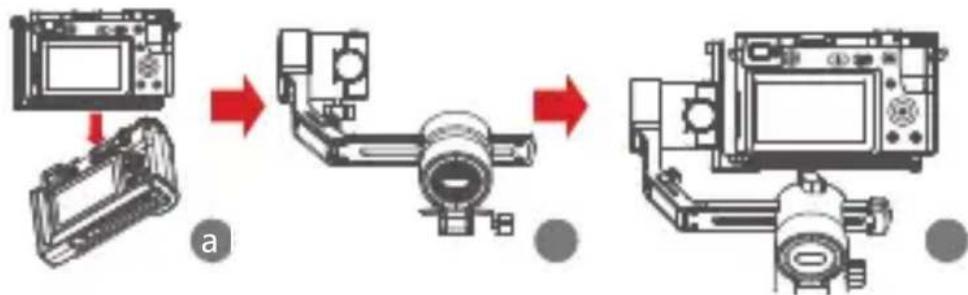
Reverse mounting steps:
a. Place the shorter side of the L-Bracket next to the lens and mount it on the bottom of the camera:
b. Rotate the roll axis 180^ around the roll motor, then the tilt motor will be on the left of the roll motor.
c. Mount the shorter side of the L-Bracket to the quick release baseplate.
flowchart
graph LR
    A["Device Setup"] --> B["Camera Assembly"]
    B --> C["Display Unit"]
    style A fill:#f9f,stroke:#333
    style B fill:#ccf,stroke:#333
    style C fill:#cfc,stroke:#333
Object Tracking
Install the smartphone to Mini-P and open the MOZA Genie App, connect the stabilizer, click the hand-shaped button at the bottom of left corner to enter the object tracking mode, and select the tracking object on the screen to start object tracking shooting.
• Inception Mode
The Inception Mode is used to control the camera to rotate in the roll direction for shooting upside down and rotating footage. Triple press the down button on the dial to enter the Inception Mode. Press the left/right button on the dial then the motor rotates to the left/right automatically.
Triple press the down button on the dial to exit the Inception Mode.
• RPV
Double-click the left button on the dialto achieve FPV wide range follow movement. Double-click the left button of the dial to enter the FPV Mode. In FPV mode, double-click the left button of the dial to exit FPV mode.
• Firmware Upgrade via Mobile App:
a. When the gimbal is powered off, long press the center button, then press the power button with the other hand until the battery indicator start flashing (Boot Mode).
b. Start the MOZA Master App, press Bluetooth to search for device then connect it.
c. The App will automatically enter the firmware upgrade interface, After the firmware download is completed, click the "Upgrade" button to start the upgrade.
d. After the upgrade is completed, turn the gimbal off and back on again. Then calibrate the gyroscope and accelerometer to get started. You can connect to the "MOZA Master App" to check the version number of the Mini-P.
[NO TEXT]
Note:
-
Make sure the gimbal is fully charged and the computer or mobile phone network connection is normal during the upgrade.
-
Do not disconnect the gimbal from power, USB-C cable or Bluetooth during the upgrade, otherwise the upgrade will fail.
-
When using the App upgrade, the upgrade process takes a longer time, please wait patiently. Do not exit the app to the background, and do not turn off the screen to avoid upgrade failure.
-
If all fails, reboot the gimbal and try to upgrade again until the upgrade is completed.
-
The firmware of the MOZA Mini P can be upgrade via both MOZA Master App and the MOZA Genie App. If you have any questions during the upgrade process, please consult our after sales service.
- Calibration
The MOZA Mini-P needs to be calibrated when:
a. The device works abnormally;
b.There is a deviation in the horizontal angle after the gimbal is turned on (not leveled), and it is unable to resolve after one-click re-center:
c. Deviation caused by the environment in which the gimbal is used. Calibration method: Please scan the QR code at the end of the page for details.
- Mobile App
If you use the camera on the gimbal, you can scan the QR code to download the MOZA Master App, or you can search for "MOZA Master" directly in the mobile app store to download. (See App download QR code at the end of the page)
!
Note:
- The mobile phone system supported by MOZA Master are iOS and Android.
- Smartphone cannot be paired with the gimbal directly via Bluetooth. You must use the MOZA Master App to connect.
If you use a mobile phone on the gimbal, you can directly scan the QR code to download "MOZA Genie" (Android 5.0 or higher, IOS 9.0 or higher), or you can search for" MOZA Genie "directly in the mobile app store to download. (See the QR code at the end of the page)

Note
- When using the Mini-P with a mobile phone to take photos, please use the app "MOZA Genie", which is customized for the Mini-P, so that you can use various functions of gimbal more creatively.
- Please check for the latest version of the App, which is subject to update without notice. For updates or latest information, please visit MOZA's official website, WeChat subscription account and mobile application stores.
- The smartphone and the Bluetooth of Mini-P cannot be paired directly, you must use the MOZA Genie App to connect the smartphone and Mini-P.
Product Specification
| Specs | |
| Payload 130g~900g / 0 | .29lbs~1.98lbs |
| Weight | 710g/1.57lbs |
| Dimensions (mm) | Gimbal (unfolded): 305*51*166 |
| Gimbal (folded): 198*166*102 | |
| Supported Phone Size | 58 ~ 88mm |
| Battery Life | 20 (h) |
| Battery Specs | Standard Voltage: 7.4 V |
| Battery capacity: 2000 mAh | |
| Charging Time | 1.5 (h) |
| Mechanical Endpoint Range | Pan : 360° |
| Roll : 330° | |
| Tilt : 330° | |


- CONTENTS
- Battery and Charging
- Mini-P Overview
- Mini-P Installation
- - Expanding and Folding the Mini-P main body
- Storage and Expand the Mini-P
- - Attaching the Tripod
- Mounting the Camera
- Horizontal Mounting
- Vertical Mounting
- Mounting the Mobile Phone
- Balancing
- Connecting camera or mobile phone
- Button Features
- Simplified Operation
- Joystick
- Follow Function
- Check the Battery Level
- Trigger
- W-T Button
- Power Button
- MOZA Genie App Control
- Functions Description of the Gimball
- - Timelapse
- • Bidirectional Start
- Object Tracking
- • Inception Mode
- • RPV
- • Firmware Upgrade via Mobile App:
- [NO TEXT]
- Note:
- - Calibration
- - Mobile App
- !
- Note
Brand : Moza
Model : Mini-P
Category : Tripod