
Elektrogrill 10034707 - Grill Klarstein - Free user manual and instructions
Find the device manual for free Elektrogrill 10034707 Klarstein in PDF.


| Brand | Klarstein |
| Model | 10034707 |
| Product Type | Electric Grill |
| Power Supply | 220-240 V ~ 50/60 Hz |
| Power | 1680-2000 W |
| Cooking Surface | Non-stick cooking plate |
| Temperature Control | Yes, with thermostat and indicator light |
| Lid | Yes, with handle |
| Oil Collector | Removable drip tray |
| Usage | Indoor and outdoor (table barbecue with legs) |
| Cleaning | Damp cloth and mild detergent |
| Safety | Minimum distance 30 cm from walls, insulated handles, overheat protection |
| Included Accessories | Side tables, wheels, tray, stand, removable controller |
| Material | Steel, heat-resistant plastic, non-stick coating |
| Warranty | 2 years (according to manufacturer) |
Frequently Asked Questions - Elektrogrill 10034707 Klarstein
User questions about Elektrogrill 10034707 Klarstein
0 question about this device. Answer the ones you know or ask your own.
Ask a new question about this device
Download the instructions for your Grill in PDF format for free! Find your manual Elektrogrill 10034707 - Klarstein and take your electronic device back in hand. On this page are published all the documents necessary for the use of your device. Elektrogrill 10034707 by Klarstein.
USER MANUAL Elektrogrill 10034707 Klarstein
INHALTSVERZEICHNIS
natural_image
Line drawing of a portable grill with labeled parts (no text or symbols present)natural_image
Technical line drawing of a vehicle chassis frame with mesh and seat components (no text or symbols)natural_image
Symbol of a trash bin crossed out by a diagonal line, with no text or labels present.Congratulations on purchasing this device. Please read the following instructions carefully and follow them to prevent possible damages. We assume no liability for damage caused by disregard of the instructions and improper use. Scan the QR code to get access to the latest user manual and more product information.

CONTENT
Safety Instructions 18
Product Overview 19
Assembly 20
Important Instructions for Use 27
Commissioning and Operation 28
Cleaning and Care 29
Hints on Disposal 30
Producer 30
TECHNICAL DATA
| Item number 10034706, 10034707 | |
| Power supply | 220-240 V ~ 50/60 Hz |
| Power | 1680-2000 W |
SAFETY INSTRUCTIONS
- Connect the device so that the mains plug is easily accessible at all times.
- Inspect the power cord regularly for damage. If the power cord is damaged, it must be replaced by the manufacturer or an authorized service center or a similarly qualified person.
- Repairs may only be carried out by qualified personnel, do not attempt to repair the device yourself.
- Do not connect the unit to a timer or a remote control power outlet.
- Never immerse the appliance, power cord or plug in water or other liquids.
- Do not handle the plug with wet hands.
- Do not pull the plug out of the socket by the cable, but hold it firmly by hand when pulling it off.
- Do not use the cable as a handle.
- Lay the cable in such a way that no one will trip over it.
- Do not let the cable run over sharp edges.
- Do not use the unit in wet rooms or in the rain.
- Place the appliance in such a way that it cannot fall into water. If it does fall into water, immediately unplug the appliance from the wall outlet and only then touch the appliance.
- Unplug the appliance from the wall outlet when it is no longer in use.
- Keep the appliance away from open fire and heat sources.
- This device may be only used by children 8 years old or older and persons with limited physical, sensory and mental capabilities and / or lack of experience and knowledge, provided that they have been instructed in use of the device by a responsible person who understands the associated risks.
- Keep children away from the grill and do not leave the appliance unattended during operation.
- Place the appliance on a stable, level surface.
- Make sure that there are no easily inflammable objects or materials around the grill.
- Keep at least 30 cm away from walls.
- Do not touch the grill grate or other hot surfaces during operation.
- Do not move the appliance until it has cooled down completely. Only touch the appliance by the handles provided for this purpose.
- Only place the appliance on surfaces that are insensitive to heat. Position the appliance so that it is not too close to the edge.
- To avoid heat build-up, do not place the appliance directly under kitchen cabinets or shelves.
- Do not place the appliance on or near a stove.
- Do not expose the appliance to excessive temperatures and weather variations.
• Never fill the grill with liquids.
• If parts are damaged, do not continue to use the grill.
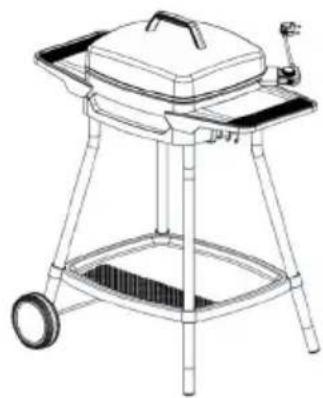
PRODUCT OVERVIEW
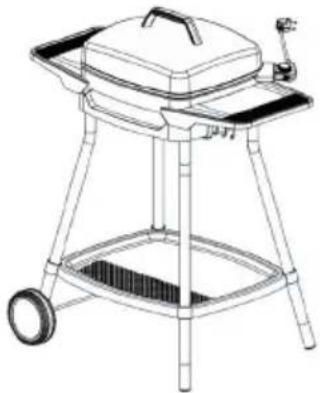
| 1 | Lid handle | 11 | Support tube A |
| 2 | Grill lid | 12 | Food tray holder |
| 3 | Removable temperature controller with mains cable | 13 | Food tray |
| 4 | Temperature indicator light | 14 | Support leg |
| 5 | Mains input socket | 15 | Support tube I |
| 6 | Grill plate | 16 | Support tube J |
| 7 | Oil drip pan | 17 | Wheel axle |
| 8 | Grill holder | 18 | Wheel |
| 9 | Storage table | 19 | Wheel cover |
| 10 | Grill tray |
ASSEMBLY
Small items
(Note: PCS = Quantity)
A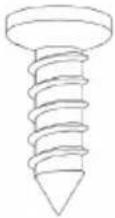 ST4×12 8PCS ST4×12 8PCS | B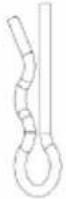 Pin 2PCS Pin 2PCS | C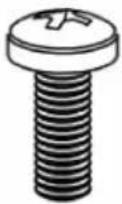 M6×70 4PCS M6×70 4PCS | D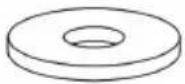 20* 5.2 2PCS 20* 5.2 2PCS |
E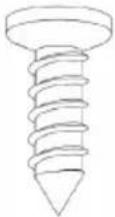 ST4×14 2PCS ST4×14 2PCS |
Assembly
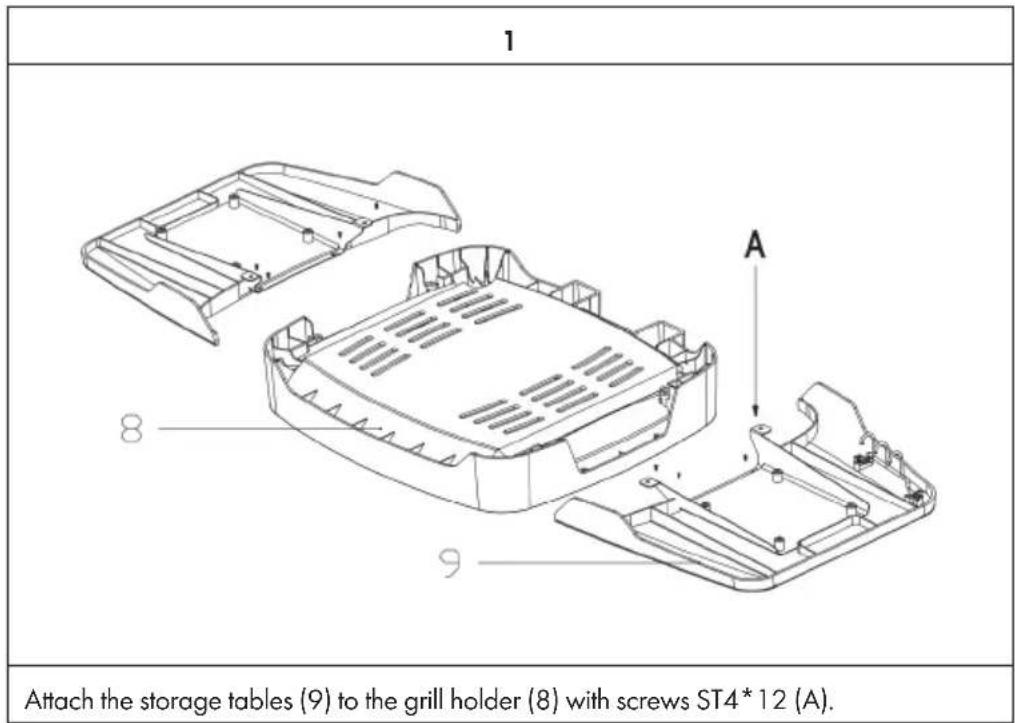
2
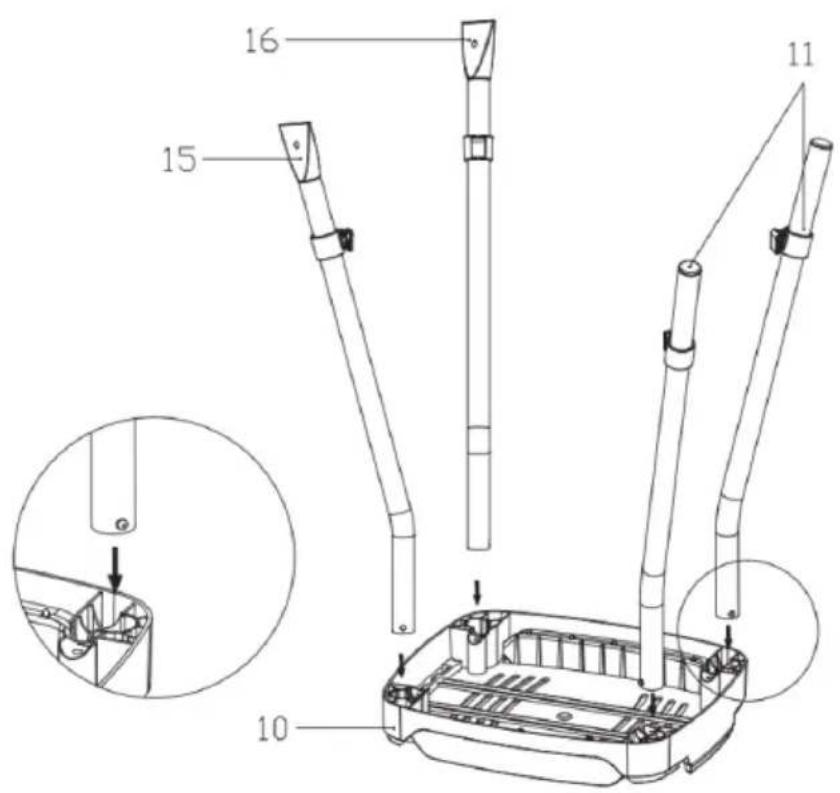
Attach the support tubes (11/15/16) to the grill tray (10). Press the feet into the recesses on the tray until they click into place.
3
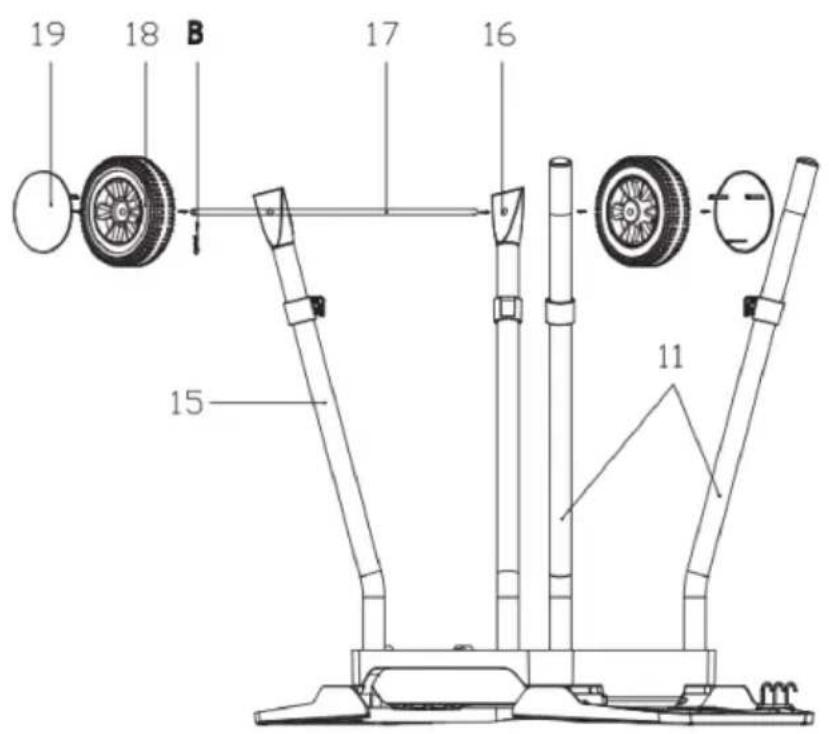
Push the axle (17) through the support tubes (15/16). Then attach a wheel (18) to each side. Fix the wheels by inserting the pins (B) through the holes at the axle ends. Finally, fit the wheel covers (19).
4
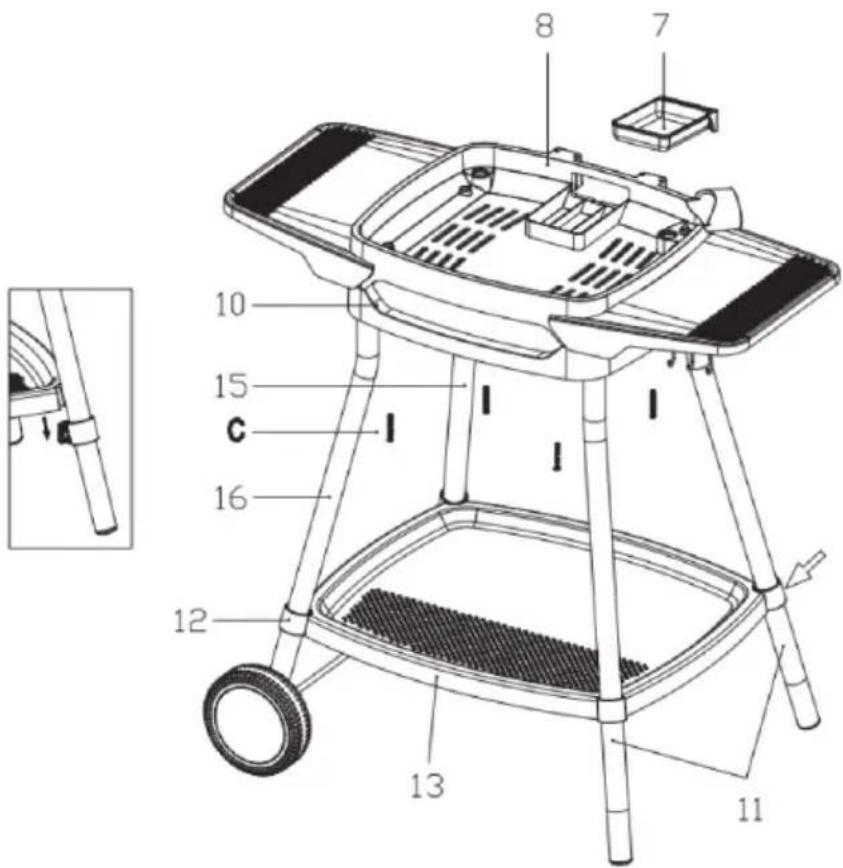
Then place the food tray (13) on the holders (12) on the support tubes. Then place the grill holder (8) on the grill tray (10). Insert the oil collecting tray (7) into the grill holder. Attach the grill holder (8) to the grill tray with 4 screws M6*70 (C).
5
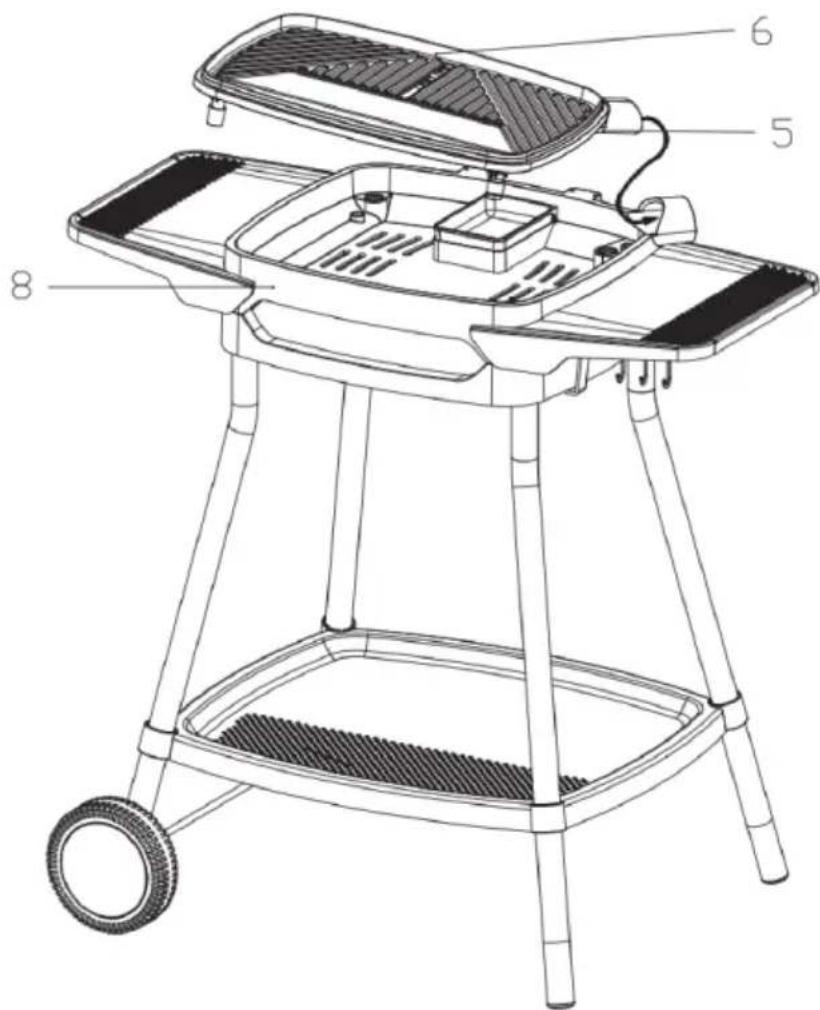
Place the grill plate (6) on the grill holder (8). Fasten the mains input socket (5) and lay the cable through the hole in the grill holder.
Note: Never use the grill plate separately, only together with the grill holder!
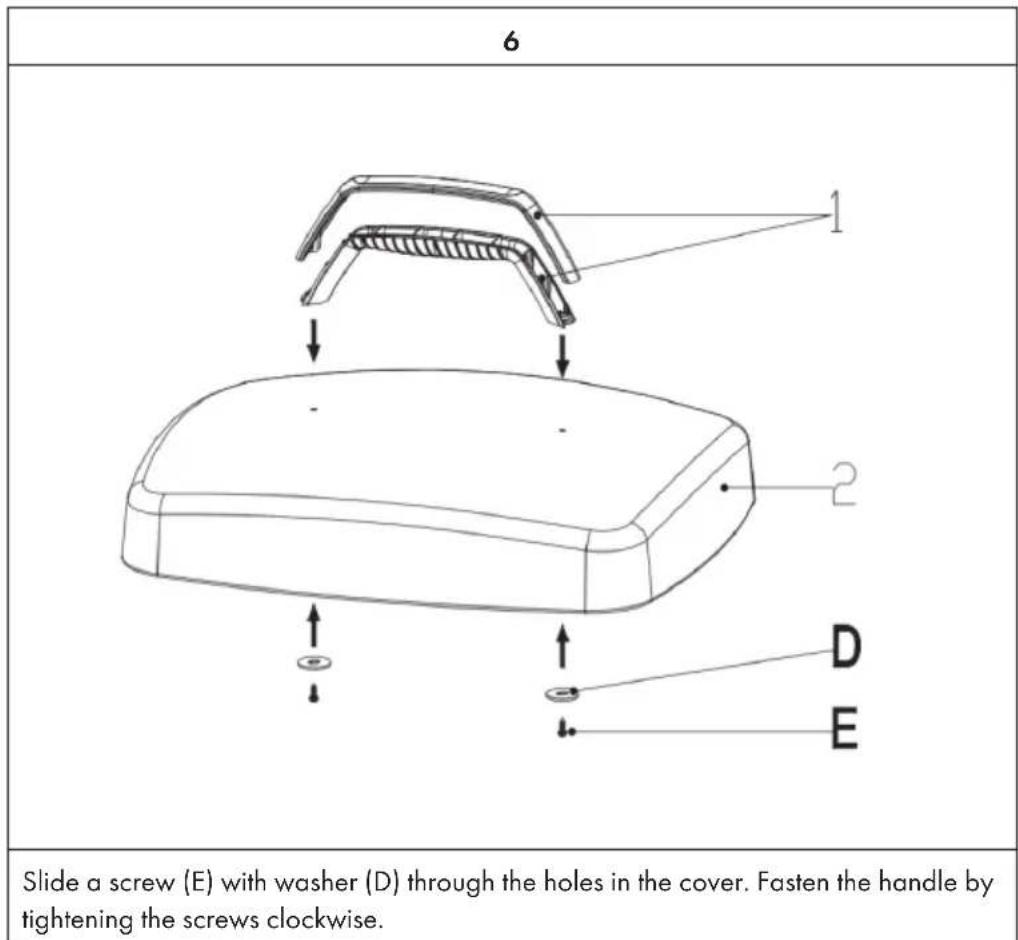
7
natural_image
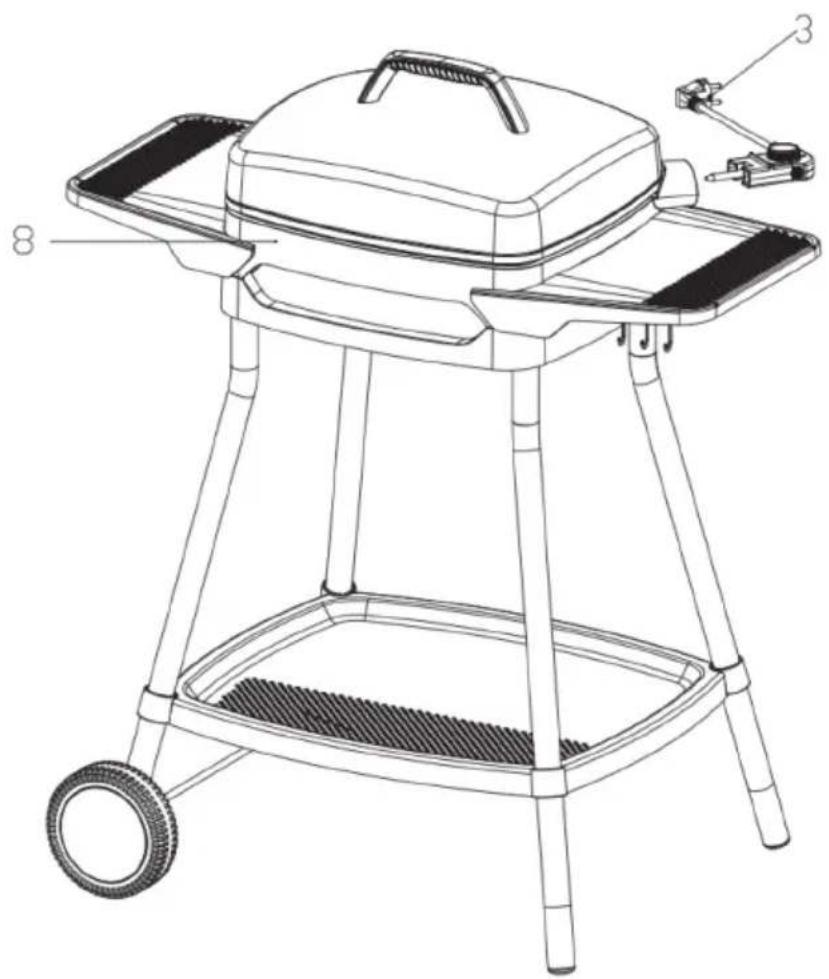
Line drawing of a portable grill with labeled parts (no text or symbols present)Finally, attach the removable temperature controller to the mains input socket using the mains cable (3).
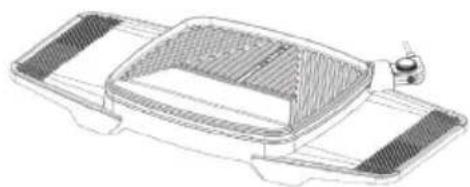
Use as table grill
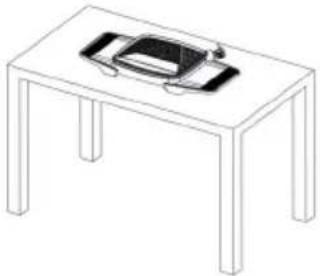
If you want to use the grill as a table grill indoors, you can also use the grill plate (6) and the grill holder (8) without the frame. However, never use the grill plate separately, but only together with the grill holder!
natural_image
Technical line drawing of a car interior frame with grating and vent slots (no text or symbols)IMPORTANT INSTRUCTIONS FOR USE
- If you want to use the grill as a table grill indoors, you can also use the grill plate and grill holder without the frame. However, never use the grill plate separately but only together with the grill holder!
- Keep the appliance at least 30 cm away from all walls during operation.
- Avoid tripping hazards caused by the mains cable when operating the appliance. Connect the power cord so that it is out of the way.
- Unplug the power cord from the wall outlet after use.

CAUTION
Risk of injury! Do not screw the plastic feet directly under the grill plate. This would reduce the safety distance between the grill plate and the grill holder, resulting in the plastic parts melting. This can lead to serious injuries and damage to the appliance.
| Indoor use Outdoor use | |
 |  |
 |  |
COMMISSIONING AND OPERATION
Commissioning
1 Insert the plug into the socket.
2 Turn the temperature control knob (3) to the desired temperature. The appliance takes about 3 minutes to heat up. If you put on the lid, the grill plate heats up faster.
3 As soon as the set temperature is reached, the temperature indicator light goes out.
4 You can now place the food on the plate.
Cooking times
The table shows the recommended cooking times. However, the actual cooking time varies depending on the size and weight of the food and also depends on whether you are grilling with or without a lid.
| Food Temperature level Cooking time | ||
| Steak/Cattle HI 10-15 minutes | ||
| Lamb HI 8-13 minutes | ||
| Chicken leg HI 15-20 minutes | ||
| Chop HI 20-25 minutes | ||
| Chicken wings HI 9-15 minutes | ||
| Pork fillet MED - HI 7-8 minutes | ||
| Whole fish | HI | 8-11 minutes |
| Kebab | MED - HI | 7-9 minutes |
| Sausages | MED - HI | 8-10 minutes |
| Green pepper | MED - HI | 5-10 minutes |
| Onions | MED - HI | 10-15 minutes |
| Mushrooms | MED - HI | 5-10 minutes |
| Potato chips | MED - HI | 10-15 minutes |
Tips for grilling
- Your meat will be tendered if you marinade it overnight before cooking (the marinade is always made of oil (to and moistness), vinegar (to tenderize) and a mixture of seasonings).
- Always use tongs or some form of scoop to turn the grilled food (using a fork to turn the food will dry it out and damage the non-stick coating).
- Only turn meat and fish once during grilling. You do not need to turn it more than once and too much turning dries food out.
- Never cook meat for too long. Even pork is better if it is served when it is still somewhat pink and juicy.
- If cooked food sticks to the grill plate, rub the plate with a piece of kitchen paper soaked in oil from time to time.
CLEANING AND CARE
- Disconnect the appliance from the mains electricity supply.
- Allow the grill to cool completely.
• Take the detachable temperature regulator out of the appliance socket. - Clean the grill plate and grease collecting bowl with warm washing-up water and damp cloth. Do not use steel wool pads, brush or abrasives to avoid any damages to the coating of grill.
- Wipe the base of the appliance with a damp cloth. Fat splashes can be removed with a mild cleaning agent.
Note: The grill plate has a non-stick coating. Do not scratch this coating during either the grilling or the cleaning stages.
HINTS ON DISPOSAL
natural_image
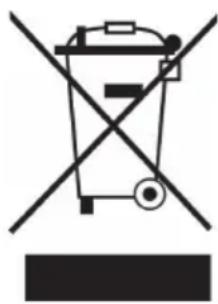
Symbol of a trash bin crossed with a diagonal line, no text or numbers presentAccording to the European waste regulation 2012/19/EU this symbol on the product or on its packaging indicates that this product may not be treated as household waste. Instead it should be taken to the appropriate collection point for the recycling of electrical and electronic equipment. By ensuring this product is disposed of correctly, you will help prevent potential negative consequences for the environment and human health, which could otherwise be caused by inappropriate waste handling of this product. For more detailed information about recycling of this product, please contact your local council or your household waste disposal service.
PRODUCER
Chal-Tec GmbH, Wallstraße 16, 10179 Berlin, Germany.
Estimado cliente:
ÍNDICE DE CONTENIDOS
natural_image
Line drawing of a portable grill with labeled parts (no text or symbols present)natural_image
Technical line drawing of a vehicle chassis with grilles and a side-mounted fan (no text or symbols)INDICACIONES DE USO IMPORTANTES
natural_image
Symbol of a trash bin crossed with a diagonal line, no text or numbers presentSOMMAIRE
natural_image
Line drawing of a portable grill with labeled parts (no text or symbols present)natural_image
Technical line drawing of a vehicle chassis frame with mesh and seat components (no text or symbols)CONSEILS D'UTILISATION IMPORTANTS
natural_image
Symbol of a trash bin crossed with a diagonal line, no text or numbers presentINDICE
natural_image
Line drawing of a portable grill with labeled parts (no text or symbols present)natural_image
Technical line drawing of a vehicle chassis frame with mesh and seat components (no text or symbols)AVVERTENZE IMPORTANTI SULL' UTILIZZO
natural_image
Simple line drawing of a four-legged table with a small electronic device on top (no text or symbols)
natural_image
Line drawing of a portable grill with a handle and wheels (no text or symbols)MESSA IN FUNZIONE E UTILIZZO
Messa in funzione
natural_image
Symbol of a trash bin crossed with a diagonal line, no text or numbers present

- INHALTSVERZEICHNIS
- CONTENT
- SAFETY INSTRUCTIONS
- PRODUCT OVERVIEW
- ASSEMBLY
- Use as table grill
- IMPORTANT INSTRUCTIONS FOR USE
- CAUTION
- COMMISSIONING AND OPERATION
- Commissioning
- Cooking times
- Tips for grilling
- CLEANING AND CARE
- HINTS ON DISPOSAL
- PRODUCER
- Estimado cliente:
- ÍNDICE DE CONTENIDOS
- INDICACIONES DE USO IMPORTANTES
- SOMMAIRE
- CONSEILS D'UTILISATION IMPORTANTS
- INDICE
- AVVERTENZE IMPORTANTI SULL' UTILIZZO
- MESSA IN FUNZIONE E UTILIZZO
- Messa in funzione
Brand : Klarstein
Model : Elektrogrill 10034707
Category : Grill