MWBA 5 A1 - Lighting MELINERA - Free user manual and instructions
Find the device manual for free MWBA 5 A1 MELINERA in PDF.


| Product Type | Christmas Village Lighting Set |
| Brand | MELINERA |
| Model | MWBA 5 A1 / MWBB 5 A1 |
| Power Supply | 2 x 1.5 V AA batteries (LR6) |
| Light Source | 4 LED modules (type: RGO) |
| Number of Houses | 5 (one with battery compartment) |
| Indoor Use | Yes, dry interior spaces only |
| On/Off Switch | Yes, slide switch on battery compartment house |
| Cable Connection | Connecting plug and socket (groove must point downwards) |
| Battery Compartment | Integrated in one house, removable lid |
| LED Installation | Insert into recesses at back of houses with cables pointing downwards |
| Cleaning Method | Brush or feather duster |
| Storage Advice | Remove batteries if not used for long; avoid excess heat or dampness |
| Safety Features | Battery polarity marked; do not recharge or dismantle batteries; keep away from children |
| Disposal | Separate collection for electronic devices and batteries per EU regulations |
| Warranty | 3 years from purchase date by HOYER Handel GmbH |
| IAN Number | 113864 |
| Manufacturer | HOYER Handel GmbH, Kühnehöfe 5, 22761 Hamburg, Germany |
| Included Items | 5 houses, 4 LED modules with cables, 2 AA batteries, operating instructions |
| Intended Purpose | Decorative lighting only, not for room illumination |
| CE Marking | Yes |
Frequently Asked Questions - MWBA 5 A1 MELINERA
User questions about MWBA 5 A1 MELINERA
0 question about this device. Answer the ones you know or ask your own.
Ask a new question about this device
Download the instructions for your Lighting in PDF format for free! Find your manual MWBA 5 A1 - MELINERA and take your electronic device back in hand. On this page are published all the documents necessary for the use of your device. MWBA 5 A1 by MELINERA.
USER MANUAL MWBA 5 A1 MELINERA
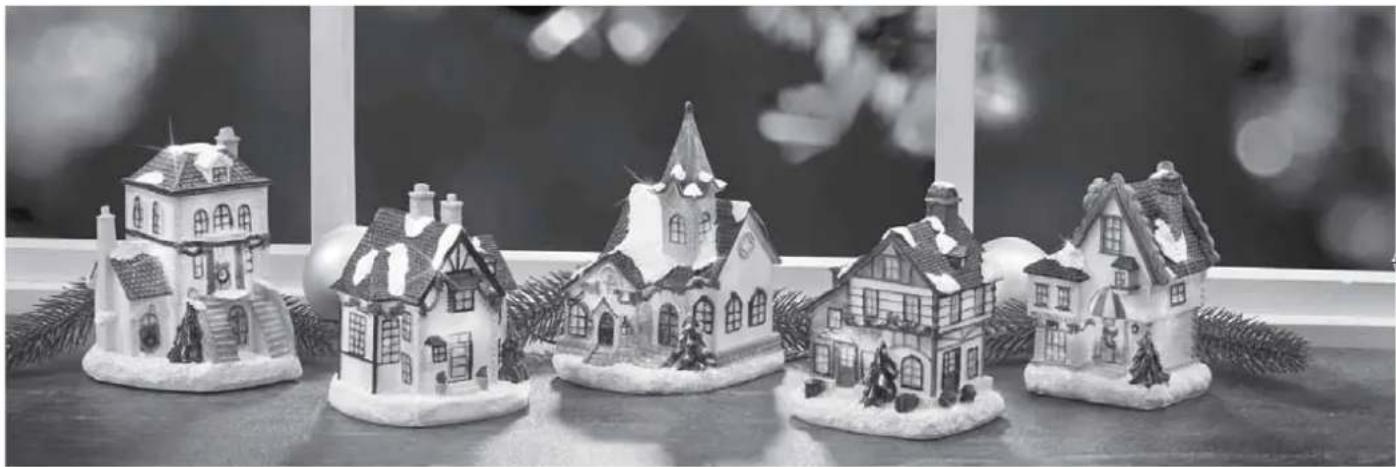
CHRISTMAS DECORATION WITH LIGHTING MWBA 5 A1/MWBB 5 A1 CHRISTMAS DECORATION WITH LIGHTING MWBA 5 A1/MWBB 5 A1
ES
CHRISTMAS VILLAGE SCENE
Operating instructions
IAN 113864
ES IT PT GB MT DE AT CH


ID: MWBA 5 AI MWBB 5 AI 15 V1.0



Overview / Panoramica / Vista geral / Overview / Übersicht![graph TD A["House 1"] --> D["Device 3"] B["House 2"] --> D C["House 3"] --> D E["House 4"] --> D D --> F["MWBA 5 A1"]](/content/2026/05/803947/images/c14179e8d6ff6c8d489bb5739b531a51d9264f65de6a0a1857fa37af5a44c874.jpg)










Index
- Overview 20
- Intended purpose 21
- Safety information 21
- Items supplied 22
- Inserting the batteries 22
- Installation and operation 22
- Cleaning and storage 22
- Disposal 22
- Trouble-shooting 23
- Technical specifications 23
- Warranty of the HOYER Handel GmbH 23
1. Overview
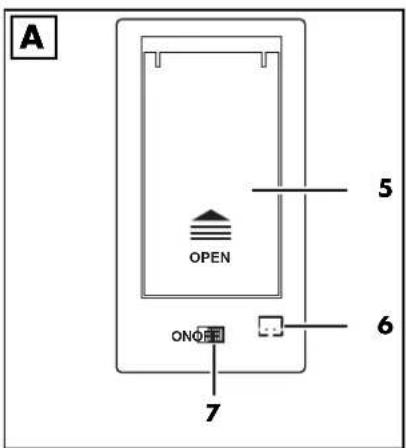
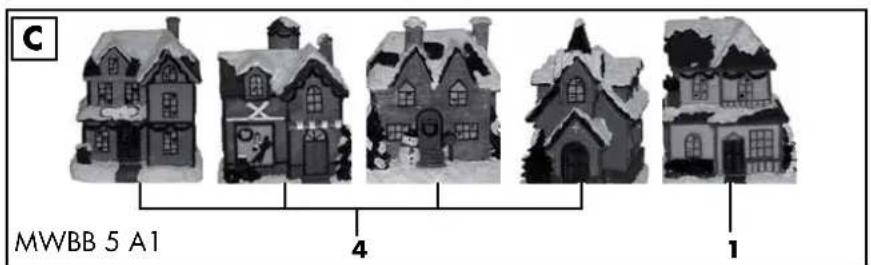
1 House with battery compartment and connecting socket 2 Connecting plug 3 LED module 4 Houses with recess for LED module 5 O P ||► Battery compartment lid 6 Connecting socket 7 ON / On/off switch 8 Battery compartment
C: Model variations
This Christmas street is available in two varying designs.
The functions are identical.
20
GB





Thank you for your trust!
Congratulations on your new Christmas street.
For safe handling of the product and to learn about all its features:
• Thoroughly read these operating instructions before initial use. Above all, observe the safety instructions! • The product should only be used as described in these operating instructions. Keep these operating instructions for reference. If you pass the product on to someone else, please include these operating instructions.
We hope you enjoy your new Christmas street!
2. Intended purpose
The Christmas street is intended solely for lighting purposes in dry interior spaces. This article is not suited for room lighting in the household. The product is designed solely for private use.
3. Safety information

DANGER from batteries
- Only use batteries of the same brand and type and do not use new and used batteries together.
- Be sure to observe the correct polarity when inserting the batteries.
- Clean the battery and device terminals before you insert the batteries.
- Batteries can be life-threatening if swallowed. Therefore you should store batteries and the product out of the reach of young children. If a battery has been swallowed, medical assistance must be sought immediately.
- Batteries must not be charged or reactivated by other means, nor must they be dismantled, thrown into a fire or short-circuited.
- Remove the batteries from the article if you do not intend to use the article for a longer period of time, or if the battery runs out of power. The batteries may leak and damage the product.
- Do not subject batteries to extreme conditions, do not e.g. place the article on radiators or expose it to direct sunlight. Otherwise, there is an increased danger of batteries leaking.
- If battery acid has leaked, avoid contact with the skin, eyes and mucous membranes. In case of contact with the acid, rinse the affected area at once with plenty of clean water and seek medical assistance immediately.
4. Items supplied
1 Christmas street (consisting of 5 houses) 1 House lighting with 4 wired LED modules 2 Type AA, LR6 batteries (each 1.5 V) 1 Set of operating instructions
5. Inserting the batteries
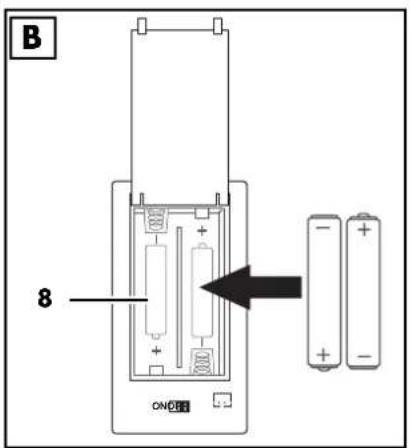
WARNING! Risk of material damage! Be sure to observe the correct polarity when inserting the batteries.
- Figure A: push the battery compartment lid 5 in the direction of the arrow and open the battery compartment lid by lifting it up.
- Figure B: insert the 2 type AA, LR6 batteries (each 1.5 V), as depicted.
- Lower the battery compartment lid 5 and push it in the direction of the arrow as far as it will go.
6. Installation and operation
- Insert the LED modules 3 into the recesses at the back of the houses 4. The cables must point downwards when doing this. Carefully press together the sides of the LED modules, but do not exert too much pressure on the back of the houses 4.
- Plug the connecting plug 2 into the connecting socket 6 of the house 1 with battery compartment. The groove of the connecting plug must point downwards when doing this.
- Switch on the lighting of the Christmas street by sliding the on/off switch 7 on ON. The lighting is switched off by sliding the switch on OFF.
NOTE: the house 1 with the battery compartment can also be operated on its own.
7. Cleaning and storage
WARNING! Risk of material damage! Remove the batteries if the device is not going to be used for a longer period of time. Otherwise, the batteries may leak and damage the article.
- Clean the article with a brush or feather duster.
- Press the sides of the LED module 3 together carefully and pull them out of the housing 4. Carefully pull the connecting plug 2 out of the connecting socket 6. Please pull on the plug, not on the cable.
- Choose a storage space which does not expose the article to excess heat or dampness.
8. Disposal
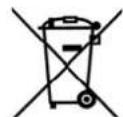
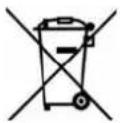
The symbol showing a wheelie bin crossed through indicates that the product requires separate refuse collection in the European Union. This applies to the products identified with this symbol. They must not be discarded with normal household waste. They must be taken to a collection point for recycling electric and electronic appliances. Recycling helps to reduce the consumption of raw materials and protect the environment.
Batteries
Batteries must not be discarded with your household waste. Spent batteries must be disposed of properly. Special containers are available for this purpose in shops selling batteries and at municipal collection points.
(Rechargeable) batteries marked with the following letters contain harmful substances such as: Cd (cadmium), Hg (mercury), Pb (lead).
Packaging
When disposing of the packaging, make sure you comply with the environmental regulations applicable in your country.
9. Trouble-shooting
If your product fails to function as required, please try this checklist first. Perhaps there is only a minor problem, and you can solve it yourself.
| Fault | Possible causes / Action |
| No function | Have the batteries been inserted/ correctly inserted?Check the connection (connecting plug 2/ connecting socket 6).Is the On / Off switch 7 set to ON? |
10. Technical specifications
| Model: MWBA 5 | A1 |
| MWBB 5 A1 | |
| Batteries: 2x 1.5 | V AA, LR6 |
| LEDs: RGO |
CE Subject to technical modification.
11. Warranty of the HOYER Handel GmbH
Dear Customer,
Your device is provided with a 3-year warranty starting from the purchase date. In the event of product defects, you are entitled to statutory rights against the vendor. These statutory rights are not restricted by our warranty presented in the following.
Warranty conditions
The warranty period starts from the purchase date. Please keep the original purchase receipt in a safe place. This document is required to verify the purchase.
If within three years from the purchase date of this product a material or factory defect occurs, the product will be repaired or replaced by us – at our discretion – free of charge to you. This warranty implies that within the period of three years the defective device and the purchase receipt are presented, including a brief written description of the defect and the time it occurred.
If the defect is covered by our warranty, the repaired or a new product will be returned to you. No new warranty period starts with a repair or replacement of the product.
Warranty period and statutory claims for defects
The warranty period is not extended when the warranty has been claimed. This also applies to replaced and repaired parts. Any
damages and defects already existing at the time of purchase must be reported immediately upon unpacking. Repairs arising after the expiration of the warranty period are subject to a charge.
Warranty coverage
The device was produced carefully according to strict quality guidelines and tested diligently prior to delivery.
The warranty applies to material or factory defects. This warranty does not include product parts that are subject to standard wear and therefore can be considered wear parts; the same applies to damages at fragile parts, e.g. switches, rechargeable batteries or parts made of glass.
This warranty expires if the product is damaged, not used as intended or not serviced. For the proper operation of the product, all instructions listed in the operating instructions must be observed carefully. Any form of use and handling that is advised against in the operating instructions or warned against must always be avoided.
The product is only intended for private and not for commercial use. In the case of incorrect and improper treatment, use of force and interventions not performed by our authorised Service Centre, the warranty shall cease.
Handling in case of a warranty claim
In order to ensure prompt processing of your matter, please observe the following notes:
- Please keep the article number IAN: 113864 and the purchase receipt as proof of purchase for all inquiries.
- If faulty operation or other defects occur, first contact the Service Centre listed below by telephone or email.
- Then, you can send a product reported as defective free of charge to the service address provided to you, including
the purchase receipt and information about the defect and when it occurred.

Please visit www.lidl-service.com to download this and many other manuals, product videos, and software.

Service Centre
GB Service Great Britain
Tel.: 0871 5000 720 (£0.10/Min.)
E-Mail: hoyer@lidl.co.uk
MT Service Malta
Tel.: 80062230
E-Mail: hoyer@lidl.com.mt
IAN: 113864

Supplier
Please note that the following address is not a service address. First contact the aforementioned Service Centre.
HOYER Handel GmbH
Kühnehöfe 5
22761 Hamburg
Germany


HOYER HANDEL GMBH
Kühnehöfe 5
22761 Hamburg
Germany


- CHRISTMAS DECORATION WITH LIGHTING MWBA 5 A1/MWBB 5 A1 CHRISTMAS DECORATION WITH LIGHTING MWBA 5 A1/MWBB 5 A1
- CHRISTMAS VILLAGE SCENE
- INDEX
- OVERVIEW
- THANK YOU FOR YOUR TRUST
- INTENDED PURPOSE
- SAFETY INFORMATION
- DANGER FROM BATTERIES
- ITEMS SUPPLIED
- INSERTING THE BATTERIES
- INSTALLATION AND OPERATION
- CLEANING AND STORAGE
- DISPOSAL
- BATTERIES
- PACKAGING
- TROUBLE-SHOOTING
- TECHNICAL SPECIFICATIONS
- WARRANTY OF THE HOYER HANDEL GMBH
- WARRANTY CONDITIONS
- WARRANTY PERIOD AND STATUTORY CLAIMS FOR DEFECTS
- WARRANTY COVERAGE
- HANDLING IN CASE OF A WARRANTY CLAIM
- SERVICE CENTRE
- IAN: 113864
- SUPPLIER
- HOYER HANDEL GMBH
Brand : MELINERA
Model : MWBA 5 A1
Category : Lighting