CT-Advanced Cross - Fitness Equipment Joy Sport - Free user manual and instructions
Find the device manual for free CT-Advanced Cross Joy Sport in PDF.


| Product Type | Elliptical Cross Trainer |
| Brand | Joy Sport |
| Model | CT-Advanced Cross |
| Max User Weight | 150 kg (330 lbs) |
| Power Supply | AC adapter (included, not compatible with GFCI outlets) |
| Console Display | LCD with backlight |
| Resistance Levels | 24 (L1 to L24) |
| Workout Programs | Manual, Program (P1-P12), Fitness, Personal, H.R.C., Random |
| Heart Rate Monitoring | EKG grip sensors on fixed handlebar |
| Body Fat Evaluation | Yes, via grip sensors |
| Recovery Heart Rate Test | Yes |
| Audio Input | 3.5mm jack for MP3/iPod |
| Stride Adjustment | 8 positions (adjustable via knob) |
| User Profiles | 5 (U0 to U4) with gender, age, height, weight settings |
| Speed Display Range | 0.0 - 99.9 km/h or mph |
| Distance Display Range | 0.00 - 99.99 km |
| Calorie Display Range | 0 - 999 kcal |
| Pulse Display Range | 30 - 200 BPM |
| RPM Display Range | 0 - 250 rpm |
| Transport Wheels | Yes, on front stabilizer |
| Assembly Required | Yes, detailed instructions in manual |
| Warranty | 24 months from purchase |
Frequently Asked Questions - CT-Advanced Cross Joy Sport
User questions about CT-Advanced Cross Joy Sport
0 question about this device. Answer the ones you know or ask your own.
Ask a new question about this device
Download the instructions for your Fitness Equipment in PDF format for free! Find your manual CT-Advanced Cross - Joy Sport and take your electronic device back in hand. On this page are published all the documents necessary for the use of your device. CT-Advanced Cross by Joy Sport.
USER MANUAL CT-Advanced Cross Joy Sport
Fitness-Import
Timmermannsweg 46
5813 AP Ysselsteyn (LB)
info@joysport.nl
www.joysport.nl
TABLE OF CONTENTS
WARNING DECAL PLACEMENT....1
JOY SPORT IIMPORTER/IMPORTANT SAFTY 2-3
HARDWARE PACKAGE CONTENTS....4-5
HARWARD KIT....6
ASSEMBLY INSTRUCTIONS.... 7-12
CONSOLE MANUAL....13-20
EXPLODED VIEW....-21
PARTS LIST....22-23
TRANSPORT AND STORAGES....24
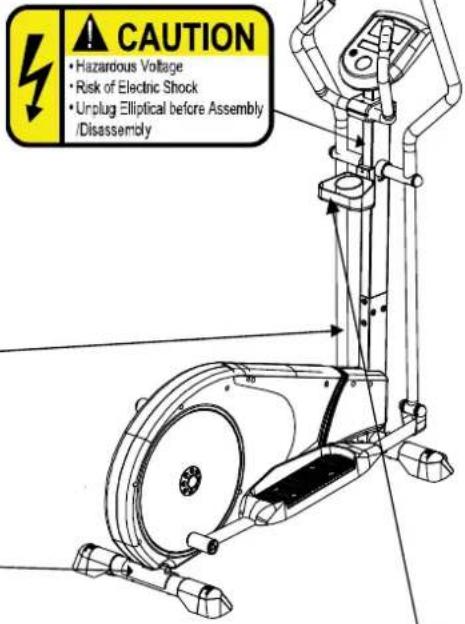
WARNING DECAL PLACEMENT
This drawing shows the location(s) of the warning decal(s). If a decal is missing or Illegible, see this front cover of this manual and request a free replacement decal. Apply the decal in the location shown. Note: The Decal(s) may not be shown at Actual size
WARNING
- Misuse of this machine may result in serious injury.
- Read user's manual prior to use and follow all warnings and instructions.
- Do not allow children on or around machine.
• Pedals continue to spin when you stop pedaling. - Spinning pedals can cause injury.
- Reduce pedal speed in a controlled manner
- User weight must not exceed 300 pounds.
- Replace label if damaged, illegible or removed.
series # & date code
- Importer North American Exercise Co., Ltd. 9911 Valley Blvd, EL MONTE, CA 91731 PH#1-6263506918 E-mail: service@go-elliptical.com
- Brand:Go Elliptical
- Max. user weight 135kgs.
• Model meet Standard EN957/F2276 with Class HB - For consumer use only.
- User should read the warning on the warning label before using the product
- model no. V100/V200/V300/V450/V500/V600/V700/V800/V900/V950
- Date code/series no. on the main frame and also on the manual.

Joy Sport Importer
Fitness-Import
Timmermannsweg 46
5813 AP Ysselsteyn (LB)
info@joysport.nl
www.joysport.nl
Dear customer,
We want to thank you for having chosen a JOY SPORT product, and wish you a lot of fun and success during training with your JOY SPORT exercisers.
Please note and follow the enclosed safety and assembly instructions carefully.
If you have questions please do not hesitate to contact us.
Guarantee,
This guarantee covers all manufacturing and material flaws on JOY SPORT products purchased from an authorized JOY SPORT dealer for a period of 24 months from purchase.
If you wish to make a claim under the guarantee, JOY SPORT shall be entitled to repair or replace the defective unit or part at its discretion.
The owner of the unit must pay for the transport costs and any dealer's workshop costs.
To make a claim under the guarantee, take your guarantee card to your dealer.
The dealer will then take the necessary action.
If this is not possible, contact your national JOY SPORT importer.
The following are not covered by the guarantee : normal wear and tear and the consequences of improper treatment or damage caused by the purchaser or third persons and faults which are due to other circumstances.
Claims may not be made under the guarantee if modifications have been made to the original construction or equipment or if JOY SPORT original parts were not used to repair the unit.
In no event the manufacturer shall be liable for incidental or consequential losses, damages or expenses in connection with exercise products.
Fitness-Import
Timmermannsweg 46
5813 AP Ysselsteyn (LB)
info@joysport.nl
www.joysport.nl
IMPORTANT SAFETY INSTRUCTIONS
IMPORTANT ELLIPTICAL EXERCISER WARNINGS AND CAUTIONS READ AND UNDERSTAND THESE WARNINGS AND CAUTIONS
WARNING: In order to reduce the risk of injury to any and all persons, READ and UNDERSTAND the following
important PRECATIONS and information before operating or allowing others to operate the elliptical exerciser.
- The owner has the responsibility of ensuring that all users of the elliptical exerciser are adequately informed of all warnings and precautions
- This elliptical exerciser should not be used by, on, or near children, invalids, or disabled persons.
- This elliptical exerciser must only be used as described in the manual. Attachments that are not recommended by the manufacturer must not be used.
- Never operate the elliptical exerciser with the air openings blocked, Keep the air openings free of lint, hair and the like. Never operate the elliptical exerciser on a soft surface such as a bed or a couch where the air openings may be blocked.
- Never drop or insert any object into any opening.
- Place the elliptical exerciser n a level surface. To protect the floor and carpet from damage, place a mat under the elliptical exerciser.
- DO NOT uses or store the elliptical exerciser outdoors, in a garage or covered patio, keep the elliptical exerciser away from moisture and dust. The elliptical exerciser should be used indoors. Heat, moisture and dirt can adversely affect the operation of this elliptical exerciser.
- DO NOT operate the elliptical exerciser where aerosol products are being used or where medical oxygen is being administered.
- The recommended minimum free space for access around the elliptical exerciser is 20" at each side and 40" at the rear of the elliptical exerciser. This is to allow for an emergency dismount and passage around the elliptical exerciser.
- Keep children under the age of 12 and pets away from the elliptical exerciser at all times.
- No person weighing over 150 KGS should use this elliptical exerciser.
- NEVER allow more than one person on the elliptical exerciser at a time
- Wear appropriate clothing when using the elliptical exerciser. DO not wear loose clothing that could become caught in the elliptical exerciser. Appropriate athletic support clothing is recommended for both men and women. Always wear athletic shoes intended for walking with a non-slip sole. NEVER use the elliptical exerciser with bare feet, while wearing stockings only or in sandals.
- The pulse monitor is not a medical device. Various factors, including the user's movement, may affect the accuracy of pulse rate readings. The pulse monitor is intended only as an aid to exercise in determining heart rate trends in general.
- Do not attempt to raise lower or move the elliptical exerciser until it is properly assembled, ( See ASSEMBLY INSTRUCTIONS.) You must be able to safely lift 100 pounds ( 46 KGS) in order to raise, lower or move the elliptical exerciser.
- Do not place object under the elliptical exerciser in an attempt to change the incline of the elliptical exerciser.
- Inspect and tighten all parts of the elliptical exerciser every three months.
- This elliptical exerciser is intended for in-home use only. Do not use this elliptical exerciser in any commercial, rental or institutional setting. Use in any commercial, rental or institutional setting voids the warranty.
WARNING: Consult your physician before beginning this or any exercise program. This is especially important for any person over the age of 35 or any person with any pre-existing health problems. Read all instructions before using. North American/LMX Group assumes no responsibility for personal injury or property damage sustained by or through the use of this product.
SAVE THESE INSTRUCTIONS
HARDWARE PACKAGE/PARTS/TOOLS
| Handle bar (L) Handle bar (R) | ||
 |  | |
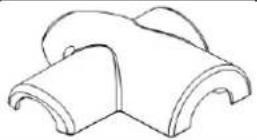
| Pedal(L/R) post joint cover | ||
 |  | |
| Pedal tube cover top (L) Pedal tube cover bottom (L) | ||
 |  | |
| Pedal tube cover top (R) Pedal tube cover bottom (R) | ||
 |  | |
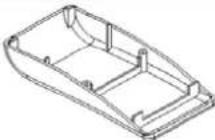
| Top step foot cover Bottom step foot cover | ||
 |  | |
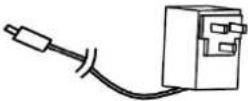
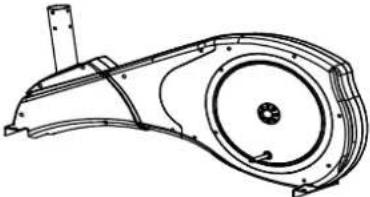
| AC Adaptor Base Frame | ||
 |  | |
| Pedal tube(R) Pedal tube(L) | ||
 | 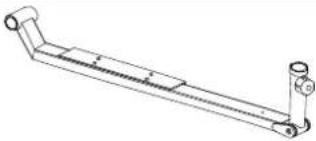 |
HARDWARE PACKAGE/PARTS/TOOLS
| hardware box CT-Advanced Rear cover for | upright tube X450 | |
 | ||
| Fix handle bar Up right tube | ||
 | ||
| Front cover for upright tube X450 Bottle holder | ||
 | ||
| Front stabilizer Rear stabilizer | ||
 | ||
| Arm cover front Arm cover rear | ||
 | ||
| Console | ||
 | ||
Hardware kit contents
Joy Sport CT-Advanced
| KEY NO PARTS LIST QTY STEP KEY NO PARTS LIST QTY STEP | ||||||||
| #192 |  | STEP 1 | ||||||
| #652 |  | STEP 1 | ||||||
| #202 |  | STEP 1 | ||||||
| #214 |  | STEP 1 | ||||||
| #192 |  | STEP 2 | ||||||
| #652 |  | STEP 2 | ||||||
| #202 |  | STEP 2 | ||||||
| #212 |  | STEP 2 | ||||||
| #186 |  | STEP 3 | ||||||
| #294 |  | STEP 4 | ||||||
| #302 |  | STEP 4 | ||||||
| #122 |  | STEP 5 | ||||||
| #172 |  | STEP 5 | ||||||
| #298 |  | STEP 5 | ||||||
| #184 | [BWW6] | STEP 6 | ||||||
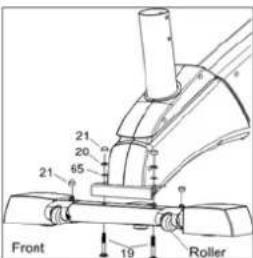
| STEP:1 | FRONG SUPPORT (Front Stabilizer) ASSY. | NO | PARTS LIST | QUANTITY |
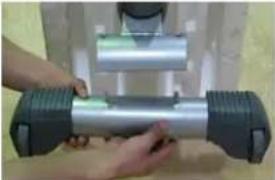
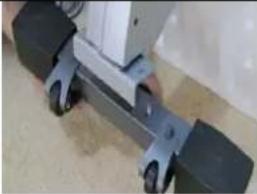
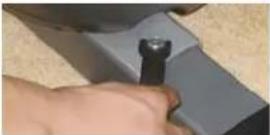
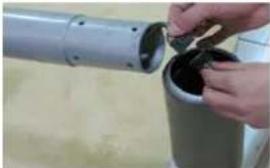
| As photo shown1) in order to facilitate assembly, use one of the lager styroform set under the Frame ( as photo shown)2) Attach the front support with transportation wheels to the frame with two bolts (#19) washers (#65) nuts (#20)3) locking sleeves with tool and cover the nut with two caps (#21)4) For V-950 two extra caps (#21) to cover the front roller screw head. ( as drawing shown) | #19 2 | [2AZK] | ||
| #65 2 | ||||
| #20 | 2 | |||
| #21 4 | ||||
| STEP:2 | REAR SUPPORT ( Rear Stabilizer) ASSY | NO | PARTS LIST | QUANTITY |
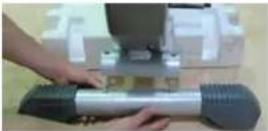
| As photo shown1) In order to facilitate assembly, use one of the lager styroform set under the Frame ( as photo shown)2) Attach the rear support to the frame with two bolts (#19) washers (#65) nuts (#20)3) locking sleeves with tool and cover the nut with two caps (#21) | #19 | ∅ | 2 | |
| #65 | ∅ | 2 | ||
| #20 | ∅ | 2 | ||
| #21 2 | ∅ | |||
| STEP:3 | UPRIGHT TUBE ASSY.TO THE FRAME | NO PARTS LIST | QUANTITY | |
| As photo shownInsert the post joint cover (#5) onto the upright tube (#68) then1) place upright tube on top of a chair ( or by a second person to assist holding) close to the main frame be facilitated to connect the cables.2) check the direction of upright tube before connect the Top/Bottom pre-assembled cables as photo shown.3) keep the post cover with upper part of the upright tube,fixing six screws (#18) with finger locking first then tighten all firmly.Note! tighten two screws on the label "1" screw hold first and then tighten up the rest of four screws to avoid the hold alignment match problem. | #18 6 | ∅ | ||
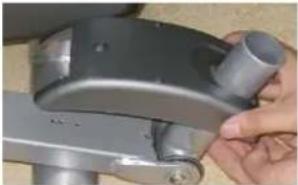
| STEP:4 | PEDAL COVER ASSY ( — ) | NO PARTS LIST QUANTITY | ||
| As photo shown1) Set both pedal tube assy (#74/#75) (left/right) on the floor, indentify (right/left)tube.2) Assembly the top step (#97/#98) with screws (#29 & #30) | #29 | ∅ | 4 | |
| #30 2 | ∅ | |||
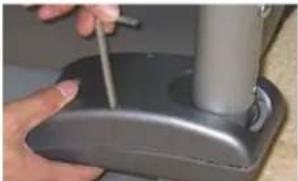
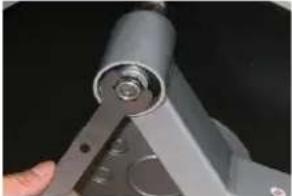
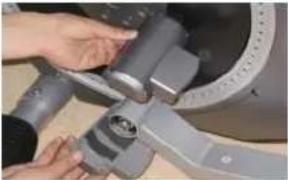
| STEP:5 | PEDAL COVER ASSY ( — ) & PEDAL TUBE ASSY. ( — ) | NO PARTS LIST | QUANTITY | |
| As photo show1) Set the pedal tube left & right (#74/#75) to the main frame, secure the pedal tube with main frame with washer (#17) and M10 lock nut (#12) tighten firmly.2) Set the right pedal tube cover, top "R" (#101) and bottom "R" (#102) with screws (#29).3) Do the same to tighten up the pedal tube cover, top "L" (#101)and bottom (#102) to the left pedal tube (#74) | #12 | ∅ | 2 | |
| #17 | ∅ | 2 | ||
| #29 | ∅ | 8 | ||
 |  |  | ||
 |  | |||
 |  |  | ||
 |  | |||
 |  |  | ||
 |  | |||
 |  |  | ||
 |  |  | ||
 | 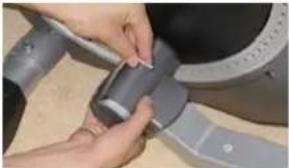 | |||
| STEP:6 | PEDAL TUBE ASSY.(二) | NO PARTS LIST | QUANTITY | |
| As photo shown1) Insert both swivel tubes (#85/#86) into the connecting tubes (#69/#70), secure both tubes with the knob screws (#44).2) Three locations on the swivel tube available adjust to lock with the middle holes for both right/left tubes. | #18 4 | |||
| #44 2 | ||||
| STEP:7 | UPPER SWING ARM ASSY. | NO PARTS LIST QUANTITY | ||
| As photo shown1) Set the swing arm handlebars R/L (#72/#73), insert to both swivel tubes (#69/#70).2) Turn and match the handlebars with the aligned holes, secure parts (#72/#69) also (#73/#70) with screw (#18) and special spring washer (#A) then flat washer (#65), tighten up both totally. | #18 4 | |||
| #65 4 | ||||
| #A | 4 | |||
| STEP:8 | CENTER COVER & BOTTLE HOLDER ASSY | NO PARTS LIST | QUANTITY | |
| As photo shown1) Pre-assemble the rear cover (#94) with bottle holder Grey (#105) with screws (#104)2) tighten up the front cover (#95) with rear cover (#96) with screws (#29) for both right & left side. Finally secure the font cover A(#93) with rear cover A (#94) with screw (#29) | #29 12 | |||
| #104 | 4 | |||
| STEP:9 | FIX HANDLEBAR ASSY. | NO PARTS LIST QUANTITY | ||
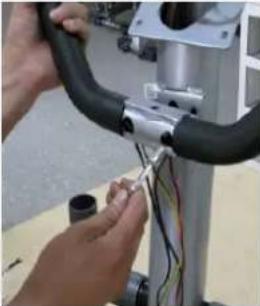
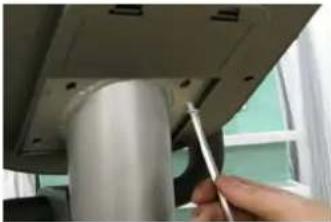
| As photo shown1) Fit the fixed handlebar (#71) with screws (#6) and thru the bracket hold of upright tube with screw driver.2) Set both EKG cables thru the small holes under the fix handlebar (#71) on the upright tube, pick up cables from top of the upright tube.3) Secure the fix handlebar covers (#88A/#88B) with screw (#61)Note: Bottom cover (#88B) got a nut inject in the bar. | #6 | 2 | ||
| #61 | 1 | |||
| #88A/B | ||||
 | 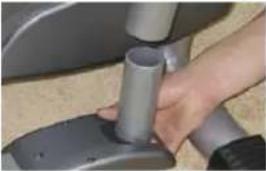 |  | ||
 |  | |||
 | 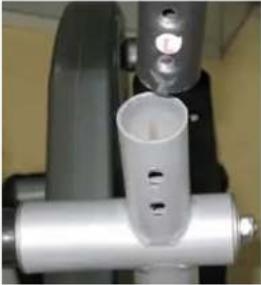 |  | ||
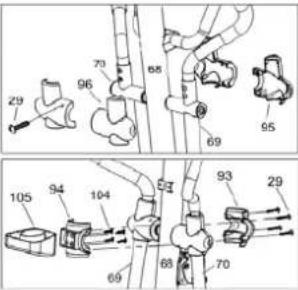 |  |  | ||
 |  |  | ||
 | ||||
| STEP:10 | CONSOLE ASSEMBLY | NO PARTS LIST | QUANTITY | |
| A photo shown1) Connect cable comes out from console (#43) also cables from the upright tube firmly.Note: check & plug cables, same color to plug together, black color can plug with black no need to select special plug.2) Insert all plugged cables into the upright tube, set console (#43) on the top of upright tube, secure with for screws (E) | E | 4 | ||
| STEP:11 | PLASTIC PEDAL ASSY. | NO PARTS LIST QUANTITY | ||
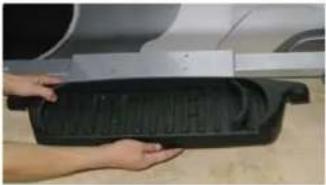
| As photo shown1) Set both pedal tube (#74/#75) & plastic pedals(#52) on the floor, There is no difference between the left/right pedals (#52), secure both pedal (#52) to the pedal tube assy.(#74/#75) with screw (#18) from the top.Note! the pedal has left/right label, check the direction of pedal for front and foot protection edge of pedal as drawing shown)2) There is a stride location adjustable bar (#55) can set with 8 different locations for the stride length, it has to set both left & right bar at the same location (number shown on the plastic pedals)Note! Three sets of holds on the tube plate, user may choice one set to use, each set will give one inch variation pedal distance to select, make sure both pedasl select the same location of holes | #18 8 | |||
| STEP:12 | POWER ADAPTOR | NO PARTS LIST | QUANTITY | |
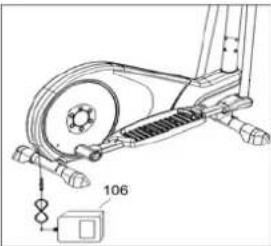
| As photo shown1) Plug the power cord with power adaptor (#34) into an appropriate outletIMPORTANT: The elliptical exerciser is not compatible with GFCI-equipped outlets.2) The other end of the access hole in the rear of the base frameNote! before plug in, please check the voltage specifications on the label. | #106 1 | |||
 |  |  | ||
 |  |  | ||
 |  |  | ||
Joy Sport CT-Advanced
I. Power Modes
- Power On: Plug in the power cord with power adaptor into an appropriate outlet. Next, locate and switch "on" the reset/off button on the frame, near the power cord. A loud beep will sound and the display will then light (Fig. 1) and enter User Set Up & Selection mode in a few seconds (Fig. 2)
- Power Off: The console will automatically switch to "sleep" mode after 4 minutes of inactivity.

Fig. 1

Fig. 2
II. Instructions for User Set Up & Program Selection
1. USER SET UP
Begin your personal set up by choosing USER 0, USER 1, USER 2, USER 3, or USER 4:
- When console displays "U0", press + or - to select "U0", "U1", "U2", "U3", or "U4".
- Press ENTER to confirm USER.
2. GENDER SET UP
- The console will now flash "SEX" on the upper right-hand corner of the display.
- Press + or - to select male or female.
- Press ENTER to confirm GENDER.

3. .AGE SET UP
- The console will now flash "AGE" on the upper right-hand corner of the display.
- Press + or - to select your age.
- Press ENTER to confirm AGE.

4. .HEIGHT SET UP
- The console will now flash "H.t" on the upper right-hand corner of the display.
- Press + or - to select your height.
- Press ENTER to confirm HEIGHT.

5. .WEIGHT SET UP
- The console will now flash "W.t" on the upper right-hand corner of the display.
- Press + or - to select your weight.
- Press ENTER to confirm WEIGHT.

- You have finished User Set Up! Now, you are ready to select a work out program.
• The console is now in Program Selection mode.
- Press + or - to select a preset workout program:
- Press ENTER to confirm your PROGRAM SELECTION.

flowchart
graph LR
    A["MANUAL"] --> B["PROGRAM"]
    B --> C["FITNESS"]
    C --> D["PERSONAL"]
    D --> E["H.R.C."]
    E --> F["RANDOM"]
- MANUAL

PERSONAL
- PROGRAM

• HRC
- FITNESS

For each preset program, you can further personalize the level of work that you desire.
(1) If you pressed ENTER on MANUAL...
- You can now set up resistance LEVEL Press + or - to adjust setting then press ENTER to confirm LEVEL set up.
- You can now set up TIME Press + or - to adjust target then press ENTER to confirm TIME set up.
- You can now set up DISTANCE Press + or - to adjust target then press ENTER to confirm DISTANCE set up.
- You can now set up CALORIES Press + or - to adjust target then press ENTER to confirm CALORIES set up.
- You can now set up PULSE Press + or - to adjust target heart rate then press ENTER to confirm PULSE set up.
(2) If you pressed ENTER on PROGRAM (P1 to P12)...
- You can now select a program from P1 to P12 Press + or - to select a program then press ENTER to confirm.
- You can now set up resistance LEVEL Press + or - to adjust setting then press ENTER to confirm LEVEL set up.
- You can now set up TIME Press + or - to adjust target then press ENTER to confirm TIME set up.
- You can now set up DISTANCE Press + or - to adjust target then press ENTER to confirm DISTANCE set up.
- You can now set up CALORIES Press + or - to adjust target then press ENTER to confirm CALORIES set up.
- You can now set up PULSE Press + or - to adjust target heart rate then press ENTER to confirm PULSE set up.
(3) If you pressed ENTER on FITNESS, press START/STOP to begin your fitness evaluation.
(4) If you pressed ENTER on PERSONAL program profile you desire
Press + or - to adjust Brake Resistance Level then press ENTER to confirm WHOLE PROFILE you desire set up
- You can now set up TIME press ENTER for 3 seconds to keep the profile you design in memory then press ENTER to confirm TIME set up.
- You can now set up DISTANCE Press + or - to adjust target then press ENTER to confirm DISTANCE set up.
- You can now set up CALORIES Press + or - to adjust target then press ENTER to confirm CALORIES set up.
- You can now set up PULSE Press + or - to adjust target heart rate then press ENTER to confirm PULSE set up.
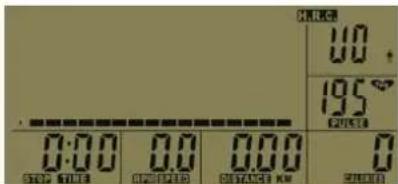
(5) If you pressed ENTER on H.R.C. (55%, 75%, 90%, Tag)...
- You can now select a preset target heart rate control program Press + or - to select a program then press ENTER to confirm.
- You can now set up TIME Press + or - to adjust target then press ENTER to confirm TIME set up.
- You can now set up DISTANCE Press + or - to adjust target then press ENTER to confirm DISTANCE set up.
- You can now set up CALORIES Press + or - to adjust target then press ENTER to confirm CALORIES set up.
(6) If you pressed ENTER on RANDOM...
- You can now set up TIME Press + or - to adjust target then press ENTER to confirm TIME set up.
- You can now set up DISTANCE Press + or - to adjust target then press ENTER to confirm DISTANCE set up.
- You can now set up CALORIES Press + or - to adjust target then press ENTER to confirm CALORIES set up.
- You can now set up PULSE Press + or - to adjust target heart rate then press ENTER to confirm PULSE set up.
III.
Preset Program Diagrams
PROGRAM(P1-P12)
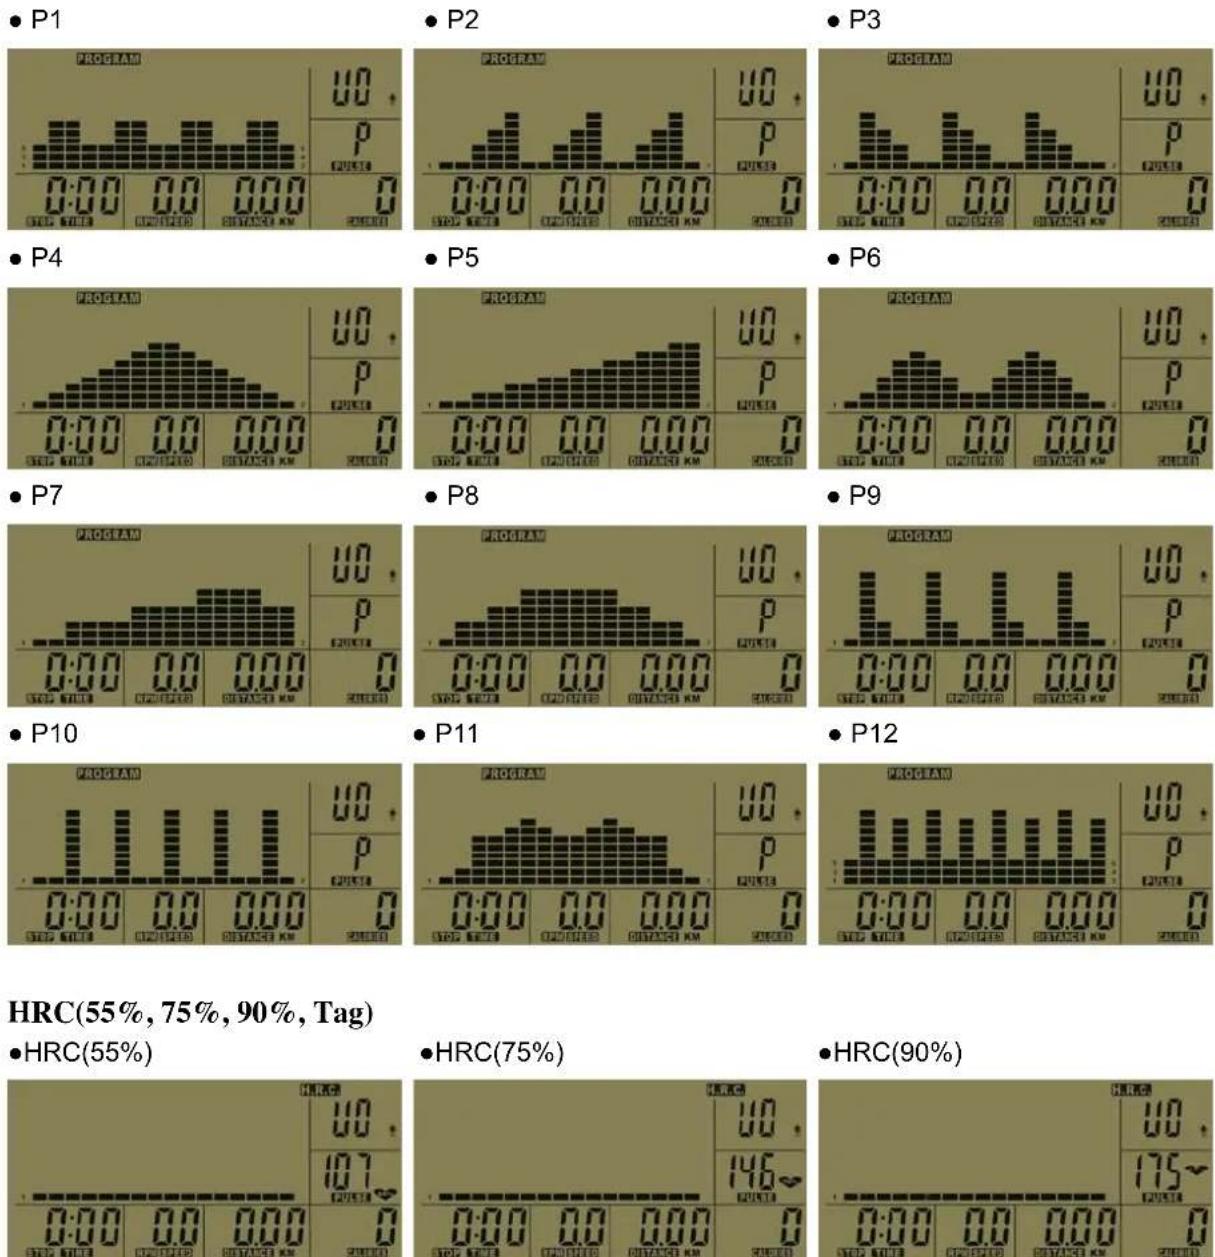
•HRC(Tag)
Fitness Evaluation Features
1. Body Fat Evaluation
Press BODY FAT to begin evaluation (Put your hand on the EKG grips for the machine to detect your heart rate.) If no heart rate is detected after 10 minutes have lapsed, "ERROR" will appear on the display. If a heart rate is detected, body fat evaluation will begin and take about 25 seconds. The result will then be shown as demonstrated below:

Note : (Body fat is different for men and women, also for people with different activity levels)
| Body Fat Body Type | |
| FAT ≤ 10% | Underweight |
| 10% < FAT ≤ 20% | Average |
| 20% < FAT ≤ 30% | Slightly Overweight |
| 30% < FAT ≤ 40% | Overweight |
| 40% < FAT ≤ 50% | Obese |
(
Body Fat Index from American Council on Exercise
Classification Women (% Fat) Men (% Fat)
Essenti 1 Fat 10-12 2-4
Athletes 14-20 6-13
Fitness 21-24 14-17
Acceptable 25-31 8-25
Obese > 31 > 25
2. Recovery Heart Rate Evaluation
A recovery heart rate is a measurement taken to help determine how well your heart is functioning. It refers to the heart's ability to return itself to a normal rhythm after being elevated during exercise.
NOTE! That the heart rate displayed may be inaccurate and used for reference
Press RECOVERY to begin the test. (Place your hand on the EKG grips for the machine to detect your heart rate). If no heart rate is detected within 10 seconds, the test will be terminated. If a heart rate is detected, the recovery heart rate test will begin and take about 60 seconds.
| Value | Recovery | Heart | |
| F 1 | Excellent | ||
| F 2 | Very Good | ||
| F 3 | Good | ||
| F 4 | Satisfactory | ||
| F 5 | Poor | ||
| F 6 | Very Poor | ||
Rate


V.
Key Console Buttons
1. RESET
(1). Return to USER SET UP.
(2). Return to PROGRAM SELECTION when pressed during a short pause in between work outs.
(3). Return to POWER ON mode when pressed and held for 3 seconds.
2. START/STOP
During exercise, you can use this button to pause then restart your work out.
3. QUICK START
After turning the power on, pressing this button will allow you to directly go into the MANUAL program and start your work out on default settings.
4. + & -
These buttons are used to adjust gender (SEX), AGE, HEIGHT (H.t), Weight (W.t), TIME, DISTANCE, CALORIES, Target Heart Rate (H.R.C.), and resistance level (LEVEL) selections.
| 5. ENTER Use this button to confirm your selection and go on to the next step.6. BODY FAT Use button to start body fat evaluation test.7. RECOVERY Use this button to start recovery heart rate evaluation test. | |||||
| . | Console Feature Specifications | ||||
| Item | Display | Display Range Setting | Range Default Memory | ||
| 1 | SEX(性别) | MALE/ | FEM | ||
| 2 | AGE(年龄) | 10 - 100 | Yes | ||
| 3 | WEIGHT(METRIC 公制)体重 | 20 - 330(Lb) | 10 - 150(KG) | ||
| 4 | HEIGHT(身高) | 36 - 84(INCH) | 90 - 210(CM) | ||
| 5 | TIME(时间) | 0:00 - 99:59 | 0:00 - 99:00 | 0:00 | |
| 6 | DISTANCE(距离) | 0.0 - 99.99 | 0.00 - 99.50 | 0:00 | |
| 7 | CALORIES(卡路里) | 0 - 999 | 0 - 990 | 0:00 | |
| 8 | SPEED(速度) | 0.0 - 99.9 | 0:00 | ||
| 9 | PULSE(脉搏) | 30 - 200 BPM | 0:00 | ||
| 10 | RPM(每分钟转速) | 0 - 250 rpm | 0:00 | ||
| 11 | BRAKE RESISTANCE LEVEL | L1 - L24 | L1 No | ||
HOW TO USE THE SOUND SYSTEM
To play music or audio books through the console sound system while you exercise, plug the included audio cable into the jack on the back of the console and into a jack on your MP3 or IPOD; make sure that the audio cable is fully plugged in.
Next, press the play button on your MP3 player or IPOD. Adjust the volume level using the volume control on your MP3 or IPOD.
Joy Sport
CT ADVANCED

Joy Sport CT-Advanced
PARTS LIST
Key Number Description Key Number Description
1 Handlebar end cap 49 Belt
2 Handlebar grip 50 End cap
3 T-Bar grip 51 Drive pulley
4 Hand pulse grip unit 52 Pedal, LH
5 Upright Protector 53 Pedal, RH
6 Screw 54 Adjustable foot
7 Locking washer 55 pedal resistance
8 Washer 56 End cap (T-Bar)
9 Sleeve 57 Middle cover, LH
10 Sleeve 58 Middle cover, RH
11 Washer 59 Side cover, LH
12 Nylock nut 60 Side cover, RH
13 Pedal tube shaft 61 Screw
14 Washer 62 Cable
15 Bearing 63 Screw
16 Retainer 64 Magnet
17 Washer 65 Washer
18 Allen head bolt 66 Pulley
19 Screw 67 Base frame
20 Nylock nut 68 Upright tube
21 Plastic cap 69 Swivel tube, LH
22 Allen head bolt 70 Swivel tube, RH
23 Rear square foot cap 71 Fix handle bar
24 Front square foot cap 72 Handle bar, LH
25 Left roller holder 73 Handle bar, RH
26 Right roller holder 74 Pedal tube, left
27 Wheel 75 Pedal tube, right
28 Plastic Ring 76 Front foot
29 Screw 77 Rear foot
30 Screw 78 Flywheel holder bracket
31 Screw 79 Belt ightener
32 Screw 80 Metal cross, LH
33 Bearing 81 Metal cross, RH
34 Metal Spring plate 82 Cable
35 Screw 83 Cable
36 Locking screw 84 Metal plate
37 Spacer 85 Connecting tube Left
38 Screw 86 Connecting tube Right
39 Washer 87(A) Front cover, LH
40 Screw 87(B) Front cover, RH
41 Nut 88(A) Upper cover
42 Spring 88(B) Lower cover
43 Meter 89 Console cable 900MM
44 Knob2 90 Washer
45 Screw 91 Cable
46 Nut 92 power wire
47 Flywheel 93 Front cover for upright tube
48 Speed Sensor Cable 94 Rear cover for upright tube
Joy Sport CT-Advanced
PARTS LIST
95 Rear cover for swivel tube 117 front lower cap right
96 Front cover for swivel tube 118 Rear foot cover
97 Top step foot cover 119 Front foot cover (middle)
98 Bottom step foot cover 120 Front foot cover (left)
99 Pedal tube cover top L 121 Front foot cover (right)
100 Pedal tube cover bottom L 122 Wheel
101 Pedal tube cover top R 123 Screw
102 Pedal tube cover bottom R 124 Meter
103 disc rim 125 End cap (T-Bar)
104 Screw 126 Base frame
105 bottle holder 127 Swivel tube, LH
106 power a dapter 128 Swivel tube, RH
107 Screw 129 Fix handle bar
108 Cable 130 Front foot
109 Washer 131 Rear foot
110 Washer 132 Connecting tube
111 Washer 133 Front cover for upright tube
112 Support Sleeve 134 Rear cover for upright tube
113 T-Bar grip 135 bottle holder
114 Rear cover for swivel tube 136 Screw
115 Front cover for swivel tube #A Washer
116 front lower cap left
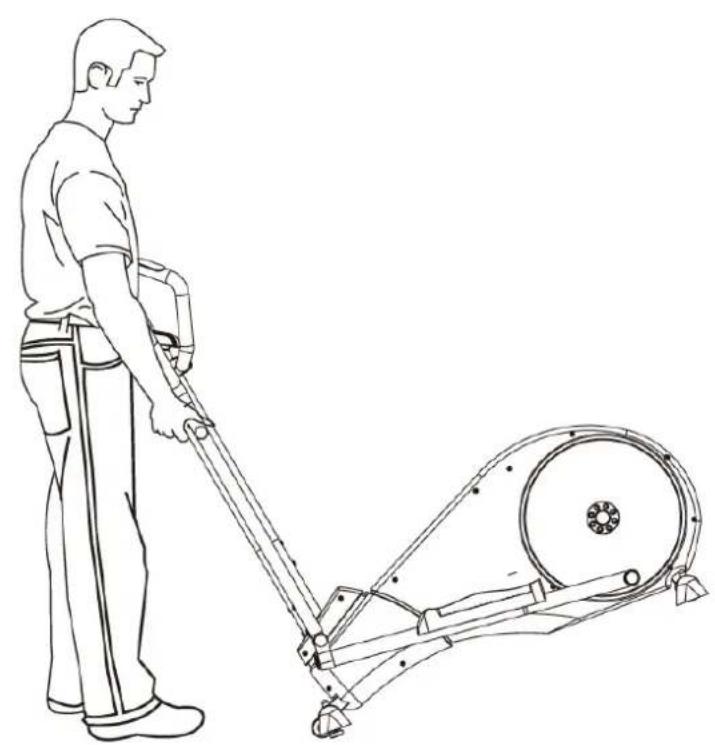
natural_image
Line drawing of a person using a manual lawn pusher to lift a circular mechanical device (no text or symbols)
natural_image
Line drawing of a person using an outdoor fitness machine (no text or symbols present)CT-Advanced

Fitness-Import
Timmermannsweg 46
5813 AP Ysselsteyn (LB)
info@joysport.nl
www.joysport.nl
INHOUDSOPGAVE
WARNING DECAL PLACEMENT
This drawing shows the location(s) of the warning decal(s). If a decal is missing or Illegible, see this front cover of this manual and request a free replacement decal. Apply the decal in the location shown. Note: The Decal(s) may not be shown at Actual size

WARNING
- Misuse of this machine may result in serious injury.
- Read user's manual prior to use and follow all warnings and instructions.
- Do not allow children on or around machine.
• Pedals continue to spin when you stop pedaling. - Spinning pedals can cause injury.
- Reduce pedal speed in a controlled manner
- User weight must not exceed 300 pounds.
- Replace label if damaged, illegible, or removed.
CAUTION
• Hazardous Voltage
• Risk of Electric Shock
• Urplug Elliptical before Assembly /Disassembly
• Hazardous Voltage
• Risk of Electric Shock
• Urplug Elliptical before Assembly /Disassembly
series # & date code
- Importer North American Exercise Co., Ltd. 9911 Valley Blvd, EL MONTE, CA 91731 PH#1-6263506918 E-mail: service@go-elliptical.com
- Brand:Go Elliptical
- Max. user weight 135kgs.
- Model meet Standard EN957/F2276 with Class HB
- For consumer use only.
- User should read the warning on the warning label before using the product
- model no. V100/V200/V300/V450/V500/V600/V700/V800/V900/V950
- Date code/series no. on the main frame and also on the manual.

Joy Sport Importeur
Fitness-Import
Timmermannsweg 46
5813 AP Ysselsteyn (LB)
info@joysport.nl
www.joysport.nl
Geachte klant,
5813 AP Ysselsteyn (LB)
info@joysport.nl
www.joysport.nl

natural_image
Close-up of a hand holding a black plastic tray with internal compartments, next to a car (no visible text or symbols)
natural_image
Close-up of a hand inserting a black plastic bag into a white plastic container (no text or symbols visible)
natural_image
Technical line drawing of a mechanical assembly with a 106-degree angle标注 (no text or symbols beyond basic geometry)
natural_image
Close-up of a hand holding a small black cable next to a metallic sewing machine (no visible text or symbols)
natural_image
Black rectangular electronic device with attached cable and power plug (no visible text or symbols)Computer Handleiding
I. Inschakelen
(5) Druk ENTER bij H.R.C. (55%, 75%, 90%, Tag)...
natural_image
Solid color block image with yellow top and gray bottom (no text or symbols)NOTE! That the heart rate displayed may be inaccurate and used for reference
V.
Display knoppen
1. RESET
Joy Sport CT-Advanced
16 Retainer 52 pedaal links
17 vulring 53 pedaal rechts
18 inbusbout 54 verstelbare poot
Joy Sport CT-Advanced
natural_image
Line drawing of a person using a manual lawn pusher to lift a circular mechanical device (no text or symbols)
natural_image
Line drawing of a person using an outdoor fitness machine (no text or symbols present)Joy Sport
CT ADVANCED
- TABLE OF CONTENTS
- WARNING DECAL PLACEMENT
- WARNING
- Joy Sport Importer
- Dear customer,
- Guarantee,
- IMPORTANT SAFETY INSTRUCTIONS
- IMPORTANT ELLIPTICAL EXERCISER WARNINGS AND CAUTIONS READ AND UNDERSTAND THESE WARNINGS AND CAUTIONS
- SAVE THESE INSTRUCTIONS
- HARDWARE PACKAGE/PARTS/TOOLS
- Hardware kit contents
- Joy Sport CT-Advanced
- Power Modes
- Instructions for User Set Up & Program Selection
- USER SET UP
- GENDER SET UP
- .AGE SET UP
- .HEIGHT SET UP
- .WEIGHT SET UP
- Preset Program Diagrams
- Fitness Evaluation Features
- Body Fat Evaluation
- Body Fat Index from American Council on Exercise
- Recovery Heart Rate Evaluation
- Key Console Buttons
- RESET
- START/STOP
- QUICK START
- + & -
- HOW TO USE THE SOUND SYSTEM
- Joy Sport
- CT ADVANCED
- PARTS LIST
- CT-Advanced
- INHOUDSOPGAVE
- CAUTION
- Joy Sport Importeur
- Geachte klant,
- Computer Handleiding
- Inschakelen
- Display knoppen
Brand : Joy Sport
Model : CT-Advanced Cross
Category : Fitness Equipment