Viper 2 - Exercise bike Joy Sport - Free user manual and instructions
Find the device manual for free Viper 2 Joy Sport in PDF.


| Brand | Joy Sport |
| Model | Viper 2 |
| Product Type | Exercise Bike |
| Dimensions (L x W x H) | 100 x 50 x 130 cm |
| Product Weight | 35 kg |
| Max User Weight | 120 kg |
| Resistance System | Magnetic, 8 levels |
| Display | LCD with time, speed, distance, calories, pulse |
| Heart Rate Monitoring | Hand grip sensors |
| Programs | 12 preset programs |
| Seat Adjustment | Vertical and horizontal |
| Pedals | Adjustable straps |
| Transport Wheels | Yes |
| Floor Leveling | Adjustable caps |
| Power Supply | 2 AA batteries (not included) |
| Assembly Required | Yes, tools included |
| Maintenance | Clean with damp cloth; lubricate chain annually |
| Safety Features | Emergency brake, stable frame |
| Warranty | 2 years |
| Spare Parts Availability | Contact customer service |
| User Manual Language | English, Dutch, German |
Frequently Asked Questions - Viper 2 Joy Sport
User questions about Viper 2 Joy Sport
0 question about this device. Answer the ones you know or ask your own.
Ask a new question about this device
Download the instructions for your Exercise bike in PDF format for free! Find your manual Viper 2 - Joy Sport and take your electronic device back in hand. On this page are published all the documents necessary for the use of your device. Viper 2 by Joy Sport.
USER MANUAL Viper 2 Joy Sport
HANDLEIDING Joy Sport
VIPER 2

natural_image
Exterior view of a MPER brand exercise stand with black handle and base (no signage or text in focus)Joy Sport Importeur
Fitness-Import
Timmermannsweg 46
5813 AP Ysselsteyn (LB)
info@joysport.nl
www.joysport.nl
Geachte klant,
5813 AP Ysselsteyn (LB)
info@joysport.nl
www.joysport.nl
INHOUD.
V e i l i g h e i d s i n s t r u c t i e s
K e n m e r k e n
V e r p a k k i n g
M o n t a g e
C o m p u t e r
O e f e n i n g e n
D i a g r a m
VEI LI GHEI DSI NSTRUCTI ES
INSTELLINGEN
natural_image
Line drawing of a person lying on a stationary exercise chair (no text or symbols)| NR | BESCHRIJVING | AANT. | NR | BESCHRIJVING | AANT. | NR | BESCHRIJVING |
| 14 | Computer | 1 | 37 | Stekkertje | 1 | 43 Elektrische ka | |
| 17 | Transformer | 1 | 38 Zekering | 1 | 44 Elektrische | ||
| 18 | Filter | 1 | 39 | Aan/Uit knop | 1 | 45 | Filter Kabel |
| 19 | Reactor | 1 | 41 | Elektrische kabel | 1 | 46 | Reactor Kabel |
| 20 | Motor | 2 | 42 | Motor kabel | 1 | 47 | Stroomkabel |
A
1
kabel

Gebrauchsanweisung
Joy Sport VIPER 2

natural_image
Exterior view of a Viper Performance Tracker device (no signage or text in focus)Joy Sport Importeur
Fitness-Import Timmermannsweg 46 5813 AP Ysselsteyn (LB) info@joysport.nl www.joysport.nl
Geehrter Kunde
5813 AP Ysselsteyn (LB)
info@joysport.nl
www.joysport.nl
Inhaltsverzeichnis.
Einstellungen

USER MANUAL
Joy Sport
VIPER 2

natural_image
Exterior view of a VIPER brand standing balance scale with black bands and a circular head (no text or symbols on the device itself)Joy Sport Importer
Fitness-Import
Timmermannsweg 46
5813 AP Ysselsteyn (LB)
info@joysport.nl
www.joysport.nl
Dear customer,
We want to thank you for having chosen a JOY SPORT product, and wish you a lot of fun and success during training with your JOY SPORT exercisers.
Please note and follow the enclosed safety and assembly instructions carefully.
If you have questions please do not hesitate to contact us.
Guarantee,
This guarantee covers all manufacturing and material flaws on JOY SPORT products purchased from an authorized JOY SPORT dealer for a period of 12 months from purchase. If you wish to make a claim under the guarantee, JOY SPORT shall be entitled to repair or replace the defective unit or part at its discretion.
The owner of the unit must pay for the transport costs and any dealer's workshop costs.
To make a claim under the guarantee, take your guarantee card to your dealer.
The dealer will then take the necessary action.
If this is not possible, contact your national JOY SPORT importer.
The following are not covered by the guarantee: normal wear and tear and the consequences of improper treatment or damage caused by the purchaser or third persons and faults which are due to other circumstances.
Claims may not be made under the guarantee if modifications have been made to the original construction or equipment or if JOY SPORT original parts were not used to repair the unit.
In no event the manufacturer shall be liable for incidental or
consequential losses, damages or expenses in connection with exercise products.
Fitness-Import
Timmermannsweg 46
5813 AP Ysselsteyn (LB)
info@joysport.nl
www.joysport.nl
TABLE OF CONTENTS
I M P R O T A N T S A F E T Y I N F O R M
F E A T U R E S
U N P A C K I N G
A S S E M B L Y
C O N S O L E O P E R A T I O N
F U N C T I O N S H O W
C I R C U I T D I A G R A M
SAFETY PRECAUTIONS
Thank you for your purchasing our products. Even though we go to great efforts to ensure the quality of each product, occasional errors, and /or omissions do occur. In any event should you find this product to be defective or missing a part please contact your place of purchase.
Be sure to read the entire manual before assembly and operation. Also, please note following safety precautions:
- Before beginning any exercise program, consult your personal physician. If you experience any pain or tightness in your chest, irregular heartbeats, shortness of breath, faintness or other unusual discomfort while exercising, stop and consult your physician before continuing.
- In any event should you find this product to be defective please stop exercise and contact your place of purchase;
- Do not insert any object into any openings;
- No person weighing over 150 Kilograms should use this product;
- Only one person at a time should use this equipment.
- Always use this treadmill on a clear and level surface. Do not use outdoors or near water;
- Leave the machine till it stop.
- Keep children and pets away from this equipment at all times.;
- Do not use the machine, when you use aerobic equipment or spray.
- Inspect your machine prior to exercise to ensure that all nuts and bolts are fully tightened.;
- Turn off the power after use;
- Most exercise equipment is not recommended for small children. Children should not use the children, at a safe distance while exercising;
CONTRAINDICATIONS:
- Pregnancy
• Acute thrombosis conditions
• Cardio-vascular disease - Fresh wounds resulting from an operation or surgical intervention
- Hip- and knee replacements
• Acute hernia, discopathy, spondylolysis - Diabetes
- Epilepsy
- Heavy migraine
- Wearing a pacemaker
- Wearing recently fitted i.u. coils, metal pins, bolts or plates
- Tumours
FEATURES

UNPACKING & ASSEMBLY
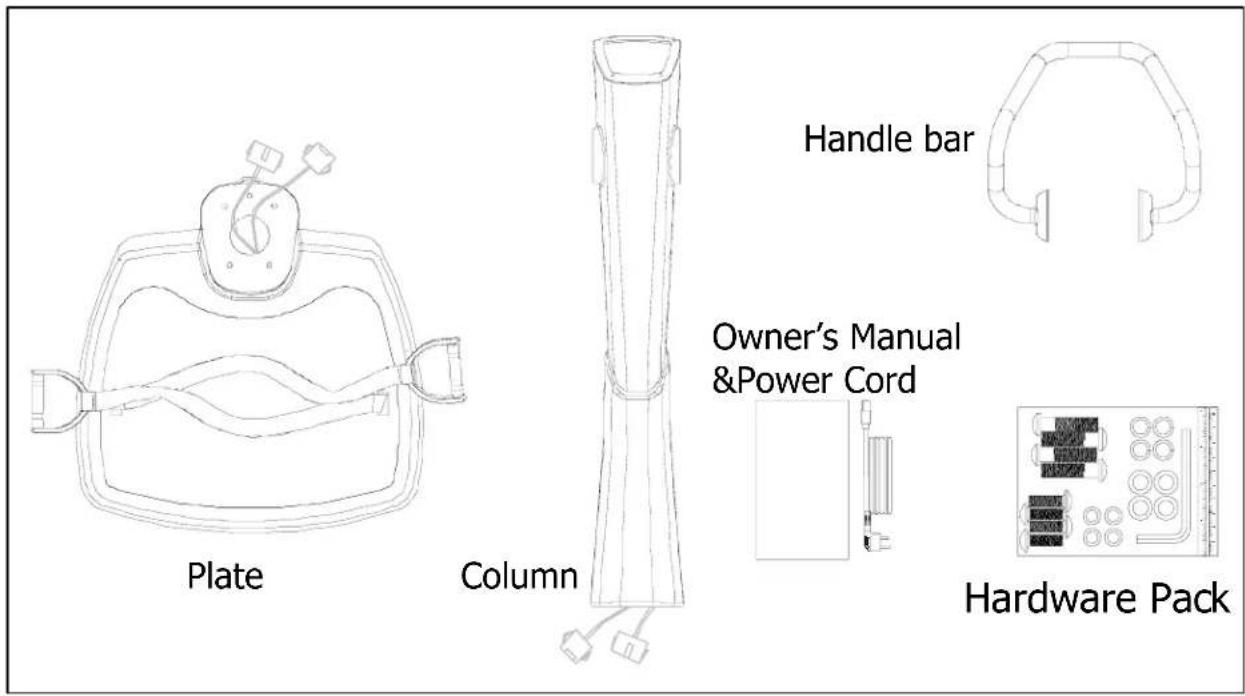
Hardware Pack

Assembly Instructions
STEP 1- Install the column on the underpan
A/ Connect the electronic wire inside the plate with the electronic wire inside the column. Put the column on the underpan, then making sure the holes alignment.
B/ Attached the column on the plate, Using 4 M10*40 bolts, 4 Φ10 washers and 4 Φ10 spring washers. Tighten it securely with wrench.

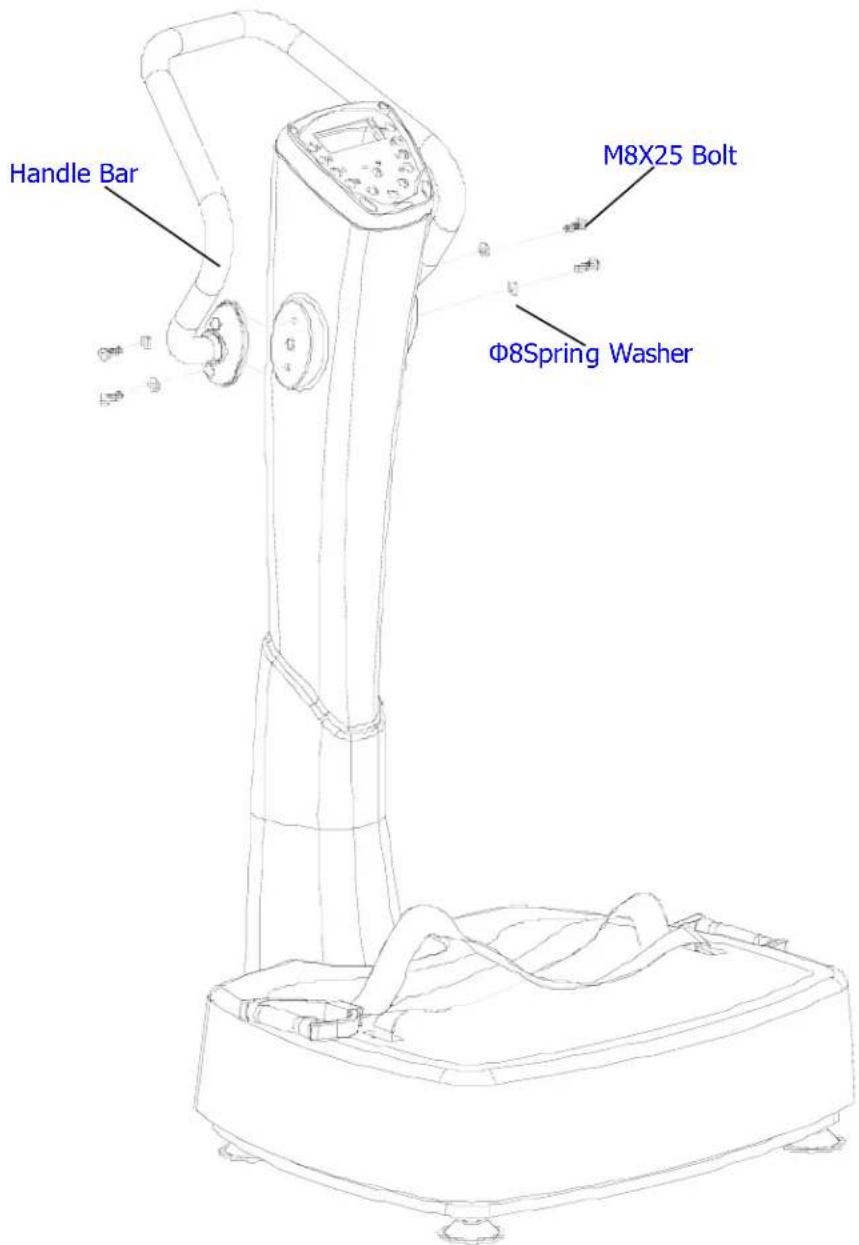
STEP 2- Install the handle bar to the column.
A/ making sure the holes alignment.
B/ Using 4 M8X25 bolts and 4Φ8 spring washers , tighten it with wrench at this time.
CONSOLE OPERATION
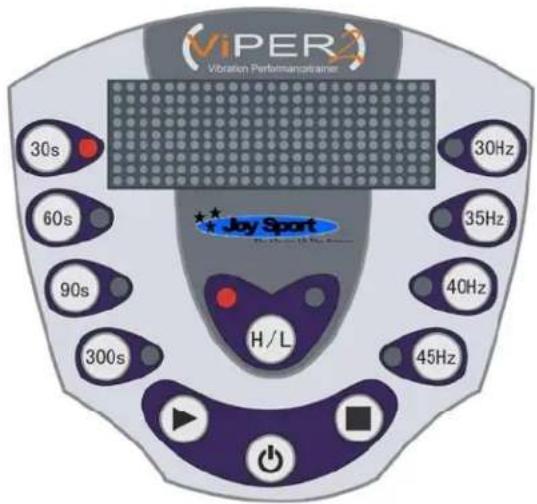
CONSOLE :
H FREQ / L FREQ SET : H/L
GETTING STARTED
-
Plug the power cord into the wall power outlet and turn on the power switch. If nonuse equipment for long time please turn off the power switch.
-
Press the Ⓞ .
-
Press the key directly, the treadmill will start work at L, 30Hz, 30S.
-
Choose the time, the Frequency and the H / L then press the ▶, the machine will start.
-
During the exercise, you also can change the program.
-
After count down, if you want continue exercise please choose the time again.
-
During working, press the ■ key o ⏻ the machine will stop.
-
Extend the time of each exercise (from 30s to 60s, from 60s to 90s, from 90s to 300s)
-
Reduce the rest period between exercises (from 300s to 90s, 90s to 60s to 30s to no rest)
-
Increase number of sets per exercise
Do not Choose the H/L key during the motor working
EXERCISE INSTRUCTIONS
A/ Strength
| A01 SQUATStand on the Power-Plate with feet shoulder width apart. Keeping the back straight and knees slightly bent, gently squeeze the leg muscles. You should feel tension in your quadriceps, buttocks and back. |  |  |
| A 02 Deep SquatStand on the Power-Plate with feet flat and shoulder width apart. Keeping the knees directly above the feet at a 100 degree angle, gently bend the legs and squeeze the leg muscles. Keeping the back straight, bend the upper body forward. This exercise aims to strengthen the back, buttocks and legs. |  |  |
| A 03 Wide Stance SquatStand on the Power-Plate with legs wide apart and toes turned outward. Keeping the knees directly above the feet at a 100 degree angle, gently bend the legs. You should feel tension in the back, buttocks, quadriceps and inner thigh area. |  |  |
| A 04 LungePlace one foot in the middle of the Power-Plate and step back with the other planting it firmly on the ground behind. Keeping the back straight and the knees directly above the toes, squeeze the leg muscles. You should feel tension in the hamstrings, quadriceps and buttocks. |  |  |
| A 05 CalvesStanding in the centre of the Power-Plate, rise up on to the balls of the feet. Keeping your back straight and abdomen tight, you should begin to feel tension in your calf muscles. To add variation to the exercise, try bending your knees to 90 degrees. |  |  |
| A 06 Triceps DipFacing away from the Power-Plate, firmly grip the edge and push upwards. Now bend the arms slightly and lower the hips toward the plate, squeezing the shoulder blades together. You should feel the tension in your upper arms and shoulders. For variation, repeat the exercise with your legs straight. |  | 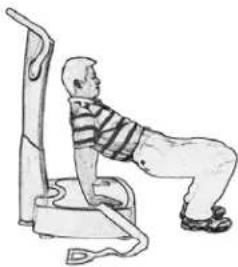 |
| A 07 Biceps CurlPosition your toes slightly under the edge of the unit for support and hold the straps tightly at waist height. Knees should be slightly bent, back and wrists kept straight. Pull your arms upward. You should feel tension in the shoulders and biceps. | 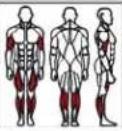 |  |
| A 08 Bent Over PullStand in front of the Power-Plate. Pull the belts upward on the side of your body. Push your chest out and shoulder-blades together. Pull your arms backwards in a smooth motion and you should feel tension in your upper back and shoulder area. |  |  |
| A 09 Front RaiseStand in front of the Power-Plate, legs shoulder width apart and raise both arms horizontally in front of your torso. Keeping your back straight and abdomen strong, pull the straps upward. For variation, perform the same exercise from a standing position on the Power-Plate. |  | 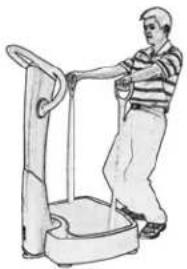 |
A 10 Shoulder Press
Position the body in a horizontal line parallel with the Power-Plate. Hands should be shoulder width apart, legs and back straight, head raised. Using slow and controlled movements push your slightly bent arms toward the Power-Plate, then return to the starting position. This exercise is perfect for shoulders and upper arms.


natural_image
Illustration of a person performing a stretching exercise using a leg presser machine (no text or symbols present)A 11 Lower Abdominals
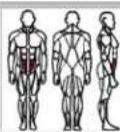
Brace yourself on your elbows and hold onto the front edge of the Power-Plate. Now, with a straight back, pull your buttocks up slowly as if you wanted to pull the Plate toward your feet. You should feel tension in your abdominal region. To vary the routine, perform the same exercise from a kneeling position.

natural_image
Illustration of a person performing a plank exercise using a leg presser machine (no text or symbols visible)A 12 Standing Abdominals
Stand in the center of the Power-Plate, feet shoulder width apart, holding the railing at chest height. Keeping the back straight and legs slightly bent, push your upper torso down. Immediately you'll begin to feel tension in your abdominal muscles. To vary the exercise simply bend your arms further.


natural_image
Illustration of a person performing a step-up exercise using a balance scale (no text or symbols)A 13 Lateral Abdominals
With one foot directly behind the other, place one elbow on the Power-Plate and lean sideways. Keeping your head, torso and legs straight, push your shoulders down and tighten your torso simultaneously. This exercise works the lateral abdomen. To add variation try pushing your hips upward at the same time!


natural_image
Illustration of a person performing a stretching exercise on a fitness bench (no text or symbols)A 14 Push Up
Kneel in front of the Power-Plate, placing hands on the plate shoulder width apart with fingers facing inward. With a straight back and strong abdomen, push off the Power-Plate platform. This exercise will strengthen chest, shoulder muscles and triceps. For variation, try straightening your legs and lifting your knees.


natural_image
Illustration of a person performing a physical exercise on a balance scale (no text or symbols)| A 15 Abdominal CrunchPlace a pillow under the small of your back, raise your legs and place your hands under your head for support making sure to keep your elbows parallel with the floor. Crunch your upper body toward your legs and feel the tension in the abdominals. Ensure your buttocks and lower back do not lose contact with the mat. To vary the routine, place your feet on the step. |  |  |
| A 16 Lattisimus DipPlace the handles on the mat shoulder width apart. Keeping wrists and forearms straight, gently push off the handles. It is important to keep the hips straight and to push the shoulders downward. This exercise promotes muscular arms, shoulders and abdomen. Try doing the same exercise but this time keep your legs straight. |  | 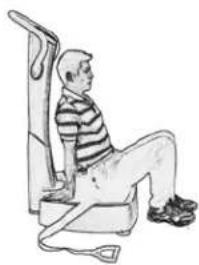 |
B/ STRETCH
| B 01 Hamstring StretchPosition your body in a wide stance on the Power-Plate, buttocks pushed backwards. Holding the handles, let your upper torso drop as far forward as possible. This exercise will stretch the buttock and hamstring muscle groups. Alternatively, stand up straight and let your upper torso and arms drop forward. |  |  |
| B 02 Quadriceps StretchPlace one shin on the Power-Plate - ensuring the foot remains off the Plate! Keeping the upper body and back straight, tense your stomach. By pushing your pelvis forward you'll be stretching your quadriceps. Vary this exercise by pulling the rear leg forward. | 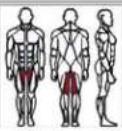 |  |
| B 03 Calf StretchStand sideways on the Power-Plate, with one leg in front of the other and toes facing forward. The front leg should be slightly bent, the rear leg is straight. Push the heel of the rear leg down and you should feel tension in your calves. To vary this exercise, keep your back straight and push your pelvis forward. |  |  |
| B 04 Adductor StretchStand sideways on the Power-Plate with your feet near the support column. Place the outside foot on the floor close to the plate so legs are apart. Bend the outside leg while keeping the other leg straight. Keeping the upper body straight, lower your buttocks to the floor. This exercise will stretch the insides of your thighs. Repeat on the opposite side. | 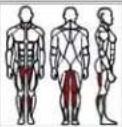 | 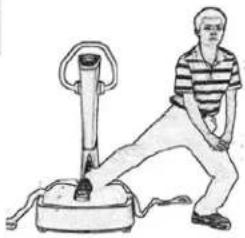 |
| B 05 Shoulder StretchStand with your back to the Power-Plate and use your left hand to pull the strap up to your buttocks. Your right hand placed on your head and pulling it slightly to the right. This shoulder stretch works best by alternating sides. |  |  |
| B 06 Pectoral StretchSit with your back to the Power-Plate. Now hold the Power-Plate behind your back so that your fingers grip the edges. By pushing your shoulders down you'll stretch your chest and shoulders. You may also gently pull the straps on either side for optimum results. |  |  |
C/ MASSAGE
| C 01 Calf MassageLie in front of the unit with both calves resting on the Power-Plate, toes pointing toward the ceiling. The rest is easy, simply relax and enjoy an invigorating calf massage. |  |  |
| C 02 Upper Arm MassageLie sideways facing the unit, with legs slightly bent. Ensure the frontal mat extends slightly over the edge. Rest one arm on the Power-Plate and relax. |  |  |
C 03 Adductor Massage
Lie on your side facing the Power-Plate. Slightly bend one leg and rest it on the Power-Plate. Making sure your body does not touch the Plate. Now repeat the massage with the other leg.

natural_image
Illustration of a person performing a leg exercise using a stationary exercise machine (no text or symbols visible)C 04 Abductor Massage
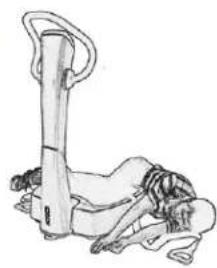
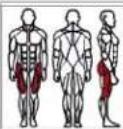
Lie sideways on the Power-Plate, with your legs pulled up to your hips. Use your elbow to support your upper body. Your back must be straight. You should feel the massage on the outside of your leg and hip. Repeat the same massage on your other side.

natural_image
Illustration of a person using a resistance band machine (no text or symbols)D/ RELAXATION
D 01 Shoulder & Neck Relaxer
Kneel down in front of the Power-Plate with your arms outstretched. Keep your back and neck straight. Now pull your upper body back while resting your arms on the plate. This exercise will relax your neck and shoulder area.


natural_image
Illustration of a person kneeling on a chair using a computer (no text or symbols visible)D 02 Lower Back Relaxer
Sit on the floor facing away from the Power-Plate with your legs apart. Place the mat between your body and the Power-Plate and hold the edge's for support. Relax during the vibration, targeted primarily in the lower back. As an alternative, angle your legs and push your body harder against the Power-Plate.


natural_image
Illustration of a child sitting on a stationary exercise machine (no text or symbols)D 03 Upper Body Relaxer
Sit facing away from the Power-Plate, with your legs bent. Using your elbows for balance, raise your upper body off the Power-Plate. Keeping your neck and back straight, pull your shoulders back. The vibration will relax your upper body.


natural_image
Line drawing of a person sitting on a chair using a leg presser machine (no text or symbols)D 04 Back Relaxer
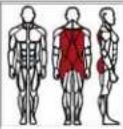
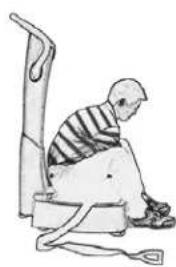
Sit in the center of the Power-Plate placing the cushion under your buttocks with legs apart. Allow your upper body to relax forward. You should feel a pleasant vibration relaxing the back, hip and thigh areas.
natural_image
Illustration of a person sitting on a bench with a ladder, no text or symbols presentCIRCUIT DIAGRAM

| ITEM | DESCRIPTION | QTY | ITEM | DESCRIPTION | QTY | ITEM | DESCRIPTION |
| 14 | Console 1 37 Power Socket | 1 43 | Electronic Wire 1 | ||||
| 17 | Transducer | 1 | 38 | Fuse | 1 | 44 | Electronic Wire |
| 18 | Filter | 1 | 39 | Power Switch | 1 | 45 | Filter Connect Wire |
| 19 | Reactor | 1 | 41 | Electronic Wire | 1 | 46 | Reactor Connect Wire |
| 20 | Motor | 2 | 42 | Motor Connect Wire | 1 | 47 | Power Wire |
QTY
- HANDLEIDING Joy Sport
- Joy Sport Importeur
- Geachte klant,
- INHOUD.
- VEI LI GHEI DSI NSTRUCTI ES
- INSTELLINGEN
- Gebrauchsanweisung
- Geehrter Kunde
- Inhaltsverzeichnis.
- Einstellungen
- USER MANUAL
- Joy Sport
- VIPER 2
- Joy Sport Importer
- Dear customer,
- Guarantee,
- TABLE OF CONTENTS
- SAFETY PRECAUTIONS
- CONTRAINDICATIONS:
- FEATURES
- Assembly Instructions
- STEP 1- Install the column on the underpan
- STEP 2- Install the handle bar to the column.
- CONSOLE OPERATION
- CONSOLE :
- GETTING STARTED
- Do not Choose the H/L key during the motor working
- EXERCISE INSTRUCTIONS
- A/ Strength
- A 10 Shoulder Press
- A 11 Lower Abdominals
- A 12 Standing Abdominals
- A 13 Lateral Abdominals
- A 14 Push Up
- B/ STRETCH
- C/ MASSAGE
- C 03 Adductor Massage
- C 04 Abductor Massage
- D/ RELAXATION
- D 01 Shoulder & Neck Relaxer
- D 02 Lower Back Relaxer
- D 03 Upper Body Relaxer
- D 04 Back Relaxer
Brand : Joy Sport
Model : Viper 2
Category : Exercise bike