Viva i7 - Tablet Allview - Free user manual and instructions
Find the device manual for free Viva i7 Allview in PDF.


| Product Type | Tablet |
| Brand | Allview |
| Model | Viva i7 |
| Display Size | 7 inches |
| Display Resolution | 1024 x 600 pixels |
| Operating System | Android 5.1 |
| Processor | Quad-core 1.3 GHz |
| RAM | 1 GB |
| Internal Storage | 8 GB |
| Expandable Storage | microSD up to 32 GB |
| Rear Camera | 2 MP |
| Front Camera | 0.3 MP |
| Battery Type | Lithium-ion, 3000 mAh |
| Connectivity | Wi-Fi 802.11 b/g/n, Bluetooth 4.0 |
| Ports | Micro USB, 3.5mm headphone jack |
| Sensors | Accelerometer |
| Dimensions (approx) | 190 x 110 x 10 mm |
| Weight (approx) | 300 g |
| Power Adapter | 5V / 1A |
| What's in the Box | Tablet, USB cable, power adapter, user manual |
Frequently Asked Questions - Viva i7 Allview
User questions about Viva i7 Allview
0 question about this device. Answer the ones you know or ask your own.
Ask a new question about this device
Download the instructions for your Tablet in PDF format for free! Find your manual Viva i7 - Allview and take your electronic device back in hand. On this page are published all the documents necessary for the use of your device. Viva i7 by Allview.
USER MANUAL Viva i7 Allview
natural_image
Illustration of a tablet device with two vertical gradient shades (no text or symbols)User manual....3
natural_image
Simple diagram of a horizontal bar with a vertical marker labeled '7' at the top (no text or symbols beyond the number)EN
1 Camera 1
2 Power 2
3 MicroUSB 3
4 Micropho 4
5 Earphone 5
6 Volume 6
7 MicroSD 7
8 Speaker 8
BG
стая 1
бутона за 2
Micro USB 3
микрофон 4
жак за 5
обем бутон 6
MicroSD слот 7
говорител 8
GR
κάμερα 1 Kamera
Thank you for purchasing our product.
These operational guidelines for the user, to ensure you a quick and convenient to use, read the instructions carefully before use.
This player is a specialized top quality portable player product with a series of remarkable functions. There will be no separate notice in the case of any change in content of this text.
This company will continue to provide new functions for the development of the product, and there will be no separate change in the case of any change in the product's performance and functions. While this unit is used as a mobile hard disk, this company will not be held liable for the security of files saved in the disk.
If the actual setup and the application methods are not identical to those as set forth in this manual, please access to the latest product information of this company's website.
Basic Operations
Power on
In the shutdown state, long press Power button
Power off
In the power on state, long press the Power key 3 seconds then pop-up device options, select "Power off" for shut down.
Sleep
Under normal operating conditions, short press the power button, into hibernation. Now, the screen will close. Short press the power button again to resume the normal mode. You can set the device to enter sleep mode automatically after a desired time of non-operation.
Power reset
If you experience a slow operation of the device in normal use, you cand shutdown and power on again to reset the operating system.
Screen time out
If you do not contact the player within the set time, and do no operate by the button, the screen will be automatically turned off.
In any state, short press Power button and for activation; Then skid the lock upwards to the green of spotted which will accomplish to access to the upper interface.
If it is necessary to deactivate the screen time out function, you can set the [Screen time out] option under [Display] function into "Never".
Using the Micro SD card
After this unit is connected with the computer, you will find two moving disks. The first one is the built-in memory disk for this unit and the other is the disk for the MicroSD card. If no card is inserted, the second disk can not be opened. This unit supports the extension of the MicroSD card from 128MB to 32GB.
Inserting and Pulling out the Micro SD card
Inserting:
Put the Micro SD card face up (side with words), and slightly force the card into the socket of the card, i.e. connecting the unit. Under this state, you can play the content in the Micro SD card.
Pulling:
Slightly push the Micro SD, and it will bounce by a section, and then you can take it out.
Caution:
Please perform inserting and pulling operation when power is off! Otherwise, it will lead to the loss or damage to the files within the unit! If no card is inserted, the computer will be unable to perform read and write operation for the disk notes of the later removable disk (Micro SD card).
Battery:
High capacity Polymer battery is used for this unit.
The duration available of the battery power depends on volume, types of playing files and operation of batteries. The player can be set up by the user as "user define power off time" or "display setup" to save batteries.
Charging:
This unit can be recharged by USB port, you can also use DC Charger:
- take out the DC charger, plug it into the wall outlet with AC 220V (output current 1A output voltage 5V\~5.2V), then plug in the charging jack into the device usb plug.
Warnings for charging:
A new battery may be empty and not charged before you get the device.
If the device is not used for long time, it is better to charge it to full capacity every 2 or 3 months during storage.
Power adapter is a key component of the portable player, which play a crucial
role in keeping the portable player's normal work and protecting your security when using the player, a long-term customer surveys and after-sales service Practice shows that the malfunction of the portable player, in many cases were caused by using inappropriate accessories, in particular the power adapter.
Using the substandard power adapter will shorten the life of the portable player by considerably, the voltage instability will seriously affected the normal work of the portable player and bring permanent damage on the player's performance and reliability. Using the substandard power adapter will also reduce the vocal quality of the players, shutdown the player when you use it. In addition, using the substandard power adapter will cause combustion and explosion which will disserve the safety of the consumers.
Return to main interface
In any interface, touch icon " " to access to main interface.
Return to upper interface or menu
In any interface, touch icon "←", click the " : " key to access to upper interface or menu. You can also click short press the " " key to accomplish it.
Points for Attention
- Do not use the player in exceptionally cold or hot, dusty, damp or dry environments;
- Do not allow the player to fall down while using it.
- Please charge your battery when:
A. Battery power icon shows an empty icon;
B. The system automatically shuts down and the power is soon off when you switch on the unit once again;
C. There is no response if you operate on any key;
-
Please do not disconnect power abruptly when the player is being formatted or in the process of uploading or downloading. Otherwise it may lead to the error in the program;
-
When this unit is used as a mobile disk, the user shall store or export files in
the proper file management operation method. Any improper operation method may lead to the loss of files, for which this Company will be held no liable;
- Please do not disassemble this unit by yourself. If there is any issue, please contact the dealer;
- There will be no separate notice in the case of any change in the functions and performance of this product;
To avoid the problems that might occur with the service shops approved by Visual Fan Ltd. (because Visual Fan reserves the right to stop the collaboration with any service shop which was previously approved and mentioned in the warranty card on the date on which the product batch was sold on the market), before taking a product to the service shop, please check the updated list of approved service shops on Allview website at the section: “Support&Service – Approved service”.
We do not assume the responsibility in case the product is used other way than stated in the user guide. Our company reserves the right to bring modifications in the content of the user guide without making this fact public.
All the modifications will be listed on the company website (www.allviewmobile.com) in the section dedicated to the specific product which is subject to modifications. The content of this guide may vary from the one existing in electronic format within the product. In such case the latter one will be taken into consideration
Settings
In the main menu, select the "Settings" option to be able to access the System Settings folder. Directly click can assess picture set options interface.
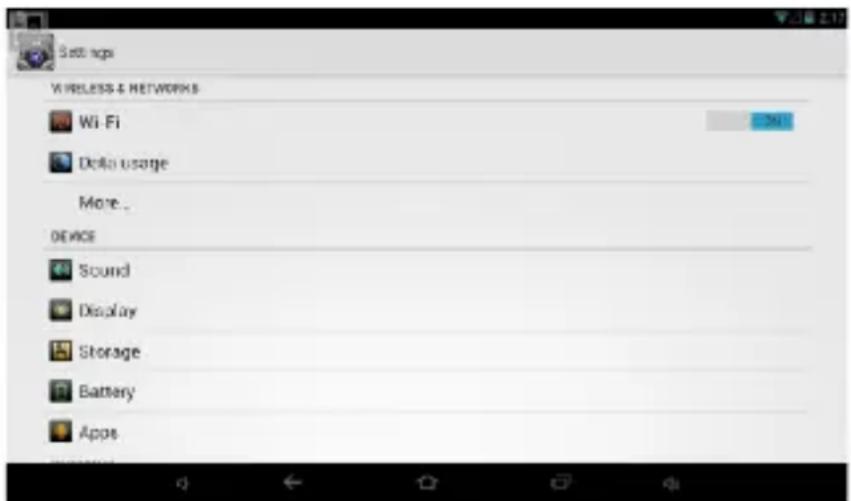
7 En
Description of functions:
1. WiFi
Wi-Fi: Open/close the wireless connection
2. Bluetooth
Bluetooth: Open/close the bluetooth connection
3. Data usage
Display data usage
4. Sound setting
Volumes: set the notification, the media and the alarm clock volume.
Default notification: click to open notifications settings menu.
Touch sounds: if checked, the touch screen pressing will make a sound
5. Display settings
Brightness: adjust brightness of the screen.
Wallpaper: you can choose wallpaper from Gallery and Wallpaper
Sleep: Setting screensaver standby time.
When the device is in stand-by the Wi-Fi function will be deactivated to save battery.
Font size: set the font size
6. Storage
Check the PMP memory and available storage.
7. Battery
Shows information about battery status and usage
8. Apps
Here you can view and manage the installed applications
9. Accounts and sync
Information and sync settings for your user accounts.
10.Location services
Contains settings for activation or deactivation of the localization options.
11. Security
Screen lock: set screen lock method: slide, pattern, PIN, password and so on many kinds of mechanisms.
Make passwords visible: if marked you may see the letters typed in the password box.
Unknown sources: allows you to install applications that do not come from Google Play Store.
12. Language & input
Set language and area, input method etc.
13. Backup & reset
Can backup, restore the machine settings and data
14. Date & time
Set the date, time, time zone and time display format
15. Accessibility
Options for screen rotation, text magnifier, password spelling etc.
16. Developer options
Settings and options for Android developers.
17. About device
Check the machine software version and other information.
Connect the computer
This machine can be connected to a PC through the USB cable, by which the data is copied or deleted. The specific procedure is as follows.
- Connect the machine through the USB cable to the PC's USB port and you will get notification "USB already connected".
- Click "USB already connected" notice options, and choose the "open USB storage devices", and you can manage the files from the memory of your machine.
Factory data reset
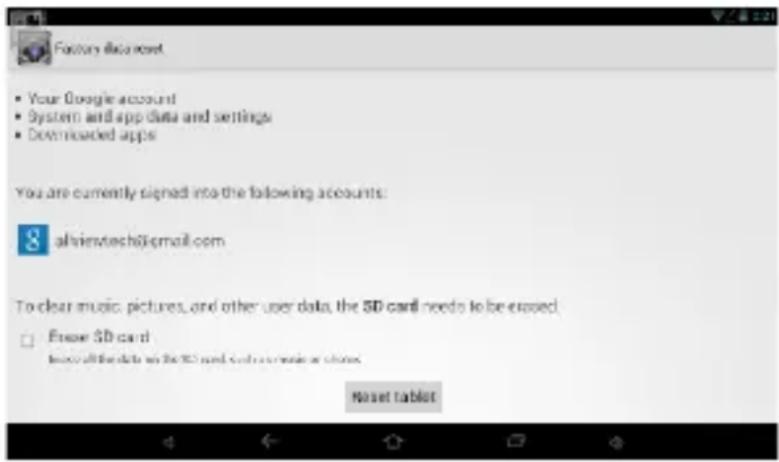
If this machine is infected, or third party software installed to run this machine is unusual, but through the recovery factory Settings, remove the third party software, and restore the state out by default. Into this machine "Settings"-" privacy ", select "Factory data reset" item, confirmed, will remove all of the data
Common troubleshooting
- What is the APK file? It and Android PMP have what relation?
A: APK is the abbreviation of Android Package. APK files can be installed and executed directly to Android system of the machine.
- How to get the APK application
A: You can download via PC-side installation, you can also “Android market” online to download and install.
- Why WIFI connection will interrupt
A: If set "screen time", when the player overtime in standby screen saver, WIFI function will be closed to save electricity purpose; When sensei player, WIFI function will be in about 5 seconds to resume automatic connection.
- Why some download APK program not working properly
A: Download the APK software, mostly by the user to development, without the platform compatibility testing, and part of the hardware and software for Android system version has a special requirements, so there could be downloaded APK
documents not compatible, not the normal operation of the phenomenon, the player itself quality problems.
5. Why does not the machine show charging state
A: When the battery is extremely low, need to use DC charger charging half an hour or more to show charging status
6. Why can't realize the gravity induction function
A: This machine support gravity feeling function, can be through the shaking to switch the screen machine did show, but some of the application does not support the gravity induction function, it can't realize the screen of switching function, this is the software support question, the functionality of the player.
7. Players can't boot
1) Check the battery no electricity
2) Connect the ac adapter after inspection again
3) If after charging still unable to boot, please contact our customer service
8. Can't Hear the voice in the headset
1) Please check the volume is set to 0
2) Please check whether the connection headphones
9. Player charging abnormalities
1) Please confirm that the use of the equipment complies with the charger of the player charger requirements
2) Such as connection USB charging, please do not connect to computers lead USB interface
10. Why some downloaded video cannot be played
This device is compatible with formats of video files from internet but due to the fact that video formats may vary there is a possibility not to be compatible with some of them. In these cases it is recommended to use the PC and some video conversion software to get to a compatible format.
Specifications
| General | Dimensions | 193x110,5x9,5mm |
| Weight | 268,1g | |
| Display | Type | IPS-LCD |
| Dimension | 7" | |
| Touch screen | Capacitive,mutitouch | |
| Resolution | 1024*600 px | |
| Format | 16:9 | |
| Characteristics | OS | Android |
| CPU | Dual-core Intel® AtomTM processor Z2520 with up to 1.2GHz | |
| GPU | POWERVR SGX544MP | |
| Flash memory | 8GB | |
| RAM memory | 1GB | |
| External memory | MicroSD up to 32GB | |
| Widget | Yes | |
| Multitasking | Yes | |
| G-sensor | Yes | |
| Design | Slim | |
| Connectivity | WLAN | WiFi 802.11 b/g/n |
| Bluetooth | Yes, v4.0 | |
| PC connectivity | Da, USB 2.0 | |
| Multimedia | Camera | 3.2MP / 0.3MP |
| Sound | Speaker | |
| Stereo with headphones | ||
| Built-in microphone | ||
| Video | Multiple formats, video decoding with 1080p resolution | |
| Internet render 1080p | ||
| E-Book | Yes, multiple formats | |
| Images | Yes, multiple formats | |
| Internet | Social | Yes |
| Yes | ||
| Applications | Yes | |
| Call by wifi | Yes.Supports videocall | |
| Software | Bitdefender, ES File Explorer | |
| Ports | Audio out | Jack, 3,5 mm |
| Video out | - | |
| Card reader | MicroSD | |
| Usb | MicroUSB | |
| Battery Charger | type DC 5V, 2A | |
| Battery type 3,7V Lithium-polymer | ||
| Capacity 2500 mAh | ||
| Package content | Tablet, charger, data cable, user manual, warranty. | |
DECLARATION OF CONFORMITY
We, SC VISUAL FAN SRL, importer located in Brasov, 61 Brazilor STR., 500313, registered at the Commerce Chamber Brasov no. J08/818/2002, CUI 14724950, assures, guarantee and declare on our own responsibility, in accordance with art.4 from HG nr. 1.022/2002 regarding the statute of the products and services that can jeopardize life, health, work security and environmental protection, that:
The product Viva i7 tablet PC, ALLVIEW brand and the accessories that came with the product: 220V charger, headphones and battery don't jeopardize life, health, work security and environmental protection and they are according to:
- The Stipulations of HG nr.982/2007 witch transpose the essential requirements specified in Direction 2004/108/CE, regarding electromagnetically compatibility;
- The Direction regarding the low voltage equipment users assurance 73/32/CEE, modified by Direction 93/68/CEE (HG 457/2003) and tests EN
55013:2001+A1:2003+A2:2006, EN 55020:2007, EN 610000-3-2:2006, EN
61000-3-3:1995+A1:2001+A2:2005;
- The Direction regarding the radio and telecommunication equipments R&TTE 1999/5/CE (HG 88/303).
- The safety requirements of the European Directive 2001/95/EC and of EN standards 60065:2002/A12:2011 and EN 60950-1:2006/A12:2011, EN62209-1(2006), EN62311(2008) of the decibels level emitted by the sold devices.
The Product described upstairs in this Declaration and all the accessories are according to the next standards:
- Health EN 50360, EN 50361;
- Safety EN 6095-1;
- EMC EN 301 489-1-7/17;
- Radio spectrum EN 301511 EN 300328;
After the performed tests emerge that the samples comply with the upstairs specification, as the test results show. Documentation is stored on VISUAL FAN LTD - Brasov, 61 Brazilor STR.
Also available on web: http://allviewmobile.com
Director
Cotuna Gheorghe

Allview VIVA I7
12. Schedule power on/off
Спецификации
Οδηγός Χρήστη
Allview VIVA I7
Πρόλογος
Funkciók leírása:
1.WiFi
Manual de utilizare
Viva i7
Prefata
De luat in considerare
Rezolvarea problemelor uzuale
Director Cotuna Gheorghe

Allview Viva i7
Uputstva za korisnike
Predgovor
Opis funkcija:
1. WiFi
Wi-Fi: Otvaranje/zatvaranje bežične veze.
Wi-Fi podešavanja: dodirom na ikonicu " možete unositi napredni set WIFI pozicija.
2. Prikazivanje datuma
Najčešća pitanja i utvrđivanje kvarova
- Šta je APK datoteka? Da li su ona i Android PMP povezani i na koji način?
- EN
- BG
- GR
- Basic Operations
- Power on
- Power off
- Sleep
- Power reset
- Screen time out
- Using the Micro SD card
- Inserting and Pulling out the Micro SD card
- Inserting:
- Pulling:
- Caution:
- Battery:
- Charging:
- Warnings for charging:
- Return to main interface
- Return to upper interface or menu
- Points for Attention
- Settings
- Description of functions:
- WiFi
- Bluetooth
- Data usage
- Sound setting
- Display settings
- Storage
- Battery
- Apps
- Accounts and sync
- 10.Location services
- Security
- Language & input
- Backup & reset
- Date & time
- Accessibility
- Developer options
- About device
- Connect the computer
- Factory data reset
- Common troubleshooting
- Why does not the machine show charging state
- Why can't realize the gravity induction function
- Players can't boot
- Can't Hear the voice in the headset
- Player charging abnormalities
- Why some downloaded video cannot be played
- DECLARATION OF CONFORMITY
- Allview VIVA I7
- Schedule power on/off
- Οδηγός Χρήστη
- Πρόλογος
- Funkciók leírása:
- 1.WiFi
- Manual de utilizare
- Viva i7
- Prefata
- De luat in considerare
- Rezolvarea problemelor uzuale
- Uputstva za korisnike
- Predgovor
- Opis funkcija:
- Prikazivanje datuma
- Najčešća pitanja i utvrđivanje kvarova
Brand : Allview
Model : Viva i7
Category : Tablet