Alldro 2 Speed - Tablet Allview - Free user manual and instructions
Find the device manual for free Alldro 2 Speed Allview in PDF.

User questions about Alldro 2 Speed Allview
0 question about this device. Answer the ones you know or ask your own.
Ask a new question about this device
Download the instructions for your Tablet in PDF format for free! Find your manual Alldro 2 Speed - Allview and take your electronic device back in hand. On this page are published all the documents necessary for the use of your device. Alldro 2 Speed by Allview.
USER MANUAL Alldro 2 Speed Allview

Contents
Safety Notices
Getting ready to use the device
What's inside box
Product Appearance
• Control buttons and connections
● Technical Specifications
Quick Guide
Power on
● Power save mode and Lockscreen
● Power off and Standby mode
• Orientation Sensor Setting
● Battery management and recharging
The desktop status bar and shortcut menu and the definition of the icons
WIFI Setting
- Mobile network settings
- APK Installer
● Uninstalled any installed APK applications
- Camera
Voice recording
● To retrieve the recorded files (by camera or video recorder)
• Use the device a multi media player
●Music playback
●Video playback
●Photo browser
Set OSD Language
Set Keyboard
Set Date and time
About the Device
- Trouble Shootings
Safety notices
1) Keep the device away from strong magnetic field to avoid damaging to the product
2) Do not let the device fall or rub or compact with any hard objects during anytime, or it may cause surface scratches, battery loose, lost of data or damages of the hardware inside.
3) Never let this product expose to humid environment or rain as the water leaked into could cause permanent damages to the hardware inside.
4) Never clean the device with any chemicals or detergents which could cause permanent damages to be device surface and corrode the spray paint
5) It is recommended not to use the headset with large volume continuous. Volume level should be adjusted to an appropriate level to avoid permanent damages to your hearing due to high volume.
6) Do not cut off the power abruptly during software update or during download, or it may cause data lost and system error.
7) Over-voltage, power cable strain, bending or squeezing by heavy objects is not allowed to avoid overheating or fire disaster.
8) To eliminate the risk of electric shock, do not connect the cable power plug with wet hands
9) Some movies, music and pictures are under the protection of copyrights, unauthorized usages are deemed as infringements to the laws of copyright
10) The performance of the wireless reception of the device could be influenced by the wireless equipments and networks.
11) Please comply with any related restrictions and rules when using
the device. Any wireless equipment will influence the flight of the plane, please consult the airline company if you use the device in the plane.
12) Do not use the device in gas station, nearby the fuel and chemicals
13) Please comply with any related restrictions and rules. Do not use the device in where blasting operations are in progress
14) Only qualified maintenance personnel is allowed to install or repair the device.
15) Please use the original accessories and battery, don't use the incompatible accessories on the device.
16) The device is not waterproof, please keep it dry
17) For the sake of data safety, please back up the important information of the device or keep a handwritten record.
18) When connecting with other devices, please read the user manual for detail safety instruction, please do not connect it with any incompatible products.
Getting ready to use the device
What's inside box
| Components Quantity | |
| MID Device 1 | |
| Charger 1 | |
| Earphone 1 | |
| USB Cable 1 | |
| OTG Cable 1 | |
| User Manual 1 |
Product Appearance
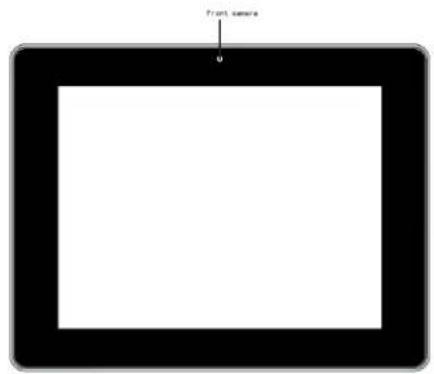
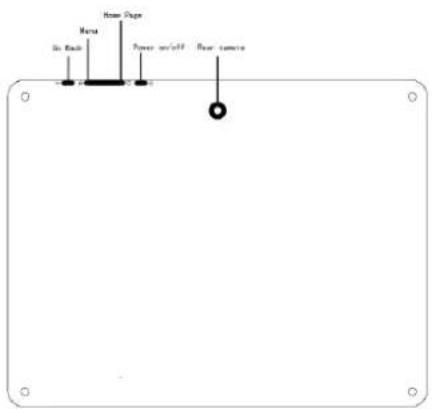
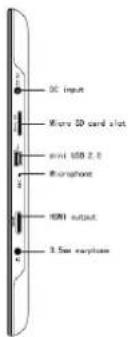
Control buttons and connections:
| Symbol Name Description | ||
| POWER | Press this button shortly during power on to enter standby modePress this button long to power on or power off | |
| Home Page | Please this button shortly to return to the desktop/main menu | |
| M | Menu | Press this button shortly to enter the submenu |
| Go Back | Press this button shortly to return to previous page | |
| Earphone Jack | Earphone Jack | |
| HDMI | HDMI output | For high definition video out to TV screen |
| MIC | Microphone | For voice recording or 3G communication |
| Mini USB Port | Port for charger, PC, external USB Driver,3G Dongle, Mouse, etc | |
| Micro SD | Micro SD slot | Insert the micro SD card hereTo remove micro SD card, press the micro SD card one time, it will eject and you can pull it out |
| DC 5V | Power charger | Connect the supplied power charge here to recharge the battery |
| Front camera | 0.3MPIXEL built-in camera for video recording and 3G communication | |
| Rear camera | 2.0MPIXEL built-in camera for video recording and 3G communication | |
Technical Specifications
| Size | 8" TFT capacitive multi Tap panel LCD display LCD Display | |
| Resolution 800*600 | ||
| Operation System Android 2.3 | ||
| PC interface | High speed USB2.0 HOST for external U-disk, Mouse, etc | |
| Built-in Flash Flash Memory : 8GB | ||
| Built-in RAM 1GB DDRIII | ||
| Capacity Expansion | Support Micro SD Card up to 32GB (not included) | |
| Power Supply | Built-in 3.7V Lithium rechargeable battery Charger: Input:AC110V~240V, Output:DC 5V@2A | |
| Music Function | Format | WMA、OGG、APE、FLAC、 AAC、WAV |
| Headset max. output | (L) 5mW + (R) 5mW (32Ohm) | |
| Bit rate 8Kbps ~ 320Kbps | ||
| WMA、WMV、 Bit rate supported | 5Kbps ~ 320 Kbps | |
| Frequency response | 20Hz to 20KHz | |
| SN ratio 90dB | ||
| Distortion | <0.05% | |
| Video Function | Play format | MKV、AVI、RM、RMVB、 MP4、MOV、VOB、DAT、 FLV、3GP, etc |
| Max. resolution supported | 2160p | |
| Ratio | 4:3、full screen for optional | |
| Photo browse JPG | 、JPEG、BMP、GIF supported | |
| Format Supported TXT 、LRC、PDF、Html、Htm、EPUB, etc | ||
| Max. capacity 20M | ||
| Recording function Format supported 3gpp Format | ||
| WI-FI Function | Spec 802.11b/g/n | |
| Transmission rate Max150Mbps | ||
| Transmission Distance | Max100m | |
| Work Frequency 2.4GHz | ||
| 3G | Support only external 3G USB-DONGLE wireless network card (3G card and USB-Dongle are not included) | |
| Auto Screen Rotation | Selectable from Setting menu | |
| Loudspeaker Built-in | 1W@8ohm | |
| Working temperature | -5 ~ 40°C | |
| OSD Languages | Default language: RomanianOther options: Catala, Cestina, Dansk, Deutsch, English, Espanol, Francais, Hebrew, Hrvatski, Indonesian, Italiano, Latviesu, Leituviu, Magyar, Nederlands, Norsk Bokmal, Polski, Portugues, Romana, Romansh, Slovencina, Suomi, Svenska, Tagalog, Tieng Viet, Turkce, Russian, Korean, Chinese, Japanese | |
| Operation systems supported | Compatible with Windows 98 se / 2000 / XP / Vista / 7, Mac 9.1 or above, Linux 2.4 | |
E-book Function
Quick Guide
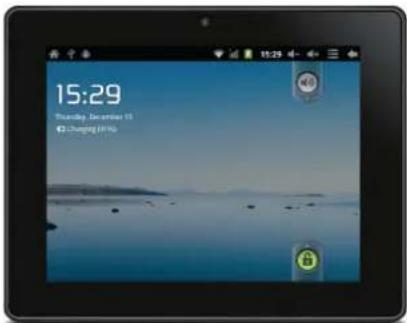
Power on
Press and hold "Button for 3 seconds to power on the device. It takes about a minute and half to boot the system. After system boot is completed, it will enter Android desktop. Slide upwards the

"bar on the Tap screen to unlock the screen to start to use the
Power Save mode and Lockscreen
You can turn off the screen and mute the volume to save power by pressing the "Button shortly. Press the " Button shortly again to reactivate the device. The screen will turn to Lockscreen mode and the primary operation of the device will continue.
Unlock the screen by sliding Slide upwards the "bar on the Tap screen to resume to status before power saving.
【Note】The primary operation of the device under power saving mode will pause and the primary operation of the device under Lockscreen mode will continue, only the screen is shut.
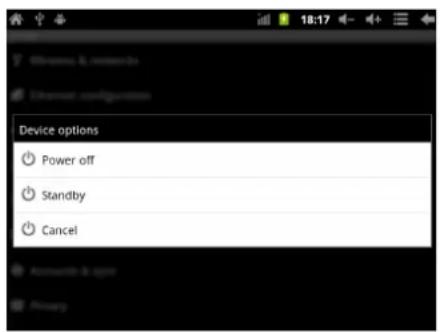
Power off and Standby mode
Press and hold ⏻ button for 3 seconds, the screen will show the power off options:
Power off – to power off the device
Standby - to shut the screen and mute the volume (the primary operation of the device will pause).
Choose your desired option by Taping the corresponding item on the screen or Tap Cancel to exit to previous operation.
【Note】When the device with low battery, it will alert continuously and it will shut down automatically when battery has completed run out. In the case if the device cannot be powered on, please check if the battery is empty. In the case of an empty battery, please recharge the battery at least one minute before restart the device.
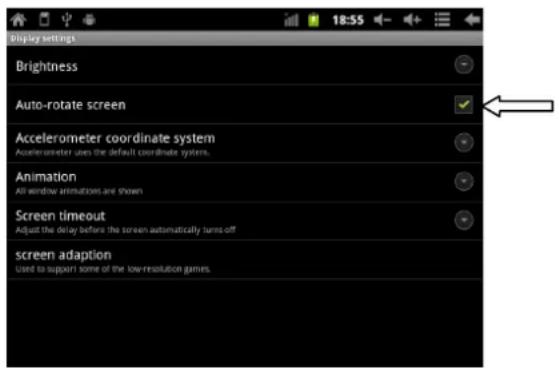
Orientation Sensor Setting
The device contains a sensor that will automatically change the orientation of most screens as you rotate the tablet. The sensor works best when the tablet is rotated perpendicular to the ground (i.e., when the tablet is held upright and not flat on its back).
The Orientation sensor can be activated or deactivated in the Setting menu: Setting → Display → Auto-rotate screen. Tick the box if you want to activate the sensor or untick the box to deactivate it.
Battery management and recharging
a. Charge the battery at about 3-5 hours to make sure the battery is fully charged at the first time.
b. Insert the power charger from the accessory pack to the DC-5V slot located on the upper right side of the device and connect the power charger to a proper power socket. You will see the power recharging icon "keeps rolling on the status bar which indicating that the device
is under recharging. The power charging icon will stop rolling when the battery is fully recharged. You can disconnect the power charger from the device when the device is recharged.
【Note】In order to keep the battery working in best condition, please pay attention as below:
- Don't recharge the device under high temperature.
- Don't release the power of the battery, you can charge the battery when there is still power in the battery. It is not necessary to wait the battery has completed run out before recharing.
- To maintain the battery a long life span, do recharge the battery once every two weeks even you don't use the device for a long time.
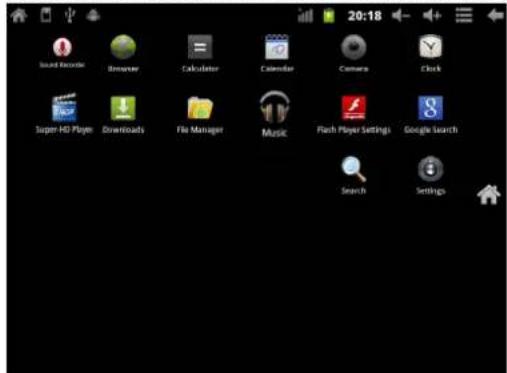
The desktop status bar and shortcut menu and the definition of the icons

The status bar is located on the top of the desktop.
| Icon Function | |
| Home page - Tap it to return to the desktop | |
| The micro SD card icon appears only when a micro SD is inserted into the device. | |
| The USB icon appears only when the device is connected to a USB device. | |
| The Android logo appears only when the device is connected to a computer. | |
| The WIFI signal indicator (it only works when the device is connected to a WIFI network) | |
| The 3G signal indicator (it only works when the device is connected to an external 3G dongle). | |
| The battery icon. To show remaining battery level or to indicate battery recharging status. | |
| 19:43 | The current system time |
| Volume up – Tap it to increase the volume level by steps | |
| Volume down – Tap it to decrease the volume level by steps | |
| Shortcut menu – Tap it and the desktop shortcut menu will pop up | |
| Back – Tap it to go to the previous screen | |
| Internet browser – Tap it to go to Google browser | |
| Applications – Tap it go to application page | |
The shortcut menu is located on the bottom of the desktop
Tap 📄 on the status bar, a shortcut menu bar will pop up.
- Tap "Add" to add shortcut, widgets, folders, wallpapers to the home screen.
- Tap "Manage apps" to go the list of installed applications directly.
- Tap "Wallpaper" to select wallpaper for the home screen.
- Tap "Search" to go to google internet browser directly.
- Tap "Notifications" to enter information available in the USB device or micro SD card directly.
- Tap "Setting" to go to setting interface directly
WIFI Setting
From desktop, Tap application icon “” to enter application page.
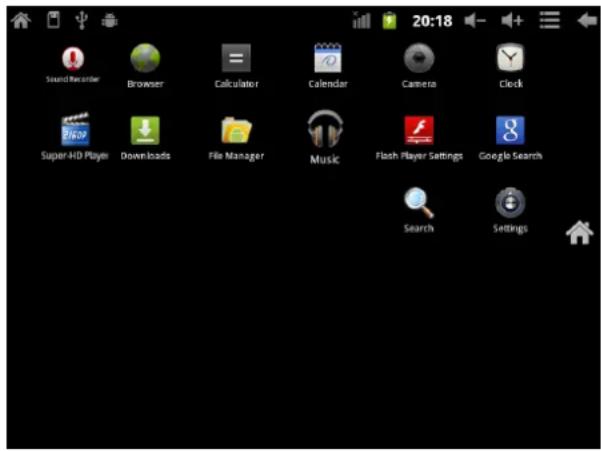
On application menu, tap "Setting" icon to enter setting menu and tap "Wireless & networks" to enter the wireless setting page.
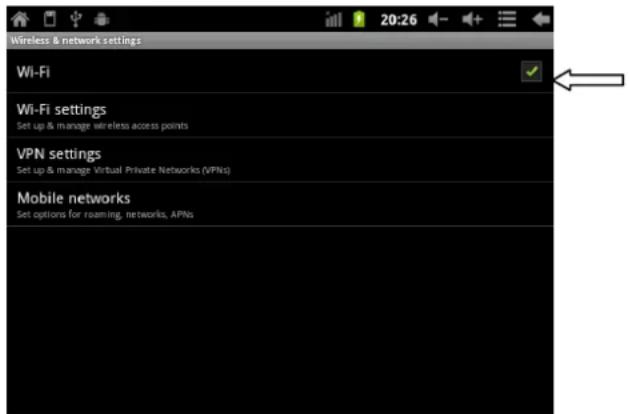
Tick the box at end of the Wi-Fi bar to turn on Wi-Fi or untick the box to turn it off. Go to Wi-Fi settings to select the appropriate Wi-Fi network from the list of Wi-Fi networks and follow the instruction to enter the password assigned by the Wi-Fi network provider and enter the assigned IP address information if the chosen network is required such information in order to obtain their Wi-Fi network (please contact the Wi-Fi network provider if password or IP address is required for access).
Mobile network settings
From desktop, Tap application icon " " to enter application page.
Tap the setting icon to enter setting menu and tap "Mobile network settings" to enter the mobile network setting page
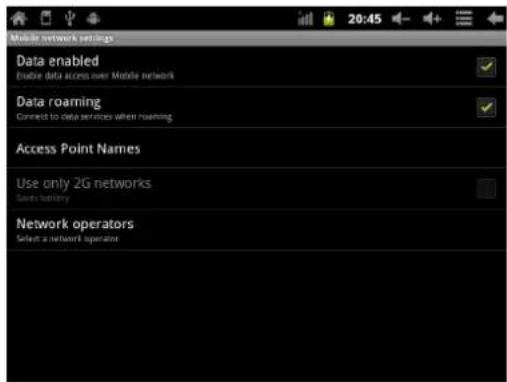
Insert a 3G dongle with 3G network card via the OTG cable provided in the accessories pack and follow the instruction to select and enter the appropriate data required by the 3G network provider.
APK Installation
This device supports the third part Application Program .APK files. Many Application Programs including the "APK installer" can be obtained from the internet for free or with charge. Download the APK files from the internet and copy it into the device directly or stored it inside a micro SD card and insert it to the device. Use application installer program "APK installer" and follow the instruction to install any APK to the device.
Uninstalling any installed APK Applications
From application menu, tap on "Setting" and select "Applications" from the list. Tap on "Manage applications" and you can see a list of installed applications (not including factory default application). Tap on the application that you want to uninstall and follow the instruction to uninstall the applications.
Camera
This device has a built-in 0.3MIPIXEL front camera and a built-in 2.0MIPIXEL back camera for photo or video.
On application menu, tap the camera icon 📄 to enter the camera interface.
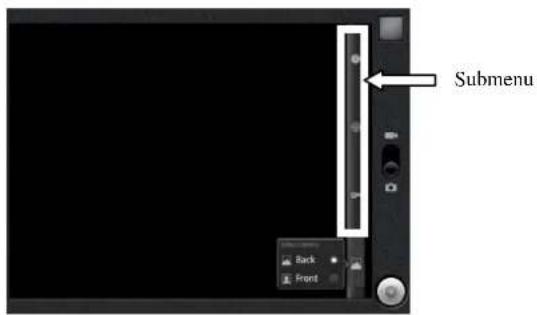
Select which camera to use by tapping on the either option:
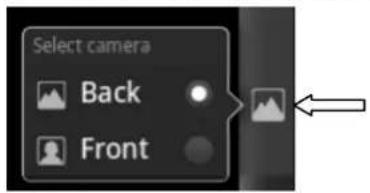
And then choose either photo or video mode by sliding the button to
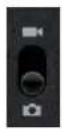
either side:
On photo mode, tap on
On video mode, tap on

to take a photo.
to start a recording and
Tap on

to stop recording.
The submenu bar, there are options to adjust the settings before taking a photo or recording a video.
You may exit the Camera interface by pressing the go back button to return to the application menu.
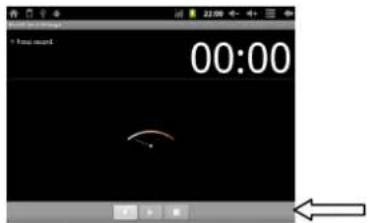
Voice Recording
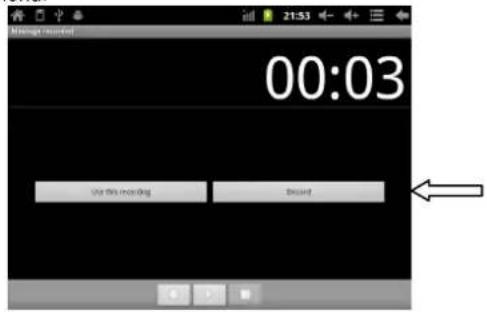
In the main menu, tap Sound Recorder icon to enter the voice recording interface, tap to start recording, tap to stop recording.
Two options will pop up on the screen, to store the recorded file, select "Use this recording" or select "Discord" to delete the file just record.
After selected either one of the option, it will return to the Application menu.
To retrieve the recorded files (by camera or video recorder)
From the application menu, tap "File Manager" to enter the list of file inside the device and you can find the file you just recorded and saved
from the file list.

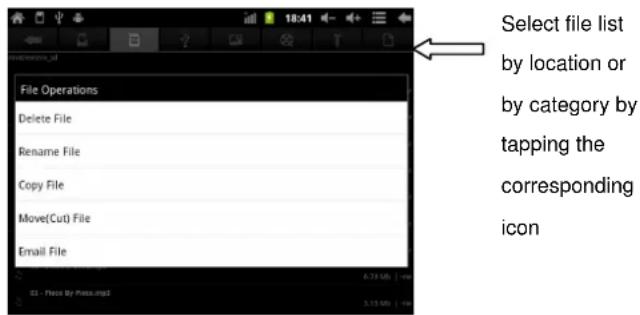
【Note】You can also view all files in device and micro SD card or USB device or by category in File Manager.
Use the device a multi media player
There are some preinstalled programs in the device:


playback of music files
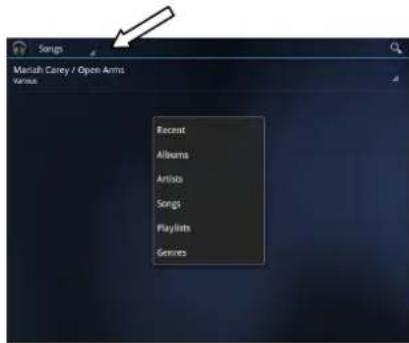
Go to application menu, tap on "MUSIC" to enter the music playback interface. Only music files that are stored inside the device will be shown in the file list. You can classify the music file list by: RECENT, ALBUMS, ARTISTS, SONGS, PLAYLISTS or GENRES by selecting the appropriate option.
Tap the song for 1 second, the option menu will pop up. You can select Play, Add to playlist, Shop for Artist, Delete or Search.
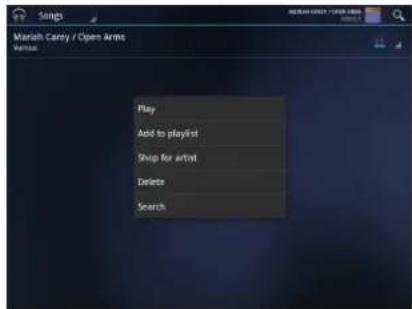
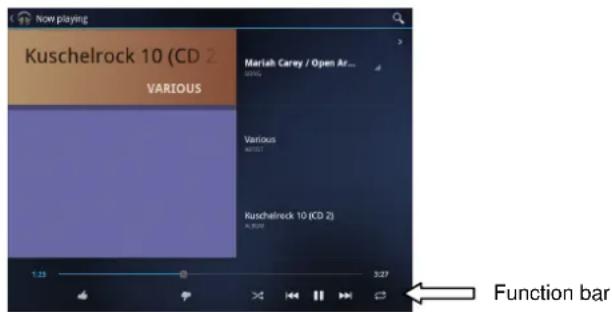
Tap "Play" to enter playback interface and start music playback or you may also tap the song name shortly directly to enter the playback interface and start music playback. On playback interface, you can
tap on the function bar to adjust the playback time, backward, forward, play, pause, shuffle, repeat setting.
To view music files in both of the device and in the micro SD card, go to Application menu, select "File Manager" to view the files list from the device and micro SD card. You may delete file, rename file, copy file, move (cut) file and email file by touching the file name for 1 second, the "File Operations" menu will pop up.
【Note】Please refer to the Technical Specification section of this manual for the file formats that are supported by the device.

yer – for playback of video files or
Go to application menu, tap on "Super-HD Player" to enter the Super-HD Player interface and it will show how many images files and how many video files are available inside the device.
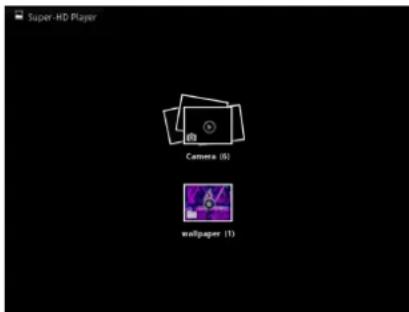
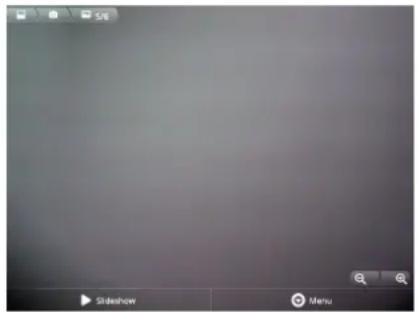
Tap on video, it will show the list of the video files in a small icon. Tap the file that you want to view to start playback. You can adjust the volume, play/pause, backward, forward, go back or go to submenu for more setting options by tapping the appropriate icon on the function bar.


Function bar
Tap on camera, it will show the list of the recorded videos and image files in a small icon. Tap the file that you want to view to start. For photo viewing, the function bar provides options such as enlarge photo, reduce photo, slideshow, Share, Delete, Crop, Rotate Left, Rotate Right, etc for your selection.
Set OSD Language
From application menu, tap on "Setting" and select "Language & keyboard" from the list. Tap on "Select language" and you can see a list of OSD languages. Tap on the language that you want and the OSD language will be set instantly.
Set Keyboard
From application menu, tap on "Setting" and select "Language & keyboard" from the list. Tap on "SliderT Keyboard" and you can see a list of keyboard setup options. Tap on the appropriate options provided.
Set Date and time
From application menu, tap on "Setting" and select "Date & time" from the list. Tick on "Automatic" and the date and time will be set automatically by using network-provided values. Or untick "Automatic" to set date and time manually. You can also adjust time zone, 24-hour format and date format by tapping the appropriate options provided.
About the Device
From application menu, tap on "Setting" and select "About device" to check the device status such as firmware version, battery consumption status, model no., Android OS version.
Troubleshooting
Can not turn on the device
- You may not be able to turn on the device when the battery is below the critical level. Recharge the battery for a few minutes and try to turn it on again.
- Check if the power charger is connected properly and firmly.
The battery working time is too short
The duration of the lithium battery varies with environmental temperature changes and the service conditions. If the environment temperature is too low or too high, the duration of the battery will be affected. It is recommended to use this device at normal temperature.
● Battery consumption varies depending on if the brightness and on time of the screen, the volume level of the loudspeaker as well as the operation status of the central processor (CPU). To save battery, please refer to Power saving mode section of this menu.
No sound from earphone
- Check if the volume setting is adjusted to 0.
- Check whether the audio file is damaged and try to play other audio files to confirm. In the case if the audio file is damaged, it may cause severe noise or staccato.
Can not copy files.
- Check if the device is connected to the computer properly.
- Check if the USB cable is working.
- Check whether the memory capacity available is enough for storage of the copying files.
Made in China
Specifications are subject to change without prior notice. No part of this document may be reproduced or transmitted in any form or by any mean, electronics or mechanical including photocopying and recording or translated to another language for any purpose