O-pen Wide P 2004 - Tablet Pentagram - Free user manual and instructions
Find the device manual for free O-pen Wide P 2004 Pentagram in PDF.


| Product Type | Graphics Tablet |
| Model | Pentagram O-pen Wide P 2004 |
| Working Area (Wide Mode) | 30.48 x 18.41 cm (12.0 x 7.25 in) |
| Working Area (4:3 Mode) | 24.13 x 18.41 cm (9.5 x 7.25 in) |
| Tablet Dimensions | 30.5 x 18.4 cm (12.0 x 7.24 in) |
| Tablet Weight | Approx. 800 g |
| Pen Power | 1 x AAA battery (included) |
| Tablet Power | USB bus power |
| Connectivity | USB 1.1/2.0 |
| Pressure Sensitivity | Yes, adjustable via driver |
| Pen Buttons | 2 side buttons (configurable) |
| Tablet Knobs | 2 knobs with button (Scroll, Zoom, VOL modes) |
| Function Fields | 24 programmable macro keys |
| Operating Systems | Windows 2000/XP/Vista, Mac OS X 10.2.8+ |
| Included Accessories | Pen, pen holder, 2 spare tips, tweezers, AAA battery, driver CD, quick manual |
| Pen Tip Life | Replace when blunt; spare tips included |
| Maintenance | Clean with soft dry cloth; avoid liquids |
| Safety Precautions | Keep away from CRT monitors and strong electromagnetic fields |
| Repairability | User-replaceable pen tip and battery; other repairs by qualified service |
Frequently Asked Questions - O-pen Wide P 2004 Pentagram
User questions about O-pen Wide P 2004 Pentagram
0 question about this device. Answer the ones you know or ask your own.
Ask a new question about this device
Download the instructions for your Tablet in PDF format for free! Find your manual O-pen Wide P 2004 - Pentagram and take your electronic device back in hand. On this page are published all the documents necessary for the use of your device. O-pen Wide P 2004 by Pentagram.
USER MANUAL O-pen Wide P 2004 Pentagram
TIP REPLACEMENT......EN - 4
LEDS AND BUTTONS......EN - 5
TABLET INSTALLATION......EN - 6
USING THE TABLET......EN - 7
TABLET CONFIGURATION ......EN - 8
WINDOWS 2000/XP EN - 8
WINDOWS VISTA......EN - 10
MACRO KEY MANAGER APPLICATION......EN - 10

NOTE! Any information and technical data are subject to change without prior notification and/or indication in this manual.
Copyright © 2007 PENTAGRAM
All rights reserved; copying and reproduction is strictly forbidden.
DE
Copyright © 2007 PENTAGRAM
Copyright © 2007 PENTAGRAM
Installation and User's manual
PENTAGRAM O'Pen Wide (P 2004)

PENTAGRAM
THE PERFECT SIMPLICITY

Introduction
Thank you for purchasing Pentagram O'Pen Wide tablet, a graphical device for your computer. Using O'Pen Wide tablet, you may do much more than previously using a mouse. The tablet has been designed as a tool for graphics professionals and CAD/CAM applications. However, thanks to reasonable price and plenty of functions, Pentagram tablets ale also appropriate for home use.
NOTE! Make sure the tablet is far from a CRT (cathode ray tube) monitor and other sources of strong electromagnetic field as they may interfere with the tablet operation.
Box contents
- PENTAGRAM O'Pen Wide tablet
- Pen
- Pen holder
- Spare pen tips (2 pieces)
- Pen AAA battery
- Tweezers for removing the pen tip
- CDs with drivers and software
- Quick installation manual
Minimum system requirements
• PC – Windows 2000 / XP / Vista operating system
• Mac – MacOS X 10.2.8 or newer
- Free USB port
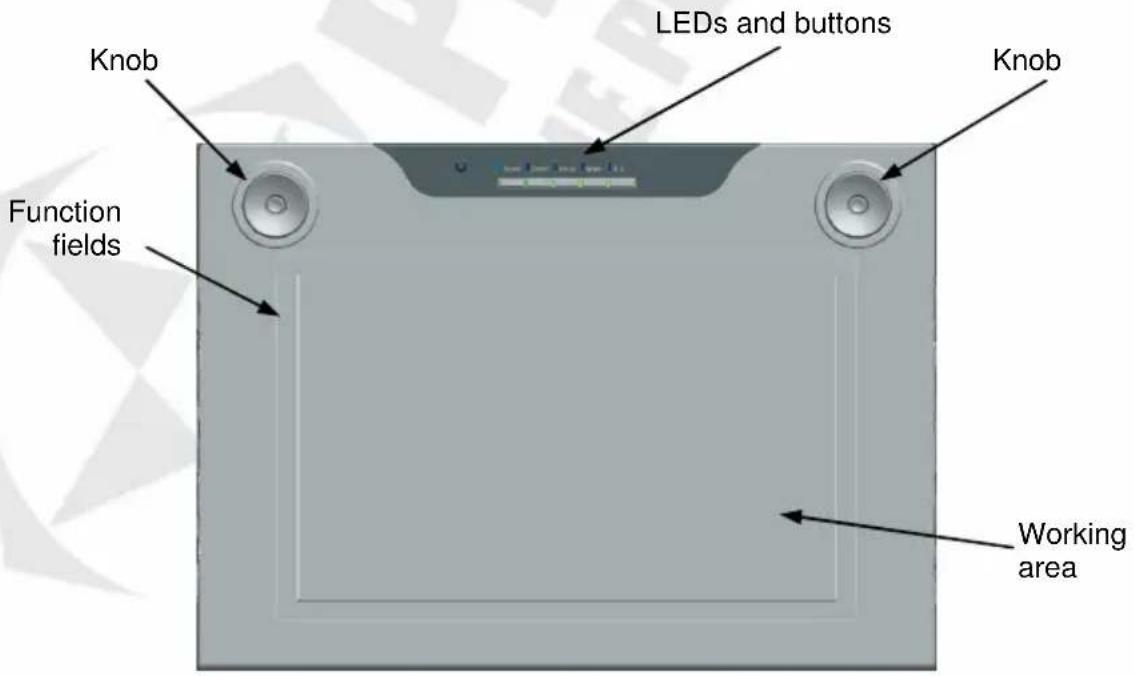
Tablet elements
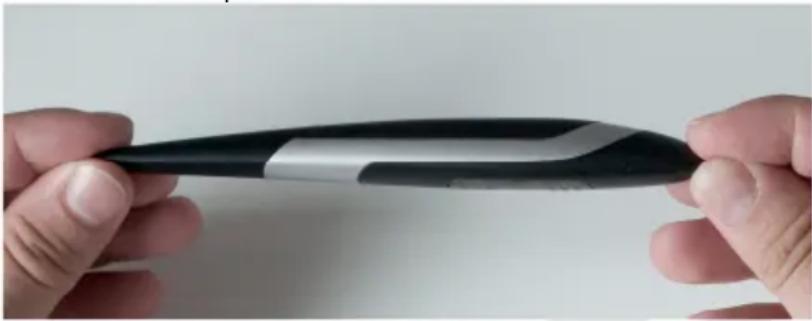
Battery replacement
- Hold the pen as shown in the photo
natural_image
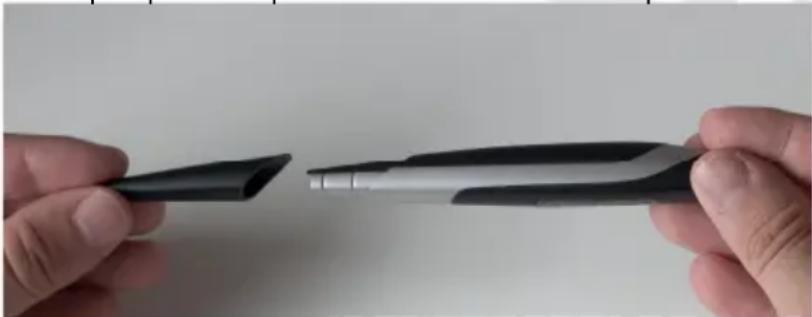
Close-up of two hands holding a black and silver object, possibly a tablet or electronic device (no visible text or symbols)- Pull firmly the back pen part to separate it from the rest of the pen case
natural_image
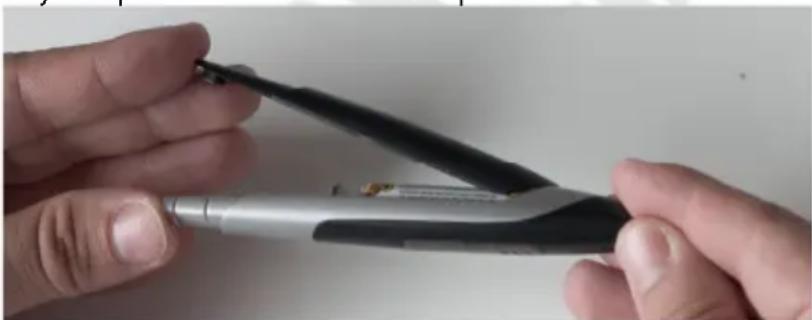
Close-up of hands holding a black and silver electronic device with a small metallic tip, against a plain background (no text or symbols visible)- Open the battery compartment as shown in the picture
natural_image
Close-up of hands holding a small black tool tip, no visible text or symbols- Remove the old battery and insert the new one, observing polarity
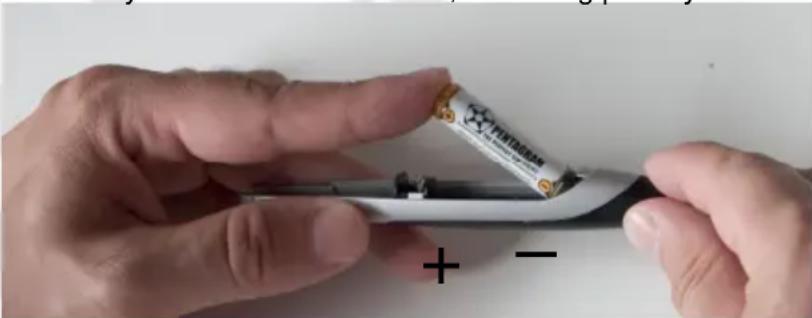
natural_image
Close-up of hands holding a battery with a plus and minus signs, no readable text or symbols on the main subject.- Assemble the pen
Tip replacement
After the pen has been used for a long time, the pen tip will shorten as a result of friction against the tablet surface. A blunt tip does not pass the pressure force properly and should be
replaced. The tablet comes with two spare tips and tweezers facilitating the tip replacement. Follow the steps below to replace the tip:
- Grab the tip with the supplied tweezers and pull it out gently from the pen case.
- Insert a new tip instead of the old one.
- Press the tip in carefully, holding the pen in vertical position.
LEDs and buttons

Power LED – blinks after connecting the tablet to the computer, lights when tracing the pen. The LEDs above the buttons indicate knobs operating mode and work area dimensions. The buttons and knobs operation requires installing the supplied drivers. Both tablet knobs work in the same way. The center knob part serves as a button, and its function depends on the knob operation mode (Scroll, Zoom, VOL). Knob functions may be different from the described ones, depending on the application used.
Scroll – In this mode, the tablet knobs are used for scrolling the window contents vertically and horizontally. The knob button changes the scrolling direction (vertical/horizontal).
Zoom – In this mode, the tablet knobs are used for changing the zoom factor. Pressing and holding the knob button in this mode works as the "Hand" tool.
VOL – In this mode, the tablet knobs are used for adjustment of the sound card general volume. The knob button turns the sound on and off (Mute).
Wide – Sets the tablet working area to 30.48 cm x 18.41 cm (the working area width is limited by the function keys) and is designed for work with a wide-screen display.
4:3 – Sets the tablet working area to 24.13 cm x 18.41 cm (the working area width is limited by vertical grooves visible under the tablet surface) and is designed for work with a standard display.
Tablet installation
Follow the steps below to install the tablet properly. The tablet drivers are designed for Windows 2000/XP and Vista systems.
- Insert the supplied CD with drivers into the CD-ROM drive in the computer.
- If the installer does not launch automatically, click the Start > Run menu, enter X:\setup (where X is the CD-ROM drive letter) and press Enter.
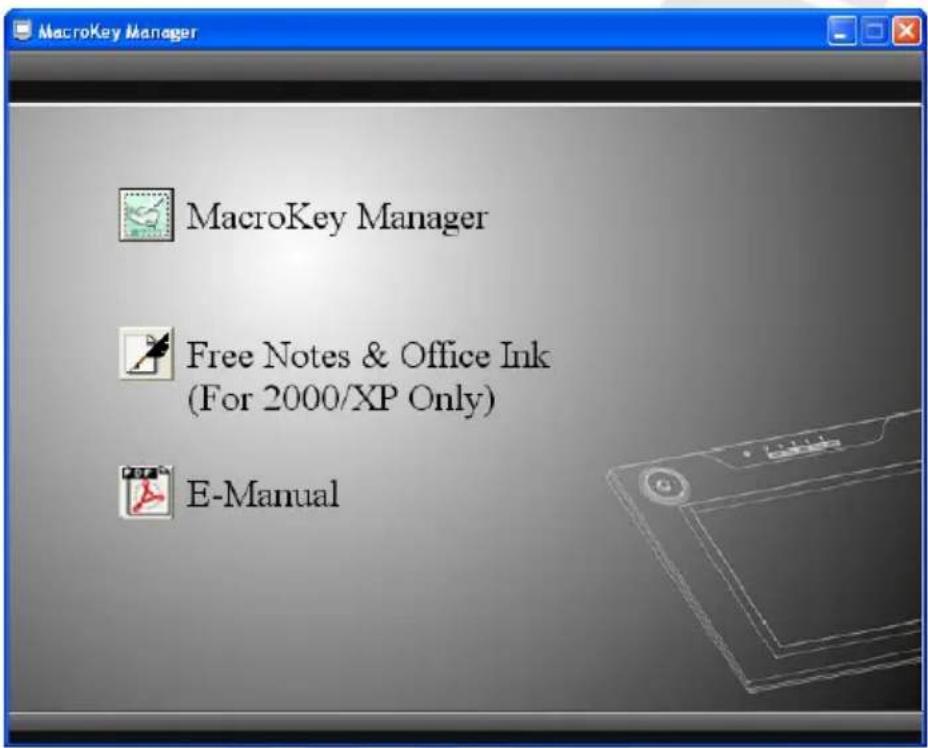
- In the installer window, click the Macro Key Manager, to start the drivers and Macro Key Manager application installer.
- Follow the instructions displayed on the screen to install the drivers and the Macro Key Manager application.
- When the installation finishes, a prompt will display, asking the user to restart the computer. Close all open applications and click the OK button.
- After the computer has restarted, connect the tablet USB cable to a free computer USB port and wait for the system to install the tablet.
- Check whether all tablet functions work properly. A pen movement over the tablet surface should cause the cursor movement on the screen.
Using the tablet
Work with the tablet is very intuitive and comfortable, but the user needs to get used to it. The key to the success in working with the tablet is holding the pen more vertically than when using a ball point pen, and also tracking the cursor movement on the screen rather than looking at the pen.
After the pen is put close enough to the tablet surface, it makes the tablet trace the pen movement, and the cursor moves accordingly. Touching the tablet surface with the pen is equivalent to a click with the left mouse button. The default functions of the pen side buttons depend on the operating system:
- Windows 2000/XP – The right mouse button is replaced with the lower side button of the pen. To perform a double click (double clicking with the left mouse button), either tap the pen against the tablet surface twice in one place very quickly (trying not to displace the pen), or press the upper side button of the pen. The pen side buttons' functions may be changed in the tablet driver.
- Windows Vista – The right mouse button is replaced with the upper side button of the pen. You can also hold the pen touched in one place of the tablet surface and wait for the visual effect. To perform a double click (double clicking with the left mouse button), tap the pen against the tablet surface twice in one place very quickly (trying not to displace the pen).
To save battery, the pen automatically switches into sleep mode when it is not used for several minutes. If you do not use the pen for a longer time, put it in the supplied holder or lay flat in a place where neither the tip nor the side buttons can be pressed. To wake the pen up from the sleep mode, tap its tip against the tablet surface.
Tablet configuration
Windows 2000/XP
You may access the tablet driver configuration by clicking the Tablet icon in the system control panel or by choosing the option Pen Pad... in the context menu of the Macro Key Manager application icon.
About tab
In this tab you can see the most important information concerning the tablet.
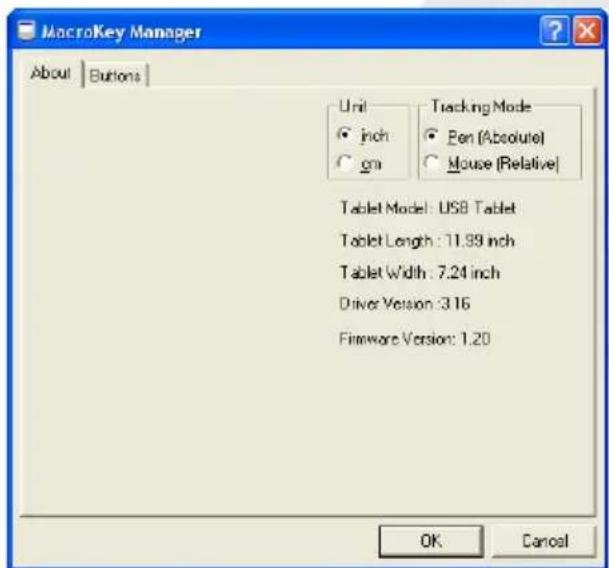
Unit – select if the tablet dimensions are to be displayed in inches (inch) or centimeters (cm) Tracking Mode – select the tracking mode of the pen movements by the tablet:
- Pen (Absolute) – the tablet active area corresponds to the screen area.
- Mouse (Relative) – the tablet pen is treated as the mouse.
Below there is more information about the tablet: Tablet Model, Tablet Length, Tablet Width, Driver Version and Firmware Version.
Buttons tab
On this tab you may assign functions to the pen buttons, as well as adjust the pressure force and height at which the tablet starts tracing the pen.
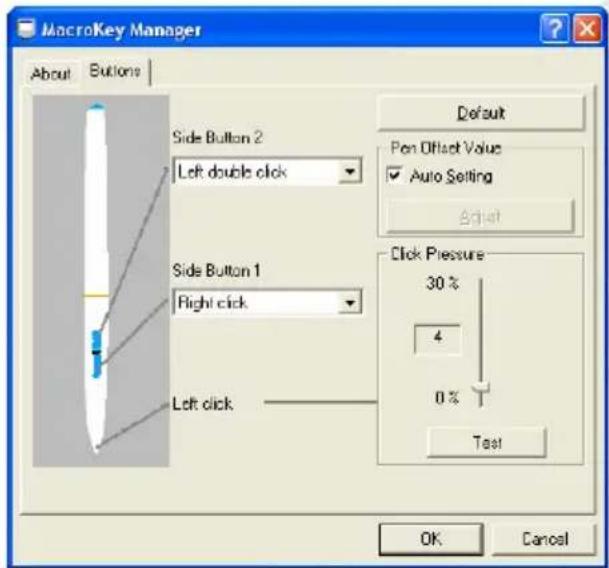
Side Button 2 – assigning a function to the upper side button of the pen.
Side Button 1 – assigning a function to the lower side button of the pen.
Default – restoring the default settings.
Pen Offset Value – to use the default tablet values, tick the Auto Setting field. To adjust the height, untick the Auto Setting field, click the Adjust button and follow the instructions on the screen.
Click Pressure – setting the pressure sensitivity.
Test – After clicking this button, a window will open, in which you may test the new pen sensitivity settings.
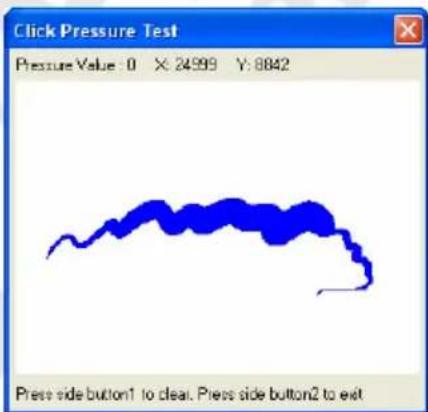
To clear the work area, press the lower side button of the pen. To close the test window, press the upper side button of the pen.
Windows Vista
Tablet support is included in Windows Vista. Basic pen options (turning the pen buttons on and off, configuration of their parameters) may be configured in the Pen and input devices applet, which is visible in the classic layout of the system control panel.
Macro Key Manager application
This application enables the configuration of function fields and assigning functions to them depending on the active application. By default, some keys are configured for Windows 2000, XP and Vista systems, as well as for Photoimpact XL SE and Photoshop elements 4.0 programs.
Application context menu
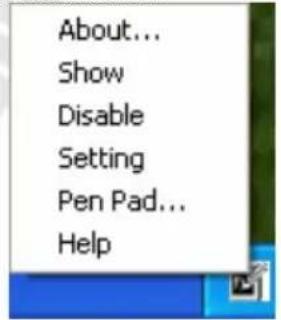
Clicking the Macro Key Manager application icon in the system tray (next to the clock) with the right mouse button causes the context menu to appear. Its items are described below:
About... – Opens the window with information about the software version, driver version and firmware version.
Show – Displays the main application window. Double-clicking on the application icon has the same effect.
Disable / Enable – Turns off/on the function fields.
Setting – Opens the window with the application settings.
Pen Pad... – Opens the driver configuration window.
Help – Displays the application help file.
Settings window
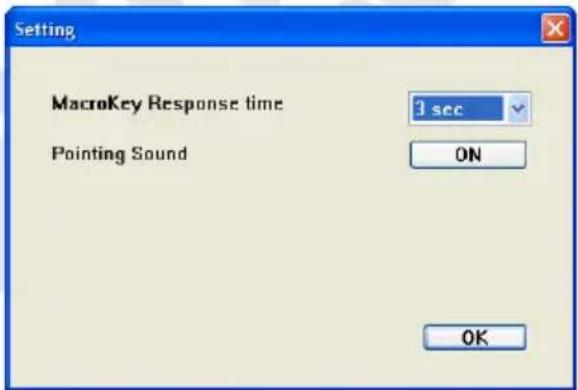
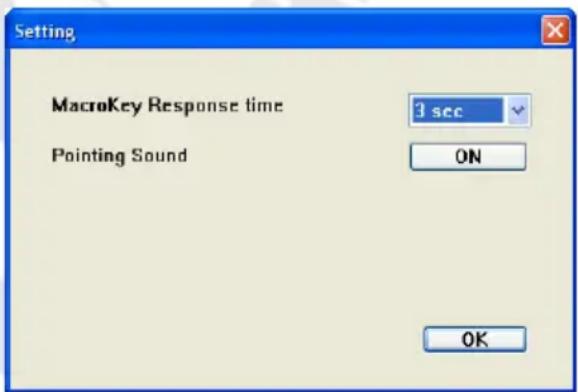
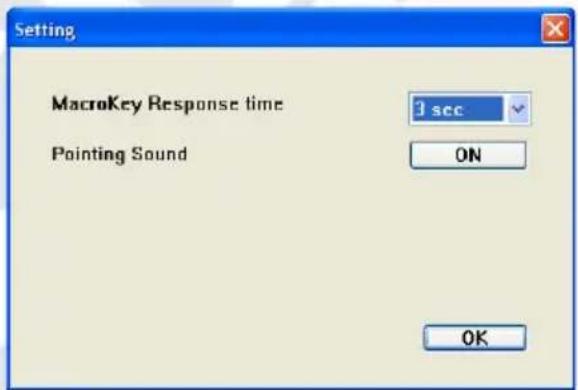
MakroKey Response time – When the pen touches a function field, this is the time after which the function assigned to the field is performed. The value – when choosing 0, it is enough to tap a function field with the pen to perform its function.
Pointing Sound – You may select whether tapping the tablet surface with the pen is to be signaled with a sound (ON) or not (OFF).
Main application window
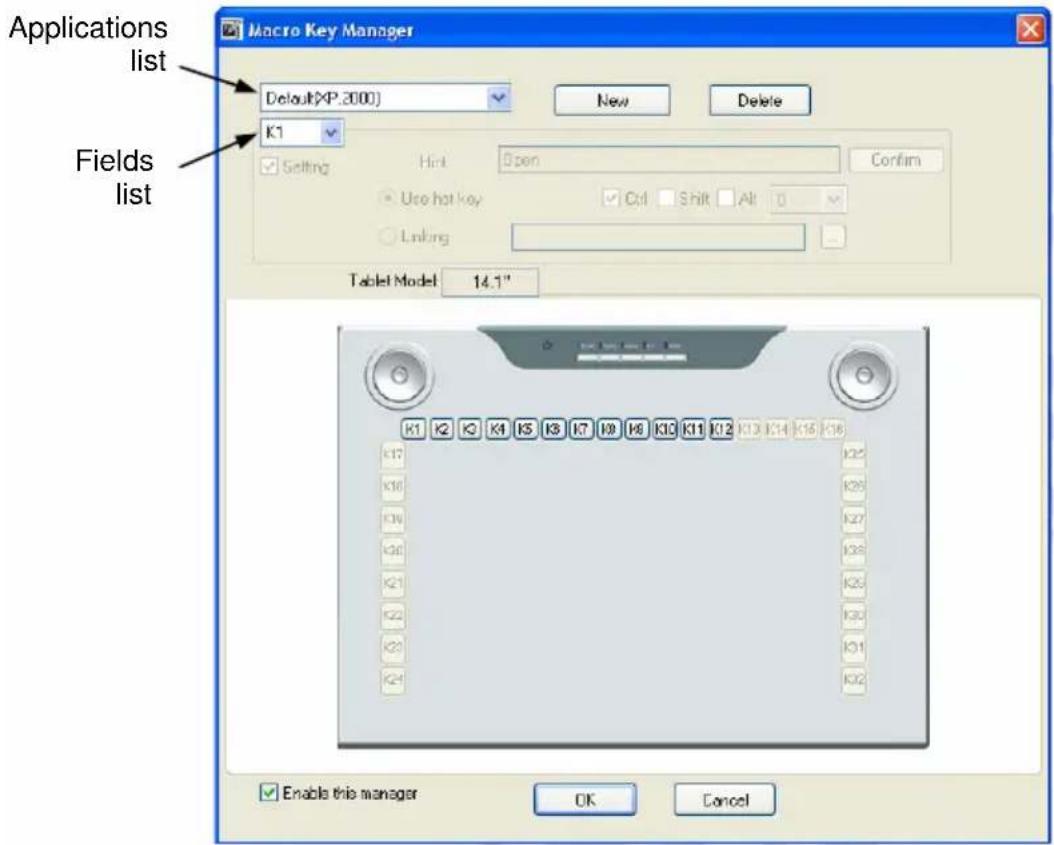
Applications list – Choose from the list the application, for which you want to configure the function fields.
New – Add a new application to the list.
Delete – Delete the selected application from the applications list (applications configured by default cannot be removed).
Function fields list – Choose a field, the settings of which you want to change (fields configured by default cannot be modified). To choose a function field for modification, you can also click the button symbolizing its field in the preview.
Setting - Tick this field to turn on the selected function field.
Hint - Enter in the field the contents of the balloon, which will display on the monitor when the pen is above the selected function field.
Linking – Enter the path to the file, which will be launched after pressing the selected function field. To browse folders in order to find the file, press the ... button.
Confirm – Press this button to save the settings of the selected function field.
Enable this manager – Tick this field to turn on the function fields. Untick to turn them off.
OK – Close the main window with a prompt that current configuration has not been saved.
Cancel – Close the main window skipping the unsaved configuration changes.
Adding a new application to the list
- Click the New button in the main application window.
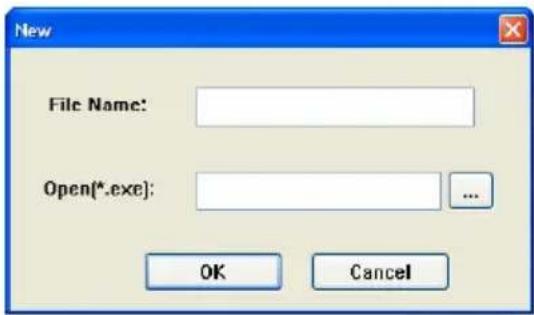
- In the New window, in the File Name field enter the application name which will be displayed on the applications list, and then in the Open(*.exe) field enter the executable file name or click the ... button to display the list of applications installed in the system.
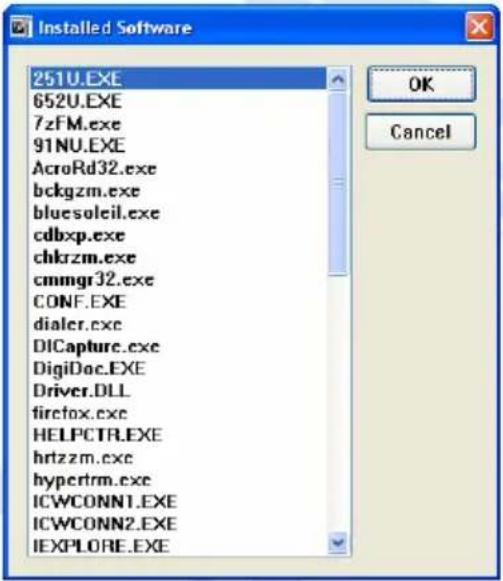
- After clicking the ... button, the window Installed Software will display. It contains the list of applications installed in the system. Highlight the application you want to add to the list and click the OK button to select the application and close the window. Click the Cancel button to close the window without choosing an application.
- After selecting the displayed application name and the executable file, click OK to add the application to the list and close the window, or Cancel, to close the window without adding an application.

natural_image
Close-up of two hands holding a black and silver object with a white stripe, against a plain background (no text or symbols visible)natural_image
Close-up of hands holding a black and silver electronic device with a small metallic tip, against a plain background (no text or symbols visible)natural_image
Close-up of hands holding a small electronic device with black leads and a metallic handle (no visible text or symbols)natural_image
Close-up of hands holding a battery labeled 'Transistor' inserted into a small electronic component (no text or symbols visible)Fenster Settings
natural_image
Close-up of two hands holding a black and white object with a curved edge, against a plain background (no text or symbols visible)natural_image
Close-up of hands holding a black electronic device with a metallic handle, no visible text or symbolsnatural_image
Close-up of hands holding a handheld electronic device with black leads (no visible text or symbols)natural_image
Close-up of hands holding a battery with a plus and minus signs, no readable text or symbols on the main subject.- Złóż piórko
Wymiana rysika
Okno Settings
,EN 61000-3-2:2000, EN 61000-3-3:1995/A1:2001 and
EN 55024:1998/A1:2001/A2:2003 (IEC 61000-4-2:1995/A2:2000, IEC 61000-4-3: 2002, IEC
61000-4-4:1995/A2: 2001,
IEC 61000-4-5:1995/A1:2000, IEC 61000-4-6:1996/A1:2000, IEC 61000-4-8:1993/A1:2000,
IEC 61000-4-11:1994/A1:2000)
- Copyright © 2007 PENTAGRAM
- DE
- Installation and User's manual
- PENTAGRAM O'Pen Wide (P 2004)
- Introduction
- Box contents
- Minimum system requirements
- Battery replacement
- Tip replacement
- LEDs and buttons
- Tablet installation
- Using the tablet
- Tablet configuration
- Windows 2000/XP
- About tab
- Buttons tab
- Windows Vista
- Macro Key Manager application
- Application context menu
- Settings window
- Main application window
- Adding a new application to the list
- Fenster Settings
- Wymiana rysika
- Okno Settings
Brand : Pentagram
Model : O-pen Wide P 2004
Category : Tablet