
GZ 2010TT - Welding machine Guzzanti - Free user manual and instructions
Find the device manual for free GZ 2010TT Guzzanti in PDF.


| Product Type | Welding Machine (MIG/MAG) |
| Model | GZ 2010TT |
| Brand | Guzzanti |
| Input Voltage | 230 V ~ 50/60 Hz |
| Fuse | 16 A |
| Welding Current Range | 30 – 200 A |
| Duty Cycle (at 40°C) | 60% @ 200 A, 100% @ 130 A |
| Wire Diameter | 0.6 – 1.0 mm (steel), 0.8 – 1.0 mm (stainless), 1.0 mm (aluminum) |
| Welding Processes | MIG/MAG, Flux-cored (FCAW), Lift TIG |
| Dimensions (L x W x H) | 450 x 230 x 350 mm |
| Weight | 15 kg |
| Protection Class | IP21S |
| Insulation Class | F |
| Cooling System | Fan forced |
| Gas Connection | G 1/4" inlet |
| Welding Torch | Euro connection, 3 m cable |
| Work Clamp | 3 m cable included |
| Accessories Included | Gas regulator, welding mask, wire brush, contact tips |
| Safety Features | Overheating protection, overload protection, voltage reduction device |
| Maintenance | Clean torch and air vents regularly; replace contact tips when worn |
| Spare Parts Availability | Contact Guzzanti authorized service centers |
| Reparability | Repairs should be performed by qualified technicians only |
Frequently Asked Questions - GZ 2010TT Guzzanti
User questions about GZ 2010TT Guzzanti
0 question about this device. Answer the ones you know or ask your own.
Ask a new question about this device
Download the instructions for your Welding machine in PDF format for free! Find your manual GZ 2010TT - Guzzanti and take your electronic device back in hand. On this page are published all the documents necessary for the use of your device. GZ 2010TT by Guzzanti.
USER MANUAL GZ 2010TT Guzzanti
natural_image
Exterior view of a white electric heater with control panel and ventilation grilles (no text or symbols visible)220 - 240 V\~50 Hz 1700 - 2000 W
natural_image
Technical line drawing of a mechanical clamp or clamping device with a screwdriver inserted (no text or symbols)natural_image
Symbol of a trash bin crossed with no text or numbers, representing environmental restriction (no text present)natural_image
Exterior view of a white electric heater with control panel and ventilation grilles (no text or symbols visible)220 - 240 V\~50 Hz 1700 - 2000 W
natural_image
Technical line drawing of a mechanical clamp or bracket with a screwdriver inserted (no text or symbols)natural_image
Symbol of a trash bin crossed with two diagonal lines, representing no waste or discharge (no text or labels)
natural_image
Exterior view of a white electric heater with control panel and ventilation grilles (no text or symbols visible)220 - 240 V\~50 Hz 1700 - 2000 W
natural_image
Technical line drawing of a mechanical clamp or bracket with a screwdriver inserted (no text or symbols)natural_image
Symbol of a trash bin crossed with no text or numbers, representing environmental protection (no text present)natural_image
Exterior view of a white electric heater with control panel and ventilation grilles (no text or symbols visible)220 - 240 V\~50 Hz 1700 - 2000 W
natural_image
Technical line drawing of a mechanical clamp or clamping device with a screwdriver inserted (no text or symbols)natural_image
Symbol of a trash bin crossed with no text or numbers, representing environmental hazard (no text present)natural_image
Exterior view of a white electric heater with control panel and ventilation grilles (no text or symbols visible)220 - 240 V\~50 Hz 1700 - 2000 W
natural_image
Technical line drawing of a mechanical clamp or bracket with a screwdriver inserted (no text or symbols)natural_image
Symbol of a trash bin crossed with no text or numbers, representing environmental protection (no text present)natural_image
Exterior view of a white electric heater with control panel and ventilation grilles (no text or symbols visible)220 - 240 V\~50 Hz 1700 - 2000 W
natural_image
Technical line drawing of a mechanical clamp or bracket with a screwdriver inserted (no text or symbols)natural_image
Symbol of a trash bin crossed with no text or numbers, representing environmental protection (no text present)natural_image
Exterior view of a white electric heater with control panel and ventilation grilles (no text or symbols visible)220-240V\~50Hz 1700-2000W
This product is only suitable for well insulated spaces or occasional use.
TECHINICAL CHARACTERISTICS
GZ 2010 TT - Convector heater with thermostat, timer and fan
IMPORTANT
Read these instructions fully before using the heater. Retain these instructions for future reference.
ASSEMBLY OF THE HEATER
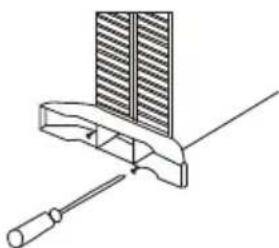
Before using the heater, the feet (supplied separately in the carton), must be fitted to the unit. These are to be attached to the base of the heater using the 4 screws provided, taking care to ensure that they are located correctly in the bottom ends of the heater side moldings
natural_image
Technical line drawing of a mechanical clamp or clamping device with a screwdriver inserted (no text or symbols)- Do not use the heater unless the feet are correctly attached.
- Ensure the power supply to the socket into which the heater is plugged is in accordance with the rating label on the heater and that the socket is earthed.
- Keep the mains lead away from the hot body of the heater.
- Do not use this heater in the immediate surroundings of a bath, a shower or a swimming pool.
- Never place the heater where it may fall into a bathtub or other water container.
- Do not use outdoors.
- Do not cover or obstruct any of the heat outlet grilles or the air intake openings of the heater.
- Do not place the heater on carpets having a very deep pile.
- Always ensure that the heater is placed on a firm level surface. Ensure that the heater is not positioned close to curtains or furniture as this could create a fire hazard.
- Do not position the heater in front of, or immediately below, a wall socket.
- Do not insert any object through the heat outlet or air intake grilles of the heater.
- Do not use the heater in areas where flammable liquids are stored or where flammable fumes may be present.
- The appliance is not intended for use by young children or infirm persons without supervision.
- Young children should be supervised to ensure that they do not play with the appliance.
- Always unplug the heater when moving it from one location to another.
- Do not use the heater if the power cord is damaged. If the power cord is damaged it must be replaced by a recognized service agent or other qualified person.
- The appliance in not intended for use by person (including children) with reduced physical, sensory or mental capabilities, or lack of experience and knowledge, unless they have been given supervision or instruction concerning use of the appliance by a person responsible for their safety.
- Do not cover. If covered, there is the risk of overheating or even fire.

- In order to avoid a hazard due to inadvertent resetting of the thermal cutout, this appliance must not be supplied through an external switching device, such as a timer, or connected to a circuit that is regularly switched on and off by the utility.
- Children of less than 3 years should be kept away unless continuously supervised.
- Children aged from 3 years and less than 8 years shall only switch on/off the appliance provided that it has been placed or installed in its intended normal operating position and they have been given supervision or instruction concerning use of the appliance in a safe way and understand the hazards involved. Children aged from 3 years and less than 8 years shall not plug in, regulate and clean the appliance or perform user maintenance.
- CAUTION Some parts of this product can become very hot and cause burns. Particular attention has to be given where children and vulnerable people are present.
NOTE: It is normal when the heaters are turned on for the first time or when they are turned on after having not been used for a long period of time the heaters may emit some smell and fumes. This will disappear when the heater has been on a short while.
Choose a suitable location for the heater, taking into account the safety instructions above.
Insert the plug of the heater into a suitable socket.
Turn THERMOSTAT KNOB fully in a clockwise direction to the maximum setting.
Turn on the heating elements by means of HEATER SWITCHES on the side panel. Turn on the heating elements by means of HEATER SWITCH on the side panel. You may obtain three heating settings (750/1250/2000W) by turning the heater switch knob in a clockwise direction.
When the desired room temperature has been reached, the thermostat knob should be turned slowly anticlockwise until the thermostat is heard to click off and the lights on the element switches are seen to go out. After this the heater will keep the air temperature in the room at the set level by switching on and off automatically.
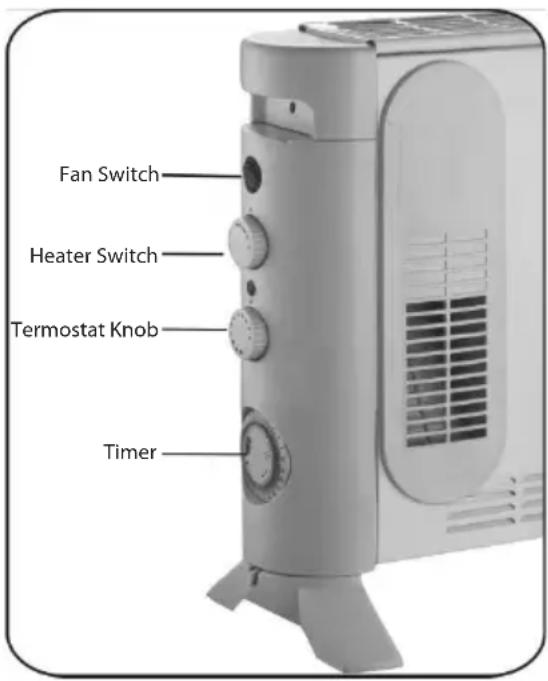
Fan Operation: This is operated by means of the switch with the fan symbol along side it. The fan will only operate with the thermostat in the "on" position and can be used when the heating elements are "on" to blow warm air into the room. In warm conditions the fan can be used with the heating elements "off" to blow cool air into the room.
This model is also fitted with a 24hr timer which has 96 segments around its circumference, each segment being equivalent to 15 minutes of time. With the aid of this timer it is possible to preset the time and duration of the period(s) that it is desired the heater will operate, in any 24hr period.
Timer Operation
The centre of the timer has a 3 position slide switch.
In the central position (denoted by the clock symbol) the timer will switch the heater on and off at times set by the segments, (see setting the timer, below).
The position denoted by the "I", is a timer override position. The timer will continue to run but power will be fed continuously to the heater. This enables the heater to be on all the time if required.
In the position denoted by the "O", the timer continues to run but no power is fed to the heater.
Setting the Timer
Ensure the slide switch on the timer is at the mid position next to the clock symbol.
Rotate the outer ring of the timer in a clockwise direction until the current time is lined up with the arrow pointer, i.e. if the time the timer is being set is 8 p.m., rotate the outer ring until the number 20 is in line with the arrow pointer.
Set the time the heater is required to run by pulling the segments around the outer ring forward appropriate to the running period(s) required.
When set, the heater will operate each day during the times programmed. Note, the heater must always be plugged into a power socket, the element switches must be in the on position and the thermostat must be suitably set to ensure the heater will come on.
If the heater is required to run continuously the slide switch on the timer should be set to the "I" position. If it is subsequently required to revert back to timer operation, the slide switch on the timer should be set to the central (clock) position.
Note: When using in timer mode, due consideration should be given to the fact that the heater may come on whilst unattended.
PROTECTION AGAINST OVERHEATING
- An additional fitted safety thermostat protects the heater against overheating and switches it off automatically. The service lamp then goes out.
- If the device switches itself off, disconnect the mains plug from the socket. The heater is ready for service again after a short cooling-off phase (approx. 15 minutes). Plug the mains plug back into the socket.
- If this repeats itself, first check whether the thermostat switch is set correctly or if objects hinder the heating operation.
CLEANING THE HEATER
Always un-plug the heater from the wall socket and allow it to cool down before cleaning.
Clean the outside of the heater by wiping with a damp cloth and buff with a dry cloth. Do not use any detergents or abrasives and do not allow any water to enter the heater.
STORING THE HEATER
When the heater is not used for long periods of time, it should be protected from dust and stored in a clean dry place.
Note: this appliance is not intended for use by persons (including children) with reduced physical, sensory or mental capabilities, or lack of experience and knowledge, unless they have been given supervision or instruction concerning use of the appliance by a person responsible for their safety.
Children should be supervised to ensure that they do not play with the appliance.
Environment
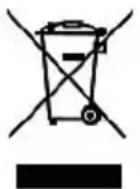
Meaning of crossed -out wheeled dustbin:
Do not dispose of electrical appliances as unsorted municipal waste, use separate collection facilities.
Contact you local government for information regarding the collection systems available.
If electrical appliances are disposed of in landfills or dumps, hazardous substances can leak into the groundwater and get into the food chain, damaging your health and well-being.
When replacing old appliances with new ones, the retailer is legally obligated to take back your old appliance for disposals at least free of charge.
Erp Table for GZ 2010 TT
| Item Symbol Value | Unit Item Unit | |||||
| Heat output Type of heat input, for electric storage local space heaters only (select one) | ||||||
| Nominal heat output | P_nom | 1.85 KW | manual heat charge control, with integrated thermostat | Not applicable | ||
| Minimum heat output (indicative) | P_min | 0.688 KW | manual heat charge control with room and/or outdoor temperature feedback | Not applicable | ||
| Maximum continuous heat output | P_max,c | 1.85 KW | electronic heat charge control with room and/or outdoor temperature feedback | Not applicable | ||
| Auxiliary electricity consumption fan assisted heat output Not applicable | ||||||
| At nominal heat output | el_max | 0.015 (fan motor) | KW Type of heat output/room temperature control (select one) | |||
| At minimum heat output | el_min | 0.015 (fan motor) | KW single stage heat output and no room temperature control | [no] | ||
| In standby mode el | _SB | 0 KW T | two or more manual stages, no room temperature control | [no] | ||
| with mechanic thermostat room temperature control | [yes] | |||||
| with electronic room temperature control | [no] | |||||
| electronic room temperature control plus day timer | [no] | |||||
| electronic room temperature control plus week timer | [no] | |||||
| Other control options (multiple selections possible) | ||||||
| room temperature control, with presence detection | [no] | |||||
| room temperature control, with open window detection | [no] | |||||
| with distance control option [no] | ||||||
| with adaptive start control [no] | ||||||
| with working time limitation [no] | ||||||
| with black bulb sensor | [no] | |||||
DISPOSAL OF USED ELECTRICAL AND ELECTRONIC EQUIPMENT
natural_image
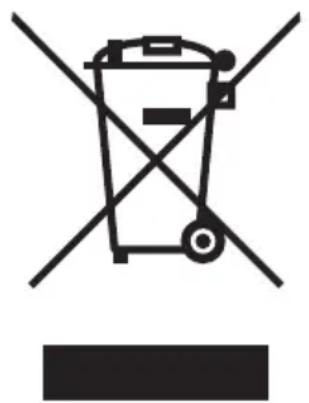
Symbol of a trash bin crossed with no text or numbers, representing environmental restriction (no text present)This symbol on products or original documents means that used electric or electronic products must not be added to ordinary municipal waste. For proper disposal, renewal and recycling hand over these appliances to determined collection points. Alternatively, in some European Union states or other European countries you may return your appliances to the local retailer when buying an equivalent new appliance. Correct disposal of this product helps save valuable natural resources and prevents potential negative effects on the environment and human health, which could result from improper waste disposal. Ask your local authorities or collection facility for more details. In accordance with national regulations penalties may be imposed for the incorrect disposal of this type of waste.
For business entities in European Union states
If you want to dispose of electric or electronic appliances, ask your retailer or supplier for the necessary information.
Disposal in other countries outside the European Union.
This symbol is valid in the European Union. If you wish to dispose of this product, request the necessary information about the correct disposal method from the local council or from your retailer.
- This product is only suitable for well insulated spaces or occasional use.
- TECHINICAL CHARACTERISTICS
- IMPORTANT
- ASSEMBLY OF THE HEATER
- Timer Operation
- Setting the Timer
- PROTECTION AGAINST OVERHEATING
- CLEANING THE HEATER
- STORING THE HEATER
- Environment
- DISPOSAL OF USED ELECTRICAL AND ELECTRONIC EQUIPMENT
- For business entities in European Union states
- Disposal in other countries outside the European Union.
Brand : Guzzanti
Model : GZ 2010TT
Category : Welding machine