
IAN 279035 - Lighting Livarno Lux - Free user manual and instructions
Find the device manual for free IAN 279035 Livarno Lux in PDF.


| Product Type | LED Ceiling Light |
| Brand | Livarno Lux |
| Model | IAN 279035 |
| Dimensions (L x W x H) | 40 x 40 x 10 cm |
| Weight | 1.2 kg |
| Power Supply | 220-240 V, 50/60 Hz |
| Power Consumption | 24 W |
| Luminous Flux | 2000 lm |
| Color Temperature | 3000 K (warm white) |
| Lifespan | 25,000 hours |
| Energy Efficiency Class | A+ |
| Material | Metal and plastic |
| Mounting Type | Ceiling mount |
| Protection Class | IP20 |
| Suitable Rooms | Indoor, dry areas (e.g., living room, bedroom) |
| Special Features | Built-in LED, overheat protection |
| Maintenance | Wipe with dry cloth; do not use abrasive cleaners |
| Spare Parts | LED module not replaceable; consult customer service for issues |
| Warranty | 3 years (standard) |
Frequently Asked Questions - IAN 279035 Livarno Lux
User questions about IAN 279035 Livarno Lux
0 question about this device. Answer the ones you know or ask your own.
Ask a new question about this device
Download the instructions for your Lighting in PDF format for free! Find your manual IAN 279035 - Livarno Lux and take your electronic device back in hand. On this page are published all the documents necessary for the use of your device. IAN 279035 by Livarno Lux.
USER MANUAL IAN 279035 Livarno Lux
Operation and Safety Notes
IAN 279035
GB IE NI
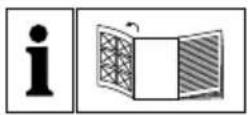
Before reading, unfold the page containing the illustrations and familiarise yourself with all functions of the device.
14104402L
text_image
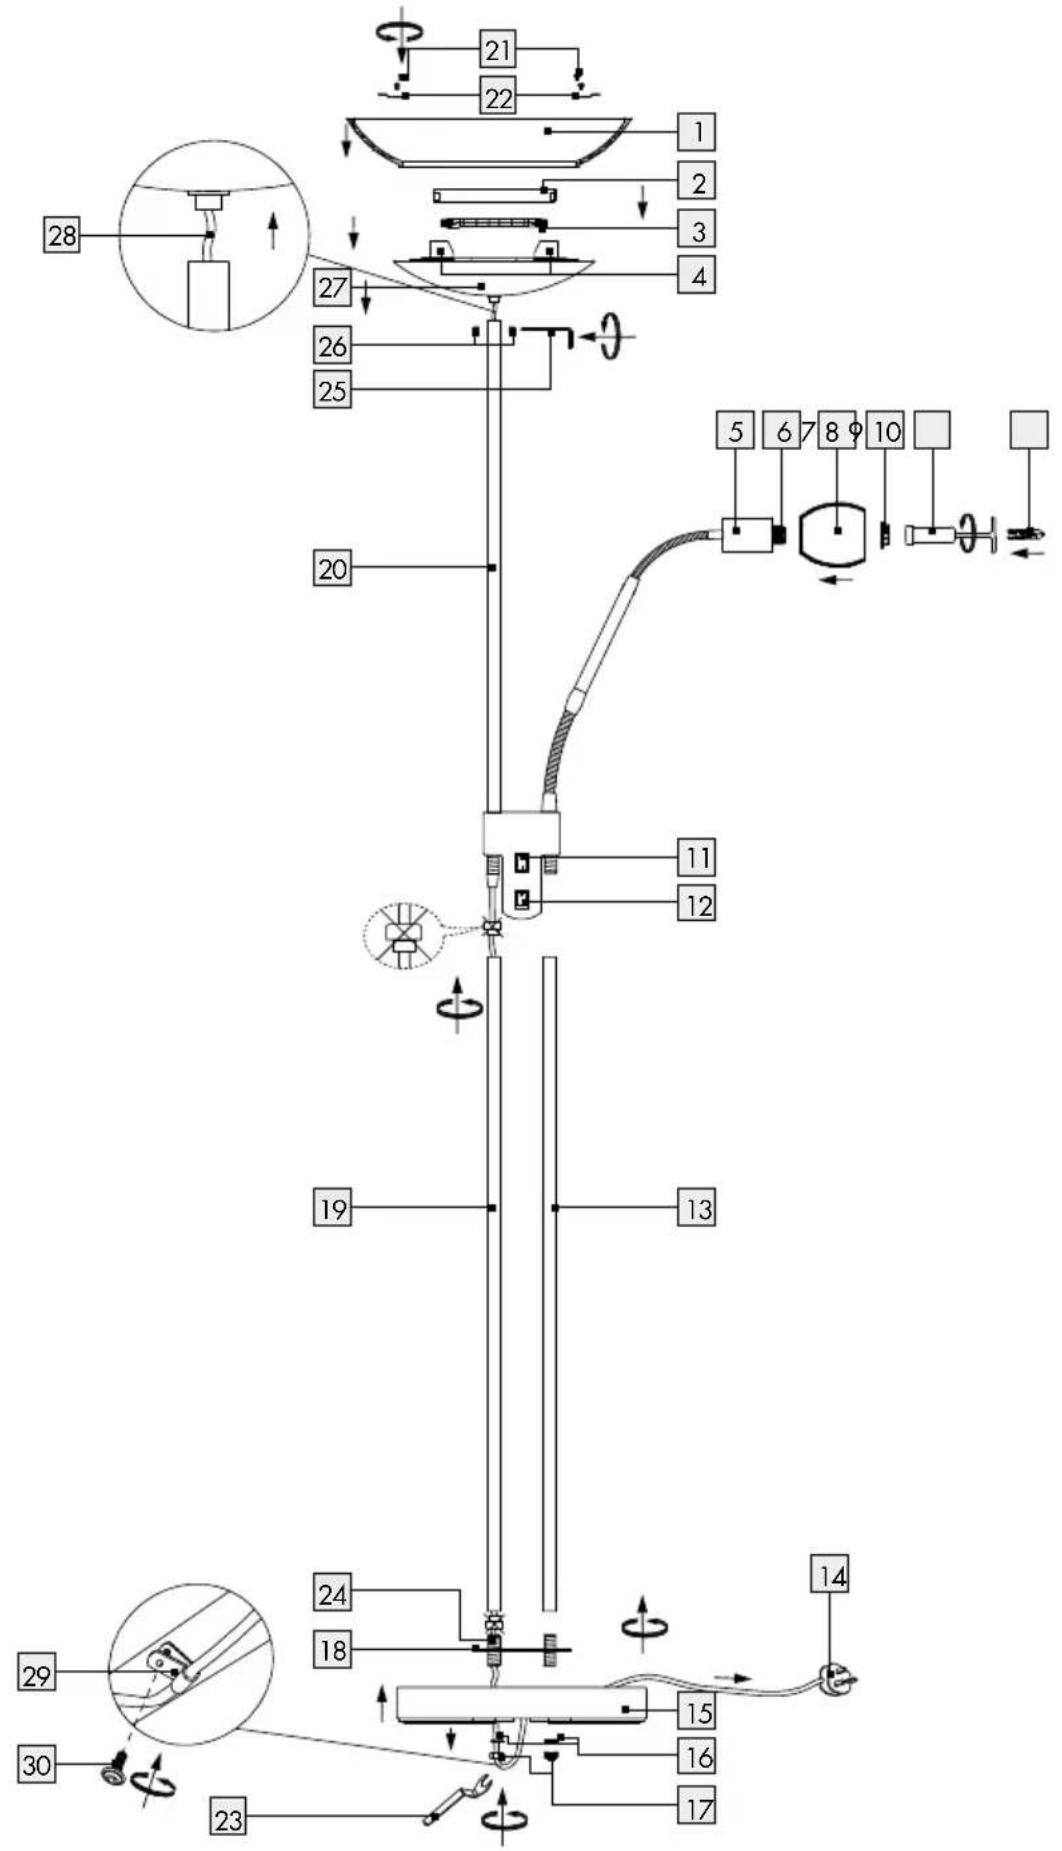
Technical schematic diagram with numbered components and directional arrows indicating assembly or control layoutList of pictograms used....Page 6
Introduction......Page 6
Proper use....Page 6
Included items Page 6
Description of parts and features....Page 7
Technical data......Page 7
Safety Page 7
Safety advice......Page 7
Preparing the product for use....Page 8
Assembling the lamp....Page 8
Switching the lamp on/off....Page 9
Directing the lamp....Page 9
Replacing a bulb....Page 9
Care and cleaning......Page 9
Disposal Page 10
Warranty and Service......Page 10
Warranty Declaration......Page 10
Service address......Page 10
Declaration of Conformity....Page 10
Manufacturer......Page 10
| List of pictograms used: | |||
 | Read the instructions! |  | Caution!Risk of electric shock |
 | Volt (AC) | 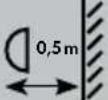 | Risk of fire! Install the light so that it is at least 0.5 m from any illuminated materials. |
 | Hertz (mains frequency) | 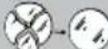 | If damaged, the protective cover must be removed immediately. |
 | Watt (effective power) Safe working |  | |
 | Protection class I |  | Dispose of packaging and device in an environmentally-friendly way! |
 | Observe the warning and safety instructions! | ||
Halogen father & child uplighter floor lamp
●Introduction

We congratulate you on the purchase of your new device. You have chosen a high quality product. Please read carefully
and completely through these operating instructions. Fold out the page with the illustrations. These instructions form part of the product and contain important information about bringing the product into use and its handling. Always observe all the safety advice. Check that the correct mains voltage is available and that all the parts have been properly assembled before bringing into use. Should you have any questions or be uncertain as to how to operate the device, please get in touch with your dealer or service point. Please keep these instructions in a safe place and hand them on to a third party if necessary.
●Properuse
This light is suitable only for interior use, in dry and enclosed spaces. This lamp is intended for use only in a domestic environment.
Includeditems
Check that all the items and accessories are present and that the lamp is in perfect condition immediately after unpacking.
1 Halogen father & child uplighter floor lamp, Model 14104402L
2 Lamp glasses
1 Halogen Lamp, 28 W, G9
1 Halogen Lamp, 230 W, R7S
1 Threaded ring
1 Tool
1 Support tube (reading lamp)
1 Support tube (uplight)
2 Threaded rods (support tube mount)
1 Support tube mount
2 Serrated lock washers
2 Nuts
1 Open spanner
1 Socket head wrench
1 Cable holder
1 Screw (for cable holder)
1 Operating instructions
• Description of parts and features
1 Lamp glass (torchiere)
2 Guard plate
3 Bulb (torchiere)
4 Socket (torchiere)
5 Flexible arm
6 Socket (reading light)
7 Lamp glass (reading light)
8 Threaded ring (reading light)
9 Tool
10 Bulb (reading light)
11 ON/ OFF switch (torchiere)
12 ON / OFF switch (reading light)
13 Support tube (reading light)
14 Mains lead with mains plug
15 Base
16 Serrated washers
17 Nuts
18 Support tube holder
19 Support tube (torchiere)
20 Upper support tube
21 Screws
22 Retaining springs
23 Open-end wrench
24 Threaded bars
25 Socket head wrench
26 Hexagonal socket head screw
27 Floodlight head
28 Cable
29 Cable holder
30 Screw (for cable holder)
●Technicaldata
Model No.: 14104402L
Operating voltage: 230-240V\~, 50Hz
Light bulb: halogen lamp:
220-240V\~, G9, 28W;
R7S 230 W (included)
Protection class:
●Safety

Safetyadvice
The right to claim under the guarantee shall be rendered invalid in respect of damage caused by the non-observance of these operating instructions! No liability is accepted for consequent damage! No liability is accepted for damage to property or persons caused by improper handling or non-observance of the safety advice!

To avoid danger to life from electric shock
■ Every time before connecting the lamp the mains, check it and the mains lead for damage. Never use your light if you find it is damaged in any way.
CAUTION! A damaged light bulb means your life is at risk from electric shock. If there is any damage, repairs to be carried out or other problems related to the light bulb, please contact the service centre or a qualified electrician.
In order to prevent hazards, if the outer flexible cable of this lamp becomes damaged it may only be replaced by the manufacturer, a service representative of the manufacturer or a similar specialist!
Before assembly, ensure that the mains voltage available corresponds to the operating voltage necessary of the light (230-240 V\~).
■ Never let the lamp come into contact with water or other liquids.
■ Always unplug the light from the mains prior to assembly, disassembly, cleaning or if the light will not be used for extended periods.
■ Never open or insert anything into electrical fittings or equipment. Doing this sort of thing can lead to a serious danger to life from electric shock.

To avoid danger of fire and injury
CAUTION! RISK OF INJURY! Check bulbs for damage immediately after unpacking. Do
not fit defective bulbs into the light. If they are, contact the service point for a replacement.
■ CAUTION! RISK OF INJURY FROM
BURNS! Ensure the lamp has been switched off and allowed to cool before you touch it. In this way you will avoid the danger of burns. Bulbs give off a lot of heat around the top of the lamp.
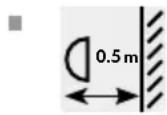
RISK OF FIRE! Install the light so that it is at least 0.5 m from any illuminated materials. Fire can result in development of too much heat.
Immediately replace the faulty light bulb with a new one. Remove the lamp from the socket before changing the light bulb.
- Do not cover the light or the mains plug with objects. Excessive heat can result in a fire.
■ Never leave the lamp operating unattended.
If damaged, the protective cover must be removed immediately.
- Do not allow the lamp or the packaging materials to lie around unattended. Plastic film or bags, Styrofoam etc. can turn into dangerous toys for children.

Working safely
Only use 220-240 V\~ halogen lamps with G9 base and a maximum output of 28 Watt for the reading light. Only use 220-240 V\~ halogen lamps with R7S base and a maximum output of 230 Watt for the torchiere.
- Install the light so that it is protected from moisture and dirt.
Prepare carefully before assembly and allow yourself enough time. Lay out all the individual components and additional tools or materials required so that you can see and reach them.
- Remain alert at all times and always watch what you are doing. Always proceed with caution and do not assemble the lamp if you cannot concentrate or feel unwell.
● Preparing the product for use
- Assembling the lamp
Note: You will require a second person to help with the assembly of the product.
Note: Be sure to pull the cable through the base 15 even and slow during assembly.
☐ Slide the cable 28 into the torchiere head 27 whilst attaching the torchiere head 27 onto the top support tube 20. Secure the torchiere head 27 using the hexagonal socket head screws 26, turning the socket head wrench 25 clockwise.
Before installation, remove the two black plastic rings on the end of the support tube 19 to allow the components to be screwed together properly.
Note: Ensure that the mains lead does not become trapped when it is fed through the support tubes 19, 20.
☐ First screw the support tube 19 clockwise into the upper support tube 20.
☐ Then screw the support tube 13 clockwise into the flexible arm 5.
Note: Ensure that the threaded rods are screwed in as far as possible so that the lamp is stable when standing up.
☐ Screw the two threaded rods 24 clockwise into the support tubes 13, 19 and push the support tube mount 18 on to the threaded rods.
☐ Insert the floor lamp with the threaded rods into the preformed holes in the base 15.
Place the serrated lock washers 16 at the underside of the support tube 15 on to the threaded rods. Using the open spanner, tighten the nuts 17 clockwise on to the threaded rods to fix the floor lamp to the base 15.
☐ Loosen the screw 30 of the cable holder 29.
☐ Feed the cable through the cable holder 29.
☐ Fix the cable holder 29 using the screw 30 in the intended position on the underside of the stand 15.
Note: Ensure that you hold the support tubes 13, 19 and threaded rods firmly in place when tightening the nuts 17.
☐ Torchiere: First loosen the retaining spring ^23 by loosening the screws ^21 .
☐ Place the lamp glass ☐ 1 on the torchiere head.
☐ Secure the lamp glass 1 with the screws 21 and retaining springs 22. Be sure not to over-tighten the screws or the light may be damaged.
Reading arm: Slide the lamp glass over the socket. Secure the lamp glass 7 using the threaded ring 8 and tool 9.
Note: Use a soft, fluff-free cloth when you are replacing a bulb.
☐ Torchiere: Insert the bulb 3 on one side of the socket. To do so, insert the projection at the end of the bulb 3 directly over the opposing elevation in the socket 4.
☐ Carefully press the bulb 3 against this elevation using light pressure until the bulb 3 can be inserted into the socket on the opposite side. Ensure it is seated correctly (both projections directly over the elevations).
☐ Then place the guard plate 2 over the installed bulb 3. Be sure it is seated correctly.
☐ Reading arm: Insert the light button into the socket 6. Ensure it is correctly seated.
☐ Plug the mains plug 14 into a properly installed socket.
Your lamp is now ready for operation.
- Switching the lamp on / off
☐ Use the ON / OFF switch 11 to switch the uplift on or off.
☐ Use the ON / OFF switch 12 to switch the reading lamp on or off.
- Directing the lamp
CAUTION! RISK OF BURNS! First allow the lamp to cool completely.
☐ Bend the flexible arm 5 to bring the reading lamp into the desired position.
- Replacing a bulb
WARNING! RISK OF ELECTRIC SHOCK!
First pull the mains plug 14 out of the mains socket.
⚠️ CAUTION! RISK OF BURNS! First allow the lamp to cool completely.
Note: Use a dry, fluff-free cloth for inserting the bulbs.
☐ Torchiere: In the event the torchiere bulb is defective, first remove the guard plate 2.
☐ To remove the bulb from the socket, push the bulb toward one end of the socket using light pressure and carefully lift out of the opposite socket.
☐ Insert the bulb 3 on one side of the socket. To do so, insert the projection at the end of the bulb 3 directly over the opposing elevation in the socket 4.
☐ Carefully press the bulb 3 against this elevation using light pressure until the bulb 3 can be inserted into the socket on the opposite side. Ensure it is seated correctly (both projections directly over the elevations).
☐ Then place the guard plate 2 over the installed bulb 3. Be sure it is seated correctly.
☐ Reading arm: Insert the light bulls into the socket 6. Ensure it is correctly seated.
Note: Only use 220-240 V\~ halogen light bulbs with G9 base and a maximum output of 28 Watt for the reading light. Only use 220-240 V\~ halogen lamps with R7S base and a maximum output of 230 Watt for the torchiere.
☐ Plug the mains plug 14 into the socket again.
● Care and cleaning
WARNING! RISK OF ELECTRIC SHOCK!
First pull the mains plug 14 out of the mains socket.
⚠️ CAUTION! RISK OF BURNS! First allow the lamp to cool completely.
WARNING! RISK OF ELECTRIC SHOCK!
For electrical safety reasons, never clean the lamp with water or other fluids nor immerse it in water.
- Do not use any solvents, petrol or similar. This would cause damage to the light.
□ Always use a dry, fluff-free cloth for cleaning.
☐ Plug the mains plug 14 into the socket again.
●Disposal

The packaging and ancillary packing consist entirely of environmentally-friendly materials. They can be disposed of at your local recycling facility.

The symbol of the wheelie bin with the line through it means that, in the European Union, the product has to be disposed of in a separate refuse collection. This applies to the product and to all components bearing this symbol. Products marked in this way may not be disposed of along with normal domestic waste but have to be handed in at a recycling collection point for electrical and electronic appliances. Recycling helps to reduce the consumption of raw materials and to ease the burden on the environment.
● Warranty and Service
●WarrantyDeclaration
This product has a 3-year warranty from the date of purchase; the warranty is only valid for the original purchaser and is not transferable. Please keep your receipt as proof of purchase. The warranty applies to material or manufacturing defects only. It does not cover wear parts or damage caused by improper use. The guarantee lapses in cases of unauthorized tampering. Your statutory rights are not restricted in any way by this warranty. Please contact the service centre by telephone. In the event of any claims under the warranty. This is the only way to ensure that your instrument can be returned free of charge.
●Serviceaddress
Please have your receipt and the product number (e.g. IAN 12345) available for all queries as proof of purchase.
● Declaration of Conformity CE
This product fulfils the requirements of the applicable European and national directives. Conformity has been demonstrated. The relevant declarations and documents are held by the manufacturer.
Manufacturer
59929 Brilon (Germany)
Last Information Update: 05 / 2016
Ident.-No.: 14104402L052016-6