
Funk-Gong-Set Orchestra - Wireless doorbell REV - Free user manual and instructions
Find the device manual for free Funk-Gong-Set Orchestra REV in PDF.


| Product type | Wireless chime |
| Brand | REV |
| Model | Funk-Gong-Set Orchestra |
| Chime power supply | 3 AAA 1.5 V batteries (not included) |
| Doorbell button power supply | 1 12 V 23A battery (included) |
| Motion detector power supply | 1 3 V CR2450 battery (included) |
| Free-field range (doorbell button → chime) | 150 m max. |
| Free-field range (detector → chime) | 100 m max. |
| Radio frequency | 433.92 MHz |
| Maximum transmission power | < 10 mW |
| Sound volume | 90 dB (4 adjustable levels) |
| Number of melodies | 52 melodies to choose from |
| Detection angle (motion detector) | Approximately 110° |
| Time between two detections | 5 seconds |
| Protection rating (chime and detector) | IP20 (indoor, dry rooms) |
| Protection rating (doorbell button) | IP55 (outdoor under shelter) |
| Main functions | Wireless ringer, motion detector, receiver/transmitter coding, 52 melodies, volume adjustment |
| Care and cleaning | Wipe with a dry cloth; do not use abrasive cleaners |
| Safety | Do not open or repair; use only recommended batteries; observe polarity |
| Spare parts and repairability | No replaceable parts; product not user-repairable |
| General information | Compliant with Directive 2014/53/EU; CE declaration available at www.rev.de |
Frequently Asked Questions - Funk-Gong-Set Orchestra REV
User questions about Funk-Gong-Set Orchestra REV
0 question about this device. Answer the ones you know or ask your own.
Ask a new question about this device
Download the instructions for your Wireless doorbell in PDF format for free! Find your manual Funk-Gong-Set Orchestra - REV and take your electronic device back in hand. On this page are published all the documents necessary for the use of your device. Funk-Gong-Set Orchestra by REV.
USER MANUAL Funk-Gong-Set Orchestra REV
Funk-Gong-Set Orchestra
Typ: B7 (DC) +
SA-IR07-NWX03-D + DB50
natural_image
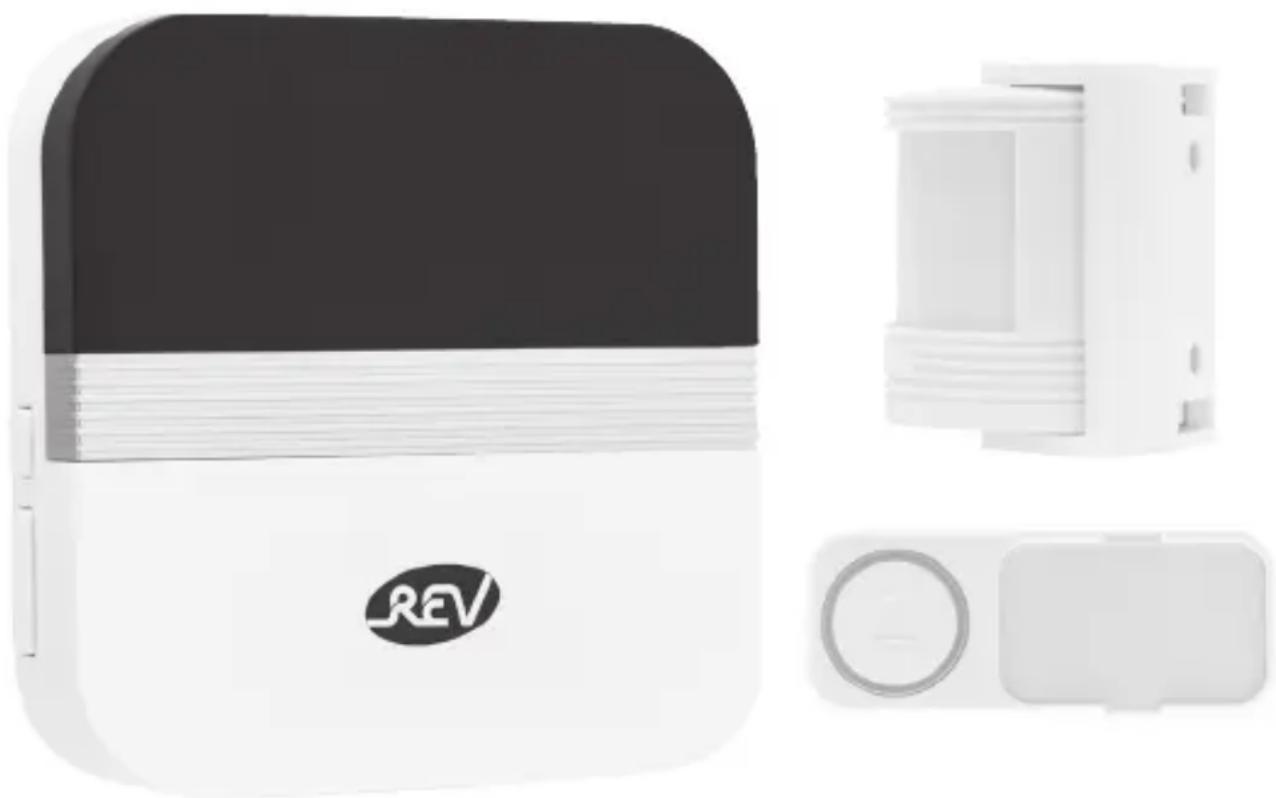
Product photo of a white REV device with a black cover, alongside a white modular device (no visible text or symbols)
DE
Allgemeines

GB You can find a multilingual version of this manual at www.rev.de. Alternatively, you can also follow the QR-code below.
GB
General information

Please thoroughly read the following operating instructions before placing the device into service and keep for future reference. The bell button is suitable for operation in protected outdoor areas and not in harsh environments. The wireless chime is intended for installation in dry indoor areas (IP20).
Note
• The wireless chime is only designed for use with the appropriate batteries.
• This wireless chime set consists of a transmitter and a receiver.
- In combination with a receiver (gong), the motion detector offers you the opportunity to set up a bell system without wiring.
- This set is not intended for integration into an existing bell system.
- The range between transmitter and receiver is maximum 100m in the open field. The radio signal is transmitted through walls, walls, furniture and other obstacles, but depends on the structural conditions - walls, especially reinforced concrete walls, heat-insulating glazing and ceilings lead to a reduction in range.
- Shielding caused by metal parts can severely impair reception, so that the signal cannot be transmitted. For this reason, never attach the transmitter to metal surfaces.
- If the product is not in use for a long period of time, remove the batteries.
• The product has no replaceable parts. Do not try to open or repair the product.
Technical Data
Range (free field): Bell push - Chime: max. 150m
motion detector - Chime: max. 100m
Frequency: 433,92MHz
Frequency band: 433,05 - 434,79MHz
Max. transmission power: <10mW
motion detector: Coverage angle: approx.110°
Detection zone:approx. 4m
Time between 2 recordings: 5 seconds
Battery: Chime: 3x 1.5V AAA (not included in delivery)
Bell push: 1x 12V 23A (included in delivery)
motion detector: 1x 3V CR2450 (included in delivery)
Degree of protection: Chime und motion detector: IP20 (for dry indoor use only)
Bell push: IP55 (protected outdoor area)
Volume: 90dB (4-stage adjustable)
Number of melodies: 52 melodies for selection
Degree of protection: Safety Extra Low Voltage
Safety Instructions for batteries:
- Incorrect polarity of the batteries can destroy the unit.
- Do not store batteries within reach of children, especially those that can be swallowed.
- Do not attempt to reactivate batteries by heating or similar measures.
• Primary batteries must not be charged as this can lead to electrolyte leakage, explosion or fire. - Do not immerse batteries in water and store them in a dry and cool place, not in a damp place.
- Do not throw batteries into the fire, do not open them or solder or weld them yourself.
- Do not short-circuit batteries.
Function motion dector
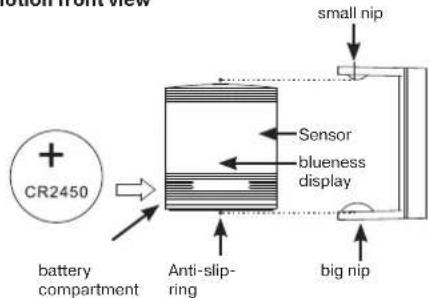
The motion detector starts a recording of the area every 5 seconds. The blue indicator goes on if a change in motion or temperature is detected in the detection zone during the detection period. The sensor is triggered and sends a signal to the receiver (chime), which indicates receiving the signal using a bell tone.
Setup
Chime: Open the battery compartment and insert the batteries. Number and type of batteries refer to "Technical Specifications". Then, close the battery compartment again.
Bell push: Remove the mounting plate on the rear side by pushing it off the rear side of the bell push (see illustration on the right). Open the battery compartment of the bell push using the enclosed screwdriver. Remove the insulation strip in the battery compartment. Then, close the battery compartment again.
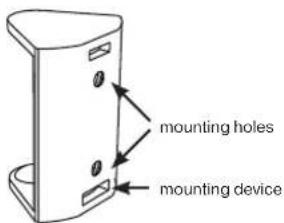
motion detector: Remove the assembly fixture on the rear side. Unscrew the cover on the battery compartment of the motion detector. Remove the insulation strip in the battery compartment. Then, close the battery compartment again.
Changing the batteries motion detector
Under normal conditions, the blue indicator blinks once, when the sensor is triggered. If the battery status is low, the blue indicator blinks an additional 2 times quickly after the normal blinking.
To change the batteries, remove the assembly fixture on the rear side. Unscrew the cover on the battery compartment. Replace the battery with a new battery of the same type (refer to "Technical Specifications"). The positive pole is pointing upwards. Then, close the battery compartment again.
The motion detector should be able to detect your movement immediately and the chime should sound the bell tone.
Creating/deleting coding
Chime and bell push in this set were already coded in the factory. If you want to renew the coding or add additional chimes/bell pushes, please proceed as follows.
Coding the chime and bell button::
- Before coding, select your preferable bell tone (refer to "Volume setting/Melody selection").
- Press the "Volume" button on the chime for 5 seconds. You will hear a ding-dong and the LED starts blinking, to signalise that the coding mode is active.
- Press the bell push, to send a signal to the chime. If the coding was successful, the chime will automatically play back the bell tone.
Coding the chime and motion detector:
- Before coding, select your preferable bell tone (refer to "Volume setting/Melody selection").
- Remove the battery from the motion detector.
- Press the "Volume" button on the chime for 5 seconds. You will hear a ding-dong and the LED starts blinking, to signalise that the coding mode is active.
- Place the battery in the motion detector and make a movement in the detection zone of the motion detector. If coding was successful, the chime will automatically play back the selected bell tone.
Note:
• The coding mode is automatically terminated after concluding the coding.
• The coding mode is only active for 5 seconds.
• The coding mode is always only available for one receiver (chime) and transmitter
(bell push, motion detector, window contact) simultaneously. Repeat the above-mentioned coding if you would like to code multiple receivers/transmitters.
- You can assign a different bell tone to each transmitter when coding and in doing so, create a call differentiation.
- Up to 20 receivers (chime) can be assigned to one transmitter (bell push, motion detector, window contact). Refer to "Compatible Products".
- Up to 20 transmitters (bell pushes, motion sensors, window contacts)
can be assigned to one receiver (chime). Refer to "Compatible Products".
Deleting the coding:
Press the "Melody forward" button for 5 seconds, to reset the chime to the factory settings. When the chime plays back ding-dong and the LED blinks, resetting was successful.
Note: The coding between chime and window contact exists, until you delete the coding as described above. Even if you remove the batteries.
chime side elevation
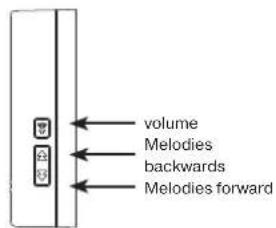
chime rear side
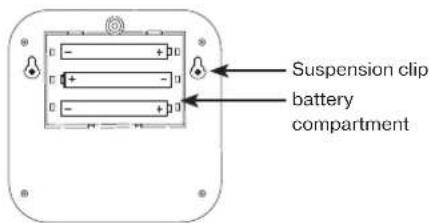
bell push rear side
Push mounting plate upwards for disassembly.
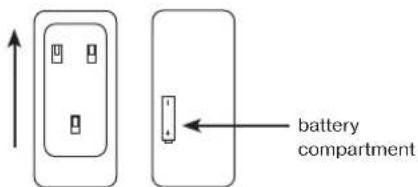
Motion front view
Volume setting/Melody selection
Press the "Volume"/"melody forward/backward" button until you hear the required volume/melody. You can change the volume at any time and this is independent of the corresponding transmitter. The last selected volume is automatically saved. You can still replay different bell tones by pressing "Melody forward/backward". This does not effect the saved bell tone when coding between transmitter and receiver.
Installation
Choose a suitable location for the chime and bell push. Check the selected location for wiring before drilling any holes.
Tip: Test the desired function before ultimately installing the device at the place of installation you chose.
Chime: Screw the screws into the wall until they are only protruding by a few millimeters. Hang the chime on the intended suspension clips.
Bell push: Mount the mounting plate using the enclosed screws. Push the bell push onto the mounting plate or use the enclosed double-sided tape for mounting.
Motion detector: Place the motion detector at a suitable location. The non-slip coating is included in the packaging and provides for a secure grip on the floor or use the assembly fixture with the enclosed screws. The recommended installation height is 2 - 2.2m, to cover a maximum detection zone.
Note:
- The detection zone depends on the selected location. Wall-mounted or ceiling installation should be favoured.
- Avoid undesired sources of heat, cold and movement, e.g. fan heaters, direct sunlight, refrigerators or fans, in the detection zone, to prevent false alarms.
- Avoid the motion detector lens from being shielded, so as not to limit the detection zone, e.g. by plants or furniture.
- Select the location in a manner, which allows the detection of movement based on the crossing of several detection zones. The detection of movement is less precise in the direction of the motion detector than it is crosswise to it.
- Avoid installation opposite windows. In this case, air flow or motion in front of the window can trigger false alarms.
Troubleshooting
| Error description | Error correction |
| The chime does not sound | Check the batteries of the receiver (chime) and the transmitter (bell push, motion detector, window contact). Change the batteries if necessary.Check whether the distance between the receiver (chime) and transmitter (bell push, motion detector, window contact) is too far. If necessary, reduce the distance, to get back within the range.Check whether the receiver (chime) is coded with the transmitter (bell push, motion detector, window contact). If necessary, code the receiver and transmitter as described above.Check the volume setting of the receiver (chime). Increase the volume if necessary. |
| Range is low • | Check the mounting surface and the surroundings. Metal surfaces can reduce the range. Avoid installation on or near metal. Structural conditions (e.g. concrete walls or ceilings) can have an effect on the range. Other wireless products in the vicinity can have an effect on the range. Change the location of the receiver (chime) and/or transmitter (bell push, motion detector, window contact) or the other wireless product. Check the batteries of the receiver (chime) and transmitter (bell push, motion detector, window contact). Change the batteries if necessary. |
| False alarm • | Check whether there are occasionally animal/plant movements, radiation of heat/cold air, air flow or the like. If necessary, change the location. |
| The chime does not sound every time someone passes by | The movement of the person passing by was not detected. An interval of 5 seconds between the detection periods is defined, to prevent a constant alarming and sounding of the chime, when the motion detector is triggered. If a person passes by the detection zone quickly during this interval, his or her movement is not detected. Install the motion detector at the recommended height of 2 - 2.2m, to cover a maximum detection zone. The motion was detected but the distance between receiver (chime) and transmitter (motion detector) is lower than before due to the low battery status. Change the batteries if the battery warning on the motion detector is flashing. |
Compatible Products
| article number type number designation | ||
| 0082600103 DB500 | + DB50 Wireless chime | Orchestra square white + bell pushOrchestra white |
| 0082610103 DB500 | 0AC + DB50 Wireless chime | Orchestra square for socket white + bellpush Orchestra white |
| 0082620103 DB400 | + DB50 Wireless chime | Orchestra rectangle white + bell pushOrchestra white |
| 0082630103 DB400 | 0AC + DB50 Wireless chime | Orchestra rectangle for socket white+ bell push Orchestra white |
| 0083950103 DB50 | Wireless bell push Orchestra white | |
| 0083960103 SA-IF | 07-NWX03-D Wireless motion detector Orchestra white | |
| 0083970103 SA-M | C08-N04-D Wireless window contact Orchestra white | |
| 0082650103 B6 (AC) | + B6 (DC)+ DB50 | Wireless chime set Orchestra Gong Q + Gong Q socketwhite+ bell push white |
| 0082640103 B7 (DC) | + SA-IR07-NWX03-D+ DB50 | Wireless chime set Orchestra Gong Q +wireless motion detector white+ bell push white |
WEEE Disposal Notice
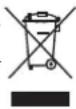
According to the European regulations, used electrical and electronic equipment may no longer be put out into unsorted rubbish. The symbol on the wheeled rubbish bin points out the necessity for separated collection. Help us to protect the environment and ensure that this unit is put out in the appropriate systems for separate collection once you do not use it any longer. DIRECTIVE OF THE EUROPEAN PARLIAMENT AND COUNCIL of 4th July 2012 concerning used electrical and electronic equipment.
Battery disposal instructions
Batteries and rechargeable batteries must not be disposed of with household waste. Every consumer is legally obliged to dispose of all batteries and rechargeable batteries, whether or not they contain harmful substances, to a suitable commercial or municipal collection point municipality/district so that they can be disposed of in an environmentally friendly manner. Batteries and rechargeable batteries should only be returned in a discharged state!
CE Conformity Statement
REV Ritter GmbH hereby declares that it complies with radio equipment type B7 (DC) + SA-IR07-NWX03-D + DB50 according to DIRECTIVE 2014/53/EU. The complete CE Declaration of Conformity can be found under: www.rev.de under the corresponding article or type number.



Généralités



- Funk-Gong-Set Orchestra
- DE
- Allgemeines
- GB
- General information
- Note
- Technical Data
- Safety Instructions for batteries:
- Function motion dector
- Setup
- Changing the batteries motion detector
- Creating/deleting coding
- Coding the chime and bell button::
- Coding the chime and motion detector:
- Note:
- Deleting the coding:
- Volume setting/Melody selection
- Installation
- WEEE Disposal Notice
- Battery disposal instructions
- CE Conformity Statement
Brand : REV
Model : Funk-Gong-Set Orchestra
Category : Wireless doorbell