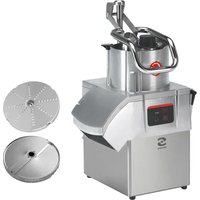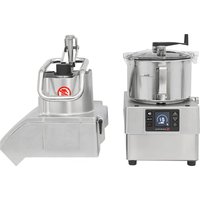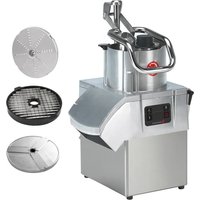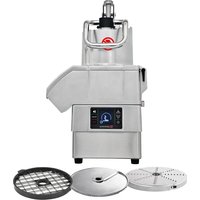
CA-31 - Vegetable cutter Sammic - Free user manual and instructions
Find the device manual for free CA-31 Sammic in PDF.


User questions about CA-31 Sammic
0 question about this device. Answer the ones you know or ask your own.
Ask a new question about this device
Download the instructions for your Vegetable cutter in PDF format for free! Find your manual CA-31 - Sammic and take your electronic device back in hand. On this page are published all the documents necessary for the use of your device. CA-31 by Sammic.
USER MANUAL CA-31 Sammic
Vegetable preparation machine
MANUAL DE INSTRUÇÕES
INSTRUKCJA OBSŁUGI
GEBRUIKERSHANDLEIDING
ES
EN
DE
FR
IT
PT
PL
NL

natural_image
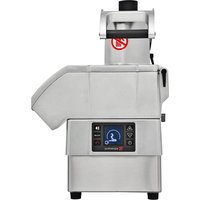
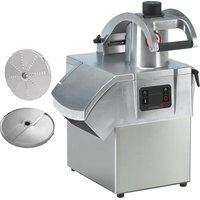
Four stainless steel kitchen machines with control knobs and a funnel-shaped top, shown from different angles (no visible text or labels)FIG. 1 / ZCHNG. 1 / RYS. 1
CA-31
text_image
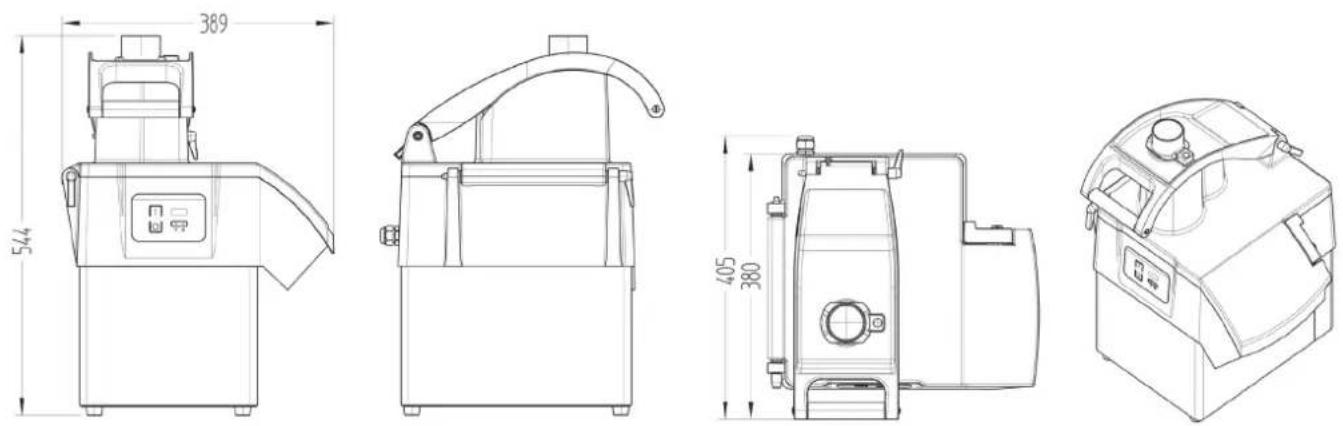
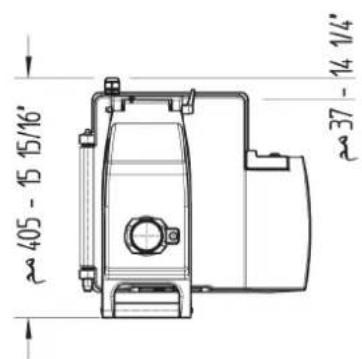
405 - 15 15/16' 37 - 14 1/4'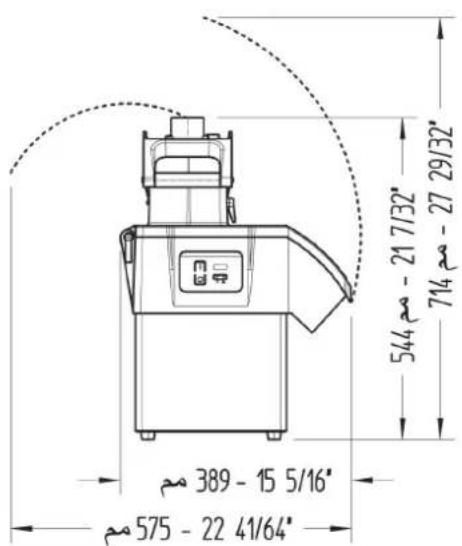
text_image
544 21 7/32" 714 27 29/32" 389 - 15 5/16" 575 - 22 41/64"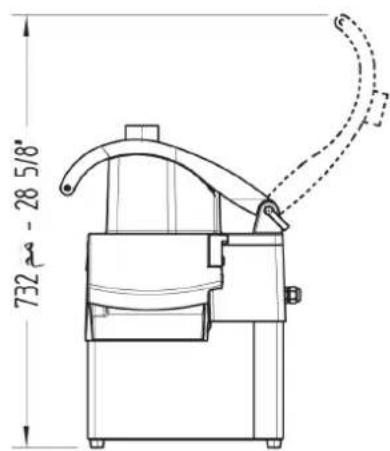
text_image
732 mm - 28 5/8"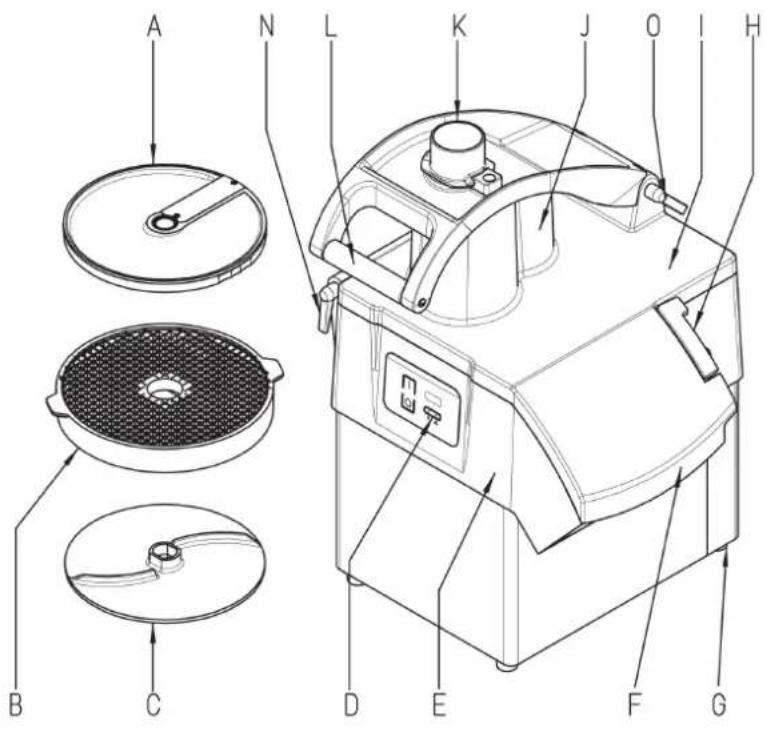
text_image
Technical diagram of a mechanical device with labeled parts, including fan, lid, and control panel components.DESCRIPCION TECNICA
A - Disco.
B - Rejilla.
C - Expulsor.
D - Teclado.
E - Tapa inferior.
I - Removable hinged cover.
J - Normal bin.
K - Drum mouth and drum pusher.
L - Push lever.
N - Removable pin.
O - Removable pin.
natural_image
Line drawing of a laboratory instrument with control panel and display (no text or symbols)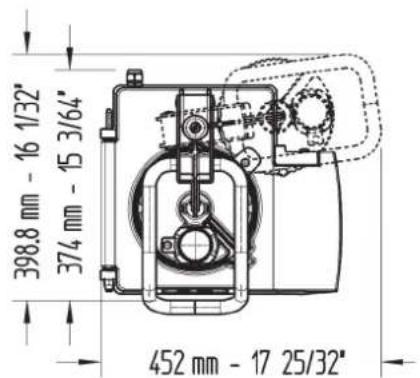
text_image
398.8 mm - 16 1/32" 374 mm - 15 3/64" 452 mm - 17 25/32"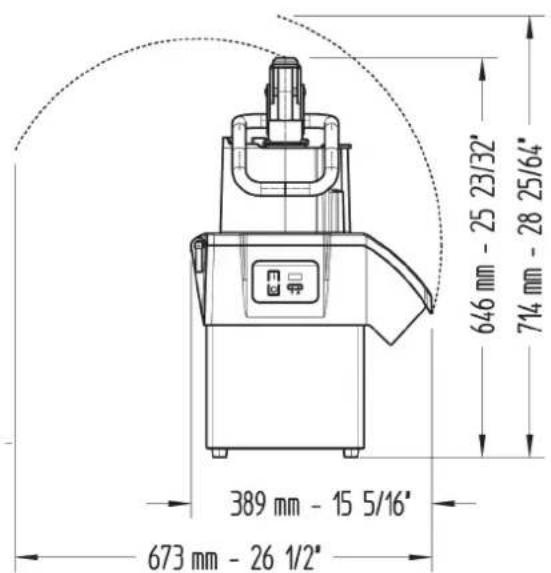
text_image
646 mm - 25 23/32" 714 mm - 28 25/64" 389 mm - 15 5/16" 673 mm - 26 1/2"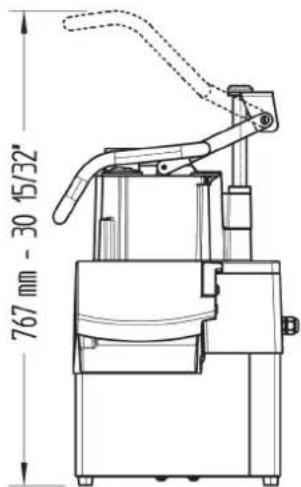
text_image
767 mm - 30°/32"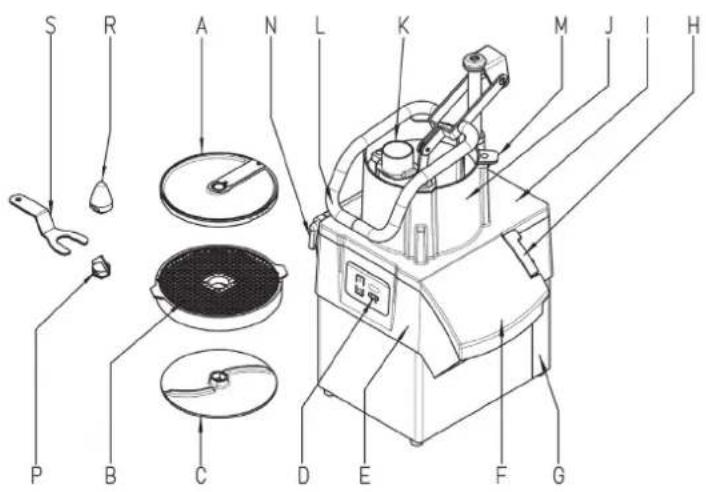
text_image
S R A N L K M J I H P B C D E F GDESCRIPCION TECNICA
A - Disco.
B - Rejilla.
C - Expulsor.
D - Teclado.
E - Tapa inferior.
I - Removable hinged cover.
J - Normal bin.
K - Drum mouth and drum pusher.
L - Push lever.
M - Push lever support.
N - Removable pin.
P - Drill set.
R - Stirrer Shaft.
S - Wrench.
natural_image
Technical line drawing of a mechanical device with a central fan and mounting base (no text or symbols)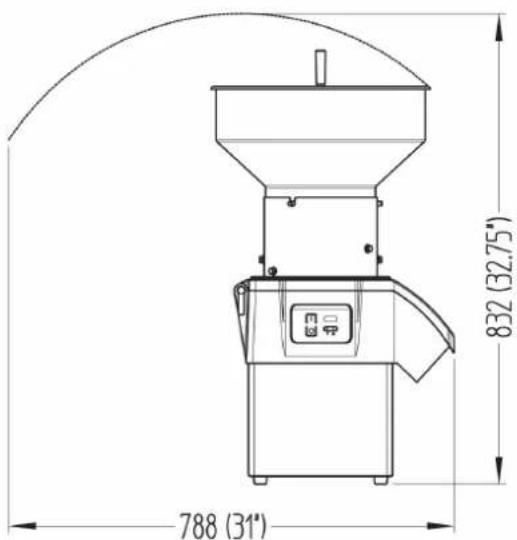
text_image
788 (31') 832 (32.75')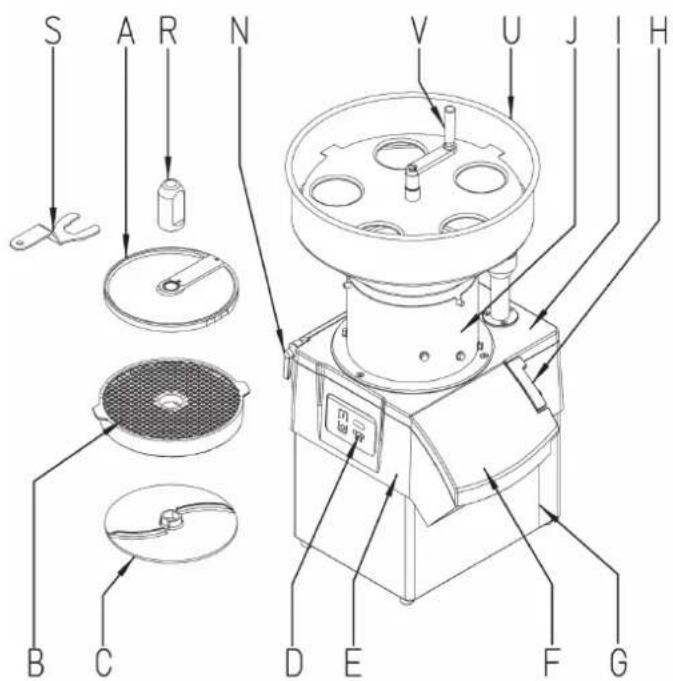
text_image
S A R N V U J I H B C D E F GDESCRIPCION TECNICA
A - Disco.
B - Rejilla.
C - Expulsor.
D - Teclado.
E - Tapa inferior.
I - Removable hinged cover.
J - Normal bin.
N - Removable pin.
R - Stirrer Shaft.
S - Wrench.
U - Removable bin.
V - Stirrer Shatf.
Each machine is identified as follows:
- Name and address of the manufacturer: SAMMIC S.L - Basarte 1 Azkoitia. Gipuzkoa (SPAIN)
- The serial number is printed on the Guarantee Card and in Declaration of Conformity.
MODELS
This manual describes the installation, operation and maintenance of vegetable preparation machines CA-31, CA-41, CA-42 and CA-62. The model reference number and its features are specified on the name plate attached to the machine. This preparation machine has been designed and manufactured in accordance with the following European directives:
- Machinery Directive 2006/42/EC.
- Low Voltage Directive 2006/95/EC.
- Electromagnetic Compatibility Directive 2004/108/EC.
- Directives 89/109/EEC and 90/128/EEC on aluminium and plastic materials and articles in contact with food.
- Aluminium alloys in contact with food standard EN 601-2004.
- Hygiene and food contact materials standard: ANSI-NSF 8 and ANSI-NSF 51.
- Vegetable Preparation Machines Standard: UNE-EN1678
- Protection level in accordance with UNE-EN 60529: Controls IP-55 and rest of machine IP-23.
- The 120V/60Hz/1\~ models comply with the UL-763 and CSA C22.2 standards
IMPORTANT INFORMATION
- This machine is not designed for use by people (including children) with reduced physical, sensory or mental capabilities or lacking the necessary experience or knowledge, unless they have received supervision or instructions from a health and safety expert.
- This machine must not be left running unsupervised.
- Before using the machine for the first time, clean the area in contact with food, the discs (A), the grids (B) and the ejector (C) with (lukewarm) soapy water, rinse and leave to dry.
- Handle the discs (A) and grids (B) very carefully because they have very sharp blades.
- Before undertaking any cleaning, inspection or repair work on vegetable preparation machines the machine must be unplugged from the mains.
- NEVER insert your hand or any other utensil through the outlets or hoppers (J and K) that feed the machine, to avoid accidents or damages to the blades.
INSTALLATION
For optimum service and maintenance, please follow these instructions.
INSTALLATION SITE
You are advised to install the machine on a steady surface -this must not act as a soundboard- elevated at a height of 700-900 mm for CA-31, 600-800 mm for CA-41, CA-42 and 500-700 mm for CA-62. Place the collector underneath the food outlet. The machine is not fixed in place and can be moved around easily.
ELECTRICAL CONNECTION
Check that the machine's electrical characteristics match the mains power supply.
^a Single-phase machines: 230V / 50 Hz / 1; 220V / 60 Hz / 1; 120V / 60 Hz / 1.
Prepare a wall-mounted socket that is always accessible, with a general disconnecting switch and with a residual current and 2P, 16 A circuit breaker, with its corresponding plug.
Three-phase machines: 230-400V / 50 Hz / 3N (connected to 400V); 220-380V / 60 Hz / 3N (connected to 220V).
Prepare a wall-mounted socket that is always accessible, with a general disconnecting switch and with a residual current and 2P, 10 A circuit breaker, with its corresponding plug.
To change the voltage, refer to the electrical diagram.
Direction of rotation: When the machine's direction of rotation is incorrect, the disc (A) will not cut. The disc (A) must rotate anti-clockwise. If the disc (A) rotates clockwise, to reverse it swap two phases in the power cable.
Power cable characteristics.
Vegetable preparation machines CA-31, CA-41, CA-42 and CA-62 are supplied with a 1.5 m thermoplastic-sheathed power cable.
WARNING: THE EARTH CONNECTION IS OBLIGATORY. DANGER OF ELECTROCUTION. The machine's earth wire is yellow-green.
ELECTRONIC CONTROL FUNCTIONS AND OPERATION

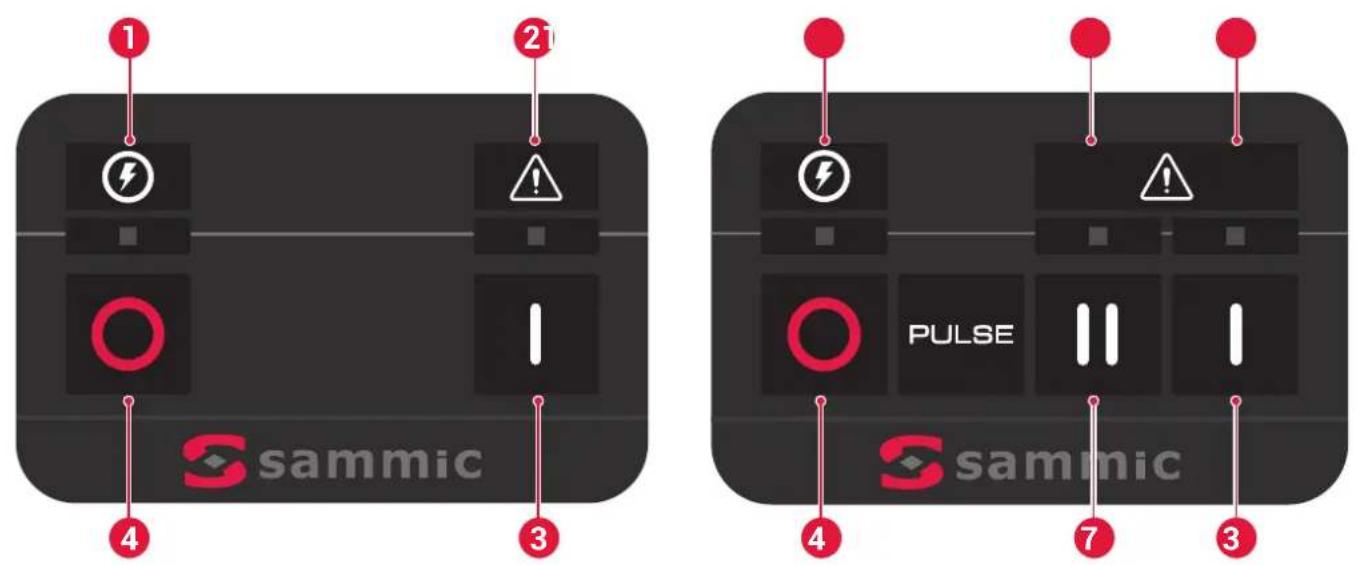
"Machine connected to mains" warning light (1).
When the machine is plugged in, this warning light switches on to show that the machine is connected to the mains.

"Start" button (3) or slow speed in the 2-speed model.
CA-31, CA-41 and CA-42:
- With the hinged lid (I) closed and the pusher plate (L) down, if you push this button the motor starts. In the 2-speed models it starts at slow speed.
- With the motor stopped, the hinged lid (I) closed and the pusher plate (L) up, if you press this button, the "safety" light (1) flashes. When the pusher plate (L) is pressed down the motor starts.
- With the motor stopped, the hinged lid (I) closed and the pusher plate (L) up, if you press this button, when the pusher plate is lowered (L) the motor starts. In the 2-speed models the pilot light "Speed 1" (5) flashes.
- With the motor on, if you lift the pusher plate (L) the motor stops. When you lower the pusher plate (L), the motor re-starts automatically. If the pusher plate (L) has not lowered in 30 seconds, the "Start" button (3) must be pressed again to start the machine.
- With the motor on, if the hinged lid (I) is opened the motor stops. When the hinged lid (I) is closed, the "Start" button (3) needs to be pressed again to start the machine.
- If the machine is left running with the pusher plate (L) down, after 30 minutes the machine stops automatically.
CA-62 and header:
- If this button is pressed whilst the motor is switched off, the hopper mounted and the hinged lid (I) closed, the motor starts.
- If the hinged lid (I) should open whilst the motor is in operation the motor will stop. When closing the hinged lid (I) the pushbutton "On" (3) must be pressed again in order to start the machine.

"Speed 2" button (7). Fast speed. Only 2-speed models.
The operation of this button is identical to that of the "Start" button (3). The only difference is that the machine starts at high speed.

"Stop" button (4).
This button stops the motor.

"Safety" warning light (2).
This warning light shows the machine's status.
- It switches off when the motor is stopped, the hinged lid (I) is closed and the pusher plate (L) is down.
- It switches on when the motor is stopped, the hinged lid (I) is closed and the pusher plate (L) is up.
- In the CA-31, CA-41 and CA-42 with the hinged lid (I) closed and the pusher plate (L) up it flashes slowly.
- It flashes quickly when the hinged lid (I) is open.

"Speed 1" pilot light (5). Only in the 2-speed models.
This pilot light provides information on the status of the vegetable preparation machine when starting at slow speed.
- It switches off when the motor is stopped, the hinged lid (l) is closed and the pusher plate (L) is down.
- It switches on when the motor is on, the hinged lid (I) is closed and the pusher plate (L) is down
- In the CA-31, CA-41 and CA-42 with the hinged lid (I) closed and the pusher plate (L) up it flashes slowly.
- It flashes quickly when the hinged lid (I) is open in conjunction with the "Speed 2" pilot light (6).

"Speed 2" pilot light (6). Only in 2-speed models.
This pilot light provides information on the status of the vegetable preparation machine when starting at fast speed.
- It switches off when the motor is stopped, the hinged lid (I) is closed and the pusher plate (L) is down.
- It switches on when the motor is on, the hinged lid (I) is closed and the pusher plate (L) is down
- In the CA-31, CA-41 and CA-42 with the hinged lid (I) closed and the pusher plate (L) up it flashes slowly.
- It flashes quickly when the hinged lid (I) is open in conjunction with the "Speed 2" pilot light (6).
PLS. NOTE: In the CA-62 there is no pusher plate and its place in the operation is taken by the hopper (U).
PLS. NOTE: Some vegetable preparation machines have an emergency stop button. This must be unlocked before starting the machine.
START- UP CA-31, CA-41 AND CA-42
- In the CA-31, CA-41 and CA-42 the hinged lid (I) must be positioned as indicated in the illustrations, being fixed with the pin (N).
- In the CA-31 the pusher plate (L) must be positioned as indicated in the illustrations, being fixed with the pin (O).
- In the CA-31, CA-41 and CA-42 if the header is to be used it must be positioned as indicated in the illustrations, being fixed with the pin (N).
WARNING: Before using the machine for the first time, clean the area in contact with food, the discs (A), the grids (B) and the ejector (C) with (lukewarm) soapy water, rinse and leave to dry.
Handle the discs (A) and grids (B) very carefully because they have very sharp blades.
Fitting discs (A) and grids (B).
- Release the lock (H), and open the hinged lid (I).
- Fit the ejector (C) in its housing on the trailing axle.
- The grid (B) is inserted in the top lid (E) pocket at the right time during the process.
- Fit a disc (A) on the trailing axle. Insert the disc (A) in the axle and rotate it clockwise until it slots into place.
- In the case of the CA-41 and CA-42 machines, screw the bit (P) or mixer (R) into the trailing axle depending on the product being chopped.
- Lower the hinged lid (I) and apply the lock (H).
Operation with standard hopper (J) and pusher plate (L) in CA-31.
- The mallet (K) must be housed and locked. To do so, rotate it anti-clockwise.
- Start the vegetable preparation machine.
- Lift the pusher plate (L). The motor stops.
- Add the products to the standard hopper (J).
- When you start to lower the pusher plate (L) the motor starts and the cutting process begins. Feed the product while gently lowering the pusher plate (L). Repeat the process several times.
- Press "Stop" (4) to finish.
WARNING: Applying too much force on the pusher plate (L) could damage the product and strain the motor.
Operation with standard feed hopper (J) and pusher plate (L) in CA-41 and CA-42.
- The mallet (K) must be housed and locked. To do so, rotate it anti-clockwise.
- Start the vegetable preparation machine.
- Lift the pusher plate (L) and rotate it anti-clockwise to clear the standard hopper (J) feed chute. The pusher plate (L) can be left resting on the pusher support (M). The motor stops.
- Add the products to the standard hopper (J).
- When the pusher plate (L) is rotated clockwise the motor starts and the cutting process begins. Feed the product while gently lowering the pusher plate (L). Repeat the process several times.
- Press "Stop" (4) to finish.
WARNING: Applying too much force on the pusher plate (L) could damage the product and strain the motor.
Operation with cylinder hopper (K) (CA-31, CA-41 and CA-42).
This ∅55mm hopper is used to cut long, cylinder-shaped vegetables, such as carrot, chicory, cucumber, etc.
- Start the vegetable preparation machine.
- Unlock the mallet (K) by rotating it clockwise.
- Feed the vegetables through the hole and push them gently using the mallet (K). Repeat the process several times.
- Press "Stop" (4) to finish.
IMPORTANT: When the cylinder hopper is not in use, leave the mallet (K) inside the hopper.
START-UP OF CA-62
WARNING: Before using the machine for the first time, clean the area in contact with food, the discs (A), the grids (B) and the ejector (C) with (lukewarm) soapy water, rinse and leave to dry.
Handle the discs (A) and grids (B) very carefully because they have very sharp blades.
Fitting discs (A) and grids (B).
- Fit the ejector (C) in its housing at the trailing edge.
- The grid (B) is inserted in the bottom lid (E) pocket at the right time during the process.
- Fit a disc (A) on the trailing axle. Insert the disc (A) in the axle and rotate it clockwise until it slots into place.
- Screw on the mixer axle (R):
- Fit the hinged lid (I) as indicated in the diagrams. Secure it with the pin (N) and block it with the lock (H).
- Place the hopper (U) as indicated in the diagrams. The three hooks of the hopper (U) must be inserted in the three spaces in the neck of the hinged lid (I). Also insert the guiding axle of the hopper (U) in its housing, located on the hinged lid (I) and block it by rotating the safety pin.
Operation of the CA-62.
NOTE: The holes in the hopper are ∅75 mm, therefore insert products (potatos) smaller than this size.
- The hopper must be mounted and locked.
- Start up the cutting machine.
- Gradually introduce the products via the top holes in the hopper (J). After 30 minutes the CA-62 stops automatically. If you wish to continue working press "On" again.
- If there is jamming turn the handle at the top of the hopper (U).
- Press "Off" (4) when finishing production.
Operation of the CA-31, CA-41, CA-42 and CA-62 with header.
- The pipe manifold must be mounted and locked. Repeat all the above processes. In the CA-41, CA-42 and CA-62 there is no need to assemble the bit (P) nor the mixer (R).
- Start up the cutting machine.
- Gradually introduce the products via the top holes in the header. After 30 minutes the cutting machine stops automatically. If you wish to continue working press "On" again.
- Press "Off" (4) when finishing production.
CLEANING CA-31, CA-41, CA-42 AND PIPE HEADER
WARNING: Disconnect the machine from the mains before handing any internal components.
Handle the discs (A) and grids (B) very carefully because they have very sharp blades.
- Any components in contact with the food must be cleaned immediately after use, using hot water and a food-safe detergent. Then rinse with plenty of hot water and disinfect using an ethyl alcohol-soaked cloth (90°).
To do so: - Release the lock (H), and open the hinged lid (I).
- In the case of the CA-41 an CA-42 machines, while holding the disc without touching the blades, use the Allen key supplied with the machine to remove the bit (P) or mixer (R), unscrewing it anti-clockwise.
- Remove the disc (A) by rotating it clockwise and pulling it upwards carefully. Remove the grid (B) and ejector (C).
- In the CA-31 machine the pusher plate (L) and hinged lid (I) can be
removed for cleaning. To do so, remove the pins (N and O).
CLEANING CA-62
WARNING: Disconnect the machine from the mains before handing any internal components.
Handle the discs (A) and grids (B) very carefully because they have very sharp blades.
Any components in contact with the food must be cleaned immediately after use, using hot water and a food-safe detergent. Then rinse with plenty of hot water and disinfect using an ethyl alcohol-soaked cloth (90°).
To do so:
- Remove the hopper (U). Rotate the safety pin and pull the hopper (U) upwards.
- Release the lock (H), pull the pin (N) to remove the hinged lid (I).
- Holding the disc (A) with your hand without touching the blades, use the key (S) supplied with the machine to remove the mixer (R), unscrewing it anti-clockwise.
- Remove the disc (A) by rotating it clockwise and pulling it upwards carefully.
- Remove the grid (B) and ejector (C).
GENERAL CLEANING
- NEVER power clean. Use a damp cloth and mild detergent for cleaning. DO NOT use abrasive detergents (nitric acid, neat bleach, etc.) or stainless steel scourers or scrubbers as they could cause rusting.
- Do not wash the parts, such as the discs (A), grids (B), hinged lid (I) and pusher plate (L), in a dishwasher.
WARNING: To remove food stuck in the grids (B) you can knock them through using an elongated potato or whole carrot in the cutting direction. This avoids damaging the grid (B). Take care with the edge of the grid (B). Never use hard objects to hit the grid (B).
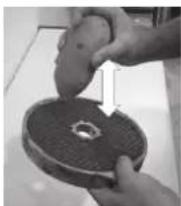
There is also a grid cleaner in the Sammic catalogue for the FMC-8D and FMC-10D grids.
The SH grater disks are designed so that the plate can be separated from the frame for cleaning.
Disc (A) and grid (B) functions.
Discs (A):
- Discs (A) FC-1 and FC-2 to cut chips or fine slices measuring 1-2 mm.
- Discs (A) FC-3 to FC-25 to cut 3-25 mm slices of potato, carrot, beet-root, cabbage, cucumber, courgette, onion, radish, etc.
- Discs (A) with curved blade for soft food, FCC-2, FCC-3 and FCC-5 to cut slices of tomato, orange, lemon, banana, apple, etc.
- Shredding discs (A) SH, 2-7 mm, to shred vegetables and grate cheese, bread, nuts, almonds, etc.
- Discs FCE-2, FCE-4 and FCE-8 to cut potato "matchsticks", carrot, celery, beetroot strips, etc.
- Discs (A) SHF and SHG to grate bread, cheese, chocolate, etc.
Discs (A) and grids (B). Possible combinations:
- Discs (A) FC-6, FC-8, FC-10 combined with grids (B), FFC-8 and FFC-10, give chip-style potatoes.
- Discs (A) FC-3, FC-6, FC-8, FC-10 and FC-14 combined with grids (B) FMC-8 and FMC-10 make 3-14 mm cubed potatoes for omelettes, vegetables and fruit for salads and Russian salad, etc.
- Discs (A) FC-20 and FC-25 combined with grids FMC-20 and FMC-25 give 20x20 and 25x25 cubes.
Bit (P) and Mixer (R). Only CA-41 and CA-42
- Bit (P): It is only used when working with cabbage and similar vegetables. Whole pieces can be cut.
- Mixer (R): It must be used with any food except cabbage and similar vegetables.
High and normal ejector (C). Only CA-41 and CA-42.
- High ejector: For cutting large products such as cabbage, cauliflower, celery and for grating products such as cheese, carrots...
- Normal ejector: All other cutting.
MAINTENANCE
IMPORTANT PRECAUTIONS
- Before undertaking any cleaning, inspection or repair work on vegetable preparation machines the machine must be unplugged from the mains.
- NEVER insert your hand or any other utensil through the outlets or hoppers (J and K) that feed the machine, to avoid accidents or damages to the blades.
- Regularly check that the machine safety devices are working. If you detect any anomaly, call the SAMMIC authorised technical service.
- Regularly inspect the trailing axle seal to ensure that this area is properly sealed. Each time the trailing axle is released for maintenance it is recommendable to fit a new seal.
- Clean the machine after every use, as described above.
- Only a SAMMIC authorised technical service can replace the power cable if this is damaged.
- Machine noise level, while running, at a height of 1.6 m and a distance of 1 m, less than 70 dB(A). Background noise: 32 dB(A).
BLADE SHARPENING
WARNING: Handle the discs (A) and grates (B) very carefully because they have very sharp blades.
The disc blades (A) can be removed easily for sharpening. Always use soft stone to keep the blade's cutting angle intact.
TROUBLESHOOTING
The hinged lid (I) is closed and the pusher plate (L) down but the machine does not start when the "Start" button is pressed:
- The machine is connected and the "Machine connected to mains" (1) warning light is on. No power reaches the plate or the plate is broken.
- In the CA-31, CA-41 and CA-42 if the "Safety" warning light (2) flashes slowly with the pusher plate (L) down there is a problem with the pusher plate (L) safety microswitch. This warning could also be triggered in the CA-62 and header. In the 2-speed machines the flashing occurs in the "Speed 1" (5) or "Speed 2" indicators (6).
- If the "Safety" warning light (2) flashes quickly with the hinged lid (1) closed, there is a problem with the hinged lid (1) safety microswitch. In the 2-speed machines the flashing occurs in the "Speed 1" (5) or "Speed 2" indicators (6).
- If the "Machine connected to mains" (1) and "Safety" (2) warning lights flash alternately, the motor thermal protection device has tripped. Wait for it to reset and investigate what the problem could have been (overload, parts seized up, problems with starter relay or capacitors in single-phase models etc...). In the 2-speed models the flashing occurs between the pilot lights "Machine connected to the mains" (1) and "Speed 1" (5) if the speed selected was slow. Or, the pilot light "Machine connected to the mains" (1) and "Speed 2" (6) if the speed selected was fast.
PLS. NOTE: In models equipped with an emergency stop button, the pilot lights blink in the same way. Verify the status of the emergency stop button.
- To check that the keypad works properly, if you keep one of the keys pressed down the "Machine connected to mains" warning light (1) should flash. If it does not the keypad may be malfunctioning.
The machine was on and stopped without pressing any key. If the machine is on, without pressing the pusher plate (L) the machine stops automatically after 30 minutes.
Note: In the CA-62 there is no pin, therefore after 30 minutes the machine stops automatically. To restart the machine simply press "On" (3).
NOTE: The electronic board has the following lights and indicators:
-Power:Lights up when there is voltage in the board.
-SEG: Lights up if all the safety devices are closed.
- RL1, RL2, RL3: They light up when the corresponding relay closes its contact.
- Switch SW1: Position OFF cutter 1 speed. Position ON cutter 2 speeds.
- Fus1-Var1: The board has a fuse and a protection varistor.
The motor does not start when the pusher plate is pressed down:
- If the pusher plate (L) is left open for more than 30 seconds, press "Start" (3) again to reset the machine.
- In the CA-31 machine the hopper might be too full and the pusher plate does not activate the microswitch. Empty part of the hopper and try again.
If the machine makes too much noise or the disc (A) rubs against any part, the main axle bearings are probably damaged.
| SPECIFICATIONS | CA-31 | CA-41 | CA-42 | CA-62 |
| HOURLY OUTPUT | 150 / 450 kg.330 / 990 lbs. | 200 / 650 kg.440 / 1.425 lbs. | 200 / 850 kg.440 / 1.875 lbs. | 500 / 1.000 kg.1.110 / 2.200 lbs. |
| ENERGY SUPPLY | 230V / 50 Hz / 1~ 230-400V / 50 Hz / 3N~120V / 60 Hz / 1~ 220V / 60 Hz / 1~ 220-380V / 60 Hz / 3N~ | 400V / 50 Hz / 3N~ | 400V / 50 Hz / 3N~ | |
| POWER | 550 W - 3/4 Hp 370 W-1/2 Hp | 550W / 3⁄4Hp | 750W / 1Hp | 750W / 1 Hp |
| DIMENSIONS | ||||
| Width | 389 mm. / 15 5/16" | 389 mm. / 15 5/16" | 389 mm. / 15 5/16" | 431 mm. / 17" |
| Depth | 405 mm. / 15 15/16" | 382 mm. / 15 3/64" | 382 mm. / 15 3/64" | 418 mm. / 16 1/2" |
| Height | 539 mm. / 21 7/32" | 653 mm. / 25 23/32" | 653 mm. / 25 23/32" | 767 mm. / 30 1/4" |
| NET WEIGHT | 22 kg. / 48 lbs. | 23.5 kg. / 52 lbs. | 23.5 kg. / 52 lbs. | 26 kg. / 57.3 lbs. |
CA-31, CA-41 e CA-42:
AVVIO CA-31, CA-41 E CA-42
CA-31, CA-41 e CA-42:
CA-31, CA-41 i CA-42:
WŁĄCZANIE MODELI CA-31, CA-41 | CA-42
text_image
767 (30.2")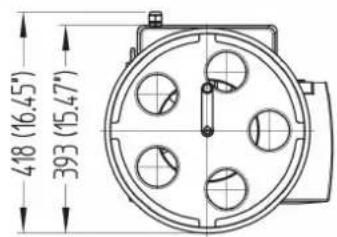
text_image
418 (16.45') 393 (15.47')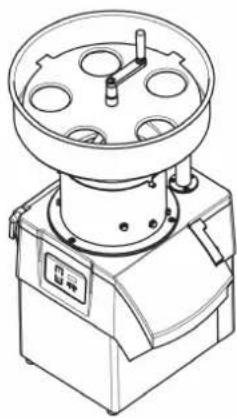
natural_image
Technical line drawing of a mechanical device with a central fan and cylindrical components (no text or symbols)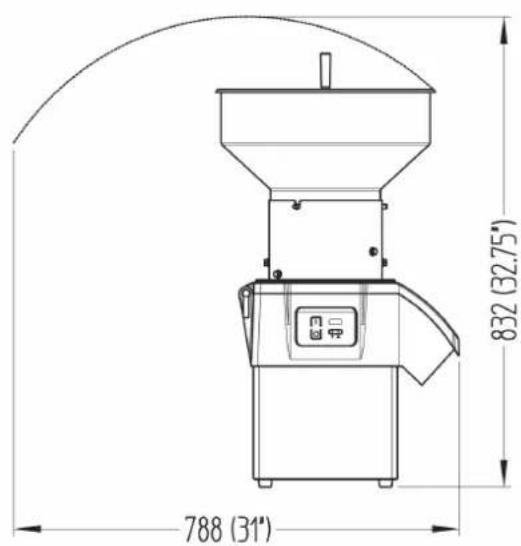
text_image
788 (31') 832 (32.75')text_image
S A R N V U J I H B C D E F G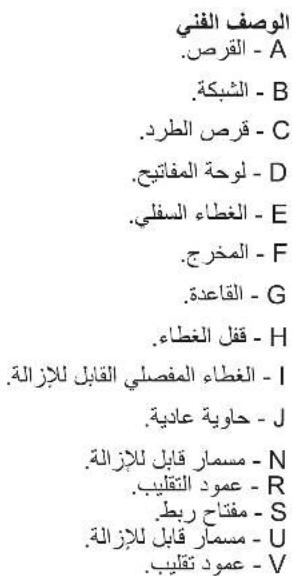
text_image
S R A N L K M J I H P B C D E F G
text_image
Technical diagram of a mechanical device with labeled parts from A to H, showing internal components and exploded views.الوصف الفني
.القص - A
الشبكة - B
C - قرص الطرد.
-LOحة المفتيچ.
broadcasting Algeria CA-62 و CA-41/42 CA-31