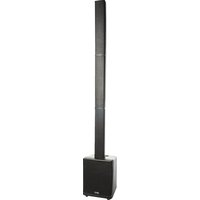
WRX-843 - Loudspeaker GEMINI - Free user manual and instructions
Find the device manual for free WRX-843 GEMINI in PDF.


| Product Type | Modular Line-Array Speaker System |
| Brand | Gemini |
| Model | WRX-843 |
| Color | Black (estimated) |
| Dimensions (H × W × D) | 1980 × 320 × 300 mm |
| Packaged Dimensions (H × W × D) | 610 × 520 × 415 mm |
| Net Weight | 11 kg |
| Packaged Weight | 13.5 kg |
| Power Supply | 110-120V~60Hz or 220-240V~50Hz (switchable) |
| RMS Power | 600 W |
| Peak Power | 3000 W |
| Frequency Response | 35 Hz - 20 kHz |
| Max SPL (peak, at 1 m) | Greater than 103 dB |
| Dispersion | 120° × 20° |
| Amplification Type | Class D + Class AB |
| Cooling | Regulated speed fan |
| Audio Inputs | 2 combo XLR/TRS (channels 1/2), 1 AUX 3.5mm jack, 2 RCA (L/R) |
| Audio Output | 1 MIX XLR output |
| Bluetooth Connectivity | Yes, audio streaming (device name: "WRX-843") |
| Built-in DSP | Yes, with presets |
| Reverb Effect | Yes, switchable per channel and adjustable intensity |
| HF Drivers | 6 × 2.75" (fiberglass cone, neodymium magnet) |
| LF Driver | 1 × 8" (ferrite magnet, 2" voice coil) |
| Maintenance and Cleaning | Clean with a dry cloth; do not use water or liquid products |
| Spare Parts and Repairability | No user-serviceable parts; refer all servicing to qualified personnel |
| Safety | Do not open the unit; avoid prolonged exposure above 90 dB; follow electrical safety instructions |
| Included Accessories | Power cord (US type), quick start guide (estimated) |
Frequently Asked Questions - WRX-843 GEMINI
User questions about WRX-843 GEMINI
0 question about this device. Answer the ones you know or ask your own.
Ask a new question about this device
Download the instructions for your Loudspeaker in PDF format for free! Find your manual WRX-843 - GEMINI and take your electronic device back in hand. On this page are published all the documents necessary for the use of your device. WRX-843 by GEMINI.
USER MANUAL WRX-843 GEMINI
At Gemini, our highest priority is making your experience unforgettable. Need help with setting up, troubleshooting, or looking for some tips? We're here for you, Monday through Friday 9AM-5PM EST.

hello@geminisound.com

1-844-GEMINI9

www.geminisound.com


@GeminiSoundHQ
| 2 | gemini® WRX-843 MODULAR LINE-ARRAY SPEAKER SYSTEM | |
| INDEX ENGLISH // PACKING LIST 2 FUNCTION LIST 3 BRIEF OVERVIEW 4 ASSEMBLY 4 CHANGING THE AC VOLTAGE 4 POWERING ON 4 CONNECTING EXTERNAL DEVICES 4 USING THE INTERNAL MIXER 5 WARNINGS AND PRECAUTIONS 6 SPECIFICATIONS 7 FCC COMPLIANCE STATEMENT 7 WARRANTY AND REPAIR 20 LIMITED WARRANTY 20 RETURN/REPAIR 20 ESpañOL // DESCRIPCION 8 MONTAJE 8 CAMBIANDO EL VOLTAJE AC 8 ENCENDIDO 8 CONEXión DE DISPOSITIVOS EXTERNOS 8 UTILIZANDO EL MEZCLADOR INTERNNO 9 ADVERTENCIAS Y PRECAUCIONES 10 PRESUPUESTO 11 FRANÇAIS // DESCRIPTION 12 ASSEMBLÈE 12 CHANGESMENT DE LA TENSION AC 12 ALIMENTATION 12 RACCORDEMENT DE DISPOSITIFS EXTERNES 12 UTILISATION DU MÉLANGEUR INTERNNE 13 AVERTISSEMENTS ET PRECAUTIONS 14 CARACTERISTIQUES 15 DEutsche // BESCHREIBUNG 16 VERSAMMLUNG 16 ÄNDERUNG DER AC-SPANNUNG 16 EINSCHALTEN 16 EXTERNE GERÂTE VERBINDEN 16 VERWENDUNG DES INTERNEN MISCHERS 17 WARNUNGEN UND VORSICHTSMASSNAHMITEN 18 SPEZIFIKATIONEN 19 ITALIANO // BREVE PANORAMICA 20 MONTAGGIO 20 MODIFICIA DELLA TENSION CA. 20 ACCENSIONE 20 COLLEGAMENTO DI DISPOSITIVI ESTERNI 20 UTILIZZO DEL MISCELATORE INTERNNO 21 AVVERTENZE E PRECAUZIONI 22 SPECIFICHE 23 | CONTENTS ENGLISH // Please ensure that you find these accessories included with your WRX-843 speaker: (3) Column Components (1) Base Component (1) IEC Power Cable (1) Operation Manual CONTENIDO ESPÁÑOL // Asegürese de encontrarlos accesos incluidos con su bocina WRX-843: (3) Componentes de columna (1) Componente base (1) Cable de alimentación IEC (1) Manual de operación CONTENU FRANÇAIS // Veuillez vous assurer que ces accessoires sont inclus avec votre enceinte WRX-843: (3) Composants de colonne (1) Composant de base (1) Câble d'alimentación CEI (1) Manuel d'opération INHALT DEutsche // Bitte stellen Sie sicher, dass Sie diese mit leur WRX-843-Lautsprecher mitgelieferte Zubehör finden: (3) Säulenkomponenten (1) Basiskomponente (1) IEC-Stromkabel (1) Bedienungsanleitung CONTENUTO ITALIANO // Assicurati di trovare质疑i accessori in dotazione con il suo altoparlante WRX-843: (3) Componenti colonna (1) Componente base (1) Cavo di alimentazione IEC (1) Manuale operativo | |
FUNCTION ENGLISH //
- Jack or XLR MIC Input
- Reverb Switch
- MIC/LINE Switch
- MIC/LINE Volume
- AUX/RCA Volume
- Bluetooth Pair
- Master Volume
- Preset DSP Switch
-
Pwr/Limit LED
-
XLR MIX Output
- Reverb Volume
- RCA Input
- AUX Input
- AC Input
- Power Switch
- AC Voltage Switch
FUNCTIONES ESPANOL //
- Jack o XLR MIC Input
- Interruptor de Reverberación
- Interruptor MIC/LINE
- Volumen MIC/LINE
- Volumen AUX/RCA
- Par de Bluetooth
- Volumen Principal
- Interruptor DSP predefinido
- Pwr/Limit LED
- Salida MIX XLR
- Reverb Volumen
- Entrada RCA
- Entrada Auxiliar
- Entrada de CA
- Interruptor de Alimentación
- Interruptor de Voltaje CA
FONCTIONS FRANÇAIS //
The Gemini WRX-843 Modular Line-Array Speaker System is an easily transportable speaker system comprised of (6) 2.75" glass fiber high-frequency drivers, an 8" high-excursion low frequency driver, and dual integrated amplifiers. This easy-to-use system is highly portable and produces incredible high-fidelity sound with the kind of dispersion only possible with an array. Perfect for artists, entertainers, or DJs, the WRX-843 delivers pro PA performance in large or small venues alike. With additional features like integrated DSP, reverb effect, and Bluetooth streaming support, it's the ultimate entertainment solution for any gathering.
ASSEMBLY
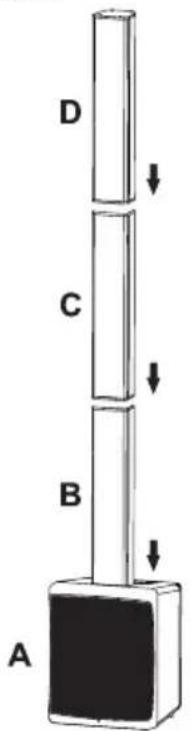
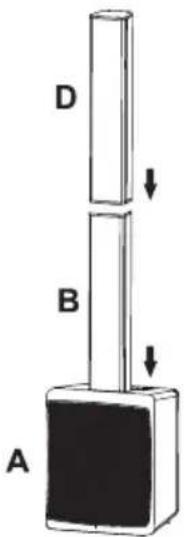
A. Subwoofer with integrated electronics for all system components.
B./C. Two identical spacers with connectors on bottom and top.
D. Column element with the speakers and a connection on the bottom.
Once the subwoofer is placed in the desired location, plug the spacers into the subwoofer and then add the column element with the speakers. Depending on the application, the column element with the speakers can be opened with only one spacer on the subwoofer.
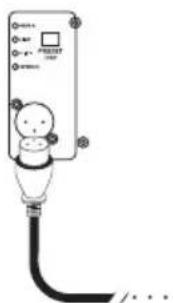
CHANGING THE AC VOLTAGE
To change the operational voltage on the WRX-843, first power the unit OFF
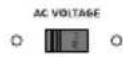

and disconnect power and signal lines, then move the clear switch cover to access the red AC Voltage Switch. Finally, move the switch left or right to select the correct voltage for your area.
POWERING ON
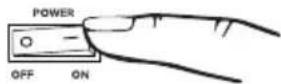
Make sure the WRX-843 is fully assembled, any required inputs and outputs are connected, and mains power is connected. Turn all volumes down, then switch power ON.
CONNECTING EXTERNAL DEVICES
Before connecting an input device to the WRX-843, please make sure all input volumes and the master volume are turned down.
WIRED MICROPHONES
Locate mixer channels 1 and 2 on the rear panel of the unit. Both channels have a "Combo Jack", allowing you to connect either an XLR or 6.5mm TRS cable to the input. Switch the channel to MIC level and connect your microphone.

Note: The WRX-843 does not supply phantom power.
BALANCED LINE LEVEL SOURCE
Mixer channels 1 and 2 on the rear panel of the unit are used to connect balanced line sources as well as microphones. Switch the channel to LINE level and connect your device. This type of connection would typically be used to connect professional gear like mixers electronic instruments.
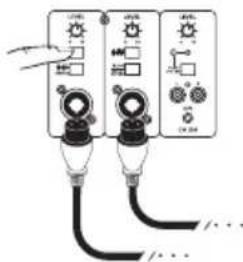
AUX INPUT
Locate mixer channel 3/4 and find at the bottom a 3.5mm TRS Jack. This type of connection is commonly used to connect the unit to the headphones output of a mobile device.
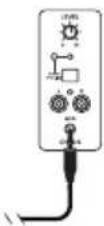
RCA INPUT
Just above the AUX Jack on mixer channel 3/4 are the RCA jacks. This type of connection is typically used to connect devices like CD or DVD players. Note: Left and right channels are color coded white and red.
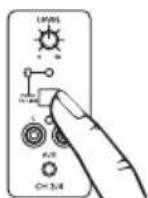
BLUETOOTH PAIRING
-
The WRX-843 can accept streaming audio from any Bluetooth-equipped portable device. First, make sure Bluetooth is enabled on your portable device. Locate channels 3/4 on the back of the WRX-843 and press the BLUETOOTH button. You will hear a tone and a blue LED will begin to flash to indicate the unit is in PAIRING mode.
-
On your mobile device, search for a Bluetooth device called "WRX-843" and select it to pair. Once pairing is complete, you will hear another series of tones, and the blue LED will light solid. Your mobile device is now connected and ready to stream music.
ADDITIONAL SPEAKER
If you would like to connect another speaker to the WRX-843 (for instance, another WRX-843 to form a stereo pair), first locate the MIC OUT XLR Jack on the rear of the unit. Connect a standard XLR cable from the MIX OUT Jack to the input of the additional speaker.
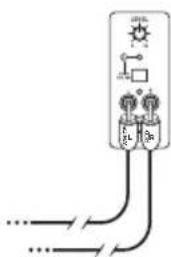

USING THE INTERNAL MIXER
MASTER VOLUME
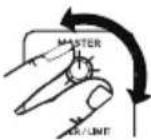
The master volume is the main volume control on the WRX-843. Use it to control the overall level of the WRX-843.
POWER/LIMITLED
This LED is located directly underneath the MASTER VOLUME knob. When the WRX-843 is powered on, this LED will light green. While the unit is operational, if this LED lights red that indicates the unit is being overdriven and the volume should be turned down immediately.
CHANNEL VOLUMES
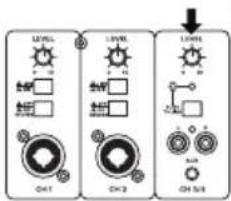
At the top of each mixer channel is the LEVEL or VOLUME CONTROL for that channel. These knobs control the relative volume of that channel only. So, if you wanted to (for instance) lower the level of the AUX IN in relation to one of the microphones, you would turn down the LEVEL of channel 3.
MIC/LINE SWITCH
These switches, located under the volume controls for channels 1 and 2, are used to set the input to the appropriate level for the connected device. If plugging in a mic, set the switch to MIC (and vice versa).
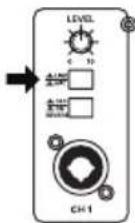
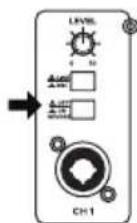
REVERB SWITCH
On mixer channels 1 and 2 there is a REVERB ON/OFF switch. When in the ON position, a reverb effect is added to that channel. This is commonly used on microphones and acoustic instruments to add more depth.
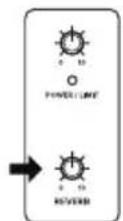
REVERB AMOUNT KNOB
This knob, located under the MASTER VOLUME knob, controls the strength of the reverb effect. Turning this knob clockwise increases the strength of the reverb.
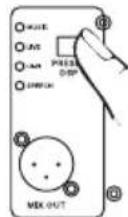
DSP PRESETS
The WRX-843 DSP is like a computerized EQ with presets. The PRESET DSP button allows you to change between these presets.
ENGLISH //
WARNING AND PRECAUTIONS
PREVENTIVE MEASURES
- Please read these instructions carefully.
- Keep all information and instructions in a safe place.
- Follow the instructions.
- Observe all safety warnings. Never remove safety warnings or other information from the equipment.
- Use the equipment only in the intended manner and for the intended purpose.
- Use only sufficiently stable and compatible stands and/or mounts (for fixed installations). Make certain that wall mounts are properly installed and secured. Make certain that the equipment is installed securely and cannot fall
- During installation, observe the applicable safety regulations for your country.
- Never install and operate the equipment near radiators, heat registers, ovens or other sources of heat. Make certain that the equipment is always installed so that it is cooled sufficiently and cannot overheat.
- Never place sources of ignition, e.g., burning candles, on the equipment.
- Ventilation slits must not be blocked.
- Keep a minimum distance of 20~cm around and above the device.
- Do not use this equipment in the immediate vicinity of water (does not apply to special outdoor equipment - in this case, observe the special instructions noted below). Do not expose this equipment to flammable materials, fluids or gases. Avoid direct sunlight!
- Make certain that dripping or splashed water cannot enter the equipment. Do not place containers filled with liquids, such as vases or drinking vessels, on the equipment.
- Make certain that objects cannot fall into the device.
- Use this equipment only with the accessories recommended and intended by the manufacturer.
- Do not open or modify this equipment.
- After connecting the equipment, check all cables to prevent damage or accidents, e.g., due to tripping hazards.
- During transport, make certain that the equipment cannot fall and possibly cause property damage and personal injuries.
- If your equipment is no longer functioning properly, if fluids or objects have gotten inside the equipment or if it has been damaged in another way, switch it OFF immediately and unplug it from the mains outlet (if it is a powered device). This equipment may only be repaired by authorized, qualified personnel.
- Clean the equipment using a dry cloth.
- Comply with all applicable disposal laws in your country. During disposal of packaging, please separate plastic and paper/cardboard.
- Plastic bags must be kept out of reach of children.
- Please note that changes or modifications not expressly approved by the party responsible for compliance could void the user's authority to operate the equipment.
FOR EQUIPMENT THAT Connects TO THE POWER MAINS
- CAUTION: If the power cord of the device is equipped with an earthing contact, then it must be connected to an outlet with a protective ground. Never deactivate the protective ground of a power cord.
- If the equipment has been exposed to strong fluctuations in temperature (for example, after transport), do not switch it on immediately. Moisture and condensation could damage the equipment. Do not switch on the equipment until it has reached room temperature.
- Before connecting the equipment to the power outlet, first verify that the mains voltage and frequency match the values specified on the equipment. If the equipment has a voltage selection switch, connect the equipment to the power outlet only if the equipment values and the mains power values match. If the included power cord or power adapter does not fit in your wall outlet, contact your electrician.
- Do not step on the power cord. Make certain that the power cable does not become kinked, especially at the mains outlet and/or power adapter and the equipment connector.
- When connecting the equipment, make certain that the power cord or power adapter is always freely accessible. Always disconnect the equipment from the power supply if the equipment is not in use or if you want to clean the equipment. Always unplug the power cord and power adapter from the power outlet at the plug or adapter and not by pulling on the cord. Never touch the power cord and power adapter with wet hands.
- Whenever possible, avoid switching the equipment on and off in quick succession because otherwise this can shorten the useful life of the equipment.
- IMPORTANT INFORMATION: Replace fuses only with fuses of the same type and rating. If a fuse blows repeatedly, please contact an authorized service center.
- To disconnect the equipment from the power mains completely, unplug the power cord or power adapter from the power outlet.
- Unplug the power cord and power adapter from the power outlet if there is a risk of a lightning strike or before extended periods of disuse.

To reduce the risk of electric shock, do not remove cover (or back). There are no user serviceable parts inside. Maintenance and repairs should be exclusively carried out by qualified service personnel.
The warning triangle with lightning symbol indicates dangerous uninsulated voltage inside the unit, which may cause an electrical shock. The warning triangle with exclamation mark indicates important operating and maintenance instructions.
CAUTION! HIGH VOLUMES IN AUDIO PRODUCTS!
This device is meant for professional use. Hearing damage due to high volume and prolonged exposure: When in use, this product can produce high sound-pressure levels (SPL) that can lead to irreversible hearing damage in performers, employees, and audience members. For this reason, avoid prolonged exposure to volumes more than 90 dB.
BATTERY SAFETY
- Keep conductive objects such as keys, jewelry or other materials away from the battery terminals. Failure to do so may result in the battery being short-circuited, which could lead to injury or burns.
- Never reverse the polarity of the battery contacts.
- Keep the battery away from excessive heat and direct sunlight. Do not place it on or in heating appliances, such as microwave ovens or radiators. Batteries can explode if overheated.
- Do not attempt to alter or modify the battery, to insert foreign materials into the battery or to immerse it in or bring it into contact with water or any other liquid. Failure to do so could lead to a fire, explosion or other dangerous situations.
- In the event of leakage of battery acid, ensure that it does not come into contact with skin or eyes. If this occurs, rinse immediately with clean water and consult a doctor.
- In the event of the battery becoming deformed, overheating or changing color during charging or storage, refrain from using the device immediately and remove the battery. Further use of the device could lead to leakage of battery acid or may cause a fire or an explosion.
- Do not put batteries into a fire because they may explode. Damaged batteries may also explode.
- Dispose of used batteries in accordance with local regulations. Improper use of the battery can cause a fire, an explosion or other dangerous situations.
- Do not allow children or pets to chew or suck on the battery. This could lead to damage or an explosion.
- Do not strike, puncture or place the battery under high pressure. Otherwise this could lead to a short circuit or overheating.
- Do not drop the device or battery. If the device or battery is dropped, especially onto a hard surface, either or both could be damaged.
- If the standby time of the device is significantly reduced, replace the battery.
- If the device has a built-in, non-removable battery, do not attempt to remove the battery, because this could cause damage to the device. Take the device to an authorized service center for replacement of the battery.
IMPORTANT: Charge the battery only with the dedicated charging system.
SPECIFICATIONS
ACOUSTIC PERFORMANCE
| Frequency Response | 35Hz-20KHz |
| Max Peak SPL (@1m) | Better Than 103dB |
| Crossover Point | 200Hz |
| Dispersion | 120°×20° |
| Input Impedance | 4 ohms |
HIGH FREQUENCY SECTION
| Type | Mini line-array |
| Size | 6 x 2.75" |
| Cone Material | Glass Fiber |
| Magnet Size | 1" |
| Magnet Material | Neodymium |
LOW FREQUENCY SECTION
| Type | System Subwoofer |
| Size | 8" |
| Magnet Size | 40 OZ |
| Magnet Material | Ferrite |
| Voice Coil Diameter | 2" |
AMPLIFIER PERFORMANCE SYSTEM
| Rated Power RMS | 600W (RMS) |
| Rated Power Peak | 3000W (Peak) |
| THD | 0.5% + 0.03% |
| Type | Class D + Class AB |
| Line Input Gain | -6dB |
| Mic Input Gain | -60dB |
| Cooling | Speed regulated fan |
POWER
| Type of line cord | US TYPE PLUG |
| Voltage | 110V-120V 60HZ |
| Voltage | 220V-240V 50HZ |
DIMENSIONS PACKAGED
| Dimensions (H×W×D) | 610×520×415mm |
| 24×24.47×16.33 inch | |
| Weight | 13.5 Kg. / 29.76 Lbs |
DIMENSIONS
| Dimensions (H×W×D) | 1980×320×300mm |
| 77.95×12.6×11.8 inch | |
| Weight | 11 Kg. / 24.25 Lbs |
ESPANOL //
DESCRIPCION
WARRANTY AND REPAIR:
All Gemini products are designed and manufactured to the highest standards in the industry. With proper care and maintenance, your product will provide years of reliable service.
LIMITED WARRANTY
A. Gemini guarantees its products to be free from defects in materials and workmanship for one (1) year from the original purchase date. Exceptions: Laser assemblies on CD Players, cartridges, and crossfaders are covered for 90 days.
B. This limited warranty does not cover damage or failure caused by abuse, misuse, abnormal use, faulty installation, improper maintenance or any repairs other than those provided by an authorized Gemini Service Center.
C. There are no obligations of liability on the part of Gemini for consequential damages arising out of or in connection with the use or performance of the product or other indirect damages with respect to loss of property, revenues, of profit, or costs of removal, installation, or reinstallation. All implied warranties for Gemini, including implied warranties for fitness, are limited in duration to one (1) year from the original date of purchase, unless otherwise mandated by local statutes.
RETURN/REPAIR
A. In the U.S.A., please call our helpful Customer Service Representatives at (732) 346-0061, and they will be happy to give you a Return Authorization Number (RA#) and the address of an authorized service center closest to you.
B. After receiving an RA#, include a copy of the original sales receipt, with defective product and a description of the defect. Send by insured freight to: Gemini and use the address provided by your customer service representative. Your RA# must be written on the outside of the package, or processing will
be delayed indefinitely!
C. Service covered under warranty will be paid for by Gemini and returned to you. For non-warrantied products, Gemini will repair your unit after payment is received. Repair charges do not include return freight. Freight charges will be added to the repair charges.
D. On warranty service, you pay for shipping to Gemini, we pay for return shipping within the continental United States. Alaska, Hawaii, Puerto Rico, Canada, Bahamas, and the Virgin Islands will be charged for freight.
E. Please allow 2-3 weeks for return of your product.
Under normal circumstances your product will spend no more than 10 working days at Gemini. We are not responsible for shipping times.
IN THE USA:
If you experience problems with this unit, call 732-346-0061 for Gemini customer service.
Do not attempt to return this equipment to your dealer.
Parts of the design of this product may be protected by worldwide patents. Information in this manual is subject to change without notice and does not represent a commitment on the part of the vendor. Gemini shall not be liable for any loss or damage whatsoever arising from the use of information or any error contained in this manual. No part of this manual may be reproduced, stored in a retrieval system or transmitted, in any form or by any means, electronic, electrical, mechanical, optical, chemical, including photocopying and recording, for any purpose without the express written permission of Gemini. It is recommended that all maintenance and service on this product is performed by Gemini or its authorized agents. Gemini will not accept liability for loss or damage caused by maintenance or repair performed by unauthorized personnel.
Gemini Worldwide Headquarters
107 Trumbull Street, Building F8 • Elizabeth, NJ 07206 • USA • Tel: (732)346-0061 • Fax: (732)346-0065
Innovative Concepts and Design LLC, All Rights Reserved.
Register your product online at
WWW.GEMINISOUND.COM
to be eligible for great prize giveaways!




- FUNCTION ENGLISH //
- FUNCTIONES ESPANOL //
- FONCTIONS FRANÇAIS //
- ASSEMBLY
- CHANGING THE AC VOLTAGE
- POWERING ON
- CONNECTING EXTERNAL DEVICES
- WIRED MICROPHONES
- BALANCED LINE LEVEL SOURCE
- AUX INPUT
- RCA INPUT
- BLUETOOTH PAIRING
- ADDITIONAL SPEAKER
- USING THE INTERNAL MIXER
- MASTER VOLUME
- POWER/LIMITLED
- CHANNEL VOLUMES
- MIC/LINE SWITCH
- REVERB SWITCH
- REVERB AMOUNT KNOB
- DSP PRESETS
- ENGLISH //
- WARNING AND PRECAUTIONS
- PREVENTIVE MEASURES
- FOR EQUIPMENT THAT Connects TO THE POWER MAINS
- CAUTION! HIGH VOLUMES IN AUDIO PRODUCTS!
- BATTERY SAFETY
- SPECIFICATIONS
- ESPANOL //
- DESCRIPCION
- WARRANTY AND REPAIR:
- LIMITED WARRANTY
- RETURN/REPAIR
- IN THE USA:
- Gemini Worldwide Headquarters
Brand : GEMINI
Model : WRX-843
Category : Loudspeaker