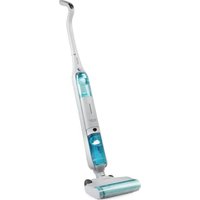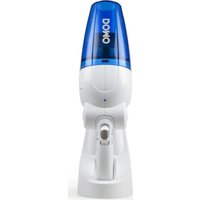
DO1001SV - Vacuum Cleaner DOMO - Free user manual and instructions
Find the device manual for free DO1001SV DOMO in PDF.


| Product type | Cordless stick vacuum cleaner |
| Brand | Domo |
| Model | DO1001SV |
| Power supply | Integrated rechargeable battery, adapter 27 V / 0.5 A |
| Adapter input voltage | 100-240 V~, 50/60 Hz |
| Adapter output power | 13.5 W |
| Charging time | 24 hours (first charge) |
| Battery type | Rechargeable Li-ion |
| Runtime | Approximately 30 minutes (depending on use) |
| Dust container capacity | Approximately 0.6 L |
| Filters | Plastic coarse filter + HEPA filter |
| Included accessories | Crevice nozzle, small dusting brush, motorized floor brush, wall mount |
| Main functions | ECO/MAX speed regulator, automatic safety shut-off, battery indicator |
| Usage | Household use only |
| Maintenance and cleaning | Clean the container and filters after each use, HEPA filter washable with water, removable rotating brush |
| Safety | Automatic shut-off in case of blockage, do not vacuum liquids or sharp objects |
| Warranty | 2 years (accessories and wear items: 6 months) |
| Customer service | Linea 2000, +32 14 21 71 91 |
| Weight | Approximately 2.5 kg |
| Dimensions (overall) | Height with handle: approximately 110 cm |
Frequently Asked Questions - DO1001SV DOMO
User questions about DO1001SV DOMO
0 question about this device. Answer the ones you know or ask your own.
Ask a new question about this device
Download the instructions for your Vacuum Cleaner in PDF format for free! Find your manual DO1001SV - DOMO and take your electronic device back in hand. On this page are published all the documents necessary for the use of your device. DO1001SV by DOMO.
USER MANUAL DO1001SV DOMO
natural_image
Purple handheld vacuum cleaner with black handle and gray body (no text or symbols visible)DO1001SV
natural_image
Two black-and-white icons: a triangular warning symbol with an exclamation mark and an open book (no text or symbols present)text_image
Labeled diagram of a vacuum cleaner with numbered parts for identification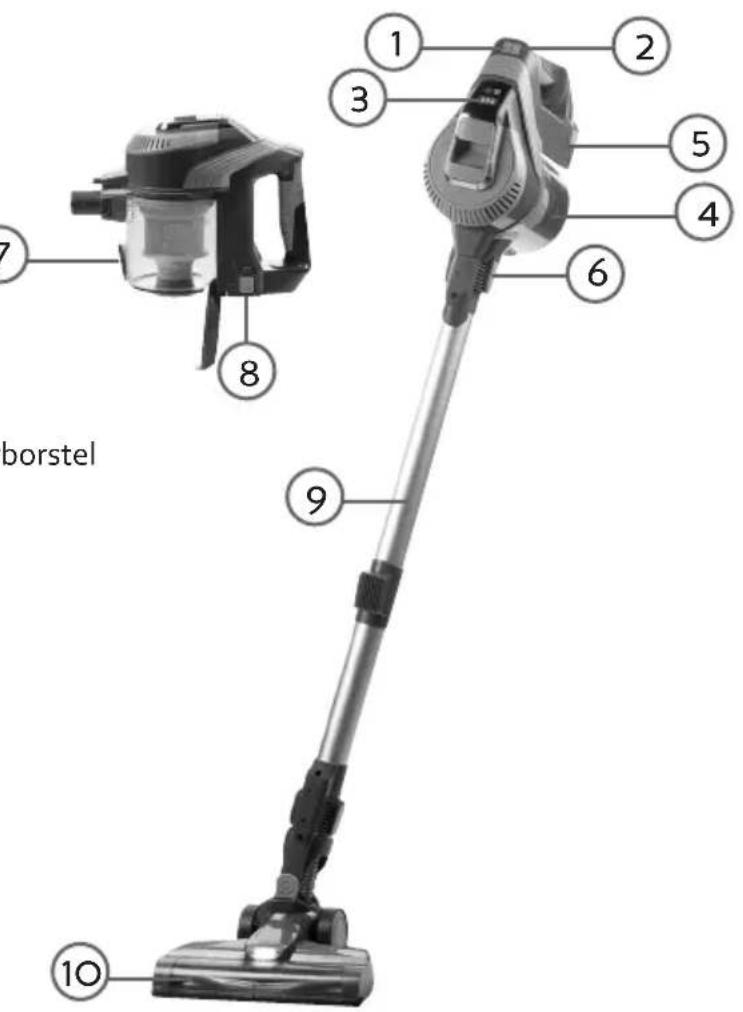
text_image
borstel 1 2 3 4 5 6 7 8 9 10
MONTAGE
DE HANDSTOFZUIGER
natural_image
Two views of a mechanical device showing internal components and a click button (no text or symbols present)natural_image
Close-up of a black industrial vacuum cleaner with a button labeled 'CLICK' (no other text or symbols visible)DE STEELSTOFZUIGER
natural_image
Close-up of a black vacuum cleaner device with a 'CLICK' button and arrow indicator (no text or symbols on the device itself)natural_image
Black handheld vacuum cleaner with clear glass body and control panel (no visible text or symbols)GEBRUIK
natural_image
Technical line drawings of two mechanical components (no text or symbols)REINIGING EN ONDERHOUD
HET STOFRESERVOIR
natural_image
Hand holding a black handheld device with a black arrow pointing to the handle (no visible text or symbols)DE FILTERS IN HET STOFRESERVOIR
natural_image
Two plastic filter components labeled A and B, shown side by side (no text or symbols on the objects themselves)natural_image
Close-up of a mechanical component with concentric rings and a highlighted circular area (no text or symbols)natural_image
Hand holding a black spray gun device with liquid inside (no visible text or symbols)natural_image
Close-up of a mechanical component with a cylindrical housing and two circular washers (no visible text or symbols)natural_image
Close-up of a mechanical component with a curved internal structure and an arrow pointing to it (no visible text or symbols)natural_image
Close-up of mechanical components including a lever and a curved tool (no visible text or symbols)PROBLEEM EN OPLOSSING
text_image
Prohibition sign with a trash bin crossed out and a black rectangular block below, indicating no waste or pollution.natural_image
Recycling symbol icon (three chasing arrows) inside a rounded square frame, no text or labels present.natural_image
Symbol of a trash bin crossed out by two diagonal lines, representing no waste or discharge (no text or numbers present)text_image
Labeled diagram of a vacuum cleaner with numbered parts for identification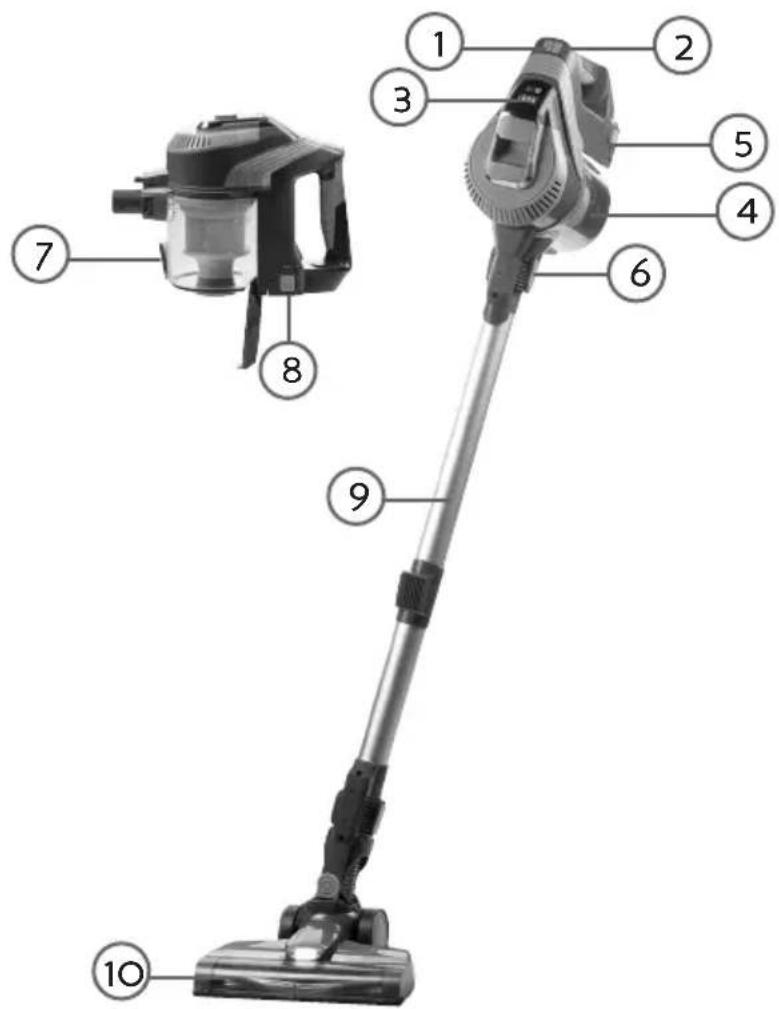
text_image
Labeled diagram of a vacuum cleaner with numbered parts for identification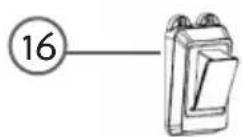
MONTAGE
L'ASPIRATEUR À MAIN
natural_image
Two views of a mechanical device showing a tool and a close-up of the component (no text or symbols visible)natural_image
Close-up of a black vacuum cleaner with a click button indicator (no text or symbols on the device itself)natural_image
Close-up of a black industrial vacuum cleaner with a click button indicator (no text or symbols on the device itself)natural_image
Black handheld vacuum cleaner with clear glass casing and control panel (no visible text or symbols)UTILISATION
natural_image
Technical line drawings of two mechanical components (no text or symbols)NETTOYAGE ET ENTRETIEN
natural_image
Hand holding a black handheld device with a black handle and arrow indicator (no visible text or symbols)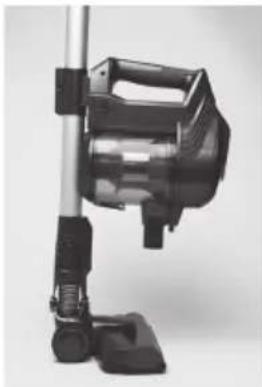
natural_image
Black and white photo of a vacuum cleaner with adjustable arm and base (no visible text or symbols)natural_image
Two plastic filter components labeled A and B, shown side by side (no text or symbols on the objects themselves)natural_image
Close-up of a mechanical component with concentric rings and a circled area, no visible text or symbols.natural_image
Hand holding a black vacuum cleaner with lid, no visible text or symbolsnatural_image
Close-up of a black mechanical device with circular lens and two separate washers (no visible text or symbols)natural_image
Close-up of a mechanical component with a curved internal structure and an arrow indicating direction (no text or symbols visible)natural_image
Close-up of mechanical components, one showing a lever mechanism and the other showing a coiled spring or ring assembly (no visible text or symbols)text_image
Prohibition sign with crossed-out trash bin and no text, indicating no waste disposal or restrictionnatural_image
Recycling symbol icon with three chasing arrows forming a triangle (no text or labels)natural_image
Symbol of a trash bin crossed with no text or numbers, indicating no waste or discharge (no text present)BATTERIE AMOVIBLE
text_image
Labeled diagram of a vacuum cleaner with numbered parts for identification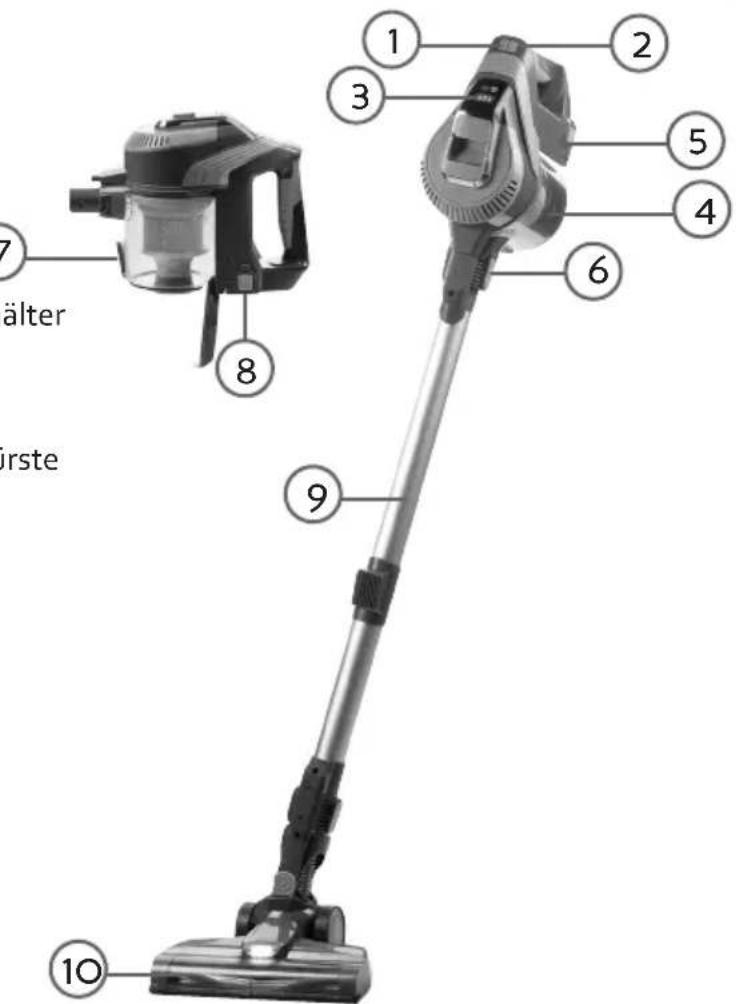
text_image
1 2 3 4 5 6 7 8 9 10 wärter wärste
MONTAGE
DER HANDSTAUBSAUGER
natural_image
Two views of a mechanical device showing a tool interacting with a valve, labeled 'CLICK' (no text or symbols on the device itself)natural_image
Close-up of a black vacuum cleaner device with a 'CLICK' button and arrow indicator (no text or symbols on the device itself)DER STAUBSAUGER
natural_image
Close-up of a black vacuum cleaner with a button labeled 'CLICK' pointing to the side (no other text or symbols visible)natural_image
Black handheld spray gun with clear glass casing and control panel (no visible text or symbols)GEBRAUCH
natural_image
Black and white photo of a vacuum cleaner with adjustable arm and base (no visible text or symbols)WANDBEFESTIGUNG
natural_image
Technical line drawings of two mechanical components (no text or symbols)natural_image
Hand holding a black handheld device with a black handle and arrow indicator (no visible text or symbols)DIE FILTER IM STAUBBEHÄLTER
natural_image
Two plastic filter components labeled A and B, shown side by side (no text or symbols on the objects themselves)natural_image
Close-up of a mechanical component with concentric rings and a circular mark (no visible text or symbols)natural_image
Hand holding a black vacuum cleaner with a handle, no visible text or symbolsnatural_image
Close-up of a black mechanical device with circular lens and two separate wash rings (no text or symbols visible)natural_image
Close-up of a mechanical component with a metallic shaft and mounting holes, showing internal structure (no text or symbols visible)natural_image
Close-up of mechanical components including a lever and clamping mechanism (no visible text or symbols)text_image
Prohibition sign with crossed-out trash bin and no text, indicating no waste or disposal restrictionnatural_image
Recycling symbol icon with three chasing arrows forming a triangle (no text or labels)natural_image
Symbol of a trash bin crossed out by two diagonal lines, representing no waste or discharge (no text or numbers present)HERAUSNEHMBARE BATTERIE
All of our products are always submitted to a strict quality control before they are sold to you. Should you nevertheless experience problems with your device, we sincerely regret this.
In that case, we kindly request you to contact our customer service.
Our staff will gladly assist you.

+32 14 21 71 91

info@linea2000.be
Monday – Thursday: 8.30 – 12.00 and 13.00 – 17.00
Friday: 8.30 – 12.00 and 13.00 – 16.30
This appliance has a two year warranty period. During this period the manufacturer is responsible for any failures that are the direct result of construction failure. When these failures occur the appliance will be repaired or replaced if necessary. The warranty will not be valid when the damage to the appliance is caused by wrong use, not following the instructions or repairs executed by a third party. The guarantee is issued with the original till receipt. All parts, which are subject to wear, are excluded from the warranty.
If your device breaks down within the 2-year warranty period, you can return the device together with your receipt to the shop where you purchased it.
The guarantee on accessories and components that are liable to wear-and-tear is only 6 months.
The guarantee and responsibility of the supplier and manufacturer lapse automatically in the following cases:
· If the instructions in this manual have not been followed.
· In case of incorrect connection, e.g., electrical voltage that is too high.
· In case of incorrect, rough or abnormal use.
· In case of insufficient or incorrect maintenance.
- In case of repairs or alterations to the device by the consumer or non-authorised third parties.
- If the customer used parts or accessories that are not recommended or provided by the supplier / manufacturer.
SAFETY INSTRUCTIONS
- Read all instructions before use.
- This appliance may be used by children from the age of 16 and up, and also by persons with a physical or sensory limitation, as well as mentally limited persons or persons with a lack of experience and knowledge. But only on the condition that these persons have received the necessary instructions on how to use this appliance in a safe way and know the dangers that can occur by using this appliance.
- Children cannot be allowed to play with the appliance.
- Maintenance and cleaning of the appliance may not be done by children, unless they are older than 16 years old and are under supervision. Keep the appliance out of reach of children younger than 16 years old.
- This appliance is suitable to be used in a household environment and in similar surroundings such as:
· Kitchen for personnel of shops, offices or other similar professional surroundings
- Farms
· Hotel or motel rooms and other surroundings with a residential character
- Guest rooms or similar
- Attention: This appliance cannot be used with an external timer or a separate remote control.
- Before use, check if the voltage stated on the appliance corresponds with the voltage of the power net at your home.
- Never use the appliance when the cord or plug is damaged, after malfunction or when the appliance itself is damaged. In that case, take the appliance to the nearest qualified service center for check-up and repair.
- Close supervision is necessary when the appliance is used near or by children.
- The use of accessories that are not recommended or sold by the manufacturer can cause fire, electrical shock or injuries.
- Unplug the appliance when it is not in use, before assembling or disassembling any parts and before cleaning the appliance. Put all buttons and knobs into the 'off' position and unplug the appliance by grasping the plug. Never unplug by pulling the cord.
· Do not leave a working appliance unattended.
- Never place this appliance near a gas stove or electrical stove or in a place where it may come into contact with a warm appliance.
- Do not use the appliance outdoors.
- Only use the appliance for its intended use.
· Always use the appliance on a steady, dry and level surface.
- Only use the appliance for domestic use. The manufacturer can not be held responsible for accidents that result from improper use of the appliance or not following the instructions described in this manual.
· Never immerse the appliance, the cord or the plug in water or any other liquid.
- Keep the cord away from sharp edges and hot parts or other heat sources.
· Before use, remove all packaging materials and any promotional stickers. - Do not use the vacuum cleaner to vacuum up detergents, liquids, needles, matches and other similar liquids, sharp objects or flammable objects.
- Do not use the vacuum cleaner to vacuum up cement, powder and other small particles. Also avoid vacuuming up large objects. The vacuum cleaner could be clogged, the motor could overheat or other damage may occur.
· Make sure that the air intake or the floor suction opening do not become blocked.
· Make sure that the machine does not come into contact with liquids.
- First charge a new battery up completely.
- Pull the plug from the outlet when the vacuum cleaner is fully charged.
- This product contains a rechargeable battery. Batteries should be recycled. Do not drill into the battery or expose it to high temperatures; the battery could explode.
· Under extreme circumstances, there could be leakage of the battery. If the liquid from the battery comes into contact with the skin, wash it off immediately with water and soap or neutralize it with a mild acid such as lemon juice or vinegar. If the liquid comes into contact with the eyes, rinse them liberally with water for at least 10 minutes and contact a doctor.
- Do not place foreign objects in the openings of your machine. Do not use the machine if an opening is blocked. Keep the machine free from dust, dirt, hair or anything that could reduce the air supply.
- Remove large and sharp objects from the floor to prevent damage to the plastic components, the brushes and the motor.
- Keep hair, loose clothing, fingers and other body parts away from openings and moving parts.
- Never use the appliance without a filters. This will damage the motor and render it unusable.
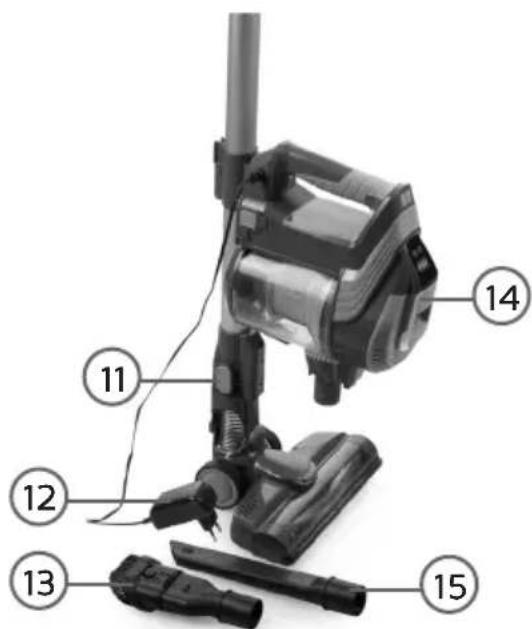
PARTS
- On-off button
- Speed control
- Battery charge indicator
- Dust reservoir
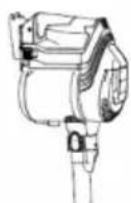
- Motor compartment
- Handle release button
- Unlock button for dust reservoir
- Battery release button
- Tube
- Floor nozzle with rotating floor brush
- Release button floor nozzle
- Adapter
- Dust brush
- Cover filters in the motor compartment
- Crevice vacuum cleaner
- Wall fixing
text_image
Labeled diagram of a vacuum cleaner with numbered parts for identification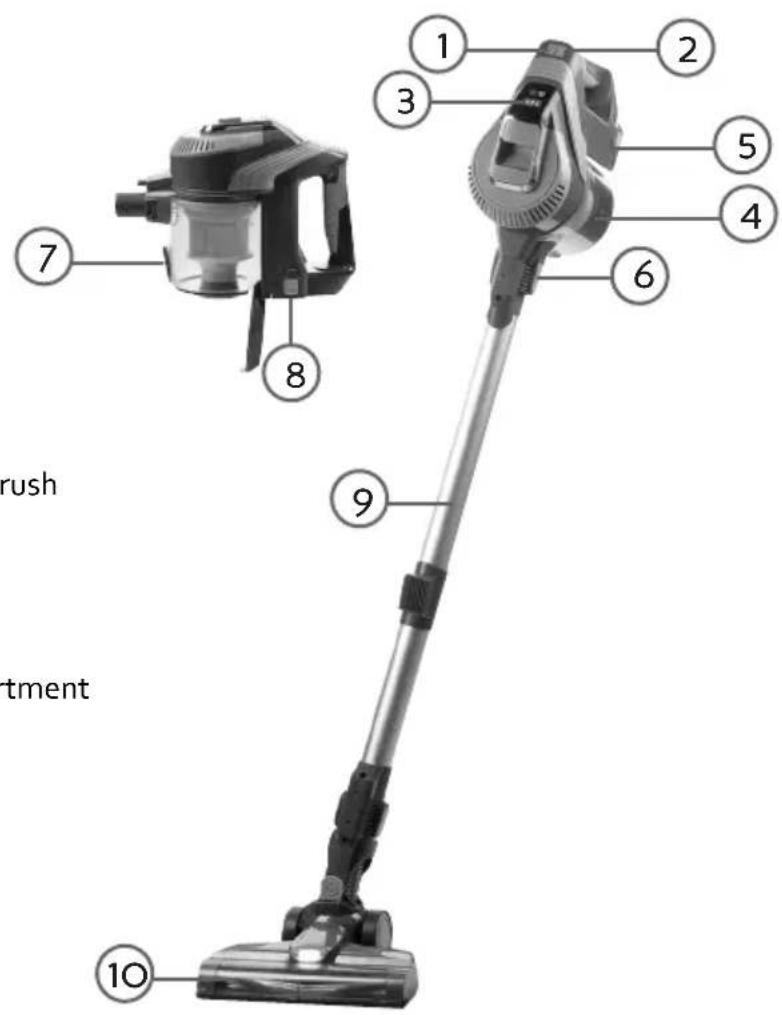
text_image
1 2 3 4 5 6 7 8 9 10 rush tment
MONTAGE
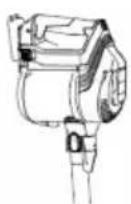
THE HAND VACUUM CLEANER
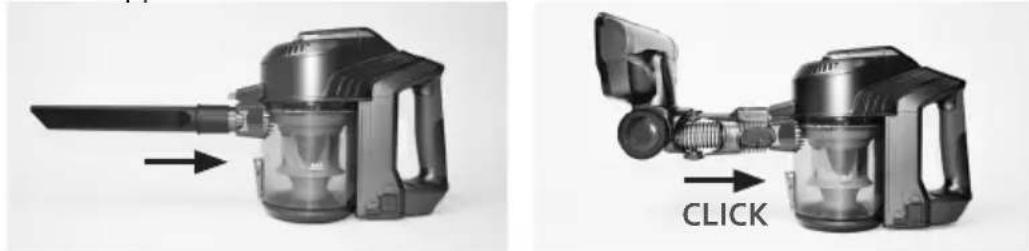
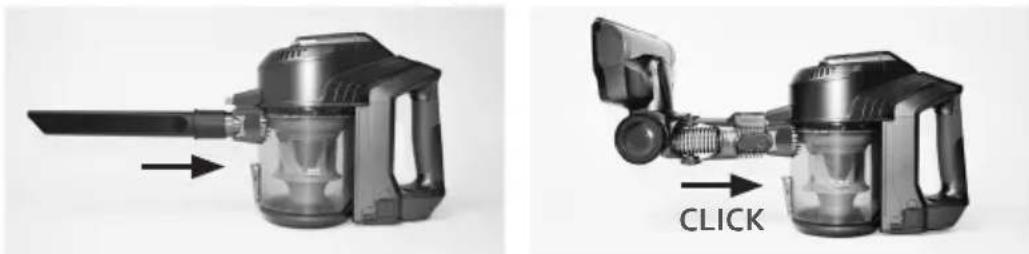
- Click the floor brush, dust brush or crevice tool securely into place in the opening on the front of the appliance.
natural_image
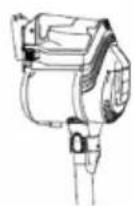
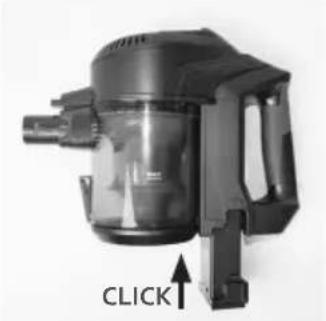
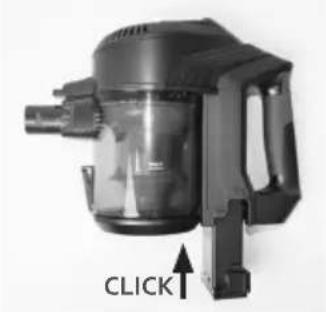
Two views of a cleaning device showing internal components and a click button (no text or symbols on the device itself)- Insert the batteries at the bottom of the motor compartment. Push until it clicks into place in the motor compartment.
natural_image
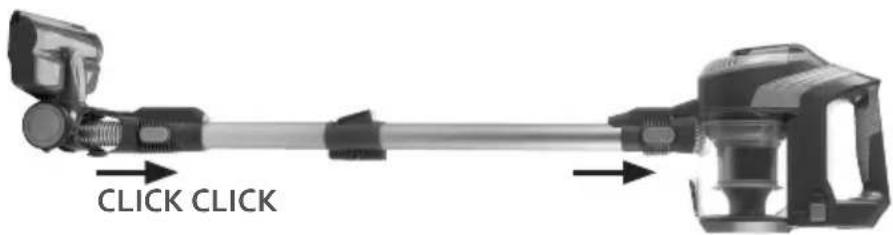
Close-up of a black vacuum cleaner with a 'CLICK' button and arrow indicator (no text or symbols on the device itself)- Click the tube firmly into place in the vacuum opening on the front of the machine.
- Click the floor brush, dust brush or the crevice tool firmly into place in the tube.
text_image
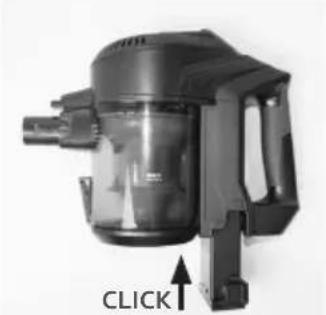
CLICK CLICK- Insert the batteries at the bottom of the motor compartment. Push until it clicks into place in the motor compartment.
natural_image
Close-up of a black vacuum cleaner with a button labeled 'CLICK' (no other text or symbols visible)To disassemble the appliance, remove the various parts step by step: the floor brush, the crevice tool, the dust brush and the tube. To do this, press the release button and remove the relevant part by pulling it firmly.
CHARGING
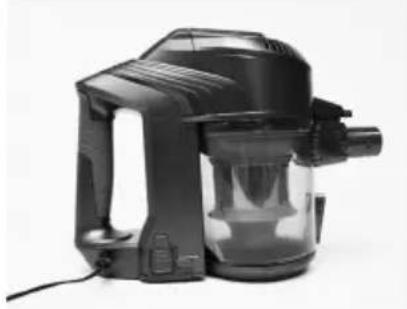
- Prior to first use, charge the machine for 24 hours in order to be able to utilize the full capacity of the battery.
- First connect the adapter to the machine and put the adapter in the outlet.
- The battery level indicator will now light up and indicate when the machine is fully charged.
· To extend the life cycle of the battery, you should regularly charge the machine fully, and allow the battery to run flat.
natural_image
Black and white photo of a vacuum cleaner with a glass lid and control panel (no visible text or symbols)USE
- Press the on-off switch on the handle to turn the machine on. When you switch on the machine, the rotating floor brush at the bottom of the floor nozzle will begin to turn. This will cause the dirt in the opening to be shifted and thereby vacuumed up. The dirt will be collected in the dust reservoir.
- Press the speed control to increase or lower the suction power. The ECO or MAX indicator lamp will light up:
· ECO: low suction power. The appliance and the battery will also use less power.
- MAX: maximum suction power for stubborn dirt.
- The machine is equipped with a safety which will ensure that the machine shuts itself off if, for example, objects which are too large are sucked up, or if fingers become tangled in the floor brush. This is for personal safety and to protect the motor. To reverse the floor brush, press the on/off button again or press the speed control.
- For the best results, clean the dust reservoir and the filters after each use. This is better for the suction power and the life span of the machine.
ACCESOIRES
You can attach the following accessories to the vacuum:
· Dust brush: for furniture, bookshelves, curtains and hard to clean surfaces.
- Crevice vacuum cleaner: for crevices, corners, stairs, keyboards,...
STORAGE
STORE UPRIGHT
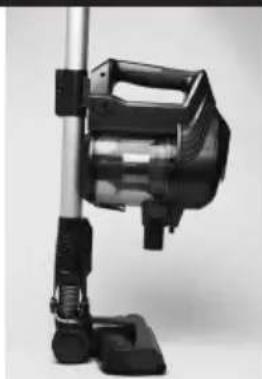
- Place the floor nozzle on the handle. Remove the motor unit from the handle.
- The handle with floor nozzle can remain upright. You can push the motor unit onto the fixing on the handle.
natural_image
Black and white photo of a vacuum cleaner with attached clamps (no visible text or symbols)WALL FIXING
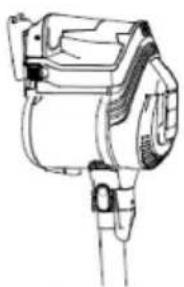
· Hold the wall fixing in a vertical position against the wall.
- Mark the holes with a pencil.
- Drill the holes in the wall and insert the plugs supplied.
- Use the screws to secure the wall fixing.
- Place the motor unit on the fixing to store it.
natural_image
Technical line drawing of a mechanical device with no visible text or symbolsCLEANING AND MAINTENANCE
THE DUST CONTAINER
Never exceed the maximum indicator on the dust container.
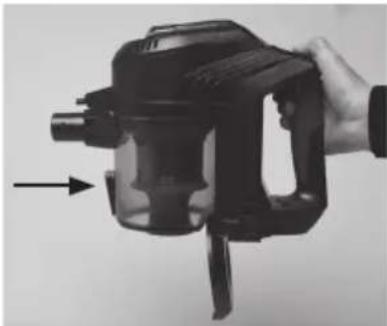
Empty the dust container by pressing the release button on the bottom. The dust container falls open and you can then remove the coarse dirt.
natural_image
Hand holding a black handheld device with a white arrow pointing to the handle (no visible text or symbols)THE FILTERS IN THE DUST CONTAINER
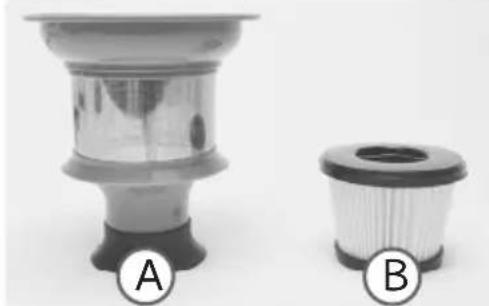
There are two filters in the dust container: the plastic coarse dirt filter (A) and the HEPA filter (B).
natural_image
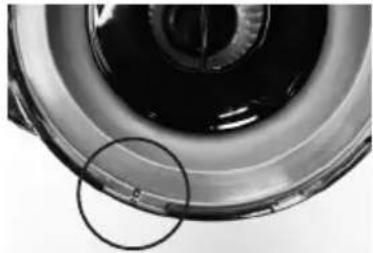
Two plastic filter components labeled A and B, shown side by side without any text or symbols on the surfaces.- Remove the dust container from the motor compartment of the chopper by rotating it clockwise. Make sure that the mark on the motor unit is aligned with the release lock symbol.
-
Pull the filters out of the dust reservoir. Remove the HEPA filter from the coarse dirt by pulling it upwards. Blow compressed air through the filters to clean them. You can also wash the filters under running water. Take care to dry them completely before using them again in the appliance.
-
Return the HEPA filter to the course dirt filter.
-
Return both filters to the dust container. Ensure that the notch in the filter is lined up with the raised part of the container.
natural_image
Close-up of a mechanical component with concentric rings and a circled gap (no visible text or symbols)- Return the dust container to the motor compartment by rotating it anti-clockwise. Make sure that the mark on the motor unit is aligned with the lock symbol.
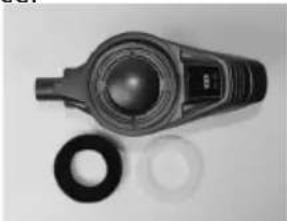
THE FILTERS IN THE MOTOR COMPARTMENT
There are two filters in the motor section.
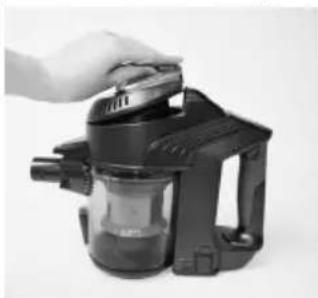
- Use the release button at the top of the motor compartment to open it and raise the cover.
natural_image
Hand placing a small component into a black industrial vacuum cleaner (no visible text or symbols)- Remove the two dust filters. Blow compressed air through the filters to clean them. You can also wash the filters under running water. Take care to dry them completely before using them again in the appliance.
natural_image
Close-up of a black mechanical device with circular lens and two separate washers (no visible text or symbols)- Return the filters to the motor compartment. Ensure that the black filter is at the top. Return the cover to the motor compartment. To do this, first hook the cover onto the front of the motor compartment and then click the cover into place.
CLEANING THE FLOOR BRUSH
-
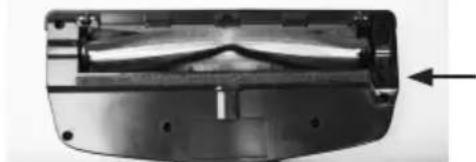
Remove the floor nozzle from the upright vacuum cleaner. Press the release button at the back of the floor nozzle and remove it from the machine.
-
Use a screwdriver to undo the lock on the bottom of the floor brush. You can then lift the lock upwards.
natural_image
Close-up of a mechanical component with a V-shaped groove and a central shaft, showing internal structure (no text or symbols visible)-
Remove the rotating floor brush from the floor nozzle.
-
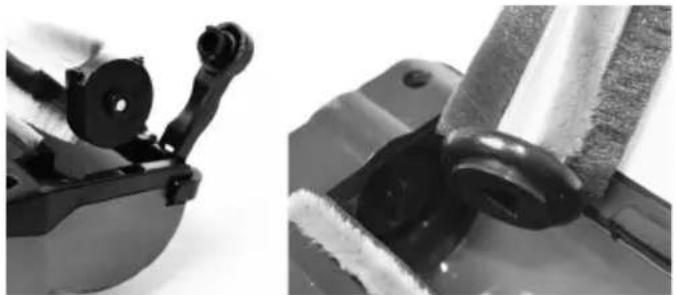
Remove hairs and other dirt that have wrapped around the floor brush. If you do not clean the floor brush regularly, it will become damaged and your machine will become unusable.
-
Then place the rotating brush back in the floor brush. Make sure that the triangle on the rotating brush is aligned with the triangle in the floor brush. On the other side, the round end of the rotating brush needs to be tilted downwards.
natural_image
Close-up of mechanical components with no visible text or symbols- Use a screwdriver to put the lock back in place.
CLEANING THE MACHINE
Clean the machine with a slightly moist soft cloth. Dry the machine off well. Never submerge the machine in water!
PROBLEM AND SOLUTION
| Problem Solution | |
| The machine does not start up. · | The battery is empty. Charge the machine.· The battery is not inserted properly. Insert the battery until it clicks into place. |
| The machine does not vacuum. · | The filters are dirty/the dust reservoir is full.· The floor nozzle is clogged/the floor brush is blocked.· The nozzle opening is clogged.· Clean the machine as described in this manual. |
| The running time of the machine is shorter and shorter. | · The machine is not sufficiently charged. Charge the machine fully and try again.· The battery is broken or old. Replace the battery.· Stuck hairs.Remove the hairs stuck on the brushes. |
| The indicator light does not burn while charging. | · There is poor contact.· Check that the adapter is connected properly.· Remove the dust on the connector of the upright vacuum cleaner |
SPECIFICATIONS ADAPTOR
| Published information Value and precision Unit | ||
| Linea 2000 BV – Dompel 9 – 2200 Herentals – Belgium | - | - |
| Model number DO1001SV - | ||
| Supply voltage 100-240V~ V | ||
| Power frequency 50/60 Hz Hz | ||
| Output voltage 27 V | ||
| Output current 0,5 A | ||
| Output power 13,5 W | ||
| Average active efficiency | 86,43 | % |
| Efficiency at low load | 74,72 | % |
| Non-loaded energy consumption 0,058 | W | |
ENVIRONMENTAL GUIDELINES
text_image
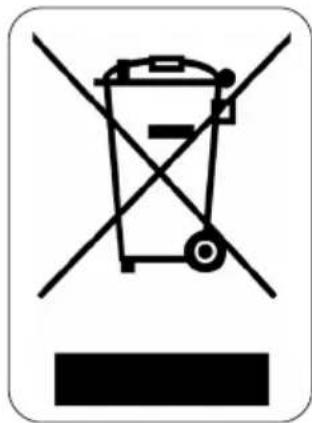
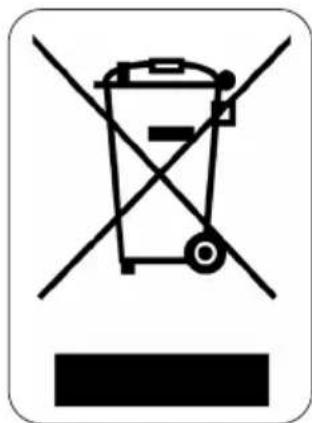
Prohibition sign with crossed-out trash bin and no text, indicating no waste or disposal restrictionThis symbol on the product or on its packaging indicates that this product may not be treated as household waste. Instead it must be brought to the applicable collection point for recycling of electrical and electronic equipment. By ensuring this product is disposed of correctly, you will help prevent potential negative consequences for the environment and human health, which could otherwise be caused by inappropriate waste handling of this product. For more detailed information about recycling of this product, please contact your local city office, your household waste disposal service or the shop where you purchased the product.
natural_image
Recycling symbol icon with three chasing arrows forming a triangle (no text or labels)The packaging is recyclable. Please treat the packaging ecologically.
natural_image
Symbol of a trash bin crossed with no text or numbers, indicating no waste or discharge (no text present)REMOVABLE BATTERY
The appliance is battery-operated, and the battery must not be disposed of with household waste, even after use. You can take the appliance to a collection point for discarded electrical appliances (Recupel) in your neighbourhood (container park, specialist shop, etc.). Batteries contain substances that are dangerous to human health and to the environment.
Remove the battery from the appliance before disposal as described in this manual. Recycle the battery in accordance with local laws and regulations. Never pierce the battery or expose it to high temperatures; this may cause the battery to explode.
Battery leakage may occur under extreme conditions. If the liquid from the battery comes into contact with the skin, immediately wash it off with soap and water or neutralise it with a mild acid such as lemon juice or vinegar. If the liquid comes into contact with the eyes, rinse them abundantly with water for at least 10 minutes and contact a doctor.
GARANTIA
text_image
Labeled diagram of a vacuum cleaner with numbered parts for identification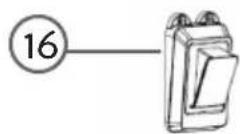
ENSAMBLAJE
natural_image
Two views of a mechanical device showing a tool and a close-up of the component (no text or symbols visible)natural_image
Close-up of a black vacuum cleaner with a click button indicator (no text or symbols on the device itself)LA ASPIRADORA VERTICAL
natural_image
Close-up of a black industrial vacuum cleaner with a button labeled 'CLICK' (no other text or symbols visible)natural_image
Black handheld vacuum cleaner with clear glass body and control panel (no visible text or symbols)USO
natural_image
Black and white photo of a vacuum cleaner with adjustable arm and base (no visible text or symbols)FIJACIÓN A LA PARED
natural_image
Technical line drawings of two electrical components (no text or symbols)LIMPIEZAY MANTENIMIENTO
natural_image
Hand holding a black handheld device with a black handle and arrow indicator (no visible text or symbols)natural_image
Two types of filter cartridges labeled A and B, shown side by side (no text or symbols on the devices themselves)natural_image
Close-up of a mechanical component with a circular annotation highlighting a feature (no visible text or symbols)natural_image
Hand holding a black industrial vacuum cleaner with a clear lid (no visible text or symbols)natural_image
Close-up of a mechanical component with a cylindrical lens and two circular washers (no visible text or symbols)natural_image
Close-up of a mechanical component with a curved internal structure and an arrow indicating direction (no text or symbols visible)natural_image
Close-up of mechanical components including a lever and a coiled spring (no visible text or symbols)text_image
Prohibition sign with crossed-out trash bin and no text, indicating no waste or disposal.natural_image
Recycling symbol icon with three chasing arrows forming a triangle (no text or labels)natural_image
Symbol of a trash bin crossed with no text or numbers, indicating no waste or discharge (no text present)BATERÍA EXTRAÍBLE
text_image
Labeled diagram of a vacuum cleaner with numbered parts for identification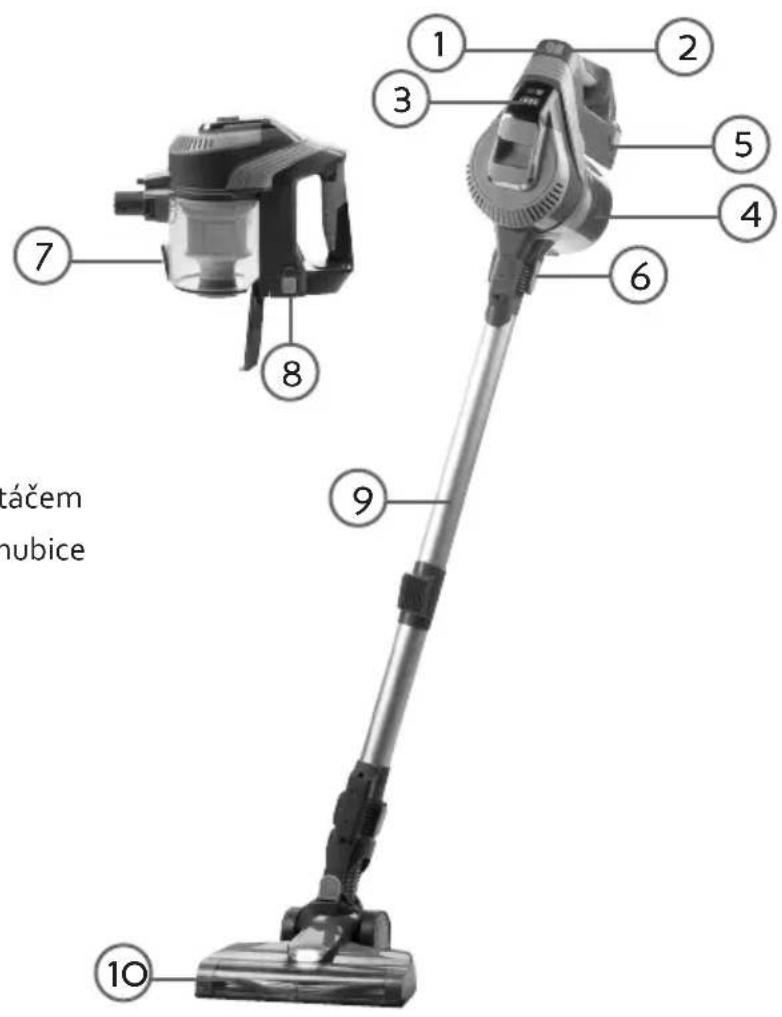
text_image
1 2 3 4 5 6 7 8 9 10 láčem nubice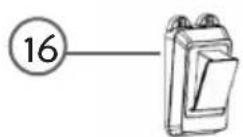
SESTAVENÍ
RUČNÍ VYSAVAČ
natural_image
Two views of a black industrial vacuum cleaner with a tool and valve, showing internal components and a click button (no text or symbols on the device itself)- Zespodu vysavače vložte baterie. Baterii zatlačte do vysavače dokud se nezacvakne.
natural_image
Close-up of a black vacuum cleaner with a 'CLICK' button and arrow indicator (no text or symbols on the device itself)KLASICKÝ TYČOVÝ VYSAVAČ
natural_image
Close-up of a black vacuum cleaner with a click button indicator (no text or symbols on the device itself)natural_image
Black vacuum cleaner with clear glass body and control panel (no visible text or symbols)POUŽITÍ
natural_image
Technical line drawings of two mechanical components (no text or symbols)ČIŠTĚNÍ A ÚDRŽBA
ZÁSOBNÍK PRACHU
natural_image
Hand holding a black handheld device with a circular handle and arrow indicator (no visible text or symbols)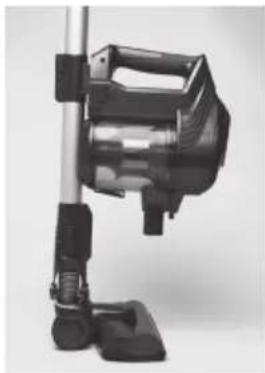
natural_image
Black and white photo of a vacuum cleaner with adjustable arm and base (no visible text or symbols)FILTRY UVNITŘ ZÁSOBNÍKU NA PRACH
natural_image
Two mechanical components labeled A and B, shown side by side without any visible text or symbols.natural_image
Close-up of a car wheel rim with two circular annotations highlighting the rim area (no text or symbols present)natural_image
Hand holding a black vacuum cleaner with lid, no visible text or symbolsnatural_image
Close-up of a black mechanical device with circular lens and two white washers (no text or symbols visible)natural_image
Mechanical component with a curved internal structure and an arrow indicating direction (no visible text or symbols)natural_image
Close-up of mechanical components including a lever and a curved pipe assembly (no visible text or symbols)OHLED NA ŽÍVOTNÍ PROSTŘEDÍ
text_image
Prohibition sign with crossed-out trash bin and no text, indicating no waste or disposal.natural_image
Recycling symbol icon with three chasing arrows forming a triangle (no text or labels)natural_image
Symbol of a trash bin crossed with no text or numbers, representing waste sorting or disposal (no text present)VYJÍMATELNÉ/VYMĚNITELNÉ BATERIE
text_image
Labeled diagram of a vacuum cleaner with numbered parts for identification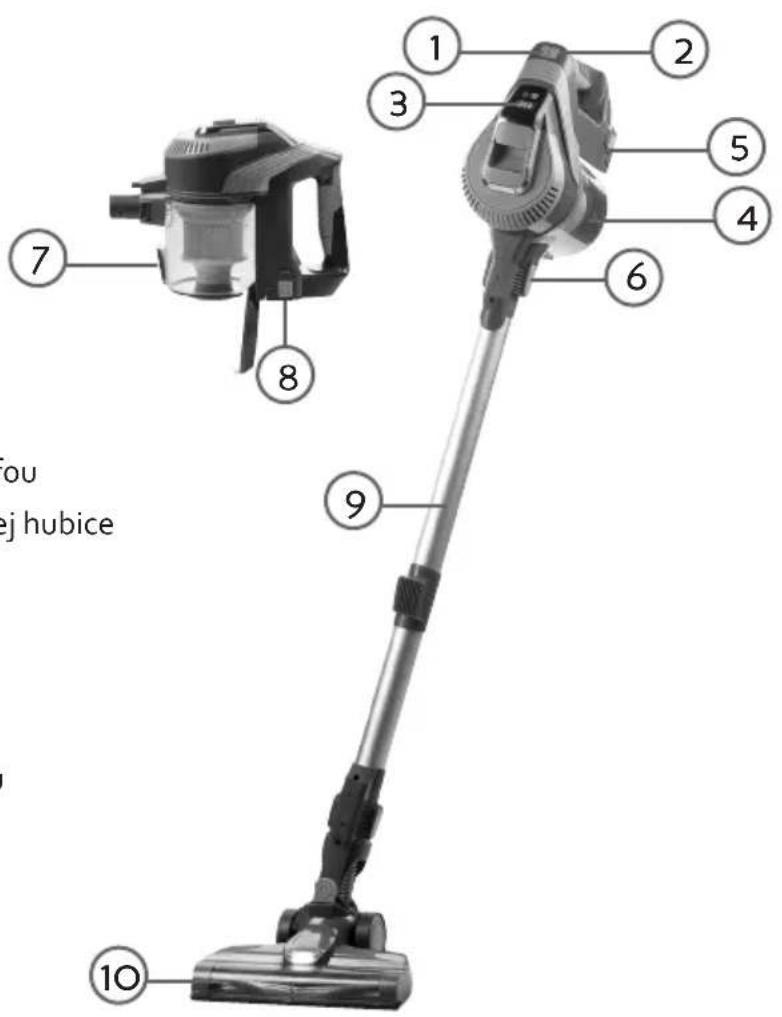
text_image
you ej hubice 1 2 3 4 5 6 7 8 9 10
ZOSTAVENIE
RUČNÝ VYSÁVAČ
- Vezmite štrbinovou alebo podlahovú hubicu a nasadte ju pevne na vysávač.
natural_image
Two views of a black vacuum cleaner device showing internal components and a close-up of the lever mechanism (no text or symbols visible)natural_image
Close-up of a black vacuum cleaner with a button labeled 'CLICK' pointing upward (no other text or symbols visible)KLASICKÝ TYČOVÝ VYSÁVAČ
natural_image
Close-up of a black vacuum cleaner device with a 'CLICK' button and arrow indicator (no text or symbols on the device itself)natural_image
Black vacuum cleaner with clear glass body and control panel (no visible text or symbols)POUŽITIE
natural_image
Technical line drawings of two electrical components (no text or symbols)ČISTENIE A ÚDRŽBA
ZÁSOBNÍK PRACHU
natural_image
Hand holding a black handheld device with a circular handle and arrow indicator (no visible text or symbols)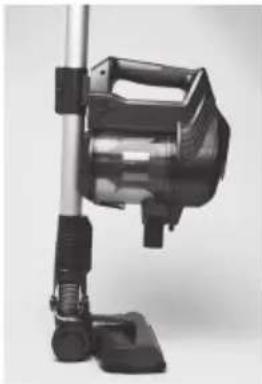
natural_image
Black and white photo of a vacuum cleaner with adjustable arm and base (no visible text or symbols)FILTRE VNÚTRI ZÁSOBNÍKA NA PRACH
natural_image
Two plastic filter components labeled A and B, shown side by side (no text or symbols on the objects themselves)natural_image
Close-up of a mechanical component with concentric rings and a circled area, no visible text or symbolsnatural_image
Hand holding a black spray gun device with a clear glass container (no visible text or symbols)natural_image
Close-up of a mechanical component with a circular lens and two flanged washers (no text or symbols visible)natural_image
Close-up of a mechanical component with a black housing and an arrow pointing to a feature (no visible text or symbols)natural_image
Close-up of mechanical components including a clamping device and a textured cylindrical component (no visible text or symbols)- Na koniec pomocou skrutkovača opät vložte plastové zámky a kefu uzamknite.
ČISTENIE PRÍSTROJA
text_image
Prohibition sign with crossed-out trash bin and no text, indicating no waste or disposal restrictionnatural_image
Recycling symbol icon with three chasing arrows forming a triangle (no text or labels)natural_image
Symbol of a trash bin crossed with no text or numbers, representing waste sorting or disposal (no text present)VYBERATEL'NÉ/VYMENITEL'NÉ BATÉRIE
natural_image
Two cylindrical milk containers on a plain white surface (no text or symbols visible)
natural_image
Three product photos: square cards, a clear glass coffee maker, and a rectangular baking pan (no text or symbols visible)of scan hier:
ou scannez ici:
oder hier scannen:
or scan here: