
DO210S - Vacuum Cleaner DOMO - Free user manual and instructions
Find the device manual for free DO210S DOMO in PDF.

User questions about DO210S DOMO
0 question about this device. Answer the ones you know or ask your own.
Ask a new question about this device
Download the instructions for your Vacuum Cleaner in PDF format for free! Find your manual DO210S - DOMO and take your electronic device back in hand. On this page are published all the documents necessary for the use of your device. DO210S by DOMO.
USER MANUAL DO210S DOMO
natural_image
Product photo of a white and blue DOKO handheld device with a handle (no visible text or symbols on body)GARANTIEVOORWAARDEN
CONDITIONS DE GARANTIE
This appliance has a two year warranty period. During this period the manufacturer is responsible for any failures that are the direct result of construction failure. When these failures occur the appliance will be repaired or replaced if necessary. The warranty will not be valid when the damage to the appliance is caused by wrong use, not following the instructions or repairs executed by a third party. The warranty will only be valid if the warranty application has been completed by the dealer at the time of purchase. All parts, which are subject to wear, are excluded from the warranty.
CONDICIONES DE GARANTÍA
RECYCLAGE-INFORMATIE
natural_image
Symbol of a trash bin crossed with no text or numbers, representing environmental protection (no text present)RECYCLING INFORMATIONEN
natural_image
Recycling symbol composed of three chasing arrows forming a triangle (no text or labels)RECYCLING INFORMATION
This symbol on the product or on its packaging indicates that this product may not be treated as household waste. Instead it must be brought to the applicable collection point for recycling of electrical and electronic equipment. By ensuring this product is disposed of correctly, you will help prevent potential negative consequences for the environment and human health, which could otherwise be caused by inappropriate waste handling of this product. For more detailed information about recycling of this product, please contact your local city office, your household waste disposal service or the shop where you purchased the product.
The packaging is recyclable. Please treat package ecologically.
natural_image
Symbol of a trash bin crossed with no text or labels, representing waste sorting or disposal (no text present)
natural_image
Recycling symbol composed of three chasing arrows forming a triangle (no text or labels)If the supply cord is damaged, it must be replaced by the manufacturer, its service agent or a similarly qualified person in order to avoid a hazard.
natural_image
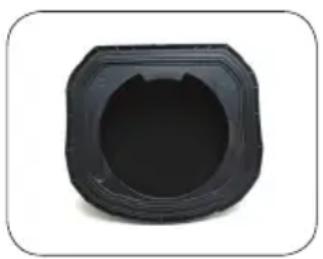
Close-up of a black plastic device with labeled parts (no text or symbols visible)
natural_image
Close-up of a blue and white mechanical component with a numbered annotation (6) pointing to a specific part.
natural_image
Two blue plastic clips with labeled sizes 7 and 8 (no text or symbols on the clips themselves)
OPLADEN
natural_image
Black square button or plastic component with a circular hole, no visible text or symbols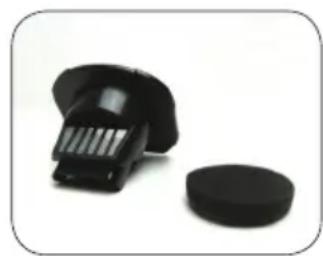
natural_image
Close-up of a black plastic brush and a circular base on a white background (no text or symbols visible)PRÉCAUTIONS
natural_image
Close-up of a black mechanical component with labeled parts (no text or symbols beyond labels)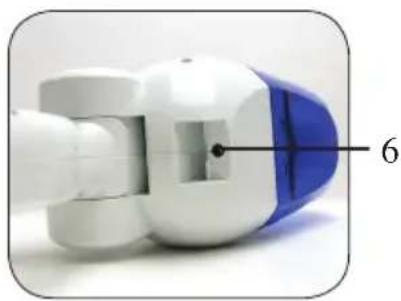
natural_image
Close-up of a robotic arm with blue and white components, labeled with number 6 (no text or symbols on the object itself)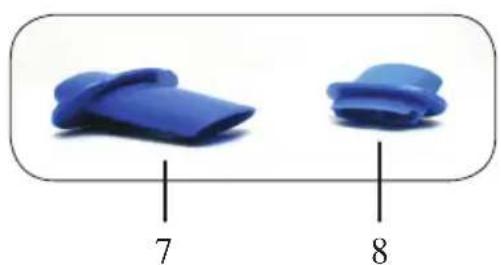
natural_image
Two blue plastic clips with labeled sizes 7 and 8, shown in a rounded rectangular frame (no text or symbols on the clips themselves)
CHARGEMENT
natural_image
Black square mechanical component with circular hole (no text or symbols)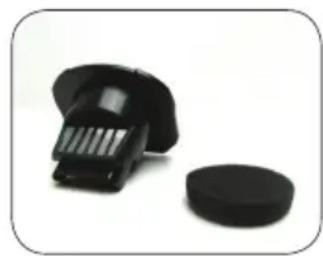
natural_image
Close-up of a black plastic pushpin and a circular button on a white background (no text or symbols visible)natural_image
Close-up of a black plastic device with labeled parts (no text or symbols visible)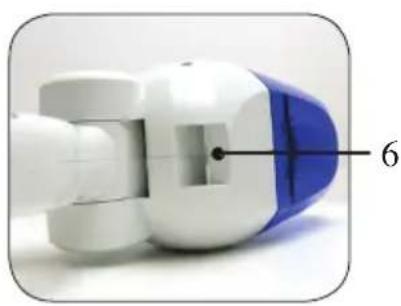
natural_image
Close-up of a robotic device with blue and white components, labeled with number 6 (no text or symbols on the device itself)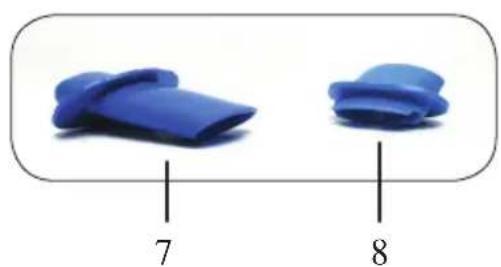
natural_image
Two blue plastic clips with labeled sizes 7 and 8 (no text or symbols on the clips themselves)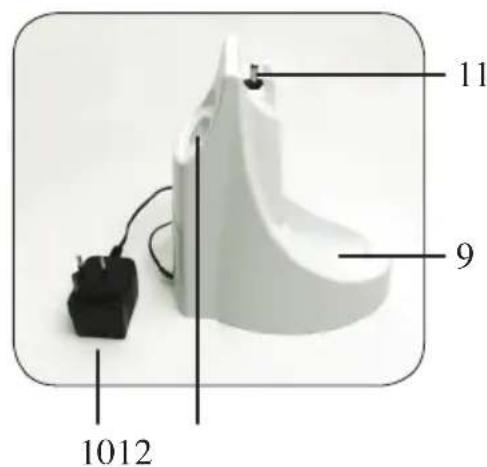
AUFLADEN
natural_image
Black square mechanical component with circular hole, no visible text or symbols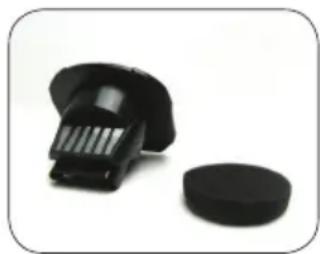
natural_image
Close-up of a black plastic pushpin and a circular button on a white background (no text or symbols visible)SAFETY INSTRUCTIONS
This appliance may be used by children from the age of 8 and up, and also by persons with a physical or sensory limitation, as well as mentally limited persons or persons with a lack of experience and knowledge. But only on the condition that these persons have received the necessary instructions on how to use this appliance in a safe way and know the dangers that can occur by using this appliance.
Children cannot be allowed to play with the appliance. Maintenance and cleaning of the appliance may not be done by children, unless they are older than 8 years old and are under supervision.
Keep the appliance out of reach of children younger than 8 years old.
This appliance is suitable to be used in a household environment and in similar surroundings such as:
- Kitchen for personnel of shops, offices or other similar professional surroundings
- Farms
- Hotel or motel rooms and other surroundings with a residential character
- Guest rooms or similar
Attention: This appliance cannot be used with an external timer or a separate remote control.
READ AND FOLLOW THE FOLLOWING SAFETY INSTRUCTIONS TO AVOID THE RISK OF FIRE, ELECTRICAL SHOCK OR INJURIES:
- Only use the appliance in the way and for the purposes described in this manual. Only use the accessories that are recommended by the manufacturer.
- Do not use the appliance when the cord or the plug is damaged. If the hand vac does not operate like it should or if it has been dropped, damaged, left outside or dropped into water, then take the appliance to a service center.
- Be careful with the cord. Do not pull the cord, do not use the cord to carry or do not use it as a handle, do not close a door on the cord or do not pull the cord around sharp corners or edges. Keep the cord away from hot surfaces.
- Do not pull the plug out of the socket by pulling the cord. Grasp the plug itself.
- Do not use the plug or the appliance with wet hands.
- Do not put any objects into the openings of the appliance. Do not use the hand vac when one of the openings is blocked. Keep the appliance free from dust, lint, hair and other things that may reduce the air flow.
- Keep hair, loose clothing, fingers and other body parts away from openings and moving parts in the appliance.
- Switch off all buttons before pulling the plug out of the socket.
- Be extra careful when cleaning stairs.
- Do not use the hand vac for vacuuming combustible or inflammable liquids like gasoline and do not use it in places where such liquids may be present.
-
Do not vacuum anything that burns or smokes like cigarettes, match sticks or hot ashes.
-
Do not use the hand vac when the filter is not in place.
- Only suitable for household use.
- Store the hand vac in a dry place.
- Make sure that the voltage of your electricity grid matches the voltage stated on the rating label on the charger.
- Only use the original charger that was designed for this model.
-
Never use the hand vac in the following circumstances, as the appliance can be seriously damaged in a way that is not covered by warranty:
-
close to inflammable gasses etc.
- when the casing of the appliance is visibly damaged.
- on sharp objects
• on hot or cold ashes, burning cigarettes, etc. - on fine matter like plaster, concrete, cement, hot or cold ashes
- Do not put the hand vac into direct sunlight.
- Never expose the battery or the charger to water.
• Always remove liquids after use. - Never expose the hand vac or the battery to heat.
- The battery may not be dismantled, placed against a metal surface or cause a short circuit.
- Never use the hand vac without the filter.
PARTS
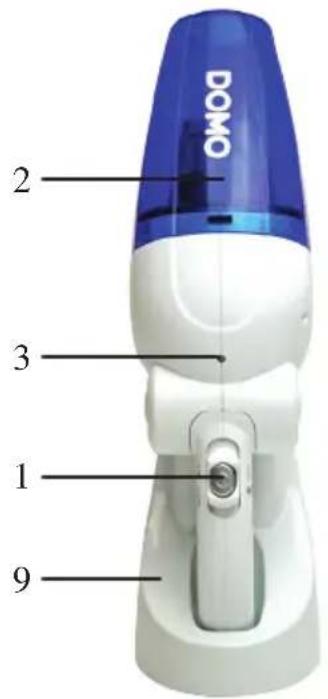
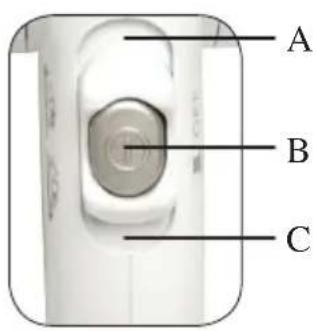
- 3-in-1 button
A: bend
B: on/off
C: open and empty
- Dust container
- Indication light for charging
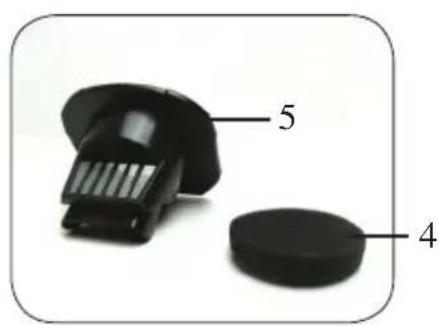
- Sponge
- Filter
- Input charging pin
- Crevice nozzle
- Liquids nozzle
- Charging station
- Adapter
- Charging pin
- Opening to store the crevice or liquids nozzle
natural_image
Close-up of a black mechanical component with labeled parts 4 and 5 (no text or symbols beyond labels)
natural_image
Close-up of a robotic arm component with blue and white parts, labeled with number 6 (no text or symbols on the object itself)
natural_image
Two blue plastic clips with labeled sizes 7 and 8 (no text or symbols on the clips themselves)
CHARGING
Place the hand vac into the charging station by making sure that the charging pin slides into the charging pin input of the hand vac. Always make sure that the hand vac is switched off when placing it into the charging station. When the hand vac makes contact with the charging station, and therefore is placed correctly into the station, the indication light will light up. The light will go out again when the battery is fully charged.
It takes 14 to 18 hours to fully charge the batteries for the first use.
When the batteries are entirely empty, it takes about 14 hours to fully recharge the batteries.
To make sure that the hand vac is always ready to be used, you can leave the appliance into the charging station when it is not being used.
The adapter may become warm during charging. This is normal.
VACUUMING
Lift the hand vac out of the charging station in a vertical way.
1. Vacuuming dry dirt
Start and stop the hand vac by pressing the on/off button. Mount the crevice nozzle on top of the hand vac to vacuum in places that are hard to reach.
2. Vacuuming liquid dirt
Remove all dust from the dust container. Place the liquids nozzle on to the hand vac. When you use the hand vac to vacuum liquids, always hold the hand vac with the suction opening pointed downwards. It is also recommended to bend the hand vac downwards, by sliding the 3-in-1 button to the front and bending the nozzle.
Stop vacuuming when the water in the hand vac has reached the maximum level, indicated with ‘MAX’.
Always remove the liquid from the hand vac after use.
EMPTYING AND CLEANING
The dust container of the hand vac needs to be emptied when the ‘MAX’ level has been reached.
When the hand vac was used to vacuum liquids, you also need to dry the filter after every use.
The dust container and the filter need to be cleaned regularly to maintain a strong suction power.
• Emptying the dust container
Remove the dust container by sliding the 3-in-1 button backwards. Take out the filter with the sponge and empty the dust container into the dust bin or sink. Put the filter and sponge back in place and push the dust container back onto the body until it clicks.
- Cleaning the filter
Remove the sponge from the filter and rinse the filter in water. Make sure that the parts are dry before putting them back. Place the parts back into the hand vac.
Never put the filter in the dishwasher.
natural_image
Black octagonal button or vent component with rounded edges and central hole (no text or symbols visible)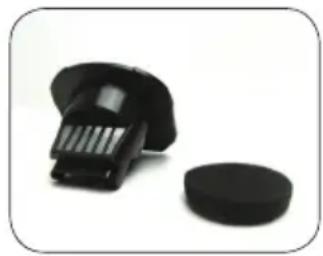
natural_image
Close-up of a black plastic brush and a circular base on a white background (no text or symbols visible)PRECAUCIONES IMPORTANTES
natural_image
Close-up of a black plastic device with labeled parts (no text or symbols visible)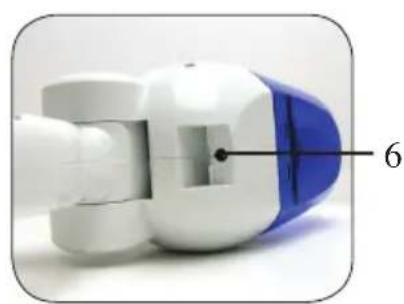
natural_image
Close-up of a blue and white mechanical component with a numbered annotation '6' pointing to a specific part (no text or symbols on the object itself)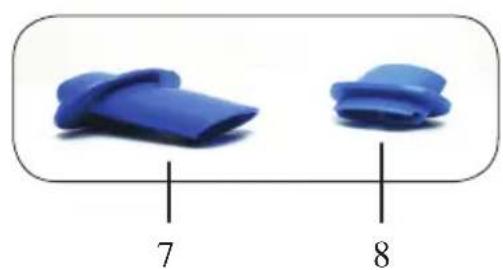
natural_image
Two blue plastic clips with labeled sizes 7 and 8 (no text or symbols on the clips themselves)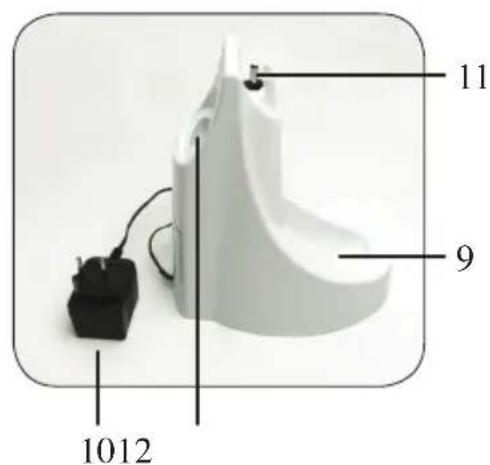
CARGAR
natural_image
Black square button or plastic component with a circular hole, no visible text or symbols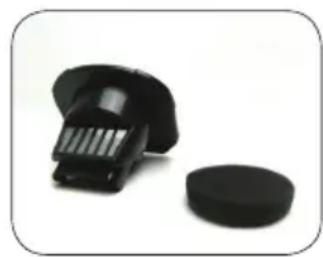
natural_image
Close-up of a black plastic object with a circular base, next to a textured black component (no text or symbols visible)DÜLEŽITÉ
natural_image
Close-up of a black plastic mechanical component with labeled parts 4 and 5 (no text or symbols beyond labels)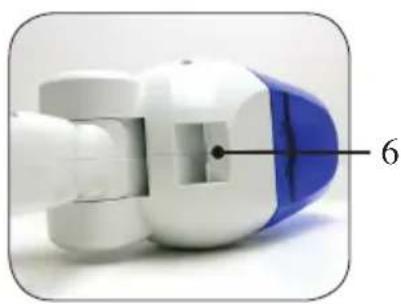
natural_image
Close-up of a white and blue mechanical component with a numbered label '6' pointing to a specific part (no text or symbols on the object itself)
natural_image
Two blue plastic objects with labeled parts 7 and 8, no text or symbols on the objects themselves.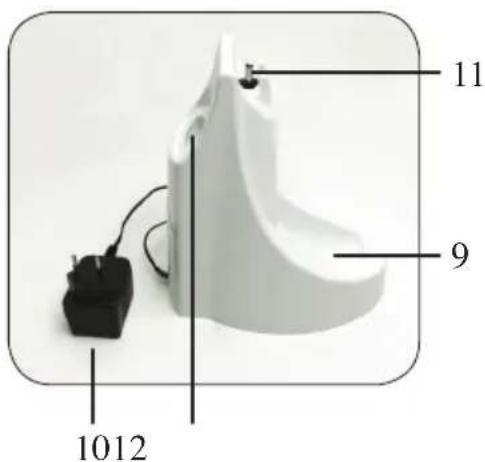
NABÍJENÍ
natural_image
Black plastic object with rounded corners and a central hole, no visible text or symbols
natural_image
Two black plastic components on a white background, one resembling a brush or scraper and the other a circular base (no text or symbols visible)
- GARANTIEVOORWAARDEN
- CONDITIONS DE GARANTIE
- CONDICIONES DE GARANTÍA
- RECYCLAGE-INFORMATIE
- RECYCLING INFORMATIONEN
- RECYCLING INFORMATION
- OPLADEN
- PRÉCAUTIONS
- CHARGEMENT
- AUFLADEN
- SAFETY INSTRUCTIONS
- PARTS
- CHARGING
- VACUUMING
- Vacuuming dry dirt
- Vacuuming liquid dirt
- EMPTYING AND CLEANING
- • Emptying the dust container
- - Cleaning the filter
- PRECAUCIONES IMPORTANTES
- CARGAR
- DÜLEŽITÉ
- NABÍJENÍ
Brand : DOMO
Model : DO210S
Category : Vacuum Cleaner