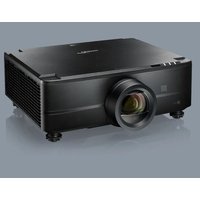
UHZ78LV - Projector OPTOMA - Free user manual and instructions
Find the device manual for free UHZ78LV OPTOMA in PDF.

 FR
FR
 AR
AR
 CS
CS
 DA
DA
 DE
DE
 EL
EL
 EN
EN
 ES
ES
 FA
FA
 FI
FI
 HU
HU
 ID
ID
 IT
IT
 JA
JA
 KO
KO
 NL
NL
 NO
NO
 PL
PL
 PT
PT
 RO
RO
 RU
RU
 SV
SV
 TH
TH
 TR
TR
 VI
VI
 ZH
ZH
 ZH-TW
ZH-TW
User questions about UHZ78LV OPTOMA
0 question about this device. Answer the ones you know or ask your own.
Ask a new question about this device
Download the instructions for your Projector in PDF format for free! Find your manual UHZ78LV - OPTOMA and take your electronic device back in hand. On this page are published all the documents necessary for the use of your device. UHZ78LV by OPTOMA.
USER MANUAL UHZ78LV OPTOMA
4 Important Safety Instructions
6 Safe Instructions for Battery
6 Lens Cleaning
Y Laser Safety Information
A FCC
8. EU Compliance Statement
9 WEEE
9 CTUVUS
9 Specifications and Warnings
- Copyright
10....Disclaimer Statement
- Trademark Acknowledgment
Introduction
11 Contents Overview
11 ...... Standard Accessories
11 ...... Optional Accessories
17 Product Overview
Connections
Keyboard
15 Remote Control Unit
17. Setup and Installation FIT
-
Turn on (Projector)
-
Connecting Sources to the Projector
19 Adjusting the Displayed Image
20 Adjusting Image Offset
22 Adjusting Zoom/Focus and Keystone of the Projector
23 Setting up the Remote Control
Using the Projector 25
25 Turning On/Off the Projector
28..... Selecting Input Source
29 Preview Screen Before Operation
30 Menu and Features Navigation
Information Menu Tree Displayed on Screen
39 Image Menu
Display Menu
47 Setup Menu
51 Sound Menu
52 Control Menu
70 Information Menu
77 System Settings
Manual Input Selection
Set Properties
Additional Information 74
Vξ ...... Compatible Resolution Levels
A. Image Size and Display Distance
81 Projector Dimensions and Ceiling Installation
82 Infrared Remote Control Symbols
Troubleshooting
86 Warning Indicator
Specifications
89
| The lightning bolt symbol with an arrow head inside the triangle alerts the user to the presence of "dangerous electrical voltage" uninsulated inside the product that can cause electrical shock. |  |
| The exclamation mark symbol inside an equilateral triangle is intended to alert the user to the presence of important operating and maintenance (service) instructions in the documents attached to the device. |  |
Please follow all warnings, precautions, and maintenance guidelines as recommended in the user manual provided to you.
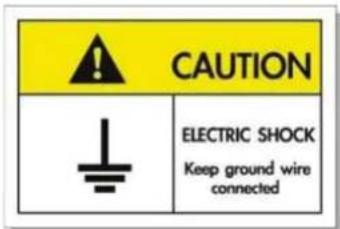
• Properly grounded. • Ground • This device is equipped with a three-pin grounded power plug. • From a power plug. • Contact an electrician. • Do not remove the grounding purpose of the plug. • Ground.
Important Safety Instructions
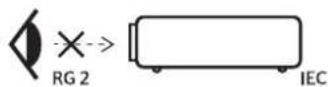
. RG2 IEC 62471-5:2015 As is the case with any light source, avoid staring directly into the beam. This product belongs to Class 1 laser products and is in accordance with 2014 and hazard group 3 .IEC 62471-5:2015
•
•
Auxiliary optical fluids.
• Distance from the projector.
In front of the projection lens.
• Cups, inside the beam.
• Extra, it is recommended to install
Do not block any of the device openings. To ensure proper operation of the projector, place the projector in a good location. For example, do not place the projector on top of a coffee table cluttered with items or on top of a sofa, bed, or otherwise. Do not place the projector in an enclosed place that obstructs air circulation, such as a bookshelf or cabinet. To reduce the risk of fire and/or electric shock, do not expose the projector to rain or moisture. Do not place it near heat sources such as heaters, fireplaces, stoves, or any other heat-generating devices. Do not allow objects or liquids to enter the projector. They may come into contact with dangerous voltage points or cause electrical short circuits in some parts that could lead to fire or electric shock.
Use in the following conditions:
Heat, cold, or humidity.
(i) Ensure that the ambient room temperature is between 0 and 40 degrees Celsius.
(ii) Relative humidity up to 80%.
Significantly exposed to dust and particles.
Device generates a strong magnetic field.
Under direct sunlight.
Do not use the unit if it has been exposed to physical damage or misuse. Physical damage/misuse includes (but is not limited to):
: the following
Unit has fallen to the ground.
Exposed power cable or plug.
Any liquid on the projector.
Exposure of the device to rain or moisture.
Avoid placing the projector on an unstable surface. The device may fall, causing
Or device damage.
Do not block the light emitted from the projector lens during operation. The light can cause body heating and melting, which could lead to
Fire outbreak.
* This instruction is for reference only.
• Electric shock.
Do not attempt to service the unit yourself. Opening or removing covers can expose you to high voltage or other hazards. Please
Contact Optoma before sending the device for repair.
Please take a look at the device to identify safety-related markings.
Only qualified service technicians should repair the device.
Use only attachments/accessories recommended by the manufacturer.
Do not look directly into the projector lens when it is in operation. Bright light can damage your eyes.
This device automatically detects the lamp life.
When turning off the device, please ensure the cooling fan has fully cooled before disconnecting the power. Leave the device for 90 minutes.
Turn off the device and disconnect the power plug from the AC outlet before cleaning the product.
Use a soft cloth with a mild cleaner to clean the screen surface. Do not use abrasive cleaners, wax, or solvents to clean the unit.
Disconnect the power plug from the AC outlet if the product is not used for an extended period.
Do not install the projector in places where it may be subjected to vibration or impact.
Avoid touching the lens with your hands.
Be sure to remove the battery from the remote control before storage. Battery fluid or batteries may leak if left in the remote control for an extended period.
There is a risk of fire or battery explosion if a different type of battery is used instead of the correct one.
Do not use or store the projector in places with oil smoke from cooking or cigarettes, as this may affect the quality of performance.
Please follow the projector mounting direction instructions correctly, as incorrect installation may affect projector performance.
Use a power disconnection device and a surge protection device, as power outages and fluctuations can damage components.
Do not use lasers or other high-intensity lighting devices with the projector to prevent damage to electrical and optical components.
WARNING
Before cleaning the lens, make sure to turn off the projector and disconnect the power cord.
•L
• Pressures to remove dust.
• Touching the lens with your fingers
Do not hot surface, do not touch.
Warning!
Do not place your hands, face, or objects in the projector's path during operation. Otherwise, there may be
• Risk of overheating the object, which could lead to fire or damage from the heat emitted from the projected light. Objects placed in front of the lens may become excessively heated and catch fire or cause a fire.

Dust accumulated in the lens; however, Override causes fire. • Do not spray gas
Warning: Do not use spray materials or flammable gases to remove dust or lint from the lens. As this may cause a fire due to excessive heat inside the projector.
Warning: Do not clean the lens if the projector is in warm-up mode, as this may cause peeling of the lens surface coating.
Warning: Do not wipe or press the lens with a hard object.


Laser Notice
IEC 62471-5:2015, Consumer Laser Product Class 1 IEC 60825-1:2014/EN 60825-1+A11/EN50689:2021
This product is designed to be used as a Consumer Laser Product and complies with EN 50689:2021
Consumer Laser Product Class 1
EN 50689:2021
This product complies with Sections 100000 and 100001 of Chapter 21 of the Federal Regulations Code except as provided for a laser-illuminated display device • Within Risk Group 2 as defined in IEC 62471-5:Ed 100
Laser Notice No. 57 dated May 8, 2019.
IEC 62471-5:2015, Consumer Laser Product Class 1 IEC 60825-1:2014/EN 60825-1+A11/EN50689:2021
Hazard 2
IEC 60825-1:2014, EN 60825-1:2014+A11:2021, EN 50689:2021 CLASS 1 CONSUMER
• Additional instructions concerning child protection and avoiding direct beam exposure and not using auxiliary magnification aids.
•
Child viewing level.
•
•
• Light path from the projector to the lens.
• Any foreign object can
cause dangerous laser emissions.
Exposure to laser radiation.
Keep any elements (such as magnifying lenses, etc.) away from the device light path. Redirecting the external light path from the lens can lead to unexpected results, such as fire or eye injury.
Any unauthorized modification or operation may result in damage from laser radiation exposure.
Do not look into the laser beam when the projector is operating. Bright light can cause permanent eye damage.
Failure to follow proper control and operating procedures may result in damage from laser radiation exposure.
FCC
Tests conducted on this device confirm compliance with the standards specifications for Class B digital devices, in accordance with Part 15 of the Federal Communications Commission regulations. These standards are intended to provide reasonable protection against harmful interference when installed in homes. Since this device generates and uses radiofrequency energy, it may emit radio frequency emissions, which could cause harmful interference with communications if not installed and used according to the provided instructions.
However, there is no guarantee that interference will not occur in a particular installation. If this device causes harmful interference to radio or television reception, which can be determined by turning the device on and off, we recommend that the user try to correct this interference by one or more of the following steps:
Reposition or relocate it.
• Receiving unit.
• With the receiving unit.
• For necessary assistance.
Note: Shielded cables
Shielded cables must be used for all connections with other computer devices in order to comply with Federal Communications Commission regulations.
Warning
Unauthorized modifications not expressly approved by the manufacturer may void the user's authority to operate this device, which is the authority granted by the Federal Communications Commission.
Operating Conditions
This device complies with Part 15 of the Federal Communications Commission (FCC) rules and is subject to the following two conditions:
1 - This device does not cause any harmful interference
2 - This device must accept any interference received, including any interference that may result in undesired operation.
Note: Canadian Users
This Class B digital device complies with Canadian ICES-003 standards.
Compliance Statement for European Union Countries
• Including amendments
• 2014/35/EU number
• Radio frequency function
Device Component Disposal Instructions
Device components. Please dispose of responsibly To reduce pollution levels and protect the environment, please dispose of responsibly when you wish to discard it.
CTUVUS

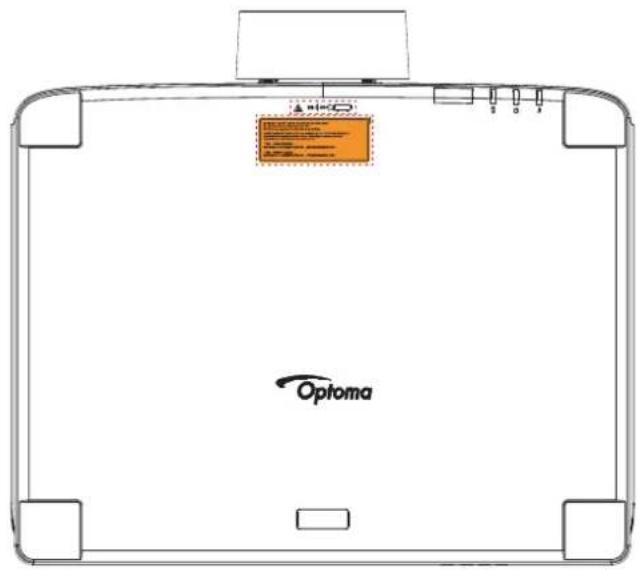
Specification and Warning Labels
Specification and warning labels are located in the following locations:
text_image
Optoma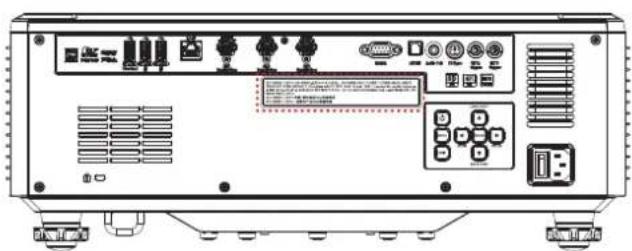
For power supply specifications, power ratings, and product information, please refer to the label on the bottom of the unit.
Note:
This document and its contents including images and videos and software are protected by international copyright laws, and all rights are reserved. This document and any of the materials contained herein may not be copied without written permission from the author.
© Copyright 2025
Disclaimer Statement
The information contained in this document is subject to change without notice. The manufacturer makes no warranties or guarantees regarding the contents of this document and hereby disclaims responsibility in particular from any implied warranties relating to merchantability or fitness for any particular purposes, and the manufacturer reserves the right to review this document and make changes to the information contained therein from time to time without any obligation to notify any person of such review or changes.
Trademark Acknowledgement
Registered trademark in the United States for Kensington Company and has registrations issued and pending in other countries ACCO Brand Corporation worldwide.
HDMI trademarks or registered trademarks for HDMI Logo and HDMI are registered in the United States and other countries. Licensing LLC
BrilliantColor™ is a trademark owned by DLP and DLP® logo Texas Instruments.
Manufactured by Dolby Laboratories Licensing Corporation. The dual trademarks Dolby Vision and Dolby and logo are registered trademarks of Dolby Laboratories Licensing Corporation. Confidential materials not for publication. Copyright © Dolby Laboratories Licensing Corporation licensed 2013-2024. All rights reserved.
HDR10+ ^TM HDR10+. This product complies with HDR10+ Projector Device Version 1.1. Registered trademark or trademark for HDR10+ Technology, LLC in the United States.
敘 UHD Alliance, Inc trademark. FILMMAKER MODE^TM logo. IMAX ^® 敘 Registered trademark for IMAX Corporation.
IMAX® Manufactured under license from IMAX Corporation (companies headquartered in Canada). DTS, Inc Manufactured under license from DTS (United States/Japan/Taiwan) or licensed from DTS Licensing Limited and related DTS messages and related DTS messages and related DTS messages and related DTS messages and related DTS messages and related DTS messages and related DTS messages and related DTS messages. JIMAX Corporation registered trademark. IMAX® Manufactured under license from DTS (affiliated companies) and related messages headquartered in Canada. DTS, Inc Manufactured under license from DTS (affiliated companies) and related messages headquartered in Canada. DTS, Inc Manufactured under license from DTS (affiliated companies) and related messages headquartered in Canada.
Affiliates. DTS, INC. Manufactured under license from HTTP://XPERI.COM/DTS-PATENTS/ for DTS patent information and Affiliates. DTS, INC. Registered or common law trademarks THE DTS-HD MASTER AUDIO and DTS-HD and DTS logo. and Affiliates. In the United States and/or other countries. Copyright © DTS, INC.
All other product names used in this guide are owned by their respective owners and are recognized.
Purchase a laser display device from Optoma. To view a complete list of accessories, please visit the products page on our website.
Package Contents Overview
Empty the package contents and verify that it contains all the items listed below under the heading Standard Accessories.
Some items listed under Optional Accessories may be available depending on the model, specifications, and purchase region.
Therefore, please check with your place of purchase.
Some accessories may vary from one region to another.
The warranty card is only provided in certain regions. Please contact your distributor for more information about this.
Standard Accessories

text_image
Quick Start Guide and User Manual Product Documentation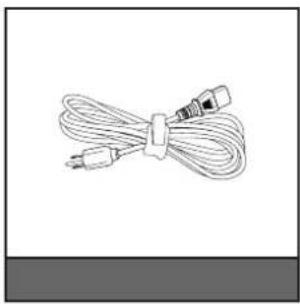
text_image
Power and Remote Control Unit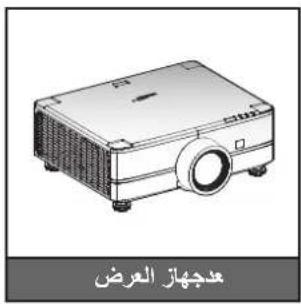
For setup information, user manual, warranty information, and product specifications, please scan the QR code or visit the URL address
Power cables may vary from one region to another.
•
Optional Accessories
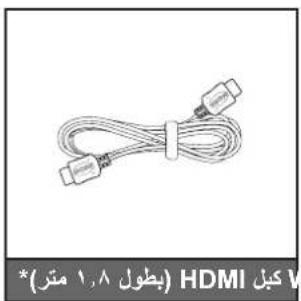
text_image
HDMI (1.8 meters)
• Optional accessories may vary by region and projector model purchased.
* HDMI 2.1a - Please use a certified "High Speed" HDMI cable
Product Overview
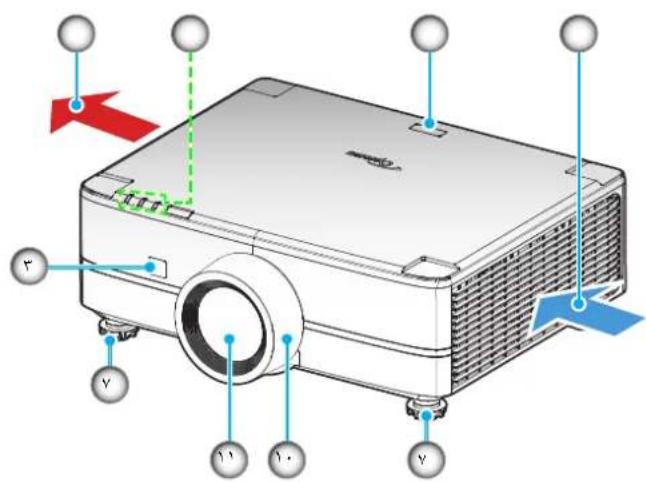
Do not block the ventilation and exhaust openings of the projector.
•
When operating the projector in an enclosed space, maintain a minimum clearance of 5 cm around air intake and exhaust openings.
•
| Control Panel | -8 |
| Kensington™ Lock | -9 |
| Decorative Ring | -10 |
| Projection Lens | -11 |
| Item Number | |
| -1 Power Outlet (Output) | |
| Status Indicator Lights | -2 |
| Infrared Receivers | -3 |
| Ventilation (Input) | -4 |
| Input / Output | -5 |
| Power Socket / Power Switch | -6 |
Connections
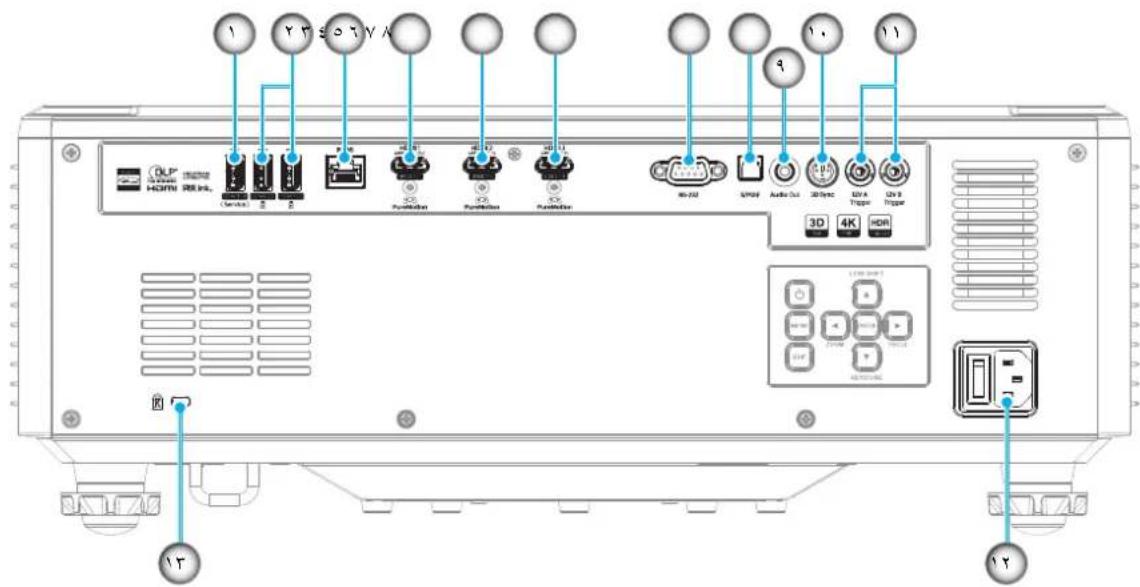
text_image
USB HDMI HDMI Control 2 3 4 5 6 7 8 9 10 11 2 3 4 5 6 7 8 9 10 11 USB 4K HDMI Audio Out 3D 4D USB A Trigger On 3 Trigger 3D 4D HDMI USB 10000000000000000000000000000000000000000000000000000000000000000000000000000000000000000000000000000| -8 S/PDIF Service Port Connector (5V Power 0.1A) -2 Audio Output Connector (5V Power 0.9A) -3 USB 3D Sync Input Connector - 10 Mbps LAN Connector 10/100 Speed HOME -3 Connector -11 No Output 12V Power HDMI -4 Power Socket / Power Switch -12 (72.0) 2 HDMI -5 Kensington™ -13 (72.1) 3 HDMI -6 RS-232C Lock -7 |
Note: (10) for service. No power output in standby mode.
WiFi (2*) Multimedia Support and Dongle
FOTA and IoT LAN (3*) Control Support
(5.3) Internal Support Up To HDMI. Please use "HDR10+ Cable and Internal Support 120/2160 0740 (1.8m)
HDMI 2.1a (Certified) Approved) Maximum 5 Meters
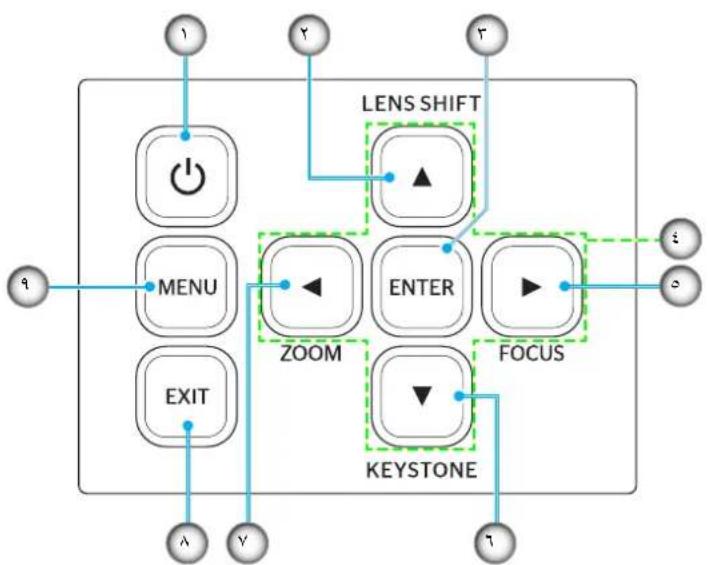
flowchart
graph TD
    A["Input"] --> B["Power"]
    B --> C["MENU"]
    C --> D["ZOOM"]
    D --> E["ENTER"]
    E --> F["FOCUS"]
    F --> G["KEYSTONE"]
    G --> H["EXIT"]
    H --> I["λ"]
    H --> J["V"]
    H --> K["γ"]
    L["LENS SHIFT"] --> M["▲"]
    N["θ"] --> O["●"]
    P["θ"] --> Q["○"]
| Item Number | |||
| -6 Keystone Correction Button -1 Power Button | |||
| -2 Zoom -2 Lens Shift | |||
| -8 Exit -3 Input | |||
| -9 Function -4 Four Directional Selection Buttons | |||
| -5 Focus |
Remote Control Unit
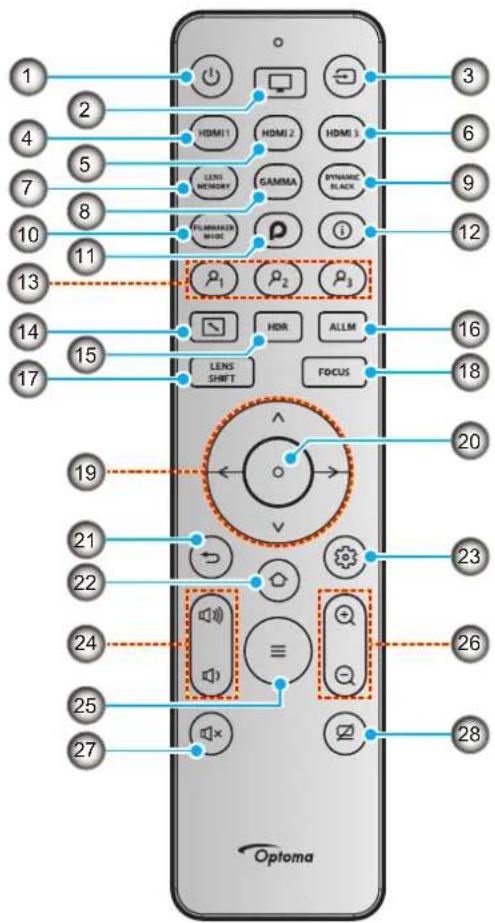
text_image
1 2 3 4 5 6 7 8 9 10 11 12 13 14 15 16 17 18 19 20 21 22 23 24 25 26 27 Optoma| Item Number | |||
| -1-5 HDR | |||
| -2-6 ALLM | |||
| -3-17 Source | |||
| -4 HDMI-18 | |||
| -5 HDMI-19 | |||
| -6 HDMI-20 | |||
| Back | -21 | Lens Memory | -7 |
| Home / Birthday Teens | -22 | General | -8 |
| Device Setup Menu | -23 | Dynamic Black | -9 |
| +/- Volume | -24 | Pen Mode | -10 |
| Menu | -25 | PureEngine Ultra | -11 |
| +/- Digital Zoom | -26 | Information | -12 |
| Mute Voice | -27 | (User / User / User 2 Customizable) | -13 |
| AV Mute | -28 | Aspect Ratio | -14 |
Note: Some buttons may not have functions in models that do not have these features.
Installing the Projector
The projector is designed to be installed in one of four possible installation orientations.
If room design or personal preferences require a different installation orientation, consider the screen size and distance, as well as the appropriate position to prevent current disruption and ensure proper spacing between the projector and other devices.
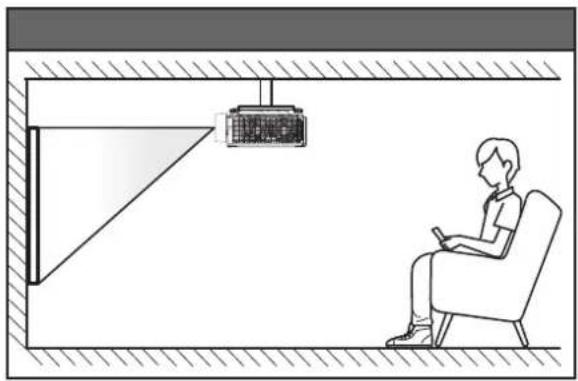
text_image
Rear Ceiling Mount Rear Table MountThe projector should be placed flat on the surface and perpendicular to the screen at 90 degrees.
• To learn how to position the projector based on a specific screen size, refer to the distance chart on page 80.
• To learn how to determine screen size based on a specific distance, refer to the distance chart on page 80.
The farther the projector is from the screen, the larger the projected image and the higher the vertical offset increases proportionally.
Note:
The projector can be rotated 360 degrees.
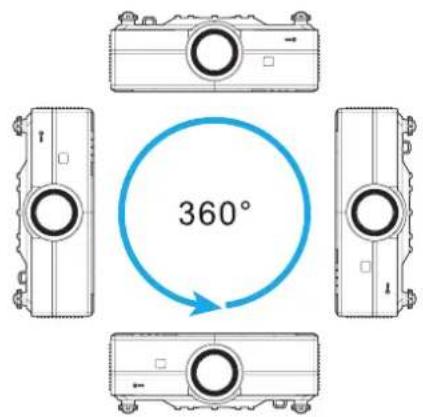
text_image
360°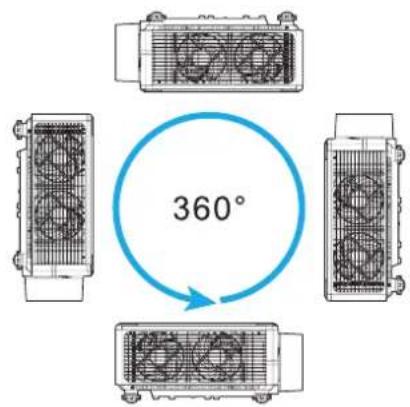
text_image
360°• For the exhaust outlet opening.
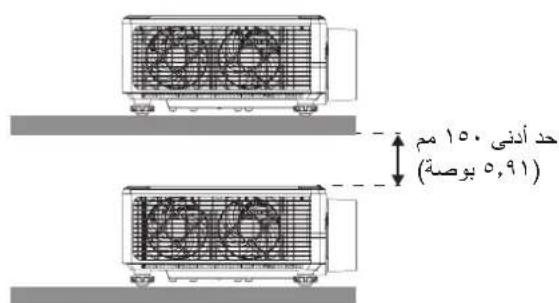
text_image
Minimum 10 mm (inches) 0.91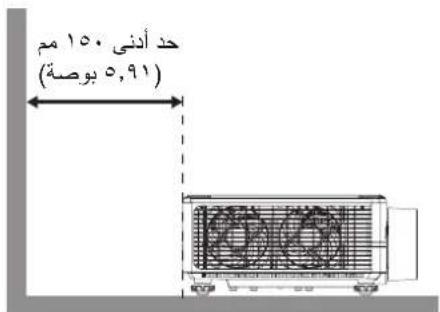
text_image
Minimum 10 mm (inches) 0.91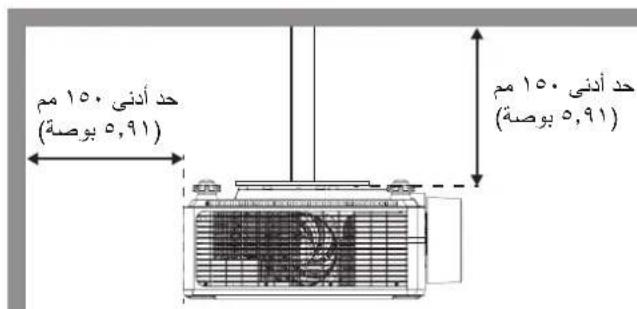
text_image
Minimum 10. mm (with) Minimum 10. mm (with)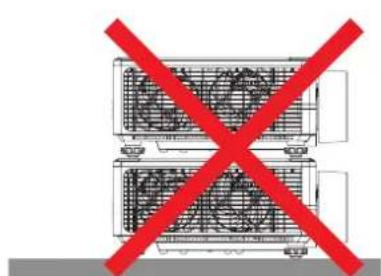
When operating the projector in a closed space, ensure that the ambient air temperature does not exceed the operating temperature during operation
of the projector, and ensure that the air intake and exhaust vents are not blocked.
All external containers must pass an approved evaluation
of the device even if the external container temperature is at the acceptable operating temperature.
hot from the exhaust vent.
.
• Otherwise, operation may
Connecting Sources to the Projector
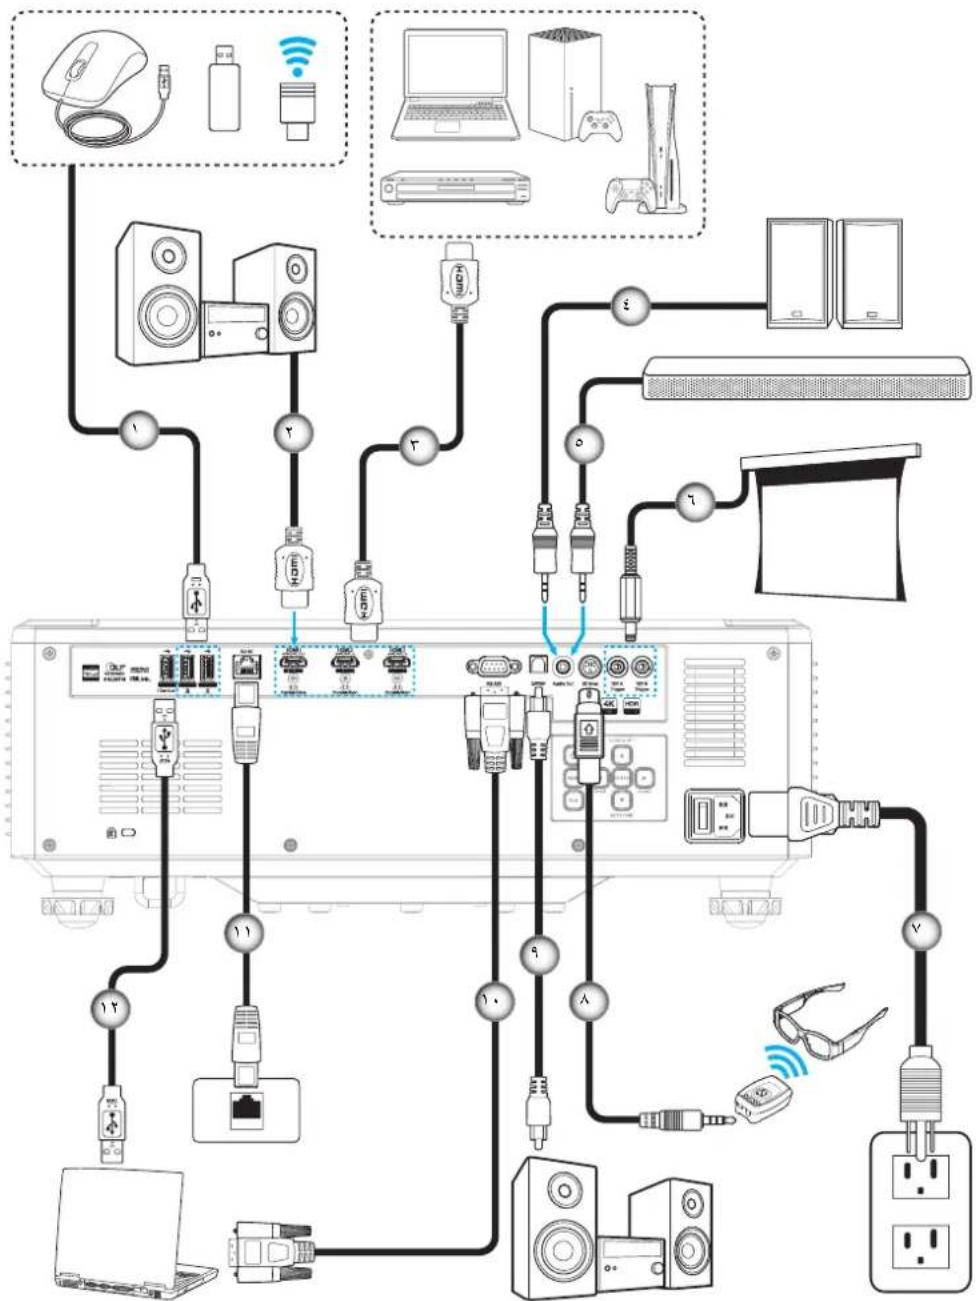
flowchart
graph TD
    A["Computer"] --> B["Switch"]
    A --> C["Speaker"]
    A --> D["Radio"]
    A --> E["Monitor"]
    A --> F["Smart Speaker"]
    A --> G["Audio System"]
    A --> H["Display Monitor"]
    A --> I["Smart Speaker"]
    A --> J["Audio System"]
    A --> K["Display Monitor"]
    A --> L["Smart Speaker"]
    A --> M["Audio System"]
    A --> N["Display Monitor"]
    A --> O["Smart Speaker"]
    A --> P["Audio System"]
    A --> Q["Display Monitor"]
    A --> R["Smart Speaker"]
    A --> S["Audio System"]
    A --> T["Display Monitor"]
    A --> U["Smart Speaker"]
    A --> V["Audio System"]
    A --> W["Display Monitor"]
    A --> X["Smart Speaker"]
    A --> Y["Audio System"]
    A --> Z["Display Monitor"]
    A --> AA["Smart Speaker"]
    A --> AB["Audio System"]
    A --> AC["Display Monitor"]
    A --> AD["Smart Speaker"]
    A --> AE["Audio System"]
    A --> AF["Display Monitor"]
    A --> AG["Smart Speaker"]
    A --> AH["Audio System"]
    A --> AI["Display Monitor"]
    A --> AJ["Smart Speaker"]
    A --> AK["Audio System"]
    A --> AL["Display Monitor"]
    A --> AM["Smart Speaker"]
    A --> AN["Audio System"]
    A --> AO["Display Monitor"]
    A --> AP["Smart Speaker"]
    A --> AQ["Audio System"]
    A --> AR["Display Monitor"]
| Item Number | |||
| Power Cable | -2 | USB Cable | -1 |
| -2 HDMI 8-3D Cable | |||
| -3 S/PDIF Output -9 HDMI | |||
| -1 RS232 Cable | Audio Cable | -4 | |
| RJ-45 Cable | -11 | Audio Cable | -5 |
| USB Cable | -12 | 12V DC Connector (Volt) | -6 |
To ensure image quality and avoid connection errors, it is recommended to use certified high-speed or ultra-high-speed HDMI cables up to 5 meters in length.
Note:
Adjusting the Displayed Image
Image Height
The projector is equipped with adjustable feet to modify the image height.
1 Select the position of the adjustable foot that you wish to modify at the bottom of the projector.
- Rotate the adjustable support in the clockwise or counterclockwise direction to raise or lower the projector.
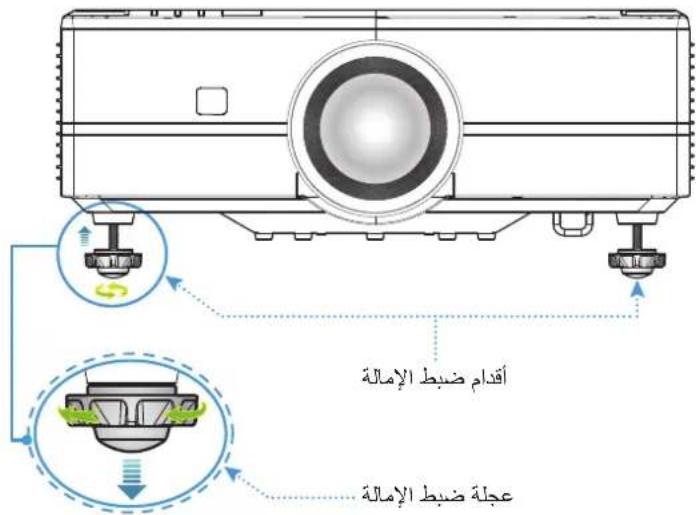
text_image
Tilt Adjustment Feet Tilt Adjustment WheelAdjusting the Offset of the Displayed Image
The projector lens can move vertically and horizontally using the powered lens shift function. This function allows for fine adjustment of the image position on the screen. Lens shift is expressed as a percentage of image height or width; see the diagram below.
Vertical Lens Shift
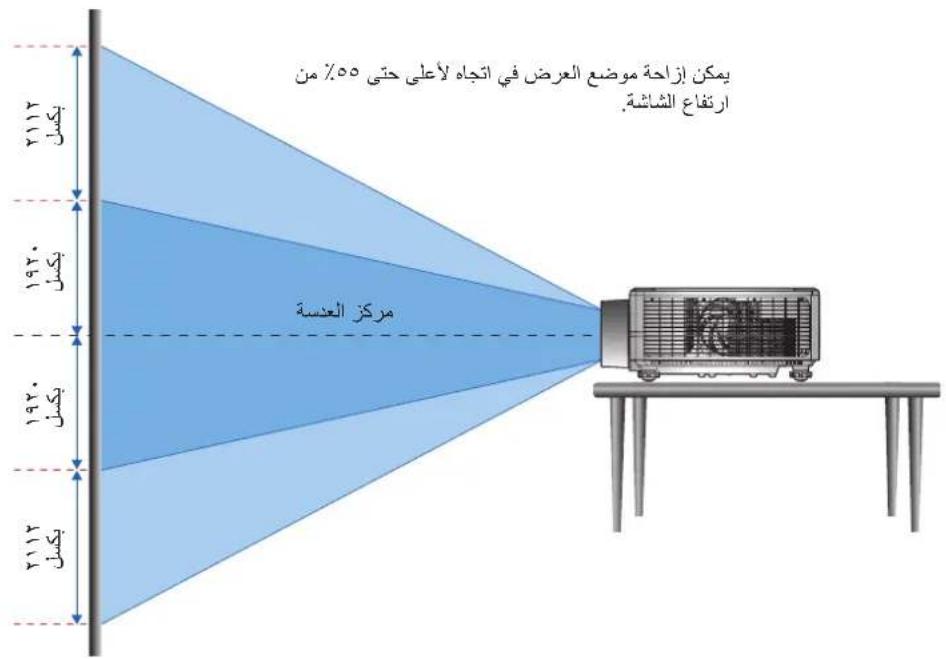
text_image
The display position can be shifted upward up to 55% of the screen height. 1974 1974 1974 Lens CenterHorizontal Lens Shift
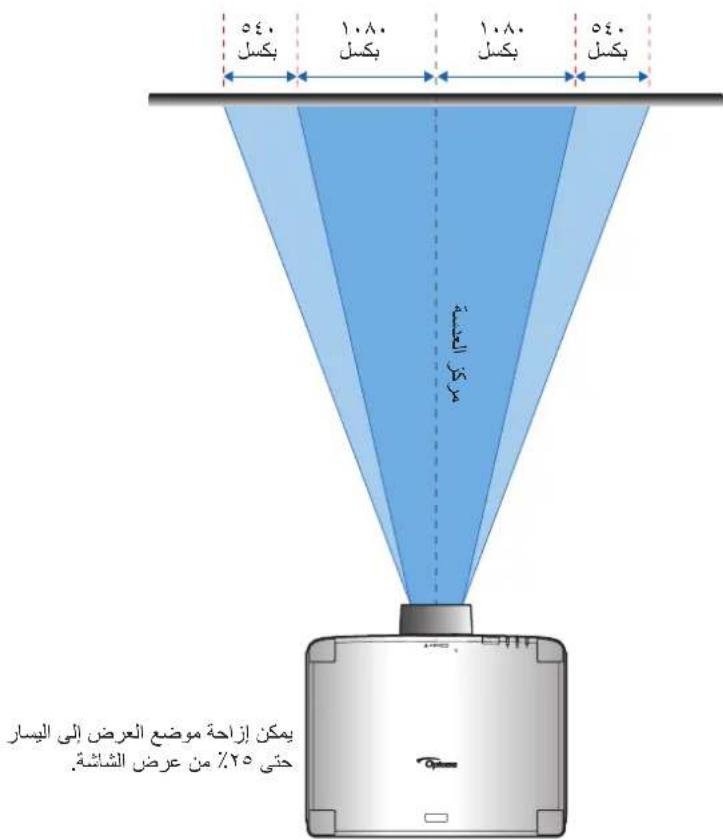
| Lens Shift Range 1/2 Image | Lens Type | |||
| H V Ho Vo | ||||
| 1.68 Lens Model 2550 50 | ||||
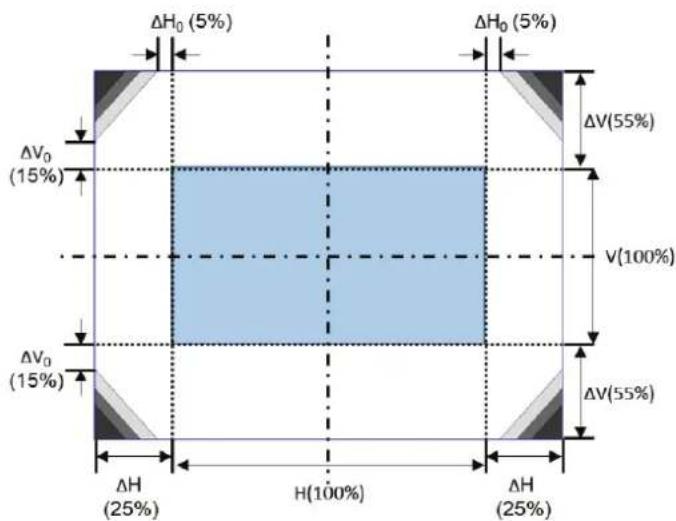
(A): Range of lens shift in the horizontal direction when the lens is in the center.
(B): Range of lens shift in the vertical direction when the lens is in the center.
(C): Range of lens shift without loss of brightness in the horizontal direction when the lens is at the top or bottom of the center.
(D): Range of lens shift without loss of brightness in the vertical direction when the lens is to the right or left of the center.
(E): Height of the displayed image.
(F): W - Width of the displayed image.
of the displayed image.
Do not use lens shift outside the specified operating range shown above. Failure to comply may result in screen darkening or distortion in
the image (such as: poor focus).
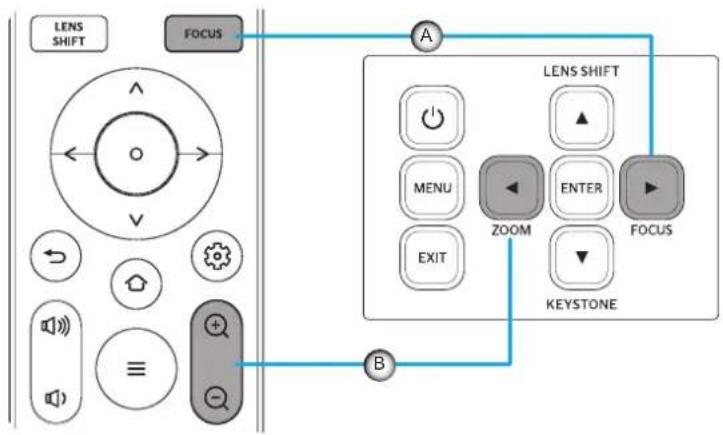
Adjusting Zoom and Focus of the Projector
Use the remote control or projector control panel to adjust zoom and focus of the displayed image. • To adjust the image focus, press the FOCUS • ≈ ⬇ ⬇ ⬇ ⬇ ⬇ ⬇ ⬇ ⬇ ⬇ ⬇ ⬇ ⬇ ⬇ ⬇ ⬇ ⬇ ⬇ ⬇ ⬇ ⬇ ⬇ ⬇ ⬇ ⬇ ⬇ ⬇ ⬇ ⬇ ⬇ ⬇ ⬇ ⬇ ⬇ ⬇
Note: You can also press the button on the remote control to adjust the image size.
flowchart
graph TD
    A["LENS SHIFT"] --> B["FOCUS"]
    B --> C["LENS SHIFT"]
    C --> D["MENU"]
    C --> E["EXIT"]
    D --> F["ZOOM"]
    E --> G["ENTER"]
    F --> H["KEystone"]
    G --> I["FOCUS"]
    J["LENS SHIFT"] --> K["A"]
    K --> L["B"]
    style A fill:#f9f,stroke:#333
    style B fill:#ccf,stroke:#333
    style C fill:#cfc,stroke:#333
    style D fill:#fcc,stroke:#333
    style E fill:#cff,stroke:#333
    style F fill:#ffc,stroke:#333
    style G fill:#ffc,stroke:#333
    style H fill:#cfc,stroke:#333
    style I fill:#cfc,stroke:#333
    style J fill:#fcc,stroke:#333
Managing the Remote Control
Installing / Replacing Batteries
The remote control comes with two AAA batteries
-1 Remove the battery cover from the back of the remote control.
2 As shown.
of the remote control.
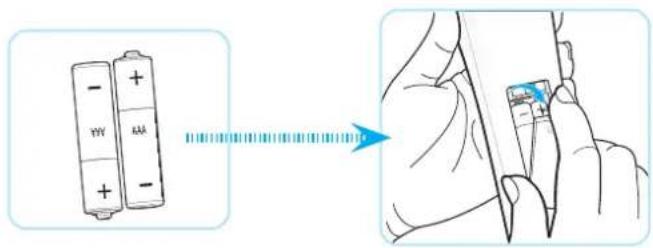
Do not replace except with another of the same type or similar type.
Note:
Warning: To ensure safe operation, please take the following precautions:
Using an incorrect type of battery may result in
• (AAA) battery
Discarding a battery in fire or hot oven or crushing or mechanically cutting it
may result in explosion.
Leaving a battery in an extremely hot environment may result in explosion or leakage of liquid or flammable gas.
.
An exposed battery may lead to
• or flammable gas.
Do not mix old and new batteries. Mixing old and new batteries may result in shortening the life of new batteries or causing leakage
in old batteries.
• Remove batteries after use. Chemical substances that leak from a battery and touch skin may cause rash. If you find any leakage
chemical, wipe completely using a cloth.
•
If you do not intend to use the remote control
according to storage conditions.
. Check for chemical leakage
Active Points
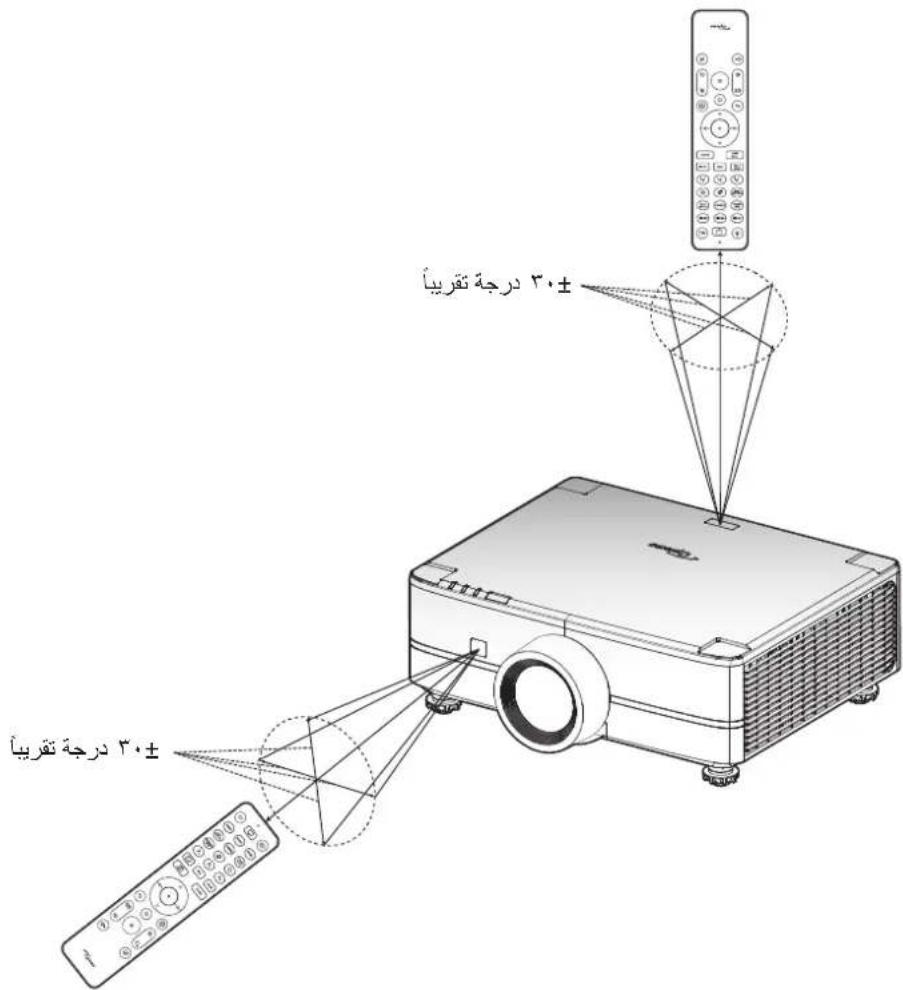
The infrared receiver and remote control unit that operates with infrared rays are located on the upper and front sides of the display device. Always ensure holding the remote control at an angle of 20 degrees perpendicular to the infrared receiver and remote control unit that operates with infrared rays located on the display device so it works correctly. The distance between the remote control and the receiver should not exceed 7 meters (19.7) when held, and should not exceed 8 meters (22.3) when pointing toward the receiver at an angle of 0 degrees.
Make sure there are no obstacles between the remote control and the infrared receiver located on the projector that could block the infrared beam from reaching the device.
Make sure the infrared transmitter operating in the display device/remote control is not exposed to fluorescent lights.
• In fluorescent light or
Please keep the remote control away from fluorescent lights at a distance of more than two meters; otherwise, there may be a functional malfunction in the remote control unit, which may fail from time to time.
.
Reflective fluorescent lights.
• Away from the display device.
When pointing the remote control toward the screen, the effective distance between them is less than 5 meters, and the infrared rays are reflected back to the display device. However, the effective range may vary according to the conditions.
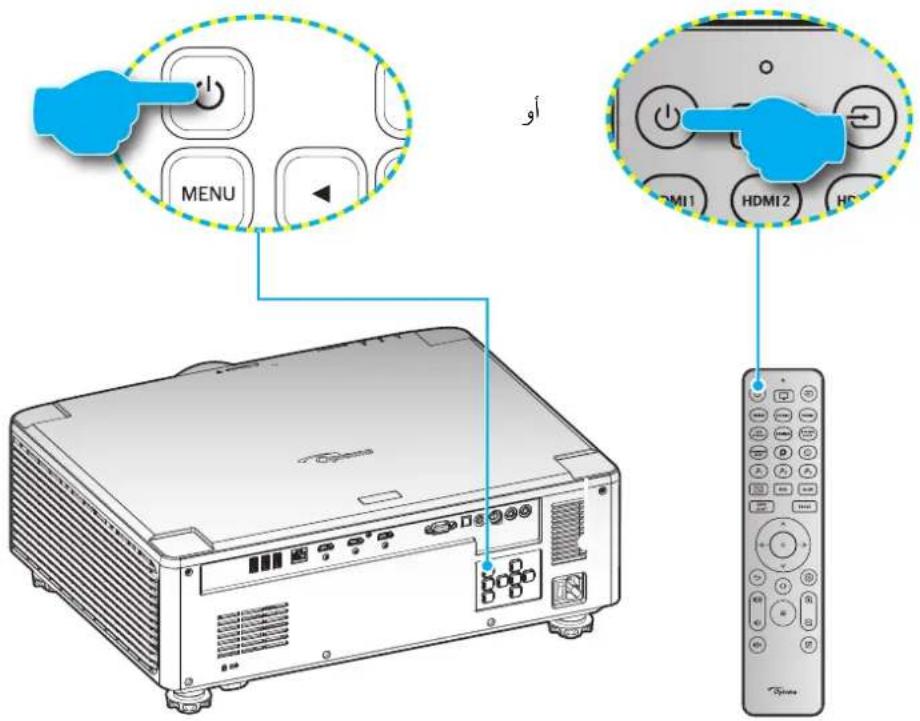
Turning On/Off the Optical Display Device
text_image
MENU or HDMI1 HDMI2 HDSPower On
Connect the power cable and select the source/signal. After connection, the power indicator light will turn to the amber color.
-1
Turn on the display device by pressing button 1 on the panel of the display device or on the remote control.
Y
The constant blue and amber colors.
- From power to the two colors
Followed by the moving image on the screen. The Optoma logo appears at startup.
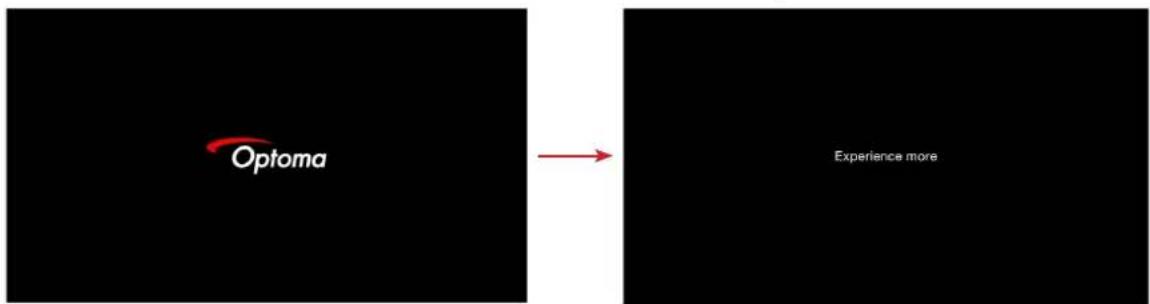
The startup screen will appear for approximately 10 seconds.
r
The blue indicator.
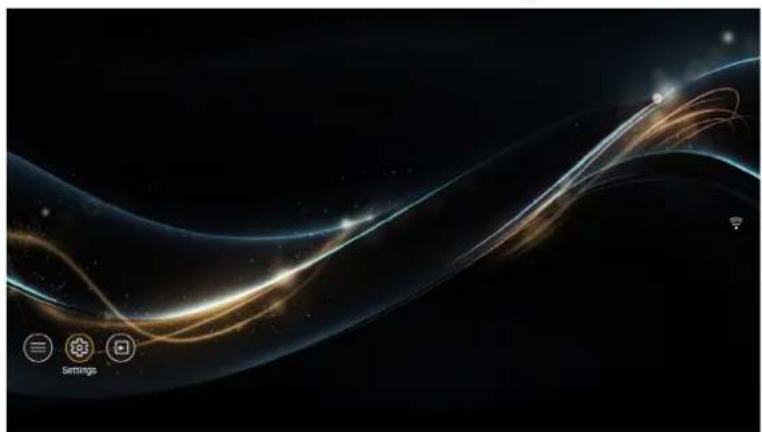
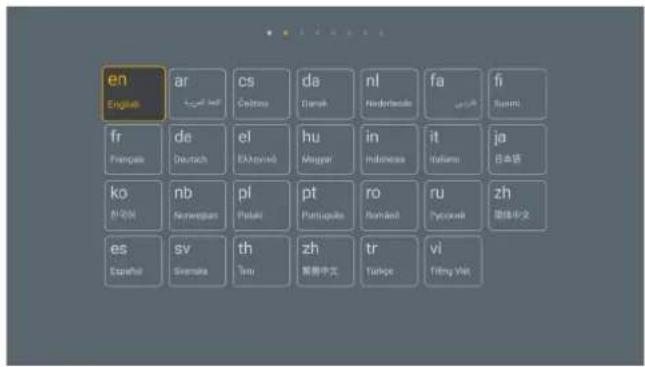
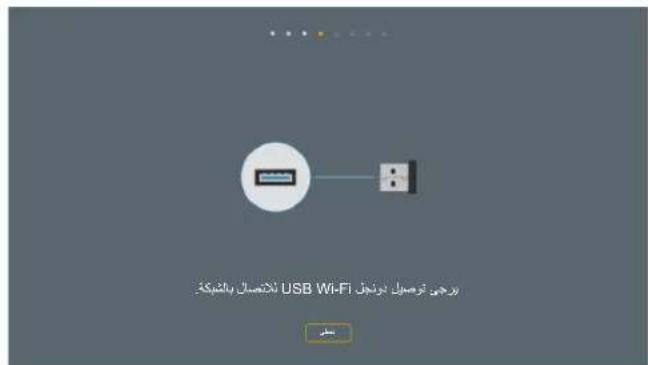
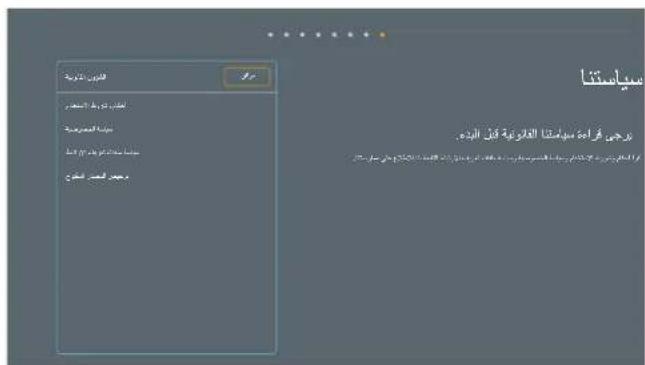
When starting the device for the first time, you will be asked to perform the initial setup including determining the display orientation, preferred language, and configuring network settings and other settings. The appearance of the screen "Setup complete!" indicates that the device is ready to use.
text_image
en English ar Arabic es Spanish cs Czech da Danish nl Dutch fa Persian fi Finnish fr French de German el Greek hu Hungarian in Indonesian it Italian ja 日本語 ko Korean nb Norwegian pl Polish pt Portuguese ro Romanian ru Russian zh Traditional Chinese es Spanish sv Swedish th Thai zh Simplified Chinese tr Turkish vi Vietnamese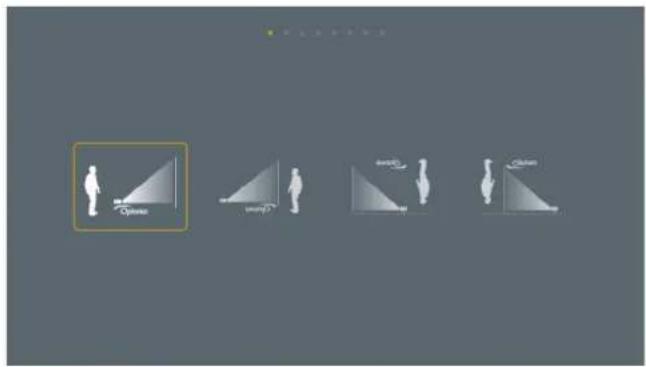
text_image
Options Simple Double Circular[Language Screen][Display Device Screen]
text_image
USB Wi-Fi Setting up the network.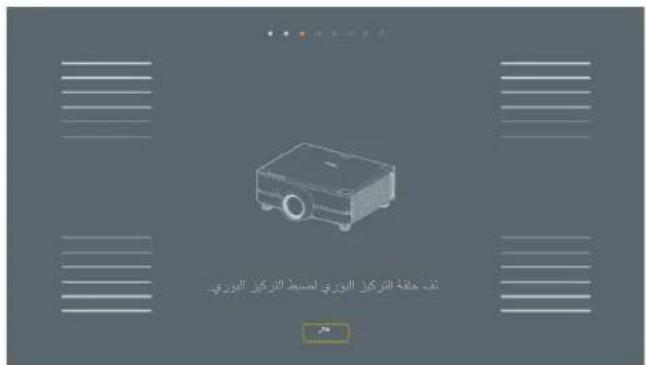
text_image
Connecting the display device to the network.[Dongle Setup Screen] [Wi-Fi] [Focus Adjustment Screen]
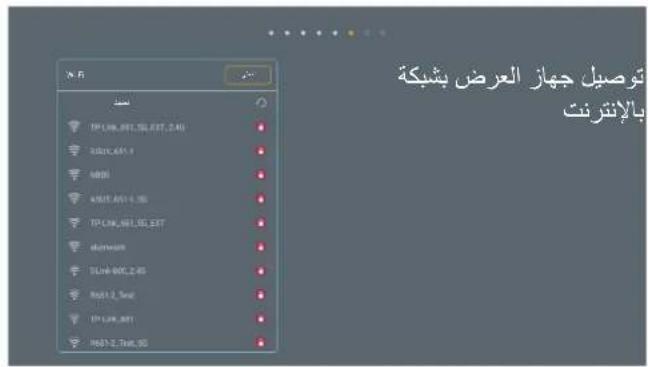
text_image
N-5 TP.LIN_001,SL.EST,2.40 A001,651.1 MB01 A001,601.1,33 TP.LIN_001,SL.EST M000000 SLIN_001,2.45 A011.2,Tm2 TP.LIN_001 H601.2,Tm4,33 Connecting the display device to the network.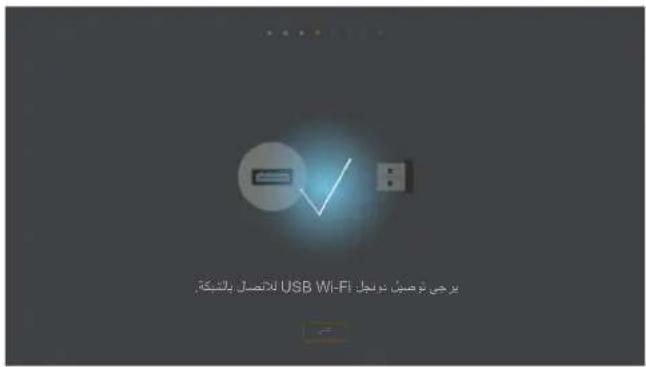
text_image
USB Wi-Fi Setting up the dongle.[Wi-Fi (Continued)] [Dongle Setup Screen] [Network Screen]
text_image
Arabic Arabic: Synchronization Arabic: Synchronization Arabic: Synchronization Arabic: Synchronization Arabic: Synchronization Arabic: Synchronization Arabic: Synchronization Arabic: Synchronization Arabic: Synchronization Arabic: Synchronization Arabic: Synchronization Arabic: Synchronization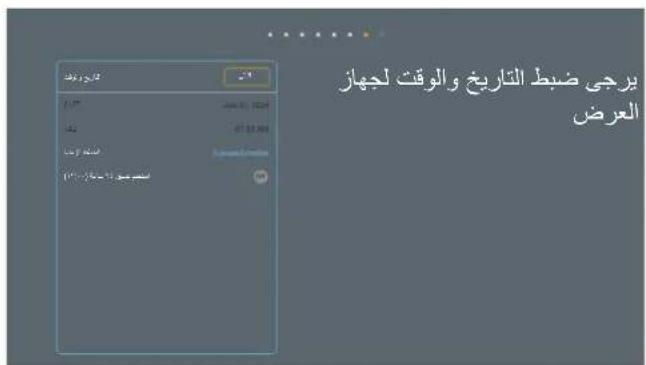
text_image
Setting the date and time for the display device.[Color Screen][Date and Time Screen]
Turn off the display device by pressing button () on the control panel of the display device or on the remote control.
Power Off
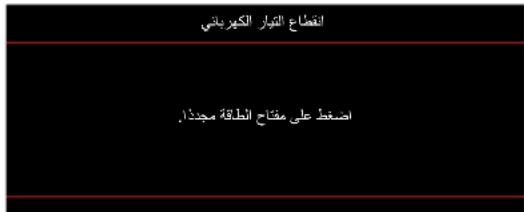
1- Check 2- The following message.
text_image
Power Cutoff Press the power button again.Press button (1) again to confirm, the message will disappear from the screen after 15 seconds. When button (1) is pressed the second time, the display device will be turned off. And when the display device is in standby mode, press button (1) again to turn on the device.
r - 6
-ξ
5 Display device.
It is recommended not to turn on the display device immediately after turning it off.
Note:
Select input source.
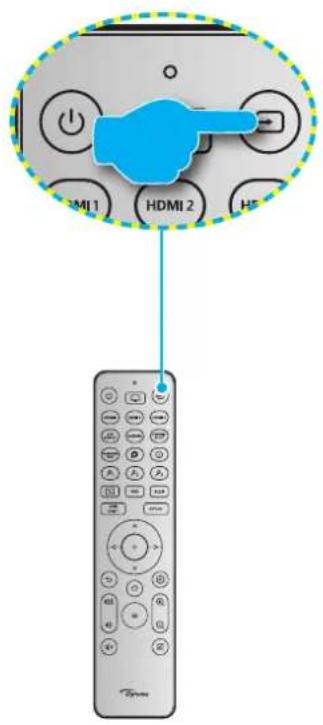
Turn on the input source that you want to display on the screen, such as a computer, tablet, or video player, and the display device will detect the source automatically. If multiple sources are connected, press the button on the remote control to select the desired input.
text_image
HDMI 1 HDMI 2 H5 TimersUsing the Display Device
Preview of the Startup Screen
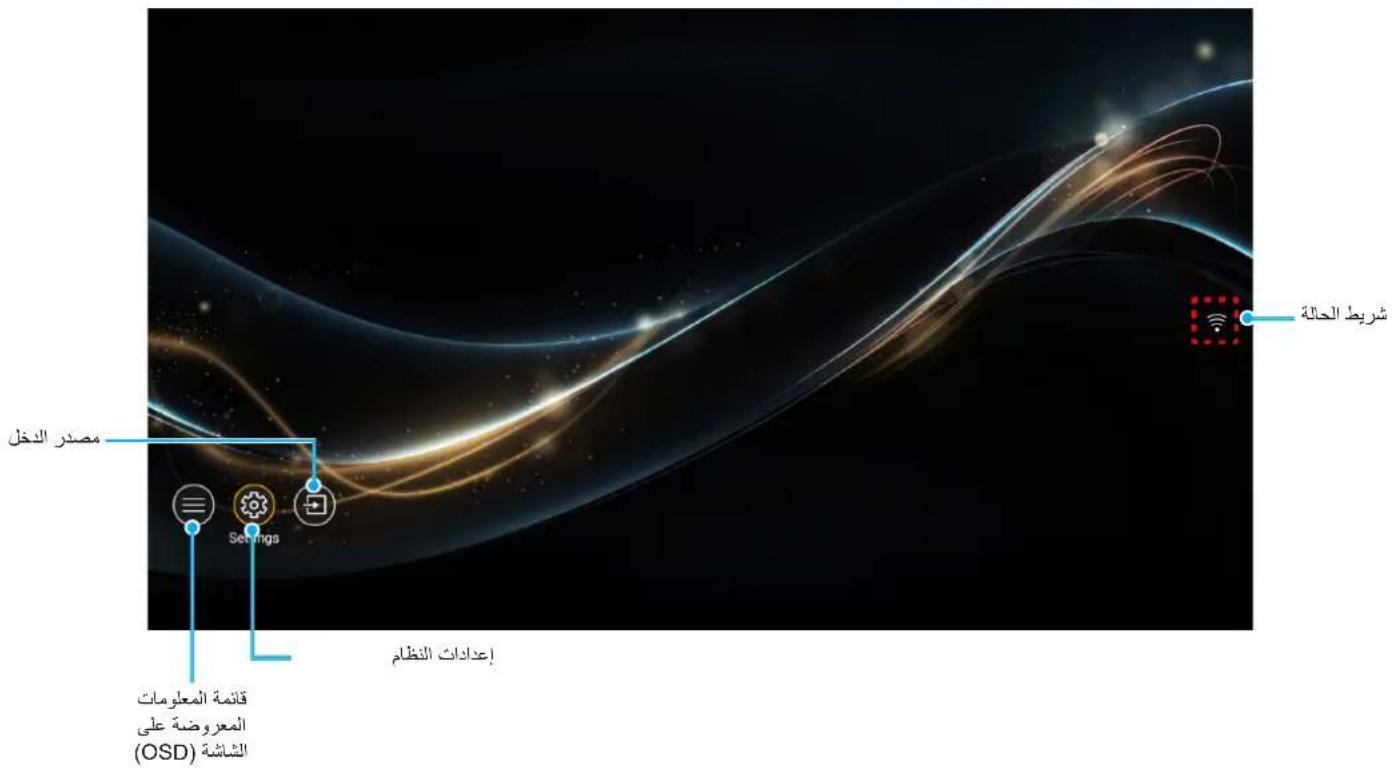
The startup screen is the main interface for starting the display device, showing system status and providing shortcuts to access various applications and settings.
To navigate on the startup screen, you only need to use the buttons on the remote control.
You can return to the home screen at any time by pressing the button on the remote control, regardless of your position in the user interface.
text_image
Input Source Settings On-Screen Display Menu (OSD) System Settings Status DisplayThe selected menu or item is highlighted in yellow, for example "Settings" in the image above.
Note:
Value and features
The display device contains menus displayed on the screen in multiple languages that allow you to make adjustments to the image and modify various settings.
Navigation within the Main Menu
| Display device using remote control | Using keyboard panel | |
| Press MENU button | Press the ≡ button | Open On-Screen Display menu (OSD) |
| Press ▼/▲ button | Press ∨/∧ button | Select an item |
| Press ENTER button | Press ○ button | Enter the submenu |
| Press ▶/◀ button | Press ◀/◀ button | Adjust the setting |
| Press ENTER button | Press ○ button | Confirm the selected item |
| Press MENU button | Press ↔ button | Move to the previous item |
| Press MENU button | Press ≡ button | Close On-Screen Display menu (OSD) |
You can also open the On-Screen Display menu (OSD) on the home screen.
Note:
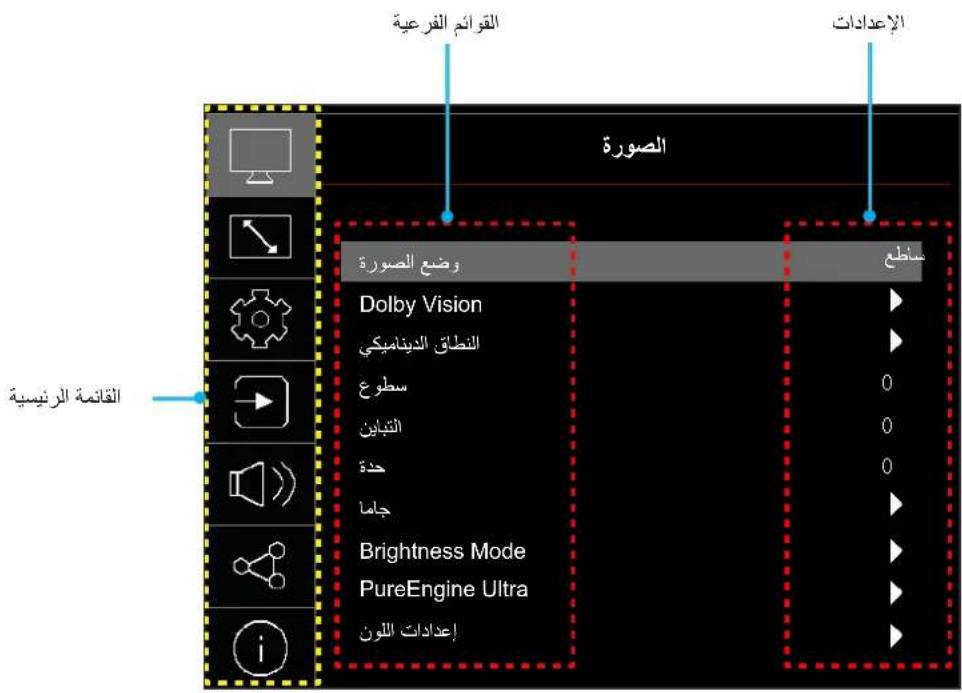
text_image
Picture Submenus Settings Picture Mode Dolby Vision Dynamic Tone Mapping Brightness Contrast Sharpness Gamma Brightness Mode PureEngine Ultra Color Settings Main MenuOn-Screen Menu Tree
t Connectivity Exposure and Exposure of Optoma reserves the right to add elements or remove them or improve the product performance without notice.
Note:
| Arabic Main Questionnaire | |||||
| Vivid | Picture Mode | Image | |||
| HDR | |||||
| HLG | |||||
| Cinema | |||||
| Game | |||||
| Reference | |||||
| WCG | |||||
| Bright | |||||
| Dolby Vision Bright | |||||
| Dolby Vision Dark | |||||
| Dolby Vision Vivid | |||||
| Dolby Vision Cinema | |||||
| HDR10+ | |||||
| Golf Simulation | |||||
| AI-PQ | |||||
| 3D | |||||
| Pen Mode | |||||
| IMAX Enhanced | |||||
| F Day | |||||
| F Night | |||||
| R Day | |||||
| R Night | |||||
| 3D ISF | |||||
| 180/260/240/220/200 | Flat Screen | Dolby Vision | |||
| 200/105/10005 | Curved Screen | ||||
| Automatic / Off | HLG / HDR | Dynamic System | |||
| 1-5 | R Brightness | ||||
| 50-500 | Brightness | ||||
| 50-500 | Contrast | ||||
| 1-15 | Sharpness | ||||
| Film | Gamma | ||||
| Graphics | |||||
| 2.0 | |||||
| 2.2 | |||||
| 2.2 | |||||
| 2.4 | |||||
| BT.1886 | |||||
| Dynamic Black 1 | Brightness Mode | ||||
| Dynamic Black 2 | |||||
| DynamicBlack 3 | |||||
| 85% / 90% / 95% / 100% Power / 70% / 75% / 75% / 80% / 50% / 55% | |||||
| Arabic Main Value | |||||
| 2/2/1/1/1/1/1/1/1/1/1/1/1/1/1/1/1/1/1/1/1/1/1/1/1/1/1/1/1/1/1/1/1/1/1/1 | Contrast | PureEngine Ultra | |||
| 2/2/1/1/1/1/1/1/1/1/1/1/1/1/1/1/1/1/1/1/1/1/1/1/1/1/1/1/1/1/1/1/ | PureLight | ||||
| 2/2/1/1/1/1/1/1/1/1/1/1/1/1/1/1/1/1/1/ | Clear Image | ||||
| 2/2/1/1/1/1/1/1/1/1/ | Clear Motion | ||||
| 2/2/1/1/1/1/ | PureDetail | ||||
| -5.0~5.0 | Color | Picture Color Settings | |||
| -5.0~5.0 | Color Gradient | ||||
| Warm | Color Temperature | ||||
| Standard | |||||
| Cool / Moderate or Cool | |||||
| Fan | |||||
| -5.0~5.0 | RGB 11 | ||||
| Native | Color Point | ||||
| DCI-P3 | |||||
| Rec.709 | |||||
| BT2020 | |||||
| White / Red / Green / Dark Blue / Purple / Red | Color | CMS | |||
| -5.0~5.0 | Hue | ||||
| -5.0~5.0 | Saturation | ||||
| -5.0~5.0 | Value | ||||
| No | Reset | ||||
| Yes | |||||
| -5.0~5.0 | Red Gain | RGB Offset/Gain | |||
| -5.0~5.0 | Green Gain | ||||
| -5.0~5.0 | Blue Gain | ||||
| -5.0~5.0 | Red Bias | ||||
| -5.0~5.0 | Green Bias | ||||
| -5.0~5.0 | Blue Bias | ||||
| No | Reset | ||||
| Yes | |||||
| RGB (0-255) / Standard RGB (16-235) | Color Range | ||||
| Off | Wall Color | ||||
| Black Panel | |||||
| Yellow Light | |||||
| Green Light | |||||
| Blue Light | |||||
| Pink | |||||
| Gray | |||||
| Off | 3D Mode | 3D | |||
| On | |||||
| P Link | 3D Sync Type | ||||
| Frame Display 3D | Arabic Main Questionnaire | ||||
| Automatic | 3D Pattern | 3D | Image | ||
| Side by Side | |||||
| Top and Bottom | |||||
| Sequential Frames | |||||
| Frame Stacking | |||||
| Off | 3D Synchronization | ||||
| On | |||||
| No | Reset | ||||
| Yes | |||||
| Reset | |||||
| On | Low Latency Mode | Display | |||
| ALLM | |||||
| Off | |||||
| 4:2 | Aspect Ratio | ||||
| 16:9 | |||||
| User Custom | |||||
| Full [Video] | |||||
| 21:9 | |||||
| 32:9 | |||||
| Native | |||||
| Automatic | |||||
| -30 ~ 30 | Vertical Trapezoid Distortion | Geometry | |||
| -30 ~ 30 | Horizontal Distortion | ||||
| Four Corner Adjustment | |||||
| Off | Keystone | ||||
| On | |||||
| Top / Bottom / Left / Right | Skew Adjustment | ||||
| Green | Grid Color | ||||
| Purple | |||||
| Red | |||||
| Dark Blue | |||||
| Reset | |||||
| 0-10 | Fine Edge | ||||
| 2K: -20~50 / UHD: -5~20 | Digital Zoom | ||||
| (increases in agreementsante) | |||||
| (increases in agreementsante) | (increases in agreementsante) | ||||
| (increases in agreementsante) | (increases in agreementsante) | ||||
| Arabic Questionnaire RBPSIE | |||||
| /Not available/(Brightness/Contrast/Sharpness/Tone)/ B HRAradaa(Tone/11) | 11 | Balance point /CMS/Spectrum of colors/Bias/Gain/B/Engineering diagram/Test pattern/Drop direction/ touching/Next task timer/Trapezoidal distortion vertical/AFCFI distortion/Four corners | User 1 | Remote Control Settings | |
| /Not available/(Brightness/Contrast/Sharpness/Tone)/ B HRAradaa(Tone/11) | 11 | Balance point /CMS/Spectrum of colors/Bias/Gain/B/Engineering diagram/Test pattern/Drop direction/ touching/Next task timer/Trapezoidal distortion vertical/AFCFI distortion/Four corners | User 2 | ||
| /Not available/(Brightness/Contrast/Sharpness/Tone)/ B HRAradaa(Tone/11) | 11 | Balance point /CMS/Spectrum of colors/Bias/Gain/B/Engineering diagram/Test pattern/Drop direction/ touching/Next task timer/Trapezoidal distortion vertical/AFCFI distortion/Four corners | User 3 | ||
| No | OSD Reset | Device Setup | |||
| Yes | |||||
| No | Reset All Settings | ||||
| Yes | |||||
| Off | Auto Input | ||||
| On | |||||
| Default | /HDMI 2 / HDMI 1/ Main / HDMI 3 | Set Input Name | |||
| Custom | |||||
| No | /HDMI 2 / HDMI 1/ Main / HDMI 3 | Input Select | |||
| Yes | |||||
| Off | Port 1 | HDMI CEC Settings | |||
| On | |||||
| Bidirectional | Standby Power On | ||||
| Display <- Device | |||||
| Device <- Display | |||||
| Bidirectional | Standby Power Off | ||||
| Display <- Device | |||||
| Device <- Display | |||||
| No | Advanced Settings | ||||
| Yes | |||||
| 10 ~ . | Volume | ||||
| Off | Volume Mute | ||||
| On | |||||
| Analog | Audio Output Settings | ||||
| SPDIF | |||||
| eARC | |||||
| Bitstream | Digital Output Format | ||||
| PCM | |||||
| No | Advanced Settings | ||||
| Yes | |||||
| Arabic Main Questionnaire | |||||
| 99 ~ . | Device Number | Control | |||
| (Network settings/frame)Network address collection/DHCP Off / On/IP 192.168.0.100/Subnet Mask/DNS 192.168.0.51/DNS 20.0.0.0 | |||||
| Off | Crestron | Control | |||
| On | |||||
| Extron | |||||
| PJ Link | |||||
| AMX Device Discovery | |||||
| Telnet | |||||
| HTTPS | |||||
| Control 4 | |||||
| Advanced Settings | |||||
| Regulatory Information | Device Information | ||||
| Serial Number | |||||
| Source | Source Information | ||||
| (···×··) | |||||
| (Refresh Rate (···,··) Hz) | |||||
| Picture Format | |||||
| Color Depth | Color Information | ||||
| Color Gamut | |||||
| Color Range | |||||
| Audio Encoding | |||||
| Connected/Standby | Power Status (Standby) | ||||
| Light Source Hours | |||||
| Brightness Mode | |||||
| 99 ~ 00 | Device Number | ||||
| IP Address | |||||
| Network Status | |||||
| MAC Address | |||||
| DDP | FW Version | ||||
| MCU | |||||
| Gamma | |||||
| LCU MCU Version |
Picture Menu
Learn how to configure image settings.
Submenus
Image Mode
•Dolby Vision
Dynamic Tone Mapping
• Brightness
• Contrast
•Sharpness
Gamma.
•Brightness Mod
•PureEngine Ultr
• Color Settings
Wall Color.
3D Dimensions
Image Mode
Predefined display modes that you can choose from to suit your preferred viewing method. These have been adjusted precisely by the color expert team. Color data for a wide range of content types.
• Bright: Selecting this mode provides balanced color saturation and brightness on a brighter screen. Choose this mode for bright environments, or when you want to view Bright content.
• HLG / HDR: HLG (Hybrid Log-Gamma) for color (HDR) / (Hybrid Log-Gamma) (HDR): Encoding and displaying content with dynamic range technology (HDR) / (Hybrid Log-Gamma) (HDR) / (Hybrid Log-Gamma) (HLG) / (Hybrid Log-Gamma) (HLG) / (Hybrid Log-Gamma) (HLG) / (Hybrid Log-Gamma) (HLG) / (Hybrid Log-Gamma) (HLG) / (Hybrid Log-Gamma) (HLG) / (Hybrid Log-Gamma) (HLG) / (Hybrid Log-Gamma) (HLG)
1080p/4K UHD Blu-ray – To HDR/HLG display device on receipt (sending HDR/HLG content) – To 4K UHD Blu-ray – HDR/HLG on display
• Cinema: Provides the best balance between detail and colors when watching movies.
• Game: Optimizes the display for content with maximum contrast and bright colors so you can see details clearly when playing video games.
• Reference: This mode produces colors to match as closely as possible to what filmmakers intended, with color, white point, brightness, contrast, and gamma settings calibrated according to Rec.709 color space.
HDR (Wide Color Gamut): Provides a wider color range. Wide color gamut is a display with a different source than WCG and can only be used with SDR content. Wide color gamut represents images with additional accuracy and HDR color precision after the source.
• Bright: This mode is suitable for environments that require very high brightness levels, such as using a display in well-lit rooms.
• Dolby Vision Bright: Encodes and displays HDR images. Dolby Vision Bright with flexible brightness provides excellent tone mapping for each scene individually and high bit depth and contrast. It features brighter whites and improved shadow details and skin tones.
• Dolby Vision Dark: Encodes and displays HDR images. Dolby Vision Dark: Provides excellent tone mapping for each scene individually and high bit depth and contrast. Dolby Vision Dark results in brighter brightness, including deeper black levels.
Shield TV, FireTV 4K Stick/Cube) (Playback Source) (4K and 4K HDR Blu-ray) PS5 content does not support (4K HDR Blu-ray Player, Xbox Series X, Dolby Vision).
Note:
• Diversity: HDR: Dolby Vision Vivid: Provides excellent tone mapping for each scene individually and high bit depth and contrast. Dolby Vision Vivid uses a more sophisticated algorithm for higher brightness and improved performance with higher peak brightness.
• While watching movies. Dolby Vision Vivid: Provides the best balance between detail and colors.
• HDR10+ content: Enhanced for improvement.
Shield TV, FireTV 4K Stick/Cube) (Video streaming games and 4K HDR Blu-ray) Source content (Playback source) HDR10+ PS5 content does not support (4K HDR Blu-ray Player Xbox Series X) 4K.
• Golf simulation mode: Enhances colors and contrast to create a realistic golf entertainment experience with light blue skies, darker shadows, and realistic green colors.
• AI Image Quality: Detects faces and scenes in real time using built-in AI processing units. To get the best experience, AI-PQ improves image quality on all displays at once.
• 3D Dimensions: Calibrated settings.
Note: To enjoy 3D SPD Extras dimensions, you need to use 3D glasses. DLP Link See the 3D display section for more information.
• 3D content.
• Filmmaker Mode: After completing all processing operations (such as motion smoothing) and preserving correct aspect ratios, colors, and frame rates, Filmmaker Mode allows the display to show video content at the same resolution as filmmakers intended. For more information about Filmmaker Mode, please visit https://filmmakermode.com
Note:
• IMAX Enhanced. DTS: Provides superior image and immersive sound experience via 4K HDR, as it is in the theatrical release of content shown in IMAX theaters. IMAX: Content may be partially or fully shot using IMAX cameras. IMAX:
• Image is enhanced using "Day" "ISF" mode for optimal calibration and high-quality images.
• Image is enhanced using "Night ISF" mode for optimal calibration and obtaining high-quality images.
• ISF HDR: Image is enhanced using "Day" "ISF HDR" mode for optimal calibration and obtaining high-quality images.
• ISF HDR: Image is enhanced using "Night" "ISF HDR" mode for night:
• Image is enhanced using ISF 3D mode for optimal calibration and obtaining high-quality images.
(High quality development) 8K30 HDMI 2.1/4K120, please use cables, eARC and Dolby Vision and HDR10+ HDR • Use and signal weakening or prevention.
Note:
Dolby Vision
Screen Size
Set screen size in Dolby Vision mode.
Screen Gain
Set screen brightness in Dolby Vision mode.
Dynamic System
HLG / HDR
High dynamic tone mapping (HDR) / Hybrid Log-Gamma (HLG) settings and their effect when playing video from Blu-ray players and streaming devices.
Dolby Vision/HDR/HLG/HDR10 Detection: Detect signal.
• Off: Turn off HDR/HLG/HDR10+/Dolby Vision processing.
HDR/HLG/HDR10+/Dolby Vision content.
HDR Brightness
Adjust HDR intensity if dynamic has been set to detection.
Brightness
Adjust image brightness.
Contrast
Contrast setting controls the degree of difference between the brightest and darkest parts of the image.
Sharpness
Adjust color sharpness in the image.
Gamma
Adjust gamma curve exponentially. After initial setup and fine adjustment, use gamma adjustment steps to improve image output.
• Home theater system.
• Graphics: For computer/photograph source.
Adjusts brightness mode settings.
(Dynamic Black) DynamicBlack 1/ DynamicBlack 2/ DynamicBlack 3
For best contrast performance.
• Power: Choose power saving mode for brightness.
PureEngine Ultra
Adjusts PureEngine parameters.
Detail precision. • High Contrast: Used to improve screen brightness detection.
• PureLight: Used to improve brightness of brighter areas in various areas.
The bright area.
• To increase image vibrancy, clear image: Increases.
• For displayed image: Clear motion: Adjusts.
• PureDetail: To significantly increase image sharpness.
Using the Display
Color Settings
Color
Adjusts video image from black and white to fully saturated color image.
Color Tone
Balances red and green colors.
Color Temperature
Select color temperature from warm, standard, or cool, moderate cool or cool faded.
RGB 11 Point Balance
Adjust balance of red, green, and blue colors.
Color Spectrum
. BT2020 and Rec. 709 and DCI-P3 color chain adjustment from original and
CMS
Specify the following settings:
Color: Adjusts the levels of red, green, blue, cyan, magenta, and white colors for the image.
• Between red and green.
Saturation: Adjusts the video image from white and black tones to an image with fully saturated colors.
• Brightness of the selected color.
Reset: Return to the factory default settings for color adjustment.
•
RGB Bias/Gain
This setting allows you to configure the brightness (gain) and contrast (bias) of the image.
• Red / Green / Blue Gain: Adjust the color of the bright areas in the image.
• Red / Green / Blue Bias
Reset: Restore the factory default settings for gray gradient (white balance).
Color Range
RGB (16-235), RGB (0-255), RGB (0-255)
Wall Color
This feature is designed to adjust the color of images displayed on a wall without a screen. Each setting has been carefully reviewed by our color expert team to ensure superior color output performance.
There are several preset modes that can be selected for wall colors. Choose from off, black panel, light orange, light green, light blue, pink, and gray.
For accurate color production, we recommend using a screen.
Note:
Using the Projector 4
Dimensional Specifications
Note:
. DLP-Link 3D This device is a fully 3D projector equipped with a DLP-Link 3D solution
• Please ensure you are using appropriate DLP-Link 3D glasses for 3D video content before watching.
. HDMI1/HDMI2/HDMI3 This device supports 3D frame rates via ports
For optimal performance, it is recommended to use 4K resolution in 3D mode.
3D Mode
Use this setting to turn off or turn on the 3D function.
• Off: Press "Off" to disable 3D mode.
3D mode. • On: Select to enable 3D mode.
3D Sync Type
Use this setting to specify the 3D technology.
• 3D Dimensions: DLP: Select this setting for optimized 3D glasses settings.
• 3D Display Sync: Select this setting for optimized settings for polarized or IR RF 3D glasses.
3D Pattern
This setting is used to select the content suitable for 3D format.
• Auto: When a 3D signal is detected, a 3D format is automatically selected.
• Side by Side: Display a 3D signal in "side by side" format.
• Top and Bottom: Display a 3D signal in "top and bottom" format.
• Frame Sequential: Display a 3D signal in "frame sequential" format.
• Frame Packing: Display a 3D signal in "frame packing" format.
3D Sync Inversion
This setting is used to enable/disable the 3D sync inversion function.
Reset
Restore the factory default settings for 3D mode settings.
• Cancel Reset.
Yes: Proceed to restore the factory default settings for 3D mode.
Reset
Restore the factory default settings for image settings.
Using the Projector 5
Display Menu
Learn how to configure the settings to properly display images according to installation conditions.
Submenus
• Low Latency Mode
Display to Height Ratio
Geometric Correction
Edge Mask
Digital Zoom/Shrink
Image Offset
Low Latency Mode
and Steam Deck and Switch and PS and Xbox Series X|S and PC This feature enables reduced response times (input lag) during gaming using these devices. All geometric settings (such as keystone distortion and lens shift) will be disabled when low latency mode is enabled. Asus Ally X geometric settings require processing, which will affect input lag.
| Input Lag Source Frame Rate | |
| 1080p 60Hz | |
| 1080p 120Hz | |
| 1080p 240Hz | |
| 4K60 |
Translation (Arabic) ALLM (Arabic) ALLM (Arabic) ALLM (Arabic) ALLM (Arabic) ALLM (Arabic) ALLM (Arabic) ALLM (Arabic) ALLM (Arabic) ALLM (Arabic) ALLM (Arabic) ALLM (Arabic) ALLM (Arabic) ALLM (Arabic) ALLM (Arabic) ALLM (Arabic) ALLM (Arabic) ALLM (ALUM, ALUM, ALUM, ALUM, ALUM, ALUM, ALUM, ALUM, ALUM, ALUM, ALUM, ALUM, ALUM, ALUM, ALUM, ALUM, ALUM, ALUM, ALUM, ALUM, ALUM, ALUM, ALUM, ALUM, ALUM, ALUM, ALUM, ALUM, ALUM, ALUM, ALUM, ALUM, ALUM, ALUM, ALUML, ALUML, ALUML, ALUML, ALUML, ALUML, ALUML, ALUML, ALUML, ALUML, ALUML, ALUML, ALUML, ALUML, ALUML, ALUML, ALUML, ALUML, ALUML, ALUML, ALUML, ALUML, ALUML, ALUML, ALUML, ALUPLA, ALUPLA, ALUPLA, ALUPLA, ALUPLA, ALUPLA, ALUPLA, ALUPLA, ALUPLA, ALUPLA, ALUPLA, ALUPLA, ALUPLA, ALUPLA, ALUPLA, ALUPLA, ALUPLA, AULPLA, AULPLA, AULPLA, AULPLA, AULPLA, AULPLA, AULPLA, AULPLA, AULPLA, AULPLA, AULPLA, AULPLA, AULPLA, AULPLA, AULPLA, AULPLA, AULPLA
Display to Height Ratio
Specify the ratio of the image width to height to be displayed among the following:
• 3:4: This format is specific to 2:4 input.
• 17:9: This format suits 17:9 input source, such as high-definition televisions and DVD players developed to fit screens.
• Vertical Stretch: This mode stretches an image with aspect ratio 1:2.4/1:2.35 vertically.
• Full: Uses the aspect ratio of approximately 200:1 to display an image with aspect ratio approximately 16:9 and 2.35:1 without displaying black bars at the top and bottom of the screen.
• 21:9: This format suits input sources with 21:9 aspect ratio, such as HDTV for DVD display developed for large display screens.
• 32:9: This format suits input sources with 32:9 aspect ratio, such as HDTV developed for DVD display.
• Original: This mode displays the original image without any size change.
• Auto: Allows automatic selection of the appropriate display mode.
Note:
Detailed information about vertical stretch mode:
- For DVD devices in 16:29 format in this case the image will appear as intended when • Some features are not optimized • Displayed in 16:9 mode in this case, please try using 3:4 mode to display DVD content • If the content is not in • 3:4, black bars will appear around the image in 16:9 display. In this type of content, vertical stretch mode can be used to fill • The displayed image with 16:9 aspect ratio
- If you are using an external distortion lens, the following vertical stretch allows viewing 2.35:1 content (including film and DVD) normally) supports distortion display. It has been optimized to display 16:9 2.35:1 wide. No black bars appear in this case. Light and vertical resolution are fully utilized.
Using the Projector 6
To use full-screen format, perform the following:
(A) Set the screen aspect ratio to 2.0:1
B) Select the "Full" format.
C) Align the projector image correctly on the screen.
4K UHD DMD Scaling Table
Auto: 4K UHD DMD Scaling Table
| Auto/Input Adjustment | Auto | |||
| Vertical Point Horizontal Resolution | ||||
| 216. | 288. | 6.. | 8.. | 4:3 |
| 216. | 288. | 768 | 1.24 | |
| 216. | 288. | 1.24 | 128. | |
| 216. | 288. | 1.5. | 14.. | |
| 216. | 288. | 12.. | 16.. | |
| 216. | 384. | 72. | 128. | Computer Converted Wide |
| 216. | 36.. | 768 | 128. | |
| 216. | 3456 | 8.. | 128. | |
| 216. | 27.. | 576 | 72. | SDTV |
| 216. | 324. | 48. | 72. | |
| 216. | 384. | 72. | 128. | HDTV |
| 216. | 384. | 1.8. | 192. | |
Using the Projector 7
Geometric Correction
Vertical Trapezoid Distortion
restricted Distort the image vertically in search correct something square shape. We use the vertical quasi-trapezoid distortion function to record a distorted image shape where the upper and lower boundaries are inclined to one side. This function is used in tight vertical axis applications.
Horizontal distortion
Deployment image extreme in which quasi-square shape. The horizontal quasi-trapezoid distortion function is used to record a distorted image shape where the left and right boundaries are equal in length. This function is usually used in horizontal axis applications.
Adjust Four Corners
This setting allows you to adjust the displayed image from any corner to create a square-shaped image when the display surface is level.
Distortion
Distortion adjustment can be enabled or disabled.
Adjust Distortion
The distortion adjustment feature provides a 256-point grid to allow alignment adjustment throughout the image. Press the ▲/▼/◀/▶ keys to focus the point and press the ENTER key
Grid Color
Select a grid color for the distortion pattern from green, purple, red, or dark blue colors.
Reset
Reset geometric correction to factory default values.
Edge Mask
Use this function to remove video encoding noise present at the edge of the video signal.
Digital Zoom/Reduce
This feature is used to reduce or increase the image size on the display screen. Digital zoom differs from optical zoom; which may result in degradation in image quality.
Note: Zoom/reduction settings are retained during the display device power cycle.
Image Offset
Adjust the position of the displayed image horizontally (horizontal) or vertically (V).
Reset
Reset display settings to factory default values.
Using the Projector
Setup Menu
Learn how to set up the projector.
Submenus
Lens Settings.
• Test Pattern
Projection Direction
Language.
• Cooling Settings
High Cooling.
• Power Settings
• Security
• Keyboard Settings
Background Color.
Remote Control Settings
• User
• Reset Device
Lens Settings
Zoom
Use the ◀◀ buttons to adjust the size of the displayed image.
Focus
Use the ◀◀ buttons to adjust the focus of the displayed image.
Lens Function
Lock the lens to prevent lens motor movement in order to disable all lens functions.
When the lens function is "locked", neither focus nor zoom, lens offset, lens calibration, and lens memory will be available.
Note:
Lens Offset
Use the ▲ ▼ and ◀ buttons to adjust the lens offset position to display the correct area.
Lens Calibration
Calibrate the lens position to return it to center. To prevent damage to the projector and lens, always be sure to perform lens calibration before replacing it.
Lens Memory
This projector has the ability to save up to five lens settings; or in other words five lens position records. To record proper data, please perform lens calibration when using lens memory for the first time.
Application: Select a record
• Load lens settings.
Save Current: Select a record
• Current lens settings.
Reset: Clear saved lens records.
.
Note:
Perform lens calibration before setting lens offset memory.
You must "save the current position, before "follow the previous position";"—otherwise, the memory application function will appear grayed out or be disabled.
If you perform lens calibration, it will clear the saved lens records.
If lens calibration is not completed, lens memory will not be available.
Using the Projector
Test Pattern
Select a test pattern from green grid, purple grid, white grid and white or disable this function (Stop).
Projection Direction
Select your preferred display direction from front and rear, bottom - top and back - top.
Language
Select the on-screen information menu in multiple languages.
Menu Settings
Menu Position
Select the menu position on the display screen.
Menu Timer
Adjust the time period during which the display menu remains flexible on the screen.
Hide Information
Enable this feature to hide the information message.
High Altitude
When set to "On", the fan rotation speed increases. This feature is useful in high-altitude areas where the air is thin.
Power Settings
Direct Power On
Select "On" to activate Direct Power On mode. The projector will power on automatically when connected to a power source without needing to press the power button
on the control panel or remote control.
Signal Power On
Select "On" to activate Signal On mode. The projector will start when a signal is detected, without pressing the "Power" button on the projector panel
or remote control.
.HDMI : Note : This function works with HDMI input
Auto Power Off (Minutes)
Allows you to adjust the time interval for the countdown timer. The countdown timer starts if the projector does not receive any signals. The device will power off
automatically when the countdown is complete (in minutes).
Sleep Timer (Minutes)
Allows you to set the time interval for the countdown timer. The countdown timer will start automatically, regardless of whether the projector receives signals or not. The
device will power off automatically when the countdown is complete (in minutes).
The "Sleep Timer" will be reset each time the projector is powered off.
Power Mode (Standby)
Set the power mode setting.
| Power Consumption - Power (Standby) | |||
| --- Watts Economic | |||
| Watts Connection | |||
| Support Watts Communication (Minutes) |
Using the Projector
12 A 12 feet / 12 B 12 feet Trigger Unit
Use this function to enable or disable the trigger.
A 3.5mm small connector outputs 12V 500 milliamps (maximum) for relay system control.
Note:
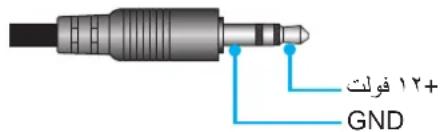
text_image
12+ GND• Enable the trigger unit.
• Disable the trigger unit.
Security
Security
Enable this feature to require a password before using the projector.
On: Select "On" to use the security verification feature when turning on the projector.
•
Off: Select "Off" to allow the device to power on without password verification.
•
Security Timer
Select the time period (month/day/hour) to limit the number of hours the projector is used. Once this time period expires, you will be prompted to enter the password again.
Change Password
Used to set or modify the password that is requested when turning on the projector.
Keyboard Settings
Lock Keyboard
When the keyboard lock function is set to "On", the keyboard will be locked, but you can still power on the projector using the remote control. By
selecting "Off", you will be able to use the keyboard again.
Background Color
Use this function to display blue or red or green or gray or nothing when no signal is available.
If the background color is set to "no proxy server" the background color will be black.
Note:
Remote Control Settings
User 1 / User 2 / User 3
Configure the functions for User 1, User 2, and User 3 buttons on the remote control. This allows you to use the functions easily without navigating through the on-screen menus.
Reset Device
Factory Reset
Return to the factory default settings for the on-screen menu settings.
Clear All Settings
Restore factory default settings for all settings.
Using the Projector
Input Menu
Learn how to initialize the settings inside the projector.
Submenus
Auto Source.
Input Source Naming
• Hide Input
• HDMI CEC Settings
Auto Source
Select this option to allow the projector to automatically find the available input source.
Rename Input Source
This feature is used to rename the input function to make it easier to identify. The available options include HDMI 1 HDMI 2 HDMI 3 and Computer.
Hide Input
Select the input options you want to hide from the input source list. The available inputs include 1 HDMI 2 HDMI 3 and HDMI 4
HDMI CEC Setup
When connecting devices compatible with HDMI CEC, they can be controlled through power on/off functions using the HDMI Link control feature displayed on the projector display, allowing power on/off for a single device or multiple devices in a group through the HDMI Link function in normal mode connected to a display through an audio receiver or home theater system.
Note:

flowchart
graph LR
    A[" projector "] -->|HDMI| B[" HDMI "]
    B --> C[" audio "]
    C --> D[" DVD "]
    D -->|HDMI| E[" audio "]
    E --> F[" audio "]
    style A fill:#f9f,stroke:#333
    style B fill:#ccf,stroke:#333
    style C fill:#cfc,stroke:#333
    style D fill:#fcc,stroke:#333
    style E fill:#cff,stroke:#333
    style F fill:#ffc,stroke:#333
HDMI Link
Enable/disable HDMI Link function.
Power On Link
CEC Power On
• Mutual: Both the projector and CEC device will power on at the same time.
• Projector --- > Device: CEC device will only power on after the projector powers on.
• Device --- Projector: Projector will only power on after the CEC device powers on.
Power Off Link
CEC Power Off
• Mutual: Both the projector and CEC device will power off at the same time.
• Projector --- Device: CEC device will only power off after the projector powers off.
• Device --- Projector: Projector will only power off after the CEC device powers off.
Reset
Reset input settings to factory default values.
Using the Projector
Audio Menu
Learn how to configure audio settings.
Submenus
Audio
Mute audio.
• Audio output settings
• Digital format
Audio
Adjust audio level.
Mute
Use this option to temporarily stop audio.
Off: Press "Off" to exit mute mode.
•
• Mute mode.
The "Mute" function affects both internal and external speaker audio levels.
Note:
Audio Output Settings
Select audio output format from eARC, SPDIF, and Analog.
Note about Dolby ATMOS support for compatible soundbars or AVRs with Dolby ATMOS and eARC transmission capability.
Note:
Digital Output Format
Select digital output format from PCM and Bitstream.
Reset
Reset audio settings to factory default values.
Using the Projector
Control Menu
The Control menu is used to configure settings required for the projector to communicate with other displays or control devices.
Submenus
Device Number
• LAN
• Control
Supplementary Information
Use the web control panel.
• RS Telnet
Device Number
The identification number can be set through the menu (0 to 99), and this function allows the user to control a projector through using a command.
RS232.
For a complete list and RS232 commands, please refer to the RS232 user guide in /.
Note:
LAN
Configure network settings for the projector.
Network Status
Displays network connection status. (Read only)
MAC Address
(Read only). Display MAC address.
DHCP
Enable DHCP to automatically obtain IP address, subnet mask, gateway and DNS 1 DNS 2.
IP Address
Set IP address for the projector.
Subnet Mask
Set subnet mask for the projector.
Gateway
Set gateway for the projector.
DNS 1 / DNS 2
Set DNS.
Reset
Reset network settings to factory default values.
Using the Projector
Control
This projector can be controlled remotely using a computer or other external devices via wired network connection. This feature allows the user to control one or more projectors from a remote control center, such as: powering the projector on or off and adjusting image brightness and contrast. Use the Control submenu to select a control device for the projector.
Crestron
Control the projector using Crestron control unit and related software. Crestron. http://www.crestron.com For more information, please visit
Extron
Control the projector using Extron devices. http://www.extron.com
PJ Link
Control the projector using PJLink v2.0 commands. For more information, please visit http://pjlink.jbmia.or.jp/english
Discovery X Devices
Control the projector using AMX devices. For more information, please visit http://www.amx.com
Telnet
Control the projector using Telnet commands via RS232 connection. For more information, refer to 64 Discovery. RS232 by Telnet.
HTTPS
Control the projector using (Server): 8088. For more information, refer to 55 specification "How to use web control panel to control the projector".
Control
Control the projector through control unit 4 and related software. (Server: 53595)
Control Ports
| Crestron Port 4 1794 | |
| Port 4 2022 | |
| PJ Link Port 4 252 | |
| AMX Port 4 131 | |
| Telnet Port 4 2 | |
| HTTPS 8088 Port 4 | |
| Port 4 42595 |
Note:
• Crestron Electronics in the United States.
• Extron Electronics: Registered trademark of Extron in the United States.
• AMX LLC registered trademark in the United States.
• JBMIA for trademark registration and logo in Japan and the United States and other countries.
• For more information about the different types of external devices that can be connected to LAN/RJ 45 and control the projector remotely, please refer to the user documentation.
For the commands supported by these external devices, please contact support service directly.
Network Control Setup
LAN RJ: 45 Function
To simplify and facilitate operation, the projector provides numerous network and remote management features. The RJ 45 function in the projector manages some features remotely via the network such as: power on/off settings, brightness and contrast. You can also view information about projector status such as: video source and audio mute and others.
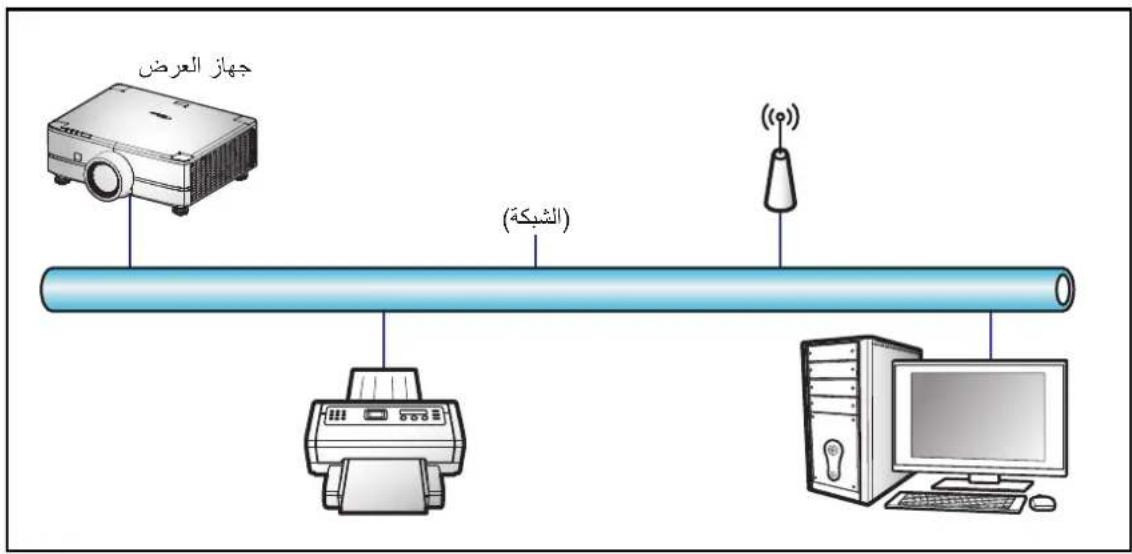
text_image
Projector (The Network) (!Functions of peripheral devices connected to wired LAN network
Crestron / Extron / AMX (Host computer) or any external device with LAN/RJ45 port is compatible with PCs (PC: 5) Device Discovery / PJLink
• Crestron Electronics in the United States.
• Extron Electronics in the United States. Registered trademark of Extron.
• in the United States.
• For trademark registration and logo in Japan and the United States and other countries through JBMIA.
• This projector is supported by a number of control units and related programs (Crestron Electronics) (RoomView®).
http://www.crestron.com/
This projector is compatible with Extron device support.
http://www.extron.com/
This projector is supported by AMX Device Discovery.
http://www.amx.com/
This projector supports all PJLink commands. Category 2.
http://pjlink.jbmia.or.jp/english/
For more detailed information about the different types of external devices that can be connected to LAN/RJ45 and the remote control unit for the projector,
and the commands supported by these external devices, please contact support service immediately.
How to use the web control panel to control the projector
Enable DHCP option "On" in the projector to allow DHCP server.
- 2 Open the web control panel on your computer and enter the IP address of the projector.
• "P Address < LAN < Control".
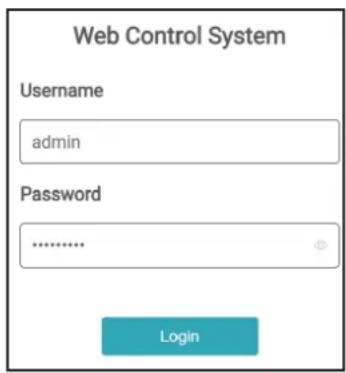
- Enter the username and password then click "Login".
The projector's configuration interface will be opened on the web.
Note:
The default username is "admin".
The steps described in this section are performed using Windows 10 operating system.
* When making a direct connection from the computer to the display device
-1 Set DHCP option to 'Off' mode in the display device.
Configure the IP address on the display device's LAN < DNS (subnet and gateway).
- Open the Network and Internet page on your computer and set the network settings for the computer as configured in the display device. Click
"OK" to save the settings.
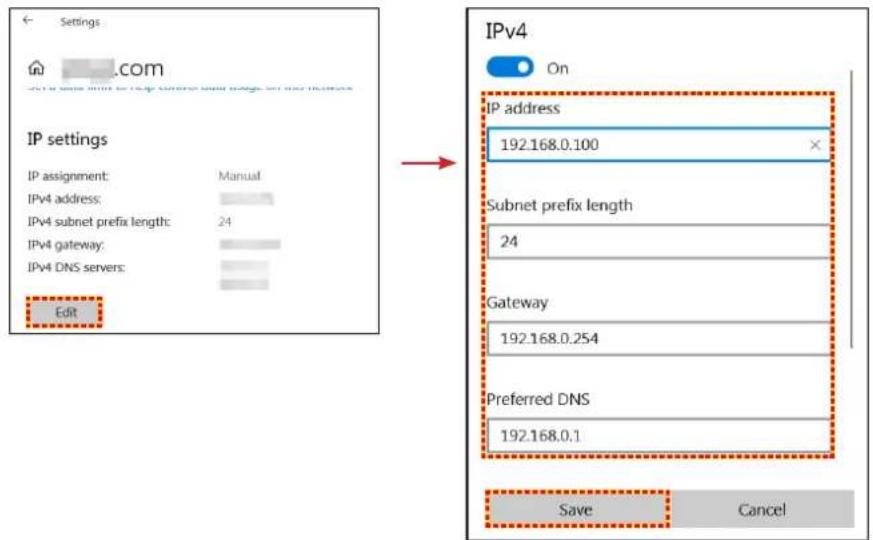
- Open a web browser on your computer and enter the IP address in the URL bar, as specified in step 3, then press Enter.
For a list of functions, see page 53. Note:
LAN RJ45
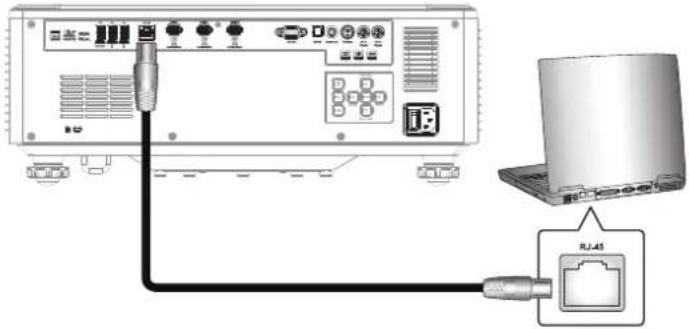
- Connect RJ45 cable to RJ45 ports on the display device and personal computer (laptop).
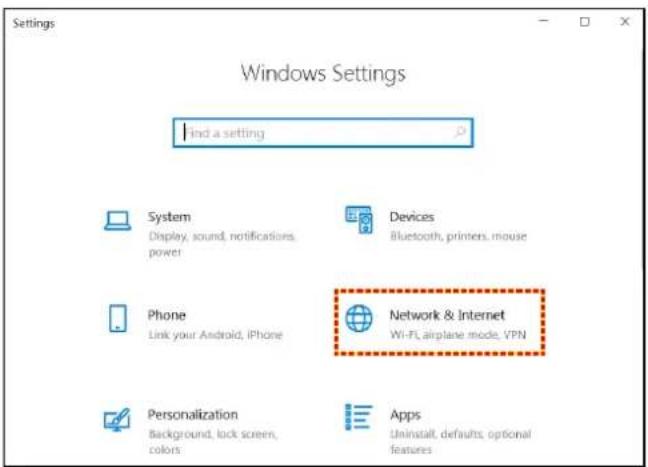
On the personal computer (laptop), select Settings > Network Settings
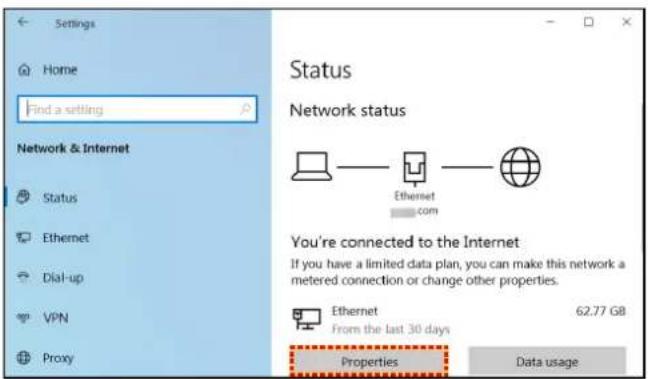
In the Ethernet section, select Configure.
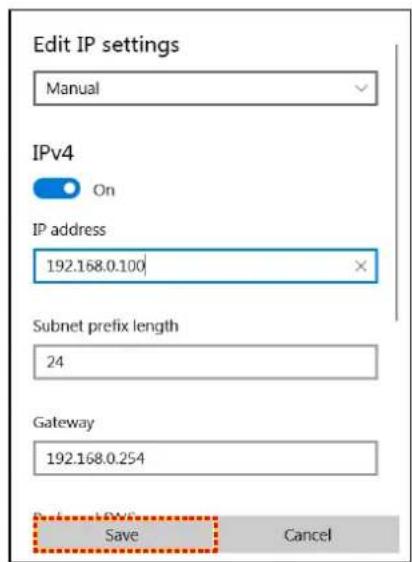
- In the IP settings section, select Manual.
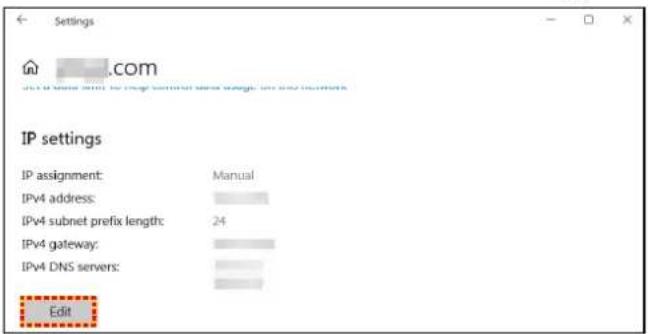
- Enter the IP address, subnet mask, and gateway, then select "Save".
text_image
Edit IP settings Manual IPv4 On IP address 192.168.0.100 Subnet prefix length 24 Gateway 192.168.0.254 Save CancelConfigure the display device.
- Open Control < LAN > on the display device.
Configure the following connection settings:
- DHCP: Off
- IP Address: 192.168.0.100
- Subnet Mask: 255.255.255.0
- Gateway: 192.168.0.254
- DNS: 192.168.0.51
Confirm the settings.
-1. Adobe Flash Player 9.0, installed with Chrome or Microsoft Edge or higher.
In the address bar, enter the IP address of the display device 192.168.0.100:8088

The display device is configured for remote management. LAN/RJ45 function is displayed as follows:
Login
When you open the web page for the first time, a screen like the one below will appear.
Please change the default password.
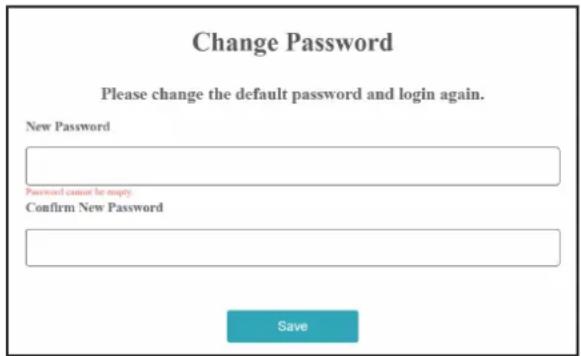
After changing the default password, you must log in again. When you open the web page, enter the password in the "Password" field and click Login.
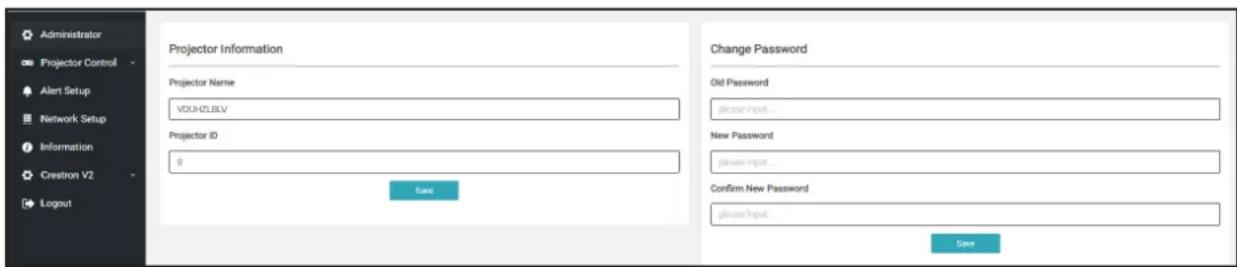
The projector name set here is also used in PJLink control. You can use alphanumeric characters in the projector name, with a maximum of 22 characters.
You can use only alphanumeric characters in the password, with a minimum of 8 characters. If you enter an invalid character, an "Invalid character" warning message will appear.
An error message will be displayed if the new password characters do not match the confirm new password characters. In this case, re-enter the password.
text_image
Administrator Projector Control Alert Setup Network Setup Information Crestron V2 Logout Projector Information Projector Name VOUHZLELV Projector ID 0 Save Change Password Old Password please input... New Password please input... Confirm New Password please input... SaveProjector Control
You can control the display device using this interface. This section provides an explanation of the control elements.
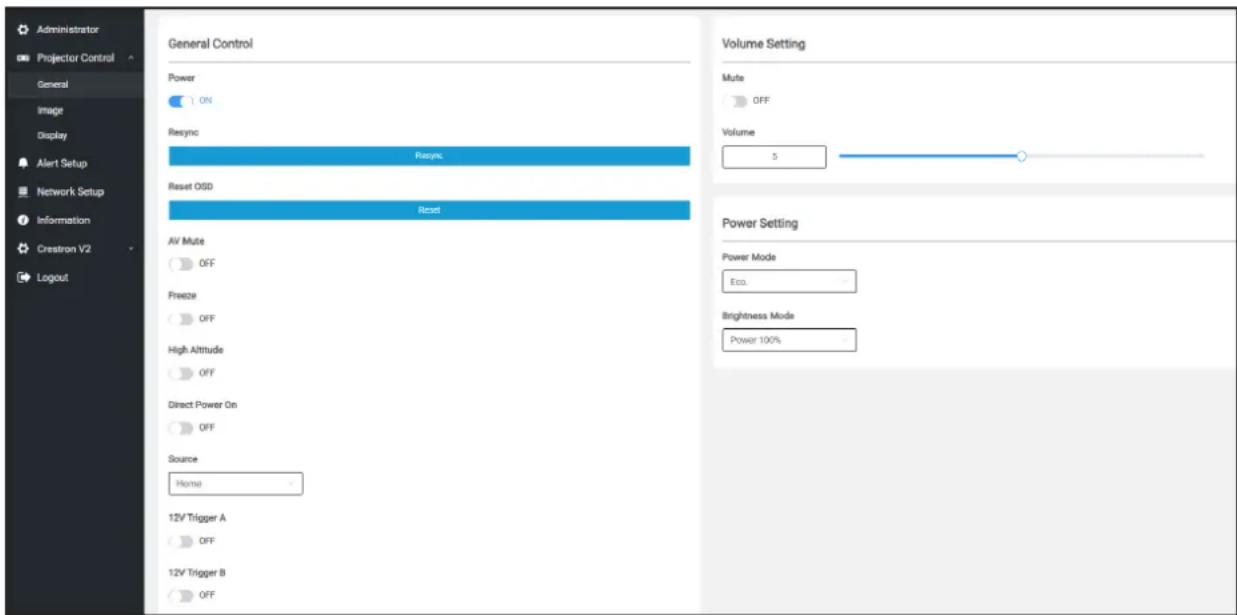
text_image
Administrator Projector Control General Image Display Alert Setup Network Setup Information Crestron V2 Logout General Control Power ON Resync Resync Reset OSD Reset AV Mute OFF Freeze OFF High Altitude OFF Direct Power On OFF Source Home 12V Trigger A OFF 12V Trigger B OFF Volume Setting Mute OFF Volume 5 Power Setting Power Mode Eco. Brightness Mode Power 100%[General]
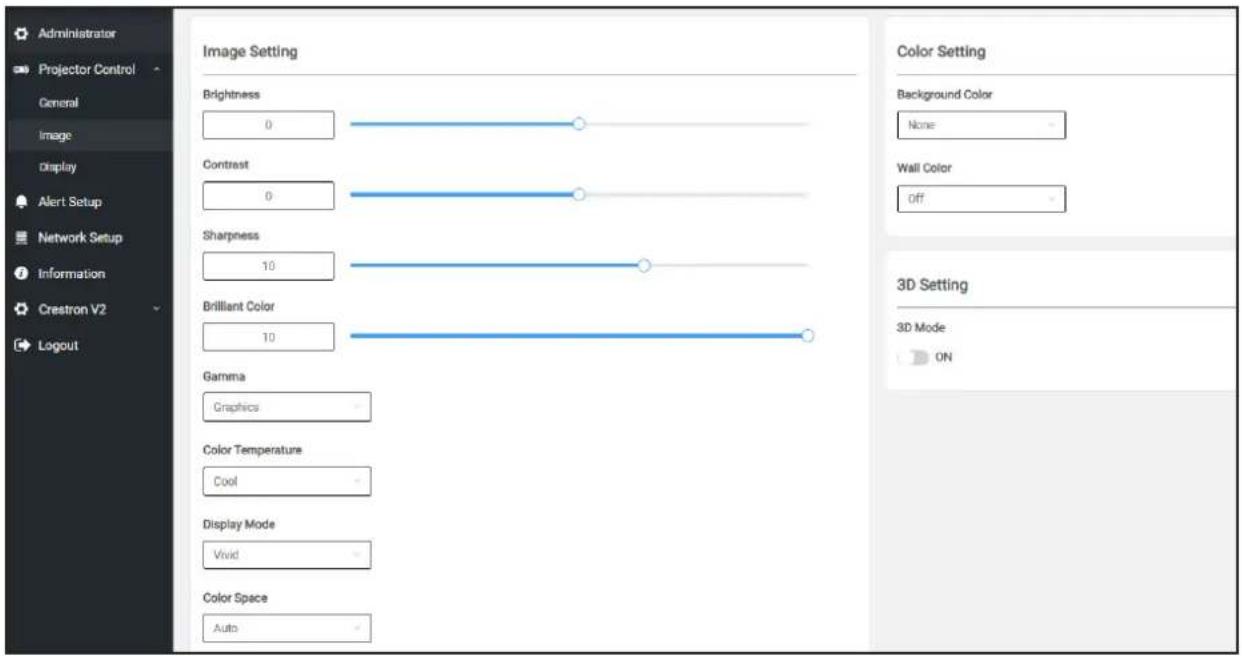
text_image
Administrator Projector Control General Image Display Alert Setup Network Setup Information Crestron V2 Logout Image Setting Brightness 0 Contrast 0 Sharpness 10 Brilliant Color 10 Gamma Graphics Color Temperature Cool Display Mode Vivid Color Space Auto Color Setting Background Color None Wall Color Off 3D Setting 3D Mode ON[Image]
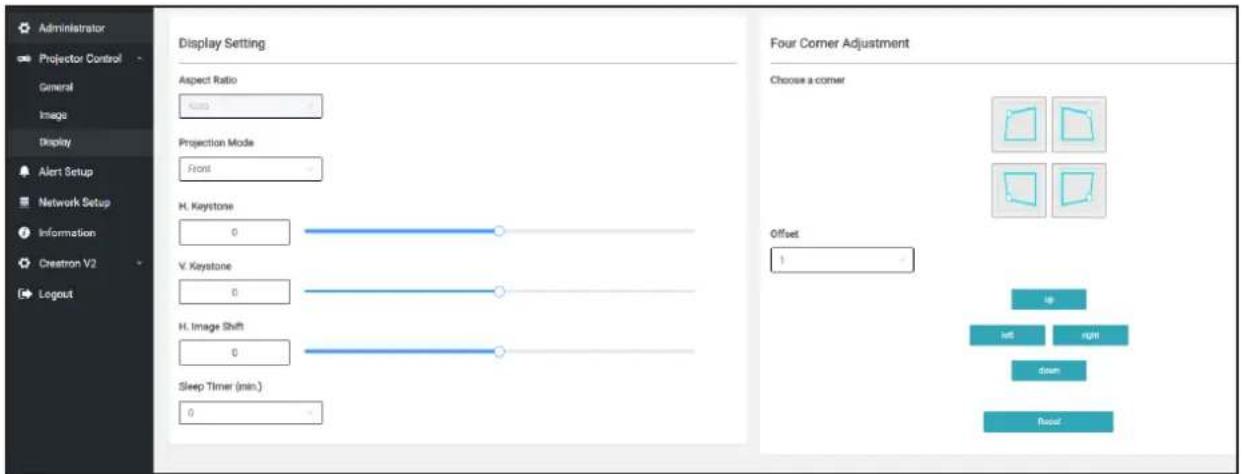
text_image
Administrator Projector Control General Image Display Alert Setup Network Setup Information Crestron V2 Logout Display Setting Aspect Ratio 4000 Projection Mode Front H. Keystone 0 V. Keystone 0 H. Image Shift 0 Sleep Timer (min.) 0 Four Corner Adjustment Choose a corner Offset 1 up left right down Reset[Display]
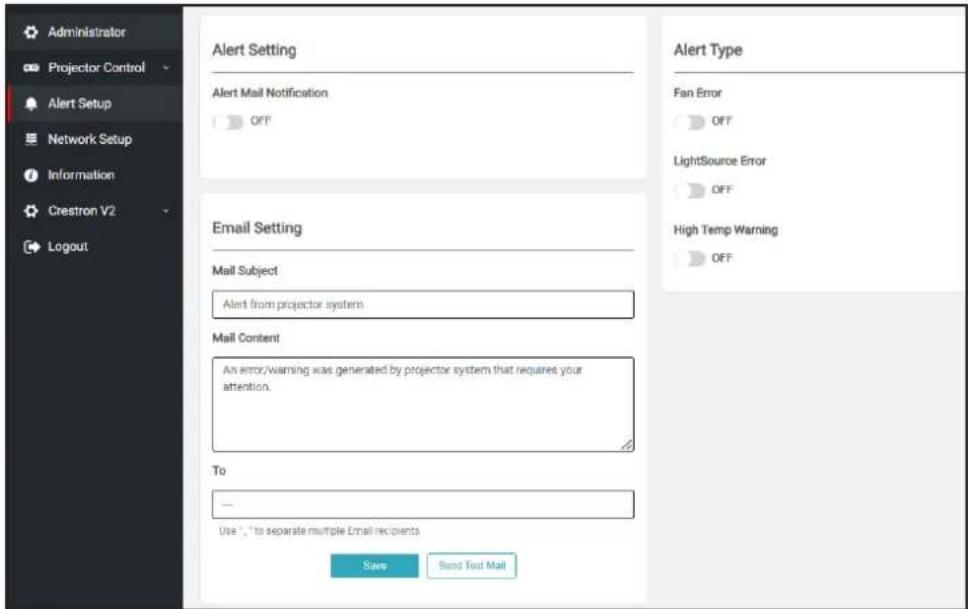
Alert Setup
You can send alerts via email when an error occurs. You can configure alert message settings in this section.
- Alert Types: Check the type of error for which you want to send an alert message.
2. Alert Message Settings: Check the following settings and configure:
- Configure the following settings: SMTP Setup
(a) SMTP Server (Server Name)
(b) SMTP Server Address
(c) Username: Username for the mail server
(d) Password: Password for the mail server
(e) From: Email address of the sender
- Email Configuration: Configure the following settings:
(a) Message Subject
(b) Message Content
(c) To: Enter the email address of the recipient.
- Click "Save" to apply the settings
- Send Test Message
When you click [Send Test Message], a test email will be sent. The message text will be as follows: "Email Test xxx.xxx.xxx.xxx"
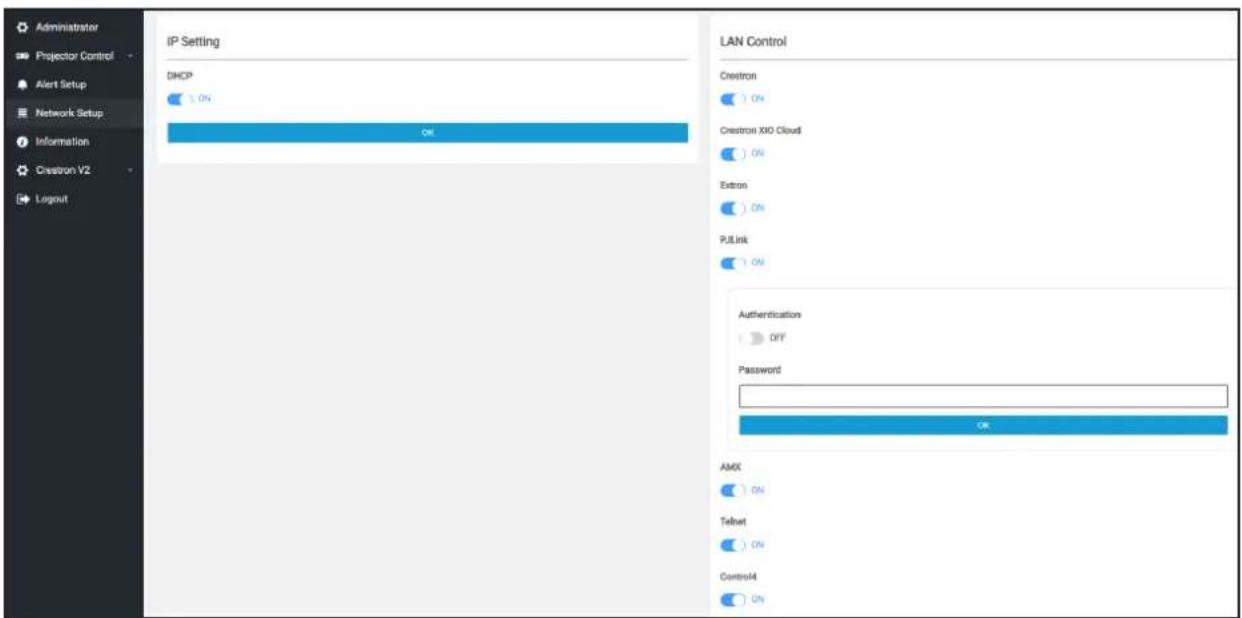
Configure the display device network settings.
text_image
Administrator Projector Control Alert Setup Network Setup Information Crestron V2 Logout IP Setting DHCP ON OR LAN Control Crestron ON Crestron XIO Cloud ON Extron ON PJLink ON Authentication OFF Password OK AMX ON Telnet ON Control4 ONInformation
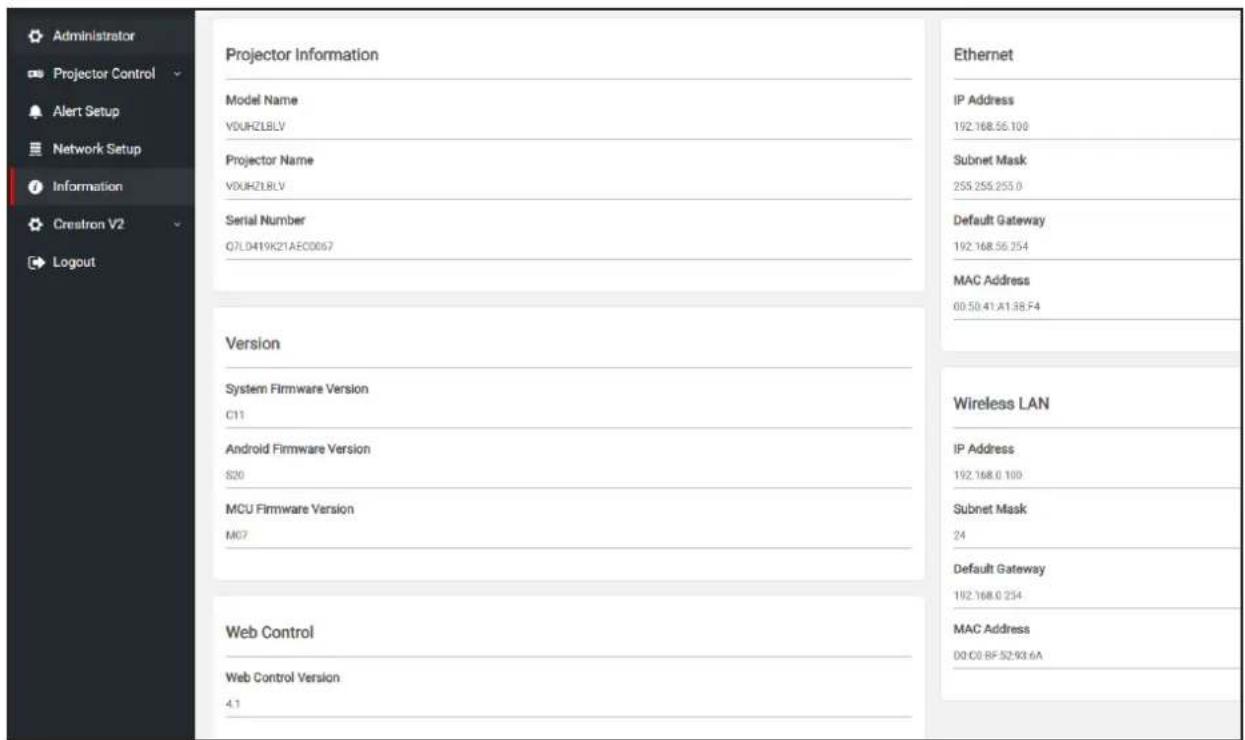
Current information about the display device is displayed. You can check the model name of the display device, firmware version, web control version, and current configurations.
text_image
Administrator Projector Control Alert Setup Network Setup Information Crestron V2 Logout Projector Information Model Name YOUHZLBLV Projector Name YOUHZLBLV Serial Number Q7L0419K21AEC0067 Version System Firmware Version C11 Android Firmware Version S20 MCU Firmware Version M07 Web Control Web Control Version 4.1 Ethernet IP Address 192.168.55.100 Subnet Mask 255.255.255.0 Default Gateway 192.168.56.254 MAC Address 00:50:41:A1:38:F4 Wireless LAN IP Address 192.168.0.100 Subnet Mask 24 Default Gateway 192.168.0.254 MAC Address 00:C0.BF:52:93:6ACrestron V2
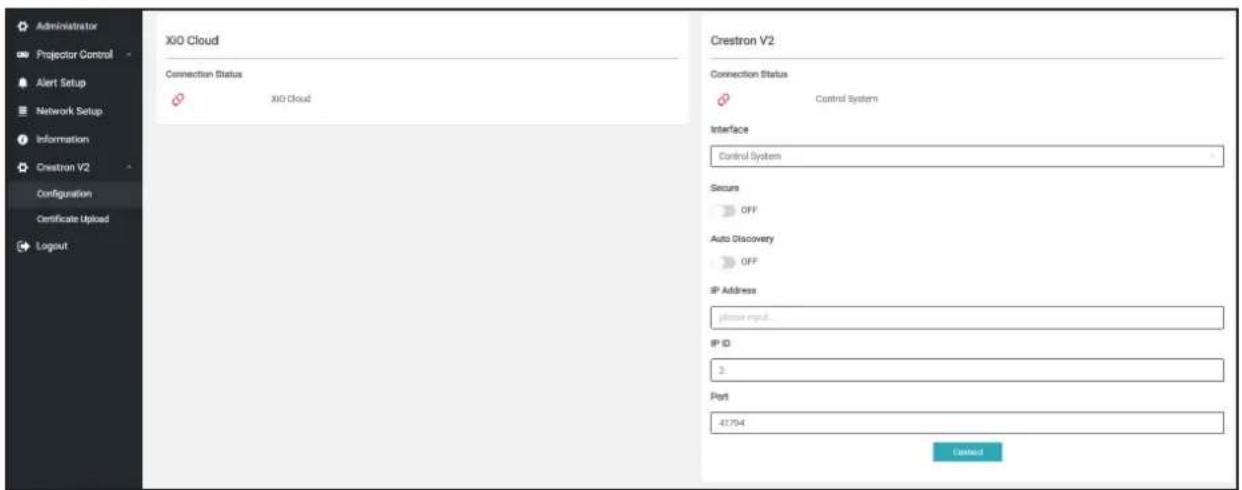
Display the connection status and configure settings related to Crestron.
RS232 by Telnet Function
.LAN / RJ45 interface for TELNET includes RS232. This display includes an alternative control method consisting of a command
"RS232 by Telnet" Essex Quick Setup Guide for Function
• Check and obtain the IP address in the information list displayed on the screen of the display.
• Ensure you can access the web page on the display via your computer or the available computer.
Ensure to disable the "Windows Firewall" setting in case the "TELNET" function is enabled and excluded from TELNET
- 1 Click Search and enter "cmd" to configure the search term. Press the "Enter" key.
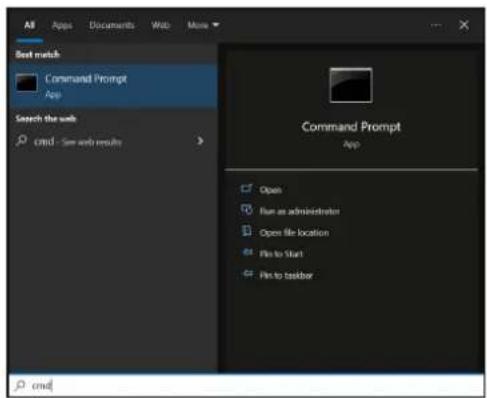
(Press "Enter" key input)
(Display IP address: ttt.xxx.yyy.zzz)
Telnet "If the RS232 connection is Telnet and press the "Enter" key, then the RS232 connection will be
.RS232 ready to control with command
:"RS232 by TELNET" Specifications
-.Telnet: TC
Optoma (for more details, please contact the service team) Telnet from - 2
. Windows "TELNET.exe" : Telnet Tool - 2
- End a session, simply close the command prompt window. Telnet
Ready T.ELNET immediately after Windows Telnet tool connection is established - 5
- Telnet : Consecutive network load for the control application cannot exceed 50 bytes. Telnet Limit 1 for teacher in
.Telnet : Telnet 2 for control in : RS232 For the control application in : Cannot use more than 26 bytes for a command 1
- Limit 2 for comparison high in : Minimum command delay duration must exceed 200 milliseconds.
Reset
Reset control settings to factory default values.
Using the Display
Information Menu
Display display status information and settings. Display information is read-only.
Regulatory
Serial Number
Source information.
Picture Mode
• Color information.
• Power mode (standby)
Light output hours.
•Brightness Mode
• Small business number
•P address
Network status.
•MAC address
Remote Bluetooth status
•FW version
System Settings
On the startup screen, select the Settings menu (to configure the selected system settings.
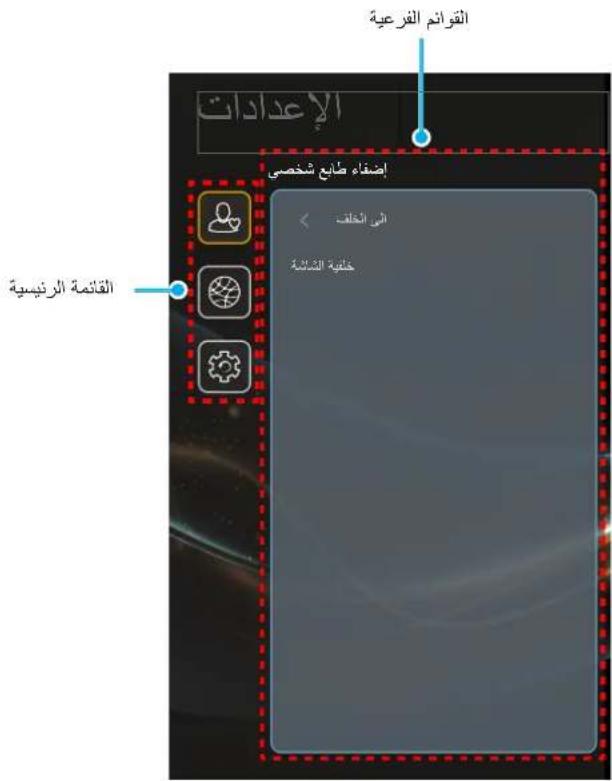
text_image
Counters Submenus Add Developer Personalize Back Available Counters Available Counters Available CountersSettings Menu Tree
| Type 2 Level 1 | |||||
| Available background personalize | |||||
| Stop | Wi-Fi | Wireless | |||
| Configure Profile | |||||
| Enter password [Wi-Fi] | LIMITED Companies SSID(WiFi) | ||||
| Internet Connection | |||||
| IP Address | |||||
| MAC Address | |||||
| Subnet Mask | |||||
| Gateway | |||||
| DNS 1 | |||||
| DNS 2 | |||||
| Signal Strength | |||||
| No Proxy Server | Proxy Server Settings | ||||
| Manual | |||||
| DHCP | IP Settings | ||||
| Static | |||||
| Cancel | |||||
| Forget | |||||
| System | |||||
| Add New Network | System | ||||
| On | Wi-Fi Connection Point | Connection Point | |||
| Off | |||||
| Network Name | |||||
| Security | |||||
| Password | |||||
| Display Share | System | ||||
| File Manager | |||||
| Current Keyboard | Keyboard | ||||
| On | Other Keyboards | Keyboard Management | |||
| Off | |||||
| On | Kika Keyboard | ||||
| Off | |||||
| ,9:··-,9:4··-,1:··-,11:··-,13:··-,ε:··-,0:··-,7:··-,γ:··-,Λ:··-,···,1:··-,γ:··-,τ:··-,τ:4··-,τ:4··+,τ:··+,γ:··+,1:··+,0:4··+,0:··+,ε:4··+,ε:··+,γ:··+,7:4··+,7:··+,0:50+,9:··+,Λ:50+,Λ:4··+,Λ:··+,11:··+,1:4··+,1:··+,9:4··+,1ε:··+,17:··+,17:50+,17:··+ | Select Time Zone | Date and Time | |||
| On | Daylight Saving Time | ||||
| Off | |||||
| Use 24-hour format | |||||
| On | |||||
| Off | |||||
| System Update | |||||
| Terms and Conditions of Use | Legal Affairs | ||||
| Privacy Policy | |||||
| Cookie Policy | |||||
| Open Source License | |||||
Note:
• Functions vary depending on model definition.
• All specifications are subject to change without notice.
Customization Menu
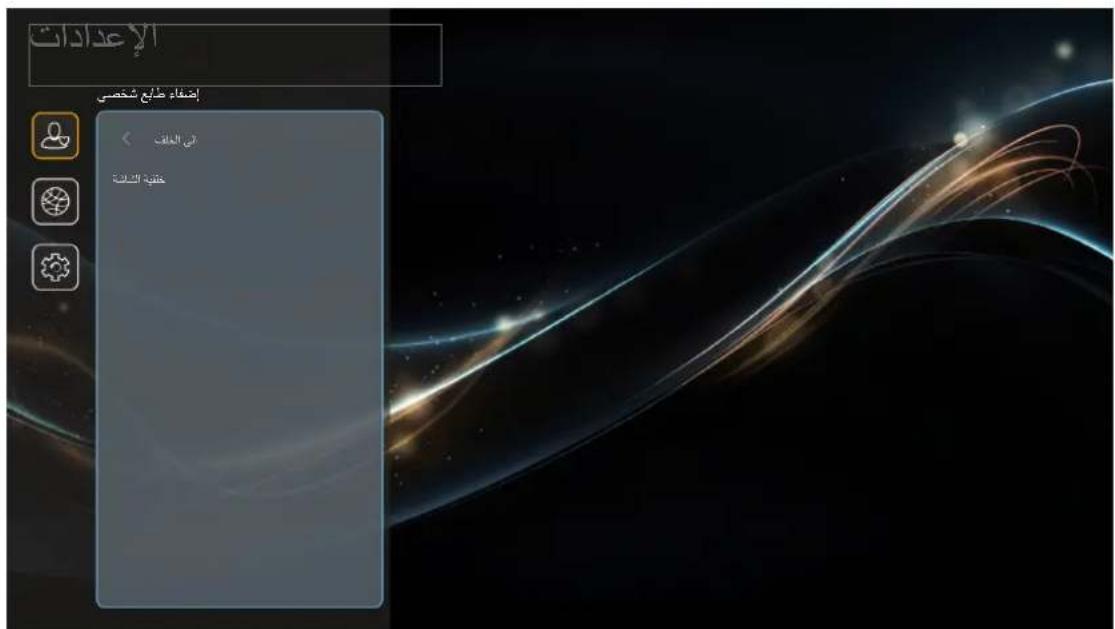
text_image
Settings Personalize ◀ In the back Screen DetailsScreen Background
Customize the main screen background.
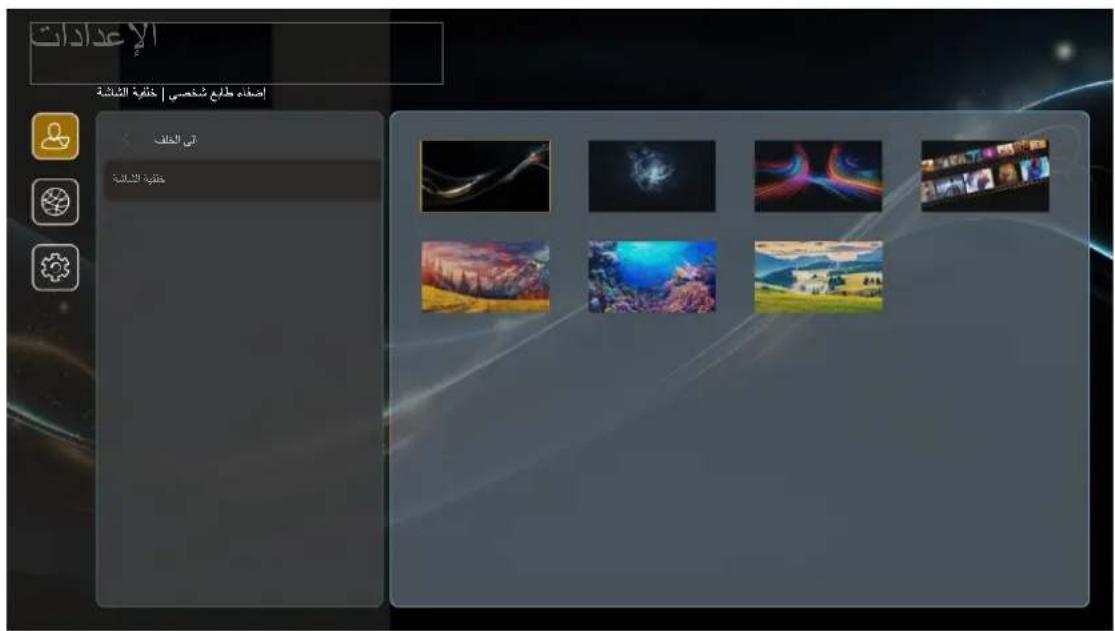
text_image
Settings Personalize | Screen Background In the back Screen BackgroundNetwork Menu
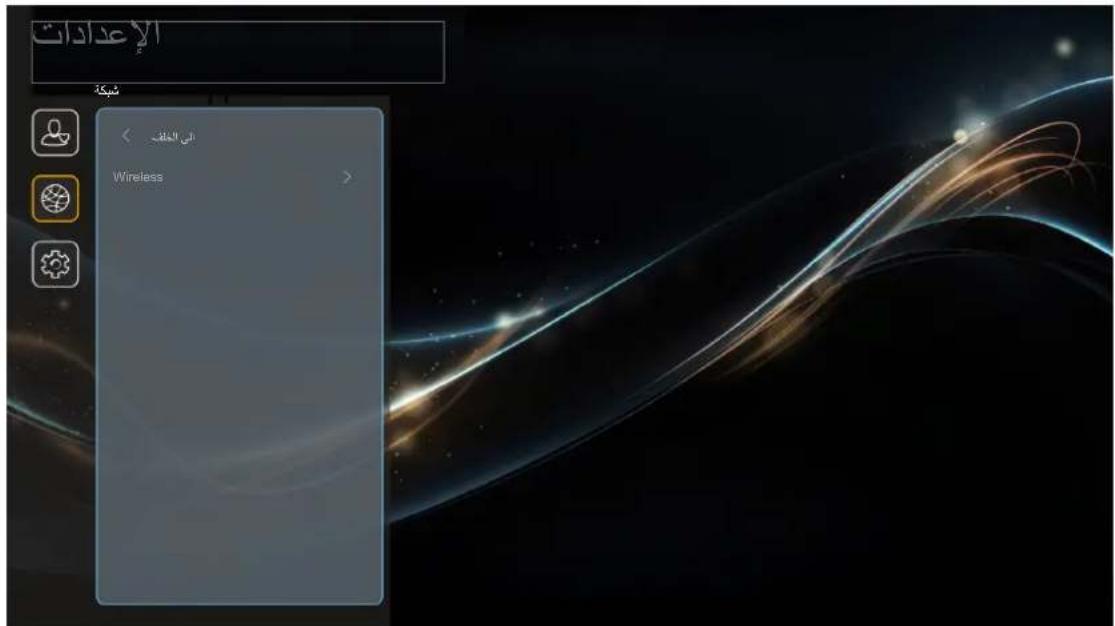
Configure wireless network settings.
• Wi-Fi : Set Wi-Fi option to "On" to enable wireless network feature.
• For available networks: Select the desired wireless access point and enter the necessary connection parameters or configure them (if required), for example SSID, password, and proxy settings and IP address. For information, you can check the signal strength.
Choose "Back" to return to the network menu without saving the settings, and click "Forget" to delete the wireless network profile.
Note: If you need to enter symbols, the system will automatically display a keyboard on the screen.
Other options: Configure advanced wireless network settings, such as: "Add New Network" (enter network name manually)
The display acts as a wireless access point for other devices).
Note:
text_image
Arabic System ◀ Display Share File Manager keyboard > Date and Time > System Search > Value RangeDisplay Share
Start the application. Display Share see page 72.
File Manager
Start the application. See page 73. File Manager
Keyboard
Select and manage keyboards.
Date and Time
Configure date and time settings.
• Select Time Zone: Select the time zone in your geographic location.
In your area. Chinese Time: Set to "On" if Chinese time is followed in your region.
• 8. Use 24-hour format: Set to "On" to display time in 24-hour format. Set to "Off" to display time in 12-hour format (AM/PM)
System Update
The system automatically searches for updates every time the display device is connected to the Internet (over the air).
Legal Affairs
Review legal documents, including "Terms and Conditions of Use", "Privacy Policy", "Cookie Policy" and "Open Source License".
You can also review legal documents via the Internet, please refer to the following web addresses:
.https://www.optoma.com/terms-conditions/: Terms and Conditions of Use .https://www.optoma.com/cookies-policy/: Cookie Policy .https://www.optoma.com/software-privacy-policy/: Privacy Policy
Note:
Manually Select Input Source
If the "Auto Source" function is available and the required input source is not displayed on the home screen, select the input source (☐) on the home screen or press the source button on the remote control, then select your preferred input source.
Selecting Applications
To display all applications (File Manager or Display Share), select the Settings menu ( ), then select the application you want.
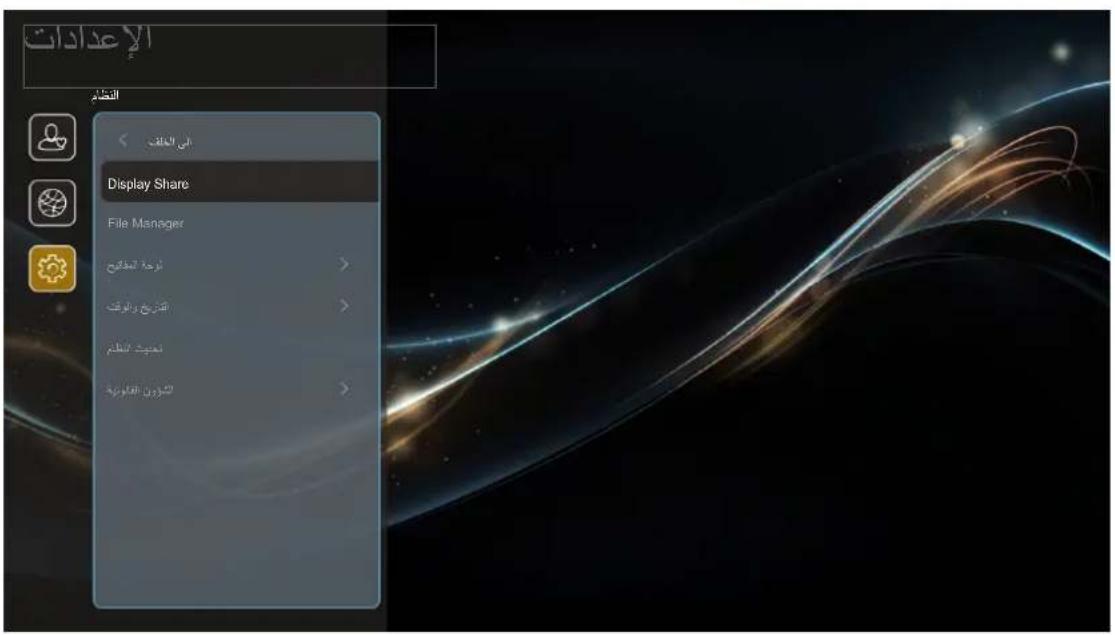
text_image
Settings Menu Display Share File Manager Software Version > Date and Time > Sound Settings Device Management >Display Share
To get started with Display Share, you can follow one of the following:
• If you are using a mobile device, scan the QR code • Or go to the link
Then install the Display Share application on your computer or mobile device.
Before starting, make sure your computer or mobile device is connected to the same Wi-Fi network as the display device, then follow the on-screen instructions to enable mirroring.
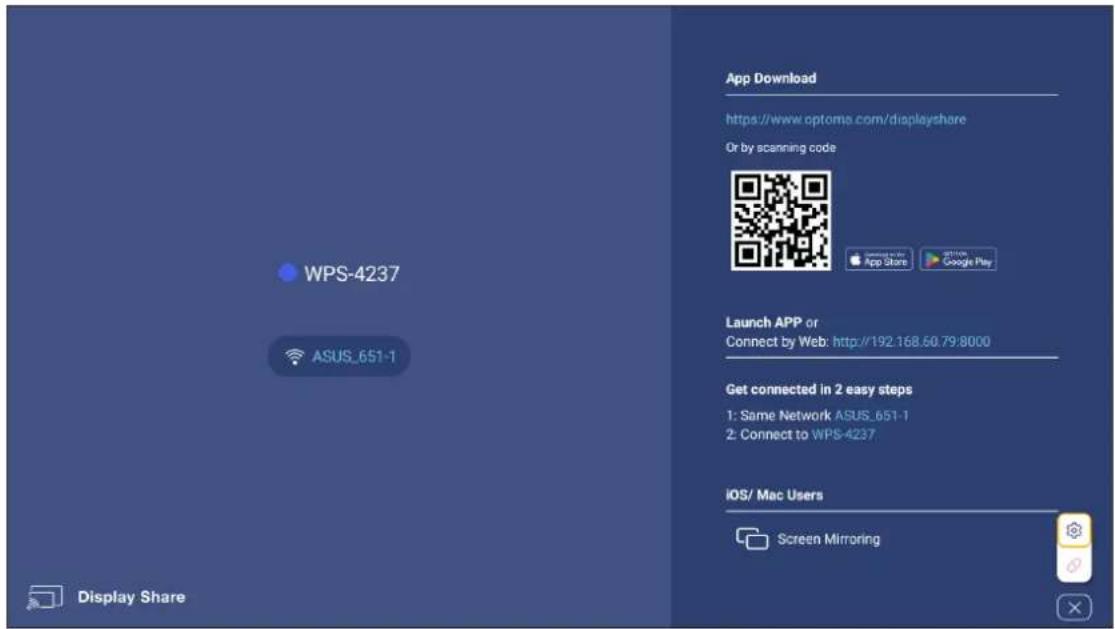
For iOS, please make sure the display device is connected to the Internet, then start the Display Share application. For iOS, please make sure the display device is connected to the Internet, then start the Display Share application. For iOS, please make sure the display device is connected to the Internet, then start the Display Share application. For iOS, please make sure the display device is connected to the Internet, then start the Display Share application. For iOS, please make sure the display device is connected to the Internet, then start the Display Share application. For iOS, please make sure the display device is connected to the Internet, then start the Display Share application. For iOS, please make sure the display device is connected to the Internet, then start the Display Share application. For iOS, please make sure the display device is connected to the Internet, then start.
(Optoma EZC-USB Wi-Fi) To use this feature, you must connect and configure an Ethernet network or use an adapter (optional accessory not included in the box).
File Manager
Using the File Manager application, you can manage files stored in internal storage, external storage, or cloud storage.
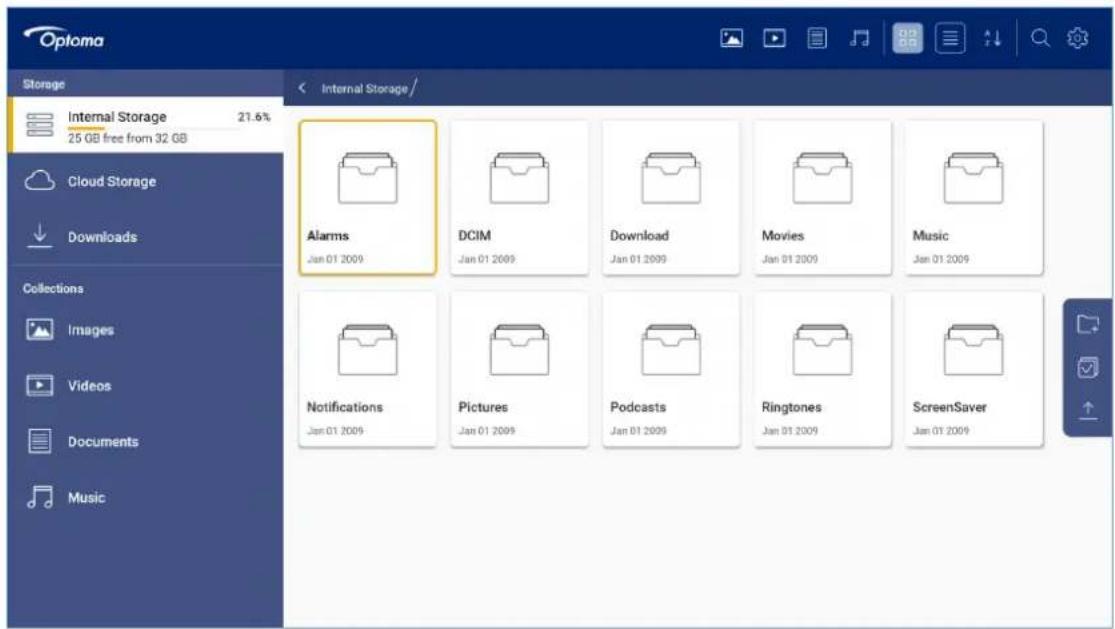
text_image
Optoma Storage Internal Storage 21.6% 25 GB free from 32 GB Cloud Storage Downloads Collections Images Videos Documents Music Internal Storage/ Alarms Jan 01 2009 DCIM Jan 01 2009 Download Jan 01 2009 Movies Jan 01 2009 Music Jan 01 2009 Notifications Jan 01 2009 Pictures Jan 01 2009 Podcasts Jan 01 2009 Ringtones Jan 01 2009 ScreenSaver Jan 01 2009To use this feature, you must connect and configure an Ethernet network or use an adapter (optional accessory not included in the box). Optoma EZC-USB Wi-Fi
Note:
Supported Resolutions
HDMI Input Signal
| Frequency (Hz) Resolution Signal | |||
| 75.×3.×0/77/77. | Mac 60/75 VGA | ||
| 77.×3.×. | |||
| 1.×7.×0/77. | Mac 60/75 SVGA | ||
| 177×77×0Mac 75 | |||
| XGA1.×3×77×17. | |||
| SDTV(480P) 77.×3.×7 | |||
| SDTV(576P) 77.×0V70 | |||
| HDTV(720P) 17.×77. | |||
| 17.×3.×7. | Mac 60 | ||
| 13.×9.×. | |||
| WXGA | |||
| 17.×1.×3×0/7. | Mac 60/75 SXGA | ||
| 13.×9.×. | |||
| 7. | +SXGA1.×3.×1.0. | ||
| 7. | 17.×17. | UXGA | |
| 7. | 19.×1.×. | HDTV(1080I) | |
| Mac 60 | 7.×17.×1.×0. | 19.×1.×. | HDTV(1080p) |
| 70.×13.×17. | WQHD | ||
| 17.×1.×0.×1.×2 | 73.×717. | UHD(2160p) | |
| 17.×1.×0.×1.×2 | 3.×7×717. |
0/V·/7·M:
17.77.Mai
Supported Dimensions
HDMI 1.4a 3D for playing Blu-Ray discs
3D Timing on Personal Computers
| Specifications | Application |
| 192.1.8. | Application |
| 178.7. | |
| 174.8. |
Multimedia Specifications - Video, Audio and Image
| Video Codec Container | |
| (.mkv) MKV | VP9 |
| (.webm) WebM | |
| (.mp4) MP4 | |
| (.mov, .mp4) MP4 | HEVC/H.265 |
| (.tp, .trp, .ts) MPEG Transport Stream | |
| (.mkv) MKV | |
| (.MPEG, .MPG, .VOB, .DAT) MPEG Program Stream | MPEG1/2 |
| (.tp, .trp, .ts) MPEG Transport Stream | |
| (.mp4) MP4 | |
| (.avi) AVI | |
| (.mkv) MKV | |
| (.mov, .mp4) MP4 | MPEG4 |
| (.3gp) 3GPP | |
| (.avi) AVI | |
| (.mkv) MKV | |
| (.mov, .mp4) MP4 | H.263 |
| (.3gp, .3gpp) 3GPP | |
| (.avi) AVI | |
| (.mkv) MKV | |
| (.flv) FLV | H.264 |
| (.mov, .mp4) MP4 | |
| (.3gp) 3GPP | |
| (.tp, .trp, .ts) MPEG Transport Stream | |
| (.asf) ASF | |
| (.wmv) WMV | |
| (.avi) AVI | |
| (.mkv) MKV | |
| (.tp, .trp, .ts) MPEG Transport Stream | VC1 |
| (.asf) ASF | |
| (.wmv) WMV | |
| (.avi) AVI | |
| (.mkv) MKV | |
| (.avi) AVI | Motion JPEG |
| (.mov, .mp4) MP4 | |
| (.mkv) MKV | |
| (.mkv) MKV | VP8 |
| (.webm) WebM | |
| (.mov, .mp4) MP4 | AV1 |
| (.3gp, .3gpp) 3GPP | |
| (.mkv) MKV | |
| Audio Codec Container | |
| (.mp3) MP3 | MPEG1 Layer 2/1 |
| (.avi) AVI | |
| (.asf) ASF | |
| (.mka and .mkv) Matroska | |
| (.m4a and .mov and .mp4) MP4 | |
| (.tp and .trp and .ts) MPEG Transport Stream | |
| (.MPEG and .MPG and .VOB and .DAT) MPEG Program Stream | |
| (.wav) WAV | |
| (.avi) AVI | MPEG1 Layer 2/2 |
| (.mka and .mkv) Matroska | |
| (.m4a and .mov and .mp4) MP4 | |
| (.tp and .trp and .ts) MPEG Transport Stream | |
| (.MPEG and .MPG and .VOB and .DAT) MPEG Program Stream | |
| (.wav) WAV | |
| (.mp3) MP3 | MPEG1 2/2.5 |
| (.avi) AVI | |
| (.asf) ASF | |
| (.mka and .mkv) Matroska | |
| (.3gp and .3gpp) 3GPP | |
| (.m4a and .mov and .mp4) MP4 | |
| (.tp and .trp and .ts) MPEG Transport Stream | |
| (.MPEG and .MPG and .VOB and .DAT) MPEG Program Stream | |
| (.flv) FLV | |
| (.wav) WAV | |
| (.ac3) AC3 | AC3(DD)(Dolby Digital) |
| (.avi) AVI | |
| (.mka and .mkv) Matroska | |
| (.m4a and .mov and .mp4) MP4 | |
| (.tp and .trp and .ts) MPEG Transport Stream | |
| (.MPEG and .MPG and .VOB and .DAT) MPEG Program Stream | |
| (.ec3) EAC3 | EAC3(DDP)(Dolby Digital Plus) |
| (.3gp and .3gpp) 3GPP | |
| (.m4a and .mov and .mp4) MP4 | |
| (.tp and .trp and .ts) MPEG Transport Stream | |
| (.MPEG and .MPG and .VOB and .DAT) MPEG Program Stream | |
| (.aac) AAC | AAC-LC and HEAAC |
| (.avi) AVI | |
| (.mka and .mkv) Matroska | |
| (.3gp and .3gpp) 3GPP | |
| (.mp4) MP4 | |
| (.m4a) MP4 | |
| (.tp and .trp and .ts) MPEG Transport Stream | |
| (.MPEG and .MPG and .VOB and .DAT) MPEG Program Stream | |
| (.flv) FLV | |
| (.wav) WAV (.ra and .rmvb and .rm) RM | |
| Audio Codec Container | |
| (.mka, .mkv) Matroska | VORBIS |
| (.webm) WebM | |
| (.ogg) Ogg | |
| (.tp, .trp, .ts) MPEG Transport Stream | DTS |
| (.MPEG, .MPG, .VOB, .DAT) MPEG Program Stream | |
| (.wav) WAV | |
| (.mka, .mkv) Matroska | |
| (.mts, .tp, .trp, .ts) MPEG Transport Stream | DTS Master Audio |
| (.mov, .mp4) MP4 | |
| (.wav) WAV | LPCM |
| (.avi) AVI | |
| (.mka, .mkv) Matroska | |
| (.3gp, .3gpp) 3GPP | |
| (.m4a, .mov, .mp4) MP4 | |
| (.tp, .trp, .ts) MPEG Transport Stream | |
| (.MPEG, .MPG, .VOB, .DAT) MPEG Program Stream | |
| (.wav) WAV | IMA-ADPCM MS-ADPCM |
| (.avi) AVI | |
| (.wav) WAV | G711 A/mu-law |
| (.avi) AVI | |
| (.mka, .mkv) Matroska | |
| (.3gp, .3gpp) 3GPP |
| Image Codec Container | |
| .jpeg, .jpg | Photograph |
| .png | |
| .bmp |
Digital EDID
Image Size and Display Distance
| Maximum Zoom (Safe Zoom) | Required Distance (meters) | ||||
| (Maximum Zoom)(Safe Zoom) | |||||
| Width (cm) | Diagonal (inches) | Width (cm) | Width (cm) | Diagonal (inches) | |
| 109 × 787 | 178 | 1.. | 1.. × 177 | 8. | 7,05 |
| 179 × 719 | 135 | 117 | 117 × 199 | 9. | 7,99 |
| 199 × 705 | 17. | 170 | 170 × 771 | 1.. | 5,54 |
| 279 × 570 | 197 | 169 | 169 × 777 | 17. | 0,71 |
| 209 × 57. | 7.8 | 177 | 177 × 788 | 17. | 0,77 |
| 299 × 041 | 75. | 177 | 177 × 777 | 10. | 7,75 |
| 279 × 7.7 | 777 | 717 | 717 × 777 | 17. | 7,07 |
| 209 × 778 | 788 | 775 | 775 × 798 | 18. | 7,97 |
| 298 × 7.8 | 77. | 769 | 769 × 769 | 7.. | 8,75 |
| 378 × 779 | 707,.. | 775 | 775 × 777 | 77. | 9,75 |
| 398 × 777 | 5..,.. | 711 | 711 × 007 | 70. | 11,.7 |
| 098 × 1.77 | 58..,.. | 775 | 775 × 775 | 7.. | 17,78 |
Zoom Ratio: 106x
Note:
Projector Dimensions and Ceiling Mount Installation
- To avoid scratching the projector, please use an Optoma mounting bracket to mount the projector to the ceiling. - If you wish to use a different mounting bracket for ceiling installation, please ensure the following specifications are met for the bolts used in the bracket installation
Projector Mounting:
Bolt Type: M4 × 408: pieces
Minimum bolt length: 8 mm
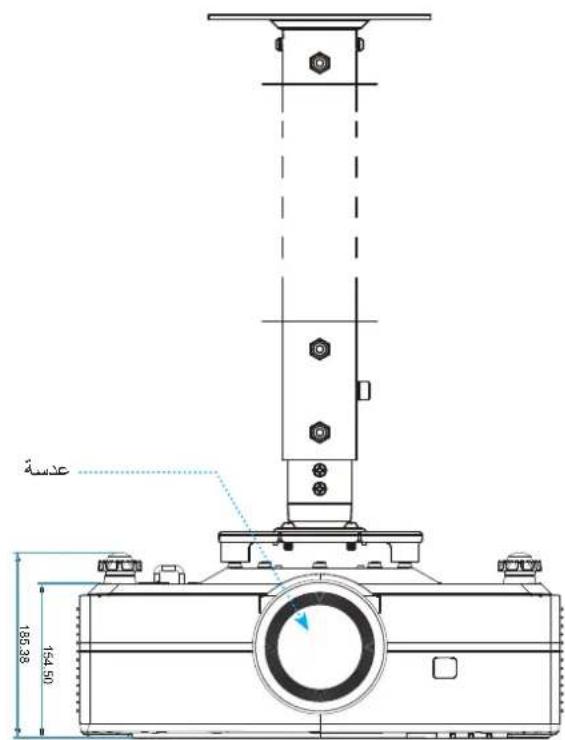
text_image
185.38 154.50 ###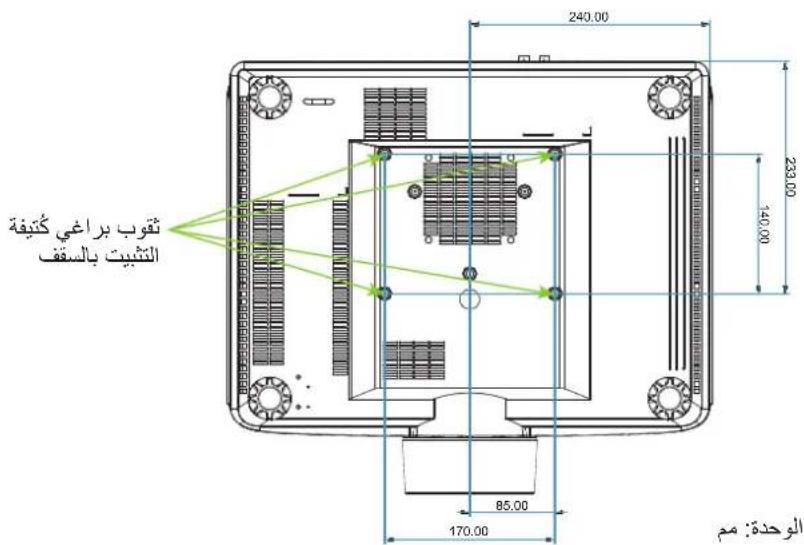
text_image
Bracket Bolts Ceiling Mount 240.00 230.00 140.00 85.00 170.00 Unit: mmPlease note that any damage resulting from improper installation may void the warranty.
Note:
Warning:

If you use mounting hardware from another company, please verify that the specifications match. Please note that bracket dimensions may vary depending on the mounting plate model.
Handle the projector carefully.
Avoid heat sources.
Infrared Remote Control Codes
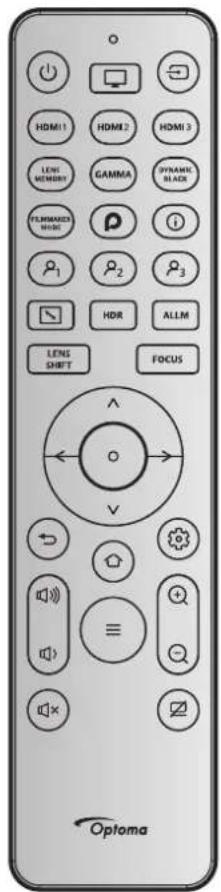
text_image
HDMI 1 LENS MEMBERY FLOMMANER MODE HDR ALLM LENS SHIFT FOCUS Optoma| Code | Mode Key | |||||
| Customer Code DATA | ||||||
| DATA0DATA1DATA2DATA3 | ||||||
| ➊ | PowerF 132CD71 | |||||
| ➂ | Picture ModeF 132CD05 | |||||
| ➌ | SourceF 132CDC: | |||||
| HDMI1 | HDMI 1F 232CD16 | |||||
| HDMI2 | HDMI 2F 232CD3C | |||||
| HDMI3 | HDMI 3F 232CD98 | |||||
| F132CDD52A | LENS MEMORY | Lens Memory | ||||
| GAMMA | GammaF 132CD7E | |||||
| F132CD44BB | DYNAMIC BLACK | Dynamic Black | ||||
| F132CDDF20 | FILMMAKER MODE | Filmmaker Mode | ||||
| F132CDD926 | ➁ | PureEngine Ultra | ||||
| ➀ | InformationF 132CDDI | |||||
| Code | Mode | ||||
| Customer Code DATA0DATA1DATA2DATA3 | |||||
| Usage 1 | |||||
| Usage 2 | |||||
| Usage 3 | |||||
| Balanced Dimensions 4 | |||||
| HDR | |||||
| ALLM | |||||
| F132CDD827 | LENS SHIFT | ||||
| FOCUS | |||||
| ^ | |||||
| < | |||||
| ○ | |||||
| > | |||||
| ∨ | |||||
| F132CDA05F | Home | ||||
| Usage 1 | |||||
| Device Setup Menu | |||||
| Volume Up | |||||
| ≡ | |||||
| Usage 2 | |||||
| Usage 3 | |||||
| Usage 4 | |||||
| Usage 5 | |||||
| Usage 6 | |||||
Troubleshooting
Please refer to the following information if you encounter a problem with your projector. If the problem persists, contact your local distributor or service center.
Image Problems
No image appears on screen
?
Make sure all cables and power connections are properly and securely connected.
See "Installation" section.
Make sure no connectors are missing or broken.
Lamp not working. Lamp is off message appears.
Image is out of focus range
?
Press the up/down arrow buttons to adjust the image until it is sharp and clear. (Please refer to page 22).
Make sure the display screen is within the required distance from the projector. (Please refer to page 80).
Image stretches when displaying a DVD clip at 16:9 aspect ratio
?
When displaying a standard DVD or 17:9 format clip, the projector will display the best image in 17:9 format on the side of the projector.
In the OSD (Vertical Stretch) menu, V-Stretch, change the format to V-Stretch when playing DVD content on the projector.
When playing DVDs in 3:4 format, also change the format to 3:4 in the OSD menu on the projector.
Please set the display mode to 16:9 aspect ratio (widescreen) in your DVD player.
Image is smaller or larger than it should be
?
Press the ZOOM button on the projector's remote control to enlarge or reduce the size of the displayed image. (Please refer to page 22).
Change different settings.
Press the "Menu" button on the projector control panel and go to "Display - Aspect Ratio".
Image has skewed edges:
?
Adjust the screen and its base.
Image appears distorted
?
Select "Setup → Projection Direction" from the information menu displayed on the screen and adjust the optical projection direction.
Other Problems
Projector stops responding to all controls
?
If possible, turn off the projector, then disconnect the power cable and wait at least 20 seconds before reconnecting the power cable again.
Remote Control Issues
If the remote control does not work
?
Make sure the remote control is pointed at an operating angle within ± 15 degrees toward the receiver on the projector.
Make sure there are no obstructions between the remote control and the projector. Move within 6 meters (19.7 feet) from the projector.
Check battery insertion direction. Replace batteries if they are dead.
Warning Indicator
When warning indicators flash or light up (see below), the projector will automatically shut down:
Laser status indicator lights red, and if Power indicator flashes
Power status indicator flashes red when the projector heats up excessively. Under normal conditions, the device can be returned to operating mode.
Power status indicator flashes red when the Temp indicator flashes.
Turn off all power to the device and wait 20 seconds, then try again. When the warning indicator flashes or lights up, please contact the nearest service center for assistance.
Status indicator message light
| Laser Status Indicator Laser Status Indicator Temp Status Indicator Power Indicator | |||
| (Red)(Red)(Red) | |||
| Standby Mode (Power Cable Connected) | |||
| - | - | Flashing (White for 0.5, 5, 0) (0.5 | |
| Power On and Lamp Lighting | |||
| - | - | Flashing (White for 0.5, 5, 5, 5, 5, 5) Returns to third bright light when cooling fan stops operating. | |
| Fixed Type - Flashing Error (Laser Failure) | |||
| Flashing - Flashing Error (Fan Failure) | |||
| Fixed Type - Flashing Error (Increased Heat) | |||
Power Off:
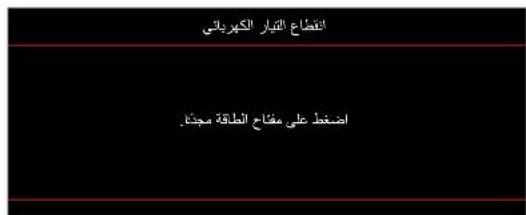
text_image
Focused Current Press the Power button once.Temperature Adjustment:
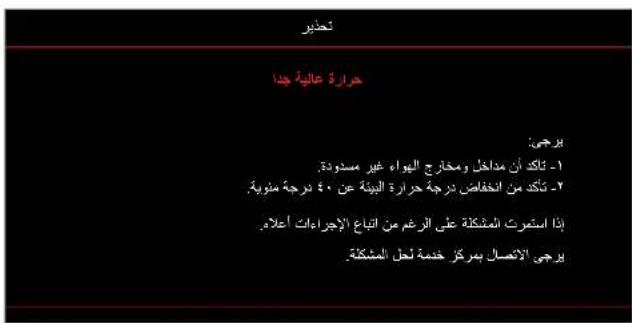
text_image
Warning Very high temperature Instructions: 1 - Make sure that air inlets and outlets are not blocked; 2 - Make sure the temperature drops below 54 degrees Celsius. If the problem persists despite following the above instructions Please contact the service center to resolve the problem.Specifications
| Item Description | |
| Maximum HDMI Resolution | |
| • Remote (1.35 ~ 2.0) Projection Ratio: 2.0 meters (2.0 meters) 2.0 meters (2.0 meters) 2.0 meters (2.0 meters) 2.0 meters (2.0 meters) 2.0 meters (2.0 meters) 2.0 meters (2.0 meters) 2.0 meters (2.0 meters) 2.0 meters (2.0 meters) 2.0 meters (2.0 meters) 2.0 meters (2.0 meters) 2.0 meters (2.0 meters) 2.0 meters (2.0 meters) 2.0 meters (2.1 meters) 2.0 meters (2.0 meters) 2.0 meters (2.0 meters) 2.0 meters (2.0 meters) 2.0 meters (2.0 meters) 2.0 meters (2.0 meters) 2.0 meters (2.0 meters) 2.0 meters (2.0 meters) 2.0 meters (2.0 meters) 2.0 meters (2.0 meters) 2.0 meters (2.0 meters) 2.0 meters (2.0 meters) 2.0 meters ()_meters (2.0 meters) 2.0 meters (2.0 meters) 2.0 meters (2.0 meters) 2.0 meters ()_meters (2.0 meters) 2.0 meters ()_meters ()_meters ()_meters ()_meters ()_meters ()_meters ()_meters ()_meters ()_meters ()_meters ()_meters ()_meters ()_meters ()_meters ()_meters ()_meters ()_meters ()_meters ()_meters ()_meters ()_meters ()_meters ()_meters ()_meters ()_meters ()_rters (}_meters (}_meters (}_meters (}_meters (}_meters (}_meters (}_meters (}_meters (}_meters (}_meters (}_meters (}_meters (}_meters (}_meters (}_meters (}_meters (}_meters (}_meters (}_meters (}_meters (}_meters (}_meters (}_meters (}_meters (}_meters (}_rters (}_meters (}_meters (}_meters (}_meters (}_meters (}_meters (}_meters (}_meters (}_meters (}_meters (}_meters (}_meters (}_meters (}_meters (}_meters (}_meters (}_meters (}_meters (}_meters (}_meters (}_meters (}_meters (}_meters (}_meters (} | |
| Interface | |
| Power Supply (2.0 meters) | |
| Power Supply (2.0 meters) | |
| Power Supply (2.0 meters) | |
| Power Supply (2.0 meters) | |
| Power Supply (2.0 meters) | |
| Power Supply (2.0 meters, 2.0 meters) | |
| Power Supply (2.0 meters) | |
| Power Supply (2.0 meters) | |
| Power Supply (2.0 meters) | |
| Power Supply (2.0 meters) | |
| Power Supply (}_meters (}_meters (}_meters (}_meters (}_meters (}_meters (}_meters (}_meters (}_meters (}_meters (}_meters (}_meters (}_meters (}_meters (}_meters (}_meters (}_meters (}_meters (}_meters (}_meters (}_meters (}_meters (}_meters (}_meters (}_meters(}_meters (}_meters (}_meters (}_meters (}_meters (}_meters (}_meters (}_meters (}_meters (}_meters (}_meters (}_meters (}_meters (}_meters (}_meters (}_meters (}_meters (}_meters (}_meters (}_meters (}_meters (}_meters (}_meters (}_meters (}_m Training (}_m Training (}_m Training (}_m Training (}_m Training (}_m Training (}_m Training (}_m Training (}_m Training (}_m Training (}_m Training (}_m Training (}_m Training (}_m Training (}_m Training (}_m Training (}_m Training (}_m Training (}_m Training (}_m Training (}_m Training (}_m Training (}_m Training (}_m Training (}_m Training (}_m Training (}_m Training (}_m Training (}_m Training (}_m Training (}_m Training (}_m Training (}_m Training (}_m Training (}_m Training (}_m Training (}_m Training (}_m Training (}_m Training (}_m Training (}_m Training (}_m Training (}_m Training (}_m Training (}_m Training (}_m Training (}_m Training (}_m Training (}_m Training (}_m Training (}_m Training (}_m Training (}_m Training (}_m Training (}_m Training (}_m Training (}_m Training (}_m Training (}_m Training (}_m Training (}_m Training (}_m Training (}_mTraining (}_m Training (}_m Training (}_m Training (}_m Training (}_m Training (}_m Training (}_m Training (}_m Training (}_m Training (}_m Training (}_m Training (}_m Training (}_m Training (}_m Training (}_m Training (}_m Training (}_m Training (}_m Training (}_m Training (}_m Training (}_m Training (}_m Training (}_m Training (}_m Training (}_m Training (}_m Industrial (}_m Industrial (}_m Industrial (}_m Industrial (}_m Industrial (}_m Industrial (}_m Industrial (}_m Industrial (}_m Industrial (}_m Industrial (}_m Industrial (}_m Industrial (}_m Industrial (}_m Industrial (}_m Industrial (}_m Industrial (}_m Industrial (}_m Industrial (}_m Industrial (}_m Industrial (}_m Industrial (}_m Industrial (}_m Industrial (}_m Industrial (}_m Industrial (}_m Industrial m m m m m m m m m m m m m m m m m m m m m m m m m m m m m m m m m m m m m m m m m m m m m m m m m m m m m m m m m m m m m m m m m m m m m m m m m m m m m m m m m m m m m m m m m m m m m m m m m m m m n m m m m m m m m m m m m m m m m m m m m m m m m m m m m m m m m m m m m m m m m m m m m m m m m m m m m m m m m m m m m m m m m m m m m m m m m m m m m m m m m m m m m m m m m m m m m m m m m m m m_m m m m m m m m m m m m m m m m m m m m m m m m m m m m m m m m m m m m m m m m m m m m m m m m m m m m m m m m m m m m m m m m m m m m m m m m m m m m m m m m m m m m m m m m m m m m m m m m m m m m.m m m m m m m m m m m m m m m m m m m m m m m m m m m m m m m m m m m m m m m m m m m m m m m m m m m m m m m m m m m m m m m m m m m m m m m m m m m m m m m m m m m m m m m m m m m m m m m m m m m mm m m m m m m m m m m m m m m m m m m m m m m m m m m m m m m m m m m m m m m m m m m m m m m m m m m m m m m m m m m m m m m m m m m m m m m m m m m m m m m m m m m m m m m m m m m m m m m m m m m m yom yom yom yom yom yom yom yom yom yom yom yom yom yom yom yom yom yom yom yom yom yom yom yom yom yom yom yom yom yom yom yom yom yom yom yom yom yom yom yom yom yom yom yom yom yom yom yom yom yom yon yom yom yom yom yom yom yom yom yom yom yom yom yom yom yom yom yom yom yom yom yom yom yom yom yom yom yom yom yom yom yom yom yom yom yom yom yom yom yom yom yom yom yom yom yom yom yom yom yom yam yom yom yom yom yom yom yom yom yom yom yom yom yom yom yom yom yom yom yom yom yom yom yom yom yom yom yom yom yom yom yom yom yom yom yom yom yom yom yom yom yom yom yom yom yom yom yom yom yom yum yom yom yom yom yom yom yom yom yom yom yom yom yom yom yom yom yom yom yom yom yom yom yom yom yom yom yom yom yom yom yom yom yom yom yom yom yom yom yom yom yom yom yom yom yom yom yom yom yom ycom yom yom yom yom yom yom yom yom yom yom yom yom yom yom yom yom yom yom yom yom yom yom yom yom yom yom yom yom yom yom yom yom yom yom yom yom yom yom yom yom yom yom yom yom yom yom yom yom yom yot yom yom yom yom yom yom yom yom yom yom yom yom yom yom yom yom yom yom yom yom yom yom yom yom yom yom yom yom yom yom yom yom yom yom yom yom yom yom yom yom yom yom yom yom yom yom yom yom yom yofyom yom yom yom yom yom yom yom yom yom yom yom yom yom yom yom yom yom yom yom yom yom yom yom yom yom yom yom yom yom yom yom yom yom yom yom yom yom yom yom yom yom yom yom yom yom yom yom yom yomyom yom yom yom yom yom yom yom yom yom yom yom yom yom yom yom yom yom yom yom yom yom yom yom yom yom yom yom yom yom yom yom yom yom yom yom yom yom yom yom yom yom yom yom yom yom yom yom yom yonyom yom yom yom yom yom yom yom yom yom yom yom yom yom yom yom yom yom yom yom yom yom yom yom yom yom yom yom yom yom yom yom yom yom yom yom yom yom yom yom yom yom yom yom yom yom yom yom yom yamyom yom yom yom yom yom yom yom yom yom yom yom yom yom yom yom yom yom yom yom yom yom yom yom yom yom yom yom yom yom yom yom yom yom yom yom yom yom yom yom yom yom yom yom yom yom yom yom yom yoma#yom yom yom yom yom yom yom yom yom yom yom yom yom yom yom yom yom yom yom yom yom yom yom yom yom yom yom yom yom yom yom yom yom yom yom yom yom yom yom yom yom yom yom yom yom yom yom yom yom yoman yom yom yom yom yom yom yom yom yom yom yom yom yom yom yom yom yom yom yom yom yom yom yom yom yom yom yom yom yom yom yom yom yom yom yom yom yom yom yom yom yom yom yom yom yom yom yom yom yom yoman a#yom yom yom yom yom yom yom yom yom yom yom yom yom yom yom yom yom yom yom yom yom yom yom yom yom yom yom yom yom yom yom yom yom yom yom yom yom yom yom yom yom yom yom yom yom yom yom yom yom tym klon tym klon tym klon tym klon tym klon tym klon tym klon tym klon tym klon tym klon tym klon tym klon tym klon tym klon tym klon tym klon tym klon tym klon tym klon tym klon tym klon tym klon tym klon tym klon tym klon tym kilon tym klon tym klon tym klon tym klon tym klon tym klon tym klon tym klon tym klon tym klon tym klon tym klon tym klon tym klon tym klon tym klon tym klon tym klon tym klon tym klon tym klon tym klon tym klon tym klon tym kLon tym klon tym klon tym klon tym klon tym klon tym klon tym klon tym klon tym klon tym klon tym klon tym klon tym klon tym klon tym klon tym klon tym klon tym klon tym klon tym klon tym klon tym klon tym klon tym klon tym k lon tym klon tym klon tym klon tym klon tym klon tym klon tym klon tym klon tym klon tym klon tym klon tym klon tym klon tym klon tym klon tym klon tym klon tym klon tym klon tym klon tym klon tym klon tym klon tym klon tym knon tym klon tym klon tym klon tym klon tym klon tym klon tym klon tym klon tym klon tym klon tym klon tym klon tym klon tym klon tym klon tym klon tym klon tym klon tym klon tym klon tym klon tym klon tym klon tym klon tym kfon tym klon tym klon tym klon tym klon tym klon tym klon tym klon tym klon tym klon tym klon tym klon tym klon tym klon tym klon tym klon tym klon tym klon tym klon tym klon tym klon tym klon tym klon tym klon tym klon tym kon tym klon tym klon tym klon tym klon tym klon tym klon tym klon tym klon tym klon tym klon tym klon tym klon tym klon tym klon tym klon tym klon tym klon tym klon tym klon tym klon tym klon tym klon tym klon tym klon tym kbon tym klon tym klon tym klon tym klon tym klon tym klon tym klon tym klon tym klon tym klon tym klon tym klon tym klon tym klon tym klon tym klon tym klon tym klon tym klon tym klon tym klon tym klon tym klon tym klon tym k Lon tym kLon tym kLon tym kLon tym kLon tym kLon tym kLon tym kLon tym kLon tym kLon tym kLon tym kLon tym kLon tym kLon tym kLon tym kLon tym kLon tym kLon tym kLon tym kLon tym kLon tym kLon tym kLon tym kLon tym kLon tym kLon tym k Lon tym kLon tym kLon tym kLon tym kLon tym kLon tym kLon tym kLon tym kLon tym kLon tym kLon tym kLon tym kLon tym kLon tym kLon tym kLon tym kLon tym kLon tym kLon tym kLon tym kLon tym kLon tym kLon tym kLon tym k Lon tym k Lon tym k Lon tym k Lon tym k Lon tym k Lon tym k Lon tym k Lon tym k Lon tym k Lon tym k Lon tym k Lon tym k Lon tym k Lon tym k Lon tym k Lon tym k Lon tym k Lon tym k Lon tym k Lon tym k Lon tym k Lon tym k Lon tym k Lon tym k Lon tym kLon tym kLon tym kLon tym kLon tym kLon tym kLon tym kLon tym kLon tym kLon tym kLon tym kLon tym kLon tym kLon tym kLon tym kLon tym kLon tym kLon tym kLon tym kLon tym kLon tym kLon tym kLon tym kLon tym kOn tym kOn tym kOn tym kOn tym kOn tym kOn tym kOn tym kOn tym kOn tym kOn tym kOn tym kOn tym kOn tym kOn tym kOn tym kOn tym kOn tym kOn tym kOn tym kOn tym kOn tym kOn tym kOn tym kOn tym kOn tym kON tym kON tym kON tym kON tym kON tym kON tym kON tym kON tym kON tym kON tym kON tym kON tym kON tym kON tym kON tym kON tym kON tym kON tym kON tym kON tym kON tym kON tym kON tym kON tym kON tym k ON tym kON tym kON tym kON tym kON tym kON tym kON tym kON tym kON tym kON tym kON tym kON tym kON tym kON tym kON tym kON tym kON tym kON tym kON tym kON tym kON tym kON tym kON tym kON t• Maximum (Brightness Mode): 222 - W (typical), 210 - W (maximum) at 110 V AC | |
| • Minimum Power Consumption (Eco Mode): 222 - W (typical), 150 - W (maximum) at 110 V AC | |
| • Input Current | |
| , Rear-Top Mounting Orientations | |
| (Leveling Adjustment, Maximum without Feet: 7901.00019.1) mid 177704 3.50001 87; Including Leveling Adjustment, Maximum with Feet: 7201 9.1mid 1185.50001 62.500187; Dimensions (Length × Depth × Height) | |
| • Net: 1110.50016 2.810; Total Weight: 1140000.50001 62 | |
| (without Feet) Interface |
All Specifications are Subject to Change Without Notice.
Note:
Optoma Company Offices Worldwide
For Chinese services or support, please contact the local office in your region.
Countries
United States of America
Service Center: +1 (0) 6918865 (0) +εε
Benelux BV
- Optoma Benelux BV +71 (.) 77 A11
Europalaan 770 D +71 (.) 77 028 9.07
1363BM Almere
The Netherlands
www.optoma.nl
France
Building E
Building E +1Υ ε7 ε1 1 1Υ
81-83 avenue Edouard Vaillant
92100 Boulogne Billancourt, France
savoptoma@optoma.fr
Asia
+35 91 399 7.7 C/ José Hierro, 36 Of. 1C 28529 Rivas
Madrid, Spain