USER MANUAL CI50CX G FAR
APERCUDU PRODUIT FR-15
PANNEAU DE CONTROLLE DU FOUR FR-17
INSTALLATION DU PRODUIT FR-18
INSTRUCTIONS D'UTILISATION FR-21
NETTOYAGE ET ENTRETIEN FR-41
DÉPANNAGE FR-43
SPECIFICATIONS TECHNIQUES FR-45
CONSOMMATION D'ENERGIE.. FR-46
ENLÈVEMENT DES APPAREILS MENAGERS USAGÉS....
SAV - GARANTIE FR-48
Thank you to have chosen the FAR quality. This product has been created by our professional team and according to the European regulation. For a better use of your new device, we recommend you to read carefully this user manual and keep it for record.
TABLE OF CONTENTS
SAFETYINSTRUCTIONS EN-3
PRODUCT OVERVIEW EN-12
OVEN CONTROL PANEL EN-14
PRODUCT INSTALLATION EN-15
OPERATION INSTRUCTIONS EN-18
CLEANING AND MAINTENANCE EN-37
TROUBLESHOOTING. EN-39
TECHNICAL SPECIFICATIONS. EN-41
ENERGY CONSUMPTION EN-42
DISPOSAL OF YOUR OLD APPLIANCE. EN-43
CUSTOMER SERVICE EN-44
Safety instructions
THESE WARNINGS ARE PROVIDED IN THE INTEREST OF SAFETY, PLEASE READ THEM CAREFULLY BEFORE INSTALLING OR USING THE APPLIANCE
- To maintain the EFFICIENCY and SAFETY of this appliance, we commend.
- Call the Service Centers authorized by the store where you buy the cooker.
-
Always use original spare parts.
-
This appliance is intended for non-professional use within the home.
- Before using the appliance, read the instructions in this owner's manual carefully, since you should find all the instructions you require to ensure safe installation, use and maintenance. Always keep this owner's manual close to hand since you may need to refer to it in the future.
- After removing the packaging, check that the appliance is not damaged. If you have any doubt, do not use the appliance. Contact your nearest service centre of the store where you buy the appliance. Never leave the packaging components plastic bags foamed polystyrene, nails, etc. within the reach of children since they are a source of potential danger.
-
The appliance must be installed only by a qualified person in compliance with the instructions provided. The manufacturer declines all responsibility for improper installation which may harm persons and animals and damage property.
-
This? appliance? can? be? used? by? children? aged from? 8? years? and? above? and? persons? with? reduced physical,? sensory? or? mental? capabilities? or? lack? of experience? and? knowledge? if? they? have? been? given supervision? or? instruction? concerning? use? of? the appliance? in? a? safe? way? and? understand? the? hazard involved. ? Children? shall? not? play? with? the? appliance Cleaning? and? user? maintenance? shall? not? be? made by? children? without supervision.
- The electrical safety of this appliance can only be guaranteed if the cooker is correctly and efficiently earthed, in compliance with current regulations on electrical safety. Always ensure that the earthing is efficient if you have any doubts call in a qualified electrician to check the system. The manu-facturer declines all responsibility for damage resulting from a system which has not been earthed.
- Check that the electrical capacity of the system and sockets will support the maximum power of the hob, as indicated on the rating label. If you have any doubts call in a qualified technician.
-
When the cooker is first used an odor may be emitted, this will cease after a period of use. When first using the cooker ensure that the room is well ventilated e.g., open a window or use an extractor fan and that persons who may be sensitive to the odor avoid any fumes. It is suggested that any pets be removed from the room until the smell has ceased. This odor is due to temporary finish on oven liners and element sandal so any moisture absorbed by the insulation.
-
Ensure that the appliance is switched off before maintenance by switching off the main switches and turning all knobs to OFF position.
- The openings and slots used for ventilation and dispersion of heat on the rear and below the control panel must never be covered.
- The user must not replace the supply cable of this appliance. If the supply cord is damaged, it must be replaced by the manufacturer, its service agent or similarly qualified persons in order to avoid a hazard.
- This appliance must be used for the purpose for which it was expressly designed. Any other use is considered to be improper and consequently dangerous. The manufacturer declines all responsibility for damage resulting from improper and irresponsible use.
-
A number of fundamental rules must be followed when using electrical appliances. The following are of particular importance do not touch the appliance you're your hands or feet are wet do not use the appliance bare footed. Never allow the Mains Cable to be stretched, pulled or damaged if the Cooker is moved for cleaning etc. Do not use the cooker if the Mains Cable is damaged, consult a qualified electrician. Do not allow the cooker to be used unsupervised by children or persons unfamiliar with it.
-
Always switch off the electrical supply to the cooker and allow it to cool down before carrying out any cleaning operations etc.
- WARNING: Danger of fire: do not store items on the cooking surfaces.
- To avoid accidental spillage do not use cookware with uneven or deformed bottoms on the burners or on the electric plates.
- Special care should be taken when using chip pans etc. in order to avoid splashing or spillage of hot oil. They should not be used unattended since over heated oil may boil over and could also ignite.
- Parts of this appliance, cooking surfaces, retain heat for considerable periods after switching off. Care should, therefore, be taken when touching these areas before they have completely cooled down.
- Never use flammable liquids such as alcohol or gasoline, etc. near the appliance when it is in use.
- When using small electrical appliances near the hob, keep the supply cord away from the hot parts.
-
Make sure the knobs are in its "OFF" position when the appliance is not in use. Also make all potentially dangerous parts of the appliance, safe, above all for children who could play with the appliance.
-
When the appliance is in use the heating elements and some parts of the oven door become extremely hot. Make sure you don't touch them and keep children well away.
- If you use the power cable for single phase, the minimum cross-sectional area is 6mm^2 . For three phases the minimum cross sectional area is 2.5m^2 Category of power cord:H07RN-F or H05RR-F.
- The appliance that you have bought may be slightly different from the one illustrated in this manual. Please refer to the information related to the model you have.
- Do not use harsh abrasive cleaner or sharp metal scrapers to clean the oven door glass since they can scratch the surface, which may result in shattering of the glass.
- Any spillage should be removed from the lid before opening and the hob surface should be allowed to cool before closing the lid.
- A steam cleaner is not to be used.
- WARNING: Accessible parts may become hot during use. Young children should be kept away.
-
WARNING: Ensure that the appliance is switched off before replacing the lamp to avoid the possibility of electric shock.
-
The appliance must not be installed behind a decorative door in order to avoid overheating.
- CAUTION: The cooking process has to be supervised. A short term cooking process has to be supervised continuously.
- WARNING: If the surface is cracked, switch off the appliance to avoid the possibility of electric shock.
- During use the appliance becomes hot. Care should be taken to avoid touching heating elements inside the oven.
- WARNING: The appliance and its accessible parts become hot during use. Care should be taken to avoid touching heating elements.
- Children less than 8 years of age shall be kept away unless continuously supervised.
- Metallic objects such as knives, forks, spoons and lids should not be placed on the hob surface since they can get hot.
- After use, switch off the hob element by its control and do not rely on the pan detector.
- WARNING: Ensure that the appliance is switched off before replacing the lamp to avoid the possibility of electric shock.
-
The appliance is not intended to be operated by means of an external timer or separate remote-control system.
-
WARNING: Unattended cooking on a hob with fat or oil can be dangerous and may result in fire.
- NEVER try to extinguish a fire with water, but switch off the appliance and then cover flame e.g. with a lid or a fire blanket.
- WARNING: Use only hob guards designed by the manufacturer of the cooking appliance or indicated by the manufacturer of the appliance in the instructions for use as suitable or hob guards incorporated in the appliance. The use of inappropriate guards can cause accidents.
- The range must not be placed on a base.
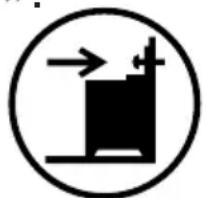
- WARNING: In order to prevent tipping of the appliance, this stabilising means must be installed. Refer to the instructions for installation.
- WARNING: Means for disconnection must be incorporated in the fixed wiring in accordance with the wiring rules
- The details indicating the correct installation of the shelves refer to «Product installation »
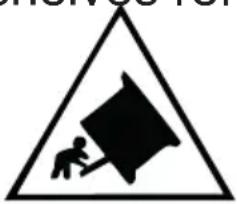
Symbol IEC 60417-6059 (2011-05)Caution, possibility of tilting
Symbol IEC 60417-6060 (2011-05)Anti-tip restraints
PLEASE READ THE PRECAUTIONS BELOW BEFORE USING YOUR APPLIANCE.
Always
- Turn controls OFF when you have finished cooking and when not in use.
- Stand back when opening an oven door to allow any build up of steam or heat to disperse.
- Use dry good quality oven gloves when removing items from the oven grill.
- Place pans centrally over the hotplate and makesure handles are kept away from the edge of the hob and cannot become heated by other hot plate/ pans.
- Take care to avoid heat / steam burns when operating the controls.
- Turn off the electricity supply before cleaning and allow the appliance to be cool.
- Make sure the shelves are in the correct position before switching on the oven.
- To find out how to install the shelves correctly, refer to the paragraph below in the instructions.
- Keep the appliance clean, as a build up of grease or fat from cooking can cause a fire.
- Follow the basic principles of food handling and hygiene to prevent the possibility of bacterial growth.
- Keep ventilation slots clear of obstructions.
- Refer servicingtoqualified appliance service engineer.r.
- Take care to avoid touching heating elements inside the oven, as during use the oven becomes hot.
Never
- Never line the interior of the oven with foil as this may cause the appliance to overheat.
- Never leave children unsupervised where a cooking appliance is installed as all surfaces will be hot during and after its use.
- Do not allow children or persons who are not familiar with the appliance to use it without supervision.
- Never allow anyone to sit or stand on any part of the applianc .e.
- Never store items above the appliance that children may attempt to reach.
- Never leave anything on the hob surface when unattended and not in use.
- Never remove the oven shelves while the oven is hot.
- Never heat up unopened food containers as pressure can build up causing th container to burst.
- Never store chemicals/food stuffs, pressurized container in or on the appliance or in cabinets immediately above or next to the appliance.
- Never place flammable or plastic items on or near the hob.
- Never fill a deep fat frying pan more than 1/3 full of oil or usealid.
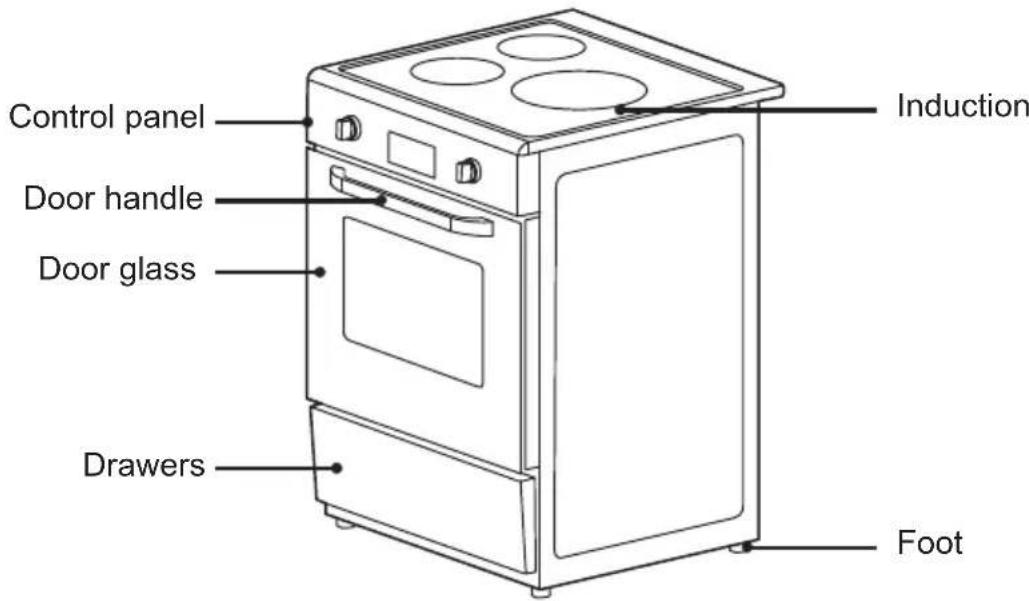
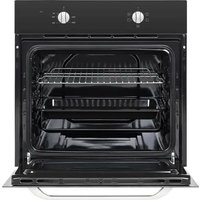
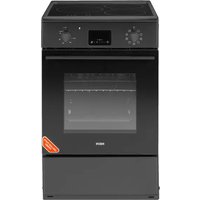
Product overview Product
Accessories
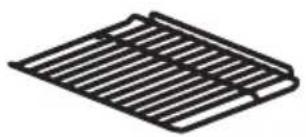
Grill rack Cooking food or placingheatresistant cookware
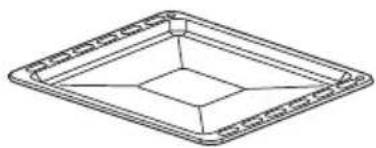
Grill tray Cooking food or receiving food scraps
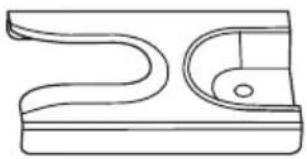
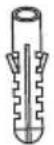

Anti-tilt bracket Pin Fixing screws
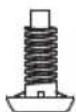
Stove foot x 4pcs
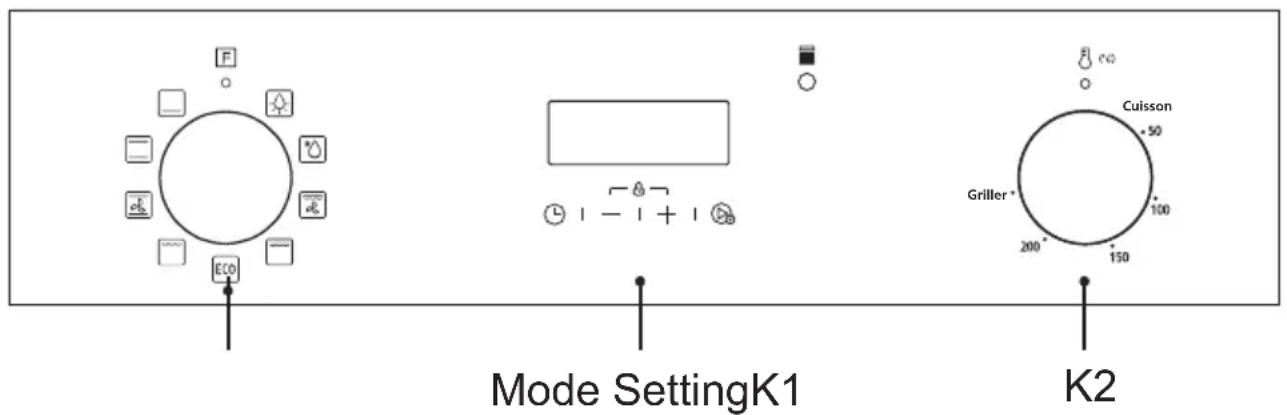
Oven Control Panel
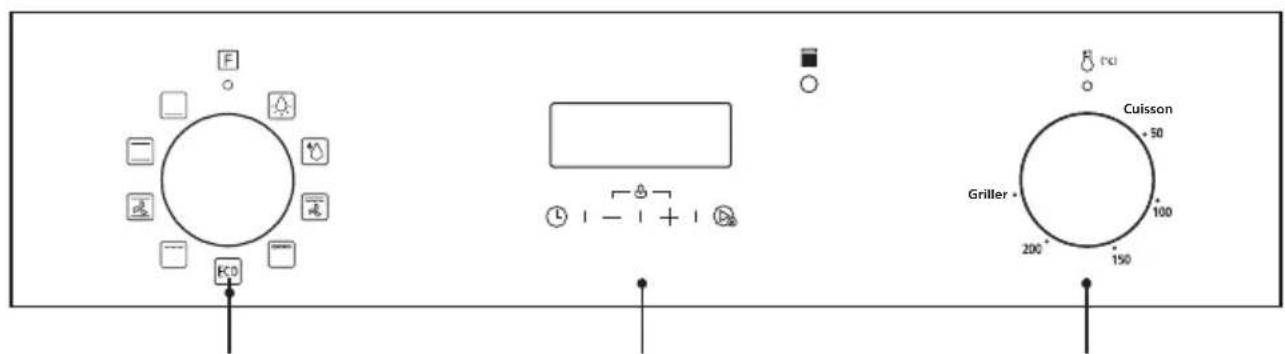
Timer Oven temperature knobOven function knob
The indicator light is on, indicating that the oven is in working condition.
| Function Function introduction |
| Lamp | The cooking process can be observed under illuminated conditions Except ECO function. |
| Defrost | The circulation of air at room temperature enables quicker thawing of frozen food (without the use of any heat). |
| Double grill with fan | The radiant heating element and top heating element are working with fan. |
| Double grill | The radiant heating element and top heating element are working. |
| Single grill | The inner grill element switches on and off to maintain temperature. Can be used to grill a small number of food. |
| Conventional +fan | The combination of fan and the top and bottom heating elements providesmore even heat penetration and coloration, primarily for cooking meat. |
| Conventional | The top and bottom heating elements work together to provide convectional cooking. |
| Bottom heating | Heating is provided by heating pipes at the bottom of the oven. Mainly used for keeping warm and the coloring of the food. |
| ECO | For energy-saving cooking. Cook some small, thin food. |
| ECO | |
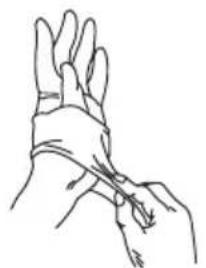
-
The installation process should be done by at least two people wearing scratch-resistant gloves.
-
Install 4 feet to the bottom of the oven.
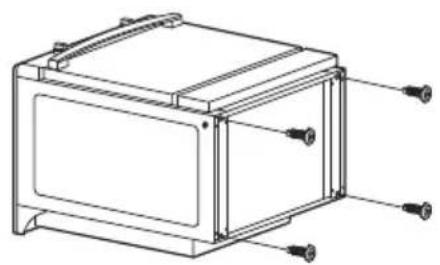
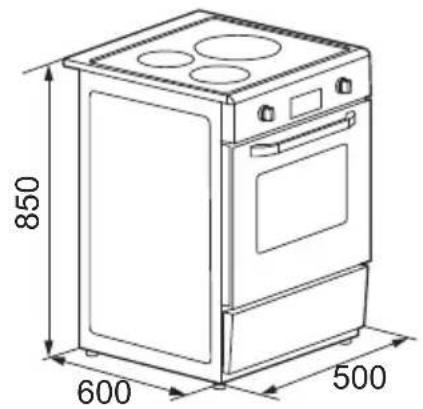
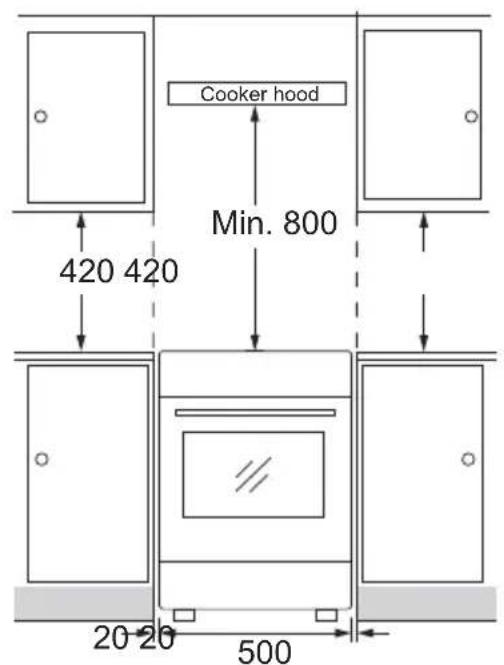
Installation diagram
- Please customize the Cupboard according to the Cupboard diagram.
- The Cupboard dimension is in mm.
- The thickness of Cupboard board is 20mm
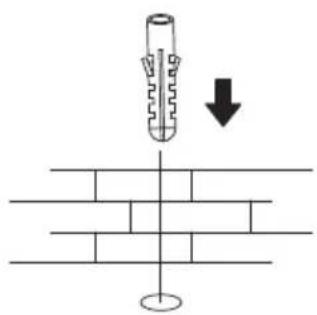
Anti-tipping bracket installation
-
Determine the location of the pin hole.
-
Make a suitable hole in the ground and insert the pin.
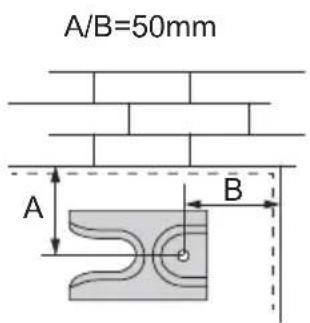
- Align the brackets with the pinholes and secure with screws.

- Snap the stove feet on the bottom of the appliance into the brackets.

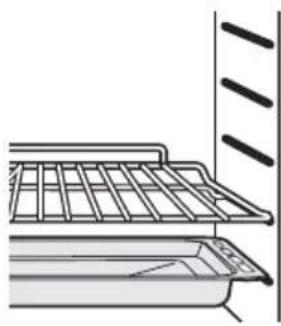
SHELF PLACEMENTWARNING:
To ensure the oven shelves operate safely, correct placement of the shelves between the side rail is imperative. Shelves and the pan only can be used between the first and fifth layers. The shelves
should be used with the right direction, it will ensure that during careful removal of the shelf or tray, hot food items should not slide out.
Operation instructions First Use
- To avoid fire, remove all shipping protection and make sure there are no residual packaging items (eg foam, cardboard, etc.) in the oven cavity.
- Clean the oven cavity and accessories with soapy water and a soft cloth.
- Open kitchen windows and cooker hoods to maintain high ventilation.
- Do not let children or pets into the kitchen and close the doors of adjacent rooms.
- After connecting the power, activate the oven mode, time, and temperature in the table below to remove odors in the cavity.
- After the first use, please open the oven door at a small angle and wait for the cooling to complete.
| Oven Mode Temperature | |
| □ | Broil 0,5-1 | HourConventional |
Oven Operation Steps
- Turn Knob K1 to select the oven function.
- Turn knob K2 to adjust the temperature.
- Mode setting.
- When cooking is finished, turn all knobs to the off position.
Display screen
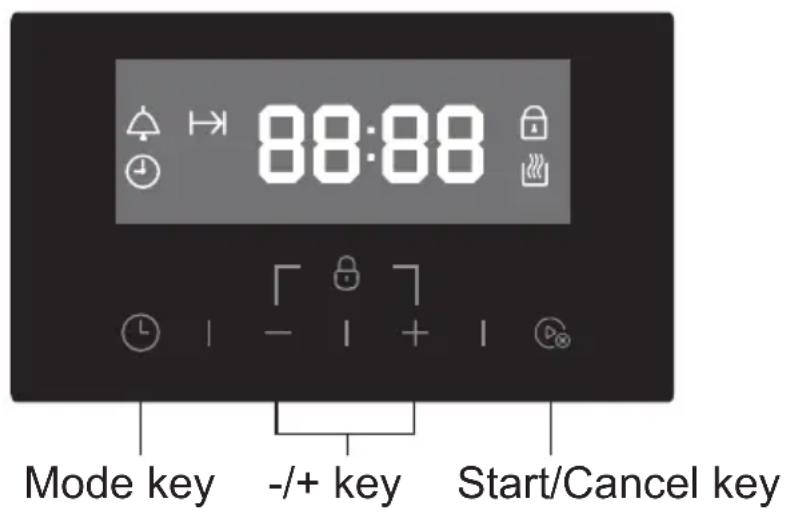
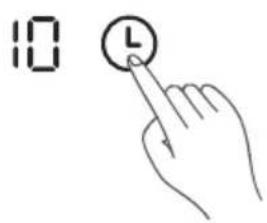
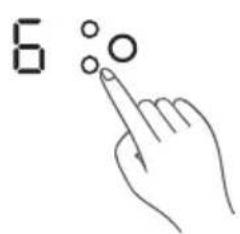
Press this key to select the mode.
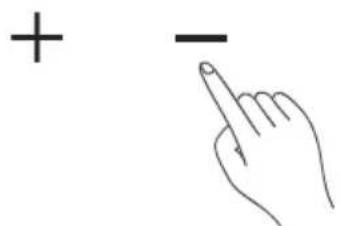
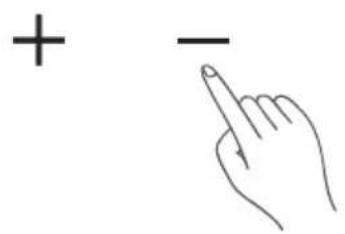
-/+ Adjusting time.
In the clock display interface, press once to start the manual mode, and then press once to cancel the manual mode.
In the setting interface, press once to confirm the setting and return to the clock display interface.
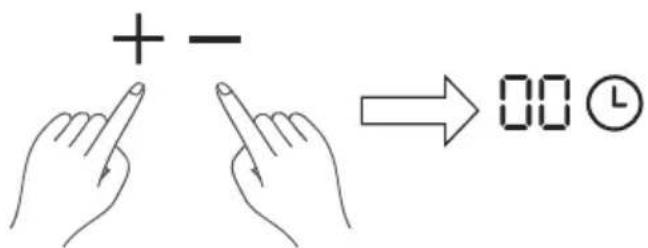
Press the " + "and " - " keys at the same time for 3 seconds to enter or exit the child lock state.
|| Cooking time icon
Alarm clock icon
Current time icon
When this icon lights up, it means that the oven can turn the K1 knob for heating.
Mode setting
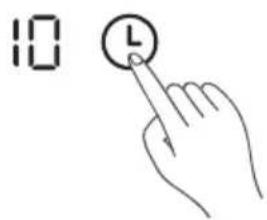
When the power supply is connected, "0:00" is displayed, "①" flashes, and press any key to exit. In standby mode, press the "L" key continuously to select functions:
Clock Alarm clock setting Duration setting Clock setting Clock (*: For default).
NOTE
When cooking is finished, please turn the knob to the off position.
Clock setting
Before using the oven, please complete the clock setting.
- Press the "L" key to select the "L".
- Press the "+" key to adjust the time, wait for 5 seconds to complete the confirmation and display the current time.
NOTE
Press and hold the " +/ - " key to quickly adjust the time.
Alarm clock setting
- Press the "L" key to select the "A".
- Press the " +/ - " key to adjust the alarm clock time. Wait for 5 seconds and start the countdown.
NOTE
- When the countdown shows "0:00", the prompt sounds. Press any key to exit the alarm clock function.
- During work, press the 13 + 13 - 13 key to adjust the alarm clock time.
Manual mode
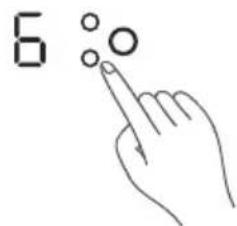
In standby or alarm state, press the "D" key once, the icon "L" will light up, and it will work for 10 hours by default.
NOTE
- If the icon " 品 " flashes, press any key, it will stay on and re-time for 10 hours.
- After entering the manual mode, press the "D" key once to turn off the manual mode and return to standby.
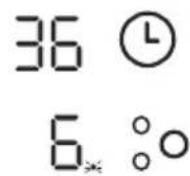
Duration/Cooking time setting
- In standby or alarm clock state or manual mode, press the "L" key to select || .
- Press the "+" key to adjust the time, wait for 5 seconds to complete the confirmation, and the icons "L" and "I→I" are always on to start the countdown.
NOTE
- After the countdown is over, the prompt sounds. Press any key to cancel the prompt.
- During cooking, press the "L" key to query and change the cooking time.
Hob Operation Steps
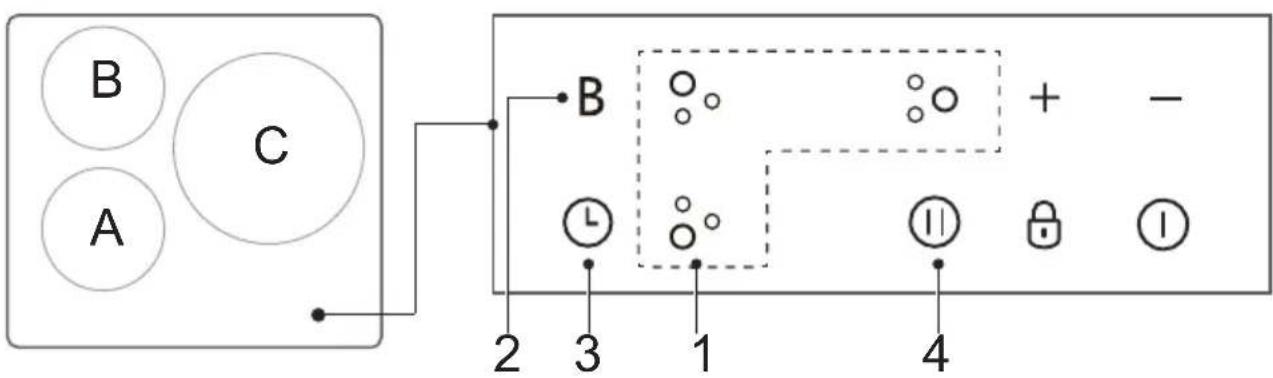
- Select the heating area
- Activate the boost function
- Adjust the heating time
- Pause control
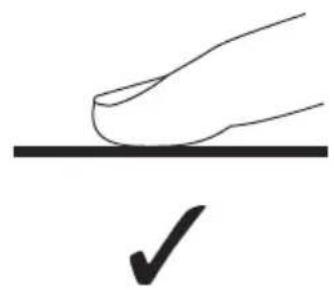
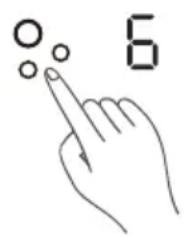
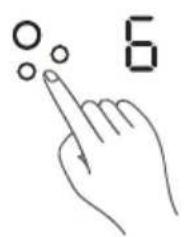
Touch Controls
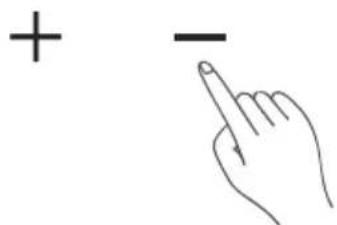
- The controls respond to touch, so you don't need to apply any pressure.
- Use the ball of your finger, not its tip.
- You will hear a beep each time a touch is registered.
- Make sure the controls are always clean, dry, and that there is no object (e.g. a utensil or a cloth) covering them.
Even a thin film of water may make the controls difficult to operate.
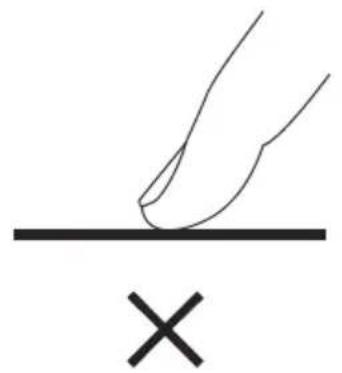
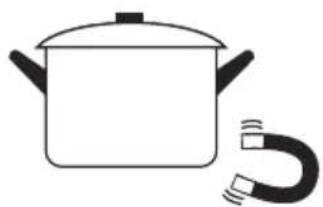
Choosing the Right Cookware
- Only use cookware with a base suitable for induction cooking.
Look for the induction symbol on the packaging or on the bottom of the pan.
- You can check whether your cookware is suitable by carrying out a magnet test.
Move a magnet towards the base of the pan. If it is attracted, the pan is suitable for induction.
-
If you do not have a magnet:
-
Put some water in the pan you want to check.
-
If does not flash in the display and the water is heating, the pan is suitable.
-
Cookware made from the following materials is not suitable: pure stainless steel, aluminium or copper without a magnetic base, glass, wood, porcelain, ceramic, and earthenware.
-
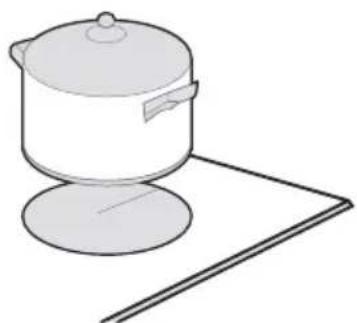
If the ferromagnetic part covers only partially the base of the pan, only the ferromagnetic area will heat up, the rest of the base may not heat up a sufficient temperature for cooking.
- If the ferromagnetic area is not homogeneous, but presents others material such as aluminum th may a affect the heating up and the pan detection.
- If the base of the pan is similar to the pictures below the pan may not be detected.
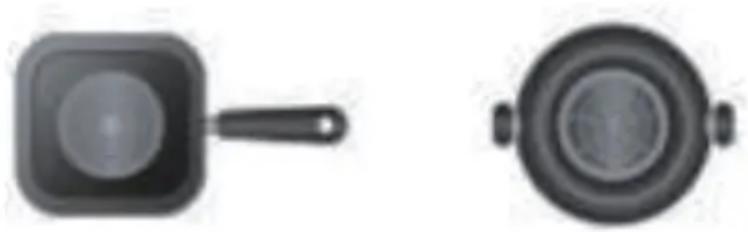
- Do not use cookware with jagged edges or a curved base.
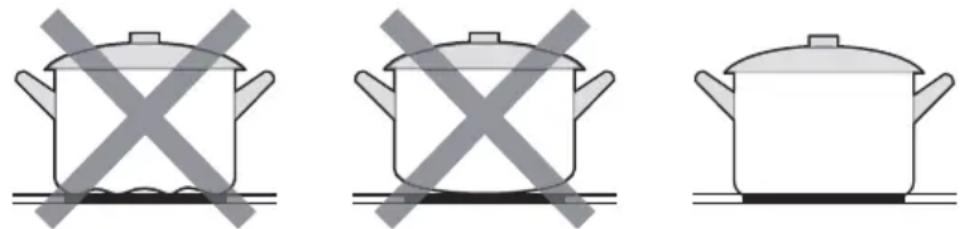
- Make sure that the base of your pan is smooth, sits flat against the glass, and is the same size as the cooking zone. Use pans whose diameter is as large as the graphic of the zone selected. Using a pot a slightly wider energy will be used at its maximum efficiency. If you use smaller pot efficiency could be less than expected. Always centre your pan on the cooking zone.

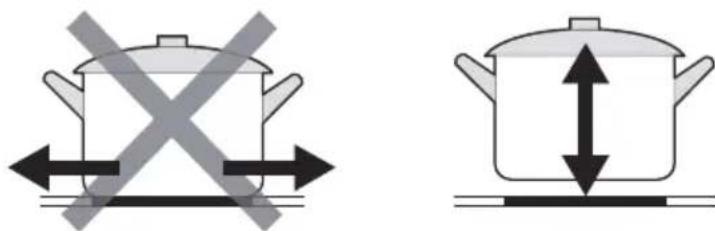
- Always lift pans off the Induction hob – do not slide, or they may scratch the glass.
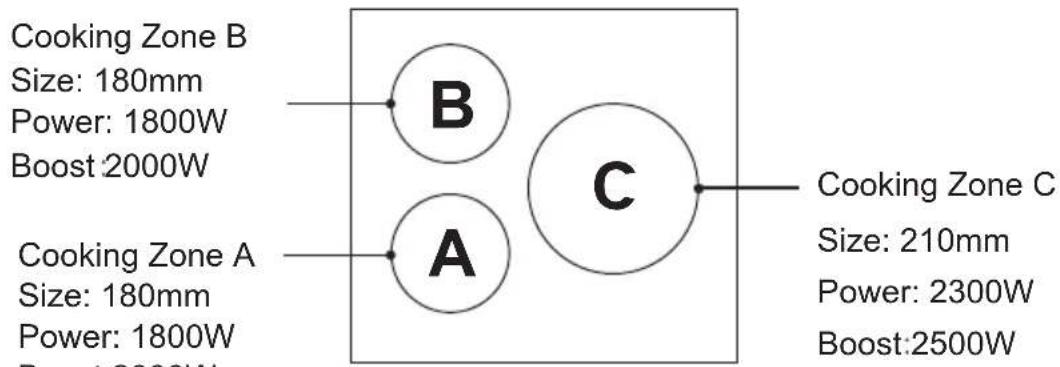
Pan Dimension
The cooking zones are, up to a limit, automatically adapted to the diameter of the pan. However the bottom of this pan must have a minimum of diameter according to the corresponding cooking zone. To obtain the best efficiency of your hob, please place the pan in the center of the cooking zone.
| Cooking zone | The base diameter of induction cookware |
| Maximum (mm)Minimum |
| | 180140180mm |
| | 210160210mm |
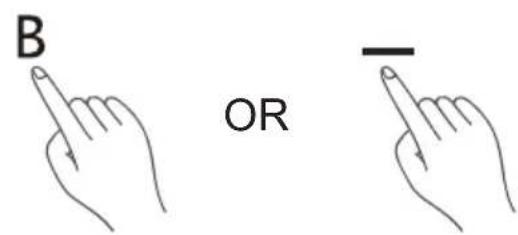
How to Use
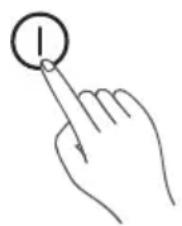
1. Start cooking
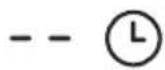
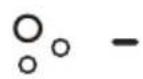
- Touch the ON/OFF control. After power on, the buzzer beeps once, all displays show “—” or “——”, indicating that the induction hob has entered the state of standby mode.

- Touching the heating zone selection control, and an indicator next to the key will flash.

- Place a suitable pan on the cooking zone that you wish to use.
Make sure the bottom of the pan and the surface of the cooking zone are clean and dry.
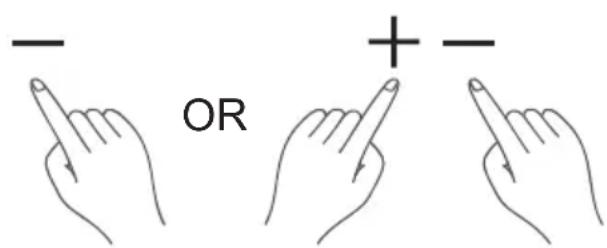
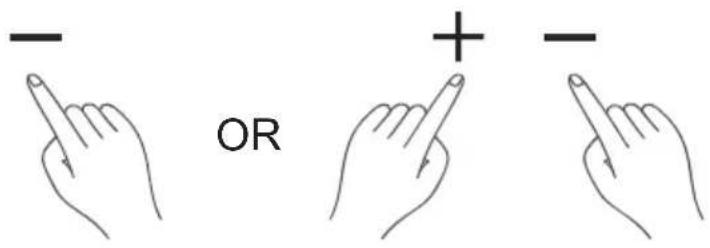
- Select a heat setting by touching the " - " or " + " control.
If you don't choose a heat setting within 1 minute, the Induction hob will automatically switch off. You will need to start again at step 1.
- You can modify the heat setting at any time during cooking.
If the display flashes ≥ alternately with the heat setting
This means that:
- you have not placed a pan on the correct cooking zone or,
- the pan you're using is not suitable for induction cooking or,
- the pan is too small or not properly centered on the cooking zone.
No heating takes place unless there is a suitable pan on the cooking zone. The display “ ≥ ≤ ” will automatically disappear after 1 minute if no suitable pan is placed on it.
2. Finish Cooking
- Touching the heating zone selection control that you wish to switch off.
- Turn the whole cooktop off by touching the ON/OFF control.
- Turn the cooking zone off by scrolling down to "0" or touching "-" and "+" control together. Make sure the display shows "0".
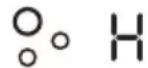
- Beware of hot surfaces H will show which cooking zone is hot to touch. It will disappear when the surface has cooled down to a safe temperature. It can also be used as an energy saving function if you want to heat further pans, use the hotplate that is still hot.
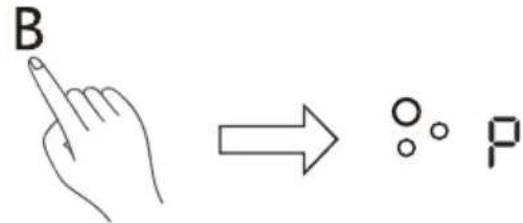
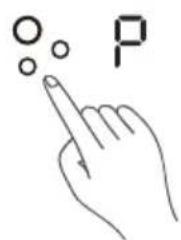
3. Using the Boost Function
Activate the boost function
- Touching the heating zone selection control.
- Touching the "Boost" control, the zone indicator show "P" and the power reach Max.
Cancel the Boost function
- Touching the heating zone selection control that you wish to cancel the boost function.
- Touching the "Boost" control or the "-" button to cancel the Boost function, then the cooking zone will revert to its original setting.
- Touching “-” and “+” control together. The cooking zone switch off and the boost function cancel automatically.

NOTE:
- The function can work in any cooking zone.
- The cooking zone returns to its original setting after 5 minutes.
- If the original heat setting equals 0, it will return to 9 after 5 minutes.
- As the boost function of 1st cooking zone is activated, the power level of the 2nd cooking zone is limited automatically to avoid overload. Vice versa.
4. Locking the Controls
- You can lock the controls to prevent unintended use (for example children accidentally turning the cooking zones on).
- When the controls are locked, all the controls except the ON/OFF control are disabled.
| To lock the controls |
| Touch and hold the lock control for a while | The timer indicator will show “Lo” |
| To unlock the controls |
| Touch and hold the lock control for a while. |
When the hob is in the lock mode, all the controls are disable except the ON/OFF ① , you can always turn the induction hob off with the ON/OFF ① control in an emergency, but you shall unlock the hob first in the next operation.
5. Pause Mode
- You can pause the heating instead of shutting the hob o□.
- When entering the Pause mode, all the controls except the ON/OFF or lock control are disabled.
| To enter pause mode |
| Touch the lock/pause control and Release | All the indicator will show “ 11” |
| To exit pause mode |
| Touch the lock/pause control and Release. |
The hob is in the pause mode, all the controls are disable except the ON/OFF ① or lock/pause control, you can always turn the induction hob off with the ON/OFF ① control in an emergency. The hob will shut down after 10min if you don't exit the pause mode.
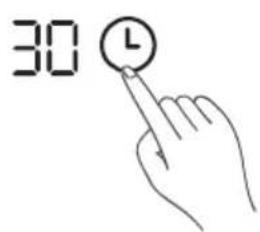
6. Timer Control
You can use the timer in two different ways:
- You can use it as a minute minder. In this case, the timer will not turn any cooking zone off when the set time is up.
- You can set it to turn one or more cooking zones off after the set time is up. The timer of maximum is 99 min.
If you are not selecting any cooking zone
- Make sure the cooktop is turned on.
Note: you can use the minute minder at least one zone shall be active. Touch the controls of the timer.
The minder indicator will start flashing and "10" will show in the timer display.
- Set the time by touching the " - " or "+" control of the timer Hint: Touch the "- " or "+" control of the timer once to decrease or increase by 1 minute.
Touch and hold the " - " or "+" control of the timer to decrease or increase by 10 minutes.
- Touching the “-” and “+” together, the timer is cancelled, and the “00” will show in the minute display.
- When the time is set, it will begin to count down immediately. The display will show the remaining time and the timer indicator will flash for 5 seconds.
35
-
Buzzer will beep for 30 seconds and the timer indicator shows "---" when the setting time finished.
-
Setting the timer to turn one or more cooking zones off
Set one zone
-
Touching the heating zone selection control that you want to set the timer for.
-
In short time, touch timer control, the minder indicator will start flashing and "10" will show in the timer display.
-
Set the time by touching the "-" or "+" control of the timer Hint: Touch the "-" or "+" control of the timer once will decrease or increase by 1 minute. Touch and hold the "-" or "+" control of the timer will decrease or increase by 10 minutes.
-
Touching the “-” and “+” together, the timer is cancelled, and the “00” will show in the minute display.

- When the time is set, it will begin to count down immediately. The display will show the remaining time and the timer indicator flash for 5 seconds.
NOTE: The red dot next to power level indicator will illuminate indicating that zone is selected.
- When cooking timer expires, the corresponding cooking zone will be switched off automatically.
Other cooking zone will keep operating if they are turned on previously. The pictures shown above are for reference only, and the final product shall prevail.
Set more zones
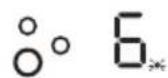
- The steps for setting more zones are similar to the steps of setting one zone; When you set the time for several cooking zones simultaneously, decimal dots of the relevant cooking zones are on. The minute display shows the min. timer. The dot of the corresponding zone flashes.
The shown as below:
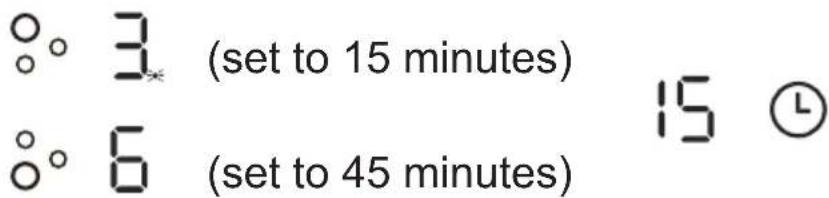
- Once the countdown timer expires, the corresponding zone will switch off. Then it will show the new min. timer and the dot of corresponding zone will flash. The shown as right:
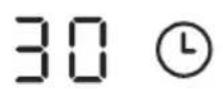
(set to 30 minutes)
Touch the heating zone selection control, the corresponding timer will be shown in the timer indicator.
Cancel the timer
-
Touching the heating zone selection control that you want to cancel the timer.
-
Touching the timer control, the indicator flash.
- Touching the " - control or " - and +together to set the timer to 00", the timer is cancelled.
7. Default Working Times
Auto shut down is a safety protection function for your induction hob. It shut down automatically if ever you forget to turn off your cooking. The default working times for various power levels are shown in the below table:
| Power level | 1 | 2 | 3 | 4 | 5 | 6 | 7 | 8 | | | 9 |
| Default working timer (hour) | 8 | 8 | 8 | | 4 | 4 | 4 | | 2 | 2 | 2 |
When the pot is removed, the induction hob can stop heating immediately and the hob automatically switch off after 2 minutes.
People with a heart pace maker should consult with their doctor before using this unit.
Cleaning and Maintenance Clean
Disconnect the power supply before cleaning and maintenance. To ensure the life of the oven, it should be thoroughly cleaned frequently. The cleaning steps are as follows:
- After cooking, wait for the oven to cool completely.
- Remove oven accessories, rinse with warm water and dry.
- Clean up food debris from the oven chamber.
- Wipe the oven with a soft cloth stained with detergent, then with a dry soft cloth.
NOTE
- Do not use sharp cleaning tools, hard brush and corrosive cleaning products, so as not to damage the oven and its accessories.
- Do not use a rough scrubbing agent or sharp metal spatula to clean the door glass.
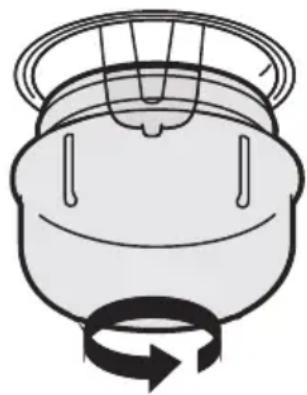
Lamp Replacement
- Switch off and disconnect the power from the oven. Ensure that the internal parts are cool before touching internal parts.
- Remove the lamp cover by turning it counterclockwise (note, it may be stiff), replace the bulb with a new one of the same type.
- Insert the new bulb, which should be resistant to 300^ . For replacement bulbs contact your local service centre.
- Re-fit the cover.
- If in any doubt, consult a qualified electrician for help.
Warning:
To avoid possible electric shock, disconnect the power supply and be sure the appliance is fully cold before replacing the lamp.
Only use 25 W/230V~ type G9, T300°C halogen lamps.
Troubleshooting
Before contacting the authorized service center in case of problems while using your cooker, check the problem list below; there may be nothing wrong with your cooker.
| Problem | Possible reason Solution |
| Unable to start | • Power is not connected | • connect power supply |
| • The main power switch is not turned on | • Turn on the power switch |
| • Oven door not closed | • Close the oven door |
| lamp does not come on | • It's broken | • Contact after-sales service |
| Has a pungent odor or smoke | • First use • No processing required |
| Food is not cooked | • Temperature is too low | • Use a higher temperature |
| • Food portion is too large | • Cook food in smaller pieces or extend the cooking time. |
| Burnt or uneven food | • The temperature is set too high or the heating time is too long | • Adjust the cooking temperature or time |
| • The food is too close to the heating tube | • Adjust the placement layers of accessories |
| Problème | Raison possible Solution |
| E1 | · Ceramic plate temperature sensor failure--open circuit | · Check the connection or replace the ceramic plate temperature sensor |
| E2 | · Ceramic plate temperature sensor failure- -short circuit |
| E7 | · Ceramic plate temperature sensor failure |
| C1 | · High temperature of ceramic plate sensor | · Wait for the temperature of ceramic plate return normal.
· Touch “ON/OFF” button to restart unit. |
| E3 | · Temperature sensor of the IGBT failure--open circuit | · Replace the power board |
| E4 | · Temperature sensor of the IGBT failure--short circuit |
| C2 | · High temperature of IGBT | · Wait for the temperature of IGBT return to normal.
· Touch “ON/OFF” button to restart unit.
· Check whether the fan runs smoothly;
· If not, replace the fan. |
| EL | · Supply voltage is below the rated voltage | · Please inspect whether power supply is normal.
· Power on after the power supply is normal. |
| EH | · Supply voltage is above the rated voltage |
| EU | · Communication error | · Reinsert the connection between the display board and the power board.
· Replace the power board or the display board. |
TECHNICAL SPECIFICATIONS
| Model | CI50CX G |
| General | |
| External dimensions
(Length width x height) | 700x540x910mm |
| Voltage frequency | 220-240V~ 50Hz |
| Top power consumption | 8.5kW (Oven: 2.6kw;
Induction hob:5.9/6.1kW) |
| Symbol Value Unit | | |
| Model identification | | CI50CX G | |
| Type of oven | | Free-Standing Oven | |
| Mass of the appliance M kg | | 45 | |
| Number of cavities | | 1 | |
| Heat source per cavity (electricity or gas) | | Electricity | |
| Volume per cavity V I | | 51 | |
| Energy consumption (electricity) required to heat a standardised load in a cavity of an electric heated oven during a cycle in conventional mode per cavity (electric final energy) | EC electric cavity | 0.98 | kWh/cycle |
| Energy consumption required to heat a standardised load in a cavity of an electric heated oven during a cycle in fan-forced mode per cavity (electric final energy) | EC electric cavity | 0,71 | kWh/cycle |
| Energy Efficiency Index per cavity | EEI cavity | 93.4 | |
| Energy efficiency class | | A | |
ENERGY CONSUMPTION
Product information for power consumption and maximum time to reach applicable low power mode.
| Standby mode | 0.8 W |
| The maximum time needed for the oven to automatically reach the applicable low power mode or condition | 20 minutes |
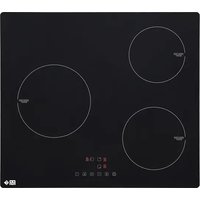
2.2. For domestic hobs
2.2.1. Domestic electric hobs
Information for domestic electric hobs
| Symbol | Value Unit | |
| Model identification | | CI50CX G | |
| Type of hob | | Electric | |
| Number of cooking zones and/or areas | | 3 | |
| Heating technology (induction cooking zones and cooking areas, radiant cooking zones, solid plates) | | Induction cooking zones and cooking areas | |
| For circular cooking zones or area: diameter of useful surface area per electric heated cooking zone, rounded to the nearest 5 mm | ∅ | Left rear: 18 Left front: 18 Right: 21 | cm |
| Energy consumption per cooking zone or area calculated per kg | EC electric cooking | Left rear: 183.23 Left front: 184.68 Right: 194.71 | Wh/kg |
| Energy consumption for the hob calculated per kg | EC electric hob | 187.5 | Wh/kg |
Disposal of your old appliance

La European directive 2012/19/EU on
Wastefrom Electrical and Electronic
Equipment(WEEE), requires that used
householdappliances are not thrown into
the normal municipal waste stream.
Used appliances must becollected separately in
order to optimize the rate of recovery and recycling
of materials that compose them, and to reduce the impact on human health and on the environment.
The crossed bin symbol isaffixed to all the products
to remind you of the obligations of separated
collection.
CE
Customer service
We decline liability for any damage or accident derived from any use of this appliance which is not in conformity with the instructions contained in this manual.
In accordance with Article L. 217 of the Consumer Code, your product benefits from a legal guarantee of conformity of 2 years.
Purchase of the device in a Conforama store:
If you have a problem with your product, before going to your Conforama store, please get in touch with our aftersales services for electrical household appliances:
https://sav-client.conforama.fr/

09 69 32 05 05
From Monday to Saturday, 08:30 to 19:00 Price of a local call
This instruction manual is also available on our website: www.conforama.fr
Purchase of the device in a BUT store:
Contact our After-Sales Service, before going to your BUT store:
From Monday to Friday from 09:00 to 19:00, and
Saturday 09:00 to 18:00
Price of a local call
This instruction manual is also available on our website: www.but.fr.
CONFORAMA FRANCE